How to insulate the basement of a house - do-it-yourself penoplex insulation
The basement and foundation in a private house are among the most loaded elements of the building. And we are talking not only about mechanical load, but also about thermal qualities. The base is subject to temperature changes, cooling and compression, and may crack and begin to let cold air or melt water inside. An incorrect microclimate inside the base can lead to the growth of mold and the accumulation of dampness. Finally, if the base is not insulated, the floor in the house will be very cold in winter.
How to solve this problem? To do this, it is necessary to implement insulation of the base.
Benefits of penoplex
Statistics have shown that low-cost materials are predominantly used to insulate house structures.
This is not always a rational decision. The above-ground part of the house is most often subject to mechanical damage. For this reason, its finishing requires insulation with sufficient density to withstand mechanical stress.
The foundation is the connecting link between the house and the ground. In the upper layers of soil, saturated with oxygen, metabolic phenomena occur, forming an aggressive environment that damages its concrete structures. For finishing, insulation must be used that is inert to biological and chemical phenomena occurring in the fertile soil layer.
Seasonal fluctuations, leading to periodic saturation of the soil with moisture, lead to wetting of plinths and basements. You need insulation that is not afraid of moisture: it does not rot, does not get wet, and does not change its structure under the influence of moisture.
Of all the representatives of insulating materials, penoplex (EPS) meets all these requirements. Its only drawback is the price. Using EPS will keep the house warm and will also increase the service life of the foundation.
Penoplex is a Russian product. It is actively used by builders and residents of the private sector who decided to do the insulation of the old foundation themselves. It is polystyrene foam, which during manufacturing was extruded (foamed under the influence of high temperatures), thereby improving its technical characteristics:
- moisture resistance – 0.5% of the total volume of the material;
- operating temperature range from –500 to 750 C;
- compressive strength – 27 t/m2;
- service life – 50 years and above.
And this is not all the advantages of penoplex. You will find more information about the composition and properties of the material here: “Foundation insulation”.
Inside or outside?
There are two options for insulating the base: internal and external. The difference is where the insulation layer is attached. External insulation has recently become extremely popular, and the demand for it is growing. Why?
Firstly, it allows for better preservation of the base itself. It minimizes seasonal heating and cooling of the base, which means it reduces stress that can lead to cracking.
Secondly, decorative finishing materials fit better on the insulation layer than on cement. Therefore, a base insulated from the outside can be finished on the surface like wild stone, brick, or even marble, and it will look much more beautiful than bare cement.
Which material to choose?
The main requirement is this: the material for insulating the base must be waterproof. Among the main aggressors attacking the basement are melt and groundwater, and it should not allow them to pass through.
Various non-waterproof materials are also used, but with additional protection. For example, some use mineral wool with a sheet of polyethylene, reinforced mesh and plastered on the outside. This is quite difficult to implement, so it is preferable to use another solution, such as, say, insulating the base with foam plastic.
Foam plastics are inexpensive, versatile materials. Among their various brands, penoplex is especially popular for insulating bases. This is a polystyrene-based foam; Penoplex insulation is easy to install with your own hands, and it can be used for a long time. Penoplex is not fragile, unlike other foam plastics, and “lives” for at least half a century.
Insulating the base with penoplex - a step-by-step guide. Press!
Having decided to start building a country house, it is worth considering a large number of issues even at the design stage. One of them is insulating the house and choosing insulation.
In winter, if the thermal insulation is poor, you will have to pay for excessive heating of the house. How to insulate and how to do it, we’ll figure it out further and try to protect you from mistakes.
- Important points of thermal insulation
- Insulation methods
- Preparatory work
- Installation work
- Work order
We suggest you familiarize yourself with How to make a bend from a metal pipe
External basement insulation
First of all, when building a house, you need to decide whether the house will have a basement or not.
In the case of a house with a basement that will be used as a living space, there is a need to insulate it to prevent heat from escaping through its walls.
In this case, the total heat loss can reach up to 15% of the heat loss of the entire building. To reduce the cost of insulation work and to avoid errors associated with the installation of insulation, it is necessary to solve many factors at the design stage.
It is worth paying attention to:
- functional purpose of the basement;
- original building materials used to construct the walls;
- climatic zone of residence.
Insulation methods
Internal insulation of the base
Today, there are many options for insulating the base.
First of all, the foundation should be divided into 2 parts, one of which (underground) is in constant contact with a moist environment (rain, melt water, dampness).
To prevent humidity from damaging the insulation and it, in turn, not losing its thermal characteristics, it is necessary to use moisture-resistant insulation, for example, penoplex.
An analogue of penoplex, polystyrene foam, also has high moisture resistance (a comparative analysis of insulation materials is given in this article).
When insulating the base, two methods are used:
- External insulation. With this type of insulation, it is preferable to use a material that has zero water absorption. Penoplex has similar properties. This work can be done with your own hands, without the help of specialists. Additionally, you will need to make a good waterproofing of the foundation, for example, from roofing felt, or treat the surface with bitumen mastic.
- Internal insulation. The procedure for insulation is similar to the steps in the first method. The only difference is that the base is lined from the outside. The advantage of the internal arrangement is that:
- protection from groundwater occurs;
the microclimate improves.
Please note: a big benefit of exterior insulation is extending the life of the materials by sealing it from the elements.
However, there is also a drawback: the appearance of condensation between the insulation and the wall.
Having analyzed the advantages and disadvantages, we will consider the stages of preparatory work for external insulation:
- The soil around the house is selected, the depth of which should be equal to the depth of the foundation. Next, for ease of installation, a trench about a meter wide is dug.
- The base is cleaned of dust and dirt.
- If necessary, the surface of the base is leveled using a cement mixture.
- Next, waterproofing is performed with roofing felt. However, you can get by with a less expensive method, namely, priming with bitumen mastic. The mastic is applied in 2 layers, with the second layer applied only after the first has completely hardened.
Keep in mind: a more reliable option would be to use deep penetration waterproofing, such as Penetron.
Installation work
Thermal insulation of the foundation and plinth with penoplex slabs
This is important: materials and tools should be chosen of high quality.
- It’s worth starting work from the corner. This is done for high-quality marking and cutting of the material.
- Then the adhesive mixture is applied to the foam board with a trowel.
Using a notched trowel, it is distributed over the surface of the insulation. Next, we apply the insulation to the wall, wait a little until the mixture sets, and release it.You can read more detailed information about how and with what to glue penoplex to concrete here.
- All slab joints should be sealed with self-adhesive bitumen tape.
After securing several sheets, they should be secured with dowels. Penoplex is easy to process. Drilling a few holes for dowels is not difficult.Due to the dowels, the foam sheets will not move away from the wall during their operation.
Please note: it is desirable that the insulation sheets have a connecting element (such as a lock).
The insulation must be laid so that there are no gaps between the joints of the plates. Due to their presence, cold bridges may form in the insulation, which subsequently will not provide proper thermal insulation.
- The work is completed by installing the slope corner. Next, the reinforcing mesh is installed using cement mortar. After the cement mortar has hardened, finishing of the base begins.
Insulation of the basement is an important and critical stage of construction. However, it is quite possible to cope with this work with your own hands, having first studied the technology of installing penoplex foam.
It should be remembered that the thicker the insulation, the more effective the thermal insulation will be.
However, it is worth calculating the thermal engineering calculations of the walls in advance in order to find the optimal thickness of the insulation.
This will reduce the cost of the material when purchasing it, thereby preventing overconsumption of insulation.
See inaccuracies, incomplete or incorrect information? Do you know how to make an article better?
Would you like to suggest photos on the topic for publication?
Please help us make the site better!
The foot of the building, which is located on the foundation itself and protrudes slightly forward, is called the plinth. This part of the house is the most important and at the same time quite vulnerable.
The base must be properly protected from the harmful effects of moisture and have the required level of thermal protection.
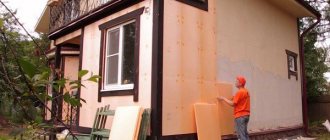
How to insulate the foundation of a house from the outside with penoplex
The excellent performance characteristics of extruded polystyrene foam make it possible to universally use Penoplex insulation of the base with Penoplex glue.
In most cases, the basement of a house not only effectively protects the structure from unauthorized penetration of moisture, but is also responsible for certain architectural functions.
In addition, a considerable amount of attention should be paid to its insulation. The thermal insulation layer formed by polyurethane foam must have a presentable appearance.
Now you can insulate the base with Penoplex yourself without much hassle.
Nowadays, in the construction market, the buyer has to choose thermal insulation materials from a large number of products presented, with the help of which high-quality finishing with polyurethane foam can be produced.
Insulating the base with polystyrene foam or even penoplex for the floor and its subsequent installation involves a moment of choice. When purchasing such cladding, attention should be paid to:
- Region of residence;
- General condition of the soil;
- The presence or absence of groundwater.
When insulating the base with polyurethane foam, you can use two main Penoplex brands that meet all the basic characteristics.
- Penoplex Wall. This material, with a high degree of efficiency, is able to provide reliable waterproofing protection for the base that has been insulated.
- Penoplex Comfort (also known as penoplex for wall insulation) is designed specifically for do-it-yourself work related to the construction and repair of private houses. Finishing the outside of the base with such material brings quite noticeable results.
How to insulate the basement of a house - penoplex insulation
The technology, which is oriented towards the installation of polyurethane foam cladding both outside and inside the base, has a number of significant advantages.
Despite the fact that the thickness of such cladding may be small, its low vapor permeability parameter prevents the formation of condensation and moisture in the structure and structures of the lower part of the building.
We suggest you familiarize yourself with what to build an inexpensive bathhouse from
If the material is applied from the inside or outside of the base, then this element of the structure will receive a reduced level of thermal conductivity, which will not depend on the ambient humidity.
Despite the fact that the thickness of Penoplex is small, when it is used, neither the walls, nor the basement, nor part of the basement from the outside will be exposed to the harmful effects of moisture and frost.
This is due to the fact that when insulated with polyurethane foam, the coefficient of water absorption of the surface is significantly reduced, which ensures a high level of waterproofing.
The presented insulation has a high level of biological resistance to the harmful effects of fungi and mold. Remember that insulation with Penoplex Comfort will protect you from rodents.
This is directly related to the significant increase in the service life of the material with which the base was insulated from the outside with your own hands.
Currently, installation and subsequent insulation of the basement of a building, both inside and outside, with polyurethane foam is a fairly effective method through which the heat-saving functions of the presented material are realized.
Do-it-yourself thermal insulation installation begins with the process of pre-installing metal profiles. This design, made and installed by yourself, will effectively protect the lower areas of the base from all kinds of mechanical damage.
Penoplex. Basement insulation from outside
Experts recommend choosing those profiles that are made using aluminum - their installation is very simple. An example of this is extruded polystyrene foam.
You need to build a profile structure with your own hands, focusing on the parameter of the thickness of the seal. Plaster can be used to finish the inner surface of the plinth, and the outer part can be decorated with wild stone.
Do-it-yourself installation of a profile structure begins with installing the profile at a height of 500 millimeters from the ground level.
How to install it?
In order to install penoplex insulation with your own hands, you need the following materials:
- Penoplex itself. The thickness of the sheets should be selected depending on the climate of the surrounding area. For colder winters, a thicker sheet is desirable.
- Additional hydrolayer. Penoplex has good waterproofing properties on its own, but for absolute reliability it is better to supplement it with roofing felt or at least polyethylene.
- Adhesive mastic. It is recommended to use mastic based on bitumen and polymers, which hardens at low temperatures.
- Plaster and reinforcing mesh.
- Finishing material. We will strengthen it, plaster and mesh on top of penoplex.
First, coat the entire length of the base with mastic on the outside. In this case, all unevenness of the cement should be smoothed out, if possible. Then you should use the same mastic to cover the outside of the base with roofing material. After the mastic has hardened, when the roofing material will stick, it should be coated with another layer of mastic on the outside.
After these preparatory work is completed, you can begin the main work of insulating the base with penoplex. Penoplex slabs are attached to mastic on top of roofing felt. If you don’t trust mastic, you can use mechanical fastening material - mushroom-type dowels, but their use is not recommended.
Technology for insulating the base with penoplex
All the work that is required to insulate the basement is quite simple and does not require any special knowledge. It is enough to follow the step-by-step instructions presented below, and the insulation will be completed as efficiently and quickly as possible.
Preparation for work, tools
In order to complete all the necessary work as quickly as possible, it is necessary to prepare in advance not only the material and components, but also the tools that may be needed. During installation, you will definitely need a special slope angle and a construction knife, trowel, hammer, notched trowel and construction level. Do not forget about a sufficient number of dowels and other devices that will help securely fix the penoplex to the surface of the base.
Installation of insulation
First of all, it is necessary to make a sand or sand-gravel cushion, which should be located under the lower part of the foundation and slope away from the building. If there is a sufficiently high level of groundwater, additionally install a drainage pipe.
It is worth installing waterproofing on the surface prepared in advance. The best way is to use a special coating method. You can use mastic or bitumen-based materials.
Some experts recommend combining several different waterproofing options at once to get the most positive result. You can also use modern film options or waterproofing membranes.
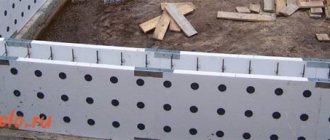
Next, you need to attach foam sheets to the adhesive foam or a special adhesive mixture. You should start working exclusively from the bottom corner of the foundation. The slabs must be laid horizontally side by side to the level at which the clean floors of the first floor of the house are located. If the external walls will be completely insulated, then the foam sheets can be glued a little higher.
When the installation work is completed, it is necessary to glue the reinforcing mesh with special glue. When it is completely dry, you can begin further finishing work.
In order to get the maximum result from using penoplex insulation, it is necessary to carry out all the work correctly and efficiently. It is necessary to ensure that there are no seams or gaps between the sheets of material. It is through them that heat will escape from the house.
Penoplex is considered a fairly good option for insulation, which deserves attention. It is also worth paying a lot of attention to choosing the appropriate finishing material, which will improve the overall characteristics of the insulation and make the house even warmer and more comfortable.
How to finish a base on top of penoplex?
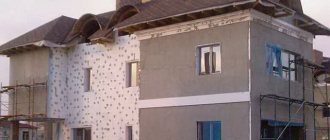
So, the penoplex is installed, but the base of your house is ugly, it has acquired the characteristic appearance of an orange inflatable boat! How to fix it? To do this, firstly, you need to apply plaster over the penoplex.
The plaster is applied in the usual way, using a reinforcing mesh fixed on top of the penoplex. After the plaster has dried, its surface should be carefully primed.
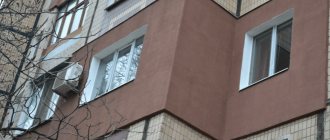
Well, now, on top of the primer, you can install the selected finishing material. There is no limit to imagination here. You can decorate the base with natural wild stone to create the impression of “my home, my fortress.” You can use a brick finish. There are ceramic tiles of various types and textures, and there are decorative plasters - the so-called textured ones.
Having finished finishing, you can rejoice: you have significantly increased the thermal insulation properties of your home.
How to insulate the foundation and basement of a house yourself with penoplex
When building a private house, it is necessary to comply with basic construction standards, including those for insulating the building.
Lack of insulation will negatively affect comfort and heating bills, and numerous cycles of wall freezing will lead to their premature destruction.
Particular attention should be paid to the insulation of the foundation and basement. In addition to cold air, this part of the structure is negatively affected by soil swelling and water, which may be at a high level.
Various materials can be used to insulate the base and basement floor, but it is best to insulate the foundation of the house from the outside with penoplex foam. The material has excellent thermal insulation characteristics.
Considering the good resistance to moisture and various pathogenic microorganisms, insulating the foundation with penoplex yourself will save a lot of money on building repairs.
The advantage of the material lies not only in its excellent physical properties, but also in its low cost. The low price is due to the fact that penoplex is produced from polypropylene chips, which are inexpensive.
- For example, you can purchase 50 mm penoplex insulation for a foundation, the price of which will be no more than 150 rubles per 1 m2. Accordingly, the cost of 100 mm of material will cost 2 times more.
- In addition to its low cost, the insulation is flexible enough to compensate for soil displacement during freezing.
With proper installation of the material, a reliable barrier to moisture penetration is formed between the base and the surrounding soil, which can significantly increase the service life of the building before major repairs. To perform installation work correctly, you do not need any special skills or experience in construction work; it is enough to strictly follow the instructions set out in the article.
Before you begin insulating the foundation, you need to select the right material and calculate the required amount of insulation.
If high-quality material is used for insulation work, you can count on a good result. By appearance, you can determine whether the material is suitable for insulating the support of a house.
The surface of high-quality material is smooth without signs of destruction, and when broken, the penoplex cells have a polyhedron shape.
To insulate the foundation, a special series “F” material is used.
This type of insulation is more resistant to biological decomposition, mechanical stress and wetness.
To simplify the process of selecting penoplex, you should pay attention to products from well-known manufacturers, which are used not only in the construction of private buildings, but also for insulating apartment buildings.
Among domestic manufacturers, preference should be given to products. Which is not inferior in quality to European materials, and the cost will be noticeably lower than that of imported insulation materials.
Before purchasing polystyrene from any trade organization, you should correctly calculate the amount of material that will be used to insulate the foundation and basement of the house.
- To determine the area of insulation, it is necessary to measure the perimeter of the base, multiply the resulting value by the sum of the depth of the foundation and the height of the base.
- For example, if the perimeter of the building is 36 m, the depth is 1.5 and the height of the above-ground part of the base is 0.5 m, then 36 * (1.5 0.5) = 72 m2.
In this way, you can easily calculate the amount of penoplex that will be required for work.
For waterproofing concrete, it is customary to use mastic based on petroleum bitumen.
You can make mastic yourself:
- For this purpose, a metal container is used in which bitumen is heated to the melting point, after which motor oil is added.
- Oil is added to give the material plasticity and resistance to low temperatures.
- To give the mastic the necessary qualities, prepare a mixture of bitumen and oil in a ratio of 3 to 1.
The mastic is applied to a flat surface of the foundation in a layer of no more than 4 mm.
After which the entire treated area must be additionally sealed using roll materials. For this purpose, roofing material is suitable, which must be glued with an overlap.
To attach roll waterproofing to the foundation and plinth, you must:
- on one side, heat the material with a gas burner;
- attach roofing felt to the wall;
- smooth the material so that the air is completely released from under the surface;
- The joints of the rolled waterproofing material should be coated with mastic.
That's it, you can start installing the penoplex.
Installation of penoplex in the underground part of the strip foundation is prohibited using dowels, so to fix the insulation boards you will need to purchase acrylic glue. The adhesive is applied to the back of the slab in several places, after which the material is installed around the entire perimeter of the building.
Installation of slabs is carried out from bottom to top. After applying the glue, the penoplex is pressed against the foundation for 1 - 2 minutes, then the next slab is installed in the same way.
The fixation between the plates is carried out using a tongue-and-groove system, so after finishing the work you will get a continuous sheet of insulation. For greater reliability, it is recommended to coat the joints of the foam boards with acrylic glue.
To increase the reliability of fastening the insulation to the above-ground part of the foundation, the penoplex should be additionally fixed to the base using dowels with wide heads.
We suggest you familiarize yourself with How to insulate a half-brick wall from the inside
Finishing the foundation
To finalize the strip base, above ground level it is necessary to plaster it with cement mortar. In order for the layer of plaster to adhere well to the insulated surface, you will need to use reinforcing mesh.
The most suitable material for this type of work is fiberglass mesh, which is lightweight, resistant to moisture and does not rot.
The mesh is fixed to the insulation using adhesive or dowels.
The underground part of the foundation does not need to be additionally fixed; its surface will not be subject to wind load.
After completing the installation work, the trench can be filled with soil or expanded clay can be used to increase the level of thermal protection.
For additional protection of the underground layer of insulation, it is necessary to make a blind area along the walls around the perimeter of the house.
Installation of blind area
In order for atmospheric moisture to be effectively removed from the walls of the house, it becomes necessary to install a blind area.
This part of the comprehensive protection of the underground part of the foundation from negative influences will reduce not only the soil moisture around the house, but also reduce its freezing due to an additional layer of thermal insulation located in a horizontal position.
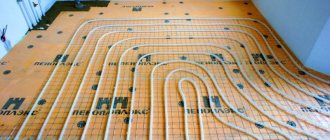
- To obtain the maximum thermal insulation effect, it is necessary to lay a layer of penoplex under the blind area.
- The insulation must be laid on a sand and gravel bed. For the construction of which it is necessary to remove the top layer of soil at least 10 cm thick.
- Penoplex is laid on top of the pillow, the thickness of which should be about 5 cm, then a metal reinforcing mesh, on top of which a cement-sand mortar is poured.
The upper surface of the blind area should be at a slight angle from the wall of the house and raised above ground level by several centimeters.
To do this work correctly, you cannot do without constructing formwork at a distance of 1 - 1.5 meters from the foundation of the building.
After pouring the solution and letting it sit for several days, the formwork can be removed, and the soil removed to fill the cushion can be distributed in an even layer immediately behind the concrete layer line.
In this way, it is possible to provide additional protection for the foundation of the house from the negative effects of precipitation.
The technology of insulating a pile foundation with penoplex requires mandatory waterproofing of the supports before the thermal insulation layer is installed. All wooden structures are treated with an antiseptic to protect against insects and mold.
You will need a homemade base that will act as a heat-saving cladding. You can lay out a brick wall in one row.
The base, built with your own hands, is insulated with penoplex and hidden behind the decorative design.
Attaching penoplex to such a structure is carried out with additional fixation with dowels. Reinforced fastening is necessary so that the insulation layer does not move under the influence of heaving soil, on which piles are usually installed.
To prevent moisture from entering through the holes made for installing the dowels, they are treated on the inside with bitumen mastic, and the fastener caps are covered with a layer of acrylic glue.
Each type of supporting part of the structure is protected by facing material from negative influences.
Conclusion
Now you know how to properly insulate the foundation of a private house with penoplex. If all stages of preparation, fastening of material and construction of the blind area are carried out correctly, then there will be no need to carry out major repairs of the building for a long time.
The foundation of the house is located in the soil freezing zone. This leads to significant heat dissipation during the winter season. To prevent the floor of the lower floors from cooling down, you should resort to appropriate finishing of the base.
Its insulation will help maintain a comfortable temperature in the basement, where water supply and drainage communications are often located. They will be able to remain accessible without the risk of winter defrosting. The insulated base helps retain heat throughout the house.
Constructive decisions:
Insulation of the basement from the outside
1. Applying plaster composition over a metal mesh
- building wall
- Basement ceiling
- Cutting from mineral wool slabs
- Cement-sand plaster on metal mesh
- Basement wall
- Blind area
- PENOPLEX FOUNDATION® insulation
- Waterproofing
- Foundation
2. Cladding with clinker tiles
- building wall
- Basement ceiling
- Cutting from mineral wool slabs
- Clinker tiles
- Basement wall
- Blind area
- PENOPLEX FOUNDATION® insulation
- Waterproofing
- Foundation
3. “Heavy” cladding (natural/artificial stone)
- building wall
- Basement ceiling
- Cutting from mineral wool slabs
- A natural stone
- Basement wall
- Blind area
- PENOPLEX FOUNDATION® insulation
- Waterproofing
- Foundation
4. Facing with facade panels (basement siding, block house)
- building wall
- Basement ceiling
- Cutting from mineral wool slabs
- Plinth panel
- Basement wall
- Blind area
- PENOPLEX FOUNDATION®
- Waterproofing
- Foundation
Insulation of the basement floor from the inside
- building wall
- Plaster on metal mesh
- Basement ceiling
- Cutting from mineral wool slabs
- Facing tiles
- Blind area
- PENOPLEX COMFORT®
- Basement wall
- Waterproofing
Table No. 2 “Required thickness of PENOPLEX for insulation of basement floors, including those located below ground level”
Exterior finishing using penoplex or how not to waste time
Penoplex is one of the most common insulation materials today. However, despite this, not everyone knows that its external finishing requires a special approach, different from finishing foam or mineral wool. Therefore, so that your energy, time and money are not wasted, in this article I will tell you how to properly decorate a facade with penoplex.
Features of penoplex
In order for you to further understand the subtleties and nuances of penoplex finishing, let’s first get acquainted with the features of this material. First of all, I note that its correct name is extruded polystyrene foam. This insulation was popularly called Penoplex in honor of the company, which, as you might guess, is engaged in its production.
Penoplex is based on ordinary polystyrene foam (foam), which is subjected to special treatment under high temperature. Thanks to this, it acquires the following qualities:
- higher strength;
- homogeneous smooth structure;
- zero moisture absorption;
- vapor permeability;
- lower thermal conductivity than conventional foam.
Often, manufacturers add fire retardant additives to the composition of penoplex, as a result of which the material acquires a G1 flammability class. True, only the most expensive brands of extruded polystyrene foam from well-known manufacturers have this quality.
On the one hand, thanks to such properties, extruded polystyrene foam is a more attractive insulation material. But on the other hand, due to zero moisture absorption and a smooth, uniform structure, this material has very poor adhesion. Therefore, initially it is not intended at all for use in “wet facade” insulation systems.
The result of incorrect finishing technology for extruded polystyrene foam
A big mistake beginners make is that they try to finish penoplex in the same way as regular foam. This leads to the fact that the reinforcing mesh lags behind it along with the plaster (glue), immediately after hardening .
However, this does not mean that the use of penoplex for arranging a “wet facade” should be abandoned. There is a proven finishing technology that I want to share with you.
Advantages and disadvantages of penoplex
Penoplex has a huge number of advantages and disadvantages, which are worth learning about in advance.
Penoplex has a huge number of advantages and disadvantages, which are worth learning about in advance. The advantages of the material include the following points:
- Low vapor permeability. Due to this, penoplex can absorb only a minimal amount of moisture.
- Low thermal conductivity.
- Can withstand quite heavy loads due to its excellent compressive strength.
- It has a fairly long service life, which can reach 40 years.
- Fast and easy installation.
- It belongs to the middle price segment and pleases customers with a good price-quality ratio.
At the same time, penoplex also has some disadvantages, which if not taken into account, then all insulation work will be ineffective.
- Quite a high fire hazard rate.
- May be damaged by rodents.
- Penoplex has a higher cost than polystyrene foam.
In general, pnoplex can be called a very good material for insulating the foundation of a house, which is why today it is very popular among buyers.
What you should know about insulation
Penoplex is one of the environmentally friendly materials, of course, if technology was not violated during production.
But since we are talking about a material of artificial origin, the chemical components from it can evaporate over time under the influence of various factors. In this regard, the insulation is always additionally covered with a variety of finishing materials.
In general, penoplex is completely safe for human health. But if the material burns, it releases very harmful fumes that can cause serious health problems.
Which penoplex is suitable
When choosing the most suitable type of penoplex, it is necessary to take into account the general condition of the soil, the presence or, conversely, absence of groundwater, and the region of residence. In the case of penoplex insulation of the base, there are only two types of material that fully comply with the necessary characteristics and allow you to get really good results from use.
- Penoplex Wall. In practice, this material has repeatedly demonstrated the highest level of efficiency and can therefore provide reliable protection from moisture and other negative environmental influences. It allows you to retain the maximum amount of heat in the house.
- Penoplex Comfort. This material is often used for additional wall insulation. This insulation was developed so that you could independently carry out all the work related to the insulation of the room. Thanks to the use of this type of penoplex, you can get excellent results and maintain maximum heat in the house for a long time.
Calculation of materials and components
In order to independently insulate the basement of a private house, experts recommend using Penoplex 45. The size of the slabs of this material is 60x120 centimeters.
The weight of one slab does not exceed 2.5 kilograms. The thickness can be from two to ten centimeters. It is first necessary to calculate exactly how much material will be needed to insulate the base. This can be done using a special formula, which indicates the area that needs to be insulated, as well as the dimensions of the material used. It is worth noting that it is worth buying a little more material for insulation, so that during installation work you can avoid all sorts of unforeseen situations.
