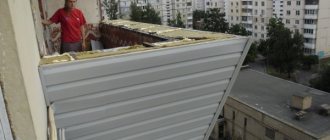
What to do with a complex roof shape
Let's tell you frankly: metal tiles are far from the best roofing material for a roof with a complex shape. Therefore, since there is already one and it needs to be insulated, be sure to think about the ventilation of all its parts. Definitely everyone!
The fact is that certain areas without ventilation will be warmer; snow will melt on them and flow down to the eaves, where there is ventilation and the roof covering has a lower temperature (especially on the overhang, under which there is no insulation). And with metal tiles for water, it’s not difficult to find an entrance to the under-roof space.
Further, the melted snow will encounter unmelted snow and remain there, eventually turning into ice. And putting it on is not only a danger for people living in the house when they go outside at the wrong time - it is also a constant destruction of the drain.
This is why the ventilation of a complex roof must be 100%, without missing a single section. To do this, install an intermittent counter-lattice, which allows air flows to move not only in one specific direction, but also in different directions, reaching all zones. Also, a couple of additional aerators will not be superfluous.
And after finishing the insulation, also make sure that the air intake hole in the eaves is always open. It cannot be hemmed with a board, but it can be covered with a slightly bent gutter drip.
As a last resort, we advise you to insulate such a roof from the inside using polyurethane foam, which penetrates into all cracks and hard-to-reach places (and a complex roof always has them), and is not afraid of moisture:
How to care for your roof
The polymer coating of the metal tile protects it from rust, but is itself exposed to temperatures, ultraviolet radiation and weather disasters.
Regular cleaning consists of the following simple steps:
- Dried leaves and ordinary dirt are removed with a damp brush with hard bristles;
- Snow is cleared using conventional soft snow clearing devices;
- To wash gutters, use a stream of water under pressure, which is directed from the ridge of the roof towards the eaves;
- Heavy dirt can be removed using gentle polymer surface products;
- Aggressive household chemicals should not be used: they can destroy the protective layer of the roof.
Pros and cons of metal roofing
The advantages and disadvantages of metal roofing arise from the properties of the material and the roof arrangement. Metal tiles are sheets of profiled steel 0.35-0.8 mm thick, coated with a special polymer that imitates natural ceramic tiles. Between the steel sheet and the colored polymer coating there are primer, passivation and zinc layers, which are duplicated on the underside of the corrugated sheet.
The complex structure of metal tiles explains many of the advantages of the material and roofing in general. These include:
- Light weight. This feature allows you to attach the sheets to the sheathing without additional strengthening of the rafter system.
- High wear resistance. Provided proper installation, the zinc and polymer layers reliably protect the metal from corrosion.
- Strength. The wavy shape of the sheet and sufficient thickness of the steel provide the necessary rigidity of the structure and allow the metal tile to withstand mechanical loads.
- Easy to install. Metal tiles are installed according to standard rules; it is easy to select additional roofing elements for them.
- Fire resistance. Metal roofing does not pose an increased risk of ignition and fire spread in the event of a fire.
- Aesthetics. The variety of appearance of metal tiles allows you to create beautiful roofs of any configuration.
Metal roofing also has disadvantages, which, however, can be mitigated during construction work. Firstly, metal roof tiles have low sound insulation. During strong winds, rain, and hail, the noise level increases. To reduce it, the roof structure is reinforced with a soundproofing layer. Its role is most often taken on by insulation.
Secondly, condensation may occur inside a metal-covered roof. This disadvantage is corrected by creating effective ventilation and a vapor barrier layer inside the roofing pie.
Installing additional items
Installing a valley: constructive tips
It is installed at the junction of the slope to the slope, but always together with the overlays. The lower valley strips are laid on the sheathing so that its lower edges are on top of the eaves strips. Then a sealant must be placed on the lower valley slats - it ensures a tight fit of the sheet to the slats. By the way, the valley is attached at the top of the profile wave in increments of 300 mm.
The joint of roofing sheets looks unaesthetic and therefore requires decorative treatment, which consists of laying a strip of the upper valley
End strip
Here it is necessary to use a “bottom-up” scheme, and the overlap of the planks is at least 10 cm in length. The end strip is attached to self-tapping screws in increments of 40 cm.
Something about the eaves strip: proper water drainage
The eaves strip for metal tiles is a longitudinal structural element, the main function of which is considered to protect the frontal board from harmful wetting and from the penetration of moisture into the internal space. The essence of its fastening lies in the following points: the cornice strip is nailed to the front board in a checkerboard pattern (step 300 mm); First, one plank is nailed, then the other is laid overlapping.
Under-roof waterproofing is laid on the last board of the sheathing and the eaves strip
Horse - say no to leakage
Small gaps must be left at the joints of the ridge. The seal is firmly glued to the upper edges of the sheets, the ridge is fixed with self-tapping screws at the apex points through the wave.
A seal with ventilation holes is placed on the ridge, onto which the ridge strip is subsequently attached.
Snow guards - such components should not be neglected
The planks are attached under the second transverse steps of the profile sheets, and a support strip is attached between them at the top of each wave. In addition, the installation of protective snow retainers can be carried out directly to the sheathing: naturally, then it is advisable to use long roofing screws.
Snow guards are installed in places such as the space above the entrance and windows, as well as at each level of the roof if it consists of several levels
In general, all of the above can be summarized unambiguously: installation of metal tiles is a complex process that requires skills, knowledge, and experience. You can’t master it on your own, so it’s better to immediately turn to professional craftsmen, because then the final result will be excellent and pleasing to the eye!
Planks
Let us dwell in more detail on specific types of components and areas of their application. The most important elements of any roofing system are the strips. Among them there are varieties.
- Cornice strip - present on all types of roofs. This element closes the rafters and the front board from water. The eaves strip is located on the eaves side of the roof. The water that gets on the roof goes down the slope and along the plank into the drain. Externally, this element is made in the form of a corner with a bend at the end. It is very important that it has a polymer coating. It is recommended to use a comb on eaves overhangs. It is used to protect the roof space from bird penetration. They are installed on slopes if the tiles are of a large height, which allows birds to penetrate inside.
Cornice strip for protecting overhangs
Without a cornice strip, all the water will fall on the rafter system, which will inevitably cause the formation of fungus.
- The front strip (wind) protects the roof gable from blowing rain or snow. This part is also an element that secures the sheets, protecting them from loosening.
- The valley strip can be upper and lower. The top one is made in the form of an element with two planes, in the center of which there is a gutter for draining water. This element also hides the roof cuts along the edges, making the roof more neat. The bottom strip is laid under the metal tile; it has the shape of a corner and protects the inside of the roof from water seepage.
Valley plank
The valley is the place on the roof where two slopes meet, forming an angle. All the water and snow collect in this place and create a large load on the roof. For this reason, the valley is strengthened and additional waterproofing is created on it.
- Junction strips are elements that serve to seal seams near pipes, vertical walls or ventilation openings. There are lower and upper slats. The lower ones are laid under sheets of metal tiles, with a protrusion at the end they are installed in a groove, which is previously cut in the wall. The top strip is installed after the tile sheets are installed. The abutment seams are treated with sealants to prevent moisture from getting under the roof.
Connection diagram to the chimney pipe
- Corner strips are used in the same way as abutment strips at joints with various surfaces. These strips are specially made for internal or external corners.
- Snow retention slats are used to prevent avalanche-like snow masses from falling off the roof. Snow rolling down your roof can damage your gutter or other structure. The snow retention bar breaks the snow mass into small parts, as a result of which the snow comes off the roof in portions. To increase the rigidity of this element, special reinforcements are placed on the slats. In some cases, a tubular snow retainer is used for metal roofs.
How to insulate a roof, design tips
Metal tiles are used to cover pitched roof structures.
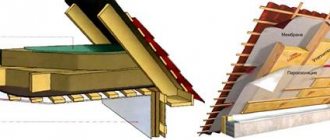
It is laid on the supporting roof frame - the rafter system. It is recommended to insulate a metal tile roof using a roofing pie made between the rafters. This technology is considered the most effective and gives excellent heat saving results. We can say that in the end, the maximum preservation of heat depends on the filling of the pie. Properly selected and installed, it prevents cooling of the living spaces of the attic and attic, prevents the penetration of moisture from the outside and ensures its removal directly from the pie itself.
The main layers of the roofing pie
It is impossible not to note the roofing material itself – metal tiles. The extent to which the roof and the elements of the “filling” of its roofing pie will be protected from the aggressive effects and physical stress of natural phenomena, snow, rain, and wind largely depends on compliance with the technology of its installation. The safety, absence of wetting and effectiveness of the thermal insulation layer are ensured by a waterproofing film, one or two ventilated gaps (depending on the type of waterproofing material) and vapor barrier material.
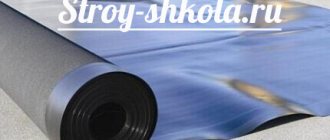
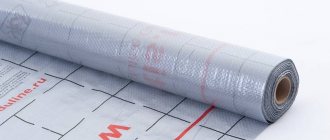
Waterproofing a metal tile roof is designed to prevent moisture from entering from the outside. Depending on the purpose of the attic space, it can be either vapor-tight or vapor-permeable.
The waterproofing film is attached to the rafters at the top using staples or galvanized nails. In this case, it is necessary to allow a slight sagging of the canvas up to 1 cm in order to protect it during temperature changes. The sheets are laid across the roof slope with an overlap of the top sheet on the bottom sheet by 10 cm. It is desirable that the waterproofing material have high vapor permeability, otherwise it will be necessary to provide another ventilated layer in the roofing pie.
On top of the waterproofing layer, counter-lattice bars are laid along the rafters, and sheathing bars are laid across. The height of the counter-lattice bars is selected based on the length of the roof slope and the size of the required ventilation gap, and the pitch of the lathing in accordance with the horizontal wavelength of the metal tile, since the roofing material will be attached to it.
For a metal roof, it is especially important to have ventilation for the under-roof space. In its absence, condensation, which forms when the internal and external temperatures differ on the inside of the metal tile, can lead to disastrous consequences for the roof structure
For metal roofs, including those made of metal tiles, it is necessary to use special membranes - anti-condensation membranes.
This material is one-sided, and it should be laid with the rough side facing the insulation.
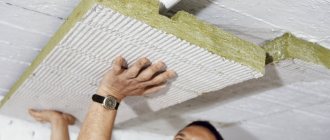
Thermal insulation layer of a metal roof
It is recommended to make it from breathable materials, usually with a fibrous structure. They are based on basalt or fiberglass. These insulation materials have good thermal insulation characteristics and excellent noise reduction. Another advantage is that they are not flammable. The total thickness of the mineral wool layers under the metal tile roof of an energy-efficient house is at least 20 cm. Fiberglass insulation, due to its structure, has many air gaps, which ensures their low thermal conductivity.
In general, the performance characteristics of mineral wool and fiberglass are similar, although the thermal conductivity of fiberglass is lower.
Penoizol is also used as insulation - liquid foam, a new generation of thermal insulation material.
It is necessary that the thermal insulation mats or slabs be semi-rigid. This way they will hold well in vertical and inclined planes.
Their length should be 2–3 cm greater than the distance between the rafters. The number of layers of insulation to be laid is calculated depending on the thermal conductivity coefficient of the material used for insulation.
Vapor barrier layer of a metal roof
protects the insulation from moisture that comes from inside. It is also attached to the rafters, only from below, using galvanized nails or staples. Similar to laying the waterproofing film, an overlap is performed. To ensure tightness, all “dangerous” junction areas, for example, to walls, pipes, windows, are taped with special tape.
The installation of the roof, insulation and other elements is carried out without deflections, gaps and irregularities with a tight fit to each other, with the exception of ventilation ducts.
2019stylekrov.ru
Insulation technology “Roofing pie”
To insulate a metal tile roof, there is a special scheme for arranging roof layers, called the “Roofing Pie”. Refer to the diagram to understand how to properly insulate a metal roof.
Experts recommend insulating a metal roof using the developed “Roofing Pie” technology
The consistency of the layers determines whether the interior will not freeze, how protected the insulation will be from moisture, and whether the latter will be vented outside.
The reliability of the roofing pie is determined by five skates:
- internal vapor barrier;
- insulation;
- external waterproofing – removes condensation from the insulation to the outside;
- an air gap of at least 5 cm - provides space for air circulation, which “dries out” the condensate moisture;
- protective covering of the roof - in our case it is metal tiles.
Materials for thermal insulation of pitched roofs
Roof insulation technology involves the use of various materials. The most popular heat insulators include mineral wool and glass wool (in slabs or rolls), slab polymer materials - polyurethane foam, polystyrene foam. The principles of their installation are similar, but it is worth noting that installing slab material is much simpler and more convenient.
As waterproofing, roofing material or a waterproofing membrane is usually used, which is impermeable to water, but capable of removing moisture from the insulation. The vapor barrier layer can be made of
:
- roofing felt;
- polyethylene film;
- glassine;
- foil materials laid with foil towards the attic.
To create a roofing pie with high functional characteristics, it is recommended to use a special vapor barrier membrane to create a vapor barrier: it removes condensation outside from the insulation and does not allow steam and moisture to pass into the roofing pie.
Insulation of the U-shaped attic contour
If the roof is high and the area of the house is large, then the attic can be equipped without sloping walls - with a U-shaped contour, the thermal insulation of which will not come into contact with the roof.
In this case, behind the contour of the attic there will be an ordinary cold attic with its own ventilation through the eaves and ridge vents. In essence, this is a technology for insulating a frame house, but inside the attic.
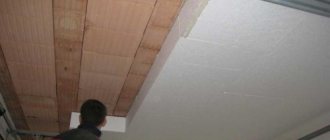
Insulating the attic ceiling:
- Boards or slats of the rough ceiling are hemmed to the top ties, which act as ceiling beams.
- A vapor barrier is installed on the side of the room. The strips are laid overlapping and all joints are glued.
- On the “attic” side of the attic, insulation is laid between the tie beams (if necessary, in two layers).
- A waterproofing membrane is spread over the insulation. It is required if it is not included in the roofing pie. If the roof has waterproofing, but the mineral wool mats are not laminated, then ordinary fiberglass can be laid on them as a wind barrier.
- On the inside, a counter-lattice is attached over the vapor barrier. It is needed to ensure that there is an air gap necessary for the functioning of a vapor barrier with an anti-condensation or reflective surface.
Related article: Which insulation is better for an attic roof
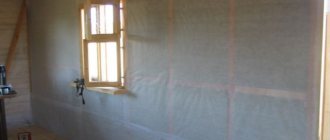
Insulating attic walls:
- A waterproofing windproof membrane is attached to the outside of the posts.
- If the contour of the attic on the roof side is sheathed with plywood or OSB, counter-lattice bars are nailed to the posts on top of the waterproofing.
- Thermal insulation is laid between the racks.
- A vapor barrier is laid in a continuous layer on the inside of the racks. Tape the junction with the vapor barrier of the ceiling and floor.
- Install the sheathing for the interior lining.
If none of the options suits you, then the roof can be dismantled, and waterproofing and insulation can be carried out using standard technology.
Calculation of the amount of metal tiles
To calculate the required number of sheets of material, you first need to decide on the type of profile and the manufacturer of the metal tile - you will need the exact dimensions of the material itself, and each profile has its own. Then you need to make accurate measurements of the slopes - length, height, if any, you need to measure all the protrusions or other decorative elements that will need to be sheathed with roofing material. If the roof has a complex shape, it is better to draw a plan, put down all the dimensions and then start doing the calculations.
Number of rows
It is best to look for metal tiles not in stores or markets. It is advisable to contact the manufacturer directly. The point is not only the price - it may not differ very much, but the fact that many workshops/factories offer to cut sheets of the required sizes. The minimum sheet height is 0.7 m, the maximum is 8 m. That is, you can order the required number of sheets covering the roof slope from the ridge to the overhang (taking into account the eaves overhang).
This option is good because a metal tile roof will not have horizontal joints, which means there will be less chance of leaks. The second plus is a minimal amount of waste and a smaller amount of material itself (due to the absence of horizontal overlaps, several square meters are saved). Disadvantages: difficulties with delivery, lifting long sheets to the top, inconvenient installation.
Calculation of a rectangular roof slope
When using sheets of standard sizes, the height of the roof slope is divided by the useful length of the sheet. The resulting figure is always rounded up. The useful length is obtained after subtracting the amount of horizontal overlap from the total length - from 100 to 200 mm. The flatter the slope, the greater the overlap of the sheets is necessary so that precipitation cannot get into the under-roof space. On roofs with a slope of up to 12°, one sheet overlaps the other by at least 200 mm; with a slope of 12° to 30°, the overlap is 150-200 mm, more than 30° - 100-150 mm. The specified amount of overlap is subtracted from the total length of the sheet, this will be the “useful length”.
An example of calculating the number of rows of metal tiles on a roof. Let the length of the slope be 4.5 m, the useful length of the sheet is 2.3 m. Divide 4.5 by 2.3, we get 1.95, round to the nearest whole number - we get 2 rows. In this case, only a small part of one sheet will go to waste, but there are times when more than half is cut off. This is very unprofitable, since this piece cannot be used anywhere else.
Number of sheets in a row
Take the length of the slope and divide it by the usable width of the sheet. This parameter is indicated in the technical specifications for metal tiles. Most often it is 110 cm (1.1 m). We round the resulting number up to obtain the number of sheets in the row.
An example of calculating metal tile sheets in a row. Let the length of the overhang be 8 m, the useful width of the sheet 1.1 m. When dividing, we get 7.27 pieces, but round up to a larger integer and we get 8 pieces in one row. Moreover, more than 2/3 of one sheet will go to waste.
Features of hip roofs
Hip roofs have slopes that are triangular or trapezoidal. Here it is necessary to select the length of the sheet in order to minimize the amount of waste.
An example of the layout of metal tile sheets on a hip roof
The height is selected so that no more than half goes to waste. It is quite difficult to do this manually, and there is still a significant error - there will be 20-25% more waste than when calculated using programs. They are usually available from sellers and manufacturers. It is better to provide them with an accurate calculation, and first measure the parameters of the roof at home (or call a measurer), and then try to select the dimensions yourself. Then you can compare the amount of material needed, calculated by you and proposed.
Determining the number of additional elements
A metal tile roof requires a large number of different additional elements (additions), which form the ridge, the edge of the overhang, the sides of the slope, the passage of the pipe, the valley (the junction of two adjacent roof slopes). The more complex the shape of the roof, the greater the amount of additions required. With a simple gable roof, ridge elements and caps, cornice and pediment strips will be needed. That's all.
What types of additional elements are there for metal roofing and why are they needed?
Despite the wide variety of extras, they are all considered the same. Take the length of the surface on which it needs to be mounted and divide by the useful length of the element. It is usually standard and is 1.9 m (total length 2 m). The result obtained is rounded up.
Roof thermal insulation
For high-quality thermal insulation of the roof of a structure such as an attic or the living part of an attic, the following modern finishing materials should be used:
- Special basalt materials as insulation;
- High-quality semi-rigid insulation, which belongs to the semi-rigid category;
- Mineral high-quality insulation;
- Ecowool;
- High-quality glass wool;
- High-quality extruded synthetic polystyrene foam.
All such materials that provide thermal insulation are characterized by a low degree of thermal conductivity, but are leaders in the construction of roof insulation. This is based on a large number of defined indicators.
You should not neglect such a design as an insulated roof made of metal tiles, as this will not only save a large amount of material resources for heating, but will also ensure an optimal microclimate in the room, regardless of the time of year.
Design of security elements and their purpose
Ladder
To climb to the roof, you need a stable ladder. It consists of wall and roof ladders with brackets. 4 brackets are required per section; they are placed in the place of the lower wave bend, where the sheathing is solid. Both the brackets and the top of the roof ladder are secured with bolt screws. The wall staircase is installed so that the topmost step is opposite the edge of the cornice. In this case, the wall staircase itself must be aligned with the roof staircase.
Roof fencing
These metal elements are a necessary condition when working on the roof. They are secured using special supports to the continuous sheathing through the lower part of the wave, sealing with a rubber gasket. See photo above.
Transition bridge
Walking bridges are needed for safe walking on the roof from an attic window, hatch or staircase. They are fastened in the same way as fences, only continuous sheathing is not necessary.
Snow guards
Snow guards have a tubular design and are made of metal painted black, brown, red or green. They are installed along the entire perimeter of the roof, above the eaves overhang. In addition, they must be placed above the entrance to the house, attic windows, as well as above each level of a multi-tiered roof.
>Metal Profile roofing system diagram
Below is a diagram of the roofing system of the Metal Profile company. On it, all the nodes discussed above are connected into a whole roof.
Roofing waterproofing
The process of waterproofing under a material such as metal tiles is carried out with all types of roofing, that is, insulated or not. The installation of a waterproofing membrane is able to perform the following functions:
- Protection from large amounts of condensation that accumulates on the insulation;
- Effective protection against large amounts of moisture in rafter systems. Waterproofing the entire attic or loft.
Important! The film used must contain small holes, which are designed to create effective ventilation air exchange in the installed system.
The modern market offers a diverse range of high-quality films designed for metal tiles. Despite this, effective waterproofing of roof coverings on pitched roofs can only be carried out using special membranes.
This demand is based on high anti-condensation properties. The level of film density and its fire resistance and ultraviolet resistance must be selected with full consideration of the operational characteristics of the roof.
The process of fastening the membrane is carried out using a special stapler with special staples and strictly to the rafter system. A sheathing is mounted on top of the film, but it should sag no more than 2 cm, thereby providing the necessary ventilation gap that the roof needs.
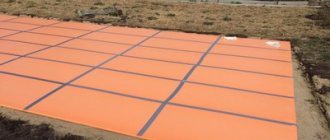
Insulation of a flat roof
What should you use?
- Load-bearing base.
- Vapor barrier.
- Roll material (roofing felt).
- Insulation.
The bulk layer on a flat roof consists of a cement-sand mixture and a drainage layer.
The order of layers in the “roofing pie” depends on the type of roof. In the traditional type, the insulation is protected by a waterproofing carpet, and in the inversion type, the opposite is true.
How to insulate a roof
Insulation of flat roofs.
To begin with, the roof should be thoroughly cleaned of excess moisture, foreign objects and dirt. This point should be given special attention; excess moisture will saturate the space in the under-roof layer with moist steam and penetrate into the open pores of the insulation
As a result, this can even lead to swelling of the roof covering and the formation of air pockets, which can significantly affect the insulation. Next, a waterproofing coating should be applied to the insulation; it is important to do this immediately, avoiding any contact of water on a flat surface. To distribute the load evenly, during installation, workers must move strictly along the inventory walkways. It is important to lay the thermal insulation towards yourself, starting from the edge opposite to the roof exit.
These simple rules require very careful study, but your efforts will not be in vain, and in return you will receive high-quality thermal insulation.
Often, when installing roofing materials, big problems arise, and as a result, you have to change the rafter system, which has worn out and completely deteriorated due to insulation that was previously done incorrectly
Therefore, roof insulation must be approached with great care. On the roof of a private wooden house, the rafters may become damaged, the sheathing may become unusable, and all this in literally just 5 years
Therefore, it must be installed correctly and on time, as soon as the team completes the rafter system. and the insulation can be installed after the roof is installed.
Share a useful article:
Stages of work on insulating a pitched roof
The roof insulation scheme is quite simple. First of all, you need to measure the distance between the rafters. The slabs of cotton wool insulation should be cut according to the results obtained, adding 1 centimeter. This will allow you to fasten the heat insulator between the rafters. This stage of work is greatly simplified if the roofing system is initially designed and installed based on the use of slab insulation boards of a certain width.
If there is no waterproofing between the rafters and the already installed roofing, you should first secure a water barrier. The membrane should envelop the rafters; it is most convenient to fasten it with a construction stapler to the rafters themselves and to the roof sheathing in the openings between them. The waterproofing must be installed under the eaves at the bottom of the roof to ensure moisture drainage. It should be taken into account that with this method of fastening the hydrobarrier, the insulation must be installed without the necessary air gap. For this reason, it is recommended to use a superdiffusion membrane as a waterproofing material.
If there is a waterproofing layer under the roofing, nails are placed on the rafters in increments of about 10 cm. The nails should be located at a distance of 3-5 cm from the waterproofing layer. It is necessary to stretch a polyethylene thread or cord between the nails, tamping them to the end. This will help create an air gap between the hydrobarrier and the insulation. If the heat insulator is planned to be fixed with a cord, and not with lathing for internal cladding, nails must also be driven along the outer edge of the rafters.
If, when deciding how to insulate the roof of a house, you chose cotton slab insulation, then the prepared elements must be slightly compressed and inserted between the rafters
When using stiffer foam boards and similar materials, it is important to accurately size them so that the boards fit snugly into the opening. It is recommended to carry out insulation in two layers
If you have to mount not solid sheets into the opening, but narrower fragments, joining them along the length or width, you need to make sure that the joints of the second layer do not coincide with the joints of the first. The heat insulator should not protrude beyond the plane of the rafter legs. If the rafters are not wide enough to install two layers of insulation, additional timber is nailed to them.
The heat insulator is fixed between the rafters using a stretched cord secured to pre-filled nails. Or, as a fastening, a lathing made of slats is used, intended for mounting the interior lining of the room. The slats are nailed to the rafters in increments of 30-40 cm. In this case, the vapor barrier is stapled to the rafters before installing the sheathing: the thickness of the slats allows you to create the necessary air gap between the vapor barrier and the sheathing.
When installing a vapor barrier, special attention is paid to the tightness of the layer. The panel is laid with an overlap of at least 10 cm, the joints should be taped with adhesive tape in two layers
It is necessary to install the vapor barrier around the chimney and at the junction with the walls as efficiently as possible. At the final stage, the sheathing is installed using wood-based or plasterboard boards.
You can learn more about how to insulate the roof of a house from the video.
Installation diagram of a metal tile roof with insulation
The installation of an insulated roof made of metal tiles requires the implementation of successive stages of work. During installation, adhere to the chosen scheme and take into account the characteristics of the roofing material.
Carrying out calculations
To install the roof, prepare metal tiles, boards, timber, additional parts, and self-tapping screws. To purchase the required amount of building materials, you must first make a calculation based on the shape and size of the roof. Construction work begins after the tiles have been purchased, since their geometric parameters (width, length, wave height) can affect the installation of the sheathing.
For calculations, the length of the walls of the building box is measured. This is necessary to determine the area of the roof slopes. Next, determine the location of the skylights, chimney, and ventilation elements. Based on the established area and the angle of inclination of the slopes, the amount of lumber and metal tiles is determined. To determine the number of rafters, the length of the wall is divided by the length of the step. Add one to the resulting figure and round the result up.
The construction of a roof covered with metal sheets is optimal when the slopes are inclined from 15 to 20 degrees. The minimum limit is an angle of 14 degrees.
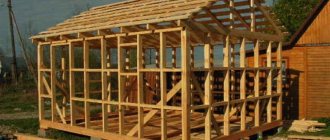
Installation of the rafter system
Compared to a cold roof, a more powerful rafter base is made for an insulated roof, since the insulation will be held between its elements. To do this, use exclusively a wooden beam, which allows you to securely fasten all the additional layers of the cake. The size of the rafter board should be 50 mm in thickness and 100 (150) mm in height. If the installation step is increased, then a beam of larger cross-section is taken for work.
Professional builders recommend using a board whose size exceeds the thickness of the selected insulation by 30-50 mm. This will create the necessary ventilation gap between the thermal insulation and the waterproofing film. An exception can be made only if a diffuse membrane is used as waterproofing, which does not require a gap. In other cases, if the width of the rafters is not enough, a counter batten measuring 30x50 mm or 50x50 mm is nailed to the beam.
When covering a house with metal tiles, to improve the ventilation of a wooden structure, sometimes through holes with a diameter of 2-2.5 cm are made in the rafters. If there are doubts about the reliability of the board, then perforations are marked in the upper part at the ridge at a distance of 30 cm from each other.
Preparing the roofing pie
Creating a multi-layer roofing system begins with laying insulation. Mineral wool or any other thermal insulation material is placed between the rafters. A vapor barrier film is stretched on the bottom side. It is attached to the rafters and covered with sheathing. The latter can be used plasterboard sheets, boards, OSB.
On the upper side, the heat-insulating mats are covered with waterproofing, which at the same time serves as a windproof layer. The film is fixed, maintaining a gap of 20-30 mm from the insulation. The material is laid with an overlap of 10 cm. In technologically complex areas (for example, at the junction of slopes), this parameter should be larger - from 20 to 30 cm.
Construction of sheathing
This structural element consists of boards 10 cm wide and 25-32 cm thick. Before installation, the lumber is treated with fire retardants and fungicidal solutions to protect against fire and fungus. The sheathing is assembled from the bottom up.
The lowest bar is thicker than all the others. That is, if the ordinary upper laths have a cross-section of 30x50 mm, then the first beam is taken thicker - 50x50 mm. The bottom rail is located strictly parallel to the edge of the cornice. The pitch of the sheathing is set according to the transverse wave of the tile. The distance between the first (lower) bar and the second is 28 or 30 cm. The distance between the remaining slats is 30, 35 or 49 cm.
A continuous sheathing with a gap of 2-3 cm is installed around roof windows, pipes, stairs, transition bridges, as well as in the valleys. The roof sheathing for metal tiles not only plays the role of a base, but also provides ventilation inside the roof itself. In order for air to circulate freely from the overhang to the ridge, the ventilation ducts must remain free.
Installation of cornice system
This part of the roofing structure includes three elements: cornice and front boards, cornice lining. The eaves board strengthens the slope and sets the necessary rigidity, which is required for installing gutters and lining overhangs. To do this, a recess is made in the rafter leg that fits the size of the cornice board. Gutters are attached to long or short hooks. To fix them, a groove is cut out in the cornice strip.
The front board is most often included in the installation of a roof with metal tiles, if it is not intended to install a drain. It covers the end of the rafters. It is fixed with nails or screws. The frontal plate performs many functions. End and finishing strips, J-chamfers and other parts are attached to it.
Vinyl soffits are used to line the cornice. Through the perforations in them, air penetrates under the roof, thereby improving ventilation. An alternative to soffits can be ordinary boards, but with such a replacement there should be gaps of 2-3 mm between the elements of the filing.
Laying metal tiles
Installation of the covering begins with the starting beam of the sheathing, which is located along the edge of the slope. The metal tile should extend 5 cm beyond the cornice. The edge sheet is attached through the wave on top of its transverse step. The remaining products are fixed in the decline of the wave at the bottom of the transverse step.
Sheets of metal tiles that are installed on the starting board must be positioned strictly horizontally and secured in each wave.
The direction of laying roofing sheets (from left to right) does not matter. The first sheet is placed in the lower left or right corner. The second copy is on the right (or, accordingly, on the left). The third sheet of metal tiles on the roof is installed above the first, and the fourth - above the second.
To maintain horizontal laying, first screw one self-tapping screw into the sheet at the top at the very edge. Then the second element is placed and also temporarily fixed at one point. After alignment, the sheets are connected to each other.
Additional elements for metal roofing
Additional elements are needed to seal and fasten various junctions, as well as to complete the appearance of the roof. The use of these parts makes the roof operate longer and safer. The list of elements includes:
- end strips;
- ridge strips;
- antenna output;
- cable outlet;
- snow retainers;
- transition bridges;
- stairs.
A cornice strip is designed to collect moisture from under the roof and protect against precipitation during cross winds. End (or in other words - wind) strips protect the pediment from the wind. Their upper section is attached to the metal tile, and the lower section is attached to the wind board.
The top of the roof is decorated with a ridge strip. To ensure that this element lies tightly on the figured sheet, foam rubber is placed under it. This material allows air to pass through, but is a barrier to insects and birds. The junction of the slopes is formed using a valley. These shaped strips improve the aesthetics of the roof and promote faster flow of water over the roof surface.
The installation of a roof with metal tiles involves the installation of ladders for roof maintenance, fences, a drainage system, and snow guards. The last additions can be tubular, lattice, plate or point type. The output of antennas and electrical cables is made using special devices (outlets), which ensure the tightness of the hole.
Laying technology
The laying of metal tiles is carried out after the assembly of the rafter frame and sheathing is completed. To avoid getting the wooden frame elements wet, installation should be carried out in dry weather. For safety reasons, it is prohibited to carry out work at height in windy weather. To lay the metal profile with high quality. There is the following instruction:
- Waterproofing material is laid on top of the rafters, starting from the roof overhang. Laying is done with a slight sag so that the waterproofing does not burst under water pressure. The film is attached to the rafters with a stapler; an overlap between the strips is made of 10-15 cm, gluing it with adhesive tape.
- Counter-lattice slats are installed along the rafters directly on top of the waterproofing, which form a ventilation gap necessary to protect the roofing material from condensation.
- Then, perpendicular to the rafter legs of the frame, the lathing is fixed to the counter-lattice with a step equal to the wavelength of the metal profile.
- Metal tile sheets are cut to fit the dimensions of the slope. If you buy the material directly from the manufacturer, then the cutting is done at the factory, so there will be no horizontal joints between the sheets. You can cut metal profiles outside of production with a circular saw, jigsaw or hacksaw.
- Begin laying from the lower right edge of the slope. If laying is done in one row, then the sheets are attached one after another. If the installation is carried out in 2 rows, then first lay the outermost sheet at the bottom of the slope, then fix the sheet above it, then the 2nd sheet of the first row, and so on.
- The sheet is attached to the sheathing using roofing screws with a rubber press washer, which closes the fastening hole from water penetration. The screws are screwed in strictly at right angles to the surface of the roofing material, leaving a gap of 1-2 mm so as not to deform it. To fix 1 sheet, 10-15 screws are required.
- During installation, metal tiles overlap each other by 1 wave. The place where the sheets overlap is fixed with self-tapping screws through a capillary groove.
Note! When fixing metal tiles, it is important not to twist the self-tapping screw to avoid deformation of the material and chips on the polymer coating. To do this, it is better to use a screwdriver at low speeds.
Material laying technology
Sheet fastening scheme
Location of attachment points
Expanded polystyrene
This material plays a fairly significant role in any construction. Not every insulation has such excellent characteristics and such an affordable price. When carrying out thermal insulation measures with your own hands, you can significantly reduce the monetary costs of operating a building, and selecting high-quality insulation will help save electricity, which is expensive in these days, and roof insulation will help with this. Metal tiles are a material that will be quite profitable in economic terms due to the price-quality ratio.
An important element of the roof sheathing
To create the sheathing, use bars with a cross-section of 50/50 mm and edged boards measuring 32/100 and 50/100 mm. At the bottom of the roof slope, along the eaves overhang, two 50/100 boards are nailed. Then a counter-lattice made of 50/50 mm bars is placed on top of the waterproofing. The bars are nailed along the rafters, from the ridge to the bottom. On top of this counter-lattice, with a certain step, sheathing boards are attached horizontally. The fastening step of these boards will depend on the type of metal tile profile that is planned to cover the roof.
Ridge sheathing
The uppermost part of the roof requires strengthening. To do this, you need to nail a pair of boards on each side of the ridge strip.
From the end of the roof you need to nail boards larger than the main sheathing to the height of the metal tile profile.
The valley is the internal junction of two roof slopes. Where the valley passes, the sheathing is made continuous.
Roof fencing
It simply must be reliable, so it is made above the overhang of the eaves. As a guide, you can take the height of the load-bearing wall. The sheathing in these places needs continuous sheathing. Therefore, additional boards are added between the ordinary sheathing and a continuous base is made.
The main components of the roofing cake
The name “pie” is based on the fact that the insulated roofing structure contains several layers simultaneously. They are connected to each other and perform specific functions. roofing insulated pie usually consists of the following layers:
- Metal tiles;
- High-quality sheathing from high-quality edged boards;
- An element such as a counter-lattice made of bars or planks;
- High-quality waterproofing film;
- Special ventilation gap;
- Unique thermal insulation material;
- Special vapor barrier film;
- Professionally constructed rafter system.
Roofs that are not insulated with special materials are installed much less frequently, because the thermal insulation layer used in this process seriously reduces the material costs of heating the room. this is based on the fact that “cold bridges” are almost completely eliminated in this design.
If the building is located in a warm region, it would be much more advisable to install a coating that consists of the following layers:
- Metal tiles;
- High-quality sheathing made of boards and bars;
- You will need a counter-lattice made of wood blocks and planks;
- A gap intended for ventilation;
- High-quality rafter system.
After this, it directly depends on whether there is a special attic room, whether there is an attic in the building, and whether the space located inside the building strictly under the roof is being developed. Below, each of the layers of such a structure as an insulated roof will be discussed in more detail.
Types of waterproofing substrates
In a high-quality roof, it is necessary to provide for the formation of condensation not only directly under the metal tiles, but also from the insulation side.
To do this, first of all, an anti-condensation layer is applied to the inside of the film and a gap is left for ventilation. The formation of condensation depends on whether the roof is warm or cold. Its intensity and volume are directly related to the temperature above and below the substrate.
There are three types of films in total:
Classic film
It is important to maintain ventilation in two circuits:
- Between roofing material and waterproofing
- Between waterproofing and insulation
Selection of thermal insulation material
To thermally insulate a roof with a cover made of metal tiles, it is better to use thermal insulators with a fibrous structure. The most common of them:
- glass wool;
- mineral wool.
Minvata
Mineral wool and similar materials with a fibrous structure have remarkable thermal insulation properties. They very effectively remove excess moisture from under the roof space into the external environment. A specific membrane fabric film will prevent condensation from remaining inside the building.
When performing roof insulation work on the inside of the attic space, the mineral wool must be cut in advance into fragments having the required dimensions with an allowance of 2 or 3 centimeters. Before installing the insulating material in the gaps between the rafters, it needs to be compressed a little. Upon completion of installation work, the insulation will expand again and completely occupy the space intended for it.
Styrofoam
As a material characterized by ease of self-installation and affordable cost, you can use the well-known polystyrene foam. It weighs little, is produced in the form of slabs and does not create additional load on the roof structure.
Polystyrene foam also has its drawbacks:
- low vapor conductivity, which threatens the accumulation of condensate under the roof and dampness in the house;
- the material attracts rodents who like to build their nests in it, which will significantly damage the insulation of the attic..
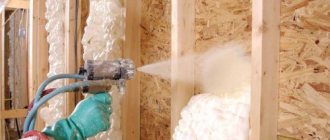
Polyurethane foam
This material can be applied in foamed form to any surface being processed, regardless of its shape and design complexity. The process takes place using a specific portable installation with a sprayer, from which the substance is supplied under significant pressure. In this way, it is possible to insulate the plane, regardless of its angle of inclination.
In addition, the use of polyurethane foam eliminates the need to lay a vapor barrier layer, which would protect the elements of decorative finishing of the living space from condensation penetration. The cost of such material is less economical than that of other materials used for heat insulation.
Ecowool
This building material is manufactured in a compressed form and will need to be loosened before being used for its intended purpose. Often, in order to return the material to its original shape, make it more voluminous and apply it to the insulated surface, special blowing equipment is used.
The technology for laying polyurethane foam and ecowool is not too complicated; the work can be done without the use of a structure for support. The use of insulation materials in rolls or panels will require more strict adherence to the rules of installation technology.
This is interesting: Types of alarm systems for dachas - we explain in detail
Ridge strips
An important element of any roof is the ridge. The ridge is installed at the junction of two slopes, in the place where they form an angle. Typically, a ventilation duct passes through this roofing element, which removes excess moisture and air from under the covering. The ridge is also important from a decorative point of view; without it, the entire structure will look unfinished. According to their shape, ridge strips are divided into types.
- The semicircular ridge is usually used for gable or hip roofs. There are special plugs along the edges of the element that prevent various debris from penetrating under the roof. This type of form is considered the most reliable and durable, but also the most expensive.
Attaching a semicircular ridge to the roof
- The flat profile has a simple shape and does not require plugs. It can be simple or U-shaped. The latter is distinguished by the presence of a decorative protrusion in the shape of the letter “P”.
U-shaped ridge profile
- The rectangular (triangular) ridge can be used on all types of roofs. This form is considered "classic". The cheapest option of all ridge profiles. From a decorative point of view, it is not as original as semicircular or flat planks, but it is easier to install.
The rectangular skate looks rustic, but does its job perfectly.
- A narrow ridge does not carry any special functional load. In most cases, it is placed on decorative elements of the roof (turrets, slopes of hipped roofs, etc.).
- T-shaped and Y -shaped connecting elements are used in roofs of complex shapes where the ridge diverges into two or in the case where one ridge approaches perpendicular to the other.
T-shaped and Y-shaped ridges for metal roofs
For proper installation of the ridge, you will need not only the strip itself, but also a layer of sealant. The seal plays the role of a “filter”; it protects the ridge from the penetration of insects, water, dust and other unwanted particles. The gasket can be of three types: profile, universal or self-expanding.
- Universal – suitable for planks of any shape. Made from polyurethane. On one side of the seal there is a self-adhesive base from which the protective film can be removed. The material does not allow air to pass through well, so it is better not to use it for ventilation.
Universal seal for metal roof ridges
- The profile is made according to the shape of a specific strip. The main component is polyurethane foam. The material retains dust and water, but at the same time allows air to pass through well, so it is used to create a ventilated ridge.
Profile ridge made of polyurethane foam
- Self-expanding - installed on adhesive tape, after which the material expands and fills the entire space under the ridge strip. At the same time, it closes all the cracks and prevents dust, moisture and insects from penetrating into the roof. At the same time, air continues to pass through the structure of the material. This type of seal is based on polyurethane foam impregnated with acrylic.
Self-expanding seal on a self-adhesive base
- The plugs are installed on the ends of the semicircular ridge strip; they also serve to seal the internal space of the roof.
Rules for working with heat insulators
When working with a heat insulator, you must follow a number of rules so that it fulfills its functions and the insulated roof serves you for many years.
Storage and installation
Firstly, moisture should not get on the surface of the materials either during storage or during installation, so the insulation must be stored in a room well protected from moisture.
Preventing the ingress of moisture during installation is carried out by installing a waterproofing layer
It reliably protects the material from getting wet, preventing it from becoming saturated with water - this is a particularly important condition for the normal use of mineral wool.
Instructions
Before you start using, carefully read the instructions for the insulator. Many people believe that all insulation materials of the same type are the same, but this opinion is wrong. Only the goals of such materials are common, but the installation process, storage conditions and other important points are often different.
Handy tools
Never neglect the reliability of the tools at hand. No matter how high-quality the materials for insulating a metal roof are, if you cut them with a dull knife, nothing good will come of it, you will only ruin the insulator.
Safety regulations
Remember about basic safety rules that apply not only to the thermal insulation of roof structures, but also to any other construction activities.
We are talking about wearing safety glasses, durable gloves, a respirator, etc. Even a small metal chip that accidentally gets into the eye can cause serious injury.