On our website we have already repeatedly talked about various types of metal stoves: buleryan, potbelly stove, simple sauna stove and others. Some owners of private houses and summer cottages buy ready-made metal stoves, some build them with their own hands, but the convenience of their use is always obvious, since they are compact, heat up quickly, but, unfortunately, cool down just as quickly. For a large house with several floors, a metal stove is definitely not suitable due to its low heat capacity.
Casing around a home stove
A metal stove is a reasonable solution for heating a small house, outbuilding or bathhouse. But it has one significant drawback that makes it unable to withstand comparison with stone units: its inability to retain heat as long as a brick stove.
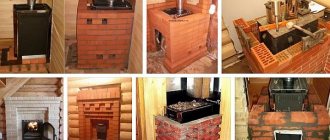
Those who want to increase the duration of heat transfer and the efficiency of heating the room should create a casing around the structure, that is, cover the metal stove with bricks. Doing this yourself is quite simple, but before starting work you need to carefully plan your actions and select the right materials and tools. Our article will help you cope with this task.
Brick selection
The range of bricks on the market is very large, but you need to know that only two types are suitable for lining stoves:
- fireclay fireproof;
- full-bodied or hollow red.
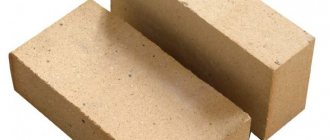
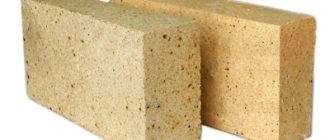
Standard fireclay brick
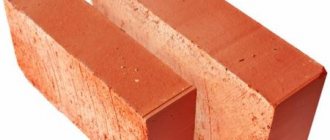
This limited choice is due to the fact that the material will constantly be exposed to temperature changes, which only the listed types of brick can withstand. Fireclay brick is made from special refractory clay, which ensures its heat resistance and fire resistance. Red brick is somewhat inferior in its characteristics to fireclay, but has a more attractive appearance, and therefore is often used for finishing surfaces that are not in contact with fire.
In addition to the variety, you also need to pay attention to the brand of brick. It determines the compressive force a material can withstand and is an indicator of its strength. For cladding stoves, it is recommended to choose dense, durable brick, as it retains heat longer. The M250 brand is optimal for these purposes.
Regarding appearance, the working surfaces of the bricks should be rough for better adhesion, and the front sides should be smooth and without flaws. If you also want to decorate the stove, harmoniously fitting it into the interior, you can give preference not to classic products, but to ones that imitate stone or other textures; you can also choose different shades.
Red kiln brick
Masonry mortar
Preparing the solution is one of the most critical stages of work, since not every mixture can withstand high temperatures. The simplest option is to use a ready-made heat-resistant mixture, which already contains all the necessary components. In this case, the preparation process will consist of diluting it with water in the required proportions in accordance with the instructions and thoroughly mixing.
It is better to use a special mixture for the solution
There is another way, more labor-intensive, but economical. The solution can be mixed from equal proportions of sand and fireclay clay. You also need to add salt to the mixture at the rate of 100 grams per bucket. After adding water and mixing, the solution is allowed to sit for at least three days, then tested for suitability. When finished, it should fall off the trowel easily.
Preparatory stage of cladding
Before you begin lining the body of the potbelly stove with bricks, it is necessary to carry out a number of preparatory work:
- If the stove is installed against a wall made of any flammable material, it is covered with a fire-resistant shield made of asbestos cardboard or other fire-resistant materials.
- A clay solution or any of the previously listed compositions is prepared. If the solution is made of clay, it is filled with water and left for three days in order to gain the necessary elasticity.
- The bricks are checked for identical sizes and soaked in water for 30-40 minutes for better adhesion of the surface to the mortar.
- In order not to clean the stove body from the solution, you can wrap it in plastic wrap or cellophane and secure the edges with tape.
- Next, you can begin working directly with the cladding.
Laying brick rows
Having prepared the solution and tools, you can proceed to laying the rows. Let's look at the sequence of work using a sauna stove as an example. It must be taken into account that the structure will be heavy, which means it needs a solid foundation. Therefore, if the base is weak, then before covering the sauna stove with brick, you will need to install a columnar or solid foundation about 30-40 cm high under the brickwork.
To do this, a pit is dug, which is filled by a third with sand and construction waste (not wooden elements!), then a concrete screed is arranged, which must be allowed to dry thoroughly. The foundation is adjusted to the floor level with a number of bricks.
Brickwork with reinforcement
If you decide to do without an additional foundation (the floor is concrete and strong), then the masonry must be equipped with a reinforcing mesh, which is laid on top of the bricks in each row. The distance from the walls of the kiln to the brick rows should be 5 cm. If you approach it closer, the metal will overheat, and if the distance is too large, then heating the masonry will take a long time and require additional fuel consumption. Heated air will circulate in the gap between the brick and the metal, which will contribute to better heat capacity of the metal stove.
Important! If there is a wooden floor in the room, you need to take care of fire safety and place a sheet of metal covered with asbestos cardboard on it.
The sequence of the furnace lining and its features:
- Using the ordering tool (a special tool that allows you to control the evenness of the masonry), we begin to lay out the bricks. In this case, the width of the horizontal seams between them should be 8-10 mm, and the vertical ones - 5-7 mm.
- For proper circulation of heat and air
Do not forget about ventilation,
starting from the second row, it is very important to make ventilation holes in the masonry - 2-3 on each side through one row. - Thus, the masonry is raised to the level of the ash pit and firebox. Particular attention should be paid to laying bricks in the places where the holes for the doors are located, not forgetting to check during the work whether they open. At the edges of the windows, for additional strength, trimmings from metal corners are installed.
- Next, the height of the casing is increased to the level of the stove, although if desired, the chimney can also be lined. However, in the second option, it must be taken into account that the design of the chimney must be very reliable, since after installation is completed, access to it for possible repairs will be difficult.
When lining the stove, make sure that the seams are completely filled with mortar, then your structure will be really strong.
Video description
An example of how to line a stove in a bathhouse with bricks is shown in the video:
The masonry can be completed at the level of the heater, bringing it only to the upper part of the heating unit body. Or you can extend it to the ceiling, also lining the chimney. It depends on the design of the stove, its location and the desires of the owner. You just need to remember to promptly remove the protective film from the structure.
If old bricks were used in the work, the heat shield can subsequently be lined with porcelain stoneware or tiles. If you purchase new material for the work, you can choose a stone of a different color or with a decorative surface, and immediately carry out the masonry with jointing.
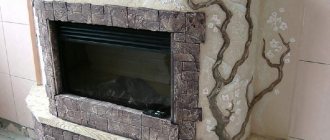
Another option for decorative cladding using brick-like clinker tiles Source giropark.ru
Preparation for use
Before using the bathhouse in operating mode, the masonry should be allowed to dry under natural conditions for several days. But even after this, you cannot immediately heat the stove at full power. It is better to use it 2-3 times in test mode, burning one load of firewood, so as not to raise the temperature to the maximum.
Thanks to this, the solution dries well and evenly and adapts to operating conditions.
Cleaning masonry from mortar
The appearance of the masonry is also important and in order for it to look neat, you should take care of it during the construction of the casing. To do this, every few rows of not yet hardened drops of mortar from the bricks need to be cleaned off and wiped with a damp cloth.
If, however, in some places the drips have not been removed in a timely manner, then after completing the work, you can walk over the surface of the casing with a grinder with a grinding attachment or a stiff brush. Then, if the brick was not chosen to be decorative, plaster or whitewash is performed. It is recommended to wait at least 24 hours before starting finishing work.
You should start heating the stove no earlier than two weeks later; it is forbidden to try the stove before, otherwise insufficiently dried seams may crack, so all work should be carried out before the start of the planned operation.
As a first test, paper is burned in the firebox to check the draft.
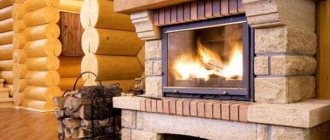
Such a metal sauna stove, lined with brick in accordance with the rules described above, will provide soft, uniform heat, delighting its owners for many years.
Plastering the stove
Why lining a stove?
A metal stove is lined with bricks for greater heat transfer.
The decision to line an iron stove with bricks is only advisable if the building is used on a permanent basis. In the cold season, such a design will not give the desired effect. Having arrived at the dacha and flooded the fireplace, the owners will receive the desired warmth only after a few hours, whereas with a metal fireplace this will take several minutes.
In other cases, a brick-lined oven almost completely eliminates the following phenomena:
- hard infrared radiation, harmful to health;
- dry air, worsening health;
- risk of fire;
- the likelihood of getting a burn from a red-hot body.
Lining the walls of the boiler with bricks improves its heat capacity, promotes ventilation and has a positive effect on the presentability of the room. Using your imagination and your hands, you can turn an ordinary heater into a real work of art.
Advantages of a brick casing
Why is it worth making a brick casing around the stove? If you still doubt the need for such modernization, we suggest that you familiarize yourself with the following advantages of brickwork:
- heated brick retains heat for a longer time than metal;
- for a steam room, a heated brick or stone is optimal because it produces more humidified steam;
- the casing around the stove will protect you from burns if you accidentally touch its surface and is good for a home where children live;
- a brick-lined stove is much more economical, because it will require less fuel to maintain heat;
- brick has more possibilities for decoration and looks more aesthetically pleasing in the room.
A brick-lined stove is a guarantee of warmth and comfort
Is it possible to line a potbelly stove with bricks?
The easiest way is to make it brick from the beginning. A brick stove is more efficient. Let's consider its advantages:
- Long-term heat retention - bricks accumulate thermal energy and transfer it into space in small portions. The heat from them is soft, low-temperature, more pleasant than from bare metal.
- More stable air temperature in the room - a potbelly stove made of brick has high inertia. Brickwork takes a long time to warm up and cools down for a long time, which is why temperature fluctuations are hardly noticeable. Metal stoves are not so good in this regard - the extinction of the flame leads to a rapid drop in temperature.
- Appearance – metal stoves burn after the first use. Over time, they become covered with brown scale, which is not beautiful. The appearance of brick potbelly stoves is almost always stable. In addition, nothing prevents them from being covered with decorative bricks.
- Safety – it’s quite easy to get burned on hot metal walls, since their temperature is high. Brick walls have a lower temperature.
There are also some disadvantages. The first disadvantage is the increased dimensions of the potbelly stove due to the arrangement of the masonry. The second disadvantage is that in order to bring the stove to the set temperature, you will have to heat it longer than a metal one. However, to make a metal stove no less effective, it is recommended to cover it with stone or brickwork.
Experts note that the quantity of brick plays a decisive role - the more of it, the longer the heat transfer. But there is no need to cover it in three layers - due to low thermal conductivity, this will cause heating difficulties.
Expert advice
A few secrets from our specialist will help you achieve optimal quality and make the installation process easier:
- If you do not have experience in this area, then you can correctly determine the required amount of brick using a simple calculation. Calculate the volume of the stove, add to it the distance by which you will increase the structure (if there is a foundation, then add the reserve for it, taking into account the laying of bricks in 1-2 rows) and the area of the chimney, if a casing is also planned for it. Then the area of the masonry should be divided by the side area of one brick and another 10% added to the resulting number. This way you will know how many bricks you need for your stove.
- Before starting work, it is necessary to load the brick
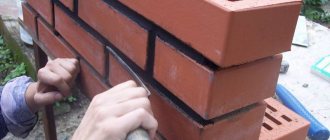
Processing seams with a trowel
in cool water. Soaking duration is 30 minutes. This will make them more durable and prevent moisture from being drawn out of the mortar during installation. The mixture, which has dried naturally, will give better adhesion and, accordingly, the masonry will be stronger. - Rows must be formed sequentially. It is unacceptable to start several rows at the same time, as this disrupts the order of work and can make the masonry uneven.
- To make the casing look neat, you need to unstitch the seams every 2-3 rows. For this, a special trowel is used, which can form a convex or depressed seam, depending on its type. Any excess solution that comes out should be wiped off immediately.
- Usually the masonry is done in “half a brick”, but if, for reasons of economy, you decide to make it in a “quarter brick”, then the verticality and horizontality of the walls must be checked with special care, since distortions are not uncommon for this method.
Using these instructions and the tips listed above, you can easily create a casing for both a bathhouse and a home or garage stove. The main thing is to adhere to the technology and take the necessary safety measures, especially when constructing holes for the air duct and firebox. Happy work!
Materials, tools and accessories
To make the furnace casing, you will need a special brick (we will tell you which one below) and a special mortar, too. Ordinary cement-sand will quickly crumble from strong heating. Therefore, a mixture of clay and sand is used instead.
The list of necessary tools includes only the simplest and most accessible:
- Pick hammer - for crushing bricks. The same operation can be performed with a grinder equipped with a diamond wheel.
- Construction trowel – for applying mortar.
- Plumb and building level. These tools can be supplemented with one more - the so-called ordering. This is a long, even strip with a cross-section of 5x5 cm with marks applied to it corresponding to the brick rows. Thin nails stick out from the order. When installed in the working position, they are driven into the horizontal seam between the rows of bricks, so that the batten occupies a strictly vertical position and serves as a guide in the future.
The bricks and mortar used should now be discussed in detail.