Materials
Over the course of geological history, Sweden has developed rich deposits of excellent fireclay clay based on aluminosilicates, so the Swedish stove was designed taking into account the availability of high-quality fireclay bricks.
It is this that makes it possible to develop such a high temperature in the firebox that is necessary for complete afterburning of the fuel under conditions of active heat extraction by the oven. Fireclay brick
Other elements of the chamber part should be laid out of stove bricks (red ceramic solid) grade M200
It is important that the edges of all ½ or ¾ brick blocks are smooth, so they cannot be prepared using a pick-hammer. You need to either cut it with a grinder or purchase it ready-made
Kiln solid brick
A channel convector can be built from ordinary brick: since the afterburning of gases occurs in the chamber part, they enter here at a temperature below 800 degrees.
The solution is mixed using a special type of clay - regular clay is not suitable. As a rule, marl is used.
Marl
You will also need fireclay clay - the mortar for fireclay bricks will be mixed from it.
Fireclay clay
Mountain sand should be used, which is characterized by a minimum of organic impurities and an angular granule shape. A solution prepared on smooth river sand will quickly crack.
For the construction of a channel convector, a conventional cement-sand mortar is used.
Stove door: cast iron
If you nevertheless decide to use a stamped door, you need to equip it with such fasteners yourself: two pieces of steel wire (annealed) with a diameter of 3–4 mm and a length of 50–70 mm are welded to each corner of the frame. During installation, these “antennae” are spread apart so that their ends are 40–50 mm apart from each other, and placed in the seams. On top of the stamped door you need to arrange an overlap of a steel angle or strip.
Door installation
Products and materials should be purchased according to the following specifications:
- Kiln brick M200: 717 pcs. (excluding chimney).
- Fireclay brick, grade Ш8: 154 pcs.
- Asbestos cord.
- Pieces of equal-flange steel angle 50x5 mm, length 1020–1030 mm: 2 pcs.
- Pieces of steel strip 50x5 mm: 3 pcs. 920 mm long, 2 pcs. 54 mm long, 2 pcs. 48 mm long.
- Grate with dimensions 200x300 mm.
- Door for the firebox, size - 250x210 mm.
- Blower door, size - 140x140 mm.
- Cleaning doors size 140x140 mm: 8 pcs.
- Oven with dimensions 450x360x300 mm.
- Chimney dampers size 250x130 mm: 3 pcs.
- Cooking plate dimensions 710x410 mm.
- Fireplace grate 690–700 mm long. In the absence of a purchased one, you can weld it from a steel rod.
- Material for installing a fireproof coating in front of the furnace: steel sheet with a thickness of 1.5 mm or ceramic tiles.
The floor must be protected within a radius of 1.2 m from the center of the fire door.
How many bricks does it take to make a Dutch oven?
If you choose a Dutch oven to heat your house, you need to know how many bricks it will require before you start building. Such a stove is much smaller than a Russian one, its walls are thinner, so it warms up much faster. Typically, dachas, country houses, and cottages are heated in this way. The services of a professional will be expensive, and the home owner is usually looking for information on how to build a stove himself, how much brick and other materials it will require, and most importantly #8212; how to do it right.
Such a furnace, in addition to its efficiency, has a number of other advantages:
- The design can be changed, which has little effect on operating efficiency.
- You can supplement it with a stove, which also will not affect the quality of work.
- Small sizes.
- A small stove requires few materials.
- Possibility to build from different types of bricks.
- Heats up quickly, cools down slowly.
What types of stoves are there?
Classic Dutch model #8212; purely heating. The rectangular model has a single brick wall. Subsequently, stoves appeared in the form of a triangle, trapezoid, and round shape.
They can be heating, with a fireplace, with a stove, or a tank for heating water. It's easy to create them yourself. You need to choose the appropriate option and get to work.
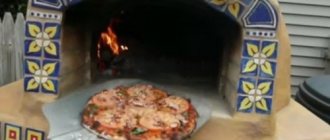
A small stove for a summer house will take up very little space. Its perimeter #8212; about 50 cm. At the same time, it is capable of heating several not very large rooms. You can lay it out of ceramic bricks. For the manufacture of fireboxes, fireclay fireproof type is used.
Dutchwoman with stove #8212; A rather rare option, it is often used not only for heating, but also for cooking. It is easy to fold it with your own hands using solid ceramic bricks. For the firebox area #8212; fireclay brick.
The three-turn stove is laid using red ceramic solid bricks. Fireclay is suitable for the firebox area.
The round stove was quite often used to heat hospital buildings and shelters, that is, where there was no money for full-fledged stoves. Usually it was laid out in one brick and covered with a steel casing on top. This Dutch oven seems simple, but is quite complex in execution, so it is better to entrust its manufacture to an experienced craftsman. It is unlikely that you will be able to lay it out yourself.
For a house in which people live constantly, it is necessary that the stove can store heat for a long time.
This largely depends on its mass and, ultimately, the amount of material spent on construction. The efficiency factor is important, on which its efficiency depends.
For a dacha where the owners only visit, the stove must heat up quickly. This is a lighter, more economical option that requires little material. The ideal option in such a case would be Dutch.
Which brick is suitable
Choosing the right brick is very important when creating a stove. It must be of high quality in order for the stove to be economical, heat up quickly and retain heat for a long time. The quality of bricks can only be determined by personal inspection.
Fireclay contains 70% fireclay clay. Her main qualities #8212; refractoriness and fire resistance. It is from this material that a brick oven will be of high quality. It heats up quickly, but it takes a long time to release heat. Brickwork is also made from solid ceramic bricks. It is created artificially and when fired it becomes durable, moisture-resistant and heat-resistant.
It is advisable to choose a brick that is whole, without cracks, of the correct shape, and of a standard size. How much will be needed for the future stove depends on this size and the quantity in the tray. Usually there are 250 pieces in a pallet, but sometimes there are other quantities depending on the manufacturer. Ceramic bricks must have smooth edges in order for a product made from it to look aesthetically pleasing.
Quantity of materials
In order for the furnace to work efficiently, it is important to calculate its dimensions. They depend on the size of the heated room, the location of the stove, the volume of the house, climatic conditions and heat loss of the room. They are calculated as the sum of all heat losses of the house passing through its enclosing structures. The larger the room that needs to be heated, the more powerful the stove should be.
A small Dutch oven will require the following materials:
- 200 bricks;
- sand, preferably river sand;
- easy bending wire;
- cement;
- roofing felt for foundation;
- firebox door;
- trowel, shovel, tape measure and other tools.
For a Dutch oven with a stove, you will need more bricks, approximately 650 pieces.
Preparatory work before assembling the stove
Before installing the stove, the foundation is poured and holes are made in the interfloor and attic floors.
Pouring the foundation
If the installation of the stove is planned during the construction stage of the house, then the foundation is poured at its location. According to the rules, it is not connected to the general foundation of the house, but is laid separately. This prevents unwanted distortions that may occur during shrinkage. The construction of the building is carried out simultaneously with the laying of the stove; when positioning the load-bearing floor beams, the height of the stove body and chimney is taken into account.
For furnace equipment, a foundation is poured that is not connected to the main foundation of the house
If the decision to install a heating unit has arisen in a finished house, carefully weigh and evaluate the work that will have to be done. The most significant ones include preparing the foundation and laying a chimney through the attic or interfloor ceilings. Sometimes it is more expedient to lead the pipe through the wall: the Dutch woman has such an opportunity.
The foundation is prepared in advance. The cement mortar must dry and shrink for at least 30 days. Only after this does the installation of the furnace begin. Otherwise, deformations are possible during operation, which leads to cracking of the thin walls of the stove and a violation of the tightness of the chimney. To avoid such consequences, the foundation is poured in accordance with the rules:
- The foundation is based on dense soil; concrete should not be poured into the soil near groundwater;
- the depth of the pit for filling should not be less than the depth of soil freezing in this region (usually 0.8–0.9 m, with the exception of the Far North);
- the concrete solution is laid on a well-established (within 2 days) sand cushion, which has a depth of 15 to 20 cm and serves as a hydraulic compensator for further operation;
- a reinforcing grid with a metal rod thickness of 5 mm or more is placed inside the concrete;
- the linear dimensions of the foundation should be 15–20 cm larger than the dimensions of the stove base;
- the height of the upper plane does not reach the floor level by 2 brick rows.
Several layers of basalt cardboard are laid between the base of the furnace and the waterproofing, which serves as a heat insulator and prevents the heat of the furnace from escaping into the foundation.
Basalt cardboard is an inexpensive but effective material for thermal insulation
Preparing holes in the floors between floors and the attic
The holes are cut taking into account fireproof cuts and fluffs, which must be built in the chimney in contact with flammable materials. This is especially true in wooden houses. The location of the pipe must be calculated so that it does not intersect with load-bearing beams and other structural elements of the house. The hole in the roof is made last, when the main part of the masonry is completed.
The hole for the chimney is prepared in advance so that plumb lines can be hung
The procedure for venting the chimney outside can be as follows:
- Remove the roof where the pipe exits. If the roof is covered with a continuous layer of material that cannot be separated (for example, corrugated sheeting, slate, etc.), use measurements to determine the location of the exit and the size of the hole, and then cut it out with a grinder or jigsaw.
- Install jumpers to restore the rigidity of the damaged area. Usually these are additional cross rafters made of wooden blocks.
- Lay and secure a heat-insulating layer between the chimney and the roof. Typically, it consists of asbestos sheet or mineral panels.
Make the hole taking into account the fact that at the outlet of the pipe there must be an “otter” laid - a horizontal displacement of the masonry that protects the attic space from water penetration.
The otter is located directly at the pipe exit from the roof
After this, you can remove the brickwork above the roof.
Fire safety standards for chimneys are important to follow when building a Dutch oven
Preparing for the installation of the furnace
Before installing the stove, you need to carry out a number of preparatory work:
- If a gas main is connected to the house, then the location of the stove must be coordinated with the gas and fire service so that the structure can be used absolutely legally. In addition to the location, you also need to pay attention to the features of the stove - for example, it can be built into a wall or located in close proximity to flammable materials.
- For the stove it is necessary to calculate and make a separate foundation. The perimeter of the foundation should protrude beyond the contours of the stove by at least 5 cm on each side. To fill the foundation, you can use either reinforced concrete or ordinary sand-lime brick. In the latter case, the foundation rows must be reinforced with mesh so that the structures do not deform. The soil under the foundation must be compacted well, and a sand cushion at least 5 cm thick must be placed on it.
- The room must have high-quality ventilation. Even if gas is not supplied to the house, ventilation is still needed - thanks to it, the stove will have good draft. The lack of high-quality ventilation causes a vacuum to appear in the room, due to which the stove “pops” noticeably during operation.
Preparation for work, materials and tools
In order to begin the main work, you need to familiarize yourself with the materials in detail. So, what working tool should you buy? You will need a red solid ceramic brick, which can be of average quality. You can also use the old one, which is often denser and has greater thermal conductivity. But when using old brick, cladding will be required. You need to decide what kind of clay you are dealing with in order to adjust its properties. To get strong seams that will not crumble, the solution is made plastic, and clay should be used with medium fat content. There is a way to increase the strength of clay plaster by adding 100 - 150 g of ordinary salt to the composition. However, this works when the oven is constantly running.
When idle, the salt picks up moisture and the solution, swelling, crumbles. However, it is much more important to determine its fat content. Skinny ones will have to be washed out, and excessively fatty ones are mixed with an additional amount of sand, the proportion of which can reach up to 5 parts by volume. It is not difficult to determine the proportion of sand and clay for masonry mortar. Take about a liter of clay and divide it into 5 parts. Next, each part must be mixed with sand in the following proportions:
- don't add
- four to one
- two to one
- one to one
- one to two
Add water to each mixture until it resembles dough, roll into balls and leave them to dry for 3 days. “Correct” balls should not crack and, when dropped from a meter height, should not fall apart. The composition of the cake that has passed the test is what is required for the work.
Making a stove with your own hands
Before you start construction, you should choose a scheme and prepare everything you need .
Project selection and ordering
When developing a drawing, the following factors are taken into account :
- appearance of the structure - if you do not plan to hire professionals, then choose the simplest possible scheme;
- the necessary set of functions - heating, cooking, a place to relax, heating water;
- cost - a structure decorated with tiles looks impressive, but such finishing is quite expensive and labor-intensive;
- linking the stove to the layout of the room ;
- the possibility of erecting a separate foundation ; the chimney should not fall on the floor beams.
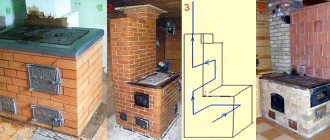
Photo 1. Diagram of chimneys and ordering for a Dutch oven with a stove. Front and side views.
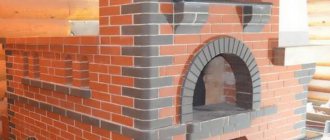
It is allowed to build a Dutch brick from not very high quality and even used bricks . But it’s better not to experiment; cracks can increase the fire hazard of the structure. The main masonry is made of solid ceramic red brick of standard dimensions 120x65x250 mm . Fireclay refractory bricks of the same dimensions are used for the firebox
The clay solution is mixed from red clay with the addition of sand in different proportions and water. If natural clay is taken, then the ratio of sand and clay for each rock will be different. The entire design of the furnace depends on the quality of preparation of the solution, so beginners are advised to purchase a special refractory mixture in the store.
To fill the foundation you will need:
- mortar ( cement + sand + water );
- gravel;
- fittings;
- formwork;
- waterproofing material.
To equip the furnace you need:
- knitting wire 0.8-1.5 mm ;
- metal corner;
- asbestos cord;
- a set of doors, grilles and valves;
- hob, oven.
Preparing tools
- pick;
- Bulgarian;
- Master OK;
- rubber hammer - for processing and laying bricks;
- level, plumb lines, squares - the verticality of the masonry is easy to control if you place four plumb lines at the corners of the stove from the very beginning;
- clay sieve
- bucket for solution;
- shovel;
- hammer;
- construction mixer .
Place for the furnace and construction of the foundation
It is best to position the stove so that it can heat as many rooms as possible. The heating and cooking Dutch oven, located in the kitchen , partially replaces the partition. It is important to obtain permission for all sides of the stove for subsequent maintenance and repairs. The distance from wooden structures is at least 250 mm . Furniture and other interior items should be no closer than 40-50 cm .
In the chosen location, a pit slightly larger than the size of the furnace and the foundation is poured. It is unacceptable for the stove base to be adjacent to the existing foundation of the house. The pit depth is at least 50 cm , depending on the type of soil. The foundation is poured to the floor level of the room, after drying it is sprinkled with cement powder and a layer of sand. Waterproofing is laid on top .
Advice. You can deepen the foundation 0.3 meters below the level of the finished floor, and lay four rows of ceramic bricks on top of it, which will prevent the heat from the furnace from escaping into the concrete. Between the top of the foundation and the bricks, waterproofing is laid in two or three layers of roofing material with an overlap of sheets of at least 0.15 meters .
To glue layers of roofing material together, a bitumen primer . The foundation is reinforced with rods with a diameter of at least 10 mm in two layers (bottom and top) with a pitch of 150 mm . The reinforcement is crossed and tied with wire. Additionally, vertical reinforcement is provided. To fill the solution around the perimeter of the pit, wooden formwork , inside of which two or three layers of waterproofing .
A 25 cm cushion of sand is placed at the bottom of the pit , spilled with water and compacted, and 10 cm of gravel . Waterproofing is placed on top in .
The foundation is filled with a solution - cement + water + sand in a ratio of 1: 3: 4 . It hardens for about a week .
Masonry scheme
Once the foundation is ready, you can begin to form the furnace itself. For beginners, the diagram of the simplest version of a Dutch heating and cooking stove is suitable: a three-channel design with a stove and oven . The thickness of the walls is equal to one brick. The order is not complicated, but requires additional explanation:
- The first row is laid dry, the next two are made in a continuous layer.
Important! Check whether the structure deviates from the vertical and horizontal.
- On the 4th row a blower is made, on the 6th row it is blocked.
- A steel wire is attached to the hinges of the blower door and embedded in the solution.
- On the 6th row, a grate is installed between two halves of sawn lengthwise brick.
Important! In all places where the metal joins the brick, a gap is made for expansion ( 5 mm ) and an asbestos cord is laid. When heated, the metal expands; the lack of gaps can lead to destruction of the masonry.
- Between the 7th and 9th rows there is a firebox door. The firebox is formed from fireclay bricks.
- On the 10th row, the firebox is closed and a metal plate is attached to the seat with gaps.
- To protect the brick from heating, the hob is installed on a clay mortar. Metal corners are placed along the edges.
Photo 2. Approximate layout of a heating and cooking Dutch oven with a stove and oven.
- On the 14th row, metal corners are built in to support subsequent masonry.
- The 16th row of bricks serves as support for the oven.
- In the 22nd row, the oven chamber is blocked by metal strips installed in the 21st row.
- In the 16th-18th row, a door is installed for cleaning the chimney, in the 23rd row - a smoke channel valve.
- In the 24th row, the bricks protrude three centimeters at the edges; the 25th row is laid similarly to 23 .
- from the 26th row .
Possible errors and their correction
In order for the stove to look beautiful and last a long time, the seams must be smooth, approximately 5 mm thick .
wooden slats or square metal rods are placed on the bricks : brick row - slats - mortar - brick row, then the slats are removed.
Even experienced stove makers make mistakes in masonry that are difficult to correct later. Therefore, it is recommended to first put the oven on dry according to the scheme , and then only carry out the laying with mortar. This will help determine if the material quantities are calculated correctly.
Immediately before laying, the brick is completely soaked for some time in water. This will prevent it from subsequently drawing water from the solution. Fireclay brick can simply be sprinkled with water.
Whatever the design of the stove, it is important to observe fire safety measures .
Photos of finished ovens
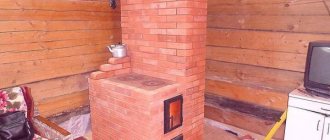
Photo 3. Large Dutch oven with stove and stove bench. A firewood shed is additionally equipped below.
Photo 4. Heating and cooking Dutch oven with a stove for cooking.
Photo 5. A Dutch oven with a stove, located close to the wall, can heat two rooms at once.
Basic rules for arranging a Dutch oven with a stove
Whatever option for arranging the furnace, size and dimensions you choose, the construction principle remains the same:
The stove is installed on a separate foundation. Of course, it is best to think about it at the stage of building a house. This will make it easier to correctly determine the location for the chimney so that it does not fall on the beams and roofing.
Separate foundation for the furnace
If the idea of building a Dutch house came to you already in a residential building, then you will have to remove part of the floor covering and build a solid foundation that is not connected to the main one. This rule should not be neglected, since, despite its small size, the Dutch oven has quite impressive dimensions.
It will create a lot of pressure on the foundation. As you know, a house undergoes a certain shrinkage during operation, and if the stove is built on a common foundation with the house, then there is a risk of deformation, displacement of the chimney, etc.
As a result of this, the sealing of the seams may be broken and carbon monoxide smoke will penetrate into the room.
- The foundation must be covered with waterproofing material.
- When arranging a firebox, you need to use only high-quality fireclay (fireclay) bricks, which in no case should be combined with ordinary ones.
- To lay the stove you need to purchase a heat-resistant clay mortar. You can, of course, do it yourself.
- The thickness of the seam when laying the combustion chamber should not exceed 3-5 mm. Beginners may find it difficult to stick to the same seam size.
- The entire Dutch oven must be laid with a joint thickness of 5-8 mm.
Despite the fact that the Dutch woman is highly fire resistant, when arranging it
It is necessary to adhere to basic fire safety measures when constructing a Dutch oven:
Fire safety standards
- Before the stove you need to leave a sheet of asbestos board to prevent accidental fire from sparks or coals.
- It is necessary to systematically clean the chimney channels from accumulated soot.
- It is also necessary to lay a sheet of fire-resistant material between the stove and the wooden walls.
- Nothing should stand at a distance of 50-55 cm from the stove: furniture, decor, other objects, etc.
- The fewer metal parts you use to build the Dutchman, the better. But when making hanging masonry that closes the opening under the cooking zone, you cannot do without metal corners.
Remember that nothing should be done against the iron or on bare brick. In all places where it is planned to join metal parts with brick, it is necessary to lay a 5 mm layer of mortar and lay an asbestos cord.
Dutch woman with stove
When laying the hob on a brick, it is necessary to lay a layer of clay mortar on it. This will protect the brick from heating.
The difference between a Dutch oven and a traditional one
Dutch ovens for the home can have a round, oval or square shape, while the classic version has strict rectangular shapes. If the stove you are building has non-standard shapes, you must take into account that the shape of the firebox must remain rectangular. The Dutch oven is different in that it does not have a grate.
A DIY Dutch oven made of ceramic brick has the following components:
- The firebox - also called the firebox - is a stove niche located at the base of the stove and is necessary for supplying coal or firewood.
- Chimney - together with the exhaust pipe, it forms a six-channel system, which includes 3 lifting and 3 lowering channels. They are located one below the other to ensure consistent transport of gases through the system.
- Since the galanka stove system does not have a blower or grate, the wood in such a stove burns at a low speed, because oxygen for mixing with fuel is supplied only through the firebox door - this is extremely insufficient to create intense combustion.
- Due to the fact that such a stove has small dimensions, it can easily complement any interior; it can be made part of water and gas heating.
- The stove is equipped with a door for removing soot from the chimney pipes.
- In some cases, Dutch ovens are equipped with a fireplace, oven and hob.
- Experienced craftsmen advise building walls with one brick for small structures, and two bricks for large ones. These thicknesses will ensure the best heat transfer with minimal fuel costs.
How to fix the gutter yourself?
When installing any drainage system, it is extremely important to take into account the thermal movement of the gutter and its structural elements, which, depending on the material of manufacture, work differently in tension and contraction. According to the rules, the only movable element of this type should be a hinged complaint, which is mounted without additional gluing - only on a latch
Moreover, modern manufacturers take care of this by making a special, so-called expansion mark inside the gutter, which helps to assemble in accordance with the air temperature that exists at the time of installation
According to the rules, the only movable such element should be a hinged complaint, which is mounted without additional gluing - only on a latch. Moreover, modern manufacturers take care of this by making a special, so-called expansion mark inside the gutter, which helps to assemble in accordance with the air temperature at the time of installation.
Here's how to properly attach a gutter directly to an eaves overhang:
This is interesting: Panels for finishing the facades of private houses - read in order
How many bricks do you need for a home stove?
Since ancient times, the stove has served as the embodiment of warmth and comfort in a human home. An attribute of calm and safety, in the winter cold or the chilly dampness of rain and downpours. With the advent of gas boilers and the use of electricity, a wood-burning stove has become less convenient and relevant, but it has not lost its main advantages.
The furnace does not require electricity, natural gas, or annual professional maintenance at a large financial cost. It also serves as an excellent alternative source of heat. There are several main types of stone stove: Dutch, Swedish stove, Russian stove.
In order to determine which type of stove to choose, you should decide what function the stove should perform. In the case of simple heating of the room, a Dutch stove is suitable, but if not only heating is required, but also cooking, in this case a Swedish stove is suitable.
The functions of a full-fledged Russian stove include not only heating and cooking, but also washing and drying clothes, simmering food, and making a bed allows you to sleep on the stove. Currently, the Russian stove serves more as an ambiance and to highlight the interior.
Although, modern construction technologies make it possible to harmoniously fit any stove into any interior by finishing it with specialized materials.
Brick oven
Calculation of the amount of required materials
The easiest way to calculate materials is to hire specialists who will select and provide you with a choice of a suitable stove design, in which all costs are calculated, down to the last brick.
A project suitable specifically for your home, with an individual arrangement of walls and roof.
If you decide to build a stove yourself, you will encounter a lot of problems in calculations, the correct location of the stove, compliance with fire safety, the appropriate choice of chimney, calculation of the depth and design of the foundation, and if you have never laid brick, you will not be able to lay out the stove beautifully , with straight seams, uniform stitching. If you are confident in your abilities and construction skills, you will be able to build your own stove, having previously studied a lot of important information on the technology of stove laying and fire-prevention cutting.
Preliminary work
- If your home has natural gas, you will need to coordinate the location of the furnace with the gas and fire departments and obtain all the necessary documents and seals. Since the stove can be built into a wall or adjacent to it, it is located in a fire hazardous proximity to wooden walls and wooden roofing elements.
- Depending on the mass of the furnace, calculate the size and load-bearing capacity of the foundation.
The foundation is the basis of absolutely any oven. It should be emphasized that the perimeter of the foundation must exceed the perimeter of the stove itself by at least 5 cm on each side. The foundation can either be poured with concrete mortar, with mandatory reinforcement, or laid out from ordinary sand-lime brick. The foundation rows are reinforced with masonry mesh to avoid deformation. A sand cushion, at least 5 cm thick, is installed under the base. The soil under the cushion is carefully compacted. - Ventilation in the room is also a requirement of the fire department if you have natural gas. In addition, ventilation contributes to good draft in the oven, without “reverse pops”. Since the lack of air flow creates a vacuum in the room during operation.
Next, you will need to calculate the amount of materials.
The most numerous of them is brick. Moreover, when constructing a stone oven, different types of bricks are used.
To lay out the firebox or furnace, that is, in places of the highest heating, refractory clay brick (fireclay) is used, note that it has a rather high price, which is why it is used only in those places where it is necessary.
For laying a chimney, the use of fireclay bricks is not advisable; it is more appropriate to use fireproof bricks; they do not have direct contact with fire, but can withstand temperatures of up to 1000 degrees. To install the outer part of the pipe, which is exposed to climatic aggression, frost-resistant brick is used; it is less susceptible to deformation from temperature changes, for example, sand-lime brick, which can crack under such conditions. Ceramic bricks, which have a beautiful appearance, are used for lining the stove.
Laying a Dutch oven - how to lay it out correctly
If you are new to the construction industry, it is better to follow the advice of real experts and start building a stove with dry masonry. Let's take a closer look at the construction of a small furnace.
The starting row of bricks is laid on wet sand, which is placed along the entire base of the concrete foundation. Do not forget that the level must be checked before pouring the solution. The first two rows of bricks must be solid. The order of laying must be carried out taking into account the rules of bonding between bricks.
Having reached the third row, they begin to lay out the ash chamber; later it will be connected to the horizontal channel. In the process of forming the ash chamber, the door intended for it is installed.
With the fourth row, the furnace is expanded, and a door for the firebox is installed, as well as steel wire to be able to secure the door. Laying at this stage is carried out in this way: if the first three rows of bricks lay flat, then the fourth and subsequent rows are laid on the edge until the top of the door is reached.
When the fifth row of masonry is reached, an ash pit is built in, and on the sixth row the construction of the Dutch oven continues.
After completing the lining of the ash pit door, starting from the 7th row, the bricks again begin to be laid flat. This also applies to row 8.
If you plan to install a Dutch oven with a hob, the order of the 9th and 10th levels should be shifted slightly back to free up space under the hob. Next, create a hole for the firebox. A non-flammable asbestos cord is laid on top of the 9th row, and the surface itself is installed on it. On the 10th row they begin to create the base for the chimney. A metal chimney pipe is built into a Dutch oven with a hob, rather than a brick one, since the latter will make the structure heavier.
At the level of the 11th row, you need to install a valve with an asbestos seal. The brick is laid in a quarter, because it is at this height that the junction of the chimney and the stove is located.
The 14th row is different in that the firebox is closed at this height, and a hole is made in the wall located behind to remove excess smoke. The same operation is performed on the fifteenth row of masonry.
From the 16th to the 17th row, the cleaning door is recreated, which is quite often replaced with a simple brick laid without mortar.
In the process of laying the 18th row, the base for the stove chimney is formed. It is installed after laying the base, and you can purchase a ready-made version or make a chimney from the same brick.
A little history
Dutch oven in the interior
The Dutch oven emerged as a structure during the time of Columbus, in the 15th century. Starting from the 16th century, after the Netherlands gained independence, it began its march around the world. In the 18th century has become commonly used; by the 19th century – dominant. It remains such in its class to this day, especially since it fits perfectly into both simple and the richest interiors, see fig.
In encyclopedias
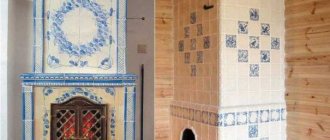
Encyclopedias define a Dutch stove as a heating RECTANGULAR, hearth, channel, multi-turn, slow-burning stove, with vertical smoke circulations and a side exit to the chimney, ORIGINALLY COVERED WITH TILES. This should be kept in mind as you read what follows.
About tiles
The Dutchwoman has another service to humanity - she brought tiles and tiles to the world. More will be said about tiles as such, but for now you need to know: aesthetically, the Dutch woman is inseparable from tiles. A naked brick Dutch oven will be good for warming a dacha or managing cooking in the kitchen, but if you are planning an interior design with a Dutch oven, then a naked Dutch oven is clearly in bad taste. Imagine Botticelli’s Venus or Bryullov’s “The Last Day of Pompeii” painted with metallic acrylic paints. A naked Dutch woman in a retro or country living room is the same.
Installation of a Dutch oven on a foundation
One of the main advantages of a Dutch oven is the ability to fit it into any design while providing high-quality room heating. The shapes and designs of these stoves are varied, and you can choose a model according to the desired size and function. The compactness of the Dutch ovens and the fact that both the stove and its service area take up very little room area speak in favor of these heating units. It is possible to build a stove designed by Utermark - it is perfect for heating a country house or a private house. A brick stove lined with tiles, majolica or tiles will not only heat, but also serve as an additional decoration for the house.
All brick ovens are massive and require a solid, reliable foundation. A reinforced concrete foundation is most suitable for this purpose. Reinforcement must be done not with flat meshes and frames, but with a three-dimensional frame. Reinforcement, concreting and maintenance of concrete are carried out using standard technology; full strength gains occur after 28 days. It is possible to start masonry work earlier, when the strength has reached 75% of the brand strength. Before masonry is carried out, the foundation is waterproofed, vertically and horizontally. You can use both coating and roll materials.
Basic materials for laying the furnace:
- A clay-sand mortar mixture in an approximate proportion of 1:1 (the ratio is unstable and must change to adjust the fat content of the solution. It all depends on the fat content of the clay used; the higher it is, the greater the proportion of sand in the solution required).
- Brick for the combustion chamber - fireclay or red ceramic refractory; brick for chimney ducts and furnace walls - ordinary ceramic brick, it is possible to use slotted and hollow bricks. Sand-lime bricks and dry-pressed products - adobe bricks, slip bricks, etc. - are not used.
The specificity of Dutch ovens is their special elongated vertical design, so the height of the combustion chamber from the level of the foundation edge can be greater than that of other models of ovens. But the fireboxes are usually located no higher than 250 mm above the floor level so that the stove heats up more evenly.
Laying order (example - a small stove 52*52 cm)
- Sand is poured onto the foundation waterproofing in a layer of up to 50 mm, leveled horizontally and carefully poured with water until the layer is completely wetted.
- A feature of the stove masonry of many stove models is that the first rows are laid dry - without bonding with mortar. For a small oven, 12-14 bricks are needed to lay rows along the base. The first row of bricks is laid as a bed.
- The second and third row of bricks are placed on the bed, but already on the mortar.
- The fourth and fifth row will be the beginning of the internal partition of the chimney channel. For future cleanings of the chimney, it is necessary to leave holes; for this, bricks are laid dry in these rows, they will be “knocked out”. Masonry, even without mortar, retains heat much better than a built-in metal door; for this reason, they prefer not doors, but knock-out bricks laid without mortar.
- The firebox door is installed, but the height of its installation depends on the overall height of the stove, and can be installed not in the sixth row, but much higher.
- In the seventh row, the bricks are laid flat (in a bed), except for the back ones - they are placed edge-on. Then all the rows are laid on the bed, and in the eighth row (or in the row closing the firebox door) the laying is done as in fireplaces - with bevels.
- Along the ninth row, an offset is made to the inner surface of the combustion chamber. Heat-resistant material is laid out on the shelf under the hob - kaolin wool, asbestos cords. Then install the slab.
- In this example, chimney channels are formed from the tenth row. In small stoves, it is more rational to make chimneys from metal rather than brick, so as not to burden the structure.
- The view, or stove valve, is installed in this example in the eleventh row, then the chimney pipe is installed.
- The sand, which serves as a shock-absorbing layer, should not spill out along the contour, so it is protected with a plank or plinth, installing them on the upper edge of the foundation up to the first brick row or slightly higher.
- They finish the stove - jointing, plastering or tiling, tiles and so on.
The stove dries out and the clay mortar in the seams sets only naturally, and the first firebox is made no earlier than two weeks later - after the stove masonry has completely dried.
General view of the furnace
1 — ash door; 2 - combustion door; 3 - cleaning doors; 4 — grate; 5 - valves
Before the floor is finished, 2 rows of bricks are made with the seams bandaged, and only then the laying of the first row begins.
The first row is counted from the finished floor mark. The two middle bricks are beveled towards the ash pit. The space between the wall of the ash pan and the rear wall of the furnace is filled with dry sand from the first to the third row inclusive.
In the second row, a blower door is inserted with a gap of 3–5 mm, filled with asbestos cord. The steel legs or wire of the door are embedded in the masonry.
The third row repeats the laying of the second, taking into account the dressing of the seams in 1/2 brick. Bandaging of shortened bricks is allowed less.
The fourth row involves partial covering of the ash pan. A 35x4 mm steel strip is laid under the brick to cover the ash pit. At the back of the oven, the sand is covered with a brick.
Fifth row. A grate is placed on the open part of the ash pan with gaps along the firebox and a gap of 5 mm, which is compacted with sand or ash. The bricks here are beveled according to the order.
In the sixth row, a furnace door is installed with a gap sealed with asbestos cord. The bricks of the back wall are chamfered.
From the seventh to the twelfth row, the firebox is laid with the seams bandaged according to the order.
From the thirteenth to the fifteenth row, the firebox is blocked and the rear smoke channel is laid out.
The sixteenth row involves the installation of cleaning.
From the seventeenth to the twentieth row, the laying of channels is underway.
The twenty-first and twenty-second rows combine two channels: lifting and lowering.
The twenty-third and twenty-fourth rows involve overlap of the middle and posterior canals.
A cleaning system is installed in the twenty-fifth and twenty-sixth rows.
From the twenty-seventh to the thirtieth row, the laying of channels is underway. A valve is installed in the twenty-eighth row.
On the thirty-first row, bricks are laid with releases for future reroofing.
In the thirty-second row, a ceiling is made and a valve is installed.
The thirty-third and thirty-fourth rows continue the laying of the roof and smoke duct.
Foundation and arrangement of a Dutch oven
The construction of the foundation requires careful attention in terms of its strength, waterproofing and levelness. The further laying of furnace rows and the future durability of its operation depend on the extent to which all these parameters are met. The first thing you need to do is dig a small hole for the future foundation and lay waterproofing material at the bottom. If this is not done during operation, the walls of the Dutch oven will “pull” moisture from the ground and, as a result, the oven will have difficulty lighting and sometimes even smoke.
Dutch oven foundation
Then lay out the main foundation slab with durable baked (normally fired) brick. For the foundation, you should not use halves and other parts of bricks, so you need to calculate the dimensions of the stove so that a whole brick is laid. Next, the slab is filled with a solution, which is preferably reinforced with wire. The entire filling plane is controlled by a level: it must be perfectly horizontal. After the solution has hardened, you can proceed to raising (arranging) the brickwork.
Arranging a Dutch oven
The ordering itself requires a certain sequence, which many sites describe in stages. The author of the article tried to imagine the entire process of constructing a Dutch oven using these descriptions and came to the conclusion that it is better to watch a good video several times than to read the points of the work being done dozens of times.
The simplest Dutch oven
Therefore, it was decided to insert an informative video on this topic, which also includes a few words about plastering the finished stove. The video is simple, intelligible and will certainly expand your theoretical base on how to make a Dutch oven.
Practical tips for arranging a Dutch heating stove
If you are a beginner and have never done baking, then before making a Dutch oven, you should lay it out without mortar, taking into account all the design features. This process is called "dry masonry". This way, you can see all the shortcomings and errors and correct them in time.
Of course, high-quality installation of the stove will only work if you follow the drawings made by professionals. You should not experiment and make inaccuracies in the masonry - this can negatively affect the efficiency of the stove.
Construction instructions
It is advisable to draw up a detailed diagram of the laying of a Dutch oven with a stove before starting work. It will be convenient to navigate during the installation of the entire structure.
First, you need to dig a hole about 50x50 cm at 75-80 cm depth under the stove. At the bottom of the pit we fill a layer of sand 10 cm thick and the same layer of crushed stone. Next, a reinforced mesh is placed over the entire height to the top of the pit. Mix a concrete solution of sand and cement in a ratio of 1:3. Next, we assemble the formwork from plywood or boards and fill everything with mortar, after which we leave the structure to dry for a week.
When the foundation has completely hardened, waterproofing from roofing material laid in two layers is laid on it. Next, take clay (8 liters) pre-soaked for 2 days, 900 g of heat-resistant oven glue and 2 buckets of sand, mix everything thoroughly. Apply the resulting mixture, similar in consistency to thick sour cream, on top of the roofing material.
Preparatory stages
Before proceeding directly to laying the stove, you need to pour the foundation and prepare a binding solution.
Foundation arrangement
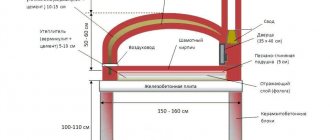
If the room already has flooring, it must be removed. Ideally, the location for a Dutch oven is calculated during the construction stages of the house. The stove is separated from the main foundation by a sand cushion. A diagram of a standard foundation for a brick kiln is shown in Figure 7.
Foundation diagram for a brick kiln
A pit of suitable size is prepared. Its dimensions are determined simply: each side of the stove + 15–25 centimeters. The depth of the pit should be at least 50 centimeters. The bottom is covered with a 15-centimeter layer of sand, then a slab or brick is laid. Everything is filled with a thick solution of cement and sand mixed in proportions 3:1.
We also recommend studying this topic:
How to arrange a sauna stove - design and implementation
The pleasure of taking a steam bath in a sauna is unthinkable without properly organized heating. Many options for such a structure, depending on the owners’ ideas about comfort and the specifics of the available premises, have been invented. In order for the work to be done efficiently, you need to know the specifics of the arrangement of the sauna stove and other subtleties of the process of laying it.
4063 1 1
Until the solution hardens, the surface is reinforced with rods. A mesh of reinforcement is laid out. The recommended cell size is 10x10 cm. Reinforcement bars are also installed vertically at intersections. The connecting nodes are fixed using steel wire.
A 10 cm layer of crushed stone is poured onto the reinforcement. Then the foundation formwork is prepared. Each side of the formwork is wrapped with roofing felt or waterproofing material. The surface of the crushed stone is filled with a layer of concrete and leveled. The wet surface of the foundation is sprinkled with dry cement and left until completely dry.
Ideally, the foundation should be infused for a month. The minimum period for the foundation to harden is a week. When the foundation has completely hardened, the surface is covered with a layer of sand of 3–5 centimeters and covered with a layer of roofing felt for complete waterproofing.
Mixing clay mortar
As mentioned earlier, clay mortar is used as a binder when laying a stove. Cement does not have high heat resistance, so it will not work. To make the solution, clay broken into small pieces is poured with water, the excess of which must be drained. Within a few hours, the clay will absorb water, and you can add sifted sand at a ratio of 2:1. 1/8 of the total volume of water is added to the well-stirred mixture. The solution must be prepared two to three days before installation.
Interesting: You can easily check the quality of the solution. Use a trowel to move the solution to the side. If the mark is torn, the solution is too thick. If the mixture “floats” behind the trowel, then you need to add a little more clay. If the print is smooth and the edge holds its shape well, the solution is mixed perfectly.
Pros and cons
Each stove has its advantages and disadvantages, and the Dutch oven is no exception. Thanks to its thin walls, it is more efficient than a Russian stove. Also, due to its fairly compact size, it can be installed in any room or building. Savings are also important. The construction will use half as much brick as a Russian stove.
In addition, the Dutch woman has the following advantages:
- if necessary, the design can be modified and supplemented with functional elements;
- the design can have different sizes and shapes (round, rectangular);
- the room warms up very quickly;
- the height of the structure does not in any way affect its productivity;
- To build a Dutch oven, you need to spend a little money, since previously used bricks will do just fine.
The operating principle of the stove is very simple.
Before construction, you should also familiarize yourself with some of the disadvantages of the device:
- even proper construction and operation does not ensure high furnace productivity;
- the channels are designed in such a way that there is a risk of drawing in cold air from the environment;
- The stove needs to be heated several times a day;
- despite the savings, a lot of fuel is spent on heating;
- the view must be constantly monitored, otherwise the structure will quickly cool down;
- It is unacceptable to heat the oven to the maximum temperature.
A modern Dutch woman is equipped with the following elements:
- fireplace;
- oven;
- hot water tank;
- sunbed;
- heating and cooking surface.
First of all, the Dutch woman is chosen due to its simplicity of design, operational efficiency and cost-effectiveness.
During construction it is worth considering many nuances
Tools and materials used in the construction of a Dutch oven with stove
A prerequisite for a good stove is high-quality masonry mortar, which is recommended to be mixed from red clay and brick. The main composition for Dutch masonry is sand, red clay and water.
In this case, the ratio of proportions for each type of clay will be different. The less sand is present in natural clay, the correspondingly less is needed for the solution.
Clay
For oily clay we take the proportion: 1 part clay and 2.5 sand.
For medium clay - 1 part to 1.5 sand.
For skinny ones you will need 1 to 1.
Materials for laying a Dutch oven with a stove:
- Fireclay refractory brick for combustion chamber.
- Red ceramic brick.
- Foundation mortar (cement, sand, gravel and water).
- Mortar for laying bricks.
- Roofing felt for foundation waterproofing.
- Boards for the construction of formwork.
- Grate.
- Blower.
- Metal door.
- Damper.
- Metal rods and wire for reinforcement.
- Metal wire 0.8 mm for dressing.
- Asbestos cord.
- Hob.
Prepare the following tools:
- Trowel for laying bricks.
- Building level, protractor and plumb line.
- Construction stapler.
- Tape measure and marker.
- Rule.
- Grinder for turning bricks.
- Shovel and bayonet shovel.
- Bucket for solution.
- Construction mixer or drill with attachment.
- Rubber hammer for laying bricks.
- Construction hammer for erecting formwork.
Methods for calculating the amount of bricks for a kiln
Calculations are not the most difficult thing, but they require attentiveness, intelligence, accuracy and accuracy. Professionals often use a tape measure, plumb lines, levels, and certain rules to determine the amount of building stone, mortar and financial costs, but there are simple schemes for beginners. It's enough just to be friends with a calculator.
Method one
This method is based on a conditional formula: count the amount of material in the 1st continuous row, multiply by the number of rows in height (one row is approximately equal to 7 cm), subtract a third from the result. Let's assume that the base of the oven is 3x4. Then the first row will take 24 bricks. A building 2.4 meters high with a cut of 30 cm will have 20 rows: (240-30)/7 = 30-1/3 = 20. Multiplying by 24 bricks of the first row, we get the number 480. At least 50 will be needed for cutting. As a result, we have 530 pieces.
The basis for the calculation is to take the amount of material in the first continuous row.
It should be taken into account that a separate calculation is carried out for the pipe. If they usually take four linear meters, each with 14 rows, then in total such a structure requires 336 bricks (6 pieces per row). Summing up the results, we get 866 units of building material for a small stove. Based on this calculation, you can already plan a purchase of at least 5,000 rubles.
Method two
The formula is a little similar to the previous one, only at the last stage we do not subtract one third, but multiply the result by the filling factor (for heating stoves - 0.8, for a stove with a heating panel - 0.65). In a building measuring 90x90 cm, for the first row you will need 24.5 bricks, for 30 rows, multiplied by a stable indicator of 0.65, - 477.75 pieces. Round up to 480. On average, a four-sided chimney 4 m high takes 224 bricks (56 pcs./m). Plus 56 for cutting. The overall result is 760. You will have to spend a little more than 4,500 rubles on this stove.
Both methods of calculation are conditional. For a Russian stove, a “Dutch stove” (three-turn construction) and a stove with a stove, the calculation is carried out separately for each component.
Foundation
Any massive structure, including a Dutch heating and cooking stove, must rest on a base. A DIY Dutch oven also includes a foundation. The usual installation of a slab into a base is a simple process. But it is definitely worth mentioning a necessary nuance: a Dutch slab is certainly reinforced not only over the entire area, but also in volume, that is, in depth. The minimum length/width of the slab is from 120 cm. The second nuance: sand must be poured between the foundation for the entire house and the separate foundation for the stove.
Approximate progress of foundation work
- Mark the dimensions of the future structure. If the stove is being built for a residential building and there is already a floor covering, it will have to be dismantled so that it can also be worked freely.
- Stir the solution according to 1:3 standards, this will be enough.
- Fill the first part of the slab; do not deepen it too much.
- On the layer of mortar, while it has not yet hardened, lay the reinforcing bars in a mesh, the distance between adjacent ones is from 10 to 12 cm.
- Immediately pour the remaining mortar over the reinforcement, then level the surface. The smoother the foundation slab, the easier it will be to maintain order when raising the rows.
- It is necessary to “iron” the surface of the foundation before it hardens. To do this, simply sprinkle the slab with clean cement, without overdoing it. It is better to use a sieve to distribute the cement evenly.
The base is ready. We proceed to the construction of the furnace.
How to prepare clay mortar for the stove?
The raw materials for the mortar for laying the stove are sifted from large lumps and stones, the lumps can be broken. It is advisable to perform this operation several times. A mesh from an armored bed installed obliquely on any support is perfect as a sieve. Then the sifted clay is poured with water and soaked for several hours. Make sure that the water is completely absorbed into the clay; it is better to drain the excess immediately. After the clay swells, it is mixed with sand; how much sand will need to be added depends on the composition of the clay. Most often, kneading is carried out in a 1:1 ratio and 1/8 of the water is added (of the resulting volume!).
Ready solution for the oven
When working, first immerse each individual brick in water for a few seconds, otherwise it will excessively absorb moisture from the mortar.
How many bricks do you need for a stove?
/ Furnaces /
Owners of country houses, private lands and other types of buildings are increasingly introducing various stoves into the interior of their houses, and the first problem they face is how many bricks are needed for masonry, and how to make the correct calculations. The information presented below will be extremely useful to those who do not yet have experience in this area.
The best oven
The Dutch oven is characterized by ease of operation, simple design and high productivity.
The compact Dutch woman can be used in a country house or in the country. It heats up quickly and cools down slowly when the damper is closed.
The classic version of the stove is rectangular in shape, with extended chimney channels above the firebox - intended only for heating.
However, over time, various shapes arose: triangular, round, trapezoidal. Various options for using Dutch ovens have also appeared: in addition to heating ones, there are heating and cooking stoves that are combined with a stove, there are combinations with a fireplace, with a stove bench, and with a container for heating water.
A Dutch oven can become the basis for a heating system based on the circulation of heated water in pipes.
An electric pump will ensure stable movement of water in the pipes. Such a heating system will increase the heating of the room, save fuel and is a good solution for a large house, say, on two floors.
Skillful design will allow you to make such a stove part of the decor, effectively integrating it into the interior of the room.
Life time
The service life of a Dutch oven is about 25 years if it is used correctly.
Note that the Dutch engine is designed for heavy fuel of good quality. It should be heated with coal or wood; garbage, wood chips, sawdust and other waste fuel will not work . This is due to the fact that the stove operates optimally in the smoldering mode, which is provided by wood and coal.
Using wet fuel will cause the chimney to become clogged with soot.
Anyone, with basic bricklaying and installation skills, can make such a stove with their own hands.
Place
The location of the Dutch oven, its size and the length of the chimney should be chosen taking into account the size and features of the house. Most often, the stove is located near one of the main walls of the house , not far from the entrance to the room.
It is important to create a thermal curtain from the cold penetrating from the front door and evenly warm the room. In addition, to monitor the serviceability of the Dutch oven, clean it and clean it, access to all its walls should be provided.
Type of material for the project
Scheme of laying furnace rows.
The outer layer of the project is usually made of ceramic bricks. This material is easy to process and has sufficient thermal conductivity.
When purchasing, carefully inspect its surface. High-quality stones of this type have no differences in color over the entire surface, there are no cracks or chips, and the geometry meets the standards.
The furnace firebox requires special refractory bricks that can withstand high temperatures and are highly durable. The latter property is both an advantage and at the same time a disadvantage, since it complicates its mechanical processing.
Refractory bricks are made in various forms. Moreover, it has no voids. This type of artificial stone can withstand temperatures of +1400… +1600 ºС. It differs from the usual type in its composition and characteristic metallic ringing when struck.
It is made from special refractory clay in industrial ovens at very high temperatures. This material has clear edges, which makes it possible to make precise geometric structures from it. But refractory bricks have a fairly high cost. Therefore, it is recommended to divide the building into external and internal decoration.
This allows you to significantly reduce project costs without compromising its safety and thermal conductivity.
How many bricks should I hang in grams?
Let's consider one of the simple and popular calculation methods that allows you to quickly find out how much brick is needed to build a Dutch oven.
Formula
The following formula is used for calculation:
This formula uses the following parameters:
- B – planned furnace height;
- P – height of one row;
- O – the number of bricks in the first row.
Let's look at a clear example
Let's say it is planned to build a Dutch house 2.4 m high, at the base of which there are 24 bricks. The height of one row is 7 cm (the thickness of one brick).
- Subtract 0.3 m from the planned oven height for cutting. Thus, after subtraction, 2.1 m remains.
- The resulting number should be divided by the height of one row, resulting in 30 rows.
- We multiply the resulting value by 2/3, that is, we subtract 10 rows.
- 20 rows remain.
- We multiply the resulting number of rows by the number of bricks in the base (24 pieces).
- We get 480 bricks.
- Let's add 50 bricks for cutting.
Arithmetically it looks like this:
The result is 530 bricks - the required number to build a thirty-row Dutch oven.
The number of bricks for the construction of the chimney is calculated separately. It is determined by the height and cross-section of the chimney. Therefore, the formula should be used:
The following parameters are used:
- Chd – number of rows in the chimney;
- N – the number of bricks in one row of the chimney.
These simple calculations will allow you to determine how many bricks will be needed to build a Dutch oven.
: Mixtures for laying stoves and fireplaces: let’s look at the points
How to calculate how much solution is needed?
It all depends on the amount of building stone. For every 100 bricks you will need at least 30 kg of clay and 70 kg of sand, plus 10-20 kg of cement for the pipe.
That is, for the furnace option from Method 1 you will need 260 kilograms of the first component and 607 kilograms of the second. For a 4-meter pipe it is better to take the maximum amount of cement.
Also, to increase the strength of the solution, it is recommended to add 150 g of salt for every 10 kg of clay. Only 390 grams.
Types of mortar when laying a furnace
Masonry bricks
Ordinary cement mortar is not suitable for installing a stove or chimney, since it cannot withstand high temperatures; it is used only when constructing a stove foundation.
For laying a firebox or ash pit, where the solution is in direct contact with the fire, a clay composition is used, since the clay only becomes stronger when fired by fire.
Lime mortar is used to lay out the chimney and chimney.
Foundation? Foundation!
A Dutch oven, despite its light weight, needs a foundation. You can equip the foundation in two ways - from cement mortar or from bricks. Both options have their own characteristics.
If free sand and gravel are available, then pouring a cement mixture foundation will be cheaper than a brick foundation. However, this is a labor-intensive process, even with the use of a concrete mixer.
In turn, a Dutch brick foundation will be noticeably more expensive , but at the same time it is much easier to make.
Formation of a cement foundation
Let's consider a method for forming a cement foundation for a Dutch oven.
You need to do the following:
- Prepare a pit, the depth of which is at least 50 cm. The area of the formed base must be larger than the size of the planned furnace.
- Make a cushion of gravel 10-1 cm thick and carefully compact it.
- Install the formwork and place a reinforcing frame made of metal rods, the thickness of which is 1 cm.
- Prepare the cement mixture and gradually pour the reinforcing structure.
- Cover the foundation with cement powder.
And now the solution
High-quality masonry of a Dutch oven with a stove requires the preparation of a clay mortar. The strength and heat resistance of the Dutch oven and its tightness during operation depend on the quality of the solution.
If the proportions of the elements that make up the solution are violated, cracking of the furnace and even carbon monoxide leakage are possible.
The ratio of binding elements in the clay mortar depends on its purpose:
- for masonry work or
- for finishing a stove with a stove.
The frozen mixture must have a high level of rigidity. Masonry mortar of the correct consistency will be plastic and viscous, it will not crumble and will not be liquid.
Preparation of masonry mortar
This process includes the following steps:
- The clay is placed in a trough where some water is added to it.
- After this, the clay soaks for 6-48 hours.
- While the clay is soaking, the material is thoroughly mixed and, if necessary, trampled in rubber boots.
- Sifted sand is added to the solution.
A solution of optimal consistency will slowly slide off the shovel.
Now that the preparations are complete, you can begin laying the Dutch oven and stove.
So, a Dutch oven is the optimal solution for heating a country house or cottage.
When preparing for construction, you should pre-select the location of the Dutch oven, choose a stove layout, decide on the material for exterior decoration, calculate the required amount of brick, and prepare tools and materials.
It is necessary to equip the foundation and prepare the masonry mortar.
Well, a short video on how to build a small oven:
Do you have experience?
Source: https://isanshop.ru/pechi/skol-ko-nuzhno-kirpicha-na-pech-dlya-chastnogo-doma.html