Features of an inclined hood
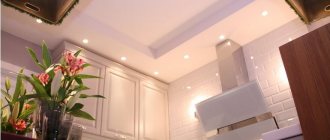
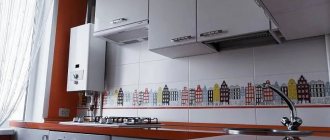
The inclined hood looks very impressive in the overall interior of the kitchen.
The inclined hood quickly and efficiently eliminates odors and fumes, looks very stylish, ideally complementing the stylish interior of the kitchen. In addition, she:
- operates almost silently thanks to the installation of a new engine;
- has a touch switch, thanks to which you can configure the operation of the device quickly and easily;
- has a “smart” display that will tell you which mode is most appropriate to use in an individual situation;
- equipped with special halogen lamps that do not irritate human vision.
Advice! You can purchase an inclined hood with either a display or push-button control. The NR-MV M IX model is made in a modern style for those who are used to operating buttons. However, the functionality of both control options is the same.
Due to their small dimensions, inclined hoods are installed in small kitchens, where it is important to save literally every centimeter of space. For larger kitchens, you can choose larger inclined hoods.
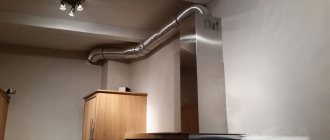
Attaching the hood to the ceiling
Ceiling hoods are used in rooms the size of which allows you to not be particularly constrained in design. At the same time, the entire working area of the kitchen is placed in a separate autonomous part - the so-called island. An air purification device is mounted above it. You must be able to freely raise and lower the dome of the device, and also have access to the work surface from all sides.
When a kitchen ceiling hood is not needed, it is located close to the ceiling. At the beginning of work, it is lowered to the desired height.
If a suspended or suspended ceiling is already installed in the room, it will have to be disassembled in order to lay air ducts and install the device. Installing the electrical wiring line also requires dismantling the existing suspended ceiling. In this case, the dome hood is attached by an experienced craftsman.
Another vital necessity is to have a grounded outlet. If it is not there, then the hood is connected to the general electrical network. This type of work also requires experience and skill.
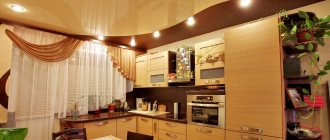
What to look for when choosing an inclined hood for the kitchen
Hood size
An excellent solution for small-sized kitchens.
The width of the equipment ranges from 350 to 1200 mm. In small kitchens, correspondingly small-sized stoves are installed. That is why a small hood will be required. As a rule, the width of the stove is about 50 cm, then it is worth purchasing a hood with a width of 50 cm. For large rooms in which stoves of the same size are installed, more “solid” appliances can be installed.
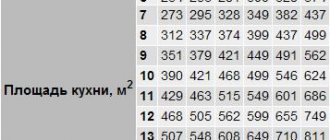
Performance
Namely, the amount of air passing through the hood during 1 hour of operation. To determine productivity, the formula is used: kitchen space volume * 12 + 15%. Such a calculation will not only increase the efficiency of the equipment, but also reduce the load on it. For example, for a kitchen space of 17 m2, a hood with a capacity of 1500 m3/hour is ideal. For small kitchens you can also use hoods with a capacity of up to 1000 m3/hour
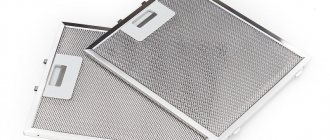
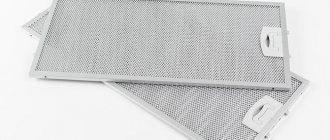
Installed filter type
Modern equipment can be equipped with a disposable carbon filter, which must be periodically replaced. Also, reusable grease filters can be installed in inclined hoods, the care of which consists of periodic washing with detergent
Appearance and colors
You can choose a hood not only by its appearance, but also by additional functions: the presence of a timer, automatic shut-off.
How to properly hang a hood over a gas stove
What distance is required from the hood to the gas stove?
Although houses usually have a ventilation system. But often it does not cope properly with its functions, especially in a room such as a kitchen. When we use a gas stove, we may encounter unpleasant odors from processed gas, but this is not only unpleasant, but also hazardous to health. In principle, fumes always occur on the stove, which carry certain odors and they will be absorbed into curtains and other kitchen utensils. After which you need to clean the kitchen more, and accordingly spend more effort and time.
How to properly install a hood over a gas stove
The ecology of your premises and the comfort of spending time in the kitchen will depend on the correctly selected model.
There are two types of exhaust devices
Let's start with the first type of device - this is a well- known type of device with a circular built-in carbon filter . which works on the simple principle of air recirculation. Due to this, the air does not leave your premises, but circulates, filters and returns back into the room. These devices are called everyday or filter devices.
Their second type serves to remove air from the room irrevocably; this is a special hood with forced intake of unwanted odors and smoke . To do this, it is necessary to vent the gas exhaust into a ventilation shaft or outside. This type of hood is designed for a large kitchen of large dimensions. This type of exhaust device is noticeably higher and better quality than the circular one. Therefore, these types of this device are most often installed in kitchens. Moreover, most multi-storey buildings have ventilation shafts, which simplifies the installation of such equipment.
Basic installation recommendations
At what height should the hood be hung? The height of the hood above the gas stove should be at least 65-70 centimeters.
The dimensions of the fence should preferably correspond to the dimensions of the kitchen stove.
The electrical outlet must be located in an appropriate location above the stove and so that it is not exposed to heat from the stove.
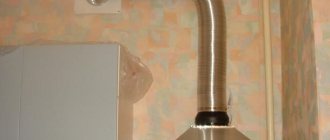
The corrugated pipe should have as little bending as possible for good air passage. Then, when the mechanism is turned on, there is no loss of device efficiency.
How to hang a hood?
Installing a hood with a circular filter does not require the most special skills or special training and special efforts. For installation, we need a regular level. As we remember, the distance from the hood to the stove is 65 - 70 cm. Therefore, we measure the height we need and carefully draw a straight line . Then use a tape measure to measure the distance from the hole to the mounting hole, which are located on the hood itself. We transfer these dimensions to our line so that it is located exactly above the slab. Next, we drill holes with a hammer drill. We insert plastic plugs into the holes and screw our equipment to them.
Some people decide to screw the hood to the wall cabinet. In this case, we, using the same principle, mark at the height we need where to screw the equipment and fasten it with wood screws.
If you are installing a hood with forced air exhaust into a ventilation shaft, then it is important to install a corrugated or plastic pipe so that the connection at the end of the pipe is strong and without holes, so that there is no loss of efficiency.
It is fundamentally important that the diameter of the pipe matches the air intake hole in the wall to avoid loss of quality air pumping power. After completing the installation procedure of the equipment, it should be tested in action to verify the correct installation of the hood.
Advice from the experts
If, for some reason, you need a separate outlet to connect your equipment, then it is advisable to hide all the wires leading to it in a cable channel or in elements of the kitchen unit . It is also possible to hide it in decorative elements of the kitchen area.
If you have tiles glued to the fastening site, be very careful when making holes so as not to break it. For this it is better to use special drills.
Provide in advance an automatic device in the power supply line for emergency shutdown of the device in the event of a voltage drop during an emergency.
Maintenance
Regardless of which hood you buy, expensive or cheap, high quality or not, if it is not properly maintained, ventilation parts may break . In the event of such breakdowns, the equipment can continue to operate, but the efficiency of the ventilated system decreases. Accordingly, the room is not properly ventilated, so the question “how to install a hood in a kitchen room” is followed by the question “how to properly maintain it?”
If the hood has a built-in carbon filter in its design, then it is necessary to replace it in a timely manner . For information about service life, read the instructions for the filters. This is the most important rule for hanging hoods, which are filter devices. In this case, the filter is the “heart” of the device. So keep an eye on it and change it regularly.
- Clean your hood regularly. Soot, grease, etc. quickly accumulate on it.
- Make sure that the mount on the pipe is strong and that there is no play at the pipe joints.
- the height of the hood above the gas stove fluctuates around 75-85 cm;
- The installation height of the hood above the electric stove is 65-75 cm.
We sincerely hope that this article will help you figure out how to properly install a hood, as well as properly operate and maintain it in order to enjoy fresh air in your everyday kitchen.
At what height should the hood be hung?
There is nothing pleasant about a kitchen without an exhaust hood - during cooking, odors spread throughout the apartment, are absorbed into the wallpaper, into the curtains and completely cease to seem fragrant. That is why the question of the advisability of purchasing a hood cannot be raised; it is obvious that one cannot do without it. But after the purchase, other important questions arise, one of which is at what height to hang the hood?
What is the optimal installation height for a hood?
Let's start with the fact that the installation height of the hood above the stove is always indicated in the description of the specific model. Of course, this is not a clear mark, but a certain range in which you can vary, starting, for example, from the design of the kitchen or from the height of the housewife. However, if the instructions are lost or you don’t trust them, there are standards that determine the distance from the hood to the stove. First of all, for proper installation, it is important to consider the type of hob:
If we are talking about an inclined hood, then the height of the lower part:
- above the gas stove should be approximately 55-65 cm;
- above electric – 35-45 cm.
Also, the distance between the stove and the hood can vary within this 10 cm, depending on the power of the air purification device. For example, if a low-power kitchen hood is fixed at the maximum distance allowed by regulations, there is no guarantee that it will fully cope with its task.
Why is it important to stick to limits?
The recommended installation height of the hood is an indicator that cannot be neglected, because the quality of the equipment’s operation and safety depend on it. If you go beyond the upper limit of the designated distance, the efficiency of the hood will decrease significantly; it will not capture all the steam. If you go beyond the lower limit, the likelihood of a fire increases. In the case of a gas stove, grease dust settling on the hood filters can become a source of ignition from an open fire. In the end, a low hood will simply interfere with the cooking process.
Where to install the socket for the hood?
The height of the outlet for the hood is usually 2-2.5 meters. It is installed above kitchen cabinets (10-30 cm from the top border). It is important to consider how the air duct will pass; it should not block the outlet. That is, the socket should be shifted 20 cm to the left or right from the center of the hood.
Hood over a gas stove: types, requirements and installation procedure
The need to install a special hood over the stove is explained by the desire of users to get rid of extraneous odors and other fumes generated in the kitchen during the cooking process. At the same time, it is possible to ensure the required efficiency of indoor air purification only if certain rules and recommendations are followed, determined by the relevant regulations and standards. In this article we will introduce you to the existing types of exhaust structures and consider the procedure for their installation using the example of one of the most common models.
Types of kitchen hoods
Hood in the kitchen interior
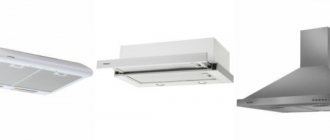
Currently, the domestic market of household appliances offers a wide range of kitchen hoods, which, according to their design, are divided into the following types:
- suspended design, which is one of the most convenient to install and practical exhaust devices, suitable for most ordinary users. With all the listed advantages, such a hood, however, is characterized by insufficient productivity;
- an exhaust device built into the walls or ceiling that provides the required efficiency in removing odors and fumes from rooms of a large area;
- an exhaust device designed in the form of a dome, the effect of which extends not only to the stove, but also to the working surfaces of the countertop located near it;
- the so-called “island” hood, mounted in the center of the kitchen space and providing air exchange throughout its entire volume (including above the gas stove).
Auxiliary elements (air ducts)
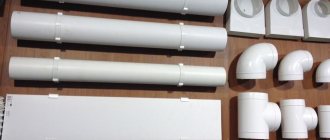
Examples of air ducts
As air channels through which unpleasant odors and fumes are diverted to the ventilation shaft hatch, special air ducts are used, made in the form of:
- corrugated pipe;
- rigid metal box;
- polyvinyl chloride pipes with smooth walls.
The advantages of corrugated pipes include their flexibility and relatively low cost. The disadvantage of this budget option for the air duct is the need for constant maintenance during operation. A metal box used as an air duct is more convenient to use, but will require significant expenses from the contractor. The most optimal option is to use PVC pipe, which is not only easy to install, but also does not require special care. Unlike other air ducts, this pipe is installed strictly above the hood.
Requirements for installation of the hood
Hanging hood
We will consider the procedure for installing a kitchen hood using the example of a simple wall-mounted system, the installation of which requires the following requirements:
- the dimensions of the intake opening must correspond to the size of the gas stove, which ensures the most effective removal of contaminated air;
- The height of the hood above the surface of the stove should not be less than 50-60 cm (the optimal distance from the heating elements is about 75-80 cm), which provides comfortable working conditions. If it is placed too low, the space for working with the stove will be limited, and the body of the device itself may overheat;
- The performance of the exhaust device must correspond to the volume of the room being served and ensure that the air in it is renewed at least 10 times a day. To calculate the exact value of this indicator, it is necessary to determine the basic dimensions of the kitchen room, and then use the following formula: V = SxHx10x1.3, where S and H are the area and height of the serviced room, respectively, and 10 is the minimum air exchange rate (1.3 - correction factor);
- in the case where your house does not have a separate ventilation shaft with access to the kitchen, it is recommended to use a flow-type exhaust device with variable capacity, operating on the principle of air mass recirculation.
Note! Connecting such hoods to an existing ventilation shaft may disrupt the operation of the entire exhaust system as a whole. In addition, it is not recommended to operate flow devices at full power (maximum performance mode) for long periods of time.
Installation procedure for the hood housing
Exhaust housing mounting height
Installing a hood over a gas stove involves the step-by-step implementation of a whole range of work operations of the following nature:
- hang the exhaust hood housing directly above the stove;
- installation of exhaust air ducts, ensuring their reliable connection with the hood and the ventilation shaft hatch;
- supply of electrical power necessary for the operation of the exhaust device.
Important! When preparing a place to install a wall-mounted hood, the main thing is to ensure that it is positioned strictly symmetrically above the gas stove, since even the slightest deviation of the body to the side reduces the efficiency of the device by 10 - 20%.
Direct installation of the hood at the place of its operation is carried out in the following sequence:
- First, the fastening points are carefully marked, taking into account the location of the supporting elements on the rear wall of the case (for these purposes, it is most convenient to use a pre-prepared template);
- after that, in accordance with the markings, holes are carefully drilled in the wall into which dowels are driven;
- then the supports used to hang the body are fixed in the dowels using bolts;
- At the final stage of installation, all that remains is to hang the hood itself on the prepared supports (watch the video).
Note! During test hanging, it is necessary to check the correctness of its orientation in various planes, which is verified using a building level and can be corrected by changing the position of the supports (their design allows adjustment within small limits and allows you to hang the hood quite comfortably).
Installation of air ducts and power supply connections
Hood with corrugated duct
When installing the air duct, we advise you to pay attention to the following important details:
- outlet channels for a wall-mounted kitchen hood are made up of relatively short and straight sections with a minimum number of bends, the radius of which should be chosen as large as possible;
- when using corrugated hoses as a discharge channel, their bending angle should not be less than 90 degrees;
- It is also not recommended to narrow the outlet section of the air duct, which can lead to increased noise;
- The hatch of the ventilation shaft to which the air duct is connected must be completely cleaned of all contaminants accumulated during its operation.
The operation of the exhaust mechanism requires an electrical network, the supply of which must be provided in advance. As a rule, products of this class are equipped with a cord with a plug, for connecting which a specially equipped socket with a grounding contact must be used.
Important! To avoid heating, such an outlet should not be located above the area where the hood is located.
Conclusion
From our description it follows that hanging a hood over a gas stove is not at all difficult, as you can see by watching any video on the relevant topic posted on the Internet. From these videos you will learn how to install a kitchen hood above the stove, as well as the existing methods of connecting it to existing communications.
- How to properly install a hood over a gas stove. What distance is required from the hood to the gas stove? Although houses usually have a ventilation system.…
- How to hang a hood over a gas stove. What distance is needed from the hood to the gas stove? Although houses usually have a ventilation system.…
- Installation height of the hood above the gas stove. At what height should the hood be hung? There is little pleasure in a kitchen without a hood - during...
- How to install a hood over a gas stove Hood over a gas stove: types, requirements and installation procedure The need to install a special hood above…
Materials and tools for hood installation
- Hammer.
- Screwdriver.
- Roulette.
- Pencil.
- Level.
You also need to stock up on materials:
- a corrugated pipe through which dirty air and fumes will be transported;
- a special grille that will become a kind of adapter from the corrugated pipe to the ventilation duct;
- clamps for fixing the corrugated pipe to the air duct grille.
Advice! When purchasing corrugated pipes and gratings, you should give preference to products with the same diameter. This approach will make it much easier to attach the corrugated pipe to the grille, and the appearance will be neat.
Determining installation height
The market offers a huge number of design solutions for inclined hoods.
Installing an inclined hood in the kitchen with your own hands depends on the type of hob and the model of the hood itself. Thanks to the use of heat-resistant materials, the inclined hood can be mounted much lower than classic models. As a rule, the mounting height of the hood is indicated in the instructions for the device. It is in the annotation that you can find out how to install an inclined hood, because each device model is individual.
Important! The mounting height of the inclined hood must be more than 35 cm above the electric stove and more than 55 cm above the gas surface.
The next step in the measurement work is to determine the size of the holes on the outside of the equipment body, thanks to which the hood will be attached to the wall and to apply indicators to the wall where the device will be located. Dimensions should be taken very accurately, determining their horizontalness on the surface using a level, since after installing the hood it will not be possible to redo or correct it. The hood must be securely and firmly attached to the wall.
Installation nuances
The operation of the exhaust device is impossible without connection to the electrical network. Therefore, regardless of how the product is installed, it is necessary to provide an electrical line to it. Most often, hoods are equipped with a small piece of wire connected to the necessary terminals in the middle of the product and without a plug on the other side.
On the one hand, this is very convenient, since there is no strict connection to the distance to the nearest electrical outlet. But on the other hand, self-installation often requires extending the cord and screwing in the plug. It is important, even at the construction stage, to provide for a hidden installation of the electrical cable, for example, under the tiles, leading to the area where the hood is attached. Then all the wiring will be hidden behind the decorative overlays of the product.
But be that as it may, there are two options that allow you to correctly connect the hood in the kitchen:
- connection directly to a cable directly connected to the electrical panel;
- using a plug into a socket.
In this case, it is worth ensuring that the cross-section of the supplied cable is no less than that already connected to the device or indicated in its passport. If the supplied wire is already equipped with a plug, then it must be replaced with your own or an outlet must be installed in the immediate vicinity of the device. The use of all kinds of extensions, tees and twists is not allowed.
In addition to the electrical requirements, there are other specific standards. The basic installation rules for hoods are as follows:
- all air duct connections must be sealed, so rubber gaskets are used;
- the entire structure must have a rigid fastening;
- the performance of the hood should not exceed the capacity of the ventilation duct;
- if there is a gas boiler in the room, forced ventilation should be installed only in its outlet channel, and natural ventilation should also be present;
- To avoid backdraft, valves are used that allow air to flow in only one direction.
Preparatory work
In order to properly install a hood in the kitchen with your own hands, you will need to carry out a number of preparatory operations. First of all, this concerns the layout of the air duct. According to SNiP requirements, the ventilation duct should not have sharp bends, so most often the connection of the hood to the outlet is made through a corrugated hose.
A mandatory element of flow ventilation will be a corrugation and a check valve. The latter is necessary to prevent foreign odors from penetrating into the room from the outside. The cross section of the corrugation is selected depending on the type of device model. An integral attribute of using corrugation is a clamp. With its help, the air duct is securely fixed both in the hood itself and near the entrance to the exhaust duct.
In addition to the air duct elements, you will need to prepare sealant and any putty. Possible pipeline joints are treated with sealant, and the voids around the junction of the air duct with the exhaust vent are filled with putty. Instead of putty, you can use polyurethane foam.
The following tools may be needed:
We recommend that you read: Ventilation control panel
- hammer drill (impact drill) - it is used to expand the ventilation shaft window and drill the necessary holes for attaching the hood;
- Phillips screwdriver or screwdriver;
- roulette;
- building level;
- hammer;
- screws, self-tapping screws, dowels.
The surface to which the hood will be attached must be smooth, without obvious bulges. The kitchen set must already be installed and all communications connected to it. The correct solution for replenishing air reserves when using a flow-through type device is to install a supply valve. To install it, you will need to drill outwards into the wall, and then insert the valve pipe into the hole. It is fixed with an o-ring, onto which the head cover and filter are then put on. The outside of the tube is covered with a mesh.
If the original ventilation system was not provided in a private house, then an attached shaft is attached to one of the walls. To improve traction, it is insulated.
Duct connection
There are two options for connecting the hood to the air duct. The first is a direct connection to an existing channel, but on the condition that there is also an additional channel used for natural ventilation. If there is only one channel, then a special adapter with two inlets is used. An exhaust hood is connected to one, and the other is used for natural ventilation. The disadvantage of this option is that some of the air may penetrate back into the room. Therefore, it would be better to make an additional hole in the channel and close it with a ventilation grille with a check valve.
The second method involves connecting to already installed ventilation, for example, coming from the bathroom. That is, a box is laid under the ceiling to which the exhaust vents of all rooms are connected. They usually have an active fan installed that draws air into the duct. The end of the pipeline is led out into the street, where a check valve and a protective grille are attached to it.
If the hood is island hood, then there is no point in pulling a separate ventilation duct for it with an existing system, so using a tee, the device is inserted into the system. To prevent the exhausted air from entering the kitchen through the hood, a check valve is installed. Such a system is especially easy to make for a kitchen hood in a private home.
It should be noted that work on organizing the air duct will not be necessary if you plan to install a recirculation type hood.
Drilling work
Using a hammer drill, make holes in pre-marked areas. You should also make holes for attaching the grille. To perform work on fixing the hood, you will need a drill with a diameter of 8 mm. The finished hole is “hammered in” with a 50-gauge dowel, into which 50 mm self-tapping screws are screwed. To fasten the grille, a drill with a smaller diameter is used, and, accordingly, smaller fasteners: 6 mm will be just right. After installing the fasteners, the grille itself is fixed. As a rule, the ventilation grille is fixed with four self-tapping screws.
Important! Before you start drilling, you should make sure that there is no hidden cable running through the marking areas. To perform such a determination, you will need a special device, for example, “E121 hidden wiring detector”.
Wall type installation
At the first stage, the performance of the hood is checked. To do this, it is connected to an outlet, and the possible operating modes are switched on one by one. The following steps are associated with the direct installation of the exhaust system:
We recommend that you read: Built-in kitchen hoods 50 cm wide
- Using a tape measure, the distance between the mounting holes of the hood is measured, and their position is transferred to the wall. Typically, fixation occurs on four self-tapping screws, one pair is used to hang the device, and the second firmly presses the structure to the wall.
- An adapter included in the kit is installed in the middle of the hood, designed to connect the air duct. It is secured with four screws.
- Using a hammer drill, holes are drilled in the wall into which dowels are installed.
- Hooks are screwed into the top row, usually these are self-tapping screws with a wide head.
- The dome body of the hood is hung on these hooks through special holes.
- Self-tapping screws are inserted into the remaining two holes, and the entire structure is pulled to the wall.
- Electrical is connected. It should be noted that at this stage you should not forget to turn off the power to the electrical line to which the exhaust equipment is connected.
- The correct connection is checked, for example, by turning on the hood light.
- A corrugated tube is connected to the hood adapter and pressed with a clamp.
- The return end is connected to the ventilation duct and is also compressed with a clamp.
- If necessary, the joints are sealed with sealant.
- At the last stage, a U-shaped decorative overlay is put on to cover the ventilation duct.
You can hang a suspended structure in the same way. The only difference from the wall structure is that the provided fastenings are located not behind the dome, but in its upper part. A base platform is installed on the ceiling, to which the cables are attached. In the future, you need to hang the hood on them. To do this, the cables are threaded through the lugs located on the device and pulled tightly together.
Connecting the hood to the power line
Design diagram of an inclined hood - must be studied before installation
- This type of work is not complicated and consists of isolating all existing contacts.
- It is worth connecting the hood after the electricity in the apartment is turned off - this is a mandatory rule for working with power lines.
- After connecting the equipment, it is worth checking it for functionality, namely functionality and the presence of traction.
Decorating the hood
To create a beautiful appearance in the room, after the performance of the equipment has been checked, you must:
- install a decorative box covering the joints;
- hide the corrugation going from the hood to the ventilation duct.
To create a stylish look in the kitchen, the hood with ventilation outlet is designed in the same direction as the room.
A properly installed hood effectively absorbs fumes and kitchen odors, preventing them from spreading throughout the apartment. You can increase the effect of using the equipment if you leave it turned on at minimum speed for a few minutes after finishing cooking.