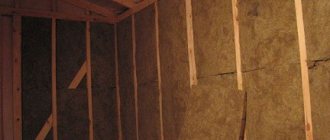
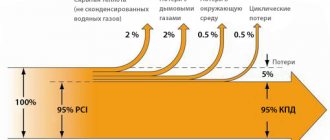
Builders with significant experience in the field of roof insulation argue that in order to insulate cold-type roofing structures, it is necessary to use backfill insulation. This insulation is used when arranging the attic floor and is poured into the space between the joists. About 20% of heat loss occurs due to poorly insulated roofing, and that is why such a measure is not superfluous. The vast majority of builders agree that thermal insulation must be installed in any heated room. But if we consider the issue of choosing a material for thermal insulation, then such solidarity is not observed between builders: some of them use materials created using modern technologies, while others prefer to insulate the roof with sawdust. In this article you will learn how to use wood waste to optimize the temperature regime in your home.
Features of using sawdust for insulation
The materials used for thermal insulation are constantly being improved, and new, more modern products appear on the domestic market every year. Its cost regularly increases and the owners of a private house do not always have enough money to purchase insulation.
For this reason, the so-called “old-fashioned methods”, used for many years for thermal insulation of walls and roofs, are still popular and relevant. Ceiling insulation with sawdust has stood the test of time for many decades, while it is difficult to say what condition, for example, polyurethane foam will be in after a 20-year service life.
The main advantages of this method include:
- environmental cleanliness;
- hassle-free purchase of sawdust;
- symbolic cost;
- simple installation;
- long service life.
At the same time, savings in the case of using sawdust as ceiling insulation consists not only in reducing financial costs, but also in caring for nature, which helps improve the environmental situation and reduce home heating costs.
The process of insulating a home consists of several stages, including insulation of the ceiling, walls and floor. Moreover, each type of surface requires a special approach. When the ceiling surface is insulated, the material intended for this can be laid both externally and internally.
It is not difficult to verify the economic benefits of insulating a home with sawdust if you compare the costs of them with the cost of popular materials and the work involved in their installation. Thermal insulation using this wood material is practically free. In addition, you can agree with a woodworking company to deliver it to a specific address for a small fee.
Of course, as with the use of other thermal insulation materials, there are pros and cons to insulating the ceiling with sawdust. The disadvantages of this method include the fact that not all varieties of this type of wood waste are suitable for ensuring heat conservation in the house.
Preparing the insulation mixture
Methods of insulating the roof and attic vary depending on how the space is used. Residential attics are insulated from the side of the slopes and interfloor ceilings. If the attic is used only for storing things, then it is enough to insulate only the ceiling from the cold. In any case, not only thermal loads are taken into account, but also the appearance of condensation.
The installation process involves filling sawdust into the design cavities. The only problem is the gradual shrinkage of the insulation. At the same time, the thermal insulation properties decrease. To reduce the effect of this drawback, the chips are mixed with other materials. Three common recipes are:
Materials and technology for insulating the roof of a wooden house
- Adding lime and gypsum. First, 85% sawdust is mixed with 10% lime. Then add 5% gypsum with water. Lime is added to the composition to protect against rodents.
- Cement. In the summer, 10 buckets of sawdust are mixed with 1 bucket of cement. For this volume, add 25 grams of copper sulfate to the water. The resulting solution is laid on floors 8-10 cm thick. After two weeks, the layer will dry and the work will be completed.
- Clay. In a large container, the clay is mixed with water until the mixture becomes semi-viscous. Next, add sawdust in small portions and mix it constantly. This insulation is laid in several layers until the total thickness reaches 10 cm. This recipe is better than others, since it protects the insulation from fire, is low cost and does not contain hazardous substances.
Sawdust insulation, 15 cm thick, has insulating properties equal to a 10 cm layer of mineral wool. Although the cost of its use is 6 times less, the weight of the roofing cake increases by 2-3 times. Therefore, it is necessary to strengthen the rafter system with supports.
Choosing the right sawdust
Medium-sized sawdust is best suited for insulating the ceiling in a private household. The fact is that it will be difficult to work with small wood waste, and coarse-grained material does not have a sufficient degree of thermal insulation.
The optimal insulation material is considered to be sawdust obtained as a result of sawing in carpentry production, since it has a low degree of humidity, does not require additional drying and does not begin to rot when used.
If round wood waste, which has natural moisture, is available, then before use it should be spread out under a canopy and thoroughly dried. You should not cover the sawdust, as it will then begin to rot.
Experts advise giving preference to waste from softwood processing. Since such material contains a lot of resinous substances, pests are afraid to settle in it. True, when deciding how to insulate a bathhouse ceiling with sawdust, it is better to use raw materials from deciduous trees.
Before installation, this type of insulation must rest for about a year. During this period, the level of sugars in sawdust decreases significantly, and it is they that contribute to the process of decay. It is necessary to pay attention to ensure that there are no foreign impurities in the insulation. It is advisable to sift the sawdust and remove large debris by hand.
Comparison with other insulation materials
Despite the fact that in terms of the ratio of layer thickness to the level of heat loss reduction, sawdust and any mixtures based on it are inferior to any modern heat insulators, this type of insulation is still in great demand .
After all, insufficient thermal efficiency compared to other materials is compensated by low requirements for the level of thermal insulation on the roof, as well as by the difference in price.
Even if you couldn’t get sawdust for free, their cost will still be much lower than the price of any modern insulation.
Read more about the difference in prices between wood sawing waste and modern insulation materials here.
Another advantage of sawdust is that when used correctly, rodents do not live in them, and various insects do not live in them.
But it is rodents and insects that are the main problem for those who insulate their houses with mineral wool, polystyrene foam and other modern heat insulators.
The third advantage, especially relevant in roof conditions, is that sawdust does not emit toxic substances when heated.
In summer, the roof surface heats up to a temperature of 60–100 degrees, which leads to air heating even in an insulated attic to a value of 45–55 degrees. At this temperature, polystyrene, foam plastic and many other insulation materials emit toxic substances, so the use of sawdust is much less dangerous.
For more information about the correct use of sawdust and the ratio of various substances in insulating compositions, as well as the effect of lime, read in a separate article.
Hemming of floor beams
Work related to how to insulate a ceiling in a private household with sawdust should begin with filing the ceiling; it is performed in a certain sequence:
- Prepare boards approximately 2.5-3 centimeters thick - this parameter depends on the distance between the beams. It is desirable that the lumber be tongue-and-groove or with a quarter, and certainly planed and dry, even if their cost is higher than unplaned edged products.
- On top of the assembled vapor barrier layer, boards are attached solidly with nails 10 centimeters deep or screwed with screws 5-6 centimeters long, 2 pieces at each fixation point. In this case, the nails are driven in at an angle relative to the wooden plane. It is necessary to ensure that the direction of the adjacent nails driven in does not coincide, and then the fastening will be strong and most reliable.
- Before starting installation work, boards and beams must be treated with special compounds - antiseptic and fire retardant. This will protect the wood material from fungus and various pests, and will also help reduce its flammability.
Ceiling insulation options
When insulating the ceiling with sawdust, you should be careful not to miss the cracks that are always present on the surfaces. To eliminate them, polyurethane foam is used.
There are several options for arranging thermal insulation of the ceiling using sawdust, both using pure wood raw materials and by adding additional additives to it, such as clay, lime, etc.
The most popular methods are:
- use of sawdust in its pure form;
- the use of additives - cement and lime;
- the use of additional components - clay and lime.
Sawdust delivery
There is no longer any need to collect waste in carpentry workshops; just order, pay and sawdust will be delivered strictly to the specified address. Many companies are ready to provide such a service. Since we are considering the most budget-friendly and simplest option - insulating ourselves and purchasing sawdust at a sawmill, rather than purchasing a processed mixture of sawdust and fillers in packaging containers, we need to organize a place for unloading and ensure their storage. It can take up to four dump trucks to insulate the roof of an average home. And since the weather does not adjust its behavior to our plans, so that the sawdust does not get wet, melt, or cake while waiting for its turn, it is advisable to prepare the attic floors in advance.
Ceiling insulation only with sawdust
This method is simple and consists of several steps:
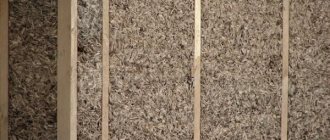
- Ceiling insulation made from sawdust is poured onto the floor of the attic in a layer of 15-20 centimeters and carefully leveled, often to the very level of the beams, but not compacted.
- Furnace ash is poured in one layer on top of the insulation. Now a vapor-permeable superdiffusion membrane is being used instead. Thanks to this coating, moisture is removed from the sawdust without hindrance, and this circumstance prevents the process of rotting. Such films are characterized by one-sided vapor permeability.
- If the attic space is planned to be used, then plank flooring must be secured along the beams. The boards are nailed so that there are small ventilation slots between them.
Thermal insulation of the ceiling with sawdust and additives
There are several options for how to properly insulate a ceiling with sawdust, if you use additives such as lime, clay, cement and others.
To prepare the insulating mixture according to the first recipe, you will need the following ingredients:
- well-dried sawdust - 10 parts;
- lime and cement - 1 part each;
- water – from 5 to 10 parts;
- a little copper sulfate, used as an antiseptic.
Work on insulating the ceiling with sawdust in a private house is carried out in stages:
- First, cement and lime are mixed.
- Pre-prepared sawdust is placed in a large container; you can use a concrete mixer.
- A cement-lime composition is added to them and all components are thoroughly mixed.
- 3 tablespoons of copper sulfate are poured into 10 liters of water and slowly poured into the previously prepared mixture of sawdust and additives. When working with vitriol, you must follow safety precautions, using a mask and gloves.
- All components are mixed well. The mixture is then considered ready when there is a small amount of it, it will not crumble if you unclench your palm, and when water does not drain from it.
There is another recipe for making a heat-insulating mixture consisting of sawdust, cement and limestone. It is often used to insulate the ceiling in a bathhouse with sawdust. In this case, vitriol is not used, since at high temperatures it begins to release harmful components into the environment.
To prepare the composition, take:
- dry sawdust – 10 parts;
- clay – 5 parts;
- lime – 1 part;
- water - from 7 to 14 parts.
The mixture is made as follows:
- The clay is poured with 2 parts of water and waited until it is completely soaked. The solution is stirred until its consistency is similar to thick sour cream. There should be no lumps in it.
- Lime is mixed with sawdust and added to the clay solution. Mix all the components thoroughly, adding another portion of wood raw materials from time to time.
- To make sure the composition is ready, use a regular wooden stick. It is placed vertically in the solution and waited for a while. It is considered ready if the stick does not fall. When the mixture turns out to be too liquid, it should be left for 24 hours to allow the excess moisture to evaporate.
An alternative recipe can be used. In this case, instead of clay, gypsum is used in the same amount. But this mixture has a big drawback. It lies in the fact that the prepared solution dries quickly and therefore needs to be prepared in small portions.
Main stages of repair work
To reduce roof heat loss using sawdust, perform the same operations as when using any other insulating material.
These include repair of the rafter system and roof, organization of proper ventilation, as well as insulation:
- roofs,
- attics,
- attic floor,
- chimney and ventilation pipes.
First of all, it is necessary to carry out an audit of the rafter system , roofing and floor elements, because repairing them after installing the insulation will be much more difficult.
After this, it is necessary to think over the ventilation system so that the air circulation it creates covers the entire internal space of the roof, and it is necessary to provide the ability to block air movement.
After all, after insulation, the temperature in the attic will differ from the street temperature, warmer in winter and cooler in summer.
Excessive constant ventilation will reduce the insulation effect to a minimum, while insufficient ventilation will lead to condensation, rot, mold and other problems.
Only after this they begin to choose a method of insulation with sawdust, that is, using:
- dry mixture of sawdust and lime;
- liquid mixture of wood sawing waste and various binders;
- finished slabs.
Regardless of the insulation method, it is also necessary to consider a waterproofing system.
After all, in winter the temperature of the roof is much lower than that of the insulation, so the air passing between them will leave dew drops on the cold surface.
But you cannot fill the entire space up to the roofing material with insulation, because in this case you will disrupt the air circulation and condensation will begin to accumulate.
Most often, waterproofing is done using various films, and their choice depends on the type of attic ventilation.
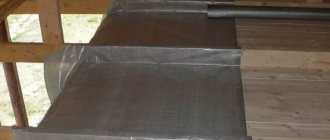
If you have provided for forced or natural air movement through the attic, then you can lay regular cellophane film , it will prevent moisture from moving both up and down.
If for some reason you have not equipped the attic with ventilation, or its efficiency is insufficient, then you need to use a vapor-permeable film. This method will protect the insulation and joists from water, but will not impede the movement of steam.
As a result, excess moisture will pass through the film and leave along with the movement of air between the insulation and the roofing material.
Roof thermal insulation
This method is best suited for roofing. After all, with minimal financial costs and low labor intensity, it provides a sufficient reduction in heat loss for this section of the roof.
The roof is insulated in order to reduce the amplitude of the temperature difference between the attic and the attic or room on the upper floor, therefore, great efficiency is not required from the thermal insulation material.
In addition, the width of the rafters usually exceeds 10 cm , and such a layer of a mixture of sawdust with any binder is similar in effectiveness to mineral wool 6–7 cm thick or polystyrene foam 4–5 cm thick.
In this case, the thickness of the insulation is quite sufficient to reduce the amplitude of the temperature difference.
On the roof, to load the mixture, you need to create a cavity consisting of rafters, waterproofing film and lining.
Due to its low specific gravity, plywood with a thickness of 5–7 mm, or fiberboard with a thickness of 10 mm, can be used as a lining.
to the rafters using a stapler ; if you don’t have one, you can get by with self-tapping screws and a tin strip 2–3 cm wide.
The lining is placed in strips 1 m wide . It is not advisable to use wider strips, because it will be difficult to compact the insulating mixture. After this, fill the cavities with the mixture and compact it with any suitable piece of wood. Do not be too zealous with the seal, because you can damage the waterproofing.
Having filled one row with insulating material, install the lining of the second row and also fill it with a mixture of sawdust and lime. In the same way, fill the entire under-roof space up to the ridge.
It is advisable to make the last row 10–20 cm wide, so it will be easier to fill it with insulating material. In addition, the lining is first lightly attached to the rafters from below, then the cavity is filled with material and the lining is pressed to the rafters, after which it is fixed normally.
You can also use solutions consisting of sawdust with water and a binder, but gives the best effect .
After all, other compounds are afraid of high humidity, so if the roof is damaged, they can deteriorate. In addition, the specific gravity of the insulation, in which water acts as a solvent or activator of the binder, is much higher than that of PVA-based mixtures.
Therefore, they have to make a stronger and thicker lining .
In addition, the use of slabs made from a mixture of sawdust and PVA gives good results , because such slabs can be prepared without haste throughout the year and installed in the spring or summer. Both methods of insulation are described in more detail in the article Ceiling insulation.
Attic repair using sawdust
The roof separates the attic room from precipitation , so here you can use either a dry mixture of sawdust and lime, or any solutions.
The use of homemade slabs also gives good results , but for them we recommend only cement and PVA as binding materials.
After all, other materials do not provide the required strength, so there is a risk of damaging the slab during lifting into the attic.
If you install ready-made PVA slabs in a heated attic, then you can do without waterproofing, because the hardened glue is not afraid of water, and its ability to transmit water vapor is sufficient to prevent condensation from accumulating to dangerous amounts.
If you use slabs made of sawdust and cement, then it is still better to install waterproofing; it will separate the condensation that settles on the slab and wooden parts, so that its amount will not reach dangerous values.
The walls of an unheated attic can be insulated with any materials, even without the use of waterproofing, because the temperature difference does not reach values at which heavy dew falls.
To insulate the attic, they use the same technique that we talked about in this article Insulating walls. The only difference is that the outer surface of the insulation does not need to be covered with a facade, because precipitation does not fall on it.
Insulating the attic floor
In many ways, this operation is similar to those performed when insulating any floor.
The only difference is that there may be no coating on top and the temperature difference with an uninsulated roof is much higher than on the floor in the room.
In addition, the bulk of condensation falls on the insulation in the mornings from late spring to early autumn, when the air temperature outside is noticeably higher than the temperature on the surface of the attic floor.
Even if you use gypsum or cement as a binder, this will not harm them, because by lunchtime the attic warms up, the moisture evaporates and leaves through the ventilation system.
more about such work in the article about floor insulation.
In addition, it is necessary to take into account the presence of insulation of the roof and walls.
If you insulate them, then the temperature difference in the area of the attic floor will be insignificant, so you can do without waterproofing.
If there is no such insulation, then it is necessary to lay a vapor-permeable film both under the insulating material and above it, this will provide maximum protection against condensation and extend the service life of the floors.
Finishing of chimneys and ventilation pipes
Ventilation and chimney pipes are insulated to reduce the likelihood of condensation appearing on their internal surfaces, which falls when hot gas comes into contact with a cold surface.
street or room air is used to burn fuel , which is why the smoke always contains a small amount of water vapor, which settles on the cooled walls of the chimney in the form of condensate.
Therefore, the less the influence of the attic temperature on them, the lower the likelihood of condensation , which harms both the ventilation system and the masonry of the chimney.
When insulating ventilation pipes, it is necessary to take into account that in winter their surface temperature is much higher, and in summer much lower than the temperature in the attic, but the difference rarely reaches dangerous values, so there is no need to worry about condensation.
To insulate them, you can use a mixture of sawdust with any binder , so use what is easier to obtain. This is usually clay that can be dug up in most vegetable gardens.
When insulating a chimney, another problem arises - its surface temperature often exceeds 150 degrees, so it is necessary to use only compositions based on non-flammable binders .
Clay is the most convenient, because its coefficient of thermal expansion is much closer to brick than that of cement or gypsum, so even if the pipe is very heated, the insulating layer will not become cracked.
In addition, the proportions of sawdust and binder should not exceed 2:1 , because the more wood sawing waste there is, the higher the likelihood of fire.
The pipes are coated with ready-made compounds.
If it is not possible to make a layer of the required thickness, then first apply a layer of small (2–4 cm) thickness along the entire length of the pipe, then wrap it with little effort with twine or thin nylon rope.
The next layer of cement insulation can be applied after 10–15 hours, gypsum after 30–40 minutes, PVA-based after 5–7 hours, and clay after 2–3 days. Therefore, when working with gypsum, cement or PVA, it is necessary to mix as much solution as is sufficient to create one insulating layer.
Creating ceiling insulation from sawdust
There is nothing particularly difficult about how to insulate a ceiling in a private house with sawdust. After completing the preparation of the ceiling surface, they begin laying thermal insulation in small layers, leveling and compacting each of them. The height of the insulation should be level with the top of the ceiling.
A thin layer of ash is poured on top of the mixture of sawdust and additives. It will protect the insulation from pests and fungus. A couple of weeks after completing the insulation of the ceiling with sawdust in a private house, when the mixture is completely dry, a vapor barrier layer is laid on top of it. It is necessary to prevent wood waste from becoming saturated with moisture present in the air.
Vapor barrier material, usually polyethylene film, is attached to the floor beams using a mounting stapler. The result of the work done will be a thermal insulation layer covered on both sides with a vapor barrier.
Nuances of insulating ceilings in a wooden house
There are a number of nuances regarding how to insulate a ceiling with sawdust in a wooden house. Thermal insulation of floors in this case can only be done from the top side, if the raw materials are not pressed into slabs or mixed with clay.
When using sawdust to insulate wooden floors, you need to make sure that they are dry. Such chips, unlike wet ones, will crunch and crumble when squeezed into a lump by hand.
All cracks on the wooden surface are filled with polyurethane foam. Sheets of cardboard are laid on the ceiling and nailed with a stapler. Then, when insulating the ceiling in a wooden house, the first layer about 10 centimeters thick is filled with sawdust. Larger shavings are also suitable for this. After completing the installation, the sawdust must be compacted by walking on it.
Next, a second layer of the same thickness as the first is poured onto the compacted material. Fine sawdust is used for it. They are compacted again.
Thermal insulation of bath ceiling
When insulating a bathhouse, the ceiling surface is sheathed with wide boards. To install the chimney, a ceiling cut is performed. Components can be purchased ready-made in a store or made by yourself. In the second case, a circle is cut out in the middle of a stainless steel sheet that completely covers the hole for laying the chimney.
Next, the edges of the cutout in the ceiling are sealed with basalt wool, and strips of metal are stuffed on top of it. The chimney is secured with guide strips so that it can move freely due to thermal expansion. A plate is screwed from below and the resulting passage is thermally insulated.
Insulation of the ceiling in the bathhouse is carried out in the following sequence:
- In the attic room, a vapor barrier is laid with an overlap of 10-15 centimeters with a bend on walls of a similar size.
- The mixture for the sawdust ceiling, prepared in accordance with one of the previously described recipes, is laid in layers, each time, well leveling the insulation and compacting it. If the bathhouse is planned to be used only in summer, then the thickness of the thermal insulation layer can be 5 centimeters, and when in winter, then at least 15 centimeters will be required.
- After finishing laying the insulation, you need to wait until it dries. If cracks have formed on the surface, they are sealed with the same composition. To keep their quantity to a minimum, salt is added to the mixture before installation at the rate of 5 - 6 tablespoons per 10 liters of water.
- It sometimes takes up to a month for the insulation with sawdust to dry. Then a thin layer of lime is poured over the mixture and a vapor barrier is laid. Next, the surface is covered with boards, if desired.
When using a mixture of sawdust and gypsum for thermal insulation, it should be applied in thin layers. When performing work, you must not forget that the gypsum composition dries quickly. By the way, both methods of insulation can be used when working with horizontal and vertical surfaces.
How and how to insulate an attic from the inside? DIY thermal insulation
The construction of an attic space during roof construction is widely popular, since this space can be used to increase the area of the house. It’s not at all difficult to create comfortable and suitable living conditions by insulating the attic roof from the inside with your own hands. You just need to follow a certain sequence. Considering the fact that the contact of the roof with the external environment has a significant area through which up to 30% of heat energy is lost, special attention is paid to the choice of insulating materials.
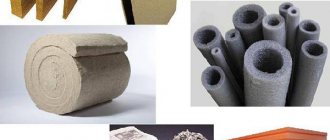
The most common are: mineral wool, glass wool, polystyrene foam, ecowool, polystyrene foam and sawdust. Let's compare the technical characteristics, advantages, and disadvantages of the main types. The table also shows their estimated cost. By the way, contrary to popular belief, the price of insulating an attic with Penoplex is not the most affordable.
| Type of insulation | Brand | Advantages | Flaws | Prices, rubles |
| Mineral wool | Rockwool Minslab P 75 | plasticity, preservation of heat and sound insulation properties for 30 years or more | under the influence of high temperature toxic substances are released | 1650 per m3 |
| Glass wool | Izover classic 100 mm | ease of installation, fire safety, durability | emits harmful dust, care must be taken during installation | 650 per pack |
| Polyurethane foam | Eurotemp | allows you to create a monolithic layer, with no gaps, holds well on any surface, does not pose a health hazard, you can insulate the attic in a matter of hours | There are 2 types: closed cell and open cell, the second is cheaper, but not suitable for use without a vapor barrier, you need to hire or purchase a portable unit | from 390 to 600 per m3 |
| Ecowool | "Extra" | environmental properties are similar to wood; the composition contains an antiseptic that protects the material from exposure to the external environment; The thermal insulation of an eco-wool attic is absolutely safe for health; sound insulation properties are superior to polystyrene foam and mineral wool, does not require vapor barrier | shrinks over time, costs a third more than mineral wool | about 450 for 15 kg (packaging), for 1 m3 you need about 45-75 kg |
| Extruded polystyrene foam | Penoplex Wall | low thermal conductivity, high strength, immunity to moisture, quality, service life up to 40 years | vapor permeable, attacked by rodents, fire class G3 | from 1200 to 1400 per package |
| Sawdust | – | environmental friendliness, accessibility, possibility of use at home | one of the longest ways | from 20 to 70 per bag |
Features of the use of each type
Insulating the attic from the inside, according to experts, is the most effective measure for creating a warm attic.
The technology for performing thermal insulation work from mineral wool, penoplex and glass wool consists of the following stages:
- Cleaning rafters with antiseptic treatment.
- Installation of surface sheathing from the inside of the roof.
- Laying a waterproofing layer that protects against moisture penetration (for example, polyethylene film or special membranes).
- Location of insulation. The slabs are laid in a spaced pattern or in a checkerboard pattern, depending on its type.
- Installation of vapor barrier.
- Exterior finishing.
Despite the general principle of performing thermal insulation work, each material has its own characteristics:
- The plastic insulation should be supported by a thicker sheathing so that it does not sag.
- Rigid - requires greater strength of the roof structure, as it weighs more.
- Loose ones need protection from wind and moisture.
Insulating an attic floor using spraying requires expensive equipment. However, the installation of polyurethane foam or ecowool is greatly simplified: they are simply attached by blowing them out to a surface that has been cleared of dust and debris. Vapor barrier and other types of protection are not needed here. Only external finishing is possible.
Separately, you need to consider sawdust. This is one of the most convenient and inexpensive materials to use at home. Its only drawback is that it takes a long time to complete the work.
Stages of attic insulation with sawdust:
- preparation of a solution, which includes fine sawdust pre-treated with an antiseptic 85%, fluff lime 10%, gypsum 5%;
- diluting the mixture with water to obtain the required non-crumbly consistency;
- applying the solution in a dense layer, up to 25 cm thick;
- compacting, drying;
- final finishing.
It is important to remember that thermal insulation for the attic and attic implies strict adherence to fire safety rules. If the house has an existing chimney, it must be lined with non-combustible material.
