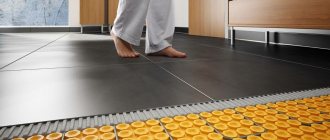
Types of pipes for heated floors
A water floor is most often used as an independent heating system. Less often it is mounted as an additional heating element.
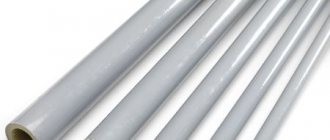
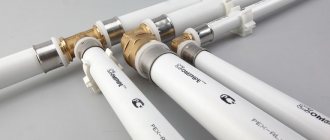
Structure of a metal-plastic pipe
Let's consider the types of pipes used in the installation of heated floors, their advantages and disadvantages:
| Types of pipes | Advantages | Flaws |
| Metal-plastic | • resistance to corrosion and chemicals; • low expansion coefficient; • smooth surface provides good pressure; • service life 40-50 years; • withstand water temperatures up to 95 degrees; • anti-oxygen protection guarantees against separation of elements from connection with metal parts; • pipes bend easily, laying them in the form of a snake is not difficult. | • Due to the difference in expansion of aluminum and polyethylene, a low-quality pipe may delaminate; • scale may form on threaded fittings; • if the fitting is tightly clamped, the pipe may burst. |
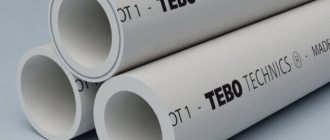
| Copper | • highest thermal conductivity; • durability up to 50 years; • withstand water temperatures up to 300 degrees, pressure up to 400 atm; • are not afraid of rodents; • are not subject to corrosion. | • complex installation, requires special equipment for connecting elements and work experience; • connecting elements must only be made of brass. |
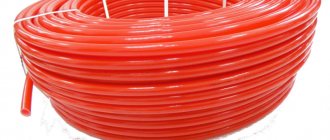
| Made from cross-linked polyethylene | • practically do not deform under the influence of high temperatures; • resistant to mechanical stress, abrasion, shrinkage; • service life more than 50 years; • flexibility, resistance to freezing/defrosting; • easily restore shape; • do not crack under internal pressure. | • the pipe does not have a frame, it is quite difficult to shape it by laying it in a snake; • if the installation technology is not followed, the anti-diffusion protection on top of the pipe can be damaged. |
Metal-plastic pipelines for heated floors are used more often than others due to the optimal price-quality ratio.
Advantages and disadvantages
Consumers and professional craftsmen include the following advantages of metal-plastic channels:
- Good resistance to high temperatures, which resulted in their use in water floors.
- Easy and convenient to install, easier to work with.
- The plasticity of the material, the ability to maintain a given shape, pipes are easy to bend even by hand, which allows them to be laid in various configurations.
- Resistant to all types of corrosion.
- Much lower linear elongation.
- Lack of oxygen diffusion.
The disadvantages include:
- The difference in the coefficient of thermal expansion between polyethylene and aluminum, which over time leads to stratification of the channels.
- Significant bending radius, which is why creases occur if installed inaccurately.
- Loosening of fitting connections due to regular fluctuations in ambient temperature.
All about metal-plastic pipes
The structure of the metal-plastic pipe includes 5 layers:
- The inner layer is made of cross-linked polyethylene. Ensures that the working shape of the pipe is maintained when exposed to elevated pressure and temperature.
- The next layer is applied with an adhesive composition, which fixes the aluminum layer to the inner polyethylene.
- The aluminum layer is made of foil 0.2-2.5 mm thick, which is butt-welded or overlap-welded into a pipe shape. The thickness of the layer depends on the diameter of the product.
- Adhesive composition.
- Protective outer layer made of cross-linked or regular high-density polyethylene.
Warm floors made of metal-plastic are lightweight.
Due to their structure, the pipes have good flexibility, which greatly simplifies their installation in a snake or spiral shape. The durability of the pipe depends on the quality of the glue; if the adhesive composition loses its elasticity, the product delaminates and leaks begin at the joints.
To check the quality of metal-plastic, you need to heat it to a temperature of 100 degrees. If layers are visible when heated, it means the pipe is of low quality.
Material calculation
Before you start purchasing material, you need to correctly calculate the flow rate of the pipe that will go to the heated floor.
Metal-plastic can be laid: Installation with a snake is easier, but has a significant drawback. Hot water enters the pipeline from one side of the room, and as it moves along the snake to the other part of the room, it gradually cools down. As a consequence, one side will always be warmer than the other.
The circuit, laid in a spiral, heats the floor more evenly
Installation with a spiral promotes uniform heating of the floor, because the pipe from the insert goes to the middle of the room, then goes in a spiral to the collector. There are fewer bends in this system, so you can use a heated floor pipe with a smaller bend radius.
Large rooms need to be divided into several sectors. For effective heating, the length of the pipeline laid in a spiral should not exceed 60 m in each circuit.
When designing a heated floor system, you need to think about the location of the pipe and choose the most suitable installation scheme.
It is better not to lay pipes under furniture and household appliances.
To calculate the required quantity, we first draw on paper a pipeline layout diagram. The optimal distance between turns is 30 cm; if it is reduced, the floor surface will overheat; if it is increased, the floor between the pipes may not be heated well. We retreat 150-200 mm from the walls to the metal-plastic pipe.
We calculate the number of turns and multiply the resulting number by 2 (pipeline with cold and hot water).
Then we calculate the length of the pipe in a coil and add 10-15% in reserve (for defects and waste).
If you can’t calculate the length yourself, you can use an online calculator. In order for the program to produce the correct result, you need to know the following pipe parameters:
- diameter;
- material;
- thickness of screed and finishing floor covering.
The length of the pipeline in one circuit should not exceed 120 m, the difference between the circuits should not be more than 15 m. The pump power is also taken into account.
Laying a metal-plastic heating system
Step 1. The first thing you need to do is purchase all the necessary materials and tools for installing water heating. That is, first of all, the metal-plastic pipes themselves, sold in large coils with a length of up to 50 m. In some cases, coils with a pipe length of 80 m can be purchased directly from the manufacturer. You will also need clamps for fixing the pipes on the reinforcing mesh, heat-reflecting material, the mesh itself, the required number of fittings to create connections between individual pipe sections, cement mixture for pouring the screed. It is best to buy pipes with a diameter of 16, 20 or 25 mm.
Preparing everything you need
Heated floor pipe circuit length calculator
Go to calculations
Step 2. Next, you need to prepare the rough foundation by laying waterproofing and insulating materials on it, as well as a reinforcing mesh with large cells. The individual mesh sheets are connected to each other using clamps. It is best to lay individual sheets so that they overlap each other by at least one cell. A damper tape must be glued along the walls, which is necessary to ensure that the poured concrete screed does not deform.
Laying reinforcing mesh
Step 3. After this, you need to select the correct location of the collector box. This is a very important indicator, since the pipe flow rate will depend primarily on the correct choice of location. You need to install the collector box itself.
Installation of the collector box
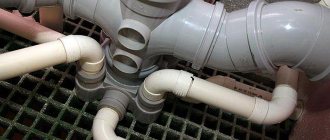
Step 4. Next you need to lay out the pipes according to the chosen pattern. They can be laid in a snake or in a spiral. In the first case, installation is usually done starting from the walls or windows. Laying in a spiral involves parallel arrangement of supply and return pipes - this is an option for spacious rooms, unlike the previous one. It is important to maintain the required pitch between the pipes. The laying step can vary and be 10, 15, 20 cm. Less often, it can be increased. Near the windows the step should be small - 15 cm.
There are several schemes for laying underfloor heating pipes. You can choose the right one based on your needs
Pipes are laid out according to the selected pattern
Another photo of the installation process
Step 5. In order to bend the pipe correctly, a pipe bending spring is used. It is put on the pipe itself and after that, adjusted to the required places, the desired radius is formed.
Using a bending spring
Step 6. The pipes must be fixed to the reinforcing mesh approximately every 1.5 m using plastic clamps. They should not be over-tightened, otherwise the pipes may be deformed during thermal expansion when heated.
Pipes are fixed on a reinforcing mesh
Step 7. After the pipe circuit has been laid and fixed, they need to be connected to the collector and the water supply checked. Then you can pour the screed directly on top of the pipes. But at this moment they should be filled with water. Otherwise, the pipes may bend.
The fixed circuit must be connected to the collector
Important! When installing a water floor heating system made of metal-plastic pipes, it is important to pay attention to the integrity of the material and the absence of damage or deformation. Otherwise, this will affect the quality of the final work. And the total length of the pipes should not exceed 80-90 m. The best option is 50-60 m. If the total length of the pipes is greater, then two circuits should be installed, and the collector should have 2 outlets.
Video - Installation of a water floor
Materials for system installation
In addition to metal-plastic for heated floors, you will need:
- Hydro- and thermal insulation material will help keep the room warm, rather than heating the neighbors below. We purchase expanded polystyrene or polystyrene as a heat insulator. Polyethylene film is most often used to protect coatings and materials from moisture.
- To strengthen the concrete screed you will need a reinforcing mesh.
- The damper tape is glued along the perimeter of the walls and serves as an expansion joint when the screed expands under the influence of heat. Protects the base of the floor from deformation and cracking.
- Clamps in the form of an anchor for fastening pipes.
- If not all rooms in the house have a heated floor system, you need to buy a mixing unit.
- The collector distributes the supply of hot water to the various circuits of the system. For the secrets of installing a metal-plastic water circuit, watch this video:
If the circuits in the system are of different lengths, then a coolant flow regulator must be installed on the collector. At the same time, we take into account that a long circuit takes longer to heat up than a short circuit, so you need to regulate the pressure and degree of heating.
Preparation stage
Whatever technology for laying heated floors you choose, you need to make an accurate calculation of the required amount of materials to solve the problem in a particular room. To do this, you need to determine the optimal parameter for the power of the heating circuit, the temperature in the system, the amount of heat loss and the flooring option.
You should choose a high-power underfloor heating system if:
- the finishing coating will be massive granite or marble slabs, or any other building materials characterized by high heat capacity;
- the room has poor thermal insulation of the balcony and walls;
- there is a significant number of glazed structures, such as a balcony, bay window or winter garden;
- The room is located on the top or first floor.
At the preparation stage, you also need to dismantle the old flooring. The freed surface must be leveled. The base level of the base can be increased, but not by more than five millimeters. If the deviation from the specified indicator is higher, it is necessary to carry out alignment using an additional screed. If these requirements are ignored, in the future it is possible that the pipes that will be laid will become airborne.
Heating installation
Before laying the water heating circuit, you need to prepare the surface. We seal all cracks and chips on the slab with cement mortar. If the difference in height is more than 5 mm, leveling the base is required. If the pipeline is laid on a surface with a slope, an air lock may form in the pipes. Watch all the stages of laying the floor from screed to contour in this video:
For better adhesion to concrete, we wet the surface with water. Then, to increase strength, you need to prime the base in two layers.
There must be metal or metal-plastic fittings under the water circuit
Installation sequence of the heated floor system:
- After preparing the surface and removing dust from it, we stick damper tape along the perimeter of the walls to the entire height of the screed.
- We lay thermal insulation. If the material has a foil surface, place it with the foil facing up.
- We spread the waterproofing material. When using rolled material, we lay the strips overlapping by 15-20 cm, and fix the joints with tape.
- We install the reinforcing mesh and we will attach pipes to it.
- We install the cabinet for the manifold and the distributor itself. We install supply and return pipes into the cabinet, on which we install valves. We connect the manifold to the valve, install a drain valve on one side, and an air release system on the other.
- We connect the end of the pipe to the manifold and lay metal-plastic pipes for the heated floor, according to the provided diagram. We attach the pipe with clamps to the reinforcing mesh. We place the fasteners at a distance of 1 m from each other.
- Upon completion of laying the entire circuit, we connect its second end to the collector.
- We test the system, supplying water pressure 1.5 times higher than the operating pressure.
- If the system is working correctly, there are no breaks or leaks, you can begin installing the screed.
The warm floor is filled with a screed 3 - 5 cm thick
- Mix the ingredients according to the instructions until you obtain a homogeneous mass of creamy consistency. Fill the screed with the resulting solution to a thickness of 30-50 mm.
- Cover the concrete base with polyethylene and moisten it with a spray bottle once a day to prevent cracking.
- A month after the screed has completely dried, you can put the water heated floor system into operation.
- cement-sand mortar in a ratio of 1:3 with the addition of a plasticizer;
- mixtures for self-leveling floors.
We perform the screed using:
The second option is easier to install, has increased strength, but costs much more than cement.
A pipe with a diameter of 16 mm is capable of heating an area 10-15 cm wide around it.
Heating system installation methods
In fact, there are two ways to install heating in the floor under a screed: open and hidden. Each of them has its pros and cons.
Open way
With the open method, the pipeline runs along the perimeter of the room, connecting radiators, which, as a rule, are located under window openings. In older houses, metal pipes were more often used; in modern houses, plastic is preferred.
The use of plastic pipes requires a lot of fastenings, which does not always look aesthetically pleasing.
Note! In this case, the collector wiring will have to be abandoned, since it will be virtually impossible to place so many pipes in the open.
Hidden way
The hidden method involves laying a pipeline under the surface of walls or floors, and laying in walls is used relatively rarely. Such a procedure will be unreasonably complicated: you will need to rout the walls and install thermal insulation.
The most popular way to conceal a heating system is to lay pipes in a concrete floor screed.
A layer of waterproofing, insulation and reinforcing mesh are laid on the subfloor. The pipeline is fixed in accordance with the chosen scheme, after which the structure is filled with concrete mixture. Since the floor is poured after the pipes are laid, there is no need for labor-intensive gating.
Another indisputable advantage is the correct principle of heat distribution. In classic heating schemes, radiators give off heat to the walls, along which it moves to the ceiling area, and only then, when very cool, enters the living area.
Here the situation is the opposite. The maximum level of heat is in the floor area, from where the heated air gradually rises to the ceiling, which creates more comfortable conditions for people in the room, but at the same time, the heating system located under the screed also creates its own inconveniences.
We recommend that you read: How to make a chimney passage through a metal roof with your own hands
Advantages of water floors
Compared to other types of heating, the water system has advantages:
- cost-effectiveness compared to electrical systems;
- lack of visible heating elements compared to central heating using radiators;
- reliability and safety;
- uniform heating of rooms.
A water heated floor system using metal-plastic pipes, if installed correctly, will last more than 50 years.
Flaws
Like all other systems, water floors have disadvantages:
- complexity of installation;
- installation of a water pump is required to increase water pressure in horizontal pipes;
- reducing the height of the room due to several layers required for the installation of such a system;
- are not suitable for use in apartments, since such a system reduces the water pressure in the risers. For more information about the advantages and disadvantages of this design, watch this video:
Most often, a water floor is used for heating private houses, in which case it is fully justified in terms of durability and economic benefits.
It is best to involve specialists who will perform all the work, strictly adhering to installation technology. They will help you correctly calculate the consumption of materials and pipe laying pitch.
Source
Advantages and disadvantages of metal-plastic
Metal-plastic is a five-layer Pex-al-pex tube (Polyethylene, glue, aluminum foil, glue, polyethylene).
The aluminum layer (about 0.2 mm) is the main difference between the composite and high-strength polyethylene.
What does such a structure provide?
Advantages of metal-plastic for heated floors
- Acceptable expansion ratio. That is, when heated, the pipes do not expand too much.
- The aluminum layer makes the pipe both durable and elastic. Excellent quality, considering that the pipe is simply poured into a concrete slab.
- Pipes can be bent, but they retain their shape - this is very convenient for heated floors. The snake can be bent from a single piece without resorting to joints, which are the weak point of the system.
- The temperature at which the pipe can operate stably is + 95 °C, which may be too low for conventional heating, but quite sufficient for a heated floor system. It is usually heated to 28 – 36 °C.
- The operating pressure is 10 bar, while in the average home system it is 1.5 - 5 bar.
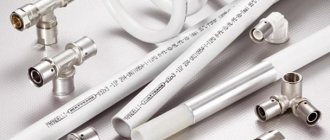
Laying metal-plastic pipes
The glue used is heat-resistant, it provides reliable adhesion of dissimilar materials, they do not delaminate.
Minuses
We must try to do everything so that not a single joint goes under the cement screed!
The O-rings in the connecting elements are not at all as reliable as the pipe itself.
They need to be periodically tightened, and after a few years they may need to be replaced. If this is not done, water will begin to ooze out. In addition, scale may settle at the joints.
Pipes must be protected from freezing.
After many heating-cooling cycles, separation of the components of the material can occur.
Sometimes the disadvantage is called thermal conductivity, which is lower than that of metal. But if you take into account how much more difficult and expensive it is to install metal tubes, their vulnerability to corrosion, weight and tendency to become overgrown with scale, then this disadvantage is covered a hundredfold.
Installation Tools
- Pipe bender or spring jig.
- A cutter (a tool that resembles pliers) helps to make a clear, strictly perpendicular cut without dents or bevels. If it is not possible to purchase a cutter, use a sharp construction knife, but under no circumstances a hacksaw (it leaves a torn cut with many burrs).
- Calibrator (a cross-shaped tool with ends of different sizes for different diameters).
- Open-end wrenches.
- Sandpaper.
- Press jaws. Easy and quick installation with press fittings. Special pressing pliers are used to crimp them. There is also an electric press tool (a gearbox increases the pressing force to several tons), it is classified as professional equipment and is expensive.
Water-heated floors in a private home are the best option for creating a comfortable indoor microclimate.
Do-it-yourself water-heated floor – design and installation features. What kind of warm floor is suitable for laminate, read in this topic.
Features of the installation process
Material calculation and diagram
The required pipe length is calculated. The optimal pitch between turns is considered to be 30 - 35 cm. Knowing the dimensions of the room, you can calculate the length of the pipe for it.
It is possible to significantly save length, without compromising the result, if you do not conduct heating under stationary objects, furniture, etc. This will not only reduce pipe consumption, but also avoid local overheating in the future.
A diagram of laying the heated floor is sketched. There are two options:
Schemes for laying pipes for water heated floors
It is easier to install the snake, but it provides uneven heating - in the far part of the room the water will be hot, and as you move towards the exit, the temperature will become lower. You can take advantage of this by heating the most popular areas, but in small rooms the difference is practically not felt.
The spiral provides even heating, but laying it is a little more difficult; you need to take a double step in order to lay the “return” in the future.
Fitting
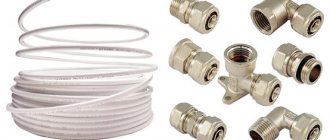
What fittings to use. They come in two types:
- Press.
- Collapsible, crimp or compression.
The first ones are easier and faster to install, but the equipment for them is expensive and not available everywhere.
The latter are cheaper to install, but it makes sense to use them if the object is small, since the time costs are quite significant.
Connection process with compression fittings:
- Both parts of the pipe are brought to a perfect circle using a calibrator. Then the burrs are removed using sandpaper (some calibrators have a chip remover).
- The ferrule nut and union ring are unscrewed from the fitting. The quality of the sealing ring is checked - it should not protrude from the groove.
- The union nut is put on the first section of pipe, then the ferrule ring (cracker).
- The fitting fitting is inserted until it stops.
- The nut and ring are moved towards the fitting and tightened.
- Use open-end wrenches to tighten the nut all the way.
Press fitting connection process:
- The edge of the pipe is processed with a calibrator and cleaned.
- A compression fitting is put on the pipe (the fact that the fitting has gone in deep enough will be shown by an indicator - a special window).
- A nozzle of the appropriate diameter is inserted into the press (the base of the tool rotates, so it is convenient to work with it in any place and position).
- The pipe is placed in the mouth of the press and crimped in a few seconds.
Crimping method
There is no need to purchase separate tools to make a crimp connection. Use fittings, a press ring, and a wrench.
A pipe cutter is needed to remove uneven edges. To increase the internal diameter of the pipe, calibration with a countersink is intended. How to make a crimp connection?
- The edges of the pipes must be smooth. To do this, measure 2-3 cm from the end of the product and set a mark. Using this mark, a pipe cutter is used to form the correct chamfer; remove part of the outline.
- Fittings are selected depending on the size of the diameter of the circuit, but the connecting elements have round rubber inserts-seals. To prevent their deformation, it is necessary to slightly increase the diameter of the pipe. To do this, use calibration with a countersink. The tool is inserted inside the contour and rotary movements are performed. Chips are removed from the inner surface. This increases the diameter.
- A crimp ring is placed on the pipe.
- Insert the fitting.
- Press the ring onto the fitting. Screw the crimp nut by hand. In the future, 2 keys are used. One is for holding the fitting, the other is for tightening the press-on nut.
- Check the assembly of metal-plastic pipes.
We recommend: What is the difference between Unimat heated floor models?
This connection method is used most often. Installation is quick and does not require expensive equipment. The crimp nut securely holds the metal-plastic contour.
Press crimping with electric crimper
In order to connect individual sections of the highway using a crimp, an electric crimper is used. The kit includes nozzles with holes that correspond to a certain pipe diameter for “warm floors”. Pressure testing is carried out as follows:
- carry out preparatory work: form a chamfer and increase the diameter of the product using calibration with a countersink;
- install the fitting;
- a compression ring is put on one end;
- a nozzle is attached to the tool; it is made in the form of tongs; they are separated, a pipe is inserted;
- connect the tool to the electrical network;
- connect tongs; a click will be heard;
- hold them in place for 2-3 seconds;
- disconnect the pliers and check the crimping area.
Installation is quick. The line connects reliably, withstands high coolant pressure, and no leaks occur. The disadvantage is the use of expensive equipment. IN
In place of an electric crimper, you can work with a hydraulic tool. It costs less, but crimping requires physical effort.
Press crimping with hydraulic device
The hydraulic crimper is a pliers. Nozzles for pipes of a certain diameter are installed on them; they have the shape of a semicircle; use nozzles in pairs.
The diameter size is indicated on the surface of the product. One semicircle is located on the body of the forceps, the other on the head. The nozzle is inserted into the grooves until it clicks.
- Preparatory work is carried out: a chamfer is formed and the diameter is increased.
- Put on the crimp nut and insert the fitting. The fitting has holes. They determine the correct location of the pipe.
- Place the junction on the body of the forceps and close the head.
- Enlarge the handles of the crimper. This will increase the load during crimping. The handles are at an angle of 1800.
- Connect the handles. At the same time, the forceps are compressed. The fitting and ring are connected.
- The handles open and the head of the device opens. To open the head, you need to hit it with your palm.
- Remove the pipe and test the connecting assembly.
If there is a rupture in the line, then the space on the floor is cleared of the screed and the circuit is opened. Wash the internal and external walls. Make sure that debris does not get inside the pipeline.
Connect individual sections of the circuit. It is recommended to cover the unit with pipe insulation. The material will protect the fittings from oxidative processes. Fill the line with a building mixture for “warm floors”.
Manual hydraulic press Viar
Connection nodes are installed closer to the boundary of the water circuit so that they are easily accessible; They do not open the entire “warm floor”. The fittings are protected with plastic or insulation. The circuit diagram is transferred to a sheet of paper in order to further determine where the main connection nodes are located.
We recommend: What types of mats are there for warm water floors?
Metal-plastic pipes for “warm floors” are a good alternative to polyethylene products. When using the main line, it is necessary to monitor the heating mode.
Do not allow increased pressure in the water circuit to exceed 10 bar, or liquid temperature to exceed 90 0C. The “warm floor” is connected to the boiler, to the collector or to the radiator.
YouTube responded with an error: The request cannot be completed because you have exceeded your quota.
- Related Posts
- What characterizes Rehau underfloor heating?
- How is a heated floor connected?
- How to lay a heated floor in a bathroom under tiles?
- Should I use penoplex for heated floors?
- How to lay heated floors over wooden joists?
- What kind of warm floor can be laid under a carpet?
How to bend metal-plastic pipes?
It is best to make turns and bends using a special pipe bender.
This is a hand-held lightweight tool that allows you to very quickly and accurately make any shapes and configurations.
Often, ordinary people do not have a pipe bender. And if the budget is limited, and the quality of the bend is not too important, then you can do it manually, with a spring - jig. This is an inexpensive device (about 150 - 300 rubles) that will help avoid defects.
The fact is that if you bend pipes simply by hand, then, without sufficient experience, you can easily exceed the permissible radius, flatten and break the tube. The conductor will help make a bend from three radii of the pipe. It can be internal (more convenient to work with, but with small sections of pipe) and external, which is easier to move over a long section.
How can you bend metal-plastic pipes?
Metal-plastic pipes for heated floors can be rotated and bent with a special device - a pipe bender. It is designed for manual pipe processing, lightweight and maneuverable, the pipe bender accurately and quickly forms any structure.
As a rule, the average person does not have a pipe bender in stock, and purchasing one is completely optional. With a limited budget, you can bend the pipe manually using a spring jig.
The device will cost about 150 rubles and will reliably protect you from defects and mistakes. Without such safety net, the radius is often exceeded, the pipe breaks or becomes too flattened.
Thanks to the conductor spring, bending from three radii is performed efficiently and accurately. The device is found internal or external, which easily moves along a bending pipe.
Price
Metal-plastic is one of the most inexpensive heating installation options if you use the services of construction organizations. The cost of a linear meter can be from 120 to 500 rubles.
As a rule, the price includes all necessary operations - stripping, connecting with angles and fittings.
The cost of the metal-plastic pipe itself will depend on the manufacturer and cross-section. On average, this is 35 – 90 rubles per linear meter.
Fittings can vary greatly in price, depending on the type of metal, as well as the configuration. Prices for compression fittings are 130 – 380 rubles. Complex angles, adapters and tees can cost 500 - 700 rubles per unit.
Press fittings are a little cheaper, on average 100 - 250 rubles.
The complexity of installing a water floor stops many people. Expanded polystyrene for heated floors is an excellent option to simplify pipe laying.
Options for underfloor heating under laminate are described in this information.
Conclusion
So, metal-plastic pipe is excellent for creating warm floors and is very popular due to its ease of installation, affordable prices for materials and installation work.
All that remains is to advise working with a professional tool (small savings here can result in defects and losses due to hidden installation flaws). If you don’t have the funds to purchase a pipe bender or cutter, you can rent them.