A small corridor separating the entrance to the steam room and the relaxation room with a washing compartment is always perceived by customers as a secondary room. Its arrangement is often approached only after numerous problems with the steam room and sink have been resolved, and this is wrong. You need to properly make the floor in the dressing room, insulate it and equip it with air vents right away, without putting the problem off for a long time. Otherwise, there is a risk of getting a stinking swamp under the floor.
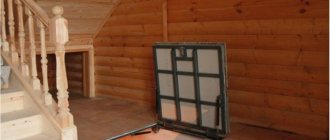
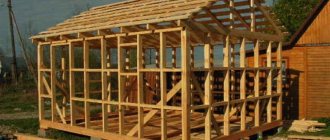
In a simple country bathhouse, the dressing room is created by installing a wall
What should be the floor in the waiting room?
The problem is not as simple as it might seem. They usually spend a long time fiddling around with a steam room, insulating it and making two-level ventilation. The rest room is also insulated; a high-quality covering, laminate or polished board is laid on the floor. In the dressing room, few people think about the quality of the coating; the room is mostly technical. There is a portal for loading the furnace firebox, a supply of brooms and firewood, and a tub of water. Therefore, many bathhouse owners do not think much about the material and decide to put on the floor in the dressing room what is left in stock from the renovation. You can often find linoleum and old waterproof laminate removed from an apartment after a major interior renovation. It is better to make a plywood floor than to use PVC.
Flooring options for baths with stove and electric heating
There is also a completely opposite approach to solving the problem. For example, you can find numerous options for a step-by-step guide to arranging the floor in a dressing room with your own hands. Most often, such documents refer to the classic, but long-outdated SanPiN 982-72, with standards on how to make a bathhouse from materials of the last century.
Insulating the dressing room from the outside
These procedures should be performed in order to reduce the amount of heat loss. This will also make it possible to maintain the same temperature in the steam room itself. You can insulate a dressing room with your own hands both from the inside and the outside.
Walls
They do not need to be treated with any impregnation on the inside, since in most cases it contains substances that can evaporate when heated. You can insulate the walls from the outside with foam plastic or other thermal insulation, which is used for arranging ordinary buildings, since the insulating material from the outside will not be affected by high temperatures.
It is important to install a vapor barrier on the walls. It will not allow moisture to penetrate the walls and condensation to form. This will also prevent fungi from appearing there. The vapor barrier is pressed to the base using a wooden beam.
Ceiling
Some warm air can also escape through the roof. You can reduce the amount of heat lost by installing thermal insulation in the attic. To do this, you need to create a wooden frame in the attic for laying insulation. It is recommended to make two layers, sprinkling them with expanded clay. A waterproofing material is also placed under the thermal insulator, which will prevent moisture from escaping from the steam room. Upon completion of such work, the attic floor is covered with boards.
A video on how to perform such work is below:
Floor installation for a simple bathhouse and dressing room
In order to properly make the floors in the dressing room, it is enough to adhere to the following practical recommendations:
- For large rooms, if the seating area and the dressing room, and often the washing compartment, are combined into one room, the floor will need to be made of the same type throughout the entire area. Popular projects with laminate and bath tile inserts are not suitable due to low resistance to moisture;
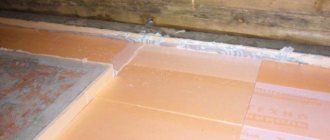
- If walking on the floor barefoot is allowed in the dressing room, then it is better to make the floor wooden according to the pouring pattern. You can make a concrete floor tiled without glaze and with a non-slip surface;
- The floor in the dressing room must be washable. The exit from the dressing room to the steam room and the area around the firebox collect the most dirt, soap and water. All this needs to be flushed into a collection gutter around the perimeter;
- If the coating is made according to the pouring scheme, then the floorboards or deck boards - gratings should be easily dismantled. This is necessary for cleaning and periodically treating the floor in the bathhouse dressing room with disinfectants, and once a year - soaking the boards with oil.
Regardless of the material used and the design of the dressing room, the floor covering must “hold” heat well and at the same time be blown to dry the covering. Without ventilation, tile floors become extremely slippery as moisture accumulates.
Important! Unlike a steam room, a small amount of heat, as a rule, enters the dressing room; the air and the floor surface are heated by radiant energy from the furnace firebox.
Therefore, it is important to insulate the floorboards, and even better, equip them with heated floors. It is better to abandon the old schemes of spilling water through the floor of the dressing room onto a sand and gravel cushion on the ground. If the steam room is very small, stands on stilts, and the dressing room is combined with a sink and a place to relax, then the deck scheme is the only possible one. It is easier to make such floors, but the presence of odors of rotting water and soap obviously will not add comfort. As a last resort, you can make a dressing room with a pit under the floor for a temporary summer bathhouse at the dacha, and only for the summer construction period.
Another nuance is related to ventilation. When planning insulation and ventilation of the floor, it is important not to overdo it with air performance. The firebox takes quite a lot of air from the dressing room, and all that needs to be done is to install an inlet window with an adjustable damper on the wall opposite the portal. Without it, the air above the floor becomes very cold, and anyone emerging from a hot steam room will receive sensations comparable to immersion in an icy stream.
If the stove is located inside the steam room, then it is better to make the wooden floors of the dressing room according to the given diagram.
The floor in the room warms up thanks to the air intake from the stove in the steam room through the pouring grooves
What material is better to make the floor in the waiting room?
It is not difficult to plan the structure; usually they use already existing insulation and ventilation schemes. You just need to choose the right material and make the floor according to a repeatedly proven design.
Concrete
Massive interest in the use of tile and concrete floors coincided with the development of technology for electric floor heating, both in the steam room and in the dressing room or washing department. A concrete floor with a tiled surface allows you to solve several important problems that plague all dressing rooms, regardless of design and size:
- The floor is reliably protected from moisture and condensation;
- The flooring is not afraid of temperature changes and any types of pollution;
- If you make the heating automatic, you can not only dry the floor in the dressing room, but also heat most of the bathhouse room.
A fairly simple installation of underfloor heating on concrete makes it possible to create heating even without the use of electricity. Heating can be achieved by circulating hot water from the heat exchanger in the furnace to the circuit through pipes laid under the tiles. The only significant drawback is the increased load on the joists, foundation and base.
Wood
Most baths are built with wooden floors, both in the steam room and in the dressing room. They are faster and easier to make than laying tiles on concrete. Wood is easy to repair and does not require significant construction costs, as is the case with heated flooring.
The classic floor arrangement in a dressing room in a wooden bathhouse is shown in the diagram below.
All you have to do is cut out the hardwood floorboards, install waterproofing and insulation, and install a water drain.
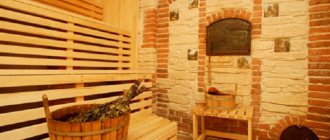
Waiting room
We will give you some tips on how to arrange a dressing room with your own hands correctly and without unnecessary costs:
- Experienced builders recommend installing small doors to the dressing room, within 1.85 m in height and 0.85 m in width . We install doors so that they open inward, and not vice versa. All this minimizes heat loss and air capture from the street through the doors.
- The windows can be made large in width, at a height of at least 1.5 m, then they will become a good source of natural light . Take care to install window units airtight.
- The walls and ceilings of the dressing room should be insulated not only to save energy, but also to create a comfortable environment and preserve one’s health.
- For the same purpose, heated floors are created in the dressing room..
Note! In the process of creating comfortable conditions for staying in a given room, special attention must be paid to the tightness of all structural elements. To do this, use both liquid sealants and various insulating materials.
In the photo - the laying of communications in the dressing room is carried out only in special protective corrugated pipes
Waiting room floors
You should worry about insulating the floor structure in the dressing room already at the stage of laying the foundation for the bathhouse.
When designing the base, its functional purpose is taken into account; the room preceding the steam room can be:
- Just a small changing room with a couple of benches and hooks for clothes and towels.
- A large recreation room with soft, comfortable furniture and various household appliances for entertainment.
- A whole complex with a swimming pool, shower or modern hydrobox.
Depending on this, a decision is made on what material to use for the flooring. Despite the apparent simplicity of the task, our bathhouse establishment has its own nuances in arranging the floor in the bathhouse.
Finishing is used traditionally:
- Ceramic tile covering in shower and pool areas.
- Wooden floors throughout the entire area for rest rooms and locker rooms.
Whatever covering option is adopted, it should be remembered that the floors, both in the steam room and in the dressing room, constantly operate in high humidity mode. Therefore, the main condition for installing floors in a bathhouse is the organized, unimpeded drainage of water from them. Second and equally important, the floor surface should be warm and comfortable for the feet.
No one likes to step on a cold and slippery floor when leaving the steam room. The cost of miscalculations when installing floors in the waiting room is discomfort and possible adverse health consequences.
Use only natural materials for the bath, this will have a beneficial effect on your health
Insulation methods
In the dressing room, it is quite possible to use the installation of an alternative “warm floor” heating system under the finishing floor covering (especially under tiles):
- Vodyany.
- Electric.
- Infrared.
The cost of setting up such a system, of course, is not small; not everyone can afford it, but, on the other hand, the efficiency and practicality are incomparable.
The classic method of insulating floors from heat loss will be cheaper and simpler, moreover, it will be more suitable for wooden flooring and you can do all the work yourself.
Here are step-by-step instructions for installing a heated floor for a bath using conventional thermal insulation.
If you already have a floor, but it is very worn out, then the first step is to dismantle the old covering
- We nail the bars to the joists. This will be the frame for the rough coating.
- We make the subfloor from boards (not planed). We nail boards 20-25 mm thick to the frame perpendicular to the joists.
- We fill the space between the joists with any heat insulator you choose. If necessary, then in several layers.
Advice! For wet rooms it is better to use cheap polystyrene foam or polyurethane foam.
- We cover the insulation layer with waterproofing for the bathhouse floor made of polyethylene film.
- We fasten the finished floor boards to the joists using self-tapping screws or using nails that are driven in at an angle.
Remember - the foundation must be strong and reliable to withstand subsequent loads
For your information! Unlike a steam room, where painting or varnishing the wood trim is undesirable, in the dressing room you can use rubber paints that work well in high humidity conditions.
Wood, in addition to varnish and paint, must be coated with protective antiseptics to prevent the development of mold and fungi
How to cover the floor in the dressing room
There are not many options for flooring for a room. First, no fabric or synthetic rugs. The floor in the dressing room should be made either of planks or under ceramic tiles.
For flooring, use a non-grooved polished board - a forty board made of coniferous wood, without knots or defects. It can be made from larch, which will result in a floor with an unlimited service life, but in this case the boards must be polished and waxed to avoid chips breaking off and splinters appearing.
If there is no firebox portal in the dressing room, then you can lay a terrace board. For old, heavily worn floors, removable wooden ladders are often used.
For a concrete floor, the best covering would be porcelain tiles; they do not slip and conduct heat well from the built-in heating system.
Metal floor with screed
If the name misleads you, then look at the diagram:
Corrugated sheet base for screed
This solution is very original and simple. It will certainly suit those whose priority is tiling the floor in the dressing room with ceramic tiles.
The design using profiled sheets combines the practicality of a monolithic slab and the simplicity of a beam floor.
Let's look at all the layers from bottom to top:
- The basis is the foundation and beams (both wooden and metal).
- Subfloor, insulation, vapor barrier - similar to a wooden floor.
- The profiled sheet is laid on the beams and secured. Type H profiled metal products have the highest load-bearing capacity.
- Reinforcement with 12 mm rods. They fit into each wave of corrugated sheeting. To strengthen the structure, transverse reinforcement bars are added.
- The resulting frame is filled with concrete or a strong screed.
By correctly calculating this design and completing all the steps efficiently, you will get a reliable and practical floor for the dressing room.
How to make a wooden floor in a dressing room with your own hands
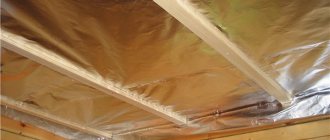
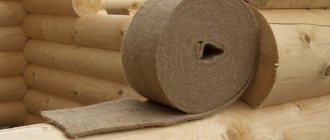
The simplest option is to lay floorboards. But if there is no expanded clay under the bathhouse, the floor in the dressing room will also need to be insulated. You can make thermal insulation based on expanded clay gravel, but the best material is mineral wool.
The easiest way to insulate a floor
For a wooden bath, mineral wool is many times more convenient and safer than polystyrene foam and polyurethane foam. Expanded clay turns out to have too high thermal conductivity, its performance is several times worse than mineral wool.
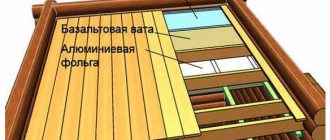
Therefore, it is easier and more convenient to make a wooden floor in the dressing room according to the diagram below.
What are its advantages:
- The vapor barrier film reliably protects the floorboards from water vapor rising from the ground;
- Mineral wool retains heat in the ventilation gaps between the film and the floor, which allows the floorboards to completely get rid of moisture and condensation.
After heating the steam room, floors and insulation, the mineral wool “pushes” excess water vapor from the lower layers of fibers towards the ground. Therefore, even in winter there is no icing of the insulation.
We put logs and a rough base under the insulation
The first step is to make waterproofing from roofing felt under the support platforms for the joists.
Next, we lay the timber on the foundation strip so that the frame of the subfloor of the dressing room is stable, and we sew the logs together with short inserts. If the thermal insulation is planned to be made from durable mineral wool mats, then it will be enough to fill the skull blocks.
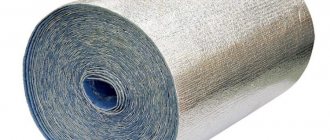
For lightweight rolled thermal insulation, it is better to make a continuous hem, as in the photo.
Laying insulation
It is best to do the insulation in several layers, so that there is an overlap at the seams, and at the same time the edges of the slabs or rolled material fit quite tightly to the side surface of the joists.
The thickness of the floor insulation must be such that there is a gap of at least 30 mm between its surface and the floorboards.
Correct position of vapor barrier
The last stage is laying the insulating film. It is rolled out into strips from rolls, leveled, slightly upset and glued with tape.
Along the perimeter of the assembled panel you need to overlap the walls and fix it with a plinth.
Laying floorboards
The laying of boards in the dressing room is somewhat different from a regular floor. Firstly, the floorboards are laid parallel to the plane of the wall separating the dressing room from the steam room. Secondly, on the site before the firebox, the boards are laid on the floor without a gap, treated with a stain and varnished with a heat-resistant compound. The rest of the floor needs to be made with gaps between the boards, approximately 1-1.5 mm per joint.
Structural elements
To meet the requirements, the floor in the bathhouse's vestibule is structurally a “layer cake”. The design includes the base of the floor (subfloor), thermal insulation, waterproofing, vapor barrier and finishing (floor) coating. In different bath rooms, the floors are in different conditions, and the level of their surface often helps to ensure operability.
The photo shows the characteristic floor height in the bathhouse and dressing room. The lowest floor is provided in the washing compartment. Here the water flows in streams, and it must not be allowed to pass into other rooms. The highest level is in the steam room, where moisture is collected and removed underground. The height of the flooring in the dressing room is also too high, which is due to the need to lift it from the ground and lay insulating layers.
A Russian bathhouse is most often built of wood, and therefore the main problem is how to ensure insulation of the floor in the dressing room of a wooden bathhouse. Like the entire structure, in this case the floor structure is made of wood. The subfloor is made of logs, between which waterproofing, thermal insulation and a vapor barrier layer with foil are laid alternately. The question of how to cover the wooden floor in the bathhouse's dressing room from above can be solved in different ways. The most common option is plank flooring, but other floor coverings can also be used.
The second common option for a subfloor for a dressing room is a concrete screed. It is a fairly cold surface, and therefore requires reliable thermal insulation. The finished floor or flooring in this case is usually made of wood.
How to make a warm concrete floor in a dressing room
It is known from experience that the best solution for heating tile floors on concrete has been and remains a cable heater. It is simpler, more reliable, and most importantly, it is possible to make controlled heating of the air in the waiting room.
Making a slab
In order to pour a concrete floor, you will need a rough foundation. You can make formwork from boards and plywood, but a sheet of profiled metal with a wave height of at least 40 mm is best.
The sheets are laid on an insulated foundation, a reinforcing mesh is installed and filled with concrete mixture. The result is a very light and durable concrete subfloor in the dressing room.
Laying heating elements
Next you need to lay the insulation. The first layer is laid from EPS boards with a thickness of at least 50 mm, the second is best made from sheets of foamed polypropylene with a reflective layer of foil.
We lay out the heating cable on special holders or roll out the heated floor from ready-made rolls. Before pouring the screed, we check the functionality of the heating.
Advice! Before pouring the mixture, it will be useful to make a sketch or diagram of the wire laying; it will certainly come in handy during subsequent repairs.
Laying tiles
The heated floor screed must withstand without load and switching on for at least three weeks. During this time, you can ventilate the subfloor and conduct wiring to the dressing room. Before laying the tiles, you need to make several test runs, and if the screed has withstood the load, then we prime and lay the decorative tile covering.