Chimneys can be brick, ceramic or sandwich pipes (double). Let's consider the installation of each of these types.
Laying brick chimneys
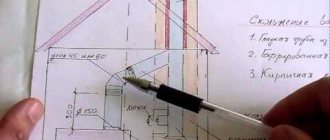
First, familiarize yourself with the structure of a brick chimney. This is the existing standard, but for a bathhouse you can simplify the design a little at your discretion. Of course, one should simplify wisely; changes should not cause the structure to self-destruct or lack the necessary traction.
Brick chimney diagram
Brick chimney installation
It is better to do the masonry from the stove to the ceiling using clay mortar; above, you can use cement-sand mortar; above the roof, only cement-sand mortar.
How to install a chimney?
Bricklaying Tools
Step 1 . Make markings for the chimney on the ceiling and roof, the holes must be strictly vertical, use a plumb line or level. Cut holes to the calculated dimensions. Prepare sawhorses and solution.
Step 2. Start laying out the top part. It is placed on the prepared place of the furnace; the nominal diameter of the passage should ensure stable draft under different climatic conditions and furnace firing modes.
Important note - make the internal passage as smooth as possible, immediately seal the seams. Any irregularities cause turbulence in the air flow; a large number of irregularities can significantly impair traction. Even with normal nominal flow rates, the thrust will be insufficient.
Check the position of each row; it is impossible to correct mistakes made during laying; the bricks will have to be removed. In order to constantly control the verticality of the chimney, stretch the thread between the corner of the first row of the nozzle and the corner of the hole in the ceiling. This simple device will allow you to lay bricks vertically. The thickness of the chimney is half a brick, which is enough for a bathhouse.
Chimney - order
Step 3 . Laying fluff. This unit not only protects the ceiling covering from spontaneous combustion, but rather serves as an element for fixing the chimney. Fluffing is the expansion of the outer walls of a structure; to increase their stability, you need to use pieces of building reinforcement. The fittings should not extend into the chimney opening and be visible from the outside.
Pipe fluff Dimensions of pipe fluff
Each new row should protrude slightly (by a quarter) above the previous one; after three rows, the width of the chimney should be one brick. The widest point should be at the level of the ceiling covering.
Step 4. A very important step. The chimney needs to be secured. To do this, nail the edged boards close to the fluff around the entire perimeter. They will hold the chimney and will not allow it to sway during wind loads. The boards are nailed onto the upper ceiling covering. The ideal option is for the fluff to be placed close to the ceiling beams, but this situation rarely occurs.
Step 5. You need to turn the fluff into a riser again. Gradually reduce the outer perimeter of the chimney. So lay the chimney before covering the roof.
Laying a chimney riser in the attic space
Step 6. Otter. This structure serves to drain rainwater. The size of the riser is a quarter of a brick. You need to lay it using the same technology as fluff. To ensure that the internal dimensions of the chimney do not change, use special thin inserts. The height of the otter depends on the angle of the roof. The main condition is that the otter should start from the bottom of the roofing and protrude two rows above the top point.
Otter
How to make a chimney
Step 7 . Next, you can lay the neck of the chimney, if desired, the head and install a metal lattice cap.
Choosing the height of the chimney depending on the distance to the ridge
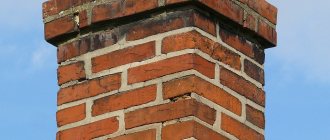
Brick chimney
Step 8. Sealing the joint between the otter and the roofing. Do all sealing work very carefully; the choice of a specific method and additional elements depends on the type of roofing. There are a huge number of different methods, the decision is made on the spot, taking into account the maximum number of existing factors.
Chimney on the roof
Chimney waterproofing diagram
Brick chimneys are among the most complex and expensive types of chimneys; modern materials and technologies make it possible to install simpler, but no less effective structures.
How to install a sandwich chimney
Insulated chimneys (sandwich)
Scheme for installing a sandwich chimney
New designs look great, are quickly installed, and have a long service life. All performance characteristics are at the highest level. The only drawback is that the price of these structures is at the same high level.
Manufacturers complete their products with a full set of additional elements: elbows, tees, clamps, plugs, ceiling-passage units, heads, protective screens. The specific choice of additional materials should be made taking into account the design features of the chimney.
How to make the right chimney
Correct joining of sandwich pipes
One of the advantages of a sandwich chimney is the presence of a layer of insulation that protects the outer pipe from overheating. In addition, this layer allows the inner tube to heat up quickly, which minimizes the amount of condensation, which prevents soot from sticking to its walls.
Sandwich chimney installation algorithm
Step, No. Illustration Description
| Step 2 | Unloading unit in the attic | Take all dimensions and determine the installation location of the unloading unit. It is made in the attic of the bathhouse; it takes on the load of the pipe coming out from the ceiling. In addition, the unloading unit does not allow lateral vibrations to occur. If you have a large distance between the attic floor and the roof, then you need to install an unloading unit; if the distance does not exceed 1.5 meters, then no additional stops are needed. The unloading unit consists of metal corners and installation elements. Metal corners are fixed to the legs of the rafter system; make the fastening as reliable as possible. |
| Step 3 | Starting chimney pipe | Install a starter sandwich on the outlet pipe of the stove; it should fit tightly into the pipe; select the dimensions at the time of purchase or change the diameter of the smoke outlet pipe from the stove. |
| Step 4 | Clamp for sandwich pipes | Please note: the inner pipe must fit into the outlet of the oven, and not cover it. All individual pipe sections are inserted into one another; transitions and bends must be additionally secured with clamp clamps. |
| Step 5 | Cutting the bath ceiling Preparation and installation of ceiling penetrations | Where the pipe passes through the ceiling, a ceiling groove should be installed to close the outlet hole in the ceiling and give the structure stability. A pipe with a slightly larger diameter (pass-through) than the diameter of the outer pipe of the sandwich is welded to the ceiling groove, due to this the abutment area is increased and deformation is eliminated during the occurrence of strong lateral loads. The passage allows the sandwich chimney to move up/down and prevents lateral vibrations. In order to minimize heat loss through leaks, it is recommended to use mineral wool. Place it under the ceiling groove and tighten it tightly to the ceiling with screws or nails. |
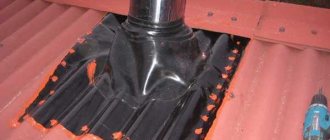
| Step 6 | Chimney passage through the roof Diagram of the chimney pipe outlet through the roof of the bathhouse | Make holes in the sheathing and roofing. Next, proceed to sealing the chimney outlet, use a roof penetration for this. All joints must be coated with sealant. If you wish and have free time, you can put an additional sheet on the cover. The waves must match; secure it with self-tapping screws and rubber sealing washers. Treat all accessible and “suspicious” cracks with sealant. The chimney outlet should be 50 cm above the level of the roof covering. |
| Step 7 | Mushroom for pipes with thermal insulation (Thermofungus) | Install a fungus at the top of the chimney. |
As an experienced master can notice, the installation algorithm has been significantly simplified. We did this specifically to speed up and reduce the cost of work. At the same time, the functionality and safety of the chimney has not deteriorated. You can, of course, install spark arresters and deflectors, thermal fungi and weather vanes, and other parts. If you have the desire and money, install it.
Video - Sandwich pipe chimney
Video - Chimney installation
Ceramic chimneys
New systems are characterized by high performance, very reliable and beautiful, and are relatively easy to install. They consist of three parts: an internal ceramic pipe, a layer of insulation and external facing ceramic bricks of a special profile. The ceramics have holes in the corners for installing metal fittings. At a price higher than sandwich chimneys, manufacturers produce a large number of different types of ceramic chimneys, differing in appearance and design features.
They do not require additional protection of wooden architectural elements. Disadvantage - they can only be erect. We will look at the easiest way to install chimneys of these types in a bathhouse.
Step 1. Prepare the installation site, it should be level. Chimneys can be installed on a separate foundation near the stove or on the upper surface of the stove, it all depends on the characteristics of the bathhouse. For masonry you need to use a special glue; the solution does not provide sufficient strength.
Pipe adhesive is included with the chimney
Prepare metal reinforcement ≈ 1 meter long, the diameter of the reinforcement is within the limits. 5÷10 mm. With its help, we will additionally fix the structure, this will make it possible to completely eliminate violations of the integrity of the chimney. Make holes in the ceiling and roof; there is no need to provide a margin of size; a ceramic chimney will perfectly protect wooden elements from high temperatures.
Installing the first block on a waterproofed base Filling the first block with glue Installing the first part of the chimney
Step 2. Install the first two halves of the ceramic, lubricate the lock with glue, check the position of the halves, and align them if necessary. Insert metal reinforcement approximately one meter high into the side holes. The gaps between the reinforcement and the ceramics need to be filled with glue. You should not try to completely fill the hole; it is enough for the glue to connect the reinforcement and ceramics in several places.
Installing the second internal part
Step 3. Wrap thermal insulation around the ceramic pipe, pull it slightly to the pipe with metal wire or a special clamp. Do not tighten too much, do not allow the heat insulator to shrink. As a rule, a layer of pressed mineral wool is used as a heat insulator.
Step 4. Insert the pipe into the hole of the ceramic, check its position. To speed up the process, you can immediately wrap all ceramic pipes with insulation; the number of pipes should correspond to the height of the chimney.
Step 5. Place the second ceramic on the glue, check the position again. Now you need to insert another pipe. It is placed in the socket first on the glue. It is difficult to get to the lower bell; you need to make some basic adjustments. Take a small plastic bag made of thick film and cut off one corner. It should look like a package that women use when spreading cream on cakes. Through the cut corner, the glue will lie exactly in the pipe socket. Remove the remaining glue from the inner surface of the pipe immediately, do not allow various drips to appear. They swirl the air currents and significantly worsen the draft of the chimney.
Step 6 . Repeat the described operations, constantly monitoring the position of the chimney. If the length of the protruding reinforcement becomes shorter than the height of one block, insert new rods into the holes. Exit the chimney to the attic of the bathhouse.
Step 7. Carefully seal the gaps between the chimney and the ceiling coverings. For these purposes, you can use ordinary wooden skirting boards or decorative baguette.
Step 8. Reinforce the chimney in the attic. Cut the boards to fit the opening, lay them around the perimeter of the chimney and nail them firmly to the attic flooring. If the height of the attic does not exceed one and a half meters, then such fixation is sufficient. If the height is greater, you will have to make another structure to fix the vertical position of the chimney. Secondary fixation is made to the rafter legs as high as possible. You can make stops from wood or use metal corners. Choose a specific design taking into account the location of the chimney exit and the characteristics of the truss system of the bathhouse.
Step 9: Seal the roof where the chimney exits. Select the sealing method and materials depending on the characteristics of the roofing. These works in themselves do not require great skill; they only require attention and strict implementation of all technological operations. For sealing, you can purchase factory-made additional elements or make them yourself. We recommend choosing the first option; the roof is not the place where you can experiment. All leaks inevitably cause big problems.
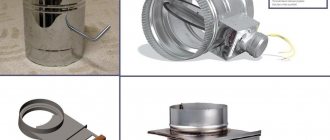
Chimney Cleanout Door
Video - Installation of a ceramic chimney
Video - How to install a ceramic chimney
Some general tips
We strongly recommend that if you have only seen brick and trowel on TV, do not immediately start laying a chimney. Lay out at least 10 rows of bricks on the ground, “teach your hand and eye,” learn how to tie, widen and narrow the wall. And further. Don’t read articles that start with the words “it’s very easy to make a brick chimney yourself.” Such articles are written by those who have not done anything themselves and have not seen how others do it.
It’s better to practice laying a chimney in advance without using mortar
After completing all the work, you need to check the “functionality” of your design. For brick stoves with brick chimneys this is not easy. At first there will never be any draft; the stove and chimney must “dry and heat up.” If it’s summer and you have time, open the windows in the bathhouse, the blower and furnace doors in the stove, and the dampers in the chimney. In this position, the chimney should dry for about two weeks.
Fire up the stove and check the draft
If you don’t have time, then heat with wood; it should only be completely dry. You need to heat it every day, but without too much enthusiasm, do not throw away a large amount of firewood. Take only a few dry logs for each fire. After the wood burns out, do not close the firebox and valve, let the masonry dry until the next day.
How to properly make a chimney in a bathhouse
Of course, it’s not just about the fire safety of the structure. Even a beginner can handle installing a chimney in a bathhouse through the ceiling and roof, especially since there are a sufficient number of ready-made stainless steel kits on sale. In order to obtain the maximum level of protection, it is not enough to remove the pipe in the bathhouse through the ceiling; you will need to correctly select the method of installing the chimney and its parameters.
When choosing a pipe design, it is advisable to give preference to:
- Lightweight composite models make them easier to install in a bathhouse, repair and change sections;
- Chimneys made of heat-resistant alloy steel with a minimum number of inserts made of black steel and other materials. Everything except stainless steel burns to holes;
- If you plan to make a brick pipe and stove in the bathhouse, then the cross-section, height and outlet pattern of the chimney will need to be chosen especially carefully.
For your information! Brick walls quickly become overgrown with soot, so the throughput of the smoke channel can be reduced by 30-40%.
Therefore, the height of the pipe in the bathhouse is selected with a small margin to ensure increased productivity, and excess air is compensated for by a built-in valve. As the brick becomes overgrown with soot, the valve has to be opened to a higher air flow rate.
Types of chimneys in a bathhouse
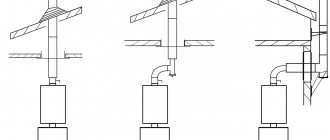
The chimney can be made in three versions:
- A simple outlet through the ceiling, the chimney is made in the form of a vertical through channel passing through the ceiling and roofing pie;
- A broken type of chimney, made of steel. It has horizontal sections up to 150 cm long, allowing you to connect the vertical outlet channel with the outlet flange of the furnace flue gases;
- A chimney with an external pipe arrangement. The external channel for removing gases is vertical and mounted on the outer surface of the rear wall of the bathhouse.
Often the stove and chimney in a bathhouse are built of brick. A chimney type of pipe is usually used to exhaust smoke. It is somewhat different from the schemes used in ordinary brick stoves in dachas or private houses. Such a pipe has a smaller height, the masonry is twice as thin, the brick must be subjected to a protective coating to prevent cases of sweating and the accumulation of black and dirty sooty condensate.
Installation options for a metal chimney
Features of a brick chimney
Any chimney must efficiently remove from the room the products that result from the combustion of fuel. This requires good traction. Unlike a metal one, it is much more difficult to equip a brick chimney for a bathhouse with your own hands. Here it is necessary to take into account the tightness of each seam, monitor the established dimensions and strictly follow all fire safety rules. You need a competent diagram that will help you understand all stages of construction.
Red brick chimney
However, a brick chimney has undoubted advantages:
- excellent traction in almost any weather conditions;
- durability, long service life;
- high fire safety;
- good accumulation and retention of heat;
- external attractiveness.
Brick chimneys are either root or mounted. The first are erected on a foundation next to the furnace and connected to it using a pipe. Suitable for heating devices made of cast iron and brick. They can be connected to 2 and even 3 ovens. Mounted pipes are an integral continuation of the entire heating structure, and therefore are not connected to other stoves.
It should be borne in mind that soot is often deposited on the inner surface of a brick pipe, which has corners and an uneven surface. Because of it, traction decreases. An overly sooted chimney can cause a fire. Therefore, it is necessary to regularly clean the chimney and monitor the draft.
Advice. When making a brick chimney for a bathhouse with your own hands, do not get carried away by the idea of giving it an unusual shape. Various protrusions and bends will provoke the accumulation of soot. It is almost impossible to clean such a pipe on your own. It is better to choose a cylindrical design.
General requirements for a chimney in a bathhouse
The first thing you need to pay attention to is the performance of the stove. The required thermal power of the furnace is first calculated. It is determined by the cubic capacity of the steam room and the bathhouse as a whole.
Knowing the power, we choose the stove model we like, for which the manufacturer has already made calculations and indicated in the passport the recommended cross-section and height of the pipe in the bathhouse. For a small bathhouse with a 3-4 kW/h stove, a cross-section of 150x150 mm will be sufficient for all rooms; for medium and more powerful heaters, up to 5 kW/h and up to 8 kW/h, a chimney of 150x200 mm and 200x200 mm is recommended, respectively.
Most often they buy a ready-made double pipe made of stainless steel, or in other words, a sandwich. Inside the outer cold lining there is a hot, heat-resistant tubular insert - a channel through which, in fact, hot gases move. In the wall space between the walls, thermal insulation made of basalt fiber is laid.
Brick chimneys for small baths have long been considered exotic, since installation requires serious knowledge and professional skills of a stove maker. It only makes sense to install such a pipe in a bathhouse on brick heaters combined with a fireplace portal leading into the rest room. Often a brick chimney is used as a heat accumulator for small country houses built with a bathhouse under one roof.
Chimney installation in a bathhouse
A metal chimney must consist of at least six main components:
- Adapter flange with a rotating elbow or the first vertical section of the chimney. This is the hottest part of the pipe, so the flange collar must be made of thick metal, and the part of the outlet channel attached to it must be made according to a sandwich design;
- A water heating system in the form of a mounted tank or in the form of a coil may or may not be installed. The choice depends on the water heating scheme in the bath;
- A two-section pipe, an adapter from the flange on the stove to the passage unit of the ceiling or walls, for removing flue gases from inside and outside the bathhouse, respectively;
- Passage unit with fluff;
- The section from the node to the roof with an additional belt and fastenings - guy wires. Installed in the roof space of the bathhouse;
- The outer section of the chimney with a cap and seal along the junction line of the roof covering of the bathhouse.
Note! The area from the flange on the stove to the ceiling of the bathhouse should be assembled in two parts. If installed in one piece, the expanding hot metal could push out the seal on the ceiling. Typically, the second section is an insert with a gate valve.
If the chimney is planned to be routed along the external wall of the bathhouse, then instead of guy wires it will be necessary to use anchors with fixing clamps. In addition, the external installation of a chimney in a bathhouse will require additional insulation of the pipe with mineral wool or fiberglass. Without thermal insulation, it will be quite difficult to heat the smoke exhaust duct and achieve normal operation of the bathhouse heating system. The second mandatory element will be a spark arrestor cap. Without it, the risk of burning the roof of the bathhouse in a strong wind increases significantly.
It is clear that the head must have a nozzle that ensures a narrowing at the cut of the chimney channel. This will not affect the draft in the pipe of the stove or fireplace of the bathhouse, but it will perfectly protect from rain or, in some cases, from overturning the air flow.
Chimney diagram in a bathhouse
The design of the external chimney pipe is a fairly long vertical channel with a rotating elbow and a horizontal section no larger than 120 cm in size. A collector must be attached to the lower part of the transition to absorb or drain condensate. Without it, the bathhouse chimney and stove fittings will rust.
When compared with a classic internal chimney, the outer chimney is generally safer, even if the bathhouse box is lined with plastic siding or clapboard.
Important! It is believed that external chimney pipes last less than the terminals of the classical scheme, but this is not entirely true. The main threat to the pipe is severe icing in winter, especially if you use the sauna infrequently. But if desired, the problem can be easily solved by covering the metal body with flat slate.
In general, the efficiency of an external chimney can be even higher than that of a chimney located indoors. The only drawback is the inability to install the stove far from the outer wall of the bathhouse.
All metal pipes are made in the form of prefabricated structures from sections 60-120 cm long. At the ends of each section there is a clamp in the form of a clamp and a seal that ensures a tight fit without gaps and clamping. Despite the fact that most manufacturers claim that they control the quality of fit at the joints, in kits for self-installation of pipes in a bathhouse there are sections with a loose fit. Therefore, before installation, it would be correct to once again check the quality of the locks.
Chimney construction technology for a brick kiln
Stages of laying a chimney flare.
If the base of the stove is made according to standard patterns, there will be no difficulties in forming a chimney pipe from brick. As soon as the laying of the last row of the base is completed, the formation of the pipe begins. This usually happens after laying rows 12-19, when the side door of the oven is closed. After 2 rows, 2 channels the size of 1 brick begin to form. In the future they will be combined.
On the right side, the opening is filled with pieces of bricks to cover the space above the core. The distance between the masonry and the core should be about 3 cm, all voids must be filled with thermal insulation material.
In the next row, the space above the core disappears completely, after which the formation of a displacement of the channels towards the middle begins. In order to prevent the destruction of the masonry in the future, an additional row of bricks is laid above the core. The next row becomes the beginning of the narrowing of the brick pipe. At the same time, the valves are installed. Next, the masonry smoothly flows into a standard fluff. The main point of laying a chimney pipe yourself is to prevent cracks and chips from appearing in the material.
The cross-section of the pipe should not be larger than permissible, this will slow down the rise of combustion products. The easiest way is to purchase a ready-made structure, however, you also need to be able to install it correctly. When installing a pipe, its end must extend to the street at least 50 cm. At the joints of the chimney and roof, an otter is installed, which will protect the bathhouse from the penetration of precipitation. The first sign of improper installation of the chimney is the appearance of black plaque on the walls of the bathhouse. In this case, you need to inspect the pipe for cracks and chips and repair them.
//www.youtube.com/watch?v=rep3bmz6z0M
Pipe installation process
First of all, we choose a place on the roof for the chimney outlet. The best option for a bathhouse is to install a pipe outside along the wall on the leeward side; the smoke should be carried by the wind away from residential buildings. In practice, this rarely happens, since most sauna owners do not want to suffer and bother with the long ignition of the stove.
The higher the power of the stove, the greater the distance you need to move it from the wall. At least 60 cm, otherwise the hot lower part of the chimney will leave scorched marks on the wall.
Pipe option for a bath without an attic
A similar problem arises with the ceiling, so in addition to the standard passage unit, it is necessary to install cladding. You can use stainless steel or stick aluminum foil on the ceiling of the bathhouse in several layers on liquid glass.
Important! Protective cladding is attached to the walls only with the help of heat-resistant sealants; no screws or nails should be used unless you want to burn the steam room.
How to make a chimney through the ceiling in a bathhouse
The first step is to determine the point at which the chimney passes through the ceiling. This is done simultaneously with the installation of the stove in the bathhouse. You will need to visit the attic and even the roof of the bathhouse a couple of times to make sure that the chimney does not intersect with the rafters and struts. In addition, the parameters for the pipe outlet through the roof of the bathhouse must meet the following requirements:
- The overhang of the chimney cut above the ridge level should not exceed 50 cm;
- If the pipe is installed on the slope of the bathhouse roof at a distance of less than 300 cm, then the angle of the slope of the conventional line drawn from the ridge beam to the chimney should be no more than 10°;
- It is recommended to make the height of the pipe above the roof no more than 1 m.
It is believed that under such conditions the draft in the smoke channel is the most stable, the firewood in the stove burns evenly, and little soot is produced. Accordingly, the threat of burning soot to the roof and wooden structures of the bathhouse is small.
We install the passage unit
After the installation location of the stove in the bathhouse has been determined, you need to move the cross-sectional center of the firebox outlet flange to the ceiling. To do this, we place a template with a marked center on the outlet hole, and attach a regular plumb line to the ceiling of the bathhouse. You can make it yourself from a two-meter piece of cord or rope, wrap one end around a nail and tie it with a knot. We attach a weight to the other end, for example, a chisel. Using the plumb line, we determine a point on the ceiling and make markings for cutting out the contour.
Next, we install the passage unit:
- We drill a hole in the ceiling at a point - the center of the cross section of the future chimney. From the attic side, we use a plumb line to once again check where and how the chimney will pass through the roof of the bathhouse;
- We cut a square in the ceiling to the size of the metal box. We wrap the thermal insulation of the ceiling with film, hammer it with slats and cover it with foil;
- From inside the steam room, insert the box of the passage unit into the opening, fix it with wedges;
- Inside, we sequentially insert basalt cardboard and thermal insulation made of fire-resistant fiber.
You can put vermiculite or even expanded clay inside the box. Bulk materials are considered more reliable, as they better tolerate contact with condensate and water vapor. Cover with a mineralite lid. All that remains is to assemble the pipe from sections and install it.
Chimney assembly
After the passage unit has been installed, you need to assemble the lower section, the seal is lubricated with silicone and connected in locks. If the assembly on the ceiling is assembled accurately, then you just need to correctly measure the length of the chimney and cut the metal to size.
We assemble the part of the pipe located under the roof of the bathhouse in the same way; this part is assembled from two sections. At the junction of the two sections, a clamp with “ears” is additionally installed; they are used for additional fixation of the chimney with wire braces.
There should be 20-25 cm of space between the sheathing and the upper edge of the assembled pipe section. This is necessary to ensure that the joint does not coincide with the plane of the roofing.
How to install a pipe in a bathhouse on the roof
Before installing the upper part of the channel, it is necessary to cut out the vapor barrier film, part of the sheathing and perform a centering drill in the roofing of the bathhouse. This part of the work is done from the inside, from the attic of the bathhouse. Next, we go up to the roof, apply markings along the completed center point, apply a template and cut out a hole for the pipe.
On a flat roof, a sandwich with a silicone apron seal is used
Next, install the upper part of the chimney and the heat-resistant silicone lining. All cracks and joints will need to be sealed with non-flammable plastic material. It is impossible to rigidly fasten a metal pipe to the roof.
For large or too high chimneys, a pair of metal plate, roof trim and casing apron can be used. In this case, the lower part is attached to the roof sheathing and blown with heat-insulating mass as in the video
Chimney through the wall in the bathhouse
Installation of the option with a pipe passing through the side surface is easier. The main difference is that the passage unit is attached to the hole in the wall using heat-resistant foam or a mixture based on vermiculite and liquid glass.
The passage unit is attached after the main part of the chimney is assembled from sections and secured to the wall with anchors. If possible, a large number of angular and inclined transitions should be avoided. The chimney needs to be cleaned periodically, and the stove is heated with wood, which always produces enough soot.
The chimney must rest on the frame and not on the corner adapter
Advantages
The main priority of a chimney made from a brick pipe is that it has good draft in different weather conditions and a beautiful and expensive appearance. The service life will be much better than a sandwich or metal chimney. An irrefutable factor of a brick pipe is the ability to connect it to various heating systems (despite its height). And most importantly, the design has other advantages:
- resistance to high humidity;
- Possibility of self-construction.
Return to contents
Tools and materials
For masonry, you need to choose first-class fire-resistant red brick, which has no cracks or signs of warping. It is prohibited to use: sand-lime bricks, materials with the addition of organic fibers. The solution is needed from clay and sand. The tools you need are: a trowel, a grinder (used for cutting bricks), a pick, and you can’t do without a container for mixing the mortar. Need instructions on how to make a chimney.
Return to contents
Brick selection
For masonry, you can purchase corrugated ceramic material.
The building material is selected depending on the type of structure: mounted or root-mounted with the possibility of joining several furnaces. Usually they use ceramic stone, which can withstand a load of up to 100 kilograms with sufficient moisture resistance. It is advisable to take for construction a brick of a regular shape (rectangular), the dimensions of which are: 120 mm wide, 250 mm long, and 65 mm high. Weight can range from 3 kg to 3.5 kg. The surface can be smooth or corrugated.
Return to contents
Construction requirements
Installing a chimney through the roof of a bathhouse with your own hands involves following these rules:
- The optimal length of the chimney is 5 meters from the stove nozzle to the head of the chimney channel.
- The height is selected taking into account the type of roof and the location of the structure relative to the ridge.
- A spark arrestor is required.
- The horizontal part of the chimney is no more than a meter.
Return to contents
Masonry and insulation
The chimney is installed according to the drawing, which describes the construction technology:
A mandatory element of the construction is fluff.
- Bottom part. The mounted pipe is being constructed. The masonry is done with bandaging, in a checkerboard pattern, when the bricks of the next row cover the seams of the previous one. The dimensions of the internal well are 140×270 mm. The plumb line controls the vertical.
- Lay out 3-4 rows. The scheme assumes a valve for traction control at the level of the 2nd line.
- Fluff. It is constructed at a distance of 50-70 cm from the ceiling with a thickness of 0.35-0.4 m for insulation from heat. To achieve the required size, it is important to expand the chimney duct by 30-40 cm by gradually moving the brickwork with each row. Next, building materials are laid down to obtain a level riser up to the roof.
- Hole in the roof. This is done in advance by thinking through the insulation material.
- Otter. The installation is needed to protect the structure from precipitation; the masonry is shifted by 0.15–0.2 m to the outside: the 1st row must be assembled as the previous one;
- The 2nd one expands outward by 1/3 of the brick;
- 8 rows are laid.
The structure must rise above the ridge by at least 0.5 m.
In the place where the pipe in the bathhouse passes through the ceiling, asbestos or glass fabric is laid. The main thing is to create an elevation above the ridge of the roof, which is at least half a meter in height. That part of the building that needs insulation in the fresh air using available means. Then it should be painted.
When installing a brick chimney, be sure to leave openings for cleaning. In this case, the walls of the building must be smooth and the corners must be straight.
Return to contents
Chimney maintenance
In order for a chimney device to serve for a long time, it must not only be installed correctly, but also taken care of. There are a couple of ways to clean a chimney: mechanical (the brush is placed inside the pipe and carefully pushed to the top without rotation), chemical, which is more popular in modern times (when chemical products are burned, the soot comes to the surface or disintegrates). Another option is to burn aspen wood; when burning, a draft appears, which gives the soot a chance to come out. But this method works when the pipe does not need to be heavily cleaned.
etokirpichi.ru
The choice of a brick device as a chimney for a stove is primarily due to its excellent draft and presentable appearance. In addition, such a chimney will serve its owner much longer than its metal or pipe counterparts. The installation of a brick chimney requires compliance with the finest technological nuances associated with masonry. We’ll look at how to lay out a brick chimney in a high-quality manner below.
Table of contents:
- Brick chimney: requirements, size, configuration
- Laying a brick chimney pipe
- What chimney brick should you use?
- How to make a chimney from brick: design features of the chimney
- Step-by-step construction of a brick chimney with your own hands
Brick chimney: requirements, size, configuration
The chimney is the most important part of the heating system, because the correct functioning of all equipment depends on its quality. The main function of a high-quality chimney is to remove products formed during the combustion process and provide high draft that promotes fuel combustion.
A brick chimney is characterized primarily by its low cost, durability and good performance characteristics. Brick tolerates both low and high temperatures well.
It is the correct calculation of the chimney that ensures comfortable conditions for the people who live in the building. A high-quality chimney can reduce the level of fuel needed to heat the stove; in addition, fire safety and indoor air quality depend on it.
Each equipment connected to the chimney must meet the following requirements:
- ensuring protection against fire - the chimney must have a high level of fire safety, the minimum distance between the chimney and the wall must be at least 38 cm, in addition, in areas where the chimney passes through the ceilings, the construction of special extensions is necessary;
- the height value significantly affects the draft, a correctly determined chimney height significantly improves the draft and the fuel combustion procedure takes place with high productivity, the minimum chimney height is 500 cm;
- chimney thickness is a parameter that ensures fire safety in the room; the thicker the chimney, the less it heats up; the optimal chimney thickness parameter is 100 mm;
- in relation to the internal cross-section of the chimney, it must be laid out in such a way that there are no differences in the internal size.
Please note that each chimney is individual, its calculations are made in relation to the individual characteristics of the room, but still each chimney made of brick must be sealed and have a smooth inner surface.
Smoke moves inside the chimney in a spiral shape, so most often the chimney has a round shape. Although, brick does not allow you to build a chimney in this form. Most often, a chimney made of brick has the shape of a rectangle or square.
Although, the corner sections of the chimney are places that prevent the normal movement of smoke in the system. Using a plaster mixture and a leveling value, it is possible to smooth the surface of the chimney so that it is round inside.
Please note that the quality of work must be at the highest level, since the plaster is prone to crumbling due to temperature changes. The size of the chimney significantly affects the quality of draft. In addition, the chimney must be in harmony with the overall exterior of the room. On a small house, a chimney that is too large will look unsightly.
The optimal size of the chimney is 26x13 cm. This structure is constructed by laying each row of five bricks. Although it is possible to make a chimney with a larger diameter, this will require more effort.
Laying a brick chimney pipe
It is necessary to start laying on top of the stove; before this, a mounted pipe is installed on its surface. To build it, you will need to observe dressing between the rows.
The brick is laid in the same way as during the construction of the wall. But there are still certain features of laying a brick chimney:
1. Make sure that each row is horizontal and regularly check it for evenness. In addition, it is necessary to monitor the verticality of the entire structure.
2. To ensure strong adhesion between bricks, it is recommended to use a composition of clay, cement and sand as a solution. The ratio of sand to cement is two to five, and part of the clay is necessary.
3. The solution is applied to a brick with a thickness of five to ten millimeters. If the layer of mortar is too thick, the structure will be less durable, since temperature changes will lead to its crumbling.
4. Another important aspect is the correct sealing of joints between bricks. If you neglect this procedure, sparks from the chimney will enter the room.
5. During the laying process, use only whole bricks; if you need to install a certain part of the brick, then the layer of mortar for laying it should be minimal.
What chimney brick should you use?
To build a brick chimney, you only need two basic materials in the form of bricks and mortar. We suggest that you familiarize yourself with the recommendations for choosing materials for chimney construction:
1. The choice of brick should be carried out with particular seriousness. The material must be fireproof and high quality. The minimum grade value is 200. In appearance, the brick should have smooth edges, a clear rectangular shape, good firing and be strong enough. The optimal brick size for arranging a chimney is 25x12x6.5 cm.
2. The next point is making the solution. To build a durable chimney, you will need a solution containing water, sand, clay and cement. A high-quality solution contains fine sand with small grains. Otherwise, the thickness of the solution layer increases, and the quality and strength of the chimney decreases. Particular attention should be paid to the clay; it should not contain foreign impurities, and the water for preparing the solution should be clean and soft.
The stove roof is adjacent to the chimney using a special material that waterproofs this area. To protect the room from moisture and precipitation, a thickening called an otter is made from the outside of the chimney.
If there is no otter, then a material is used in the form of galvanized iron, which is mounted on the roof in a special way.
If you follow the previously given tips and recommendations, the brick chimney will be of high quality and durable. However, there are certain points in which inexperienced builders most often make mistakes, and we’ll talk about them further.
The first and most common mistake is a small pipe. It leads to a lack of draft in the stove or other heating device. Such a chimney is not able to function normally. Therefore, before carrying out work on arranging a brick chimney, you should carefully study the recommendations for determining the optimal length of the chimney pipe, which can provide good draft.
Failure to comply with the proportions for preparing the solution leads to the fact that cleaning the chimney becomes difficult, and the solution crumbles over time. The more uniformly located the internal channel of the chimney, the better the quality of smoke and all combustion products removed from it. If the duct is poorly made, then smoke enters the room, and this threatens the residents of the house with poisoning.
Try to ensure that the chimney is as vertical as possible and avoid horizontal sections that are too long. If it is planned to deviate the chimney, then in an area of up to 100 cm, the chimney should deviate by no more than thirty degrees.
How to make a chimney from brick: design features of the chimney
Before making a brick chimney, you should carefully study its design. The first element of the chimney is a pipe installed on the shoulders. It has a latch. To lay out the pipe, the bricks should be tied.
If you count 5-6 rows of bricks from the ceiling, then at this stage you should arrange the neck of the fluff. This element is a kind of widening, although the diameter inside is the same as the chimney. The diameter of the outer part of this element is reduced by 30-35 cm.
A chimney located in the attic is called a riser; this section extends right up to the roof base. The next cutting element is the otter, it expands on each side by at least 100 mm. It is this fragment of the chimney that prevents precipitation from entering the room.
After the otter comes the arrangement of a neck, the size of which is similar to the cross-section of the chimney. The final fragment of the chimney is the arrangement of the head, on which a part in the form of a deflector or metal cap is installed. Thus, the chimney is protected from snow, rain or wind. In addition, these elements significantly improve traction.
Step-by-step construction of a brick chimney with your own hands
We suggest dividing the work of laying a brick chimney into several stages:
1. Preparatory stage.
First, you should consider the diagrams of brick chimneys and choose the best option that will suit the individual parameters of the room and heating equipment. If you have a conventional wood stove, you will need to carefully design each of the rows of masonry. And if the stove is gas, then you need to install a metal pipe inside the chimney.
Before starting to lay the chimney, you should install a rectangular foundation. For its construction you will need solid brick or concrete with metal reinforcement. The minimum height of the foundation is 300 mm, and the width is 150 mm greater than the chimney itself.
2. The next stage involves the direct work of laying a brick chimney with your own hands.
For these works, a special scheme will be required, according to which each brick is laid. Red or refractory bricks should be used to lay out the chimney. If the temperature in the chimney is too high, then it is recommended to use special fire-resistant solutions to connect the bricks. Otherwise, using a solution of cement with lime or cement with clay is sufficient.
In order to cut off a certain part of the brick, you should use a grinding machine, and marks are made using a marker. The strength of the chimney directly depends on the thickness of the layer; the thinner it is, the stronger and more reliable the chimney.
To form an otter or other areas of similar purpose, it is enough to use metal rods that are mounted along the frame of the structure. Please note that the rods should not be located along the diameter of the chimney, as they will become an obstacle to the removal of combustion products. In addition, you should take into account the fact that the high width of the chimney depends on the thickness of the mortar that is applied to the brick.
In addition, in the process of making a brick chimney for the boiler, special holes should be made that will simplify the cleaning procedure. The wall inside the chimney must be particularly even. To do this, they must be finished with plaster. Thus, soot will not accumulate on the walls, which negatively affects the quality of the chimney.
3. The final stage of manufacturing chimneys for brick stoves.
If the chimney is being erected directly next to a wall, then to increase its stability, it should be fixed to it using steel anchors at intervals of 25 cm. At the junction of the chimney, ceiling and roof, asbestos-based or fiberglass-based fabric should be laid. Although the brick is heated rather slowly, it is still necessary to reduce possible fire. Another important point is the fact that the minimum height of the chimney rising above the roof is 300 mm.
To increase the attractiveness of a brick chimney on the outside of a building, it is necessary to insulate and finish it. Choose thermal insulation materials that have good resistance to high temperatures and moisture. Thermal insulation will help avoid the accumulation of condensation in the chimney due to temperature changes. It is recommended to use facing bricks or special roofing materials as finishing.
Brick chimneys video:
strport.ru
How to cover a pipe on the roof of a bathhouse
Based on experience in operating metal chimneys, we can say that the main problem always remains ensuring seals at the joints and at points of contact with the roofing. Metal expands when heated, so any hard type of seal will fail over time.
Additional thermal insulation with a cord reduces the thermal load on the foam
In the lock, at the junction of the two sections, the elastic band can be reinforced with red heat-resistant sealant. It is actively used for repairing hot areas of mufflers and exhaust systems. But only the joints of the upper sections can be sealed; the rest of the chimney, especially at the outlet of the stove, is sealed with asbestos cord.
Is it possible to use polyurethane foam in a bath?
It’s another matter if you need to fix the pipe body in an opening or passage through a wall or pier. For relatively cold sandwich pipes, if the surface temperature does not exceed 120°C, polyurethane foam is suitable for the bath, but with preliminary coating of the surface with a heat-resistant mixture of liquid glass and asbestos.
For hotter chimneys, with temperatures up to 250 ° C, you can use the same scheme, but with the obligatory additional winding of the pipe with a basalt or asbestos fiber cord. The remaining space is filled with heat-resistant foam for chimneys. You can use “Soudal Soudafoam FR” or “Ognez”, “MAKROFLEX FR77”, any material with a zero flammability class according to EN 13501-1B.
If heated for a long time, even fire-resistant foam can ignite
You cannot directly apply polyurethane foam to the chimney. The best and most heat-resistant polyurethane foam seal lasts a maximum of 360 minutes. heating Then the process of oxidation and destruction begins. Therefore, we must wrap the chimney with fiberglass, mica or cord and only then blow it with foam.
To seal the chimney on the roof of the bathhouse, you can use superheated liquid glass. The pipe must also first be wrapped in one layer of fiberglass, but the material must first be washed to remove lubricants. Add ¼ part of water with liquid soap and asbestos fiber to liquid glass.
We wrap the wooden roof structures in foil, fill the space around the chimney with a thick mixture and heat it with a hand-held gas burner. When heated, the glass boils, turning into a kind of mineral foam. The surface must be coated with protective paint or sealed with a metal apron.
