Why do you need moisture-resistant plaster?
Moisture-resistant plaster is designed to protect premises from excess corrosion. Special additives help repel water. This prevents the appearance of rust on load-bearing structures and prevents the growth of mold and fungi.
In order for the composition to withstand moisture for many years, it is produced with average vapor permeability. Thus, thin layers continue to “breathe” and the natural microclimate in the room is not disturbed.
With everything else, you should not ignore high-quality ventilation at the place of use.
Plasters of this type are suitable for aggressive internal and external conditions. They are used to treat bathrooms, bathhouses, basements, swimming pools, basement floors, utility rooms and toilets without heating.
In addition, moisture-resistant plaster perfectly prepares walls for subsequent finishing. Paint, tiles, decorative materials, and drywall adhere to them as firmly as possible. There is a huge scope for design with both thin and thick finishing layers.
Benefits of plastering
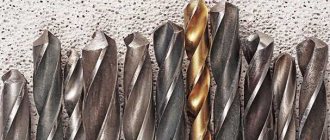
Preparing a solution that will stick to a hot surface, and not just prevent leaks, is not so easy.
For this purpose, it is necessary to determine the quality and content of clay fat in order to accurately calculate the proportions of ingredients in the solution. It is much easier and safer to use a mixture that is already available as a finished product or simply diluted with water. Special heat-resistant plaster has the following positive qualities.
- Eco-friendly ingredients. This is very important, because under the influence of high temperature, substances that are normally harmless decompose and release toxins.
- Great strength and resistance to significant temperature fluctuations, low risk of cracking.
- Durability. Properly prepared and applied plaster for a bathhouse stove will last for at least 50 years.
- High elasticity and viscosity. The material can be easily applied to almost any surface.
- Some of the mixtures can also be used on metal surfaces.
Traditional plaster finishes can deteriorate at very high temperatures, but a fire resistant finish remains intact even when exposed to temperatures up to 650 degrees Celsius. Thanks to this, independent use of the heat-resistant composition becomes much safer and more functional.
Types of moisture-resistant plaster
Construction stores offer a huge range of water-repellent mixtures.
All of them are divided into categories:
Separately, it is worth removing the façade plasters. Despite frequent recommendations, they are often not suitable for wet areas. They cannot be used for a beautiful finish due to the coarse grit. In addition, the composition often contains toxic substances, the concentration of which in a closed space can be hazardous to health.
What plaster to take
For Bath
For bathrooms and combined sanitary facilities in apartments and offices, all types of moisture-resistant plaster are suitable, except facade and epoxy. Epoxy is less toxic than façade, but has an unpleasant odor that takes a long time to dissipate without proper ventilation. Otherwise, when choosing, you need to rely on the desired effect and type of surface finish. For example, it is better to avoid plaster under tiles.
For the bath
Gypsum and cement plasters are popular for interior decoration of baths. They react steadfastly to heat and do not ignite near stoves. The unsightly appearance is easily covered with tiles and sidings. The risk of cracking is compensated for by condensation hoods.
It is better to finish rest rooms, rooms with swimming pools and plunge pools with polymer plasters, silicone, silicate plasters. In showers it is better to use sanitizing types, since there is great direct contact with water.
Utility rooms
In utility rooms remote from water and in ground floors with low traffic, all types are used, including mineral ones. The main condition for this is the possibility of ventilation or high-quality artificial ventilation.
Basements and cellars
Basements and cellars often suffer from dampness. Moisture-resistant compounds are vital there. To save money, most craftsmen use gypsum-sand mixtures and sanitizing plasters. Mineral, polymer and silicone types are practically not used due to the lack of ability to ventilate the premises.
In the case of surrounding water, it is necessary to additionally waterproof the outside.
Norms and requirements
For the interior decoration of a brick bath, you need to use materials that will cope with the effects of high temperatures and moisture. Therefore, the use of plastic and ceramic mixtures that emit odors and become covered with condensation is excluded. Metal and brick are excluded for the interior decoration of the steam room, as it gets very hot and can be dangerous due to burns. It is best to use wood that has low thermal conductivity and is ready to last a long time even under difficult operating conditions.
The materials used when finishing a brick bathhouse with your own hands must have not only an aesthetic appearance, but also good breathability so that condensation does not accumulate in the layers, which will certainly cause the occurrence of fungus and mold. In rooms where there will be high temperatures, it is not recommended to use coniferous wood, linoleum, fiberboard and chipboard. The last two options quickly become unusable and absorb moisture well.
As for conifers, the lining of them releases resin when heated. Therefore, when finishing a brick bathhouse from the inside, this grade is not used. When choosing materials that will come into contact with hot surfaces, their fire safety should be taken into account. A distance of 0.5 m should be maintained from the wood-burning stove to the wooden elements of the walls and floor. To save space, when choosing a place for a heating device, a corner is usually preferred, and the walls there are protected with heat-resistant materials. For example, you can use mineralite or stainless steel, the latter of which is represented by protective screens.
How to work with moisture-resistant plaster
The technology of working with moisture-resistant plaster involves several stages.
Preparing the walls
Before application, it is necessary to remove the old coating and clean the surface from dust and dirt.
There is an opinion that paint cannot be removed. But even durable paints and varnishes can be burned off with a blowtorch. The remaining materials are scraped off with a metal brush or spatula. If the wall is fragile, pieces of technical material fall out of it, it is better to additionally strengthen it with a special means and repair chips and potholes. It is preferable to remove very weak areas and refill them with fresh solution.
For better adhesion, make several notches along all surfaces of the wall. The surface should remain slightly rough.
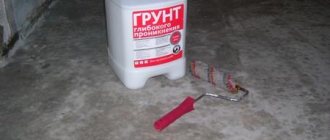
After the “patches” have completely dried, beacons are installed in increments of 1 to 1.5 meters. Then comes priming 1 or 2 times.
Applying plaster
First the starting layer . In the professional slang of finishers you can hear the word “spray”. This term refers to the application base. Thick mortar is applied pointwise onto a slightly damp wall using a spatula, trowel or ladle. Before the moisture has had time to be absorbed, lightly “flatten” the spots to 0.5 mm. On wood, the thickness of the starting layer is sometimes increased to 1 cm. The spray should evenly fill the entire wall.
Next comes the draft layer, also known as the main layer . Along the beacons, using the rule, new “splatters” of a larger size are drawn out. Then the beacons are removed, and the grooves that appear are corrected with a spatula or trowel.
When the base layer has dried, apply the finishing layer . A wooden trowel is moistened with water, a new portion of moisture-resistant plaster is applied in a circular motion, and leveled to the desired result.
Life hacks and tips
Experienced craftsmen have their own tricks when working with moisture-resistant plaster:
The most popular plasters include:
| Name | Type | Purpose | Price |
| AZOLIT-VSH | Cement | For brick and concrete walls | 500 RUR/25 kg |
| Profit Barrier | Cement-polymer | Under tiles for baths, bathhouses, utility rooms | 380 RUR/25 kg |
| Profit Hydrophobe | Cement-sand | For stone walls and previously plastered surfaces. All types of premises, except severe constant dampness | 200 RUR/25 kg |
| Ceresit CR 65 | Cement | Any type of foundation, especially stone | 800 RUR/25 kg |
| Weber. Vetonit TT | Cement | For all walls and rooms with a required thickness of no more than 1 cm | 330 RUR/25 kg |
| Consolid 540 | Multicomponent | Walls and ceilings in any wet areas | 240 RUR/25 kg |
| UNIS Teplon | Plaster | Universal for baths, saunas, basements and utility rooms with average humidity | 330 RUR/25 kg |
| Dufa Kratzputz aussen | Acrylic | Decorative covering in bathrooms. Orange peel effect. | 1800 rub/20 kg |
| STUC GRANITO | Polymer | For bathrooms, swimming pools and bathhouses | RUR 10,600/16 kg |
The table shows the most popular brands and series, proven by time and numerous practical experiences. There is a much larger assortment on the shelves, where everyone can find alternative options to suit their taste and budget.
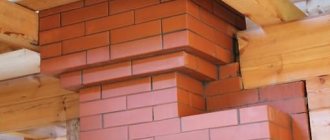
Plastering brick stoves: how to do it right?
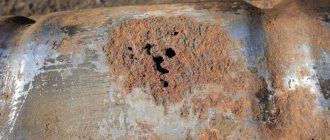
An unlined stove is always an unaesthetic sight. And outwardly there is nothing beautiful here, and dust accumulates in the cracks, and over time the seams crack and life-threatening carbon monoxide begins to be released. In order to avoid all these unpleasant phenomena, the stove is tiled or plastered after one or two months.
Advantages
- the simplest and most accessible way for everyone to “ennoble” the stove;
- savings in price compared to tiles, ceramics or facing bricks;
- You can plaster both new, newly built stoves, and old ones that require restoration;
- even a thin layer of plaster multiplies the thermal insulation of the stove and extends the heat retention time;
- plaster completely eliminates the risk of carbon monoxide entering the room, but only if the composition is correctly selected and applied;
- The plaster can be painted over or whitewashed at any time.
Plaster for stoves
Today, you don’t have to worry too much and buy a ready-made composition, which is diluted with water and applied to the stove. Or you can go the traditional route and prepare a solution from clay, sand, lime or cement. First things first.
Cladding or plaster is applied only after the oven has settled. As a rule, this takes one and a half to two months, depending on the frequency of operation. If the stove is used frequently, a month is enough for complete shrinkage, after which you can begin finishing.
Fireclay (fireproof) clay is the most popular, cheap, but very strong material that was used several hundred years ago.
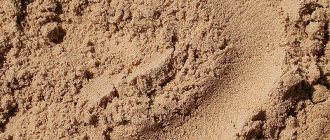
Before mixing, the clay is passed through a fine sieve to remove foreign matter. The sand should also be sifted.
How to prepare a clay solution
Real fireclay clay is very oily, so sand must be used in a ratio of 1 to 3. First, you need to mix a small amount of sand with different proportions and make small balls out of them. After the balls have hardened, you need to test them for strength. To do this, they are thrown onto the stone floor from the height of their height. The proportions of the composition of the ball, which did not crack and remained unharmed, are suitable for plastering the stove.
To increase strength, you can use crushed fiberglass in a ratio of 1 to 0.1.
If the solution turns out to be of high quality and all proportions are met, it will be very easy to apply and correct according to the rules.
Recipes for preparing popular solutions
(data are given in proportions)
How to apply correctly
- Even on a new stove, dirt and dust accumulate, so before you start plastering, clean it thoroughly, brush out the seams and wipe with a damp cloth.
- In order for the solution to set better, firstly, you need to open the seams a couple of millimeters, and secondly, heat the oven and apply it to a still warm surface.
- For better adhesion, spray the wall with water from a spray bottle before applying the solution.
- The solution is applied with a trowel using sharp movements, after which it is leveled using the rule.
- Carefully monitor the evenness of the applied layers, the thickness of which should not exceed 5 mm. If this condition is not observed, the plaster will dry unevenly.
- You should start from the top of the oven, gradually working your way down.
- It is always applied in two layers - the first liquid, the second thicker.
- You can grout it when the solution is slightly dry, but not yet completely dry. The result is a truly perfectly flat surface, smooth to the touch.
- Slopes are made according to the same rules as windows. First, the straight line of the slope is adjusted using corners or a profile, after which the composition is applied. After a few minutes, when the solution has already set, the slats are carefully removed. And unevenness is smoothed out with a grater or trowel.
Secrets of the masters
- Plaster tends to peel off. This could happen in six months or ten. There are a lot of reasons - a violation of the order, an incorrectly prepared solution, a violation of the layer thickness, overheating, etc. A special burlap sack for clay or a reinforcing mesh can save the situation. Their operating principle is the same - increasing adhesion and ensuring the most complete contact of the mortar with the brick.
- If burlap is used, it is pre-soaked in a liquid clay solution. The mesh is fixed in the corners, stretching evenly over all surfaces.
Burlap is a more difficult material to work with, since it is necessary to constantly monitor the presence of air cushions. If you miss even one such layer, the plaster in this place is 100% likely to peel off.
- After plastering the stove, be sure to cover it with lime milk mixed with regular table salt at the rate of 100 grams per 10 liters. This will provide, on the one hand, an increase in strength, and on the other, a beautiful gloss.
If you don't want to plaster
No matter how beautifully we describe everything here, there are many people who will say: “Laziness”, “No time”, “Why bother, this will do.” It won’t do, because in less than 5 years the stove will lose all its beauty and originality. If you don’t want to plaster, cover it with brick, tiles or ceramic tiles. It will be much faster, but more expensive.
Be sure to pay attention to the quality of the masonry mortar, which should not crack during operation of the furnace or during the shrinkage process.
Facing brick
In a series of finishing materials for the stove, this is the most affordable option, allowing you to create the appearance of a lack of finishing, but keep the unit in good condition.
In this case, it is necessary to follow a number of recommendations:
- For cladding you need a smooth, even material.
- You can enhance the attractiveness of the stove by placing bricks outside its body when laying.
- With single-color bricks, you can make colored grout.
- After finishing the masonry, wipe the surface with a damp cloth and sand with the remaining brick to level out all the protrusions and depressions.
Plastering a brick oven with your own hands: photo, video step-by-step instructions
For plaster - clay or special compounds. In this article we will discuss what the plaster of a brick oven should be like and what materials are suitable.
Stoves without lining do not look aesthetically pleasing; dust and debris collect in the seams of the masonry, which not only is difficult to clean, but also spreads unpleasant odors, burning when the stove is heated. Plus, (especially if the stove-maker laid the masonry very quickly, since his pipes were “burning” and a legitimate hundred grams and a cucumber were waiting for him for lunch), a certain amount of smoke and carbon dioxide comes out through various microcracks in the seams formed due to poor-quality masonry which are harmful to health.
Why does plaster fall off the surface of the stove?
1) due to who made the stove - he could have made the wrong thickness of the seams or bandages of the rows of bricks.
We invite you to familiarize yourself with Heat-resistant adhesive for stoves and fireplaces (fireproof, heat-resistant)
2) overheating of the oven.
To prevent this problem, a thin steel reinforcing mesh is used, the cell size of which is no more than 1 cm. The mesh is attached with wire to the brickwork of the furnace, with a wire 3 mm thick. It is advisable to insert wire into each row of brickwork during the construction of the furnace.
Instead of steel reinforced mesh, you can cover the stove with burlap, which must first be soaked in liquidly diluted clay and a thin layer of clay mortar applied to the walls of the stove. The burlap is laid out and straightened on the surface of the oven so that there are no air gaps between them. Such a furnace cannot subsequently be overheated too much.
Furnaces are plastered with simple clay mortar or lime-gypsum, cement-clay-sand, lime-clay-sand mortar. You can purchase these solutions in the store in dry form, packaged in bags, or prepare them yourself.
Since ancient times, clay mortar has been popular for plastering stoves with your own hands. Plastering the stove is done after the brickwork has completely hardened and its shrinkage has been eliminated (after about a month). If you prepare the solution correctly and plaster the stove, the plaster will last for many years.
A high-quality solution for plastering a stove should be easily applied to its surface and smoothed well; the amount of sand mixed into the clay depends on the degree of fat content of the clay. If the fat content of the clay is high, then the proportion of the components of the mixture for plaster should be 1/3 or 1/4. In order to increase the strength of the plaster, you can add 0.1/0.2 shares of crushed glass fiber or asbestos fiber to the clay-based solution.
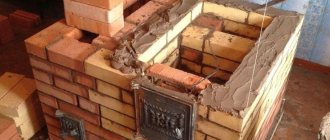
Before you begin plastering the stove, its surface must be cleaned of dust, masonry mortar residues and other contaminants. In order to improve the adhesion of the mortar to the brickwork, it is necessary to clear the seams between the bricks to a depth of about 0.5 cm. Before applying the plaster mortar, it is necessary to heat the stove and apply the mortar to the warm walls.
Proportions of the most common plastering compositions for plastering stoves
clay -1, sand - 2, asbestos - 0.1;
gypsum - 1, lime - 2, sand - 1, asbestos - 0.2
clay - 1, sand - 2, lime - 1, asbestos - 0.1;
clay - 1, sand - 2, cement - 1, asbestos - 0.1;
gypsum - 1, lime - 2, sand - 1, fiberglass - 0.2.
Applying plaster to the stove
After preparing the plaster mortar, we begin to apply it to the surface, that is, to plaster the stove with our own hands.
We start plastering the stove from the top. We moisten the brickwork with water and apply a thin layer of mortar with a trowel or grater, and then a thicker one. It is not recommended to apply layers thicker than 0.5 cm. In order for the plaster to dry evenly, it must be applied as evenly as possible. After the plaster has set but is still soft, you need to rub it in a circular motion using a wooden trowel.
At the end of this procedure, the surface of the oven should become smooth and even. If the plastered surface of the stove is poorly smoothed, this indicates that the plaster has already set. In this case, you need to spray with a large brush or brush, moisten the set surface of the plaster and continue grouting with a wooden brush. Ultimately, the thickness of the facing layer of plaster should not be more than 1 cm.
How to plaster a brick wall in a bathhouse
When performing repairs, many home craftsmen are interested in whether it is possible to plaster with tile adhesive? This question can arise for a variety of reasons, for example, glue was purchased in excess, but before laying the tiles it turned out that the walls were uneven.
It is quite difficult to give a clear answer to this question, so next we will look at the pros and cons.
Remove excess glue between seams. Wait at least 12 hours before grouting unless using a quick-drying adhesive. The grout should be firmly secured in the joints using a grout sponge. Excess solution can be removed from the tiles with a regular sponge. They can then be polished with a dry cloth.
Using glue for flooring
The type of adhesive used will depend on the type of floor. When tiling over other tiles, they must also be completely free of dirt or grease and securely fastened. However, if the floor is not level and adhesive must be used to level it, then more will be needed. To ensure the tiles can bond properly, the tiles should be left to sit for 24 hours unless instant adhesive is used. When grouting on a wooden floor, a water-polymer additive will improve flexibility. Use a squeegee to press the mortar into the joints.
How to do the work yourself
Preparing brick surfaces for plastering is also a mandatory step in the process. Direct application of fireproof plaster to the stove in a bathhouse can be carried out using several methods. You can get the job done without additional skills in handling tools and solutions. However, if you are not confident in your own abilities, it is better to entrust this matter to professionals.
You can apply a layer of fireproof plaster using one of the available methods. The first method is used when we are talking about an uneven surface with a large number of defects. In this case, it is necessary to apply a layer 5–8 cm thick.
Instructions for plastering a stove in a bathhouse with your own hands
Stages of work
Useful tips
For the last stage you will need a liquid solution. Layer thickness – no more than 2 mm. After applying it, the stove can be whitewashed or painted.
To ensure that the plaster is applied as evenly as possible, use an angled spatula in the corners.
Some experts prefer to use a wooden board. Secure it to one side of the stove while you apply a layer of plaster. After the solution has hardened, move the bar to the other side and proceed to applying the solution on that plane.
Applying plaster to metal mesh
This is another, no less popular method. The composition is fixed on the surface, allowing the plane to be leveled as much as possible. The maximum distance from the mesh to the oven is 25 mm.
The solution is also applied in several layers. The first and second - in the same way as in the previous case. After applying and curing the last layer, which will hide the mesh, eliminate the defects using grout. This method will make the oven walls stronger and more reliable.
Using a small layer
Another common technology for plastering a stove is to apply one or two thin (no more than 2 mm in thickness) layers of liquid mortar with the addition of asbestos. It is used if the surface of the oven is sufficiently smooth and neat. This will update the look of your home bath.
A primer must first be applied to the surface to be treated. The composition is applied from bottom to top. Use beacons to ensure a flat, level surface. The plaster is leveled with a regular wide spatula.
You can choose fire-resistant inexpensive plaster for the stove in any construction supermarket or on the Internet, and its use ensures complete safety while maintaining the high aesthetics of the interior decoration. It is recommended where there is a lack of finishing coating: in places exposed to high temperatures, which causes cracking, especially when it comes to plastering a stove in your own bathhouse.
Fire-resistant plaster is an excellent alternative to traditional coating and, in some respects, differs for the better.
Cancel reply
By clicking on the “Submit” button, you consent to the processing of your personal data.
Source
| First, apply markings on the wall to fix the beacons. | Install them using a building level. |
| Now you need to warm up the oven, and then moisten its surface with a damp roller or wide paint brush. | This is necessary in order to finally get rid of dust and remaining dirt in the cracks. After the surface of the oven has dried, it is necessary to apply a layer of primer. |
| After this, proceed directly to plastering. | The first layer of fireproof plaster should not be thicker than 5 mm. The consistency of the solution is thick sour cream. Carefully work through every centimeter of the surface so that the thick solution penetrates into all the cracks. Once finished, allow the mixture to dry completely. |
| The second layer of plaster is applied from below and leveled parallel to the beacons. | Make the layer thickness such that the plaster protrudes 8 mm beyond the installed beacons. The height of the layer should be approximately 50 cm. After leveling the lower level, apply the next one, and so on until the entire surface of the stove is covered with a uniform, dense layer of refractory plaster. |
| To smooth out defects, use grout after applying this layer. Experts recommend that at the end of this stage, cover the oven with a damp, dense and coarse cloth (burlap, for example). | If the oven is warm enough so that the fabric dries quickly, repeat the procedure a couple more times. |
General information
It would seem that each building material has its own purpose, so tiles should be glued with glue, and nothing else. However, tile adhesive even has some advantages over conventional plaster, which we will discuss below.
In addition, many home craftsmen have successful experience in decorating walls with their own hands. But, at the same time, it cannot be said unequivocally that this can be done, since this operation has a number of its own nuances, which are described below.
Excess mortar should be removed from the tile surface using a sponge. A grout tool should be used to ensure a smooth finish to the grout and improve its feel. Dry mixed adhesives containing self-priming are ideal for most walls. This type of adhesive is extremely convenient as you don't have to mix it or apply it to the walls in front of the shingles. For walls exposed to moisture, such as in the bathroom, waterproof adhesive should be used; otherwise, standard glue is good enough.
Start of construction
It is recommended to lay 1.5 or 2 bricks with voids, which corresponds to 38 cm and 51 cm, since this method has better thermal insulation properties. The construction of masonry indoors can be done in ¼ and half brick, respectively 6.5 and 12 cm, provided that standard building material is used, according to GOST.
The plinths and the fundamental base of the bathhouse, located below the surface layer of waterproofing, must be built from red refractory solid brick. When constructing a surface level, hollow brick can be used above the waterproofing, and the walls themselves can be made of standard white (silicate) or red brick.
The strength of brickwork largely depends on the correct execution. It is necessary to begin laying by installing a corner plumb line at the junction and intersection of the walls. The first row of corners starts with 2/4 or ¾ brick. Lightly loaded parts of the wall, for example, a window opening, are made of half a brick. Between horizontal and butt rows, the thickness of the gap between bricks should not exceed 12 cm. To control the quality of masonry, installation fines, or construction beacons, are used.
We suggest you familiarize yourself with the passage of a pipe through the ceiling in a house
Tile adhesive and its properties
Types of glue
Generally, adhesives designed for floor tiles are water-resistant. If you are covering a concrete floor, it is always best to use a non-flexible adhesive, but on wood floors and floorboards a flexible adhesive should be used. Normal and instant adhesives are available for wall and floor tiles. With normal adhesives you will have to wait up to 24 hours before you can begin cementing. With speed dial, the wait is reduced to several hours. The problem with quick-release adhesive is that it can install faster than you can lay the tiles.
All existing types of tile adhesives can be divided into two types:
With normal variety, where you spread the area one square meter at a time, you will have no problem drying before laying the tiles. Adhesives are sold in a variety of colors, which is not a problem unless you are fixing natural stone tiles. Colored glue will stain them, so be sure to only use white glue.
Grout is used to fill gaps between adjacent slabs. This prevents moisture and dirt from entering and helps maintain good visibility of the wall or floor. Since most surfaces expand and contract over time, the grout can be made more flexible by using an additive. When grouting in areas where there are likely to be high levels of moisture, such as a bathtub or shower stall, you should use a waterproof grout or seal it. Today, most solutions are waterproof.
As you might guess, only the first type of adhesive can be considered as plaster. Ready-made compounds are completely unsuitable for this, although it is unlikely that anyone would want to use expensive material as plaster.
Today on the market you can find the following mineral adhesive compositions that have proven themselves:
Problems with the use of combination adhesives and solutions
There are various factors that will determine the volume of grout you need for a given area of tile. These include the size of the tiles used and the spacing between them. There are combination adhesives and solutions on the market, but you are not advised to use them. Although purchasing a combination adhesive and mortar may seem like a good way to save on costs and finish the job much faster, many who have used these products have encountered problems.
Note! Before using glue for plaster, you should make sure that it is universal, i.e. not limited to any one application or type of material with which it may interact.
Typical complaints are that the adhesive and mortar combination is of poor quality and it is difficult to achieve an acceptable finish. Also, when the "mortar" is installed, it contains small holes and must be replaced. The answer is to always use a separate adhesive and grout that is appropriate for your specific tile project.
No, flexible cementitious adhesive should be used. The added polymer content accommodates the movement caused by thermal expansion and contraction created by heat. Ready-mixed adhesives depend on evaporation to cure. Large tiles do not allow water to escape from the adhesive behind them, especially on a non-porous background, which significantly increases drying time. Yes, provided the tiles are sound, securely fastened, dry, clean and able to support the weight of the tiles and adhesive that will be attached to them.
Properties of adhesives
Among the features of dry mixes for tiles, the following points can be highlighted:
From all of the above it follows that such mixtures have even better characteristics than ordinary plaster. However, one point must be taken into account - the adhesive is not intended to be applied in a thick layer, otherwise various problems with the coating may occur.
The key can be applied to glazed tiles by rubbing with sandpaper and cleaning. Any loose tiles or tiles that sound hollow when tapped should be secured first. When choosing the type of adhesive, you need to consider the size and porosity of the tile. How to fix natural stone floor tiles? Cement-based adhesives should be used to secure natural stone, granite, limestone, marble, travertine and similar tiles. Consideration should be given to whether white cement based adhesives should be used when fixing lighter colored slabs to avoid staining.
Manufacturers of the compositions recommend applying them to the wall in a layer of no more than one centimeter. But, as practice shows, it is possible to achieve a high-quality finish by applying a layer of up to 4 - 5 cm. The only thing is that the composition should be applied in layers, and it is necessary to regulate the fat content of the solution itself by adding sand to prevent cracking of the surface.
A “hard roof” installation is recommended, whereby a ribbed layer of adhesive is applied to the floor using a notched trowel, and the back of the tile is “smeared” with adhesive. Twisting and pushing the tile into place will ensure nearly 100% coverage of the adhesive and support of the tile.
Firmly anchoring the bed is especially important when using tiles, which may contain natural voids that can be destroyed given time. Travertine is a type of limestone that has been used in Italy since Roman times. It has a very low density, in its natural state it is filled with holes and voids, these are often filled with synthetic resins on the surface. Even high quality travertines can have voids and holes. To ensure sufficient support, the “hard bed” bracing method as described above should be used.
Do-it-yourself bathhouse finishing
In order to make the bathhouse beautiful, you need to choose reliable and high-quality finishing materials and install them in accordance with the specifics of the premises described in the previous sections.
Selection of finishing materials
The optimal choice for each bathhouse owner will be one that takes into account the size of the building, personal taste and financial component. In order not to make a mistake when purchasing material, you must first:
Calculation of premises area
To determine the need for materials, it is necessary to know the area of the surface to be finished. All calculations are done in meters.
For the floor and ceiling, multiply the length of the room by its width. To get the area of the walls, calculate the perimeter of the room: add the length and width and multiply by two. We multiply the product by the height of the ceilings. From the result obtained, subtract the area of doors and windows, if any.
In rooms with complex combined decoration, the area of each section is calculated separately.
How to buy quality materials and prepare them for installation
When choosing a material, you need to pay attention first of all to the quality of the product.
Calculation of material requirements
- Find the area of one board. So, with a standard length of 6 m and a thickness of 90 mm, the area of the board will be equal to 6∙0.09=0.54 m2.
- Calculate the surface area to be finished. Let's assume that it is necessary to upholster the walls of a room measuring 3 x 6 m with a ceiling height of 2.5 m. The surface area is equal to: (3+6)∙2∙2.5=45 m2.
- Calculate the number of boards. To do this, divide the surface area by the area of one board: 45/0.54 = 83.3 boards.
As an example, here is a specification of material for finishing a steam room:
In the same way, the wood requirements for the remaining rooms are calculated.
To calculate paint and varnish materials, the surface area should be multiplied by the paint consumption, which is usually given on the packaging in liters per square meter. The product will show how many liters of paint you need to buy.
All goods must be purchased with a margin of 10%, taking into account the allowance for waste and defects in work.
Required Tools
To finish a bathhouse with your own hands you will need:
- Hammer.
- Screwdriver.
- Building level.
- Hammer.
- Furniture stapler.
- Plane.
- Hacksaw or jigsaw.
- Self-tapping screws, nails or clamps.
Step-by-step instructions for finishing a bath
The work is carried out after laying the electrical wiring and ventilation ducts, starting from the floor. The floor of the steam room is raised 10–15 cm above the level of adjacent rooms. After the clean floor has been laid, they begin finishing the walls. The last thing to do is the ceiling.
- Making a frame for insulation.
The frame is assembled from 100x40 mm timber, impregnated with fire retardant and fungicide. The timber is attached with self-tapping screws or dowels to the wall at intervals equal to the width of the insulation board minus 5 mm. A frame made of wooden beams is mounted on the walls and ceiling - Installation of insulation. Between the frame beams, insulation slabs or mats are placed on heat-resistant glue with additional fastening with 5-6 dowels. per 1 m 2.
- Installation of heat-reflecting material.
Aluminum foil or foil fire-resistant film, for example, foil penofol, is secured with staples using a construction stapler to the thermal insulation layer. A counter-lattice is installed over the heat-reflecting layer under the finishing coating.
Wall cladding. The lining is attached to the frame in accordance with the selected layout. The nails are driven into the grooves so that they are not visible on the finish. They nail the baseboard.
To decorate the premises in the bathhouse, you can choose different types of wood with different shades of color.
Installation of false ceiling frame. The frame of the false ceiling is attached to the floor joists or to the walls made of 100x50 timber with a vertical orientation. The distance between the beams should correspond to the width of the insulation slab minus 5 mm for the expansion.
Construction of the ceiling begins after covering the walls.
Installation of heat-reflecting material. Foil or foil material is attached in the same way as on the walls.
Ceiling lining with clapboard. It is carried out similarly to wall upholstery. The section of the ceiling above the stove-heater is protected by non-combustible material: a stainless steel sheet or slab material. The ceiling plinth is attached.
A foil vapor barrier is attached to the insulation, and then the clapboard is nailed onto the finished sheathing
Video: interior decoration of the steam room
Having become acquainted with the requirements for bathhouse premises and having studied information about the correct execution of finishing, you have received the necessary theoretical knowledge. The work does not require any special professional skills and can be done by any homeowner.
Bathhouse, sauna [We build with our own hands] Nikitko Ivan
Plastering and painting
Oddly enough, oil paint is also an acceptable material for the interior cladding of a bathhouse (however, only in the dressing room and washing compartment and only if you have brick walls).
Let's talk in more detail about plastering brick walls in the locker room and washing compartment. First, you should clear the masonry seams by 1.5–2 cm. Then moisten the surface.
The plastering process itself consists of three stages: spraying, priming, covering.
It is best to apply the plaster using beacons positioned at such a pitch that it is possible to level the solution between them using a rule. Remember: the thickness of the beacons is certainly equal to the thickness of the plaster layer (without covering).
If the weather is dry and hot outside, it makes sense to periodically moisten the newly applied plaster, otherwise it will dry faster than the technological process allows and will immediately crack.
If defects suddenly appear, such as an incomprehensible roughness or mortar drips, they can be immediately cleaned using the end of a dry tree or a scraper.
From the book Loggias and Balconies by Natalya Gavrilovna Korshever
Painting glass To install stained glass windows on a glazed balcony or loggia, painted glass is required. Glass cut to size is thoroughly washed and degreased. The selected drawing is made on a sheet of paper in full size. The contours of the drawing are transferred to glass
From the book Complete apartment renovation. How a woman can cope with repairs author Shtukina Lyudmila Vasilievna
Plastering walls Question. In what cases is it necessary to carry out plastering work? If the unevenness of the wall exceeds 5 mm, then there is a need for plastering work. Or, for example, if vertically installed doors protrude significantly beyond the plane
From the book Natural cosmetics: do-it-yourself soaps and masks, creams and tonics without chemicals author Elena Yankovskaya
Henna dyeing Pour the henna from the bag into a bowl (for short hair you will need 50 g of henna, for long hair - 200 g) and pour boiling water over it, stir thoroughly so that there are no lumps. In order to get a very rich color, you can add a few drops to the resulting mixture.
From the book Home Master by Vladimir Onishchenko
Plastering broken areas Broken areas of plaster and especially its edges should be thoroughly moistened with water. The better the edges of the old plaster are wetted, the more firmly the applied solution adheres to them and the more monolithic the plaster becomes. In case of insufficient wetting
From the book Exterior decoration of a country house and dacha. Siding, stone, plaster author Zhmakin Maxim Sergeevich
Plastering slopes and caps Before plastering window slopes and caps, they must be caulked (fill the groove between the wall and the window or door frame) and prepare the surfaces (if required) for applying thick plaster to them
From the book Wood Burning [Techniques, techniques, products] author Podolsky Yuri Fedorovich
Plastering internal slopes Plastering the upper slopes begins with hanging rules strictly horizontally on the upper parts of the slopes. Having plastered the top of the slopes, the rules are hung strictly vertically on the sides of the slopes and plastered
From the book Handbook of Painting Masters author Nikolaev Oleg Konstantinovich
Plastering caps Caps are plastered in the same way as slopes. The solution is leveled with a spoon, at the ends of which two cuts are made. The cutouts are necessary in order to leave gaps between the boxes and the plaster. The dimensions of the gaps are the same as on the slopes. If
From the book Practical summer shower and toilet at the dacha author Dobrova Elena Vladimirovna From the book All about tiles [Laying with your own hands] author Nikitko Ivan From the book Building a house quickly and cheaply author Evgeniy Vitalievich Simonov
Plastering the surface for painting The highest quality layer of paint is obtained if it is applied to thoroughly dried plaster. In this regard, when finishing premises of any type - wooden, concrete, brick or block - walls and ceilings,
As soon as a new stove is installed in a bathhouse, or repair work is carried out on its surface, any bath attendant asks one question: “How to plaster a stove”?
Under the influence of heat, moisture, and expanding stones and bricks when heated, cracks appear on the stove. A small web of cracks gradually turns into solid holes. Therefore, repairing a stove in a bathhouse is common.
There is no need to wait for the moment when the crack turns into a hole. It's time to get down to business right away. To solve the issue of stove repair, plaster solutions will help. The main purpose of these solutions is to give the queen stove its original appearance.
The finishing components for furnaces continue to be: clay, sand, lime, cement, asbestos. These are binding materials, and their mixture with water is called a solution.
The most important purpose of binder mortars is to bind together the masonry of the furnace. A prerequisite for obtaining a high-quality solution is the good quality of the starting materials.
Therefore, sand, cement and asbestos must be sifted through a fine sieve before starting work. The clay is pre-soaked in water and filtered through cheesecloth, and then thoroughly mixed until smooth. Clean, dry clay will reduce the strength of the mortar.
An important point when preparing solutions for plastering stoves is the correct proportions. The most important thing is the ratio of clay and sand; the ratio is one part clay to two parts sand. The components are mixed dry (with the exception of clay), and filled with clay or lime water. The more water you add, the thinner the solution will be, so you need to add water carefully, in small portions.
There are many types of solutions, I will give recipes for the most popular and simple ones.
Choosing fireproof plaster for a stove in a bathhouse
Most heat-resistant joints are universal. They can be used not only as a material for creating a flat surface and leveling walls, but also as a reliable base for brickwork. When choosing plaster, you first need to pay attention to its operating temperature and correlate it with a certain degree of heating of the stove in your home bath.
The raw materials for the production of heat-resistant fillers are clay, cement, sand, lime and gypsum. The key components - lime and clay - are used in all mixtures; other ingredients may be absent or appear in different proportions. In the past, asbestos was also added. But today it has been completely abandoned due to the high toxicity of the material and harm to health.
The range of oven putty in stores is for every taste and budget. But if you think that it is enough to just take ordinary cement plaster for the fireplace, which will retain its qualities and appearance for a long time, you are mistaken. This is only possible for decorative stoves that do not operate in the heating system. The composition for operating furnaces must have special properties.
We suggest you familiarize yourself with: Steam room oven with water tank
External insulation of the bath
The roof of a bathhouse is an equally important element of construction, since the supporting frame on which the roof is mounted must comply with all civil engineering rules and ensure the structure’s reliability in case of unforeseen weather conditions.
Technical preparation and processing of rafters in a brick wall in a bathhouse must be carried out thoughtfully and clearly, in accordance with all the rules of architecture and construction. Therefore, it is better to entrust the fastening of wooden rafters to a brick wall to a competent builder, especially since erecting a roof in a bathhouse alone is an impossible task.
Insulating the walls of a brick bathhouse from the inside and outside is a prerequisite for the high-quality completion of a construction project. To do this, it is necessary to fill the voids between the internal and external brickwork. Insulation of a brick wall of a bathhouse from the outside can be done as follows: fill the void with a mixture of sawdust, sand and lime in a proportional ratio of 2:2:1. To this are added expanded clay and slag of medium or fine fraction. All insulation material is filled with thick lime mortar.
Tile insulation is another option for insulating the outer wall of a bathhouse, which can be purchased at specialized construction stores, and is a synthetic binder base. It should be remembered that according to construction rules, there must be an air gap between the insulation and the outer wall, which ensures air circulation.
A wooden grate is mounted on a vertical brick surface, and waterproofing material, foil or expanded clay is fixed onto it. A good option is basalt and/or fiberglass insulation, which is not afraid of temperature changes and high humidity in the interior. The next touch in the decoration of the steam room is clapboard lining, the material of which is selected from deciduous wood, giving the interior a pleasant aroma, for example, linden or oak.
- internal brick surface;
- waterproofing agent;
- frame slatted grille;
- selected insulation;
- sheathing of the second ball;
- fiberglass;
- vapor barrier material;
- wall upholstery with wooden clapboard.
The composition of the mortar for plastering a brick stove or fireplace is selected depending on the type of brick (fireclay, red), the clay used and other factors.
Additionally, the operating and performance characteristics of the composition used are taken into account. The meaning is:
- Surface heating temperature.
- Direct exposure to fire.
- Further wall cladding.
The stove in the bathhouse must be plastered with a solution whose composition and properties optimally meet all the specified requirements.
The easiest way to plaster is to coat the stove with clay. Clay has several advantages:
- The material is cheap - you can get clay and sand in a quarry. It is better to choose deposits closer to a body of water. If sand and clay are mined yourself, the composition will be almost free (excluding transport costs).
- Thermal and operational characteristics - in terms of its composition and heat transfer, clay is identical to the red brick used for masonry. The linear expansion of the materials is the same. For these reasons, the composition of ready-made mixtures for plastering a refractory brick oven always includes clay.
During plastering, it is necessary to achieve a tight fit to the surface of the brick. To do this, carefully observe the proportions of clay and sand when preparing the solution, and also apply the recommendations of experienced craftsmen when applying the composition to the brickwork.
The preparation of clay mortar for plastering a bathhouse and any other brick stove proceeds as follows:
- Clay mass is prepared. For finishing, clay with a normal consistency is suitable; lean and greasy material will have to be diluted with impurities. Furnaces made of refractory bricks are plastered with a mortar made from fireclay clay and the same sand. The composition is mixed 1 to 1.
- Preparation of the solution. Sifted clay powder is poured into the container. Fill with water to completely cover the composition. Subsequent layers are laid in a similar manner until the container is completely filled.
- After about a day, the mixture is thoroughly mixed and water is added.
After two to three days, sand is added to the solution. Traditional methods recommend adding fine manure or bran to the finished composition to prevent rupture of the plaster layer and the appearance of small cracks.
Liquid glass can be used to strengthen the plaster layer in two ways. Some craftsmen add liquid glass directly to the clay mixture before plastering, others use it as a primer, applying it diluted to a dry surface.
Preparing a clay-sand mortar for plastering red brick stoves is a labor-intensive process that requires a lot of physical effort and time. It will take 2-3 days to prepare for finishing.
We invite you to familiarize yourself with do-it-yourself formwork for blind areas
The difficulty of preparing clay-sand mortar yourself explains the popularity (despite the high cost) of ready-made plaster. The range includes mixtures intended for finishing and repair work.
Mixtures of the following brands are in demand:
- Plitonit Super Fireplace Thermal plaster.
- Plitonit SuperFireplace OgneUpor.
- Pechnik
- Borovichi CMEA.
- RS parade.
- Terracotta.
The list contains modern, heat-resistant, high-strength mortars suitable for any type of brick kiln. Manufacturers produce formulations in the form of dry and ready-to-use mixtures. A series of some brands produce primers, as well as textured (decorative) compositions.
When choosing the appropriate type of mixture for plaster, pay attention to several characteristics:
- Heating temperature - basically, plastering compositions are intended for application to a surface heated to 600-800°C. Special heat-resistant Terracotta plaster compositions can withstand temperatures above 1200°C; they are used for finishing combustion chambers and open hearths.
- Purpose – solutions are used for finishing and initial finishing. Good properties and strength characteristics make it possible to further cladding with natural stone or ceramic tiles.
- The components are recommended mixtures for plastering stoves; they contain plasticizers, liquid glass, and additives that increase heat resistance. The components used affect the properties and characteristics of the preparation. Thus, mixtures based on terracotta clay are infused after stirring for 30-60 minutes.
Plaster mortars have advantages over clay: greater strength, ease of preparation, quick drying and good adhesion to brickwork.
Another popular way to finish a brick surface is decorative plaster for the stove. Finishing advantages:
- Obtaining a beautiful textured surface.
- Small layer thickness.
- High strength structural fireproof plaster.
The mixtures contain plasticizers that promote the elasticity of the top layer and prevent its damage. The buyer is offered several types of decorative solutions:
- Mixtures with mineral chips are easy to apply and cover minor defects and chips. The color of the filler stone varies from white to black.
- Compositions for obtaining heterogeneous texture. Decorative plaster for fireplaces and stoves is presented in a wide range, from standard bark beetle to unique compositions that create almost any texture. The beauty of appearance directly depends on the craftsman performing the work.
Decorating the stove with decorative plaster will only work if the brickwork is even. The maximum application thickness is no more than 0.5 cm. If the differences are greater, you will first need to level the surface.
Plastering walls with adhesive mixture
Preparing the base
First of all, it is necessary to properly prepare the foundation. There should be no crumbling or peeling areas, as well as contaminants that impair adhesion.
This entails using 5 pieces of tile adhesive. This does not provide sufficient adhesive coverage or support for the tile. Do I need to prime plaster walls before tiling? When using a cement-based adhesive, the porous background must be primed with a suitable primer.
How to properly level walls with glue
When using ready-mixed glue; No primer is required unless the surface is dusty or shiny. But don't sit back just yet—at the risk of sounding like party opera, this is a fun beat. Now we need to think about adhesives and installation. After all, your new tiles will only look better if they are installed correctly.
In particular, concrete slabs must be cleaned of the oil used in their manufacture. To do this, you can use warm water and detergents. If there are traces of mold or mildew on the surface, it must be cleaned with a wire brush.
The final stage of preparation is the application of a primer, which will not only improve the adhesion of materials, but also protect the base from the effects of microorganisms. The solution is applied to the walls in two layers.
In many cases, it makes sense to choose a fast-acting adhesive. However, there are many times when you prefer to use an adhesive with a longer open time - when you are laying a floor in a complex pattern such as herringbone or when laying large format tiles on a wall and you want to ensure a flawless finish.
So as a reminder, when covering any floor and many walls, you need to use powdered adhesive. The exact choice of adhesive will depend on the color of your grout and the desired flexibility and working time. There are a few more things to consider while we're on the topic of tile adhesive. Let's take a closer look.
Installation of beacons
This stage is quite complex, as it requires extreme precision - all guide beacons must be positioned strictly horizontally, in the same plane. This determines how smooth the walls will be, i.e. what plastering is done for.
If you want to install either wet or wet, it is very important that you use flexible tile adhesive. The heating and cooling processes create significant stress, and the flexible adhesive absorbs this stress, reducing the likelihood of the tiles cracking over time.
Electric underfloor heating systems consist of small cables that are laid over the underfloor layer and then covered. However, we do recommend using a self-leveling compound to cover the cables and ensure a perfectly level surface for the tiles - it can be a nightmare to grout over exposed electrical cables!
As beacons, you should use a special plaster profile, which is fixed to the wall using lumps of gypsum or the same adhesive solution. To adjust the position of the beacon, screws can be screwed in on both sides. In this case, the profile with its edges will “lie” on their caps.
Note! If necessary, check their position several times with a building level.
If you are on a time critical project, our kits are as fast as 45 minutes. Mix, pour and go while you have your tea break! Absorbent surfaces such as plaster can suck water out of the tile adhesive, reducing bond strength and working time. Applying a to the backing in front of the tiles seals the surface, preventing water absorption and increasing bond strength. They are also useful if your substrate is too dusty or smooth for tiles.
When applying two coats of primer, it is best to apply the first coat vertically and the second coat horizontally. When it comes to fixing tiles, the old adage that "Failure to prepare to prepare for failure" couldn't be truer. So before you open your first bag or tub of tile adhesive, it's important to have your subs ready, i.e. they are flat, clean and strong enough to take your tiles.
Preparation of the solution
The peculiarity of preparing the solution in this case is that it may turn out to be too greasy, which will lead to cracking of the surface. Therefore, sand is usually added to it.
The fat content is determined during its preparation; if the solution sticks strongly to the instrument, then it is necessary to add sand. As a result, the composition should only slightly stick to the trowel.
Nobody wants uneven floor tiles - it's hard to get the tiles level and you'll end up losing the adhesive. Use a 2m straight edge to check how flat your underlayment is; if there are any deviations greater than 3mm, then we recommend pouring a layer of self-leveling layer to ensure a smooth, level surface.
Uneven walls can be made flat by using a good plaster material or by adjusting tile slabs. Dust and dirt can interfere with tile adhesion and can get into the grout, so be careful to sweep your substrates in front of the tiles. There's a good reason why a lot of chicks swear by their Henry Hoover!
Applying the composition to the wall
After preparing the base and completing the solution, you can proceed directly to plastering.
The instructions look like this:
As we touched on above, it is important to consider the weight of the tiles and adhesive when covering plaster or drywall walls. Fresh plaster can withstand 20kg per square metre, and plasterboard can withstand 32kg per square metre. Typically, you will need up to 2 - 4 kg per square meter for adhesive and mortar, on top of the weight of the tiles. This weight may vary; small ceramic tiles tend to be quite lightweight, but larger porcelain tiles can weigh over 20kg per square meter. Where possible, we advise attaching wall tiles to walls without a wall or better yet.
This completes the plastering procedure. If you do not make technological mistakes during its application, then the adhesive plaster will be quite durable and of high quality.
What is plastering done?
Traditionally, the most affordable and yet effective binding material is high-quality gully clay. Why is it gully, because the mineral of the required quality lies at a certain depth from the surface. Which, however, does not at all prevent the extraction of clay raw materials in quarries and banal pits.
In general, there are a lot of binding materials for plastering a stove; in addition to clay, they include: cement, alabaster, commonly known as gypsum, and slaked lime. In addition to binding materials, the solution contains an inert material, in our case quarry or gully sand. Moreover, its chemical composition can be different; certain sands have feldspar as their raw material, others have quartzites.
A word from Experienced! Practice shows that good inert sand is made up of different fractions, or, in more professional terms, has a different coarseness modulus. Grains of sand that are different in size adhere to each other better and create a denser mass. Therefore, you should use fractionated or, as it is also called “calibrated” sand, with caution.
In addition to the binder and inert substance, the plaster mortar must also contain alloying substances, that is, materials the addition of which to its formulation will make it possible to obtain a mortar with certain properties. In our case, the key properties are: temperature stability, strength, ductility, the ability to maintain working qualities for a sufficient amount of time and be ready for use.
Alloys include: liquid or silicate glass, table salt, asbestos, various kinds of heat-resistant plasticizers, fireclay grains, fiberglass.
Attention! The World Health Organization classifies asbestos as a material that has carcinogenic properties, so its use should be limited by rationalism and common sense and accompanied by strict compliance with safety standards for handling potentially hazardous substances.
Here are the basic recipes for plastering solutions. For ease of use, we provide this information as a table:
| Component name | Volume fraction in the formulation, in parts |
| Clay | 1 |
| Lime | — |
| Alabaster /gypsum/ | — |
| Cement | — |
| Sand | 2 |
| Asbestos | 0,1 |
| Liquid glass | 0,2 |
| Table salt | 25 gr. per 1 kg of finished solution |
Important! The clay in the given recipe, which is noted in the reference literature as fire-resistant plaster for the stove, should be thinned, ordinary. If enriched or otherwise fatty clay is used, the number of parts of sand should be increased to 4. Clay is added to the mixture only in soaked form, in the state of a clay mash that has matured for at least 4 hours. The fat content of the clay and its overall quality are determined through instrumental control, and at home in a simple but effective way, testing “on a stick”.
Determining the quality of clay at home
Since ancient times, stove makers have determined the quality and fat content of clay, in particular, by testing it “on a stick”. To do this, a smoothly planed stick is lowered into a mature clay mash; in modern conditions, this can be a clean and preferably uncracked handle from a factory-made shovel. The stick is lowered to the entire depth of the container and slowly removed. Good quality clay should cover the stick with an even layer about 1.5 - 2 mm thick. This is the norm.
If the stick is covered in places, grooves and traces of runoff are visible on the surface, then the clay is thin. This is either “tortured” or used in a ratio of 1 to 2 with sand. If the stick is covered with a thick, uneven layer, including loose lumps, then the fat content of the clay is excessive, and the rate of adding sand to the solution should be increased to 4 parts.
Plaster mortars based on alabaster
Gypsum plaster mortars belong to the class of high-strength, but have an unpleasant quality to use; their life time is about 6 - 8 minutes. Within 20 minutes, the solution completely and irrevocably sets.
Here is the recipe:
| Component name | Volume fraction in the formulation, in parts |
| Clay | — |
| Lime | 2 |
| Alabaster /gypsum/ | 1 |
| Cement | — |
| Sand | 1 |
| Asbestos | 0,2 |
| Liquid glass | — |
| Table salt | — |
| Polyvinyl acetate glue /PVA/ | 50 gr. per 1 kg of finished mixture |
Attention! To mix alabaster-based mixtures, you need clean and cold water. PVA glue is used, partly, as a plasticizer, and in general, as a reaction inhibitor, that is, it somewhat slows down the setting process of gypsum. But it must be remembered that gypsum mixtures are demanding in terms of speed of work and their full use.
Cement based plaster mixtures
Cement is a good binder, but classic cement mortars are characterized by low temperature stability, so heat-resistant plaster for stoves includes several components that increase its characteristics:
| Component name | Volume fraction in the formulation, in parts |
| Clay | 1 |
| Lime | 1 |
| Alabaster /gypsum/ | — |
| Cement M-500 | 1 |
| Sand | 2 |
| Asbestos | 0,1 |
| Liquid glass | 0,1 |
| Table salt | — |
| Polyvinyl acetate glue /PVA/ | — |
The order of mixing such solutions is generally accepted. The dry ingredients are mixed in a separate container, then added to the aqueous clay solution.
Important! The consistency should be close to the thickness of sour cream and the finished solution should be firmly held on the surface of the trowel. An exception is the mortar for the first layer of masonry. It should be somewhat thinner and confidently fill masonry joints.
Conclusion
Answering the question posed at the very beginning of the article, it should be said that, in general, plastering with tile adhesive is acceptable. However, this procedure has a number of limitations, both in terms of the type of composition and the thickness of the plaster layer.
Therefore, before you get down to work, you need to take all these nuances into account. Additional information on this topic can be obtained from the video in this article.
Tiles? you need to level approximately 2.5 - 3 centimeters. Is this possible due to the thickness of the application one day before laying the tiles? if not, please advise other solutions/materials
if you need it quickly, then there is quick-drying
mp-75 dries longer but this is price-quality
Topic: leveling walls with tile adhesive when laying tiles
I don’t know how to name the topic more correctly.. In the bathroom, at least one wall has a vertical difference of about 2 cm. Is it possible to level out this thickness with tile adhesive? thickness when leveling with glue? If not, then pre-level them with plaster? I’m going to lay the tiles myself, so don’t give answers like “the craftsman will do everything himself.”
If you are not in a big hurry, then where it is “thick”, first apply glue with a 10*10 comb, let it dry, and the next day - completely. The glue is thicker.
It is better to pre-level the wall than to decide on large plaster mixtures. It will be much easier for you, as a beginner, to lay tiles.
FARAON7575, I'm thinking of plastering it with glue in 2 stages, so I'll try to level it. My mother-in-law professionally does plastering, putty and other repairs. But for some reason she wants craftsmen to lay the tiles. Although there is not enough money anyway. And if he says you will lay it yourself, then I will not level it. that's bullshit
There was such a problem, the vertical difference was 2.5 cm. I found “Plitonit Maxislayer” tile adhesive; it can be applied up to 3 cm. But if you lay it while leveling it, then this is a very labor-intensive and time-consuming process. I had time, I wasn’t in a particular hurry, I managed to lay 3-5 tiles in the evening (ceramic granite 15*60cm), it turned out quite evenly, but in some places I still didn’t catch a fraction of a millimeter.
Can tile adhesive be used as plaster?
After this, you can safely apply the plaster mixtures. For a more reliable process, you can add tile adhesive and PVA glue to the plaster (mixture). Mix the mixture thoroughly. It should have a sticky consistency. Then, using a tool, apply the resulting solution to the wall. The layer thickness should be 6-7 millimeters.
So, is it possible to plaster with tile adhesive - decide for yourself. The main thing to remember is that you need to use the highest quality materials for renovations, so don’t skimp!
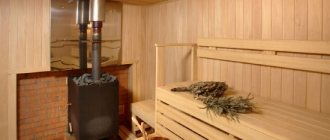
Steam room
In a modern bathhouse, there should be three rooms - a steam room, a washing room and a vestibule. Additionally, of course, you can provide entertainment if the space allows.
To arrange a steam room, you need to take into account several nuances. For example, there are sudden changes in temperature conditions, where the maximum value can be above 130 degrees. Don't forget about hot steam, which is emitted in a powerful stream, and high humidity.
Cladding boards that do not absorb liquid, do not heat up, and do not emit harmful substances from heating are ideal for finishing a steam room in a bathhouse. For lining, choose linden, aspen or cedar surfaces.
Now the lining is presented in four classes, depending on the quality of processing. Choose the best type so that it does not deteriorate and lasts a long time.
Do not forget to insulate the walls before covering, and also the fact that the panels cannot be treated with varnish, paint and antiseptic, because they will release harmful substances.
Is it possible to putty/level a wall with tile adhesive?
Vorpos is a little off topic, but he puzzled me a little and I’ll ask anyway. it turns out to be quite weak. that is, it can be easily passed through with a hammer drill. and is scratched with a nail. How normal is this? While tearing off the remnants of the old renovation, I also noticed an interesting feature - the tile adhesive on the floor, about 7-8 mm thick, breaks into two pieces first. Next comes the floor screed, which was done at the same time, about 5 years ago. but it is very strong, it is difficult to break and pieces break off from it very reluctantly. Why is that? from Floor screed
Source