Before kindling it is necessary
The easiest way to do it yourself is to convert a standard wood-burning stove into equipment that will run on oil.
To do this, it is best to find a suitable training video on the Internet to avoid any mistakes during operation. You also need to follow the instructions exactly and take into account all the nuances and features of the process. We suggest you familiarize yourself with How to paint a brick stove in a house, choosing varnishes and paints
The whole process is divided into the following steps:
- A diagram of the future stove is created, which should indicate what changes must be implemented in order to obtain a high-quality and reliable result.
- Next, you can start forming the tank, namely, you will need to pour the treatment into it to heat up the furnace. For this, readily available and standard iron sheets can be used and welded properly to form an iron tank.
- A special hole is created in the potbelly stove itself, which is designed to supply air.
- In order to regulate the flow of air into the firebox in an oil stove, it is necessary to install a valve of a suitable size.
- The chimney is eliminated, and instead a pipe should be installed in which there are holes for the passage of air.
- A secondary combustion chamber is created, which should have a removable top. It is this that is correctly and tightly connected to the pipe in which there are air holes.
- Next, the previously removed chimney is installed.
In order to use a coal-fired stove, you need to do some preparatory work. This, first of all, applies to those heating structures that are located in dachas, country houses, i.e. places where owners appear infrequently.
Article on the topic - how to light a stove, detailed instructions.
For the normal passage of the entire combustion process, it is necessary:
- carefully inspect the stove structure, starting from the firebox door of the stove and ending with the chimney. If cracks are found in the brickwork or chimney pipe, they must be sealed with a sand-clay mixture. Otherwise, the room will instantly fill with smoke, a large amount of carbon monoxide may appear, and small cracks will turn into large cracks and can actually damage the masonry;
- whitewash the pipe if you have not used the stove for a year or more;
- clean the chimney structure, including chimney channels, pipes from soot (if you have not used the stove for 3-4 months);
- clean slag and ash from the furnace. To avoid the appearance of dust in the room, combustion waste must first be filled with water, then raked out and taken outside;
- check for traction. To do this, insert a newspaper folded lengthwise into the firebox, set it on fire, and if smoke goes up the chimney, then everything is fine;
- use a dry cloth to wipe the outer part of the heating structure, otherwise an unpleasant odor will appear during the fire;
- Heat a little at a time 2-3 times a day, if the unit has not been heated for a long time, to prevent overheating of the stove.
- Prepare coal.
- Take crumpled newspaper or other paper and place it in the firebox. Ignition can also be accomplished using wood shavings.
- Place 10-12 wood chips, for example pine or birch, on top in the shape of a well or hut. It is necessary to ensure that air can circulate freely between the firewood and the paper, which will promote more efficient combustion.
- Set the newspaper on fire.
- Close the door and at the same time open the ash pan, with which you can regulate the combustion process.
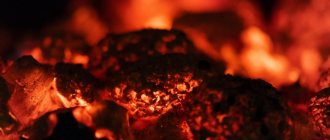
- After the wood has burned, pour fine coal on top with a layer thickness of approximately 12-15 cm.
- After the fuel burns strongly, you can continue to use fine coal, or you can pour larger coal into the firebox in a layer 20-25 cm thick (depending on the dimensions of the combustion chamber).
We invite you to familiarize yourself with Build a sauna from profiled timber with your own hands
To prevent smoke from entering the room, during the next addition of fuel, you should close the vent with the door open.
When can you light the stove?
When the unit is fired, water vapor begins to be released, which must be removed through open doors and vents, creating increased ventilation. After drying, combustion follows with a gradual increase in the portion of fuel, while the combustion chamber door is closed.
The chimney must be open during the day. As for how long it takes for the stove to dry after laying, this process differs in time. Its duration depends on the size of the heating structure and ranges from 3 to 6 days.
Among other methods of drying a stove after finishing its laying, the natural method is popular. To implement it, all the valves and views are opened to create a draft. Next, the oven is melted, and this is done no earlier than after 2–3 days. It is heated for only 20 - 30 minutes. The materials for this process are wood chips and paper.
So it is necessary to heat the unit for several days, increasing the time daily. It would be ideal if you do the kindling twice during the day, observing the interval. If you fire quickly, cracks may appear in the brickwork. Therefore, experts do not recommend rushing, since steam will be removed due to the presence of drafts due to open windows and doors.
If heavy smoke appears during the first fire, then it is necessary to increase the draft force in the pipe. The best solution to the problem would be to burn paper. Drying should be done indoors at a stable temperature from +5°C to +25°C.
Do not forget that when drying, all doors are kept open. If there is smoke formation, then this phenomenon is considered normal and there is no need to worry. When a significant amount of moisture is released during the combustion process, it will create obstacles to the removal of fuel combustion products, since it has an increased density.
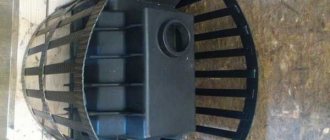
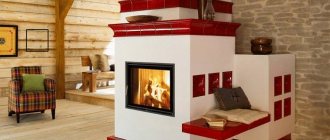
Malyutka stove design
Inside there is a cooking chamber and two drying compartments, located one above the other.
One of them, the bottom one, is located on the right just above the slab ceiling. This chamber is closed and is used for vertical drying of mushrooms or fruits strung together in bunches. Therefore, when constructing a Potapov heating stove, hooks made of thick wire are inserted into the ceilings on the sides of the lower chamber, on which it is convenient to hang food for drying. Another option for designing a drying chamber is to make shelves for baking sheets. The temperature in the drying chamber can remain at the same level for a long time. To monitor temperature fluctuations, you can place a special thermometer with heat-resistant glass on the door. The drying chamber door is mounted on a metal frame. If desired, the hinged door can be replaced with an L-shaped flap. The upper drying chamber is supposed to have no door, although if necessary, a damper is installed on it. This should be thought out in advance, and a metal plate should be inserted to secure the damper between the side bricks. It is not recommended to cover the walls of the drying chambers with plaster - it is enough to cover the seams. You can make the Potapov stove higher by laying 2 additional rows of bricks after the 18th and 19th rows.
The design of the Malyutka stove is simple enough that you can build it yourself at home. This will require basic construction skills, but usually even novice craftsmen can get this small-sized stove right the first time and without any flaws. “Baby” is suitable for any solid fuel, but if you intend to burn with coal, peat or dung, be prepared for annual cleaning of flues clogged with soot. Such a stove can only be heated in winter.
Repairing the structure is quite simple, because there are no horizontal channels in it, and there is a cleaning door in the vertical channel.
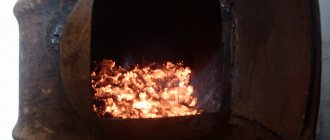
First furnace firing - conclusions
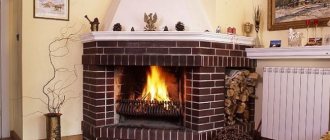
Everything suited me - it became hot on the first floor (+26C), the wood burned for 5 hours (or rather, it smoldered). At the same time, the temperature of the sandwich was quite acceptable - on the second floor the sandwich was simply warm and did not burn your hands.
So we can safely wait for the frosts - I’m ready for them.
PS. The power of the Butakov model Engineer is 15 kilowatts - this is just enough to heat the first floor of my house - 100 square meters. I will install a Gucha Prometheus or Gucha Arina fireplace on the second floor. As soon as I install it, I’ll write it down in my diary.
Principles and rules of kindling
The rules for lighting a stove have been passed down from generation to generation. Over the centuries, the technology has been refined, and today it has reached perfection. Many stove operating procedures form the basis for servicing modern heating equipment, such as pellet boilers
Preparatory work
Before lighting the stove for the first time after completion of construction work, you will need to wait until the solution has completely dried.
The first stage is an external inspection, paying attention to the following points:
- Corresponding thickness of seams;
- correct execution of brick ligation;
- compliance with vertical angles;
- ensuring the accuracy of tile installation.
In this case, deviations are allowed: for masonry without cladding - up to 5.0 mm, and up to 2.0 mm when facing with tiles, vertical - no more than 2.0 mm per 1.0 m height.
Next, check the density of the masonry. Typically, a material with a high emission of black smoke is used for this. A trial fire is carried out for several days in a row with a normal load of firewood. When the furnace is operating, not only the uniformity of heating along the outer walls is determined, but also the uniformity of cooling. Next, the structure is checked for cracks and, if found, they are promptly repaired.
Stacking firewood
Before laying firewood, clean the ash chamber to allow the blast air to flow without resistance through the ash pan to the flame. The stove is lit only with dry wood.
After cleaning the stove from any remaining ash, they begin to place logs in the firebox. This is done in two ways: • a hut with a cone for a large combustion space; • in parallel, maintaining clearances of 8 to 10 cm.
Firewood is placed in the center of the firebox or closer to the door until approximately 2/3 of the firebox is filled. The top of the combustion space must remain free at least 18–25 cm. Firewood should not be stacked against the back wall.
Methods of igniting a flame
Next, push the view to the desired level and push the blower door a little. The paper is lit with matches in front of a pile of firewood. After igniting the wood, close the combustion door. When burning evenly, cover the view. The combustion process is adjusted by opening/closing the viewer and the blower.
The firebox door must always be closed. Open it only if you need to stir the coals with a poker or add firewood.
Control of the combustion process:
- White flames and noise in the smoke ducts indicate a high draft; it is reduced by using the blower door.
- A red flame with dark smoke from the chimney indicates low draft and you need to open the vent slightly.
- The yellow color of the flame characterizes the normal process of fuel combustion.
Nuances of choosing fuel
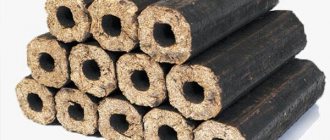
A home stove is actually a universal heating device, since it can operate on different types of fuel: wood, coal, peat. In modern conditions, fuel manufacturers offer new types, so-called Euro-firewood, and various options for pressed briquettes.
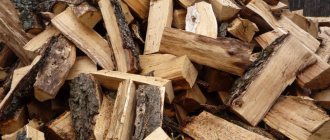
The traditional fuel for the stove is birch, which has a high lower calorific value. Its logs burn out completely, do not shoot or spark. The only drawback of birch is that if it is placed in a firebox higher than normal, a strong fire can lead to a fire.
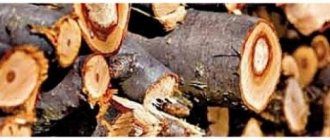
In terms of calorific value, the best fuel is oak, which burns for a long time and produces a lot of heat. Its net calorific value is almost 20% higher than that of birch. But since the price of oak is also much higher, before choosing, you need to make a simple calculation of what will be more profitable for heating in a given climatic region.
Oak firewood
Pine and spruce firewood have a heat transfer even lower than that of birch and oak. For the heating season, they are purchased 20-30% more. The presence of resin in the logs not only causes a strong crackling sound, they also shoot and can throw pieces of ash onto the floor; if it is wooden, a fire may occur. Therefore, when using this type of firewood, it is recommended to place a metal sheet in front of the stove.
Aspen and alder firewood are highly valued because in addition to providing heat, they clean the chimney of soot, which is why they are rightfully considered “royal” firewood.
Euro firewood performed well when firing a Russian stove, with a complete combustion process and low ash yield. Their price remains high, equal to the cost of coal, but their calorific value is approximately the same.
Mechanical chimney cleaning: only in the warm season
As a rule, owners of stoves and fireplaces clean their chimney once, before each heating season, and it’s good if this is enough. The mechanical method is the oldest, but even today it makes sense:
You can clean the chimney manually both from inside the house, from below, and from above, directly from the roof. Each method has its own tool.
If you choose a brush that is used from above, you need to tie a rope to it, hook a weight, and then launch it into the chimney through the roof. It will pass along the entire chimney and take away soot from the walls. It is only important to lower the brush carefully and gradually, slowly, so that the soot is collected efficiently and the load does not damage the chimney itself. In this way, you need to lower and raise the brush several times until it becomes noticeable that the soot has been cleaned and the blockage has been broken through. Typically, one brush is not used for more than three heating seasons.
Stages of work - step-by-step instructions
You have already chosen how to plaster the stove so that it does not crack. Now is the time to start the application process:
- we clean the masonry from the old coating (if any), debris, dirt, dust;
- seal cracks with cement mortar;
- We prime the masonry. To do this, you need a solution, which is sold at any hardware store. Costs from 50 to 100 rubles per liter. There is no need to dilute with water or other liquid. From a can, bucket or bottle, apply the primer to the wall with a brush;
- we attach the reinforcing mesh to the self-tapping screws;
- plastering.
Important: all dust, dirt, and debris from the masonry must be thoroughly removed. Otherwise, cracking or chipping of the finished coating is possible.
If the wall is not cleared of debris and dirt, the plaster will not last long.
Choose your primer carefully. Choose a composition with deep penetration so that in the future the plaster will lie tightly on the wall. After applying the primer, wait at least 24 hours, then plaster the stove.
The fittings are attached with self-tapping screws so that the mixture stays firmly on the wall and does not crumble, and the heater itself becomes more stable and strong.
The final coating is done step by step:
- apply in an even layer;
- smooth with a spatula, then with a trowel. The reinforced mesh should not be visible through the coating;
- if another layer is needed, then leave the first one for a day, prime and apply the second (also the third);
- after the mixture has dried (after 24-48 hours), the surface is sanded with sandpaper to make it smooth;
- The final stage is sweeping away dust from the structure and putting the heater into operation.
After the stove has been plastered, it is usually covered with lime. Dilute the dry lime mixture with water and salt. Proportion – 10: 1: 0.1
It is important to maintain the proportions, otherwise the mixture will turn out incorrectly, it will not lie on the wall in a dense layer
Control check
After the droplets of condensation have disappeared, you need to carry out quality control of the dried oven. For this purpose, firewood is laid that will be used every day. The total mass of burnt firewood will be 20 kg. It is advisable to adjust the draft so that combustion efficiency is maximum.
Over the course of several hours, the masonry in the firebox area is inspected very carefully. Ideally, no cracks should occur. But in some situations, the appearance of small cracks is considered normal. Small formations that look like cobwebs do not need to be sealed. The oven is ready for use.
The preparation went well
Forced drying of a new oven
Forced drying is drying with dry wood that burns in the firebox.
Such a fire should be carried out once a day, using finely chopped logs with a diameter of no more than 3-4 cm.
Before drying the stove, the vent must be opened slightly, and the main valve can be opened halfway. But the secondary air supply doors should be kept closed.
After the combustion process is completed, when the firewood turns into coals, the ash door must be closed so that a gap of approximately 1 cm wide remains, and the main valve must be closed, leaving a gap 1-2 cm wide for the exit of moist air. The secondary air supply doors must be slightly open.
4-6 hours after heating, it is necessary to fully open all valves and doors, except for the heater door
Particular attention should be paid to the fact that during the entire period of forced drying of the stove, the heater door must be closed. This forced drying must be carried out for 7-10 days. On the first day you should burn approximately 2 kg of wood
Then every two days you need to increase the amount of wood burned by 1 kg
On the first day, approximately 2 kg of wood should be burned. Then every two days you need to increase the amount of wood burned by 1 kg.
In the cold season, the duration of forced drying increases and can be 2-3 weeks. But at the same time, the amount of firewood burned in one session should not exceed 7 kg. An indicator of the completion of drying the oven is the absence of condensation on the doors and the main valve after the oven has been closed for 3-4 hours.
After the drying process is completed, it is necessary to carry out a control fire. You can already heat the stove with normal wood and at full power. The amount of firewood for one firebox will be approximately 20 kg. After the wood burns and coals form, all doors and the main valve should be closed. Over the next 3-5 hours, you still need to observe the outer surface of the stove to check if any cracks have formed in the seams. The cause of cracks may be improper masonry or poor quality materials.
When cracks 2-3 mm thick appear, it becomes obvious that there was a defect in the masonry and these cracks must be repaired. But you shouldn’t do this right away; it’s best to operate the stove for 3-6 months, and only after this period begin to repair problem areas using an elastic clay-sand mortar.
In general, thread-like cracks for a sauna stove are considered quite normal. The sauna stove is operated under rather harsh conditions. For example, in winter, in a few hours, only the outer surface can heat up from 1-5 °C to 70-80 °C, and this is a very wide temperature range. In addition, there are significant internal temperature differences. To prepare a heater in winter, it is necessary to burn up to 40 kg of wood, and in summer - up to 30 kg per firebox. The furnace masonry is subject to intense thermal expansion, so thread-like cracks may form in some heat-stressed areas after firing, which is not a sign of defective material.
Oven drying and safety precautions
When performing the drying process for brick kilns, you should definitely follow the rules to ensure safe handling:
- Before starting the kindling, you need to check the draft and make sure that the valves and views located on the chimney are open.
- Dry newspaper should be burned in the space above the view to eliminate damp and cold air.
- If there is no traction, the unit cannot be operated.
- It is prohibited to store firewood close to the stove if its volume exceeds the needs of one firebox.
- The combustion chamber is filled no more than 2/3.
- Do not accumulate coals in the firebox and allow them to fall outside.
- In strong winds, do not dry the stove using a firebox.
By the way, if you had to repair cracks in the masonry, many people are interested in when you can fire the stove after repairs. There is no need to rush - you need to wait until the solution is completely dry.
What to heat with?
The potbelly stove is efficient, small-sized, and unpretentious in operation. Its installation is not difficult, and kindling is a process that does not require special preparation. Firewood (or dry wood chips) is used as fuel.
Expert opinion
Pavel Kruglov
Stove maker with 25 years of experience
When using firewood, it is recommended to use logs that do not exceed half a meter in length and 8-10 centimeters in thickness. This will allow them to burn efficiently and evenly, avoiding sudden smoldering. You can also take a closer look at wood briquettes, which are no different in properties from firewood. At the same time, they are more capricious in storage and, if left for a long time in conditions of high humidity, disintegrate into sawdust.
Wood is one of the most popular types of fuel. But how to heat a potbelly stove other than wood?
What to use besides firewood?
You can take:
- Peat briquettes, like wood briquettes, do not tolerate direct wetness, but they are less critical of storage conditions. However, when they are burned, a lot of ash is formed. Peat does not like long-term burning and produces an unpleasant odor.
- Coal is no less popular for kindling than firewood. It burns longer and has higher efficiency. But due to the high combustion temperature of the stove, coal-fired stoves place special demands on the design of the chimney.
- Pellets are granules made from compressed waste from the woodworking industry. The economic benefit of such fuel lies in the fact that it is produced from real waste and does not require special processing - cutting, splitting.
What can't you heat?
You should not heat a potbelly stove with raw fuel; this leads to moisture being converted into steam during combustion. Steam, passing through the furnace channels, cools them and settles on the walls of the structure. Mixing with soot, the drops form condensation, which leads to damage to the metal components of the unit and the failure of the potbelly stove. So, firewood must dry out for at least a year before use.
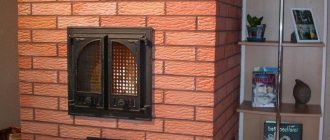
Why plaster a stove?
Quite a large number of people are wondering about the need to plaster the stove.
In most cases, a freshly laid stove has an attractive appearance that you want to leave unchanged, however, if the work is done at a sufficient level, and taking into account the use of high-quality materials, you can create a new engineering solution. How to properly seal a stove so it doesn't crack
Why do you need to plaster the stove:
- The first reason is its pleasant appearance. The room takes on an aesthetic and finished look.
- The second reason is design advantages.
- Strength and durability are improved.
- The tightness is enhanced.
- Energy efficiency increases.
- The possibility of insects developing in the masonry is excluded.
- Fire safety increases.
Temperature changes have a negative impact on the structure. After a certain amount of time, cracks may form, which will have a detrimental effect on the room (unpleasant odor from furniture, clothing) and on health (some of the combustion products will enter the room, and there is a possibility of carbon monoxide poisoning).
If the stove was not built from synthetic materials, in the future there is the possibility of the emergence of certain types of insects that will negatively affect the integrity of the structure. Plastering the stove will help avoid this problem.
Energy efficiency can be improved by applying a layer of plaster, which increases the thickness of the walls. As a result, the stove retains heat longer, and less fuel is needed to maintain heat.
The brickwork of the stove is subjected to constant and intense thermal stress. Flue gas heating temperature is 450-550°C. The brickwork constantly “walks”, expands when heated and returns to its original state when cooling. Over time, the seams crack and lose their tightness. To avoid rapid destruction, the stove masonry is plastered.
Plaster applied correctly to the surface of the stove provides the following advantages:
- The strength of the masonry increases.
- The tightness of the seams improves, which prevents carbon monoxide from entering the living room or steam room.
- Improves appearance. After applying the plaster mixture for stoves and fireplaces, the surface is tiled with ceramic tiles, natural stone or whitewashed. Some compositions create texture when applied and do not require additional finishing.
- Antiseptic properties - the plaster layer prevents insects from entering the seams of the brickwork; when antifungal components are added to the composition, the appearance of mold is prevented.
To prevent the stove in the bathhouse from cracking, it must be plastered with the correct solution, with strict adherence to the technological process. Any violations lead to the layer beginning to crack and fall off in pieces over time.
Quite often, plastering a brick oven is done with your own hands. There are several reasons for this: the opportunity to significantly save money, fully control the quality of work, and the absence of a specialist. All of the above can be the reason why they start doing the work themselves.
To properly plaster the masonry of a stove or fireplace, adhere to several basic rules:
- Plaster cannot be applied until the masonry has completely hardened. The clay mortar used for laying bricks gains strength no earlier than after 30 days.
- The surface temperature of the stove and the humidity in the room should be the same. If the method of forced drying of the masonry (with a firebox) was used, wait until the walls cool down. Work cannot begin until a stable, natural temperature has been established in the room.
Craftsmen advise holding off on plastering a freshly laid stove for at least a month. One of the common reasons for constant cracking of walls is untimely, early plastering of surfaces.
Cracks in the plaster of a sauna or heating stove installed for heating are quite common. In fact, this is a completely normal process caused by strong heating of the surface. Small cracks can be easily repaired with a new portion of clay mixture.
Modern ready-made solutions contain reinforced fiber and additives, which, when properly applied to the surface, prevent cracking.
Despite the type of plaster chosen, critical mistakes are made during the work, leading to the appearance of cracks and peeling of the composition. Causes of cracking:
- Poor-quality masonry - the thicker the plaster layer, the higher the likelihood of it peeling off from the wall. Uneven masonry is the main cause of rapid cracking.
- Violations of the technological process associated with applying the composition to the wall.
- The use of clay-sand mortar made with non-compliance with the proportions of the components.
- Violations of the integrity of the brickwork.
- Applying the composition to the wall on fresh masonry that has not dried properly.
All mistakes lead to rapid cracking of the wall surface and peeling of the plaster from the brickwork.
Choosing a location for the oven
Despite its very modest size, the stove is ideal for heating rooms with an area of 14–50 m2. It cannot be called the most economical in terms of fuel consumption, but 3.5–5 kg of solid fuel is usually enough for the stove to fully warm up and begin to heat the room.
Such an oven heats up evenly on all 4 sides. This must be taken into account when choosing the place where it will be installed. In wooden buildings with fire-protected walls, the distance from the stove to the wall of the house should not be less than half a meter. And also you should not install the stove in the center of the room. With such an installation, the circulation of heated air will be extremely unfavorable, and the corners of the room will freeze.
The best option is to install the stove to the right or left of the front door, at a distance of at least 0.5 m from the door jamb. In this case, the cold air entering through the door will not spread along the floor across the entire area of the room and create dangerous drafts.
Natural drying
The process involves fulfilling the most important condition to ensure unhindered circulation of air flow. To do this, for five days all the dampers and doors are opened wide. In this case, a reverse draft appears, removing moisture evaporating from the surface of the brickwork through the chimney.
The natural mode involves drying only the outer layers of the walls on both sides of the oven.
The efficiency of the process is often increased using a 200-watt electric light bulb and a household fan. The first is suspended directly in the firebox, and the second is installed in front of the door to force air inside. In this case, warmer air currents will dry the walls.
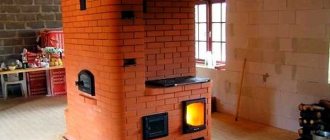
First firing of a new brick kiln
As a rule, a stove that has just been folded melts worse than a dry one. To start drying, open all the valves:
- Summer run valve;
- The main valve.
We take a small amount of fuel. For example, 10 - 20 dry sticks, approximately 2 centimeters in circumference and the length of your firebox. If we talk about the weight of dry sticks, then no more than three kilograms are allowed for the first bookmark.
That is, all the “logs” should fit within the circumference of your palms. It is not advisable to heat it any more, since drying should be gradual, without sudden temperature changes.
It is better to ignite the prepared fuel from above. Place a piece of crumpled paper on top of the firewood. Set it on fire and wait for the wood to fill up. Repeat the procedure if necessary.
With this method of arson, when the upper layers are ignited first, the combustion process proceeds more slowly and with less heat.
After the wood has completely burned out, you should open all the doors on your stove.
- Fire door;
- Door to the ash pit;
- Doors for cleaning channels.
That is, there must be ventilation of all furnace channels, free air flow. This completes the first firing of the new brick kiln. But this does not mean that the oven is dry and suitable for use.
Drying a brick kiln
Further drying of the brick kiln consists of daily, twice-daily fires with a small amount of firewood.
In the same way as described above, heat the stove in the morning and evening, leaving all the doors open in between.
How long does it take to dry a brick oven?
I would like to know exactly how long it takes to dry a brick oven. However, depending on the brick, mortar, temperature and humidity, the drying process may vary.
On average, one week is enough for a brick stove until it dries completely. Subject to regular, daily, twice-a-time heating.
It is recommended to heat the oven during the drying period for no more than 3 hours a day. This is done in order to avoid cracking and uneven drying.
After about five days of drying, you can increase the amount of firewood to six kilograms.
At the same time, it is already possible to heat the stove with the summer valve closed. However, still continue to ventilate the stove after heating.
You can check the readiness of the oven for operation by the presence of condensation on the doors and valves.
Condensation appears after the stove is heated. After condensation has stopped appearing on the iron parts of the stove, you can begin operation.
And most importantly, there is no need to try to speed up the oven drying process. By increasing the amount of wood and burning time, you can only make things worse.
The moisture in the bricks and mortar should evaporate gradually, slowly. If you raise the temperature higher than set and heat the stove longer, the moisture in the bricks and mortar may boil.
This, in turn, can cause rupture of bricks and connecting seams. After this, the oven becomes unusable.
Simply put, the stove will have to be rebuilt. What is more important to you, to do everything right or quickly?
How to properly heat a new brick stove, summary
As you can see, there is nothing difficult in the process of drying a new stove or fireplace. Finally, I want to give you some advice.
Firewood for heating the stove must be completely dry. Firewood should be stored under cover for at least one year.
That is, if you bought firewood in winter and stored it under a shed, you can only use it for the next heating season.
Thus, your stove will last longer, and the efficiency of dry wood will be higher.
Video on how to properly heat a new brick stove
Some tips on how to operate a brick stove or fireplace stove.
Like any technical device, a brick stove or fireplace requires attention and constant monitoring during its operation. Before the start of the heating season, the stove must be checked and repaired
Particular attention should be paid to the integrity of the masonry, starting from the bottom row to the top of the pipe. If cracks are found in the masonry, they should be filled with mortar, and the broken bricks should be replaced. Seal the gaps between the stove appliances and the masonry with kaolin wool soaked in a clay solution
Whitewash the pipe in the attic, this way the cracks that appear will be more visible. Wooden structures located in close proximity to chimneys should be treated with fire retardant compounds. Cracks in the masonry or broken bricks can cause a fire. It is a good idea to read the Fire Safety Rules in the Russian Federation and GOST 9817-82 “Household Appliances Operating on Solid Fuel”. Having a working fire extinguisher in your home and knowing how to use it will never be superfluous. The process of burning wood in your stove is divided into three stages: kindling, intense combustion and post-burning. At each stage of the wood burning process, a different amount of air is required, the volume of which is regulated by valves and the blower door. Correct air supply leads to maximum use of the efficiency of your stove, complete combustion (i.e. maximum heat transfer) of loaded firewood, reduces the amount of soot generated to a minimum, increases the trouble-free life of the stove, thereby saving your money and time. At the stage of kindling and post-burning, a small amount of air is required. At the stage of intense combustion, the largest amount of air supplied to the furnace is required, but this amount must be optimal. The air supply is regulated by the blower door. How much to open or close it, i.e. increase or decrease the volume of supplied air can be determined by the color of the flame. If the flame is dark yellow with black smoke, then there is not enough air, the door must be opened slightly, and if the flame is bright white, the oven is humming, then there is too much air, the door must be closed. The light yellow (straw) color of the flame will tell you about normal combustion (“correct”). At the post-burning stage, the blower door can be closed completely, and the draft in the pipe can be reduced with a valve. Try to open the firebox door as little as possible. In cold weather, the stove or fireplace stove is heated twice a day (morning and evening), and maximum heat transfer from the stove is achieved. In warm weather, it is enough to heat the stove once.
How to save on heating
If you conduct a survey about which housing and communal services service is the most expensive, almost everyone will name heating.
- This line of the receipt often contains the most significant amount. In a small apartment - up to two thousand, and in a large apartment it can easily exceed three thousand.
- It is not always clear where these numbers come from. And why does anyone pay for heat in the summer?
- When the heat is on at full blast in the fall and spring, you have to pay for the heat and stuffiness. Or turn off the radiators and open the windows - and still pay.
- Sometimes, on the contrary, they drown somehow unconvincingly. If in winter the batteries couldn’t cope and you had to buy heaters, the amount on the receipt is especially annoying.
If your heating is extremely bad (in the apartment it is less than 18 °C during the day or 15 °C at night), you can try to get a recalculation.
Let's figure out how the heating fee is calculated and whether it can be somehow reduced.
Products for inventors