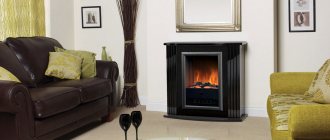
A commercial electric fireplace costs about the same as a large flat-screen TV. Without a heating function, such a fireplace is actually just a “TV” showing one 3D picture of an animated flame and making sounds that imitate the crackling of burning wood. This is an expensive pleasure that has only aesthetic value. You can make such an electric fireplace with your own hands, saving an impressive amount. We will consider the manufacturing technology of a device with a heating function.
Features of the electric hearth
So, we need a device that will not only please the eye and warm the soul, but also serve as a heater. Such electric fireplaces are equipped with a tubular electric heater (TEH), which, when connected to an electrical network, can heat up to 900 degrees Celsius and generate nearby heat similar to that coming from a real fire.
Electric fireplaces with a heating function are usually equipped with reflectors that are installed on top and can collect, accumulate and reflect heat.
The electric fireplace consists of two main parts:
- A hearth that simulates the combustion of a real wood-burning fireplace and the burning of a flame.
- A portal that acts as a decoration for decorating an electric fireplace.
We will not consider the technology of making a portal for an electric fireplace with our own hands - this topic is worthy of a separate article. And it’s best to do this while renovating a room where you plan to install a stationary fireplace.
We are more interested in the design and manufacture of a fireplace, which you can make with your own hands if you have the necessary elements and tools.
Do-it-yourself electric fireplace - step-by-step instructions
The process of creating an electric fireplace with your own hands consists of several successive steps. If you strictly follow them, then no difficulties will arise in installation.
Frame installation
Most often, plasterboard is used to make an electric fireplace. This material has many advantages: it is resistant to temperature changes, environmentally friendly, and easy to use. It is mounted on a frame made of metal profile. To make such a frame, it is necessary to prepare a profile of two sizes:
- rack-mount - 50*50 mm;
- guide - 50*40 mm.
Having prepared all the necessary materials, you can begin making a frame for a wall-mounted electric fireplace:
- Cover the entire surface of the wall where the fireplace will be located with heat-resistant material. An asbestos sheet is ideal for this.
- According to the drawing, make markings on the wall.
- Secure the guide metal profile according to the indicated markings using dowels and nails. The result of these actions is a parallelepiped.
- Connect all the components of the frame with special elements, the so-called bugs. This is necessary so that the walls do not move apart.
The crossbars for the frame must be attached clearly according to the markings
- Strengthen the structure with a rack metal profile. It needs to be inserted across the walls of the frame at a distance of about 20 cm from each other.
- Make the inside of the frame, which will serve as the basis for the firebox. In this case, you need to take into account that there will be a fireplace and internal lining with heat-resistant material.
While performing this work, it is recommended to check each step with a building level. At the stage of installation of the frame, irregularities may not be noticeable, but during sheathing they can cause inconsistencies.
If desired, you can build a frame for the chimney. In this case, it will play an exclusively decorative role. For this purpose, it is recommended to choose a 100*50 mm metal profile for the crossbars.
Communications liner
At this stage, all wires must be connected to the future fireplace. For this electrical device, it is recommended to use wires with a cross-section of 2*2.5 mm or 2*4 mm, depending on the installed wiring in the apartment. They need to be wound in a specialized metal sleeve, which will isolate the effect of heat on the sheath of the wires.
If the apartment has grounding, then it is imperative to use a triple wire for an electric fireplace. Additionally, you should purchase a special socket with grounding. Its body must be ceramic.
It is recommended to additionally install a switch at the outlet. This is necessary so that you can turn the fireplace on and off remotely, and not remove it from the portal each time.
Electric fireplace trim
For cladding, sheets of plasterboard are used, which must be cut according to the drawing. You can use a regular stationery knife or any other similar device for this. The sheets themselves can be fastened with metal screws (they are black in color), their size should be 3.5 * 25 mm.
For sheathing, drywall must be cut in advance.
Carefully fill all joints between sheets using a special mesh and galvanized corners. After sealing the joints and corners, the entire surface of the portal must be primed and puttied.
We must not forget about ventilation inside the firebox. To do this, you need to make several holes opposite the eyes.
To seal corners, it is recommended to use special chrome corners
Device structure
An electric hearth with a heating function consists of two parts: heating and decorative elements. The first of them generates heat, the other imitates fire in the hearth
You can use a regular room heater as a heating element if you don’t want to make one from scratch (which can be unsafe). Therefore, here we will not consider in detail the technology of its manufacture. Let’s just say that for this you will also need a screen (reflector) to reflect the generated heat and a fan to ensure better circulation of warm air in the right direction.
The decorative part of the electric fireplace consists of decorations of a stone or brick hearth, imitation fire and smoldering logs. To make all this, any available material available in the house will do.
What materials to use
Drywall is the most popular building material from which all kinds of arches, shelves, fireplaces and other design delights are built. To work, you will need a screwdriver, a jigsaw and a frame assembled from a metal profile (wooden blocks are also an option).
If you plan to use any kind of fire, fire-resistant plasterboard is preferred. For a decorative fireplace, ordinary varieties are suitable.
The thickness of the sheets in straight sections is 12.5 mm. Where it is necessary to bend the arch, thinner drywall is used.
Portal for an electric fireplace made of plasterboard
In some cases, wood is used. These can be only finishing parts glued to the base, or a completely wooden product. For the base, you can use chipboard from old furniture. The structure is assembled using self-tapping screws and is completely transformed under finishing materials.
Making a heater
As mentioned above, it is better to use some ready-made factory heater, manufactured in compliance with all safety requirements. But if you are well versed in what is written below, then go for it!
All types of electric fireplaces use heating elements of various types for heating. It could be:
- spiral in a quartz tube;
- biospiral on ceramic bases;
- nichrome spiral elements.
That is, even an iron spiral in a ceramic shell is suitable for our purposes. Only such spirals may need several pieces so that the total generated power is 1-2 kW.
Naturally, all this needs to be properly mounted on some kind of frame, insulated, grounded and taken care of with electrical wiring that could withstand the expected load. For the best distribution and preservation of heat, it is necessary to equip this entire structure with a reflector in the form of a kitchen stove hood, for the manufacture of which you will need a frame made of galvanized steel corners and stainless steel sheets.
A heater made in this way can be additionally equipped with a temperature controller and even sensors that turn on the device automatically. You can always find them in the store.
Firewood layouts
Regardless of the type of structure simulating a flame, a mock-up of firewood will always be needed. In this matter, the master’s flight of imagination is only welcome. Props can be purchased in the online store. They can send you components for fireplaces from China (we will use this fact in the future). In some cases, real firewood is used. With skillful lighting, a good result is obtained.
But if all searches are unsuccessful, then you will have to make a dummy yourself. But then it will be doubly pleasant to look at handmade work. The material used is corrugated cardboard, which can be found in boxes of household appliances. There it is often used as a filler between sheets.
Corrugated cardboard log
By making tubes from such cardboard and painting them brown, we will get a log, to which a knot made of the same material, only with a smaller diameter and length, is attached with tape. All that remains is to stack the wood in the fireplace; from a distance it looks like the real thing.
Good to know: How to choose an electric fireplace for a house or apartment, basic criteria
Decorating an electric fireplace
There's plenty of room to expand here! It all depends only on the wildness of your imagination, the flight of which can only be stopped by a lack of necessary materials. To simulate fire, we will need “logs”, lighting and something very similar to live fire.
Logs can be made from ordinary cardboard, rolled into rolls and secured with tape, then wrapped in paper and painted in the desired colors. Also, nothing prevents you from using real dry logs for this, if you have somewhere to get them.
To illuminate the “flame,” it is best to use LED bulbs that shimmer in red and yellow colors. They can be placed behind a flame or ember decoration made from sheer fabric or other material.
Here is a step-by-step process for making the simplest flame decoration in the hearth:
- We take the most ordinary tree branches of medium thickness (8-10 mm).
- We wrap them in foil, onto which we glue strips of tulle or lace on top.
- After the glue has dried, the branches are pulled out of the foil (if they are not pulled out, you can cut the foil lengthwise, and then glue the lace back into tubes).
- Place pebbles on the bottom of the fireplace in a semicircle.
- Place a rolled up garland in the center of the circle of stones.
- Place logs of lace above the “hut” garland and fasten them at the top with leftover fabric or threads.
To achieve the best effect, you need a garland that alternately flashes yellow and red. But even an ordinary light bulb that burns only yellow will do.
For more advanced flame simulations, various tricks are used: mirrors, rotating light sources behind a panel depicting fire, or transparent fabric that can be rigidly fixed to a frame, or cut into flaps and a fan installed under them, the flow of air from which will make them “dance.”
Preparatory work before assembling the electric fireplace
Before proceeding with the actual installation of the device, you need to decide on its location. Here you should follow some rules:
- You should not install an electric fireplace opposite other light sources, as they may cause a decrease in the efficiency of the device;
- if the room is large, then its center is suitable for the fireplace, and you can place poufs and armchairs nearby;
- In a small room, an electric fireplace will look good in the corner.
In small rooms, it is better to place an electric fireplace in a corner
No special preparatory work is required for installing an electric fireplace. It is enough to choose a place, prepare the necessary materials, calculate their quantity and develop a project.
Photo gallery: drawing of an electric fireplace
The drawing should be as detailed as possible
The project needs to take into account the fireplace lining
Before you start installing a fireplace, you need to develop a project
If the electric fireplace has a chimney, this must be taken into account when designing
Simulated flame
Modern electric fireplaces use tricks of a completely different kind to simulate combustion. In them, realistic fire is born using an ultrasonic steam generator on a quartz plate! Jets of steam from it, rising upward, fall into the rays of the backlight bulbs and become visible to the eye. Moreover, the effect is so realistic that it is scary to touch the “tongues” of this flame with your hand. Although this is just steam formed at room temperature by vibrations of a quartz plate under the influence of an electric current.
It is quite possible to make a similar steam generator at home with your own resources and resources, as the following video proves.
Doing something like this is very difficult and will require some knowledge or qualified help from an electrician.
To make your own version of a realistic electric fireplace, we will need:
- Fan (cooler from a computer).
- Ultrasonic steam generators.
- DMX converter.
- LED lights.
- Waterproof box.
- Distilled water.
We attach ultrasonic steam generators (preferably several) to the bottom of the waterproof box. They will promote the evaporation of water, and a fan located on the side will drive the vapors upward, preventing them from cooling prematurely, swirling and falling.
Lamps are needed to illuminate the rising steam, which in their rays will create the effect of “burning” of decorative firewood, with which this entire cunning structure must be reliably covered.
Creating a wireframe
The frame of the portal will be built from a special metal profile, which is produced for the installation of plasterboard partitions. We will need the following varieties:
- rack profile with section dimensions 60x27 mm;
- guide profile with section dimensions 27x28 mm.
To fasten the profiles together, you should use special short self-tapping screws with a rounding along the edge of the cap, which are commonly referred to as “bugs” or “seeds.” To screw them in you will need a Phillips screwdriver.
Stylish plasterboard fireplace
The frame is assembled in the following order:
- A heat-resistant screen, for example, a sheet of tin lined with basalt cardboard, is fixed to the wall where the portal is installed.
- A pedestal is installed on the floor, the edges of which should protrude slightly beyond the edges of the portal. The pedestal is a laminated MDF board (tabletop) mounted on profiles with a section of 50x50 mm. The ends of this part of the structure are covered with a plastic plinth.
- Using a slatted level and a plumb line, a perfectly even marking is applied to the wall, along which the guide profile is then screwed with dowels. The same profile is screwed to the pedestal table top.
- Sections of the rack profile are screwed to the guide profile, forming the ribs of the portal. Next, along each face of the resulting parallelepiped, intermediate reinforcing elements are fixed in increments of 200 - 250 mm, which are also made from a rack profile.
A box frame is screwed on top of the portal frame, which will imitate a chimney. At the same time it is screwed to the wall.
The pipe box can have a small depth - 100 mm is enough to just indicate the relief; but it must necessarily reach the ceiling.
