Choosing corrugated sheets for walls
First of all, you need to decide on the entire range of products available on the market and choose the material that is best suited for facade work. Manufacturers produce three types of profiled sheets:
- Corrugated sheeting marked “C” is intended for finishing facades, walls and creating small fences
- Corrugated sheeting marked “H” is used for roofing work
- Corrugated sheeting marked “NS” is mixed in purpose and can be used for different types of finishing work
The best option for finishing the facade of a building is profiled sheets marked “C”. Accordingly, you can choose several subtypes of this material on the market - C8, C10, C15, etc. The materials do not have significant differences, but from the point of view of a professional, you can notice some important nuances:
- C8 sheets are light, strong and thin. Its main advantage is its light weight, which allows finishing work to be carried out simply and quickly.
- C10 corrugated sheeting has a relatively wide wave, and the thickness of the sheet is greater than that of corrugated sheeting marked C8. This material is perfect for finishing the facade of a building. Due to their weight and strength, C10 profiled sheets can be used in all types of work where vertical installation of finishing material is necessary
- C15 corrugated sheeting is also successfully used in finishing work due to the characteristics of the wave, the thickness of the material and the size of the sheets. Like other facade materials, C15 profiled sheets are galvanized and polymer coated
It is worth noting that other markings are also suitable for cladding a house - profiled sheets C13, C18, C20, etc. are found on the market. The further choice of material depends on the builder himself - the sheets differ in the height of the wave, its width and the thickness of the material itself.
Installation of corrugated sheets on the wall
Profiled sheets can be attached to an existing wall or to a wall that is a prefabricated structure.
Installation of profiled products to the wall of a building is carried out as follows:
- First of all, a metal or wooden frame is attached to the wall of the house using dowels. It is better to use a metal frame, since the quality of the structure in this case will be better. When installing, you should use a level to avoid distortions. Wall profiled sheets are mounted on a fixed frame in a horizontal or vertical position. It should be noted that the position of the profiled sheets does not in any way affect their performance characteristics.
- The thermal insulation layer is being installed (if provided for in the project). For these purposes, disc-shaped dowels should be used. It must be protected from moisture by covering it with a waterproof film.
- Next, the corrugated sheets are attached to the wall using galvanized self-tapping screws. This fastening element is equipped with special gaskets that protect the connection point from water.
- Installation of purchased additional elements is in progress.
The frame is a steel profile that has the shape of the letter P. First, the vertical elements of this structure are installed. They should be fixed to pre-installed brackets. Then horizontal jumpers are installed between the vertically installed profiles. When the base is ready, you can perform the subsequent stages of installing the corrugated sheet on the wall.
Profiled elements are attached to a prefabricated wall structure, as a rule, during frame construction, when a metal profile acts as the base of the wall. First of all, the foundation is waterproofed. To do this, a double layer of roofing material is laid on its upper part.
Next, install the metal profile on the foundation. The profiles are fastened using universal self-tapping screws. The racks are also installed in a metal profile.
The result is a panel frame of the building. First, a vapor barrier material is installed on the inside. Next, the insulation is attached, which must be covered with plastic film. Then you can begin installing the corrugated board.
Similar articles :
How to calculate the required amount of corrugated sheets for wall cladding?
Has the material been chosen? In this case, it is necessary to calculate how much it will be needed for the walls of the building. First of all, you need to know the length of the profiled sheets. Based on this value, the volume of material is calculated. Let's look at this process in more detail:
- It is necessary to determine the area of the surface to be covered. Let's say one of the walls of the house is 6 meters long and 2.8 meters high. The length of the other wall is 8 meters, and the height is similar - 2.8 meters. Thus, we calculate the total area of the surface to be covered: (6X2.8) + (8X2.8) = 39.2 square meters of the area of two perpendicular walls. Since the house has four walls, we double the figure - it turns out 78.4 sq.m.
- Since there are door and window openings, it is necessary to calculate their area and subtract it from the total surface area that was calculated earlier. Let's assume that there is one door (width - 1.4 m, height - 1.9 m) and six window openings, each of which has parameters of 1.5X1.3 m. Total, the total surface area that does not need to be covered with corrugated sheets is will be equal to the sum of the areas of all openings - 14.36 square meters. m. This indicator is subtracted from the total area of the surface to be covered. As a result, it turns out that the ideal finishing area is 64.04 sq.m.
- The next step is to calculate the area of one profiled sheet. Next, you need to divide the total surface area by the area of one sheet - this way the builder will know how many sheets are needed to finish the house
- The area of the pediment is calculated. Using the standard formula, the area of the pediment is calculated, which will need to be covered with corrugated sheets, after which the result obtained is multiplied by two and summed with the total area
It must be remembered that additional material may be needed during the work process. Therefore, the master, having carried out all the calculations, should increase the result obtained by 10-15% - the final number will mean the amount of material with a reserve.
How to cover a house with corrugated sheets?
After preparing the required amount of profiled sheet, you can begin installation work. Typically, the façade of a building consists of the following “layers”:
- Vapor barrier material
- Thermal insulation
- Wind barrier
- Metal or wooden frame
- Corrugated sheet
The installation process then looks like this:
- A metal or wooden frame is installed. If wooden blocks are installed, it is necessary to pre-treat them with antiseptics. If it is metal, then for its installation you will need brackets and U-, L- and T-shaped profiles. Initially, brackets are attached to the wall, to which U-shaped profiles are then attached. Accordingly, other profiles are required for fastening at internal and external corners
- The insulation material is being laid. First, insulation boards are installed and secured using disc-shaped dowels. A vapor barrier is lined on top, after which a wind barrier is additionally lined
- Corrugated sheeting is being installed. The sheets are mounted on the installed profiles using self-tapping screws, while maintaining a step of 30-40 cm. The self-tapping screws must be galvanized and have a special rubber gasket in order to avoid moisture getting under the profiled sheets
- The corners of the house are finished using special corner elements, which are installed in the same way as corrugated sheets.
Sheathing the pediment with corrugated sheets
The procedure is no different from standard house cladding. Initially, the pediment is subjected to reliable waterproofing, after which a metal or wooden frame is installed using the technology described above, and then insulation sheets are laid out and sheathed with corrugated sheets.
The only difficulty lies in the correct cutting of the material for the pediment. But if you have the correct markings and the necessary tools, you don’t have to worry about this nuance.
Where else is corrugated sheeting used?
The material is often used for cladding hangars, garages, storage facilities and other buildings. Thus, the hangar can be used as a storage or warehouse, parking lot or other utility room. And the best cladding option for this building is corrugated sheeting - installation is carried out in a matter of hours, immediately on the frame structure, the features of the material allow cladding of both arched and standard structures.
Corrugated sheeting can also be used in the construction of any other buildings on your own site. For example, you can build a full-fledged garage from corrugated sheets with your own hands. Speed of installation, reliability, strength and excellent performance properties allow us to make lightweight and durable structures.
Corrugated sheeting is quite often used as a roofing material. Corrugated roofing is of high quality and reliable. But the roof will not be considered complete without one very important element, namely the wind strip. The wind strip for corrugated sheeting helps protect the roof from moisture and gusts of wind. It also provides an ideal connection to the spotlights.
There are other nuances in laying corrugated sheeting on the roof. We recommend that you familiarize yourself with the installation of corrugated sheets yourself in this article. It contains step-by-step instructions, as well as installation diagrams for corrugated sheeting.
Video about covering a house with corrugated sheets with your own hands
Training film on installation of corrugated sheets. How to cover the walls of a house with corrugated sheets.
If you choose a finish for the facade solely for reasons of practicality, you should pay attention to corrugated sheeting. Strong, durable, not too expensive, this material is widely used in private construction. And if earlier it was used more for fences and roofs, now it is actively used for external walls. Sheathing a house with corrugated sheets does not require special skills, and if you know how to handle construction tools, the installation will not be difficult.
Sheathing a house with corrugated sheets
The corrugated sheet can have not only a colored decorative coating, but also imitate wood, stone
Instructions for covering a house with corrugated sheets
When calculating the area of the facade, door and window openings are not taken into account.
Facing the facade with corrugated sheets is done according to the principle of a suspended frame. It is possible to mount the panels directly on the walls if they have a perfectly flat surface, but this rarely happens.
When making a hanging frame, a number of issues are resolved:
- the sheathing compensates for unevenness of the building’s vertical fences;
- the corrugated sheet on the frame does not collapse when the wooden structure shrinks;
- it becomes possible to install insulation to move the dew point outward from the wall.
The insulation additionally insulates from noise. A vapor barrier and a waterproofing membrane are installed on the walls, and wind protection is installed. As a result, the building receives protection several times higher than when finishing without a frame.
Material calculation
To calculate, take the area of the walls, for which you calculate the square footage of each section of the facade, then add the values. The area of the gables is added. The area of window and door openings is not removed from the quadrature, otherwise trimmings will have to be used for cladding the external slopes. This does not make the appearance attractive.
Select the required type of corrugated sheeting and determine the usable area of one strip. The total square footage of the walls is divided by the indicator for one piece, and the number of panels is obtained. The result obtained is multiplied by 1.1 or 1.2, which depends on the complexity of the facade. The result obtained is rounded to the nearest whole number of elements.
Sometimes it is better to make a complete layout of the sheets to see how the cutting will go. This is especially important when calculating the strips for covering the pediment with corrugated sheets.
Required set of elements
Sheathing with corrugated sheets requires additional elements that simplify the installation of strips and cover panel joints.
Types of parts:
- Internal and external corner strip with rolled edges. It is produced in lengths of 2.0 and 3.0 m, the width of the side edges is 115 x 115, 75 x 75, 50 x 50, 30 x 30 mm.
- The outer corner is produced with sides of different widths, placed perpendicular to one another. The semicircular part has additional stiffening ribs. The width of the shelves is 1.15 m, the length of the element is 2.0 and 3.0 m.
- The internal corner is similar to the previous element, but its concave part serves as the front side. Side width 1.15 m, length 2.0 and 3.0 m.
- The base drip strip has dimensions of 240 x 30, 210 x 30, 180 x 30, 150 x 30, 50 x 20 mm, length - 2.0 m.
Aquilon strips, window elements and eaves overhangs are also used. If the corrugated sheet is placed vertically, the corner elements are selected according to the height of the wave so that they overlap at least one corrugation.
List of tools
To mark the walls, use a regular tape measure or a laser one. Correct installation is checked using a building level and plumb line.
Other tools are being prepared:
- iron scissors, metal hacksaw;
- hand-held circular saw or other electric tools for cutting galvanized steel with a polymer layer;
- cord, hammer, pliers;
- drill, hammer drill, screwdriver.
Right angles on a profiled sheet are marked with a square. You cannot cut sheets with a grinder, because the protective layer is destroyed.
Preparing the surface for finishing
Protruding parts on the facade are removed, lamps and wires are removed. Platbands and ebbs are removed from door and window openings. If tree branches reach the walls, they are tied up or cut down. From above, the hanging water intake boxes are removed from the roof.
The surface of the walls is cleaned of poorly adhering layers and dust. Cracks are deepened and sealed with repair mortar or putty for façade work. If a dowel gets into an untreated crack, the frame will become loose over time. After repairing the surface, it is primed.
Installation of a supporting frame for a wooden house
Wooden sheathing for corrugated sheets
You can sheathe a wall with corrugated sheets using a lath made of wood or a steel profile. For walls made of timber, boards, and other lumber, take a 25 x 50 mm lath, pre-treat it with drying oil and dry it.
Work order:
- Mark the position of the slats on the facade. For vertical corrugated sheeting, horizontal supports are installed and vice versa.
- The slats are attached to the surface using wooden pads or an ES bracket from the g/cardboard fastening system is used. To fix it to a wooden wall, use wood screws or self-tapping screws.
- To attach the slats to the bracket, flea screws are used.
During the work, verticality and horizontality are checked, the plane is coordinated using a stretched cord on the outer slats.
Installation of a supporting frame for a brick house with insulation
To sheathe a brick house with corrugated sheets, choose steel profiles. It is better and more convenient to install them, because the metal elements are always smooth, they are not susceptible to moisture, and they do not require pre-impregnation.
Work order:
- Mineral wool is attached to the wall, it is nailed with mushroom dowels, then waterproofing is installed. They install brackets and fix the profiles in them.
- If slab foam or polystyrene foam is used, the frame is first mounted, then the insulation is placed between the racks. The gaps are sealed with foam, and the waterproofing is attached to the frame.
To fix the brackets into the brick, dowels with self-tapping screws are used, and the profiles are screwed together and to the brackets with flea screws.
Finishing the facade with corrugated sheets
Insulation is placed under the corrugated sheet.
A vapor barrier and windproof film is attached to the upper part of the sheathing, then unwound down and fixed to the lower part. Provide an overlap of strips of 15 cm.
First, additional strips for interior work are installed on the façade; these include plinth, window, corner elements, and joining strips. They are fixed to the sheathing with self-tapping screws. Measure the location for attaching the corrugated sheeting and cut off the required pieces.
For fixation to the frame, special self-tapping screws with press washers are used. The color of the hardware is chosen to match the color of the profiled sheet. The second sheet is placed with an overlap in one wave, the fasteners are placed every 0.5 m.
Laying corrugated sheets on the pediment
The frame slats on this part of the facade are placed vertically. Insulation is carried out if it is provided on the attic wall. At the bottom, an additional strip is installed in the form of a plinth flashing and secured with roofing screws. A finishing strip is placed under the roof to secure the last strip on the gable.
Measure each subsequent strip after installing the previous one along the contour of the roof. The cut piece is leaned against the frame and secured with roofing hardware. The second one is placed with overlap on one wave, the work is done in the same way as the previous one.
Installation of additional elements on openings and corners of the facade
After installing the corrugated sheet panels, internal and external decorative corners are installed at the intersection of the walls. Window openings are sheathed using a small aquilon strip; it is installed in the areas of the upper and side joints of the frame with the slopes. This detail helps to align the edges of the slopes.
On the gable, cornice strips are installed on the sides of the inclined sections to cover the junction with the roof. Self-tapping screws with press washers and rubber gaskets are used everywhere. They are screwed in so as not to attract too much, leaving room for thermal expansion.
Basic properties of the material
To make corrugated sheets, thin sheet steel is used, protected from corrosion by a zinc coating. After rolling in machines, flexible metal turns into corrugated profiles with waves of different configurations and sizes, and acquires additional characteristics. To enhance the protective properties, the sheets are coated with a polymer composition, and a decorative layer is applied to the front side. Stiffening ribs give the product high strength with low weight, which helps reduce the load on the base. And the greater the height of these ribs, the more resistant the corrugated sheet is to mechanical loads.
The service life of the cladding depends on the type of protective coating: simple galvanized corrugated sheeting lasts about 30 years, and polymer-coated corrugated sheeting lasts up to 45 years or more. The material can be machined and is easy to drill and cut, making installation of sheets effortless. If necessary, corrugated sheeting can be dismantled and reused without deteriorating performance characteristics.
Choosing corrugated sheeting for cladding
Covering the walls of a house with corrugated sheets
According to GOST 24045-2010, corrugated sheeting is divided according to purpose into several types - load-bearing, roofing, wall and mixed type.
GOST 24045-2010
Bent steel sheet profiles with trapezoidal corrugations for construction. File for download
GOST 24045-2010
Each type is marked accordingly. For cladding facades, wall corrugated sheeting (C) is intended, characterized by a trapezoidal corrugated shape. The profile height varies between 8-44 mm, the decorative coating can be either plain or with a pattern.
Seeing the letter “C” standing in front of the numerical marking combination, there is no doubt that this is wall corrugated sheeting.
Wall corrugated sheeting
If you need to sheathe the frame of a garage or some other non-residential building, it is recommended to choose load-bearing (N) corrugated sheeting, or a mixed type, which is designated by the letters NS.
Load-bearing corrugated sheet
When marking sheets, numbers are placed next to the letter designation that indicate the height of the corrugation - C-8, C-10, C-20 and so on. When cladding private houses, the most popular is C-8 corrugated sheeting: it is the most inexpensive, lightweight, but at the same time has good strength.
Profiled sheet S-8
If the façade is subject to high wind loads, it would be more appropriate to use profiles C-15, C-20 or C-21, which are more rigid and not prone to bending.
Profiled sheet S-15
Profiled sheet S-20
No less important when choosing are the decorative qualities of the material. An ordinary galvanized sheet is not suitable for a residential building; such cladding is more appropriate for industrial buildings or domestic buildings. Therefore, preference should be given to colored corrugated sheets with a high-quality polymer coating.
Corrugated sheeting with a stone pattern
The decorative layer can be matte or glossy, plain, with a texture like stone, wood, brick and other materials. Sheets with a pattern are much more expensive than plain ones, but they look just great. From a distance, the wavy relief of the cladding is not noticeable, and it seems that the house is really made of stone or brick.
Brick imitation
Imitation of torn stone
Stonework, drawing
Volumetric drawing
Advice. When choosing a material, pay attention to the back side of the sheet. There are options with double-sided decorative coating designed for fences and partitions. Of course, they can also be used for cladding a house, but why overpay for something that won’t be visible anyway?
It is more economical to use corrugated sheets painted on one side
Selection of wall corrugated sheets
Before purchasing corrugated wall sheeting, you need to decide on the conditions in which it will be used and, based on this, choose the best option. For cladding a house, you can use a profile with a height of 8 mm, this is quite enough. There is no need to overpay a lot of money, since sheets of higher markings will cost much more. For the construction of a fence, it is best to use a grade of at least C18. This is necessary to withstand harsh weather conditions. For very high loads, higher markings can be used.
To increase the already long service life of sheets, you can purchase polymer wall profiled sheets, the service life of which can exceed 50 years.
Speaking of color, it is worth remembering that such building material can be painted. Therefore, you can purchase gray sheets, and then repaint them in the color that suits you best.
Video for the topic
Material calculation
To avoid unnecessary costs, you need to correctly calculate the amount of material before purchasing. First, measure the walls and calculate the total area.
Area of walls and pediment
Next, take away the area of window and door openings, as well as those areas that will not be sheathed (if any). The area of the gables is added if they are also planned to be sheathed. Now the resulting value remains to be divided by the area of one sheet.
When calculating, you should take into account not the overall, but the usable width of the sheet, since the corrugated sheet is laid overlapping. The standard sheet length is 2 m, although it can vary from 0.5 to 14 meters among different manufacturers.
Standard sizes of corrugated sheets
For example, let's take a rectangular house: the height of the walls is 3 m, the length is 4 and 6 m, there are 4 windows measuring 1.5x1.1 m and a doorway 2x1.4 m. By multiplying the height by the length and adding up the area of the walls, we find out the total area future cladding – 60 m2. Using the same formula, we calculate the area of the openings:
1.5 x 1.1 x 4 = 6.6 + 2.8 = 9.4 m2;
60 – 9.4 = 50.6 m2.
That is, the working area of the walls is 50.6 m2.
The area of the gables is calculated differently, depending on their shape. If the pediment has the shape of a trapezoid, you need to sum up both bases, divide in half and multiply by the height. If the pediment is an isosceles triangle, you need to multiply half its height by the base. For example, the height of the pediment is 2 m, the base is 4 m. 0.5 x 2 x 4 = 4 m2.
Since there are two gables, we add another 8 m2 to the total cladding area, and as a result we get 58.6 m2. The standard dimensions of a sheet of corrugated sheet C-8 are 2000x1150 mm, which means its area is 2.3 m2. We divide the sheathing area by the sheet area - 58.6: 2.3 = 25.48. Rounding, we get 26 sheets, but you need to take 2-3 more in reserve, since additional material may be needed when cutting.
Additional elements for corrugated sheets
In addition to the sheets themselves, additional elements will be needed for finishing. Each of them performs specific functions and is an integral part of the house’s cladding.
| Item name | Purpose |
| Outside corner External corner | Used for framing external corners. Gives the skin a finished look and at the same time protects the joints from precipitation, dust, and small debris. Mounted on top of the corrugated sheet, as a result of which the screw heads remain visible |
| Internal corner Internal corner | It is attached to the inner corners of the building and performs protective and decorative functions. Mounted on top of profiled sheets, fasteners remain visible |
| External corner difficult | Performs the same functions as a regular corner, but it is attached to the sheathing before installing the sheets. This installation allows you to make hidden fasteners |
| Inner corner difficult | Installed in the internal corners of the facade before installing corrugated sheets, it performs protective and decorative functions |
The docking strip is complex | Intended for protecting and finishing sheathing joints on the wall plane. Attached to the sheathing before installing the corrugated board |
End strip | It is used to frame the ends of the sheathing, protects them from the effects of precipitation, and gives a neat appearance. Attached to the sheathing before installing the sheets |
Sloping strip | Used for framing door and window openings. Protects against precipitation and debris, attaches to the sheathing before installing the sheathing |
Docking strip | Performs the same functions as a complex docking strip, but is attached after installation of the sheathing, as a result of which the fastener heads remain visible |
| Molding | It is used to finish the joint between the facade of the house and the lining of the eaves overhang. Attached to the sheathing before installing corrugated sheets |
Window ebb | Used to protect window sills from rain flows. Installed at the bottom of the window slopes before installing the casing |
| Platband | Used to decorate door and window openings, giving them a finished look |
Base strip | It is used to protect the upper part of the base from rain and snow, thereby extending its service life. Attached to the bottom of the sheathing before installing corrugated sheets |
As a rule, these products are produced in lengths of 3.2 and 1.25 m, although each manufacturer may have its own parameters. It is much easier to calculate their number than sheathing sheets, since here everything is measured in linear meters, and not in square meters.
2.6.1 Installation of additional elements when installing “GL shipboard” siding panels
Installation of GL shipboard panels begins with the installation of the initial strip. To do this, it is necessary to determine the lowest installation point - the desired level of the initial siding line (basement or blind area). Then you should apply chalk markings from this point up to forty millimeters, using a building level, draw a horizontal line along the entire perimeter of the surface to be mounted. Install the starting strip so that the top edge runs along the horizontal line drawn with chalk, insert screws into the sheathing, and finally fix it after alignment. The next initial plank is attached at a distance of six millimeters from the end of the previous one, this avoids overlapping of the planks during thermal expansion, thereby eliminating the wave effect of the siding panels.
You can install a complex finishing strip in advance. The final plank is mounted to the load-bearing wall butted against the cornice. Then it is necessary to install complex strips of the internal and external corner (Fig. 8). The planks are mounted at the junction of two walls, leaving at the top the distance necessary for filing overhangs or ceilings (for interior finishing using profiled sheets). If the project provides for the installation of built-in lamps, then the distance increases by the amount specified in the technical requirements for lamps. From below, the angle bar is placed 5.6 mm below the initial bar. The planks are screwed into the sheathing with self-tapping screws, and after alignment they are finally fixed in increments of 200, 400 mm, with a gap of 1-1.5 mm between the self-tapping screw and the plank. Simple corner strips are installed after installing all the panels with self-tapping screws into the sheathing in increments of 200, 400 mm. The next stage is the installation of complex joining strips (Fig. 9). Having previously marked the surface on which the profiled sheets are installed, mark the joints of the panels. The upper edge of the strip is mounted on the top line of the last siding panel, the bottom protrudes 5.6 mm below the initial strip. Having fixed the bar at the top point, you should check the perpendicularity of the joining bar relative to the initial strip and fix the bar along its entire length. The panels must be positioned so that the joints do not fall into the space above or below the windows; this draws attention to the joints, disrupting the aesthetic appearance of the building. Simple joining strips are installed after all panels are secured with self-tapping screws into the sheathing in increments of 200, 400 mm.
Then you should arrange the openings (windows, doors). You need to start from the bottom of the openings, moving upward. Complex additional elements for openings are fixed with self-tapping screws in increments of 300 mm directly to the profile of the window or door frame through the sighting shelf. At the corner junction of additional elements, “ears” are cut out on the elements, which are folded onto the lower elements (Fig. 10). Simple corner strips can be used to frame openings that are installed after the panels have been installed. Simple planks are screwed into the sheathing with self-tapping screws in increments of 200, 400 mm and, after leveling, are finally fixed.
How to do the cladding yourself
Covering walls with corrugated sheets includes three main stages: preparing the surface, installing the frame, installing additional elements and sheets. If you plan to insulate the walls, laying the insulation is done after installing the frame.
Sheathing a house made of corrugated sheets
The diagram shows wall cladding with corrugated sheets
Corrugated sheeting can be mounted horizontally and vertically; this does not affect the protective functions of the cladding. There must be an air gap between the sheathing and the load-bearing wall, which allows vapors to escape through the walls of the house. When covering a wooden facade, the frame can be mounted from wooden beams, but for brick and concrete walls a metal profile is more suitable.
Preparatory work
Under the metal sheathing, minor defects are not visible, so there is no need to carefully level the walls. But it is imperative to eliminate cracks, through gaps, and fungus, otherwise the destructive effect will continue, and the walls will soon require major repairs.
Gutters, platbands, ebbs, lighting fixtures and other items that interfere with finishing are removed from the façade. Clean dust and dirt, check the integrity of the walls. Cement mortar is used to seal cracks. Where the masonry is heavily crumbled, you need to knock out the remaining bricks and lay new ones on fresh mortar. This applies not only to the walls, but also to the basement of the house.
How to repair a crack in a brick wall at home
The areas affected by the fungus are cleaned with a scraper and thoroughly treated with products containing chlorine.
Fungus on the facade
Mold protection
Apply the product with a roller
If these are wooden walls, you need to treat them with an antiseptic primer 2-3 times. After this, the surface should dry completely.
Primer antiseptic
Installation of frame and sheathing
The frame for the sheathing must be perfectly flat, that is, all the guides must be located strictly in the same vertical plane. Fastening “by eye” is not allowed here, because even small deviations lead to deformation of the skin and a decrease in the strength of the structure. It is recommended to mount the guides on brackets, this makes it much more convenient to align them vertically.
Step 1. On the prepared surface, make markings for adjustable brackets. They start marking from the corner: determine the vertical using a level or plumb line, and put chalk points on this line every 50-60 cm. Then step back 40 cm and repeat the steps.
Marking
Step 2. Having completed the marking, drill holes for all fasteners, insert dowels, and screw the brackets. It is recommended to insert paronite gaskets between the bracket and the wall.
Drilling
Bracket Attachment
Brackets
Advice. If the walls are brick, the holes for the dowels should not fall on the masonry joints. Also, you cannot use a hammer drill for drilling if the load-bearing walls are made of hollow brick.
Step 3. Next, take the first guide profile, apply it to the brackets and attach it with self-tapping screws. Using a level, check the horizontal position of the profile, correct it if necessary, and tighten the screws. The design of the brackets allows for alignment of the sheathing elements within 30 mm. All other frame profiles are installed and screwed one by one. Additional jumpers are attached around the openings so that the sheathing is continuous.
Brackets and fastening the supporting profile to them
Example of vertical lathing
Vertical frame posts
Step 4. Slab insulation is attached between the guides. Most often, mineral wool is used for insulation under corrugated sheeting: it retains heat well, is easy to install, and has vapor permeability. The slabs are fastened from the bottom up, with the obligatory displacement of the vertical seams in each subsequent row. The insulation layer must be continuous, so be careful to ensure that there are no gaps between the plates.
Installation and fixation of insulation boards
To fix the insulation, disc-shaped dowels are used. Holes in the wall are drilled directly through the material, to a depth of 4-5 cm. There should be at least 5 dowels per slab - one in the center, four in the corners.
Step 5. Water and wind protection is required on top of the thermal insulation layer. The windproof membrane sheets are attached perpendicular to the guides, that is, they are mounted horizontally on a vertical frame, from bottom to top, and mounted vertically on a horizontal frame. To do this, the upper edge of the canvas is fixed with self-tapping screws to the upper guide, the material is rolled down, slightly stretched, and secured with self-tapping screws to the lower profile.
Fastening the wind barrier
Adjacent canvases are installed with an overlap of 10-15 cm. At the overlap line, the material is also fixed along the entire height to the guide profiles. Near the openings, the membrane is cut around the perimeter of the frame and also secured to the sheathing. Sometimes the waterproofing film is attached using double-sided tape and fixed to the wooden frame using a stapler.
Step 6. Screw the base ebb along the bottom edge of the frame with self-tapping screws. If the frame is vertical, you first need to beat the horizontal level, otherwise the ebb will be uneven. In the case of horizontal lathing, this element is screwed to the lower profile. The drip strips are overlapped by 20-30 mm.
Attaching the plinth strip
Step 7. Next is the doorway. Take the slope strip, cut it to the height of the door frame, apply it to the outer edge of the frame and level it. Screw it with self-tapping screws in increments of 30 cm through the sighting shelf. I install the bar in the same way on the other side and above the opening.
Measurements and installation of the starting slope strip
Cutting and installing the starting strip over the opening
Step 8. Start designing window openings. The window sill is cut to the width of the opening, applied to the bottom of the frame and adjusted to size. Screw the element to the sheathing guides. Next, the side slope strips are cut and fastened, and the top strip is mounted last. At the ends of the planks, two neat cuts are made and the resulting “ears” are folded onto the side profiles.
Step 9. Next, install the external and internal corners, as well as the connecting strip if elements of complex shape are used. The profile is placed on the outer corner, screwed on top with a self-tapping screw and leveled. The lower edge of the corner profile should overlap the bottom of the sheathing by 5-6 mm. Having aligned the element, screw it to the sheathing along its entire length. The internal corners are secured in the same way. If simple profiles are used, they are attached on top of the sheathing, so that after finishing the openings, you can immediately begin installing the sheets.
Advice. Experts recommend starting installation of the sheathing from the back of the house towards the front of the facade. When laying sheets horizontally, the starting line of fastening is the corner of the building or the doorway; when laying vertically, installation begins from the base or blind area from the bottom up.
Step 10. Remove the protective film from the finishing material. Take the first sheet, place it against the sheathing from the corner and attach it with a self-tapping screw at the bottom along the edge. Next, level it and, holding it in one position, screw the screws into the deflections of the wave. The fastening step is about 30 cm, or every 2 waves.
Fastening the corrugated sheet
Step 11. The next sheet is overlapped by 15 cm, aligned along the bottom cut, and screwed with self-tapping screws.
Fastening sheets
Along the joint line, fasteners are placed in increments of 50 cm. When sheathing, vertical deviations are allowed no more than 6 mm.
Fixation of corrugated sheets and platbands
Advice. When tightening the screws, avoid excessive tension on the sheathing sheets. They should fit snugly against each other, especially at the joints, but at the same time have a minimum gap of 0.8-1 mm at the fixation points to compensate for thermal expansion.
Opening design
Step 12. When finishing the openings, the sheets are pre-cut according to measurements. To cut corrugated sheets, use metal scissors, a fine-toothed hacksaw, or a jigsaw.
Cutting corrugated sheets with a saw
Cutting profiled sheets with a grinder
After installing the sheathing, the remaining additional elements are installed - platbands, simple corners and joining strips, and the joints between the walls and the cornice are covered with moldings.
The profiled sheet on the facade can be laid both vertically and horizontally
Facade made of corrugated sheets (horizontal arrangement)
An example of finishing a building with corrugated sheets
Warehouse with corrugated sheet lining
Covering the façade of a country house with corrugated sheets
Finishing the house with corrugated sheets
Gable trim
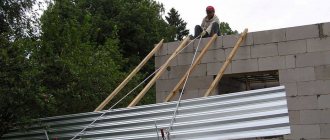
The final stage is covering the gables of the house. As on the walls, here the sheets can be placed both horizontally and vertically, depending on the preferences of the homeowner. Before sheathing, the gables should be treated with a waterproofing compound and wait until the surface dries. After this, install a sheathing made of 50x50 mm timber or aluminum profile. The sheathing pitch is 30-40 cm. If the attic is planned to be insulated, the sheathing cells are filled with slabs of mineral wool or polystyrene foam, and reinforced with disc dowels.
Next, the insulation is covered with a waterproofing membrane, and a counter-lattice is mounted on top, which provides a ventilation gap. Along the lower edge of the pediment, a flashing is screwed to the sheathing, and end strips are mounted on the sides, at the junction with the roof overhangs. Now all that remains is to correctly cut the sheets and install them on the pediment. For convenience, you can make a simple template from scrap materials and cut corrugated sheets according to it. When installing, the edges of the material are inserted into the end strips, adjusted tightly so that there are no gaps left, and the position is checked with a level. Fixation is carried out as standard with self-tapping screws or rivets in increments of 30 cm.
Pediment made of corrugated board
Finishing the pediment with corrugated sheets
The size of the roof overhang is selected so as to cover the sandwich of insulation and corrugated sheets
The apparent simplicity of corrugated sheeting can be used in the most unusual way
>Wall corrugated sheet – select the material and install it on the walls
Technique for constructing partitions
Do-it-yourself installation of a partition from a corrugated sheet is quite possible; such sheets are easy to use. But when installing such bulkheads in rooms with a large area, it is still better to seek the help of professionals.
The construction of partition elements must be carried out at the stage of finishing work, before the creation of clean floors, after completion of all “wet” processes and the installation of the necessary communication systems. During the work, the room temperature should not fall below 10°C, so in winter, connected heating is necessary.
The partition should be installed in the following order:
- We determine the exact location of the planned partition made of corrugated sheets. We mark the walls, floor and ceiling for the guide profile using a level, a plumb line and a tapping cord. We install a metal frame base assembled from a special reinforced metal profile.
- We fix the guides on the base with screws with a pitch of no more than 300–500 mm. We prepare a rack profile of the required size with a length one centimeter less than the distance from the floor to the ceiling. We cut it to the required length using an angle grinder or metal scissors, and fix it in the places where it adjoins the guide. The step between the posts is no more than 40 cm to give the frame base rigidity. The metal frame for the construction of the partition element is ready.
- We cover the frame with corrugated board. To fasten corrugated sheeting, you cannot use nails, only self-tapping screws with sealing washers. Pre-drill holes for hardware. We fasten one of the corners of the profiled panel with a self-tapping screw. We do this in order to align the flooring vertically. Before fixing the bottom edge with a level, check the horizontal and vertical positions. We fix the panel with hardware to the lower part of the deflection through two or one ridge.
- We install the corrugated sheets overlapping horizontally with an overlap of 15 cm. Vertical joints of the sheets are additionally secured at a distance of 30 cm. To avoid the formation of a gap at the joints, it is necessary to accurately find the upper and lower edges of the junction. The first one will always be a few millimeters wider.
During the installation process, ensure that the corrugation fits snugly to the fixed corrugated sheeting, but do not tighten it. When temperature changes, the metal can contract and expand, and this can cause deformation of the partition.
To maintain the tightness of the joints of the corrugated sheets, its fixation must be done in the following sequence:
- at the lowest points of the flooring;
- at junctions;
- along the top.
The fastening of the remaining profiled sheets is carried out according to the same scheme.
Cutting corrugated sheets must be done using special metal shears, since the use of a grinder does not allow preserving the protective layer of galvanization on the cut of the corrugated sheet. Unprotected metal will begin to rust over time. Extension of the profile is used only in cases of extreme necessity, because even a slight deviation from the rules for connecting sheets can cause future deformation or fracture of this frame element.
If it is intended to provide insulation or improve the noise-proof properties of the partition, the insulator is laid after covering the first side of the partition.
The main functions of thermal insulation material are to retain heat inside the room in winter and reduce wall heating in summer. Laying the insulator into the frame base begins from the bottom. There is no need to secure it. It is held in place due to its elasticity, and frame jumpers prevent it from sliding. After laying the thermal protection and sound insulation, you can begin lining the second side with corrugated sheets.
The installation of a partition element made of corrugated sheets is considered fully completed after installing special corners at the corner joints between the wall, floor, ceiling and bulkhead. Such decorative elements will give the wall a finished look. Then construction dust is removed from the surface, and the cut areas are covered with paint.
Types of corrugated sheets for wall insulation
There are two types of corrugated sheeting: wall and roofing. Wall corrugated sheeting, as a rule, has a lower wave height.
Corrugated sheeting, due to its availability, is in demand everywhere. They cover the roofs and facades of residential buildings. For the manufacture of wall profiles, rolled steel is used with a polymer coating placed on it. Wall cladding can be carried out both inside the building and on its outside. The C8 wall profile sheet has different profile wave heights. Due to insignificant loads on the walls, the profile height is: 8 mm, 10 mm, 20 mm, 35 mm. The color scheme for sheets corresponds to the European RAL scale. Weight ranges from 5 to 8 kg per m2.
For profiled sheet KS-81180, the profile height is 8 mm, thickness is 0.8 mm; It is an excellent material, airtight, provides strength and lightness of the coating. Corrugated sheet C - 21 has an overall sheet width of 1051 mm, with a profile height of 21 mm; provides the walls with a certain rigidity. When installing corrugated sheets with your own hands, inexpensive brands NS - 441045, N - 60916, N - 75802, which are easy to install, environmentally friendly, and easy to transport, have proven themselves well. To cover the walls, a load-bearing profile sheet of the NS35 brand is used (despite the fact that it is classified as a roofing sheet, it is suitable for external and internal decoration of the room), NS44.
Insulation of external walls of a building with corrugated sheets
In old buildings, you can line the walls with sheets of corrugated sheets with your own hands and change not only the appearance of the facade, but also insulate the entire living space. Sheets of corrugated sheets are mounted on wooden, brick, concrete walls.
Before starting facing work, it is necessary to prepare the following materials:
Corrugated sheet installation diagram.
- wall corrugated sheeting grades C8, C10, C13, C20 C8;
- leveling brackets;
- thermal break gaskets;
- U-shaped guide profiles;
- façade anchor dowels;
- insulation (mineral or polymer), with a density of at least 8 kg/m³;
- disc-type polyamide dowels;
- film (for protection from wind and rain);
- rivets;
- galvanized self-tapping screws, with EPDM gasket.
First of all, the brackets are secured using facade dowels. To eliminate the possibility of cold bridges appearing, the brackets are placed on spacers. The brackets can be secured in a vertical or horizontal position. In the horizontal plane they lag behind each other by 500-750 mm, in the vertical plane - by 1000 mm. Insulation boards are installed with your own hands by stringing them onto brackets. Insulation boards are placed vertically in a checkerboard pattern. Fastening between the slab and the wall is carried out using disc-shaped dowels made of polyamide. The insulation is covered with a special film on top, providing protection from atmospheric influences. The protective film is positioned so that in a vertical position there is an overlap of at least 100 mm. The fastening between the insulation and the film is carried out with disc-shaped dowels. The insulation is installed in dry, windless weather. Water and snow are not allowed to get inside the mounted structure.
Attaching vertical guides to brackets
Approximate diagram of installation of corrugated sheeting on a brick wall.
At the next stage of work, it is necessary to fasten the vertical guides and brackets. Fastening is provided by rivets. During installation, the guides are positioned in such a way as to create a gap for ventilation between the corrugated sheet and the insulation. Its size is strictly defined and ranges from 40 mm to 10 mm. When installing with your own hands, pay close attention to the coincidence of the level of all guides. Installation of horizontal guides is carried out to similar ones, but located in the vertical direction. The frequency of their repetition during installation makes it possible to ensure close contact between corrugated sheets and profiles. The overlap goes into one corrugation. The corrugated sheet is attached to the profile in a horizontal position in sheets on the inner edges using self-tapping screws. At the joints, the connection is ensured with rivets, the pitch is 300 mm.
Corrugated sheeting as a facing material for insulated wall panels
When constructing residential buildings and industrial premises, a method is used in which insulated panels or sandwich panels are used. The method of their use is economically justified and simple to implement. To install sandwich panels with your own hands, you need to prepare the tools for work in advance.
It is best to stock up on necessary materials such as:
Self-tapping screws: approximate dimensions.
- roofing felt;
- universal screws (anchor);
- guide profiles;
- vapor barrier film;
- thermal profiles;
- insulation (mineral or polymer);
- hat profile;
- screws for metal;
- self-tapping screws with EPDM gasket;
- Protective film.
Two-layer waterproofing of the foundation is performed primarily with roofing felt. Laying is carried out along the perimeter of the constructed foundation. It is necessary to secure the guide profiles on top. They are secured with anchor screws. Thermal profiles are fixed directly into the guide profiles. Place them vertically. Next, they move on to connecting the thermal profile and guides using self-tapping screws. A vapor barrier gasket is attached from the inside; place it horizontally. Work is carried out in the direction from the bottom edge to the top. The overlap is about 100 mm. The insulation is inserted inside the frame. It is placed in a checkerboard pattern. The top is covered with a film to protect it from atmospheric influences. Sheets of corrugated sheets and thermal profiles are connected to each other by guides located horizontally.
Fastening guides for fixing corrugated sheets
All guides for fixing sheets are attached so that the step ensures their strong fixation. Adjacent profiles are attached to the insulated panel to the thermal profile and connected with self-tapping screws, which firmly press the film to the panels. From the outside, the entire panel is covered with corrugated sheeting. You can fix the sheets using self-tapping screws with an EPDM gasket. In vertical joints, fastening is ensured using rivets. The pitch will be 300 mm.
When constructing a wall from corrugated sheets, installation can be done at the bottom of the wave, the layout diagram is in the wave, through the wave; fastening is done using metal screws. Fastening at the joints is done with rivets, with a step of 30 cm.
All methods of installing walls made of corrugated sheets can be done with your own hands, using the necessary technological developments and having sufficient experience in working with this type of building material.
Marking of wall corrugated sheets
It is necessary to select sheets with a wave height from 8 to 20 mm; most often, sheets with the following markings are used:
1. C8; 2. C10; 3. C18; 4. C20; 5. C21.
The letter “C” indicates that the corrugated sheeting is wall, the number indicates the height of the profile wave. Above I said that a profile height of up to 20 mm can be used, however, under high loads you can (severe weather conditions) use a wave height of 21 mm.