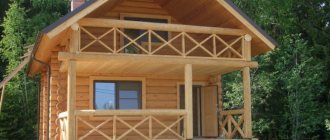
Almost every modern city apartment has the opportunity to expand the living space by using additional balcony or loggia space. To do this, you will need to carry out work to insulate cold glazing, as well as walls, floors and ceilings. It will be useful for anyone who is faced with the need to solve this problem to learn about the technologies, methods, stages, and materials that will be required for this.
Insulating the balcony expands the living space in a city apartment
How to insulate a balcony, what materials are best to choose?
To understand how to insulate a loggia or balcony, let’s first figure out what properties the materials should have:
- high strength;
- fire safety;
- water resistance;
- environmental friendliness;
- relatively low cost;
- ease of installation (if we want to do all the work ourselves).
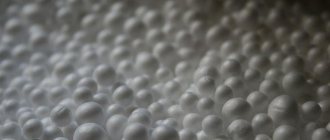
Most often, mineral wool, polystyrene foam, polystyrene foam, etc. are used for insulation. Sometimes several of these materials are combined. We have reflected the pros and cons of each heat insulator in the table:
| Insulation | Advantages | Flaws |
| Expanded clay | Low cost; Durability; Fire safety; Not afraid of mold and mildew; Light weight; Easily takes any shape | High moisture permeability; Suitable only for floor insulation; May be difficult to install |
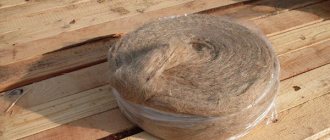
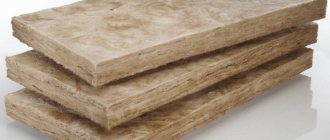
| Mineral wool | Good sound and heat insulation; Environmental friendliness; Fire safety; Easily takes any shape | Deterioration of properties when exposed to water; The thickness of the insulation “steals” the usable area |
| Styrofoam | Low cost; Easy installation; Light weight; Not afraid of mold and mildew | Fragility; Flammability |
| Extruded polystyrene foam in slabs | High strength; Easy installation; Moisture resistance; Durability | Relatively high cost |
| Polyurethane foam (liquid insulation) | High strength; Moisture resistance; Durability; Fills cavities of any shape | Relatively high cost; Mandatory availability of special equipment |
| Penofol (foamed polyethylene with a layer of metal foil) | Moisture resistance; Durability; Small thickness; Good thermal and waterproofing | Rarely used as an independent heat insulator, usually only in combination with other materials |
Which insulation for a balcony is better? The answer to this question depends on your preferences and financial capabilities. You can read more about the characteristics of insulation materials, as well as about insulating an apartment in general, in our blog.
Preparatory work
Of course, the loggia or balcony must first be glazed with window frames, it can be plastic or wooden, it doesn’t matter. The second step is to make a concrete floor and parapet; the walls must be repaired, the cracks must be sealed with a cement-sand mixture and covered with acrylic or polyurethane primer.
The floor on the balcony can be leveled with a mesh and concrete screed at the horizon level. This will make it easier to assemble the frame and insulate the floor on the balcony with mineral wool yourself.
The balcony wall will need to be lined with foam blocks or tiles
Interior wall decoration
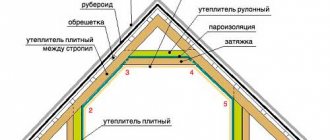
The technology for insulating balcony walls, done by yourself, depends on the design of the parapet and the heat-insulating material used. It is better to sheathe a metal frame, externally finished with plastic or corrugated sheeting, with 2 layers of thermal insulation so that the second row of insulation covers all metal racks that act as cold bridges. Moreover, on the outside, between the cladding and the insulation, a windproof film should be laid.
When insulating a balcony with mineral wool, it is necessary to use not an ordinary film, but a diffusion membrane as a wind barrier. It will let out the moisture that arises in the thickness of the cotton wool, but will not allow it to get wet from precipitation or fog on the street. For polystyrene foam and expanded polystyrene, the use of a membrane is not necessary; ordinary film will do.
To attach the mineral wool, you will need to assemble with your own hands an additional wooden frame from beams, the width of which is equal to the thickness of the insulation. The pitch between the bars is selected according to the width of the material, the latter is placed between them at random. At the last stage, the thermal insulation layer is covered with a vapor barrier film, after which the frame is covered with clapboard or plasterboard.
Advice from professionals
Important information about wool insulation:
- It is not allowed to have gaps through which heat will escape. It will not be possible to achieve high-quality thermal insulation;
- thermal insulation allows you to save thermal energy inside the room, but not create it. It is recommended to regularly open the door from the apartment or place a heating device on the loggia;
- thermal insulation allows you to turn a loggia and balcony into an additional small room - a full-fledged living space. Depending on their size, it is possible to design a workplace or a comfortable relaxation area with soft armchairs and a hanging table. Morning coffee with a view of the metropolis will make a great start to a new day;
- the resulting space can be turned into a beautiful botanical garden. In winter, this will make you feel like summer. Plunge into the green kingdom;
- For additional fixation of the slabs, it is allowed to use special clamps - butterflies.
Mineral fiber-based wool as thermal insulation allows you to turn the loggia into a real living space, comfortable for living. In the new room you can arrange a place for relaxation, a study and even a winter garden. The main thing is to decide on the wishes of the owners.
Finishing
After completing the thermal insulation of the loggia, it is worth thinking about finishing work, which also affects the degree of thermal insulation in the room. When all layers are laid and sealed, the metal hangers must be returned to their original position, and then the aluminum profiles must be attached to them.
It is convenient to attach almost any of the materials available on the modern construction market to these profiles. Wooden, cork and metal slatted panels, PVC structures, siding and many other options are perfect as finishing materials for loggia walls.
Moisture-resistant drywall has proven itself quite well. The advantages of this material are its lightweight structure, which “breathes” well. Drywall is very affordable in terms of price, and it is also easy to process, paint, fix, and stick wallpaper on its surface.
At first, insulating a loggia may seem like a rather complicated and time-consuming process. However, if you decide to try, you will quickly realize that there are no particular difficulties here. All operations are quickly mastered and do not require special construction skills.
The balcony can also be turned into a comfortable and useful room. For example, equip it with an office, a workshop, a small sports corner or a comfortable relaxation room.
Advantages and disadvantages
Mineral wool is a fibrous material that is obtained from rocks or slag. This insulation has unique properties, they are its undeniable advantages:
- Fire safety. Minwatane deforms at high temperatures.
- Convenient to use. Material in the form of slabs is easy to cut with a knife, and mats are sawed with a hacksaw.
- Minimal thermal and natural shrinkage. Over time, no gaps are formed at the joints for the passage of cold.
- Excellent sound insulation properties. When passing through the material, the sound becomes weaker by 95%.
- Non-hygroscopic and good vapor conductivity. An optimal microclimate is maintained in the room.
- Excellent biological stability. Mice or mold will grow in the mineral wool.
- Low thermal conductivity. High thermal resistance allows you to save money on repair work.
Disadvantages of mineral wool:
- The material loses its thermal insulation properties when wet.
- When installing insulation, precautions must be taken. For safety reasons, it is recommended to wear a respirator.
- Over time, mineral wool begins to release formaldehyde. These emissions themselves are minimal and cannot exceed the permissible limit. However, if there are other sources of formaldehyde in the room, then this factor cannot be ignored.
If you find an error, please select a piece of text and press Ctrl+Enter.
Insulation with mineral wool yourself
Read on the topic - foam insulation. How to fasten, lay and glue.
Before starting work, you need to calculate the amount of material:
- Wooden beam 60 cm. Its quantity depends on how many layers the protective layer is planned to be made.
- To lay a layer 10 cm thick, it is recommended to use 5 cm thick cotton slabs and form a second layer from them, where the blocks are located perpendicular to the direction of laying the first layer.
- Glue for gluing protective blocks and vapor barrier film are purchased based on the total area of the insulated surface.
Preparation for installation of mineral wool slabs
The floor, side walls, ceiling and parapet (if any) are covered with mineral wool slabs. Blocks of insulating material are placed inside the wooden sheathing. Its installation has the following features:
- The thickness of the wooden beam is 50-60 mm.
- The vertical or horizontal arrangement of the timber is determined by the design and shape of the decorative finishing panels and the method of their installation.
- Wooden elements are attached using self-tapping screws and dowels to concrete or a brick wall.
- The gaps between the frame elements for the mineral wool blocks should be 1-2 cm smaller than the size of these blocks for a tighter fit.
- With a two-layer method of laying thermal insulation, the frame beams of the second layer are laid perpendicular to the sheathing of the first layer.
Mineral wool adhesive
The use of a special cement-based adhesive allows you to completely block the movement of air between the insulated surface and the insulation. Full gluing of the two-layer protection, when the blocks are laid perpendicular to each other, allows you to create a dense monolithic barrier without random cold bridges. Additional fasteners for blocks can be fungi - dowel nails with wide washers.
Vapor barrier
A roll of vapor barrier material is unrolled along the insulated surface on top of a layer of stone wool. The material is attached using a furniture stapler to the wooden frame elements. The butt overlap must be at least 10 cm. The joints are additionally sealed with double-sided tape. The junctions of the vapor barrier film to the ceiling, walls, floor and window profile are covered with sealing, moisture-proof tape.
Installation of counter beam
The counter beam is used to fix the decorative trim panels. Before installation, double-sided tape is applied to its surface, which should be adjacent to the vapor barrier coating. Fixation is carried out using self-tapping screws to the sheathing elements located behind the vapor barrier layer.
Insulation on the floor
To install the frame under the floor insulation, a wider beam of 50X100 mm is used. It is recommended to make the step between the lags the same as that used when installing wall and ceiling cladding. For slabs with a width of 60 cm, it is necessary to take a step of 58-59 cm for a tighter fit. The flooring can also be done in 2 layers. For installing 100 mm thick mineral wool insulation. It is allowed to place 2 layers of 50 mm each with mutually perpendicular arrangement of blocks. Before installing plywood or fiberboard, a vapor barrier film is applied to the thermal insulation layer and attached using staplers. All joints of the vapor barrier material are overlapped and glued using double-sided tape.
Finishing the floor
Plywood sheets or boards are laid on the frame joists, covered with a vapor barrier film, and secured with self-tapping screws. It is recommended to make the flooring two-layer, when the elements of the second layer are laid across the elements of the first. Only after this will the linoleum, laminate or parquet laid on top last a long time.
Internal cladding of walls, ceilings and parapets
The choice of decorative panels for finishing an insulated balcony is very wide:
- Drywall.
- Siding.
- Lining.
- Decorative plastic panels.
If the insulation and vapor barrier layer were installed correctly, then no facing coating will suffer from temperature changes, moisture penetration, or ice. The interior of the insulated balcony becomes completely residential, and it can be used in this capacity all year round, which increases the total living space of the apartment.
Interior finishing of insulated glazing
Metal clamps on an aluminum profile covering a layer of vilaform or other insulation are covered with plastic decorative panels with the desired shades, or for painting. Multilayer double-glazed windows become full-fledged apartment windows, so the balcony doors do not need to be closed.
Do-it-yourself insulation of a balcony with mineral wool
Insulation with mineral wool is especially popular.
The work can be done in-house. This is done in the following sequence:
1. The frame is mounted. A beam measuring 50 by 50 cm is attached to the insulated surface. The distance between the elements is consistent with the size of the slabs being laid. It should be 10 - 20 mm less than the corresponding geometric parameter. The frame can be vertical or horizontal. The optimal location of the sheathing is selected taking into account the subsequent finishing. The position of each element is controlled using a level.
2. Mineral wool slabs are laid between the frame posts without additional fastening. If necessary, the insulation is cut to size using a construction knife.
3. A beam is attached to the frame posts on top, which is placed perpendicular to the previously fixed elements. It is attached with a similar step. Mineral wool slabs are laid perpendicular to those laid earlier.
4. A vapor barrier is attached to the top of the frame using a construction stapler. All joints of the vapor barrier material are taped using double-sided tape. The individual elements are connected with an overlap of at least 100 mm. In places adjacent to the window, walls and ceiling, vapor barrier is used using a special sealing tape.
5. The counter-lattice is installed. The pitch and spatial position are selected taking into account the subsequent finishing. The facing material is attached to the counter-lattice.
Source https://www.youtube.com/watch?v=G7rZmJG-L38
Carrying out work on a loggia or balcony using mineral wool
But before you get ready to insulate the balcony directly with the cotton wool itself, you need to carry out additional work. Thermal insulation itself, no matter how good it is, will do nothing if you still have old window frames on the loggia or there are cracks somewhere.
If you have a loggia, then there will be much less preparatory work than on a balcony. Firstly, loggias most often have side walls and, in addition, the front wall is made of blocks or bricks, which cannot be said about the balcony.
Stages of preparation for installation:
- the first stage is to restore order, that is, it is necessary to completely empty the loggia of all items, including building materials;
- taking measurements and calculating the materials needed for the work - this stage is important because it will help you avoid unnecessary costs; at current prices for building materials, this point plays a big role;
- It is also necessary to assess the condition of the slab - whether it can withstand additional load; if you are not able to do this yourself, then you need to invite a specialist.
After the preparatory work has been carried out and all materials have been purchased, you can proceed directly to work. The first step is to install double-glazed windows; it’s up to you to decide what they will be, wooden or metal-plastic.
Next, you need to prepare the surface itself for installing insulation, in our version of mineral wool. If there are cracks and holes, they must be eliminated, sealed with polyurethane foam and plastered. After this, we proceed to waterproofing the surfaces; this process is not as complicated as it seems. There are two main methods of waterproofing: coating or roll. In a city apartment, the second option is more preferable, since bitumen is most often used as a coating, but its smell can persist for a long time. This stage of work is mandatory, since without the necessary waterproofing, mineral wool may soon become unusable.
Advantages
In terms of application, the leading position among mineral wool options is occupied by stone wool, which is due to a number of its advantageous performance characteristics. For example, when insulating a loggia with mineral wool, about 70% of homeowners give preference to basalt, because, unlike glass wool, it:
- much safer, working with it does not require the use of a respirator, special clothing or other protective equipment;
- more resistant to high temperatures: if glass wool can withstand a temperature range from – 60 to + 500°C, then stone wool can withstand a temperature range from – 190 to + 1000°C;
- does not react to humidity, is less susceptible to shrinkage (due to hygroscopicity of 0.5%);
- does not react with chemically aggressive environments.
As a result: when choosing mineral insulation, you should take into account that stone wool has a significantly longer service life, although it is somewhat more expensive.
How to insulate a balcony inside
A positive result of the work performed is considered to be an equally comfortable temperature inside the room and the adjacent balcony. There is no point in investing effort and money in insulation that does not protect against the penetration of cold onto the balcony and forces you to tightly close the doors leading to the loggia in winter.
Here, the type of insulation used and its thickness, as well as compliance with the work technology, play a big role.
As a rule, for internal insulation of balconies the following is used:
- foamed polystyrene with a density of 25-35 kg/m 3, otherwise - polystyrene foam;
- mineral wool based on basalt fiber 80-110 kg/m3 density;
- extruded polystyrene foam (one of its varieties is penoplex).
Note! For additional thermal insulation, thin foil polyethylene foam insulation - Izolon or Penofol - is often laid on the base layer.
In addition to the listed insulators, there is another insulating material - ecowool, made from cellulose waste. Simply put, waste paper. The rules for handling it and the installation technology used are the same as with basalt wool. Ecowool is not very popular due to its high cost.
What materials should I use?
When insulating balconies, finishing should be done using materials that can withstand temperature changes and possible penetration and accumulation of moisture for a long time. The resistance of these materials to fading due to sunlight (when they enter through the glass of a balcony window) is important.
Here is an approximate list of parts on a well-insulated balcony:
- wind-moisture-proof membrane;
- sexual lag;
- floor insulation;
- heat-protective membrane;
- floor tongue and groove;
- laminate flooring;
- finishing panel;
- drainage;
- window frame and installation profile;
- vapor barrier membrane.
In order to efficiently insulate a balcony for many years, you need to choose insulation materials that are best suited for a specific category. The heat retention on the balcony and the price depend on the technological properties and heat protection. You can choose a heat-insulating material from a wide range:
- extruded polystyrene foam, foaming polystyrene;
- Styrofoam;
- penoplex;
- foil polyethylene foam (penofol and ecofol);
- fiberglass;
- mineral wool.
7 photos
Materials made from synthetic resins with fillers are considered the best for thermal insulation of rooms of different profiles and levels. Like all other insulating materials, they must meet certain requirements:
- low thermal conductivity;
- resistance to bacteria;
- high hydrophobicity;
- soundproofing;
- ease of machining.
The best materials that meet these requirements are extruded polystyrene foam and expanded polystyrene in the form of slabs that are easy to install. The thickness of the insulating material depends on climatic conditions, the area of the balcony, and the selected flooring option. It is appropriate to recall that the installation of all parts for thermal insulation is carried out after installing the frame and bases for the windows.
Insulation of the loggia from the inside with clapboard
Another do-it-yourself way: using lining. The lining burns 3 times weaker than polystyrene foam, and is almost not hygroscopic, unlike mineral wool. In addition, lining is an environmentally friendly material.
Tools and materials:
- wooden logs;
- lining strips;
- perforator;
- dowel-nails;
- wood screws;
- cordless screwdriver;
- nails without heads;
- thin nails;
- hammer.
To insulate the loggia with clapboard, logs are nailed to the walls below the level, and it is on them that the clapboard is attached.
To insulate a loggia with clapboard yourself, you first need to prime the surface of the walls, floor and ceiling. After this, using a hammer drill and dowel nails, nail wooden joists to the wall, floor and ceiling. On them, starting from the corner of the wall, we nail strips of lining with a hammer and nails, and we drive the nails in at an angle. At the end of the strip, the lining must be secured with self-tapping screws, drowning them inside the lining with a cordless screwdriver at low speeds. In this way we secure each strip of lining at both ends.
We cover all the corners of the loggia with a plank on top, nailing it in with a hammer and thin nails.
The lining itself is a decorative material, so there is no need to attach any finishing on top of it, unless you can cover it with a double layer of varnish if desired. The lining is heavy and expensive. It can only be used to cover a loggia (but not a balcony) adjacent to a heated room, since the lining has little heat-insulating properties.
Foamed polyethylene has good thermal and waterproofing properties, is quite cheap, durable, easy to use (does not scatter throughout the room like mineral wool), thin and light (unlike lining), does not burn (like polystyrene foam), melts when burned, releasing toxic substances.
Tools and materials:
- penofol rolls with an additional layer of foil (for better vapor barrier);
- glue for penofol;
- glue brush;
- roller;
- scissors.
http:
https://youtube.com/watch?v=EmsXWnchQXE
To insulate a loggia with your own hands using foamed polyethylene, apply glue to the primed surface of the walls, ceiling and floors of the loggia. We cut out the required size pieces of penofol, apply a layer of glue and glue it so that the foil layer is on the outside. Level it with a roller.
We treat all corners, joints and parapet of the loggia with polyurethane foam. We mask the penofol on top with laminate, plasterboard or wall panels. Since aluminum, which is part of the foil of penofol rolls, is a good electrical conductor, it is necessary, in order to avoid a fire hazard, to well insulate the electrical wiring on the loggia.
What is better for insulating a balcony - penoplex or mineral wool?
The main competitor to mineral wool for thermal insulation of balconies is expanded polystyrene (foam plastic) - their share is approximately the same. But the StroyGuru editors have their own point of view on this matter, based on extensive experience in the construction industry. Therefore, let’s briefly consider what is better to insulate a balcony, “Penoplex” or mineral wool.
Balcony insulation scheme.
We will compare according to the main criteria:
- price. At a price per 1 m3, materials are in the same price sector. But when calculating the total costs of insulation, Penoplex will cost less due to the smaller thickness of the insulation layer;
- durability. Basalt mats will last 2-2.5 times longer, which pays off the cost of insulation;
- density. Polystyrene foam is much lighter, which is important for a balcony;
- flammability - all types of wool have a flammability class of NG (non-flammable), polystyrene foam burns well. Even fire retardant additives do not completely eliminate the problem;
- complexity of insulation technology. According to the specified criterion, materials have complete equality;
- vapor permeability. Unlike mineral wool, Penoplex is completely vapor-tight, which creates difficulties when insulating wooden structures and the need to calculate the dew point when insulating brick and concrete building structures;
- environmental cleanliness. The Stockholm conference banned the use of Penoplex in attic insulation in Europe and did not recommend its use when insulating balconies from inside the room - when the temperature outside rises above 25oC, styrene begins to be actively released in the room - a toxic substance that is not excreted from the body. The ban does not apply to external insulation.
General conclusion: when insulating a balcony from the outside, foam has an advantage, and from the inside, mineral wool has an advantage. But only the walls can be insulated from the outside. The floor and ceiling will have to be insulated from the inside. Therefore, the choice will have to be made in favor of mineral wool. If for some reason polystyrene foam was used to insulate the balcony, in summer in warm weather the balcony should be constantly ventilated.
Pros and cons of mineral wool
If you still chose mineral wool when choosing insulation, then it would be nice for you to know about the advantages and disadvantages of this material. Where and how it can be used, what properties it has and whether it is safe for humans.
Advantages of mineral wool:
- if you live in a city and your area is a noisy courtyard or a busy highway, then you will immediately be able to evaluate the soundproofing properties of mineral wool;
- in cold weather, you will understand to what extent it protects from frost and allows you to retain heat in the room, and accordingly save on heating;
- its light weight is also its advantage;
- due to its physical properties, mineral wool is convenient for installation, because it can be given any shape;
- and another great advantage is that it does not burn, that is, it is safe.
People love comfort and safety, and insulating the balcony with mineral wool provides this.
Disadvantages of mineral wool:
- its biggest disadvantage is that it can intensively absorb moisture, as a result of which it loses its properties and becomes deformed over time;
- the second drawback is that during work with it, harmful and dangerous dust is generated for humans, so it is necessary to use a respirator.
These disadvantages of this material are, of course, significant, but they can be circumvented by applying some actions. For example, when you insulate a loggia with mineral wool, you can use special waterproofing materials to protect it from external influences. When working with mineral wool, your body can be protected with an ordinary respirator and special clothing. The safety rules are the simplest, but they will help you avoid major troubles. In addition, after finishing work directly with mineral wool, it is best to immediately clean up the work area so that small pieces of cotton wool and its dust are not spread throughout the apartment.
Is it possible to insulate a balcony with mineral wool?
Nevertheless, the idea of insulating a balcony with mineral wool with your own hands is extremely popular, primarily due to the low cost and availability of thermal insulation. True, such insulation is most often done handicraft, according to one’s own understanding of exactly how mineral wool and protective film slabs should be laid, hence all the problems.
Two factors speak in favor of insulating the floor on the balcony with mineral wool:
- Insulating a balcony is quite simple and reliable. If you do everything according to technology, this thermal insulation on a balcony or loggia can last a couple of decades;
- Formally, balconies and loggia do not belong to residential premises; parapets and walls are blown by air currents, which means that there will be no problems with removing water vapor if properly insulated with mineral wool.
It is possible and necessary to insulate a loggia with mineral wool, since the material has zero flammability and looks like an ideal candidate when compared with polyethylene foam or expanded polystyrene. If you are looking for an option that is balanced in price and durability, then it will probably be difficult to find something more affordable than insulating a balcony in a Khrushchev-era building with mineral wool with your own hands.
Mineral wool insulation scheme
Floor installation, determining the amount of materials
In order to quickly and successfully complete a task, you need to have a clear plan. In this case, this is the plan of the loggia. We measure the length and width of the loggia, as well as niches and projections, if any.
Scheme of beams layout
On the plan of the loggia we determine the layout of the transverse and longitudinal beams. In doing so, we adhere to the following rules:
- the bottom row consists of transverse beams, which are laid out along the loggia, the step between the beams is 40-60 cm;
- the top row consists of longitudinal beams located along the loggia; the distance between the longitudinal logs should be no more than 45 cm.
In standard loggias, it is enough to lay three longitudinal beams. If the loggia has a width of 1.2 m, then you can lay the outer beams at a short distance from the walls: 10 cm from the inner wall and 20 cm from the fence of the loggia. The length of the longitudinal beam can be 10-15 cm shorter than the length of the loggia (5-7 cm on each side).
Floor structure height
It is important to correctly determine the height of the floor. For good insulation, it is enough to make the floor 10-20 cm thick
You need to check how the floor will fit the threshold of the balcony door and match its height. In this case, it is necessary to take into account all the elements that make up the structure: the height of the transverse and longitudinal beams, the thickness of the subfloor (chipboard) and the thickness of the finishing coating.
In order to achieve the desired floor height, you can choose the appropriate timber height and chipboard thickness. It must be remembered that the thinner the chipboard thickness, the smaller the distance between the longitudinal beams should be. The recommended chipboard thickness is 18 mm, the recommended height of the upper (longitudinal) row of beams is 70 mm. The height of the bars of the first row is 50-70 mm. To accurately calculate the required amount of flooring materials, you can use our calculator.
After drawing up the layout of the beams, the required amount of material for the floor frame is determined. The amount of chipboard is determined based on the floor area and the width of the loggia. Having decided on the size of the chipboard sheets, you can immediately order them to be cut in the store.
To install the floor you will need:
- timber 50x70 (or 60x40, 50x50) mm depending on the height of the structure;
- sheet chipboard with a thickness of 18-20mm;
- mineral wool;
- frame anchor 112 mm long;
- self-tapping screws 70 mm and 40 mm long;
- mounting wedges;
- drill;
- screwdriver;
- level;
- construction knife;
- polyurethane foam;
- protective glasses;
- gloves.
We cover the ceiling and walls with insulation
Before you begin insulation work, you need to check all walls and corners for cracks and cracks, and if there are any, they should be sealed with sealant, if they are small, or with polyurethane foam. After drying, cut off the remaining foam and cover everything with cement mortar or seal it with sealant tape. Do the same thing, walk along the walls, see if the plaster is crumbling.
If neighbors live above you, you need to find out from them whether their floor is insulated; if so, you shouldn’t bother too much with insulating the ceiling. For your peace of mind that the heat will be retained in the room, experts recommend covering the balcony on your side.
The walls of the balcony are mainly covered with double-glazed windows, which are not subject to insulation. The insulation from windows will depend on their thickness. The lower part is mainly made by builders using either concrete or iron.
Do-it-yourself insulation of balcony walls with mineral wool
Now let's start insulating the walls and ceiling. On them it is necessary to attach a wooden beam measuring 50 x 40 mm from the ceiling border. After which we attach the beam to the wall along its entire length in increments of 50 cm. If you plan to install wiring and sockets, then all electrical work must be carried out at this stage of work.
Important! All switches and sockets should be installed only externally.
To lay mineral wool between the beams, it must be cut into pieces the size of the areas between the beams. It is, of course, better to insulate from the ceiling. To attach the mineral wool sheets, use a special glue. It must be applied carefully. After applying the glue, the sheets must be pressed lightly to the surface to avoid pressing through the insulation. After you have completed all the thermal insulation work, you can safely begin insulating the walls.
If the loggia wall has sufficient thickness, you can install additional fasteners in it, which will not only securely secure the entire system, but also extend its service life.
Depending on the climatic conditions, you determine what the thickness of the material should be (50-150 mm). All additional fastening elements should be installed after the glue has dried. Since mineral wool does not have high strength, but performs all its functions, all work with it should be done carefully so as not to damage it.
Important! When working with insulation, you must wear a respiratory mask, as small particles can fly off the sheets, causing allergic reactions.
Mineral wool slabs are laid end to end. The glue used should be the same on all sheets. After completing the installation of the insulation, you can safely proceed to installing the reinforcing layer. Upon completion of the latter, begin finishing work.
Insulating the balcony ceiling with mineral wool
When making glue for installing mineral wool, it is necessary to make it of a thick, uniform consistency. If you make the glue too thick, you will have a hard time getting a good adhesion to the surface. Too liquid will also add to the hassle, as it will not have the necessary density for adhesion. Therefore, make sure that the consistency of the glue is not liquid, so thick that it does not flow off the spatula.
Remember, do not press mineral wool under any circumstances when attaching it to the surface; work with insulation carefully, as it is a rather fragile material.
For better adhesion, fasten the mineral wool using a knitting wire; fasten the mineral wool using a construction stapler.
As for the wall separating the balcony area from the room, it does not need to be insulated, since it is already warm. You can connect and attach lamps, sockets, and switches to it.
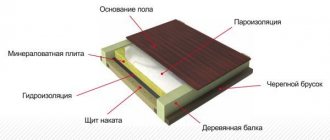
Floor insulation
The technology for thermal insulation of balcony floors differs from walls and ceilings, since the insulation “pie” must bear certain dynamic loads and have a flat surface. Leveling is carried out by laying wooden logs, between which insulation is laid, and a finishing coating is laid on top. The sequence of actions is as follows:
- Cut the wooden beams into cross members along the width of the balcony and secure them to the floor with anchors or self-tapping screws and dowels using steel corners.
- Attach 3 longitudinal logs to the crossbars with self-tapping screws. During the process, they must be aligned horizontally, starting from the highest point. Using a building level, the beams at the intersections with the crossbars should be raised and plastic or wooden wedges placed.
- Place insulation tightly between the crossbars and the joists. In the case of mineral wool, a vapor barrier must be laid on top of it.
- Lay the flooring with fastening to the joists.
Note! Some craftsmen practice insulating the balcony floor with polystyrene foam without installing logs. This method is unsuccessful, since it will be difficult to bring the floor surface to the same level. For instructions on raising the floor level, see here.
It is typical that the length of the crossbars and joists do not need to be adjusted to the dimensions of the balcony. It would be more correct to make them 10-20 mm shorter so that the ends do not rest against the walls. Wood has the ability to “breathe” and deform slightly; if the fit is tight, the floor surface may later bend in an arc.
Moreover, walking on such floors will be accompanied by an annoying squeak. The resulting gaps near the walls will hide under the floor covering and become invisible.
When using slab insulation, it is worth choosing the correct spacing of the crossbars so that you do not have to cut the slabs again. The standard width is 600 mm, and this is what you need to focus on. After laying polystyrene foam or expanded polystyrene, all joints and cracks must be filled with polyurethane foam.
Useful training video:
https://youtube.com/watch?v=GPDTFtvh-Go
Mineral wool is protected with a vapor barrier as tightly as possible so that moisture from inside the room cannot seep into it
Here you can also use foamed polyethylenes such as Penofol, but pay special attention to gluing the joints
If you take a serious and scrupulous approach to the procedure for internal insulation of a balcony, then it is not at all necessary to hire craftsmen and pay them money, which is never superfluous. You will spend twice as much time on completing the work, but you will do everything efficiently and in accordance with your personal wishes. In addition, you will save money on your family budget.
We insulate the floor
Before you start insulating the floor, it is first cleared of debris, after which roofing felt is laid. Apply sealant tape at the joints of roofing felt sheets. Install logs on top of the roofing felt, installing them in increments of 50 cm. The thickness of the bars is calculated: the height from the floor to the balcony door minus the thickness of the floor covering, rough material and roofing felt.
Important! Before installing the logs, they are treated with a special composition that protects the material from rotting.
After this, the logs are installed using a building level and bars to connect them.
Floor insulation with mineral wool
Cut pieces of mineral wool equal to their dimensions are placed in the cells formed by the lags. It is also better to work with mineral wool for floor insulation while wearing a protective mask or bandage to prevent small particles from entering the respiratory system.
After laying out and fastening the mineral wool, the subfloor is attached to the joists using self-tapping screws.
Preparing the balcony
The first stage is preparing the premises for work.
- Cleaning the surface from cement, paint and other irregularities. The working wall or floor must be smooth, otherwise the insulation will be difficult to install.
- Removing dust and debris from the floor. All dirt must be carefully removed with a vacuum cleaner so that it does not get into the cracks.
- Sealing internal holes, joints, cracks. Large cracks are filled with sealant or cement mortar. The gaps between the plates are removed using polyurethane foam.
- Removing excess hardened foam and sealant. Coating the surface with a primer.
Next, you can move on to waterproofing the surfaces. A properly installed protective layer will protect your home from mold.
Proper insulation of the loggia floor with penoplex: step-by-step instructions
Penoplex is a modern thermal insulation material made from extruded polystyrene slabs. Compared to polystyrene foam, penoplex is more durable and has a higher density. Penoplex 5 cm thick is usually used to insulate the ceiling, floor, parapet and walls of the loggia.
A detailed step-by-step guide describing one of the options for the penoplex insulation algorithm is as follows: window frames are installed. On the walls and parapet it is necessary to make a wooden sheathing with a pitch of no more than 0.6 m to attach the penoplex.
First of all, the walls are insulated with penoplex:
- Insulation with foam sheets begins from the lower corner of the side wall.
- First, the appropriate mounting foam is applied to the junction of the floor and the wall, then the foam sheet is pressed against the wall, squeezing out the remaining foam.
- The vertical position of the insulation sheet is checked using a building level.
- Next, holes of the required diameter are drilled in the insulation sheet and the wall with a drill.
- Mushroom dowels are inserted into the prepared holes, which are then secured with a screwdriver.
- The fixed penoplex sheet is blown with polyurethane foam around the entire perimeter.
- A second layer of the same insulation is laid on the first layer of foam sheets using polyurethane foam and dowels.
Insulation of the parapet and ceiling of the loggia is carried out in the same way as insulation of the walls. To insulate the floor of a balcony (loggia), a wooden sheathing is pre-installed in increments of 0.5 m. The wooden beams are fixed to the floor with dowel nails. The horizontal position of the timber is checked using a building level. Next, vapor barrier of the loggia structures is carried out using foil penofol. To do this, sheets of penofol are fixed to the walls and parapet with self-tapping screws with a wide head.
Sealing all seams and joints is a necessary condition for high-quality thermal insulation. The final stage of insulation is laying sheets of moisture-resistant plywood on the floor, which are fixed to the wooden frame with self-tapping screws using a screwdriver.
Selecting a thermal insulator
Advantages and disadvantages are inherent to each type of thermal insulation. In order to choose the most suitable insulation, you should compare the main characteristics of heat insulators.
The most common thermal insulator options:
- Extruded polystyrene foam (penoplex);
- Foamed polyethylene (penofol);
- Polyurethane foam (PPU);
- Styrofoam;
- Mineral wool.
Mineral wool
The thickness of the sheets varies from 2 to 20 cm. Mineral wool is divided into three types, depending on the components of the raw material:
An example of installing mineral wool on a loggia. The material is placed into the prepared structure. The mounting frame can be made of metal profiles or wooden blocks.
Manufacturers produce cotton wool in the form of mats and soft rolls. In some cases, one side is covered with foil. Aluminum foil improves the level of thermal insulation.
The main disadvantage is that moisture is destructive; a vapor barrier is required.
Choosing mineral wool insulation
The term mineral wool combines several types of insulation:
- Glass wool has low thermal conductivity and absorbs noise well. When working, it releases small particles that are hazardous to the respiratory tract. The problem is solved by using protective equipment.
- Slag wool - used in industry, is not suitable for insulating balconies, because it does not meet environmental standards.
- Stone (basalt) wool is an environmentally friendly material used for insulating residential premises. Does not crumble and does not harm humans. Very durable, with thermal conductivity up to 0.077 W/(m*K), moisture resistant.
The last type is the most expensive, but high-quality mineral wool insulation for balconies. Available in a wide range of products that vary in density. This allows you to choose the right insulation for different rooms and surfaces (walls, floors, ceilings).
It is necessary to choose mineral wool insulation according to certain criteria:
- Thickness depends on the type of insulated structure and the climatic conditions of the region.
- Density - does not affect the thermal insulation properties; different building envelopes require mineral wool of different densities.
- Thermal conductivity - the coefficient at zero humidity is indicated on the packages. More accurate data can be obtained from the manufacturer.
- Purpose - mineral wool insulation is produced in an assortment for specific tasks. In addition to dividing into industrial and household, they are produced for certain areas of the building. They come in the form of hard slabs and soft rolls.
Advice! When choosing mineral wool for insulating a loggia or balcony, pay attention to the availability of a certificate confirming compliance with GOST or TU. Names of well-established manufacturers: Knauf, Isover, Ecover, Rockwool, TechnoNIKOL.
Mineral wool from blast furnace slag
A by-product of metal production technology. It has a fiber thickness of 4-12 microns. Thermal conductivity 0.46-0.48 Watt/m K° Melting point 300° C.
Slag wool is much more friable compared to glass wool, which is elastic to the touch.
A special feature of this heat-insulating material is the residual acidity of blast furnace products.
Therefore, the use of slag wool in damp rooms or when wet leads to the formation of acids, which can have a detrimental effect on metals or other chemically unstable materials. Slag wool is a much moisture-absorbing material compared to glass wool, and in no case should it be used in damp rooms or for external wall insulation.
Insulation of the balcony from the inside
Action plan for internal insulation:
Preparatory work, which includes:
- Checking the supporting structure. In case of visible damage, it is necessary to eliminate it.
- Removing old trim and frame. Seal possible cracks in the slab with concrete mortar.
- Clearing the balcony room of foreign objects.
- Glazing of the balcony. For greater thermal insulation, it is better to choose two- or three-chamber double-glazed windows.
- Carrying out electrical wiring (if necessary).
- The preparation of insulating material is in accordance with the calculations made.
https://youtube.com/watch?v=H6QS9Jq_8TI
- Floor insulation.
- Insulation of walls.
- Ceiling insulation.
Floor insulation
The first stage of insulation begins from the floor.
https://youtube.com/watch?v=GPDTFtvh-Go
Step-by-step instruction:
- All kinds of cracks in slab joints or in concrete are sealed. For this, polyurethane mastic, polyurethane foam or sealant is used.
- The waterproofing layer is laid on the balcony slab, which can be ordinary polyethylene. The film must be laid overlapping, with a protrusion on the wall.
- The frame is installed using wooden beams with a section of 50 by 70 mm. They are laid across the balcony slab. The distance between the bars must be at least 40 cm and no more than 60. Fastening to the slab is done with an anchor 112 mm long; for this, holes must first be drilled in the bars. Two fastenings will be enough for one beam.
- The next stage of frame installation is the laying of longitudinal beams, thanks to which the floor will be leveled. They are fastened using self-tapping screws.
- Upon completion of the construction of the structure, insulation is placed in the gaps of the frame until they are completely filled. Depending on the insulator, the gaps can be filled with foam.
- And the last stage is the final coating, which can be made of plywood, chipboard or boards. When laying it, there should be small gaps between the shelter and the walls, since if they are laid tightly there will be friction and, as a result, creaking. The covering is attached using self-tapping screws. The gaps between the wall and the floor covering must be sealed with mounting foam to prevent glass wool dust from blowing in or escaping when using this material.
Important! For normal floor insulation, its minimum thickness should be at least 7 cm. But you shouldn’t get carried away with overestimation, you need to take into account three main criteria - the height of the threshold, its protrusion should not be more than 20 cm, the final height of the room should not be less than 2, 45 m and the height of the fence, which must be at least 95 cm
Based on these indicators, choose the best option; on average it is 16 cm.
Wall insulation
Step-by-step instruction:
- The surface of the walls is being waterproofed.
- A lathing made of timber is mounted on this layer, the cross-section of which depends on the selected material. It is advisable to choose a beam of such thickness that after laying the insulation there remains space between it and the finishing, thereby forming an air cushion that also performs thermal insulation functions.
- Having finished with the frame, the insulation is laid.
- The last stage is the final finishing of the walls. There are many materials for this, the choice of which depends solely on the preferences of the owner. This could be chipboard, fibreboard, drywall, lining, siding and so on.
Ceiling insulation
The ceiling can be insulated using a frame or without any devices, attaching the insulation directly to the ceiling slab. In this case, lightweight materials such as polystyrene foam or expanded polystyrene are used.
Stages of ceiling insulation:
- An antiseptic layer is applied to the cleaned ceiling surface.
- The material is secured with glue or foam. The best option is penofol, installation of which is very quick and easy.
- A sheathing of beams with a small cross-section is nailed on top of the insulation, which is necessary for attaching the finishing coating.
- In the case of using mineral wool: first, a frame is made from an aluminum profile or timber with a cross-section of 4*4 cm. Cotton wool is placed in the gaps, after which drywall is laid.
- Finishing is in progress.