Many novice beekeepers discover in the spring a large dead bees after wintering or a small brood. As a result, insects produce less honey and suffer from diseases. This article will give recommendations on how to prepare bees for winter so that the families come to spring healthy, fruitful and producing a lot of honey.
Choosing a wintering site
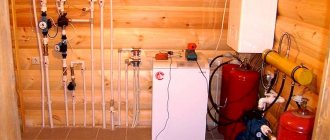
For wintering bees, you can choose any room that has enough space for several hives. The main thing is to observe the following conditions in the bees’ winter home:
- Low humidity;
- Air temperature inside and outside the hive;
- No noise;
- Lack of light.
In the garage
If you want to leave the apiary in the garage during the winter, take care of sound insulation. Chances are there are neighboring garages nearby. This means that cars will regularly pass near your box. They bother insects. Insects eat more honey and overload the intestines. Families become weak by spring.
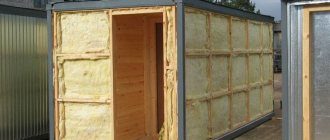
Insulate the garage with foam or mineral wool. Thermal insulation must be done inside and outside. Seal the cracks. Install an electric convector and maintain the temperature at 6-8 degrees above zero.
Make a vapor barrier. Cover the room with plastic film.
In the cellar
To winter bees in a basement or cellar, try to choose a deep room. But if it is almost at ground level, then you will have to insulate the ceiling and walls. Don't forget that there is usually high humidity underground.
At high humidity, bee products turn sour and mold forms. The winged workers are dying of hunger. Additionally, mold weakens insect organisms. To reduce the amount of moisture in the cellar, it is necessary to drain it before leaving the apiary in it. Make a vapor barrier and provide air exchange.
In the barn
Cover the inside of the room with fiberboard or chipboard to prevent light from entering. Insulate the floor with sand, dry leaves or dense flooring. Make insulation so that it can be removed at the right time. During frosts, insulate the room additionally, and during a thaw, remove the thermal insulation.
Advice! Enter the bees' winter home as rarely as possible.
On the street
If you leave insects outside during the winter, place the hives close to each other in a row. This way the wind will not blow on their sides. To prevent the houses from being blown in front and behind, place them on one side next to bushes or a fence, and install a barrier opposite the other.
To overwinter bees in the wild, you need to properly insulate the hive. Wintering of bees outside can take place on bees or in multi-hull hives. But read about this in the next section.
In omshanik
There are three types of omshaniks: above-ground, semi-underground and underground. The best option is to use an underground room. The temperature is stable there and light does not penetrate. You just need to make sure there is good ventilation.
Other wintering methods
In addition to wintering in a barn, you can organize wintering by placing the hives in the attic or under a canopy.
In the attic
To winter in the attic, you need to choose a slope under the roof, fill it with dry leaves, grass or straw and build an impromptu wall. The hives are placed near such a wall to ensure free access and good ventilation.
Video: Wintering bees in the attic
If the attic is located above a heated house, the hives are placed directly on the floor without additional insulation. The floor of a cold attic can be insulated with 18 cm thick mats. Otherwise, the procedure for installing hives in the attic is the same as in a barn.
In addition, it is necessary to darken the attic or cover the entrances with nets or planks. You can use cones or bundles of reeds. There should be no smoke or noise in the attic, and mice are less likely to visit attic spaces.
Did you know? The hawk moth butterfly can imitate the sounds of the queen bee and is a dangerous pest.
The best hives for wintering
Comparing the Dadanovsky hive and the sun lounger as a place for wintering insects, beekeepers are more inclined to the second option. Wintering of bees on bees is dry. Such houses have good ventilation. There is never enough death.
If you are going to use wooden hives for wintering, then you will have to insulate them. A convenient option for wintering bees outside without insulation are hives made of polystyrene foam. There is no need to install warm side blocks and pillows in them. The material does not rot.
Polystyrene foam maintains a stable temperature in the houses. The air inside does not heat up or cool down, despite the fact that winter in central Russia is characterized by a large temperature difference.
Furry workers wintering in polystyrene foam houses begin their spring migration 2 weeks earlier. Families approach the honey harvest period in strong condition.
PPS hives require increased ventilation. Otherwise, the temperature in the house will be higher than normal. During wintering, the bees are located tightly in a ball. If the hive is warmer than necessary, then the insects crawl away from each other and become more active. They spend energy faster and eat more honey to replenish it. Firstly, the family will weaken by spring due to heavy loads on the intestines. Secondly, it makes sense to save honey.
The material does not absorb moisture, but all water flows to the bottom. Make a hole in the bottom and leave it open until spring. The entrance should be open 5 cm.
Is it possible for bees to winter in the wild?
Wintering insects in natural conditions allows beekeepers to reduce labor costs and save money on the construction of winter huts. At the same time, for good preservation of bee colonies, you will need to pay attention to several factors:
- Quality hive . They need to be insulated, made of 2-walls or made of 60 mm thick boards. In addition, the hives should be wrapped in paper, roofing felt and covered with snow 0.5 m or more above the roof. The fact is that snow has low thermal conductivity, so it will provide an optimal microclimate in the nest and prevent sudden changes in temperature.
- Access to feed . The nest of wintering insects should have a sufficient amount (up to 30 kg) of high-quality food. To allow them to move freely under the canvas, it is worth laying slats with a cross-section of 10x10 mm across the frames in the fall.
- Snow removal . In early spring, the snow needs to be pushed away from the front wall of the hive so that it is heated by the sun's rays, and the bees can make their first flight. Warming and bright light will help them come out of dormancy, which is necessary for their earlier development and the rapid replacement of wintering bees. Simultaneously with snow removal, hay or straw should be spread in front of the hive so that insects do not die on the snow when flying around.
If all the necessary requirements are not met, the bee colony will die or emerge from wintering weakened, so in the summer they will have to be strengthened, which may be ineffective. However, even if all conditions are met, there may be large waste and weakened bees in the wild, but there is no need to worry about this. The fact is that those families that successfully survive the winter will have special energy, efficiency and gain strength faster than the family that wintered in the omshanik.
It is believed that the mobilization of their defenses and the will to survive is of great importance in the successful overwintering of bees. If insects spend the winter outside every year, they go through natural selection and can subsequently withstand bad weather. If bees winter indoors every year, they get used to optimal conditions, and their genes develop other skills and hope for help. The likelihood of their successful wintering in natural conditions is low.
Wintering in the wild in steppe zones, where there is practically no snow until January, is undesirable, since strong winds will blow away the meager covers, and bee colonies will die, unable to survive such conditions.
Top dressing
For one family in winter it is required to leave 20-25 kg of honey. The amount of honey for wintering depends on the air temperature inside the hive. If it remains normal without fluctuations, then the sweet mass is consumed optimally. When the temperature rises or falls, bees eat food faster.
You should not give honey and honeydew to insects. If they consume such food, substances that cannot be digested will form in the stomach. The insects will die.
Check the quality of honey. Pour a liter of quicklime into a 2-liter jar, fill the rest with water. Let the solution settle. In another container, mix the treat with water, and then pour the mixture with lime into it. If flakes appear, then such honey should not be given to bees.
In addition to honey, insects are given sugar syrup, kandi and potato mixture in winter. To prepare the syrup, boil a liter of water and add 2 kg of sugar. Stir until a viscous mass forms.
We prepare honey kandi from powdered sugar, honey, water and acetic acid. At home, boil 2.5 kg of honey to a temperature of 55 degrees to kill the microbes in it. Cool and mix the bee treat with powdered sugar. Add sugar gradually. In total you need to add 7.5 kg. Pour 200 ml of water and 20 ml of vinegar into the dough.
To make food with potato juice, you first need to prepare sugar syrup. Pass the peeled potatoes through a meat grinder, blender or grater and extract the juice from them. For one liter of sugar syrup, add 60 ml of juice.
How to check stocks
For wintering, each bee colony needs on average 25 kg of food. If the insects have secured the necessary supplies, then you don’t have to worry about preparing winter feeding. You can visually estimate the amount of food. Each bee house should have 3 full frames of beebread and 2 frames of honey left for the winter.
Advice! If at the end of August you find that there are not enough supplies, then during the Indian summer in September it is worth organizing the removal of bees for late honey harvests.
Activities before wintering
There are a number of necessary measures that are recommended to be carried out before wintering. Assembly, insulation of hives, ventilation design and insect treatment.
Assembling nests
There are 3 ways to assemble a bee nest:
- Double-sided. Insert 8 frames into the hive. Fill the central frames with 2 kg of honey, the outer ones with 3 kg, and the ones between them with 2.5 kg of honey in each frame.
- Unilateral. Add 3 kg of honey to the first frame; in the second – 1.5 kg; in the third, fourth and fifth – 2 kg each; in the 6th – 2.5; at 7 and 8 – 3 each.
- Beard. This method involves economical consumption of honey. Add 2 kg to the central frames. The closer the frames are to the edge, the less honey they should contain.
In multi-hull hives, store food in the upper housing and insects and brood in the lower one.
Warming the hive
There should be a 50 cm layer of snow on the roof of the hive. It provides thermal insulation.
When insulating, it is necessary to line the bottom, side walls and top of the hive with heat-insulating material. For this purpose, use polystyrene foam, polyurethane foam, dense polyethylene or straw, fiberboard. If you will be the last to insulate, coat the material with drying oil. Do not insulate the hive too much so that the bees do not get excited.
Ventilation
Ventilation is carried out through tapholes. In polystyrene foam hives, air circulation is ensured, in addition to the entrance, by a hole at the bottom. Firstly, it removes water from the hive. Secondly, a house made of PPS needs additional ventilation to maintain the temperature at normal levels.
The entrances must be covered from snow or rain. In frosty weather, the summerhouse becomes covered with frost, and ventilation deteriorates. In this case, open the tapholes wider or make a hole in the roof.
Insect treatment
After collecting the honey, insert the formic acid bags into the frames. In multi-hull hives, one bag weighing 30 grams is stored for a week. This will protect flying workers from ticks.
In reference and educational literature, it is recommended that after assembling nests for the winter in beds and twelve-frame hives, insulate them from the sides and top. Such actions are often accompanied by a reduction of the entrance to several centimeters and inattention to the ventilation of the roof space. As a result, by spring, especially after slushy winters, mold may appear on the frames, the walls of the hive may become damp, the bees will defecate and the colony will weaken.
The search for ways to reduce excess humidity leads to attempts to use moisture-absorbing materials such as moss, dry leaves, sawdust as insulation; some beekeepers additionally place silica gel in the hive. After absorbing excess water, they cease to perform their functions. In the hives, they absorb moisture, not only produced by the bees, but also supplied with the outside air, so they quickly become saturated.
Hoping to reduce humidity due to the absorption properties of insulation, beekeepers reduce the entrances and ventilation openings to less than the minimum required size and, as a result, are faced with an unsatisfactory wintering.
Various types of capacitors in the form of metal sheets installed in the hive do not reduce humidity, but only increase heat loss from the club. It follows that moisture must be removed through ventilation. This problem can be solved with simple steps. Having opened the lower entrance to a width of 10–15 cm, move the insulation 2–3 cm from the back wall and bend the canvas the same amount. To prevent moisture from condensing in the under-roof space, the distance from the roof to the top insulation should be about 15 cm. In addition, the under-roof should be equipped with slotted holes in all four walls, each with an area of 20–30 cm2.
Often, the presence of a ventilation slot at the back wall of the hive causes beekeepers to worry about excessive cooling of the nest. However, with the thermal power of the club being 7–10 W and the temperature on its surface being 8°C, the temperature around it in cold weather will not be much higher than outside. Therefore, the speed of air exchange flows, and therefore heat losses, are small. For example, if the ventilation gap at the back wall of the hive is 90 cm2 (3x30 cm), and to oxidize the daily portion of honey, the bees need as much oxygen as is contained in approximately 100 liters of air, and even assuming that ten times more of it passes through the nest (1000 l), then the flow rate in the slot will be fractions of a millimeter per second. The flame of a lit match at the entrance does not react to such air movement. It is clear that there is no need to talk about any whistling draft and catastrophic loss of heat by the club. The weaknesses of this solution are: a sharp increase in heat loss when wind blows into the tapholes; luring bees out with tits; possible entry into the mouse hive. It is noteworthy that these problems are associated with open tapholes. It is logical to conclude that by closing them tightly, you can get rid of these troubles. And so that the club is not left without fresh air and moisture and carbon dioxide are removed, it is necessary to stop filling the voids between the outer frames and side walls of the hive with insulation and connect them to ventilation.
When assembling a nest in winter, warm insert boards should be placed on both sides, not reaching the bottom of the hive by 1.5–2 cm (Fig.), and the top insulation should be placed so that it does not extend beyond them. In this case, wells are formed between the side walls of the hive and the insert boards, communicating with the sub-frame and under-roof spaces. I have been practicing this nest assembly for more than ten years; it has been tested by wintering in a wide range of outdoor temperatures, including during thaws. In this respect, the scheme is equivalent to air exchange with a barred window in the bottom. In both options, the area of the ventilation holes is obviously larger than the minimum required, there are no stagnant zones in the nest and ventilation is sufficient at any outside temperature. But the windows in the bottoms should be closed or replaced with solid bottoms during the period of spring development.
If there are wells and gaps under the insert boards, these concerns are eliminated. Outside air enters the nest from under one of the boards and passes through the club from bottom to top. If the top insulation is breathable, the used air partially escapes through it or leaks from above, having partially cooled, flows down along the walls and insert boards and goes beyond the nest into the gap under them and further along the wells through the roof vents to the street.
Another circumstance contributes to the stability of air exchange - between wells for various reasons (different sun lighting, wind blowing, thermal conductivity of diaphragms, etc.) there is always a small temperature difference, so the density of the air in them is also different. As a result, equalizing air flows arise between the wells, flowing under the diaphragms and drawing the nest air into circulation. Therefore, it is preferable to have two wells in the hive. This is easy to do in beehives. In twelve-frame hives, you can create two wells by installing two narrow warm insert boards and reducing the nests to seven frames. The boards can be made in the form of a sheet of foam plastic of the appropriate size, covered with a fabric cover. You can make them from a nesting frame, filling it with insulation and closing it on both sides with fiberboard, thin planks or plywood. The top of the nest can be sealed (warm dome), but this does not lead to a deterioration in air exchange. The ventilation slots (size 2x45 cm) under the insert boards are never clogged with waste.
Many beekeepers doubt which is better - canvas or film on top of the nest? Throughout the year I cover the nests with film. I don’t see any difference with linen, other than being cheaper, and I don’t see any increase in humidity. The transparency of the film allows you to obtain additional visual information about the nest.
V.G.ZHAROV
Moscow region, Protvino
Share with friends
Tips and tricks
Preparing bees for winter begins with checking the brood and queens.
Inspect colonies for fertile queens. The hive must have at least 4 frames completely filled with brood. If this is not enough, take frames with eggs and larvae from other hives.
Replace old honeycombs. If they are dark, filled only with drones, or light cells in which insects have not yet hatched, the combs need to be replaced. If there is brood in such cells, then the frames with them should be placed on the edge.
The furry workers must fly over before the weather turns bad. Until approximately September 25th. If they fly, they will not cleanse the intestines. Then they will defecate in the hive. This will lead to mass death.
Young individuals also fly around before wintering. The queens must lay eggs a month before the last flight. If they have collected enough nectar by this time, they will make brood. If the queens have not taken bribes, then feed them.
If the weather is good in October, allow the flying workers to fly away at this time. You can induce insects to fly by knocking. The later they empty their intestines of feces, the better they will winter.
Move the apiary closer to honey plants. Then the bees will provide themselves with a sufficient amount of food supplies and raise offspring by spring.
To prevent mice from getting into the hive, place glass on the entrances. Rodents' paws will slip when trying to get inside. Cover the top of the hive with a fine mesh net.
Advantages
Outdoor wintering is a natural process that has a beneficial effect on insects. In addition, it does not require large additional expenditures of time and money to build a winter hut, and there is no need to constantly monitor the humidity and temperature of the air. Also, in the wild, workers receive more fresh air than in a closed room.
This is interesting Preparing bee hives for wintering
In the spring, individuals themselves can fly out of the hives and make their first flight, due to which the honey harvest season also begins earlier. This is not possible indoors before the beekeeper takes the nests outside. The free life of individuals has a wonderful effect on them: they become more productive and stronger.
Wintering without insulation
Sometimes beekeepers prefer to overwinter bees in a cool room. For wintering bees in omshanik, buildings made of above-ground, combined or underground wood are suitable. Insulation can be made of boards, clay or straw. Good ventilation is needed to bring in fresh air. A solid floor and strong walls retain heat.
In the absence of a special structure, for wintering bees it is suitable to keep them in:
- barn;
- greenhouse;
- basement;
- cellar;
- dressing room;
- shelter in a hut.
Wintering bees in a polycarbonate greenhouse in an area with mild frosts but heavy rainfall. The disadvantage of the structure is considered to be spring temperature changes. To avoid overheating, in the fall the greenhouse is covered with roofing felt.
The inside of the greenhouse is insulated with polystyrene foam using polyurethane foam. Compliance with the requirements ensures that the family remains strong and reduces feed consumption.
Nutrition of bee colonies in winter
In winter, a family’s food consumption is 18–25 kg of honey. The food is pre-sealed for safe storage. The bee club gradually moves upward, eating supplies. At the same time, free sealed honeycombs are occupied. It is advisable to select frames in dark shades.
Feed consumption depends on the quality of the hive. Warmth, low humidity and high-quality ventilation guarantee minimal consumption. A strong family is able to independently make the necessary amount of supplies for the winter. Harvested honey is stored in a thick form. Insects disperse it with specific glands. The necessary moisture is taken from the steam released during breathing. Excess moisture spoils the honey, causing death.
During winter, bees do not defecate when consuming high-quality fodder honey. Crystallized or sour food causes diarrhea and nosematosis, which is detrimental to the entire family.
Weak bee colonies require more food to maintain warmth. Wintering is better tolerated if there is a young queen in the hive.
Bee food:
- honey;
- honey is full;
- syrup;
- powdered sugar;
- honey;
- protein feeds.
Syrup is the most economical food. No additives, but also no protein.
