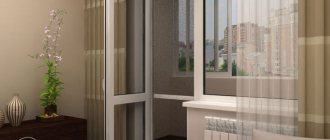
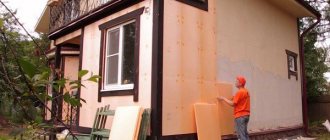
Independent insulation of the balcony with penoplex. Instructions + 11 photos
Among the range of insulation materials, the most popular option is penoplex. In addition to its affordable price, this material differs from existing analogues in its reliability and good thermal insulation. It is quite possible to insulate a balcony with penoplex yourself, without the help of a professional team of builders. For a successful result, you should purchase insulation in the required volume and understand the technological features of the process before starting work.
Characteristics of penoplex
Penoplex is extruded polystyrene foam, which is produced in the form of slabs. The thickness of individual elements is from 20 mm. The high degree of efficiency is confirmed by the use of this material for insulating oil pipeline networks, covering airfields and roads. The use of penoplex is widespread even in extremely low temperatures.
Main advantages:
- Due to the structure of many closed cells with air, this insulation has low thermal conductivity (mineral wool and polystyrene foam are less stable);
- The level of efficiency and optimal dimensions of the tiles allow you to economically use the balcony area while creating a reliable structure. This effect is of particular importance in small apartments;
- Eco-friendly composition (safer than alternative insulation options);
- The structural features ensure maximum moisture resistance - about 100%. This condition explains the absence of rotting and long service life (50 years or more). The material is successfully used in areas with high humidity;
- Low weight with high strength. The slabs are able to withstand significant compressive loads without deforming;
- Possibility of self-installation. The slabs are easy to work with during preparation (cutting) and installation;
Flaws:
- The material is not resistant to sunlight, so penoplex is not used to insulate the outer part of the balcony;
- When interacting with petroleum products and solvents, the slabs are destroyed. Carefully study the components of construction foam and installation adhesive before purchasing ;
- The cost of penoplex is higher than traditional insulation. You can save money by installing it yourself.
Important points:
- The slabs are installed along the entire perimeter of the room, including the walls, ceiling and floor surfaces. If you lay the material only on the walls, then the costs will be ineffective - the room will remain cold. This circumstance plays a big role when combining the balcony part with the apartment;
- To install penoplex, you do not need to build a sheathing frame. This design promotes heat loss through cold bridges in the structure.
Extruded polystyrene foam: advantages
Of course, polystyrene foam can also be used to insulate a balcony. Literally until recently this was the most popular solution. But extruded polystyrene foam, which is a new generation material, surpasses it in characteristics. It has the following advantages:
- Durability, which is associated with the integral structure and increased mechanical strength of the material. Its service life can reach 50 years.
- Resistance to temperature changes. Expanded polystyrene can withstand temperatures from minus 50 to plus 75 degrees.
- Resistant to harsh winter conditions.
- Resistance to rotting and environmental safety.
- Easy to install.
- Low thermal conductivity.
- Thickness 20 millimeters (compared to 30 mm foam and 40 mm mineral wool).
- Affordable price if calculated correctly.
- Limited liquid absorption (up to 10 days) while maintaining the integrity of the top layer.
Expert opinion
Konstantin Alexandrovich
Along with obvious advantages, extruded polystyrene foam for balcony insulation also has some disadvantages. These include flammability, which is combined with the ability to self-extinguish.
Insulation can deteriorate when it comes into contact with a number of complex hydrocarbons, such as paint thinners, polyvinyl chloride, coal tar, and also under the influence of ultraviolet radiation.
However, these disadvantages are offset by the use of special glue and the exclusion of the use of PVC-containing materials for finishing. Knowing the characteristics of the materials, we can approach the issue of direct insulation of the balcony with polystyrene. Instructions with clear recommendations on how you can do it yourself will help with this.
Preparing for insulation
To build a warm balcony you need to purchase: polyethylene with foil (provides correct vapor barrier), slabs 40-60 mm thick, boards for leveling the floor, or a special screed, timber, fasteners, finishing material.
Installation of wiring in the loggia space on the eve of repairs.
Infrared installation for heating the room.
Correct installation of insulation in stages
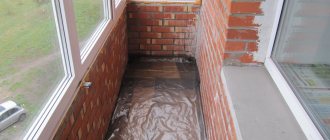
1. The room should be cleared of unnecessary items before starting the insulation process.
2. The enclosing surfaces are leveled - they should be free of screws and cracks.
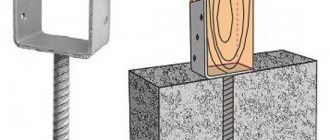
3. Using fasteners (dowels), the slabs are fixed (the sheets are cut with a knife if necessary).
A disc-shaped dowel used for mounting sheets on walls (“umbrella” or “mushroom”).
The sheets can also be secured using a special mounting adhesive if the surface is pre-leveled.
5. In order to smooth the joints, you can use tape. The result will be a smooth surface;
6. The high moisture resistance of the material allows for the absence of special vapor barrier. However, if you decide to organize an additional layer, it can be made of polyethylene film covered with foil (penofol). Thus, the balcony room will be protected to the maximum from moisture. The foam layer should be oriented with the foil facing outward.
Polyethylene foam with metal tape operates on the principle of a thermos, additionally insulating the room;
Metallic tape for joining polyethylene foam film.
7. Another way to provide vapor barrier is to cover the surface with special plaster and plasterboard;
Creating a warm floor structure
After covering the balcony with penoplex, it is necessary to complete the insulation of the floor.
There are three finishing options:
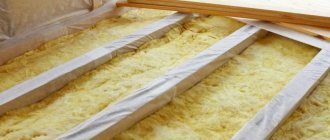
1. Light flooring option. A base is created from timber in two tiers, the elements of the two layers are fixed perpendicular to each other. Insulation is placed in the structure, then the cells are sewn up with sheets of plywood or boards. The resulting coating can serve as the basis for the final layer.
2. Screed made of concrete or sand-cement (thickness 40 mm). The leveled floor is tiled. A prerequisite for installation: creating a 10 mm gap with polyurethane foam around the perimeter of the floor (between the walls and the screed). The weight of the structure is significant; preliminary load calculations are necessary.
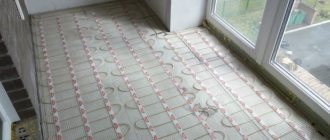
3. Installation of heated floors. Installation instructions are included with the specific system.
Installation of heated floors on top of insulation.
Balcony insulation with polystyrene foam.
Insulation of balconies and loggias
general information
Insulating a balcony/loggia allows you to get rid of drafts and dampness, as well as expand the usable area of the apartment. To create effective thermal insulation, it is important not only to use high-quality window blocks, but also to insulate the walls, floor and ceiling of the loggia or balcony. The modern environmentally friendly material PENOPLEX COMFORT ® is perfect for this purpose. With the help of PENOPLEX ® slabs, anyone can insulate a loggia with their own hands. This material, unlike cotton insulation, does not require respiratory and skin protection. The use of PENOPLEX ® thermal insulation in an apartment is absolutely safe, this is confirmed by the expert opinion of the sanitary and epidemiological examination.
- High compressive strength;
- Low thermal conductivity;
- Zero water absorption;
- Environmental friendliness;
- Ease and simplicity of installation;
- Low vapor permeability, which is very important for internal insulation.
Scheme 1 - insulating a balcony with Penoplex
- Loggia wall;
- Balcony insulation PENOPLEX COMFORT ®;
- Sheet material;
- Lathing;
- Fastening element;
- Loggia floor.
How to insulate a loggia or balcony with your own hands.
- Insulation of the loggia combined with the interior of the apartment;
- Insulation of a non-combined loggia.
Thermal insulation of a loggia combined with the interior of the apartment
When combining a loggia and a room inside an apartment (for example, a kitchen), the question arises: is it necessary to insulate the walls, floor and ceiling of the loggia, and if so, how to do it. We will try to answer these and other equally interesting questions. So, why insulate the loggia? The existing walls, floor and ceiling of the loggia were not designed for indoor operation and, accordingly, maximum heat conservation. Becoming part of the interior space, the loggia walls no longer meet the requirements of both the old SNiP II-3-79* and the new SP 50.13330.2012 “Thermal protection of buildings” for such a parameter as heat transfer resistance. That is, in winter it will be cold in this room, so condensation and mold may appear on the outer wall of the balcony. Insulating the loggia with PENOPLEX ® will help avoid the negative effects listed above, and will also ensure a comfortable indoor air temperature at any time of the year. Thermal insulation of windows is recommended using polyurethane foam PENOPLEX ® FASTFIX ® - another effective material produced by.
Thermal insulation of loggias and balconies is one of the most popular ways of using PENOPLEX ® slabs in apartments of multi-storey residential buildings.
To insulate a loggia/balcony with your own hands, you will need the following building materials:
- Thermal insulation PENOPLEX ® (the required thickness for a combined loggia is 40-60 mm). The thickness can be calculated using a "calculator". However, it is important to remember that he makes calculations based on the requirements of the new SNiP, and they are increased by 3 times compared to houses built before 1995;
- Moisture-resistant plasterboard (GKL) or gypsum fiber (GVL) sheets;
- When creating a screed on PENOPLEX ® slabs, it is necessary to use a cement-sand mixture with reinforcing mesh; for a “dry” coating - two layers of board materials, such as gypsum fiber board, fiber board, OSB or plywood, overlapping the joints;
- Vapor barrier layer - foil polyethylene film or thin (3 mm) foil polyethylene foam;
- Polyurethane adhesive PENOPLEX ® FASTFIX ® ;
- Waterproofing (if necessary);
- Self-tapping screws for fastening gypsum plasterboard and gypsum board sheets to the guides.
Related article: How to cover a loggia with MDF panels
Instructions for insulating a balcony or loggia combined with the interior of an apartment
- Window blocks are installed and seams are sealed with polyurethane foam;
- PENOPLEX COMFORT ® slabs are attached with disc-shaped dowels with plastic cores to the surface of the side walls, façade walls, floors, and ceilings. Balcony insulation with PENOPLEX COMFORT® will save usable space due to a smaller layer of thermal insulation provided by the low thermal conductivity of the slabs. The absence of the need for lathing is another advantage of PENOPLEX COMFORT ® balcony insulation;
- The joints between structures are treated with polyurethane adhesive PENOPLEX ® FASTFIX ® ; when installing thermal insulation, the joints between PENOPLEX ® boards are glued with ordinary tape;
- We attach a vapor barrier or thin-layer thermal insulation material with a reflective coating. We use foil PE film or foil foamed PE 3 mm thick. We glue the vapor barrier to all insulated structures using polyurethane glue compatible with polystyrene or double-sided tape. The vapor barrier is placed at the joint, and the joint between the canvases and the structures is glued with metal tape. Create a “thermos effect”;
- We install the balcony floor. Following the step-by-step instructions for insulating the floor of a PENOPLEX ® loggia, installation of thermal insulation can be done on the following bases:
- DSP screed (thickness 4 cm). It is necessary to leave a temperature gap of 1 cm between the vertical wall and the screed. To install it, it is enough to install a 1 cm thick strip of foamed PE around the perimeter before pouring the screed. After the screed has hardened, ceramic tiles are laid on tile adhesive;
- DSP screed with electric or water heating - according to the technology of installing a heated floor system;
- Continuous flooring made of gypsum fiber sheets (gypsum fiber sheets) is installed in two layers with the obligatory overlap of joints.
- The sheathing on the walls, ceiling and parapet is made of dry wooden beams (treated with antiseptic) and set at vertical and horizontal levels. It is attached directly to the concrete using dowels and screws. The beam can be 40x20mm in size;
- The finishing trim is attached to the sheathing. Usually these are plastic panels 25 cm wide or moisture-resistant plasterboard. In the case of using drywall, additional finishing work is required, namely: priming, puttying, corner processing, leveling, wallpapering or painting;
- Electric heaters, lighting, etc. can be installed on the loggia. Installation of electrical wiring is carried out before installing interior finishing materials.
- For internal insulation, a vapor barrier is installed on the cold side of the insulation (between the insulation and the wall). This is incorrect and leads to the formation of condensed moisture on the vapor barrier.
- Wooden guides are mounted in the thickness of PENOPLEX ® slabs. This leads to the formation of cold bridges, because The main layer of thermal insulation is torn.
- A metal frame is used, installed in the body of PENOPLEX ® boards. This leads to the formation of cold bridges and may cause condensation to appear on the metal surfaces of the profile.
- Various types of mineral wool are used without ensuring their proper operation, which leads to the mineral wool getting wet and the destruction of the interior finishing, followed by a complete replacement of the insulation system.
Do-it-yourself insulation of a non-combined loggia
The insulation of an ordinary, non-combined loggia differs only in the thickness of the insulation and the exterior finish. The required thickness of PENOPLEX ® slabs for a non-combined loggia is 20-40 mm.
After insulating the walls with PENOPLEX ® slabs, we recommend plastering the loggia using specialized plasters for expanded polystyrene.
You can buy PENOPLEX ® balcony insulation in Moscow, St. Petersburg, Novosibirsk, Khabarovsk, Perm and other Russian cities. Find your nearest point of sale in the "Where to Buy" section.
Methods for insulating a balcony
Insulation is carried out using the adhesive and frame method.
Glue method
Even an inexperienced craftsman can glue polystyrene foam.
Even a person without construction skills can cope with such work. We treat the surface with adhesive suitable for working with polystyrene foam, glue the insulation, and additionally fix it with self-tapping screws.
A fiberglass reinforcing mesh is attached to the glue on top, then plastered or covered with the selected finishing material.
Frame method
Installation is more complex than insulation using the adhesive method. Preliminary installation of a frame made of wooden beams or metal profiles is required.
The insulation is fixed between the frame so that there is no space left between the frame elements and the polystyrene foam.
We choose insulation of the same thickness as that of the frame slats.
How to insulate the floor on a loggia with your own hands
Insulating a loggia in an apartment is a great chance to create your own winter garden or increase your living space. You can turn it into a miniature gym, a cozy office, or remodel it by adding a few square meters to the area of the room. Insulating the floor on the loggia is an integral part of creating a comfortable environment in this room. Let's find out how to do it right without wasting time, money and effort.
p, blockquote 2,0,0,0,0 —>
Preparing for floor insulation on the loggia
This stage is very important: the life of the floor, as well as the ease of performing the work, depends on the quality of surface preparation. Step-by-step instructions for preparing for floor insulation will look like this:
- The first step is glazing the loggia. The most suitable are double-glazed windows. Wooden frames with one glass can only be installed if the loggia will not be heated and used throughout the year.
- Thorough cleaning of the premises. There should be no dust left on the loggia.
- Sealing cracks. Small cracks are filled with mounting foam or sealant, and large cracks are filled with broken bricks or crushed stone mixed in cement mortar.
- Thinking through the location of sockets and lighting systems. It is necessary to take into account that the floors will rise by at least a few centimeters.
- If, due to the loggia, the area of the room will increase or it will be used constantly, you need to think about heating.
p, blockquote 4,0,0,0,0 —>
p, blockquote 5,0,0,0,0 —>
Important! It is prohibited to place radiators connected to central heating onto a balcony or loggia. Permission for such an event can be obtained only in some regions of the country, but for this you will have to prove that the loggia is insulated to a very high quality.
- If there are ceramic tiles on the floor, you must remove them along with the adhesive.
p, blockquote 6,0,0,0,0 —>
Thermal insulation of the floor should be carried out on a glazed loggia, protected from moisture penetration. The floor must be completely dry.
Preparing for floor insulation
From the very beginning, apartment owners need to check the suitability of the loggia for installing an additional room on it. It is worth understanding that these elements of the house are constantly under the influence of all atmospheric phenomena. If a balcony has been open for many years, it may become unusable or partially damaged. It is clear that in such a situation, insulating a balcony without repairing it can turn into a waste of money.
Therefore, the right step is to first assess the condition of the loggia.
This is best done with the help of specialists from the management company. Its employees can also share information about the maximum permissible load. When the condition of the balcony is not very good, it is repaired. Specialists from the management company can provide advice on this process. If everything is in order with the loggia, then you can start insulating them yourself.
First they insulate the walls, then they take on the floor.
Insulate the walls
You should not think that insulating the floor on the balcony alone is sufficient. In this case, the walls will allow cold to pass through, and the desired microclimate will not be achieved.
Also, before starting a process such as insulating the floor on the loggia, the foundation is prepared. This is done in the following sequence:
- Removing old flooring (if there is one, of course). Only the concrete base should remain.
- Working out every crack. The fallen cement is removed.
Working out every crack
- Surface cleaning. It is better to clean it using a vacuum cleaner. You can wash it, but then you need to wait for the surface to dry completely.
- The cracks are covered with a primer and filled with cement mortar. It is also used to fill joints formed by concrete slabs.
Fill with cement mortar
- Waiting for the solution to dry completely.
- Organization of waterproofing.
General recommendations
They insulate the floor on a loggia or balcony by installing joists and placing heat-insulating material between them. A subfloor is installed on top. Many people know that there is such a way as placing thermal insulation material and pouring screed.
Selection of floor material and design
Do-it-yourself insulation of a loggia floor begins with the question: Which insulation should I choose?
The most popular thermal insulation materials are:
- Styrofoam. The most popular material for thermal insulation, due to its low price and ease of use, 50% of all balconies and loggias in the country are insulated with it. Its advantages include low thermal conductivity, excellent moisture resistance and low weight, while its disadvantages include fragility.
- Penoplex. Extruded polystyrene foam, a “relative” of polystyrene foam, which differs from it in increased strength, durability, ease of installation and, as a result, higher cost, is presented in the following photo.
p, blockquote 9,0,0,0,0 —>
- Mineral wool. It is considered one of the best insulation materials in terms of technical and operational characteristics. It is durable, does not burn, and is a vapor-permeable material. The main disadvantage is the fear of moisture, due to which mineral wool loses its properties, so when using it, high-quality vapor and waterproofing is required.
- Expanded clay. Bulk insulation with good thermal insulation properties and affordable cost. For high-quality insulation, a large layer is required - from 15 cm. Disadvantages include high hygroscopicity.
- Penofol (isolon). Foamed polyethylene with foil coating (photo). To insulate a balcony, its thickness will not be enough, but it is successfully used as a heat reflector and vapor barrier in combination with other insulation, such as mineral wool, making thermal insulation ideal.
Related article: Loggia heating options
p, blockquote 10,0,0,0,0 —>
p, blockquote 11,0,0,0,0 —>
You can insulate the floor on the loggia with your own hands in two ways:
- Insulation by joists. A simple and quick method of installing an insulated floor; any of the above insulation materials can be used for its implementation. Thermal insulating material is placed in the spaces between the joists, and a flooring of boards or plywood sheets is placed on top, as in the following photo.
p, blockquote 12,0,0,0,0 —>
- Laying insulation under the screed. When choosing this method, you can insulate the floor on the loggia with expanded polystyrene (foam plastic, penoplex) or expanded clay. Screed is the best choice when installing a “warm floor” on a loggia, but you need to take into account that you will have to wait a long time for it to dry.
p, blockquote 13,0,0,0,0 —>
p, blockquote 14,0,0,0,0 —>
Important! Laying a heat insulator under the screed is possible when insulating a loggia that has a reliable ceiling. In the case of a balcony, it is better to immediately choose a lag floor structure, since the balcony slab may not withstand the weight of the screed.
First priority
Before you start insulating the balcony, you should glaze it. Why is glazing important? Old or low-quality windows will produce colossal heat losses, so it makes no sense to insulate the balcony if the windows will blow out. It is better to entrust the installation of windows to professionals who will carry out the installation using modern technologies.
After installing the windows, you should decide where it is best to install insulation. Of course, it is recommended to insulate the outer walls of the balcony, which will prevent the development of problems such as moisture settling on the walls and the appearance of fungal mold. But insulating a balcony if it is at a high altitude is not easy. To do this, you will need to call steeplejacks-builders, who will ask for a considerable amount of money for the services. And one more important point - in order to insulate a balcony from the outside, you will need approval from the authorities, since by your actions you plan to change the design of the facade of a residential building.
As a result, the last option remains - to insulate the balcony from the inside. Moreover, such work can be done independently if you have the necessary tools. Many apartment owners do not want to pay a lot of money for balcony insulation, so in order to save money, they decide to insulate the balcony themselves. This article will tell you how to insulate a balcony yourself, what material to choose for this, and what are the main steps to complete the work.
Insulation of loggia floors using logs
Step-by-step instructions for choosing a joist structure will be as follows:
- Floor level markings. It is best to ensure that the floor on the loggia is on the same level as the flooring in the rooms. The insulation together with the coating should not exceed the level set by you. When marking, it is convenient to use a laser or water level.
- Laying a layer of waterproofing. You can use roofing felt or technical polyethylene laid in 2 layers. The material is overlapped, and an overlap of at least 50 millimeters is made on the walls.
- Installation of wooden logs, which are pine beams 50 × 50 mm. They are laid at intervals of 30–40 cm and secured to the concrete with dowels and self-tapping screws. The first element can be placed at a distance of 10-15 cm from the wall. There should be a gap of 3 cm between the ends of the joists and the walls so that the beams, having absorbed moisture, do not bend and spoil the floor covering.
p, blockquote 16,0,0,0,0 —>
p, blockquote 17,0,0,0,0 —>
Important! Each timber must be treated with an antiseptic.
- Laying insulation. It is necessary to insert slabs of mineral wool or polystyrene foam so that there are no gaps between the joists, as in the photo. If they do form, they must be filled with polyurethane foam. Expanded clay is simply poured into the gaps of the sheathing, which should protrude at least 15 cm above the subfloor level.
p, blockquote 18,0,0,0,0 —>
p, blockquote 19,0,0,0,0 —>
It is strictly forbidden to compact mineral wool: this will result in the loss of thermal insulation properties.
- Installation of vapor barrier. For this layer, you can use film or foil polyethylene insulation.
- Organization of flooring. You can use boards, but more often the flooring is made of plywood or OSB.
- Installation of the finishing coating.
p, blockquote 20,0,0,0,0 —>
Features of penoplex insulation
Insulating the floor on a loggia using penoplex has its own characteristics. The fact is that due to the strength of the material, it is not necessary to use logs when laying it under the flooring; plywood sheets can be laid directly on the foam plastic. The stages of work will be as follows:
- A leveling screed is made on the prepared floor, which is necessary to prevent deformation of the insulation boards.
- After adjusting to size, the foam boards are glued directly to the floor with special glue. It is convenient to use a type of insulation that has a groove connection system. If it is not there, then you need to use polyurethane foam along the joints between the slabs, as well as between them and the walls.
- To increase the efficiency of floor insulation, you can lay penofol (isolon) on top with the foil side facing out, gluing the joints with reinforced tape.
The following photograph demonstrates the insulation process in this way.
p, blockquote 23,0,0,1,0 —>
Thermal insulation and strength characteristics of penoplex
Like most other heat-insulating materials, the thermal insulation properties of penoplex depend on the density and thickness of the material used.
Extruded polystyrene foam produced by the Russian chemical industry corresponds to foreign analogues in almost all characteristics, and has several grades with the corresponding index, differing in density and, depending on this, in the scope of application as insulation.
Penoplex:
| Index | Density kg/m3 | Scope of application |
| WITH | 25-32 | Walls |
| TO | 28-33 | Roof |
| F | 29-33 | Foundation |
| 45 | 35-47 | Road insulation |
The thermal conductivity of penoplex is only 0.03 W/m2, and moisture absorption does not exceed 0.2-0.4% by weight in 24 hours. That is, the material is practically waterproof. This allows it to be used without installing additional vapor-waterproofing, both for external and internal insulation work in wet rooms.
The width of the slabs is standardized and is 600 mm, the length is 1200-2400 mm, the thickness of the slabs varies from 20 to 100 mm.
The most acceptable price/thermal insulating properties/strength ratio for use as insulation in cottage construction or on a balcony (loggia) is penoplex “F”.
A slab of such penoplex does not bend under the weight of an adult, is not subject to thermal deformation in winter/summer and can be successfully used to insulate the floor of a balcony.
Insulation under the screed
Insulating the loggia floor with penoplex under the screed is an excellent solution when organizing a heated floor system. This insulation is done as follows:
- After removing the old coating, a thin leveling cement screed is made. Without a perfectly level floor, foam sheets can be damaged.
- A film is laid for vapor and waterproofing, the joints are taped.
- Penoplex sheets with a thickness of 40–60 mm are laid. The joints are sealed using polyurethane foam or sealant.
- A second layer of vapor barrier is placed.
- The foil heat reflector is laid with the foil facing up.
- A “warm floor” system of the selected type is installed.
- The screed is poured. When installing a heating system, its thickness should be at least 7 cm, without it - at least 4 cm.
p, blockquote 25,0,0,0,0 —>
p, blockquote 26,0,0,0,0 —>
To pour screed over a heated floor system, you must use a special mixture intended for this purpose. A regular cement screed will crack when exposed to high temperatures.
Thermal insulation of the loggia floor with foam plastic is done in a similar way, but in this case the screed is reinforced:
- After pouring the first layer 2–5 cm thick along the beacons, a reinforcing mesh is installed.
- The final screed is made with a thickness of 4 cm.
p, blockquote 28,0,0,0,0 —>
Foam plastic for the floor must have a density of 35 kg per square meter. m.
If we insulate the floor with expanded clay, before pouring the screed, the surface is leveled and a grid of metal reinforcement is laid on it, as in the following photo.
p, blockquote 30,0,0,0,0 —>
p, blockquote 31,0,0,0,1 —>
If you want to make your balcony or loggia warm, this guide will help you. After completing the insulation work, all you have to do is think over the design of the loggia: turn it into a cozy corner where you can retire, or expand the space of the living room or kitchen using it.
Preparing the balcony for flooring
The classic option is to insulate the floor with polystyrene foam at the final stage of glazing and finishing the balcony with wooden lining or plastic panels. But this only applies to cases where it is not planned to fill the screed. Filling the screed usually precedes the finishing of the balcony.
When the bulk of the work is completed. You can, without fear of damaging the fragile screed, begin work on floor insulation with Penoplex (Teplex)
There are two options:
- insulation of the floor with polystyrene foam slabs on the existing base of the balcony slab;
- leveling screed device.
The first insulation option is suitable for balcony floors if there is no horizontal slope of the balcony slab.
The balcony is completely cleared of objects and furniture on it. The balcony floor is undergoing cosmetic repairs: visible cracks are eliminated and the crumbling top layer of screed is removed.
After this, the base of the balcony slab is swept with a broom or brush and washed with a damp cloth or mop. After 30-60 minutes, the balcony is ready for further arrangement.
The second option is used if the balcony slab has a slope in any direction, and pouring screed over polystyrene foam is not planned when installing the floors.
Characteristics and advantages of the material
The penoplex manufacturing process was invented more than 50 years ago by American technologists. The structure of the material consists of many small granules (0.2 mm), which form a smooth surface. A foaming additive is introduced into these cells. Under high pressure and when heated to a certain temperature, these granules are combined.
The resulting mass is passed through an extruder. During the manufacturing process, all auxiliary additives are replaced by air.
This material structure provides high technical characteristics - strength and excellent heat-saving properties. Other advantages of penoplex:
- Low water absorption. Moisture penetrates only into the outer layer of the material, but the internal structure remains dry. This is a very important property for insulation. Wet material swells from water, it loses its air layer, and its basic qualities are lost. Such insulation becomes useless.
- Low thermal conductivity. The thermal conductivity coefficient of penoplex is one of the lowest among similar materials. This allows it to be used for rooms with high humidity (attics, basements), thermal insulation of external walls of buildings and foundations.
- Resistance to mechanical loads. The manufacturing technology ensures that the structure of the material is homogeneous and durable, but to maintain the integrity of the penoplex it must be laid on a flat surface.
- Low vapor permeability. In terms of resistance to various types of evaporation, penoplex is not inferior to roofing felt, which has long been used for waterproofing floors. This makes it possible to use penoplex for bath insulation.
- Light weight. The material easily rises to any height; it can often be seen on the external walls and balconies of multi-storey buildings. Fixed slabs do not weigh down the structure, so special permission is not required for insulating balconies and facades.
- Easy to install. You can cut penoplex with a regular knife; this does not require special tools.
Lightweight material is quickly installed; even rainy weather does not interfere with this, as it is not afraid of moisture
- Long service life. The results of experiments carried out in laboratories (multiple freezing and testing at high temperatures) prove that penoplex can last up to 50 years.
- Resistant to many chemicals. Most drugs used in construction do not have any effect on penoplex. These include alkali, alcohol, ammonia, propane, butane, freon, and water-based paint. However, there are compounds that can destroy the integrity of this insulation; you need to know about them before starting construction. These include gasoline, acetone, enamel, formaldehyde.
Related article: How to insulate a loggia from the inside yourself
Among the disadvantages of penoplex, one can note its ability to melt and release toxic substances during combustion. Low sound insulation characteristics lead to the fact that the material does not retain noise well. It cannot withstand prolonged exposure to the sun; it must be covered with cladding.
You will learn how to properly insulate a loggia with modern penoplex material from this video:
Types of expanded polystyrene
To answer the question of which material is more suitable as insulation - extruded polystyrene or polystyrene foam for a balcony - you must first familiarize yourself with their characteristics. Despite the similar chemical composition, these materials differ in the production method. So, to obtain polystyrene foam, polystyrene is immersed in a special block mold and steamed under the influence of water vapor. During this process, the granules increase many times in volume, sintering with each other. However, over time, the newly formed bonds weaken and the material begins to crumble.
Insulating a balcony with this material has many advantages.
Extruded polystyrene (as the name implies) is produced by extruding raw materials. It is first melted. Then, a foaming agent is introduced under pressure and at high temperature, after which the newly formed viscous homogeneous mass is forced through the extrusion head. In this way, slabs of the desired cross-section and configuration are obtained.
Both hard and soft freons, as well as freon-free systems based on CO2, are used as foaming agents. The latter are preferred due to their environmental friendliness. Whereas freons are capable of destroying the ozone layer of the earth's stratosphere. As a result of extrusion and pressing, a monolithic material is obtained, consisting of many impenetrable cells filled with air.
Do-it-yourself balcony cladding
You can insulate a loggia with penoplex yourself without involving specialists, but mistakes should not be made in this work. It is necessary to go through all the stages and securely fasten the material, otherwise there will be no benefit from the insulation. Most often, only the balcony wall is sheathed, but if the floor and ceiling are insulated, the effect of thermal insulation will be maximum.
The main advantage of penoplex is its excellent tolerance to moisture and any temperature.
To finish a balcony with penoplex you will need the following tools and materials:
It is important to carefully prepare the surface, because the quality of the insulation directly depends on this. Any errors will lead to a loose fit of the material and gaps at the joints. This significantly reduces the effectiveness of thermal insulation.
External thermal insulation
Allows you to save internal space and simplifies the entire process. If the balcony is located on the 1st and 2nd floors, installation of insulation can be carried out without special devices; for this you will need a strong and reliable stepladder.
For external insulation at high altitudes, you will have to resort to the services of specialists
The process of insulating a balcony with penoplex with your own hands:
- Surface preparation. The walls of the balcony must be prepared before installing the insulation. In order to level the brickwork, it must be filled with cement mortar, having previously treated the surface with a primer. Take special care to close all gaps between the parapet and the floor. Small holes in the walls are treated with polyurethane sealant or mastic. If the walls of the balcony are made of metal gratings, they must be covered with plastic or moisture-resistant plasterboard. The sheets are pre-treated with an antiseptic, and the seams are sealed with sealant. All defects that appear on the material during the work process are treated with foam.
- Installation of heat insulator. Laying the material begins from the corner of the balcony. Glue is applied pointwise to the surface, then a foam board is applied and pressed as tightly as possible. The insulation in the corners must be secured with dowels. The remaining sheets are mounted according to the same scheme. Penoplex must be laid as tightly as possible. Possible gaps in the joints are sealed with polyurethane foam.
- Fixing foil polyethylene. It is also laid on glue. It is important that the polyethylene joints do not coincide with the seams between the foam sheets. The individual elements of the foil material are secured with construction tape. It should be laid evenly without folds or gaps and completely bury the insulation.
- Installation of sheathing. Before finishing, it is necessary to completely cover the thermal insulation layer. For this, a sheathing is installed. It is installed from beams, which are impregnated with an antiseptic and completely dried before work. First, the bars are fixed along the perimeter of the balcony, and then the bars are screwed to them with self-tapping screws after 45 cm, to which the siding is then attached.
- Finishing. Siding is most often used for decoration; it is more practical and attractive. It is mounted on the sheathing, special attention must be paid to the corners and joints. Everything must be carefully secured. Small cracks are treated with foam.
Step-by-step instructions for insulating polystyrene foam
It is possible to insulate a balcony yourself using polystyrene foam, but if you are going to carry out work for the first time, then it will be useful for you to read the step-by-step instructions presented below.
Ceiling insulation
When working with expanded polystyrene, insulation should begin from the ceiling. Ceiling insulation consists of the following steps:
1) Preparing the ceiling surface for insulation . To do this, check the ceiling for evenness and dust. If decorative elements are attached to the ceiling, they should be removed. Expanded polystyrene must be mounted directly onto a concrete ceiling slab. If the slab is smooth and free of dust, dirt and other defects, then you can begin priming the surface. You can use any material for priming. Additionally, you can treat the ceiling with liquid glass, which will prevent the formation of mold and close all small pores on the surface. If there are defects, cracks, chips or other irregularities, they should be removed and the surface should be puttied.
2) Preparing insulation for installation. To ensure reliable adhesion of polystyrene foam to the adhesive mixture, it is necessary to make the surface of the material rough. To do this, you can use a nail, a knife or a special needle roller. After this, you can prepare glue for gluing the slabs. It is prepared simply: you need to pour the material into a container, then add water and gradually stir.
3) Installation of penoplex . The pre-prepared adhesive is applied to the surface of the polystyrene foam and its residues are removed using a notched trowel. It is necessary to apply the slab immediately after applying the glue. After applying the slab, you need to do several rotational actions so that it fits securely to the surface. Thus, it is necessary to go through the entire surface of the ceiling. In this case, it is recommended to choose slabs with a thickness of 4-5 cm. This thickness is enough to ensure complete thermal insulation of the room.
After insulating the ceiling, you need to let the glue dry for 1-2 days. After this, it is recommended to further secure the foam boards using plastic dowels, which are called fungi. The joints between penoplex boards should be treated with polyurethane foam to avoid cold bridges.
Floor insulation
There are two ways to insulate the floor on a balcony:
1) First you need to level the floor and clear it of debris. If the concrete floor slab has unevenness, then it can be leveled using a screed. After this, a layer of waterproofing should be laid - with the material overlapping the walls. After this, a frame of wooden beams is laid out, thereby creating a kind of lathing. The beams should be placed from each other at a distance equal to the width of the insulation. After this, you can glue the polystyrene foam boards to the floor. On top - you can install a floor from a tongue-and-groove board, covering it with varnish or paint. This method has some drawback: wooden beams have higher thermal conductivity, therefore, the occurrence of cold bridges is possible.
