Areas of special attention
The shower room is completely exposed to regular moisture. However, there are areas that take on the greatest load, the so-called high-risk areas. This is, as a rule, the lower part of the walls, the location of the washbasin, the floor, the shower (without a tray or with it). As well as the places where communications enter and the pipes themselves, if we are talking about metal elements susceptible to corrosion. These vulnerable areas and elements of the shower require special attention when installing waterproofing.
Waterproofing a bathroom floor under tiles
Whatever the floor level in the bathroom, it is very desirable that it be slightly below the floor level in the rest of the apartment or house. This will guarantee that water will not spill in the event of an accident. If the floor in the bathroom is higher or at the same level, you can make a threshold. In any case, it is better if the water is locked in one room. After all, the waterproofing of a bathroom is many times better than in the same corridor, for example.
It is better for the bathroom floor to be a little lower in level
Bathroom floor on concrete slab
It is very difficult to call a concrete floor in its “pure” form even. If the surface is generally uneven, the corners may be blocked, or there may be a tilt to one side. To eliminate all these shortcomings, a leveling screed is poured. If the screed is being made in a shower room, then it makes sense to use concrete with increased water resistance. There are hydrophobic additives for this purpose. In a regular bathroom this is not necessary.
Waterproofing can be laid under the screed
Regular scheme
If the bathroom floor is a smooth screed, waterproofing under the tiles is very simple. First, we coat and glue the joints of the floor with the walls with a special tape or a piece of rolled waterproofing. Then we apply the material to the floor, extending it onto the walls by 15-20 cm. The number of layers depends on the type of material and how important it is for you that moisture does not seep down. The best thing is to read the description and recommendations for application and installation. It will take 5-10 minutes, and the problems will disappear by themselves.
Waterproofing is simply applied to a flat screed according to the manufacturer’s recommendations. True, the joints with the wall need additional protection, as well as the places where communications enter.
If at the same time you are doing waterproofing on the walls, then it is mandatory in the so-called “wet areas”. This is where water can get on the walls - the area above the bathtub and 60 cm around it, the same piece near the sink - 50 cm in both directions and up and down to the floor level.
Areas at high risk of water ingress
The sealing of the bathroom walls in these areas is the same as on the floor. The application is similar, usually using the same materials. It is also worth paying attention to the corners - they are additionally glued.
Double layer
As already mentioned, the unevenness of the concrete slab is leveled with a screed. But it is not necessary to put waterproofing under the leveling screed in the bathroom in all cases. Double waterproofing of a bathroom under tiles is needed:
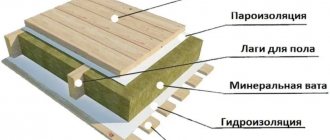
- If you are using water floor heating. The main task here is to prevent moisture from penetrating downwards if the pipe suddenly leaks. Therefore, waterproofing material is placed on the slab under the screed.
Important point. In the diagram below, extruded polystyrene foam is used as thermal insulation. It absorbs very little moisture, so it itself is a barrier to the access of water to the lower layers. But its joints are not airtight, which is why a layer of waterproofing under the insulation is needed. If the insulation is made of mineral wool (this material itself needs protection from moisture), another layer will be added - waterproofing on top of the insulation. But in order not to damage it when laying heated floor pipes, a protective screed is poured over it. That is, in a scheme with a water-heated floor and mineral wool insulation, a layer of waterproofing and a layer of reinforced screed will be added on top of it, and on them pipes and tiles with glue.
How to waterproof the floor in a hot water heated bathroom
- If there is a damp unheated room below, basement, underground. In this case, a vapor barrier is placed on the concrete slab under the screed. It cuts off the flow of moisture from a colder and more humid room. Then the screed is poured, and waterproofing is applied to it for laying the tiles.
Note! Vapor barrier does not allow moisture to pass through in any form - neither in the form of liquid nor in the form of vapor. Not all waterproofing materials are vapor barriers.
Waterproofing under the tiles if there is high humidity below.
If there is a heated room under your floor, under the floor tiles in the bathroom, using all technologies, waterproofing material is laid only on top of the leveling screed. But if you prefer to play it safe, you can also make a protective layer between the slab and the leveling screed. As in the diagram above. It won't get any worse. It will take more time, but the waterproofing will be more reliable.
Preparing a wooden floor
Laying tiles on a wooden floor has its own characteristics and is a separate big topic. Let's briefly say that you can either fill the screed or level the wood floor with sheet material - plywood, OSB, glass magnesite, even asbestos-cement sheets are used.
Two waterproofing options for wooden floors
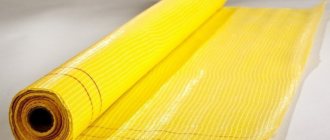
Actually, in any case, to avoid problems, the wooden floor below must be ventilated. There should be very good waterproofing underneath the tiles. Two coats are usually recommended. Moreover, the material must be selected and laid taking into account the fact that the base is movable. That is, there must be either elasticity after drying (for coating waterproofing) or high tensile strength (for rolled materials). So let’s say right away that roofing felt is not the best choice. If you want guarantees, polyester-based roll waterproofing is better. Very good, high-quality material, but the price is even higher than that of expensive coating materials. It can be replaced with waterproofing based on fiberglass. Less strength, but quite sufficient for normal seasonal expansions.
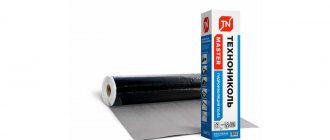
Materials for waterproofing shower rooms
You shouldn’t skimp on waterproofing your shower. Firstly, so that this area does not turn into a generator of mold and mildew. And, secondly, if you live in an apartment, it’s elementary so as not to flood the neighbors below.
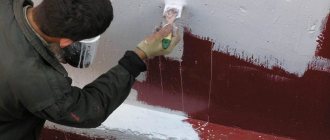
The ideal solution is waterproofing, proven in practice. Having been engaged in waterproofing professionally for almost a decade and a half (since 2004), we have repeatedly been convinced that the best material for waterproofing a shower (without a tray, with a tray, with a cabin, etc.) is liquid rubber. In the case of a shower, it is a bitumen-polymer mastic that does not contain solvents, i.e. without smell.
To install coating waterproofing of shower walls, we recommend:
- Elastopaz mastic. The material is suitable for treating floors and walls; tiles can be laid on top of such a waterproofing layer, screed, etc.
- primer or primer as an accompanying agent for mastic. The primer, firstly, improves the adhesion of the mastic to the concrete or other base. And secondly, it works as an additional penetrating waterproofing. In our company you can buy water-based bitumen-polymer primer “PazPrimer” and “Tekhnoprok”.
- “Expanding Plombizol” + “Penetrating Plombizol”. These two compositions work in tandem. Used for waterproofing shower floors, including under tiles.
If desired, you can combine: “Elastopaz” and a primer for the floor, “Penetrating Plombizol” + “Expanding Plombizol” for the floor.
Single-component liquid rubber ELASTOPAZ (Pazkar, Israel) Water-based bitumen-polymer mastic, cold, ready for waterproofing
Expanding Plombizol For finishing treatment when eliminating leaks, waterproofing walls indoors below ground level.
Penetrating Plombizol For penetrating waterproofing of concrete surfaces
How to properly waterproof a shower without/with a tray
First of all, we take into account that the floor in the shower should be lower than the floors in other rooms of the house/apartment. If it is not possible to lower the floor level, there should be a high threshold in the doorway as a natural barrier in case a water spill occurs.
Choosing a drain
Yes, yes, the quality of waterproofing begins with the drain! The drain ladder must have a flange for joining with the waterproofing. A flange is a 2-3 centimeter “skirt” around the drain, specially designed for connection with the waterproofing layer. By default, all expensive drains have a flange, which cannot be said about budget products - such a protrusion is not always found on them.
One of the weak points in the finished pallet is the junction of the waterproofing with the drain, so the presence of a flange is mandatory. There are several flange options: just a plastic border without additional components; the flange is equipped with self-adhesive tape for impregnation with waterproofing; The flange comes complete with an overlay for fastening the fabric, which is impregnated with a waterproofing mixture and overlaps the pallet structure.
Whatever the design of the flange, it is necessary to glue tape onto it (if it is not included, then tape for the corners will do) which in turn overlaps the screed. If non-self-adhesive tape is available, then it is glued to the waterproofing compound, which is used to treat the entire pallet. In this case, the plastic flange must be treated with coarse sandpaper for better adhesion.
Working with waterproofing material
Today, 3D or self-leveling flooring, porcelain tiles with an anti-slip effect and other advanced materials are used as floor finishing in the shower. But ceramic tiles remain the most common option for finishing shower floors and walls. Therefore, when talking about waterproofing a shower room, we will focus specifically on waterproofing under the tiles.
Coating under tile shower waterproofing is an excellent choice if you plan to do the job yourself. The mastic is easy to work with: it is ready for use, applied evenly with a brush or roller, dries fairly quickly and has no odor.
Procedure for pasting moisture protection
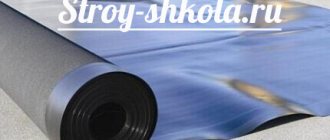
Roll insulation is the least expensive way to protect concrete from water. But it has the shortest service life.
Before laying the waterproofing layer, sewer pipes must already be laid with a slope of at least 2 mm per 1 m and a plumbing drain must be installed in the floor of the future shower stall.
The surface must be flat, with a difference of no more than 0.5 cm. Chips and cracks must be covered with a solution of cement and sand. The floor should dry to a moisture content by weight of no more than 4%. It is measured with a special moisture meter.
The sequence of actions is as follows:
- the roll is cut into sheets into 2 layers and a length that allows the waterproofing to reach a wall 20-25 cm high;
- Solar oil is applied to the workpieces with a brush to give better elasticity;
- the material is aged for 1 day;
- heated bitumen mastic is applied to the surface cleared of dust and debris;
- sheets of waterproofing material are immediately glued onto it with an overlap of about 10 cm;
- the surface is rolled with a heavy roller;
- the second layer is laid perpendicularly in the same way;
- after compaction, hot mastic is applied and sprinkled with quartz sand;
- after drying, a concrete screed is poured on top to a height of no more than 1.5 cm to the sewer drain grate;
- tiles or mosaics are laid from the opening of the ladder to the walls;
- All joints are sealed with sealant.
Self-adhesive roll materials can also be used. To do this, the surface is treated with a roller or brush with a bitumen primer (cold primer) at the rate of 0.3 liters per 1 m².
Drying is controlled by applying a paper towel to the surface, on which there should be no traces of bitumen. After removing the film from the adhesive side, the roll is rolled out onto the floor and walls.
So, the procedure for installing waterproofing will be as follows:
- Remove debris, dust, plaster residues, etc. from the surface.
- The joints of walls and ceilings, as well as the seams of panels and slabs, are expanded to 2-2.5 cm. Longitudinal and corner grooves are moistened with water and filled with “Expanding Plombizol”.
- All surfaces (floor, walls, ceiling) and corners are treated with an antifungal solution.
- A clean, dry surface for waterproofing in the shower (walls, floor) is primed with a primer at the consumption indicated on the package.
- The primer must dry completely.
- Elastopaz mastic is spread over the primed surface. Recommended mastic consumption is 2.0-3.0 kg/m². The composition is applied in two layers: the second layer after the first has completely dried.
- The walls are coated with mastic to a height of at least 30 cm from the floor level. Most often, experts recommend treating the walls completely, since the mastic creates not only a water barrier, but also works as a vapor barrier.
- The communication outlets are additionally reinforced, for example, with geotextiles.
- When the second layer of waterproofing is completely dry, finishing work can begin.
Types of materials
In general, many methods of protection against water penetration have been developed. In private housing construction, three types of waterproofing materials are usually used:
Main types of waterproofing materials
- Rolled, built-up.
- Painting agents (mastics or primers).
- Penetrating.
Each group has different materials that differ not only in price. The price is usually not “just like that”. There are some properties that justify it. The cheapest roll ones, and not all of them. And those that have the lowest reliability/strength. In addition, the coating is obtained with seams - this increases the risk of leakage. Moreover, it is difficult to apply. Therefore, liquid formulations are increasingly used. They are available on different bases, with different properties. One thing distinguishes them is ease of application and the absence of seams.
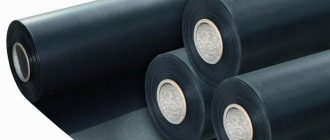
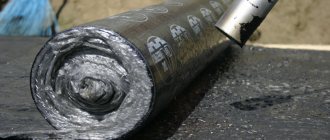
Use of roll welded materials
Roll waterproofing is known to everyone. But it is inconvenient in the bathroom: try to turn around, and the presence of seams does not inspire confidence. There are the following types of roll waterproofing:
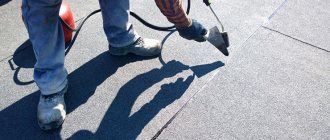
- Bitumen. They are laid during processing with a flame from a burner. It’s very uncomfortable in a small room, and there’s still the same smell in the apartment or house when it’s melted. Their advantage is their low price. No more than $1.5 per kilogram.
- Bitumen-polymer. They can stick and do not rot. Can only be laid at temperatures above +5°C. The price is also low - up to $1.3 per kilogram of weight.
You also need to know how to handle rolled materials. Everything is in the recommendations for each material. You just need to read it carefully - Polymer. They are glued (on a primer), do not rot, and are highly flexible. Resistant to mechanical stress. But the price is already about $5-5.5 per kilogram.
- Polyester based. High tensile strength. Resistance to mechanical damage, flexibility, can be fused or glued. Price is about $10 per kilogram.
- Based on fiberglass. Tensile strength is lower than polyester, but better than others. The price is about $5 per kilogram.
- Bitumen-rubber. High moisture resistance, flexibility, strength. Resistant to mechanical stress. The price is around 5-5.5 $ per kg.
In general, recently, materials based on bitumen resins have been losing popularity. They remain the cheapest, but the characteristic odor and environmental friendliness lead to a decrease in demand. New materials are more expensive, but they have better characteristics.
Waterproofing using fused materials
Waterproofing a bathroom with materials of this group requires careful preparation of the surface - a difference of no more than 2 mm per 2 meters, a dry base without dust and dirt. Pre-treatment with bitumen impregnation is also required. When laying, place the material on the walls 15-20 cm and glue it there. It is better to first prime the joint between the wall and the floor and weld a cut strip of at least 30 cm wide onto it, so that 15 cm are on the walls and on the floor. And stick strips of material on top, extending onto the walls.
Painting waterproofing
Some of the easiest waterproofing materials to use are paintable ones. Some are based on bitumen, some are based on polymers (based on cement and synthetic latex). Applied with a brush or roller, they fill small cracks and form a waterproof (some types also vapor-proof) film several millimeters thick. Apply in several layers - from two to six.
Probably the most convenient option
Painted waterproofing under tiles can be:
- Cement based. It is universal, has a low price, and is vapor permeable. Requires surface preparation (there should be no cracks - they must be sealed first), it is not necessary to dry. The price is low - $2.5-3 per kilogram.
- Bitumen mastic. It can be applied to any substrate, but is flammable and does not tolerate freezing. The cost is about $3 per kg.
There are also rubber-bitumen and rubber-resin ones. But, firstly, they are available only in specialized large companies. Secondly, they have the same set of characteristics, but cost more.
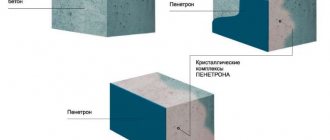
Penetrating or impregnating
Penetrating waterproofing materials are used on cement screed, concrete, asbestos cement. For wood and wood fiber materials, wood chips, etc. they don't fit. These compositions are based on special types of cement with polymer additives. The composition penetrates into concrete, upon contact with water, new salts are formed, which block the capillaries through which water penetrates. The peculiarity of these materials is that materials that have not reacted do not lose their properties. When moisture appears, they react, filling new pores and cracks. So the composition can “heal” concrete.
Penetrating waterproofing - comparison of prices and declared consumption
Impregnating waterproofing penetrates concrete to a depth of 60 cm. After treatment, a film 1-3 mm thick remains on the surface. It consists of cement residues, fine sand and polymers. Consumption is at least 0.8 kilograms per meter, and the prices are considerable. But the advantage of these materials is that they can and should be applied to a damp surface. That is, there is no need to wait until the screed dries. Bathroom under-tile penetrating waterproofing can be applied immediately after the screed can be walked on. That is, in 48 hours maximum.
If the Plombizol complex is used to waterproof the floor:
- The surface is thoroughly cleaned of debris and dust.
- The joints of walls and ceilings, as well as the seams of panels and slabs, are expanded to 2-2.5 cm.
- “Penetrating Plombizol” is diluted in the form of a suspension, as indicated on the packaging, and applied manually to the floor surface, joints with walls.
- Longitudinal and corner grooves are moistened and filled with Expanding Plombizol.
- Coating waterproofing is carried out with “Expanding Plombizol” mixed with water in the specified proportions. You can see how to work with Plombizol in the video material on our website.
If you are planning a shower corner without a tray, waterproofing is carried out under a layer of covering screed. That is, under the facing layer (tile) there will be a concrete screed, and under it there will be a water barrier.
If you install a ready-made shower tray, you can do without a cover screed. After installing the pallet, all seams along its perimeter must be sealed with a moisture-resistant sealant; polyurethane sealant is best suited for this.
How to waterproof a floor
Almost all houses made of wood have wooden floors, and accordingly, wooden materials are also used for the base of the floor.
Today this is not a big problem, and when using high-quality waterproofing materials, such a floor can even be equipped with a heating system, including water.
For houses built of wood, there are several different flooring options, namely: concrete screed and logs.
Experts do not recommend doing the first option, since it significantly makes the entire structure of the building heavier and contributes to the leakage of heat from the premises.
Therefore, in a wooden house, it is recommended to install the floor covering on joists and waterproof it using special materials.
In this case, all the necessary work can be done with your own hands.
First you need to completely waterproof the entire foundation under the floor.
You can do this yourself using a special mixture for plaster, which includes various polymer materials.
Video:
When carrying out work, special attention is paid to treating areas near the walls with plaster. The same plaster can also be used to treat the surface of walls in the bathroom (as well as the toilet) of a wooden house
Next, you should use red brick to build small special columns, after which the main structure of wooden slabs is installed.
After this, the finished logs are laid on brick columns, in accordance with the accepted technology.
Before laying the floors themselves, it is imperative that all materials used are carefully treated with a special waterproofing layer.
Many experts strongly recommend using several layers of such a waterproofing coating at the same time.
Bituminous varnish designed specifically for flooring is perfect for these purposes. It creates a high-quality protective layer on the wood and increases its elasticity.
To effectively waterproof the front surface of the floor, various types of parquet varnishes are used. You can also use all kinds of stains for this purpose.
In addition, the complex use of various waterproofing layers for the floor is allowed.