Waterproofing a floor without cement-sand screed: how to do it
It is for cases when it is necessary to organize waterproofing without a cement-sand screed, the TechnoNIKOL corporation has released a new product - TechnoNIKOL roll waterproofing . This is a baseless bitumen-polymer material intended for waterproofing interfloor ceilings.
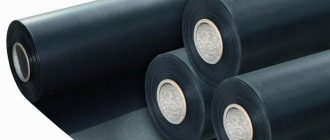
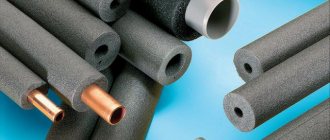
Self-adhesive floor waterproofing
The material can be installed either under a protective screed or without it. Laying tiles directly on TechnoNIKOL floor waterproofing (without installing a protective screed) significantly facilitates and speeds up the finishing work.
The characteristics of the material allow you to install it efficiently and quickly on your own, without the involvement of specialists and complex equipment. If the work is carried out by hired workers, the simplicity of the technology for laying rolled material allows even a person far from the construction industry to control the quality of the work. To do this, it is enough to know only a few simple basic points, which will be discussed below.
Structure of self-adhesive waterproofing
The material is self-adhesive, so to install it you will need a simple set of tools: a knife, a rolling roller, a brush and a roller (for applying primers).
the TechnoNIKOL Floor Waterproofing itself, you will need a water-based TechnoNIKOL bitumen-emulsion primer or a deep penetration latex primer.
Types of waterproofing materials for floors
Rolled waterproofing produced by modern manufacturers differs in the method of its attachment to the base and the type of base material. Based on the method of fastening, it is customary to distinguish between adhesive, weld-on and mechanically fixed waterproofing materials.
Fused insulation usually has a backing made of fiberglass, fiberglass or polyester, which have become substitutes for the traditionally used cardboard.
The binding component of roll waterproofing is bitumen mastics and their bitumen-polymer grades (often with the addition of atactic polypropylene (APP), which is also called artificial plastic or styrene-butadiene-styrene (SBS), also called artificial rubber).
Roll fused waterproofing is one of the most popular materials due to its performance, easy installation and affordability. When installed correctly (following the required technology), such waterproofing forms a single whole without cracks or joints, which significantly increases its waterproofing qualities.
Mechanically fastened roll waterproofing differs from the fused version in that the bottom layer in it is not a polyethylene film, but fine-grained sand. The prototype of this kind of roll waterproofing with a mechanical method of attaching it to the surface is the well-known roofing felt.
Modern roll waterproofing is attached to the surface using self-tapping screws or overhead strips. The disadvantage of using this material is the complexity of its installation and its insignificant effectiveness in protecting the surface from moisture.
Adhesive waterproofing or, in other words, adhesive waterproofing, similar to built-up waterproofing, has a base consisting of polyvinyl chloride or fiberglass with a bitumen-polymer component and mineral chips applied to it. Laying of adhesive waterproofing is done using mastic or glue based on epoxy resin. Reliable moisture protection is achieved by creating 2-5 layers of waterproofing material.
Adhesive waterproofing can be installed on any base - no special professional knowledge or additional tools are required for their installation. The main condition for the correct implementation of waterproofing with adhesive materials is the preparation of a flat (without protrusions) surface of the base for them.
Preparation of the base for installation of TechnoNIKOL floor waterproofing
It is important to remember that the base should be as non-shrinking as possible.
The top rough floor covering, on which the waterproofing will be directly laid, can be made, for example, from DSP boards. Their geometry remains stable over time, even with strong changes in temperature and humidity.
The base for installation must be level, since the finishing tile covering is immediately installed on top of the waterproofing. For the same reason, it is very important that by the time the waterproofing is installed, all engineering communications have already been installed either outside or in the body of the house structures in compliance with fire safety standards.
Stage-by-stage work
Each of the technologies listed above requires its own approach and the use of special tools. Before you start work, you should prepare the base.
Floor preparation
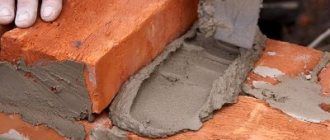
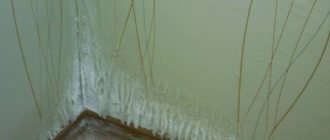
First of all, the concrete base must be thoroughly cleaned from all types of contamination. After this, you should putty or plaster all detected cracks and crevices at the joints of concrete slabs or at the junction of walls and floors. This will avoid the penetration of condensate vapors from the underlying rooms under the water-repellent layer.
Before installing waterproofing, it is recommended to fasten a special damper tape along the lower edge of the walls. It is designed to compensate for the expansion and contraction of waterproofing material due to temperature changes.
Don't forget the antiseptic primer
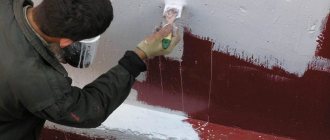
Next, be sure to apply primer to the floor. It will increase the adhesion (adhesion) of adhesive or coating compositions to the floor surface.
It is also advisable to apply a special impregnation to the load-bearing surface, which will not allow fungus and mold to develop in the thickness of the floors. Immediately before applying the mastic, dust and small construction debris must be removed from the floor surface.
If you plan to move interior partitions during the renovation process, then they should be dismantled before applying the water-repellent coating. Otherwise, there will be areas unaffected by insulation.
Installation of roll vapor barrier
Let's look at the main stages of installing rolled waterproofing. Before applying adhesive insulating materials, the subfloor must be carefully leveled. To do this, it is best to use a liquid composition, the so-called “self-leveling floors”. For more details about the process, watch this video:
After preparing the base, which includes putty and primer, we apply an adhesive composition - bitumen emulsion or polymer mastic - to the surface of the floors. It is not necessary to apply adhesives in a continuous layer. It will be quite enough to coat the floor in the idea of diagonal intersecting stripes.
After heating the roll, roll it in the desired direction
Then, using a gas burner or a hair dryer, we heat the edge of the roll to a plastic state and roll it along one of the walls.
The softened edges of the insulation should be folded onto the wall with an overlap of 10–20 cm. In exactly the same way, we apply subsequent strips of rolled insulation with an overlap of at least 15 cm onto the walls and the adjacent insulation sheet.
Their joints are carefully coated with water-repellent mastic. When gluing, insulation sheets must be carefully smoothed to avoid the formation of air bubbles underneath them.
If you use self-adhesive insulation, then after smoothing the sheet is heated with a torch or a powerful hair dryer, which softens the adhesive base and ensures its strong adhesion to the floor.
Since roll waterproofing in most cases is made on the basis of flammable bitumen, when using burners with an open flame for heating, fire safety measures must be observed.
For greater efficiency, it is recommended to cover the floor with water-repellent roll materials in 2–3 layers, each of which is applied across the previous one.
Related article: Choose your own curtain design for three windows in a room!
Application of coating waterproofing
Before applying mastic, the surface should be cleared of debris.
The method of applying liquid compositions is quite simple - for this we only need a roller or paint brush. Before applying liquid waterproofing, the surface of floors and walls must be cleaned of dust and small debris, and then primed.
You should start applying the composition from the walls. Using a brush or roller, paint the walls to a height of up to 30 cm from the floor level along the entire perimeter of the room. After this, we begin painting the floors. It is advisable to paint the floors in a room in one go, otherwise leaky seams may occur between the old and fresh layers of mastic.
Polymer mastics are sold in a ready-to-use form - they can be applied immediately after opening the packaging. These types of waterproofing include liquid glass and other self-hardening compounds.
Bitumen is the basis of waterproofing materials
Bitumen compositions must be heated before use to give them plasticity and fluidity. To do this, you can use a hair dryer or a blowtorch. Before heating, bitumen mastic should be placed in a metal container to avoid direct contact with an open flame.
Both “cold” and “hot” compositions are applied in several layers, each after the previous layer has completely dried.
Waterproofing for heated floors
Underfloor heating systems are increasingly being installed in residential premises today. Before installing heated floors, the floors must be waterproofed. This will protect electrical contacts and other metal structural elements from corrosion and possible short circuits. See this video for all the details of the process:
Insulation in this case is made in several layers:
- A layer of waterproofing is applied to the base of the floors.
- A concrete screed is poured over the waterproofing.
- A heated floor system is laid on the screed.
- A second layer of concrete screed is placed on top of the heated floors, or the floor covering is installed immediately.
Do not use bitumen-containing materials to insulate floor heat.
When using heated floors indoors, it is not recommended to use water-repellent bitumen-based compounds for insulation. When electrical heating wires or metal pipes heat up, the bitumen will also heat up. In this case, not only can the waterproofing material lose its properties, but it is also possible that harmful chemical elements can be released into the air.
Seeping through the floor covering, they can literally poison the lives of the inhabitants of the apartment.
How to calculate the amount of waterproofing
TechnoNIKOL floor waterproofing is available in rolls 75 cm wide and 10 m long.
For a standard bathroom with an area of about 4 m2, one roll will be enough. When calculating material consumption, it is necessary to take into account that the waterproofing layer is laid not only on the floor, but also on the walls to a height of 20 cm. Based on this, the waterproofing calculation coefficient is equal to 1.75 to the floor area of the room.
Types of waterproofing
Waterproofing before screed can be of three types, depending on the technology and materials used.
Coating
Bitumen solutions seal surfaces well
It is based on oxidized bitumen with various organic and inorganic additives: crumb rubber, plasticizers, latex, etc. They are intended to improve the fluidity of the composition when working with it and increase elasticity after it hardens.
Additives also make it possible to increase the adhesion of the coating material to the concrete base. Liquid glass, bitumen and polymer mastics are used for coating waterproofing.
In addition to the fact that coating compositions provide increased protection of interfloor ceilings from leaks, they prevent floors and concrete screeds from cracking, acting as a reinforcing frame.
Pasting
The adhesive waterproofing of the floor screed is carried out using rolled materials. The composition of such materials may include reinforcing inclusions made of glass fiber and polymers.
For ease of installation, some roll materials are produced in a self-adhesive version.
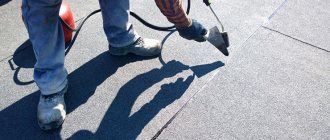
Fused materials for floor waterproofing are attached to the concrete base using special burners with an open flame.
Combined
Combined waterproofing is used at high humidity
Such waterproofing of concrete screed is used to provide maximum protection for floors from moisture. This may be necessary when there is increased dampness in the basement or basement, or to prevent water from leaking through ceilings in bathrooms and kitchens.
Related article: Flowers on the wall: do-it-yourself flower drawing
The combined option involves the use of pasting and coating options, while the waterproofing of the screed can be done in 3 - 4 layers.
Preparing the base for waterproofing the floor
Before laying waterproofing, be sure to remove any dirt, small debris and dust from the base. If it is possible to use a construction vacuum cleaner, then it is better to use it.
To improve the adhesion of waterproofing, the base is pre-treated with a primer. This can be a water-based TechnoNIKOL bitumen-emulsion primer or a deep penetration latex primer. It is important to take into account that the primer needs to be treated not only with the subfloor, but also with the adjacent walls to a height of 20 cm.
The most convenient way to apply the primer is with a paint roller with a long handle or a brush. At a temperature of +20°C, the drying time of the primer is 20-30 minutes.
Preparing the surface (base) for applying waterproofing
In order to waterproof the floor with your own hands, careful preparation of the base is necessary.
Preparation tasks:
a) ensure good adhesion of the structure to the material;
b) ensure uniform and high-quality application of waterproofing;
c) prevent possible damage to the insulating layer during its application (laying), during the installation of subsequent layers, as well as during operation.
Preparing the floor for waterproofing
First, all the protrusions are knocked down using a hammer drill. If it is reinforcement metal or the edges of embedded parts, they are cut off with a grinder. The cracks are embossed.
Immediately before waterproofing the floor, the surface is primed to increase adhesion and remove dust. For soil, bitumen primers, acrylate-based penetrating compounds, etc. are used.
Preparation of material for floor waterproofing
1. Measure the base carefully.
2. Cut the material into strips, be sure to take into account the overlap allowance: the width of the longitudinal overlap is 10 cm, the width of the transverse overlap is 15 cm.
3. Prepare strips of material for covering the bottom of the walls. To do this, cut elements 30 cm wide, of which 20 are the height of the waterproofing “side” along the bottom of the wall, 10 are the overlap on the floor. On these strips, carefully trim the protective film where it bends from the floor to the wall and to create transverse overlaps, the width of which is 15 cm.
4. Treat the longitudinal and transverse overlaps of all prepared material elements with a primer (water-based TechnoNIKOL bitumen-emulsion primer or deep penetration latex primer). The width of application of the primer composition corresponds to the width of the overlaps (longitudinal - 10 cm, transverse - 15 cm)
5. All prepared material must lie on a horizontal surface for at least 30-60 minutes.
Types of Insulation Materials
Waterproofing materials for floors come in a wide variety. They have different technical characteristics and scope of application, so before purchasing you need to carefully read the instructions for their use.
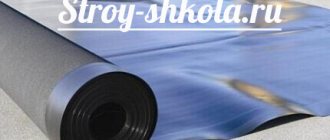
Roll materials
Ruberoid is cheap and reliable
Such insulating materials include the well-known roofing material, as well as its modern analogues - hydroisol, filizol, isoplast, etc. They are fairly dense materials sold in the form of rolls.
This option can be used in rooms with both wooden and concrete floors. Among the advantages of roll materials are low cost and ease of use.
The familiar roofing material is not recommended for use in rooms with increased requirements for insulating properties (bathrooms, bathrooms, kitchens).
Rolled materials are usually attached with glue or using torches
The fact is that it is based on ordinary cardboard impregnated with bitumen, so its service life in conditions of constant humidity is limited to 2 - 3 years.
For such premises, modern roll materials based on polymer components should be used.
Roll insulation can be attached to the floor in several ways:
- using adhesives - bitumen and polymer mastics;
- heating the surface using open flame burners;
Installed materials
They are shields made of polymers, less often sheet metal.
This insulation is installed on the floor using anchors or dowel-nails.
The top of the boards is coated with water-repellent mastics, and the joints between them are especially carefully coated.
According to the installation technology, rolled bentonite mats also belong to the same type of insulation.
In residential apartments, this technology is used quite rarely; its main area of application is large-scale industrial and commercial premises.
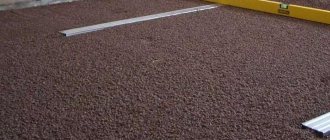
Bulk insulation
Loose-fill insulation usually comes in pellet form
Bulk compounds are used under floor screed, or directly under wood flooring. To do this, a load-bearing formwork is mounted on the floor, into the compartments of which the insulating composition is poured.
It consists of granular or sand-like components that prevent moisture penetration.
The main disadvantage of this technology is that the bulk composition significantly “eats” the height of the building, because for such insulation to work effectively, a thickness of 20 to 40 cm is required.
The use of bulk compounds should be considered already at the housing planning stage.
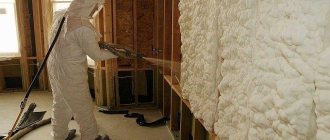
Paint insulation
These materials got their name because of the way they were used. They are applied in two ways - cold and hot. In the first case, epoxy resin compositions are used, which are applied with a regular paint brush, and over large areas with a roller. To learn how to properly insulate a bathroom, watch this video:
Liquid glass
Liquid glass for waterproofing is also applied cold, and hardening occurs under the influence of special hardeners added to its composition.
For hot application technology, bitumen-based compositions are used, which are heated before application to give them fluidity. The table shows the technical indicators of some bitumen compositions used for coating floors in the house.
Related article: Using cream curtains in the interior of rooms
Not only the concrete surface is treated with coating materials, but also the lower part of the walls along the entire perimeter of the room to a height of 20–30 cm. Particular attention should be paid to the junction of the walls and the floor.
Liquid materials
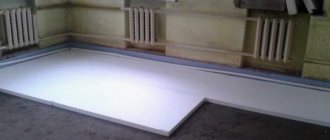
Self-leveling solution allows you to create a completely insulated monolithic surface
They are one of the types of coating waterproofing. They have a liquid consistency, which is applied to the floor by pouring and coating the walls.
The result is monolithic insulation that completely prevents the penetration of moisture through the ceiling.
Liquid glass for waterproofing can also be applied to the floor using self-leveling technology. The only disadvantage of such materials is their high cost, which is several times higher than the same roll insulation option.
Installation of TechnoNIKOL floor waterproofing under tiles (without protective screed)
Horizontal mounting
1. You can begin laying the material only after the primer composition has completely dried on the base and on the material sheets prepared for installation. For ease of installation, prepared waterproofing strips can be rolled into rolls immediately before starting work.
2. Installation begins from the far corner of the room. The roll is gradually rolled out with the adhesive side over the surface, removing the adhesive film as it goes. The already glued waterproofing needs to be additionally rolled with a roller, this will help to avoid possible bubbles or waves.
3. During installation, make sure that in places of transverse and longitudinal overlaps, the lower sheet of material must be treated with a primer.
4. The discrepancy between the end overlaps of adjacent rolls must be at least 50 cm.
Installation on a vertical surface.
1. Carefully removing the protective film, lay the material on the wall, smooth it, press it and roll it with a stitching roller. Make sure that the material adheres well to the surface.
2. Remove the protective film of the part of the element that is on the floor and glue it in the same way. .
3. To strengthen internal and external corners, use triangular patterns from self-adhesive waterproofing . Pre-treat the corners with a primer, after complete drying, place the waterproofing patterns on the corners and carefully roll them to the base.
How and with what to waterproof a concrete floor?
Kitchens and bathrooms are called “wet” areas because they are at risk of water overflows and leaks in pipelines. Yes, and residential premises may suffer from breakdowns in the radiator heating system. This means that the floors in the house first of all need good waterproofing. Let's talk about how to make it reliable and durable
Ubiquitous in city apartments, reinforced concrete floors are very often used in country houses. They are environmentally and fireproof, can withstand high loads (up to 1250 kg/m²), and are resistant to deformation. However, in order to prevent corrosion of the reinforcement in them, as well as to prevent leaks through the joints of the slabs with the walls and between themselves, the floors must be carefully waterproofed - both around the perimeter and along the entire plane. The water barrier must provide the structure with complete water resistance, have high adhesion, resistance to temperature changes and cracking, and prevent the penetration of steam into the base.
To protect slabs from moisture, coating, spraying, penetrating, welding and self-adhesive materials are used. Liquid insulation - bitumen mastics, cement-based, polymer-based and rubber-based compounds - is applied with a roller or brush in several layers, forming a hard or elastic film on the surface. The work is quite labor-intensive. It is necessary to prepare solutions (dry mixtures are dosed and mixed with water, two-component mixtures are kneaded), the uniformity and continuity of the layers is maintained, and their intermediate drying time is maintained. For surfaced materials, the hot installation method is used, laying them using a torch. This requires appropriate equipment and the ability to handle it; During the process, it is necessary to carefully control the density and evenness of the insulation to the base, and in addition, the heated adhesive mixture will emit an unpleasant odor.
TECHNONICOL self-adhesive roll floor waterproofing
It is clear that not every homeowner will undertake to insulate floors using these technologies on their own. Optimal from the point of view of operational properties, as well as convenience and ease of installation, is TECHNONICOL roll self-adhesive floor waterproofing.
The material is a bitumen binder modified with SBS polymers, covered on top with a protective layer of non-woven polypropylene (Spunbond), and on the bottom with a removable siliconized film. The canvas has a thickness of 1.5 mm and is available in rolls of a convenient size of 0.75 × 10 m. Weight - 1.5 kg/m². The waterproofing is intended for installation on reinforced concrete floors, including in rooms with high humidity (bathrooms, kitchens, showers, saunas). The price of a roll is from 1650 rubles.
Due to its strength and elasticity, as well as the presence of a layer of protection against mechanical damage, TECHNONICOL floor waterproofing is not subject to cracks and will ensure complete integrity of the structure for a period of more than 45 years
The material is absolutely waterproof, can withstand temperatures up to +85ºС and remains flexible down to –15ºС. It is self-adhesive, so it does not require the use of a torch for installation, which means it can be laid on both concrete and combustible wooden floors. Following the manufacturer's instructions, the work can be easily completed by any performer who does not have special skills. The process does not require mandatory technological breaks (for layer-by-layer drying, etc.), so it will take a minimum of time compared to coating or fused insulation. For example, a standard bathroom in an apartment can be waterproofed in one day.
Insulation system for interfloor ceilings in bathrooms
The presence of a unique front layer Spunbond is an important advantage of TECHNONICOL Floor Waterproofing over other rolled materials, which allows you to lay the tile covering directly on it, without installing a protective screed (the waterproofing is laid on a concrete base and treated with a concrete contact type compound). This not only significantly reduces the period of work, but is also a significant savings item. In addition, thanks to this floor design, it is possible to maintain the ceiling height, which is very important for typical urban dwellings.
In total, the manufacturer offers three floor “pie” schemes using this material: the first involves gluing tiles directly onto the waterproofing, the second involves pouring a cement-sand screed for laying any floor covering (laminate, parquet, etc.) and the third involves installing an insulated screed with integrated water or electric underfloor heating system. The TN-FLOOR Barrier KMS system has been developed specifically for the implementation of these schemes, which includes TECHNONICOL products such as emulsion bitumen primer No. 04, reinforced three-layer vapor barrier film ALPHA Barrier 3.0 and thermal insulation boards made of extruded polystyrene foam CARBON ECO.
Rolls of waterproofing packed in boxes should be stored under the roof in a vertical position, without stacking them on top of each other, at a temperature of –35 to +35ºС and at a distance of at least a meter from heating devices. The material should not be exposed to moisture or direct sunlight
Installation of TECHNONICOL self-adhesive floor waterproofing on a concrete base
Work is carried out at a temperature not lower than +10ºС, having previously kept the material in a warm room (+18…+23ºС) for 24 hours. The base - floor slab or leveling screed - must be dry and clean. To improve adhesion, the surface is primed with bitumen primer TECHNONICOL No. 04. If necessary, it can be replaced with a penetrating latex primer (both compositions are water-soluble, odorless and recommended for interior work). The primer is applied to the floor plane with a roller, extending 20 cm onto the walls, and all corners and joints are carefully coated with a brush. At room temperature it dries in 15–20 minutes. To make sure of this, you need to apply a napkin to the surface, on which there should be no traces.
The base for laying waterproofing must not only be cleaned of debris and dust, but also its levelness must be checked according to the rule. Lumps and sagging should be removed, recesses and cracks should be sealed and the solution should be allowed to dry completely. All these measures will help achieve optimal adhesion of the material to the surface.
The next step is to roll out the roll starting from the far corner of the room and cut it into pieces of the required length, taking into account that they will be laid with longitudinal overlaps of at least 100 mm and transverse overlaps of at least 150 mm. ( An important point: the cutting of the canvas must be carried out with the expectation that the transverse overlaps on adjacent canvases should be offset by 500 mm relative to each other.) The further progress of the work depends on the design of the floor. Let's consider both options - with and without a screed.
Installation of self-adhesive waterproofing under the screed. After cutting, cut the protective film along the overlap lines on the fabric fragments and let the coating lie flat for an hour. Then the pieces of material are rolled into rolls and installation begins: they are carefully rolled out, slowly pulling off the film and exposing the adhesive bitumen-polymer layer. The overlaps are not glued in this case, since the film is removed along the cuts only from the main plane of the canvas. So that there are no air bubbles left under the laid waterproofing and it fits tightly, without waves, to the base, the coating is smoothed with a rolling roller. Having covered the entire surface of the floor, the overlaps are fastened. To do this, the edge of the upper sheet covering the joint is folded back and bitumen mastic is applied under it, after which, after removing the remaining strip of protective film, it is pressed against the lower sheet. Glued overlaps are also rolled with a roller.
During the installation process, it is necessary to ensure that the outer side of the siliconized film does not touch the bitumen-polymer layer: they will set tightly and it will no longer be possible to separate them. As a result, this piece of coating will become unusable
The joints of the floor and walls are waterproofed separately. This is done because it is easier to ensure a high-quality fit of the canvas to horizontal and vertical structures without swelling and folds, and the adhesive properties of the bitumen-polymer mixture in combination with the additional application of bitumen mastic guarantee absolute tightness of the joints.
The waterproofing is cut into strips 30 cm wide, 20 cm of which will be on the walls and 10 cm on the floor. The protective film is cut along the corresponding line and, having first removed its upper half, glued the vertical part of the segment, and then, having removed the lower half, the horizontal part. The end overlaps are performed immediately, during installation, by coating them with bitumen mastic and rolling them with a roller. External and internal corners must be reinforced with triangular pieces of canvas, laying them on the same mastic and pressing them tightly to the base.
Installing self-adhesive bitumen-polymer waterproofing on the walls allows you to create a reliable water barrier in the room, which will prevent water leaks through the joints along the perimeter of the ceiling
Installation of self-adhesive waterproofing under tiles. Having cut the material, the edges of the canvases, which will be at the bottom of the overlaps, are treated with a bitumen primer (or latex primer) to enhance adhesion. The minimum width of overlaps is the same - 100 mm longitudinal, 150 mm transverse. When the composition is completely dry, installation can begin. The installation of waterproofing is carried out according to the principle described above - with the difference that cuts are not made on the protective film, but rather it is removed entirely, since mastic is not used in this case. Both the overlaps and the canvas itself are rolled with a roller.
The sections for installing waterproofing on the walls should also be pre-coated with primer in the overlap area. The film on the back side of the strips is cut and pasted in the familiar way - first on a vertical surface, and then on a horizontal one. Triangles to strengthen the corners are also mounted on top of the dried primer. A concrete contact primer is applied to the finished coating, after which it dries you can begin tiling work.
Technique for waterproofing floors using coating waterproofing materials
To treat the floor with coating waterproofing proceed as follows:
- The prepared concrete base is cleared of debris, dirt and dust. Particular care must be taken to remove cutting edges, sharp particles and protrusions, stains from solvents, oils and chemically active substances, since by interacting with solutions they can destroy the waterproofing.
- Most often, coating waterproofing is performed using cold-applied bitumen or bitumen-rubber mastic. Before starting work, it is recommended to treat the floor surface with a primer, namely a primer for this type of mastic. It is advisable to use a primer from the same manufacturer.
- The primer is applied in one layer using a brush, thoroughly covering all areas. It will reduce dust on the surface, improving the adhesion of the mastic to it. Particular attention should be paid to the treatment of joints with walls and the space around the pipes. As a rule, the primer dries in no longer than two hours.
- The mastic is applied using a roller or wide brush in several layers. Each new layer must be applied when the previous one is completely dry. Layers should be applied in different directions of movement of the roller or brush. At the joints with walls and around pipes, mastic is applied using a thin brush, thoroughly covering all areas.
- As a rule, coating waterproofing dries completely in about two days. After it has dried, you can begin screeding. When laying reinforcement, plastic guides should be used to avoid contact of the coating waterproofing with metal structures, as they can damage it under load.
Features of floor waterproofing in a private house
Many experts argue that in such cases it is mandatory to carry out both waterproofing under the floor screed and on top of it after its installation and drying is complete.
In general terms, the process of waterproofing a house before screeding is as follows:
- The initial stage involves the creation of a so-called air cushion, which is performed using materials characterized by varying degrees of density.
- Lay crushed stone in a layer of at least 10 cm.
- Add sand on top of the crushed stone to the required level.
Advice!
Such an air cushion eliminates the possibility of capillary rise of moisture from the soil to the screed, since the size of the air pockets that remain in the crushed stone layer is significantly higher than those required for moisture penetration.
- If there is a high groundwater level under the house, additional waterproofing must be carried out before screeding the floor. For these purposes, polyethylene film is often used, which is laid between the air cushion and the concrete screed. It is an excellent barrier to moisture entering the room, while serving as the easiest to install and inexpensive solution to purchase. However, there are alternative options - more expensive, but much more durable. These are mainly rolled materials that are created using polymer components.
Recommended scheme for waterproofing the floor from the effects of ground and flood waters