Decorative elements for pipes
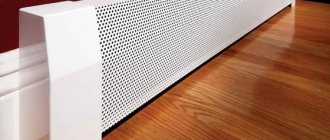
Pipe boxes
Transport highways occupy a large part of the heating system. They are designed to transport coolant to radiators and pipes. Another feature is the location of the pipelines in the house. Often the pipeline is installed in an open way - along the wall.
In this regard, problems arise not only with appearance, but also with safety. The likelihood of getting burned by touching the hot water supply pipe increases. You can prevent this in the following ways:
- Decorative linings for heating pipes with good thermal insulation;
- Hiding the highway behind false walls. This is a labor-intensive, but the most effective way to isolate a pipeline from possible external influences.
Each of these methods has a number of advantages and disadvantages. To select, you should familiarize yourself with the features of the decorative design, the materials of their manufacture and the installation method.
Decorative boxes and rings
Pipe rings
The easiest way to hide a heating main is to install a box on it. It consists of a mounting and an overhead part, which are connected to each other using a locking mechanism. Such decorative panels for heating pipes are convenient for installation into an already installed system.
However, it is difficult to choose a ready-made model, since the location of the pipes relative to the wall and floor is always different. Therefore, they prefer to make the design themselves. To make a plastic decorative box for heating pipes, you will need to perform the following steps:
- Measure the distance between the main line, the floor and the wall.
- Based on the data obtained, draw up a diagram for installing the panel. When using plastic pads, the minimum distance should be 12-15 mm.
- Install a frame made of galvanized profile.
- Install plastic panels and decorative elements - corners, end caps, etc.
Types of decorative rings for pipes
The service life of decorative linings for heating pipes of this type depends on the quality of the plastic panels
When drawing up a diagram, it is important to consider access to shut-off valves and junction points of highways. In these areas there is always a high probability of a leak or rupture
If the appearance of the system only partially needs modernization, it is recommended to install decorative rings for heating pipes. Initially, they were intended to hide the uneven undercut of the stretch ceiling. However, ease of installation and good appearance have made them popular for heating decoration.
Along with them, other types of decorative covers for heating radiators are used:
- The pipes are wrapped with jute or hemp rope. These materials have good thermal insulation, which reduces heat losses in the pipelines;
- Heat resistant fabric. However, you should carefully consider the choice of material;
- Painting. A traditional method, often used before the advent of decorative panels for heating pipes.
Decorative false walls
False wall
If installation of heat supply is done simultaneously with repairs, you don’t have to make decorative boxes for heating pipes. The best alternative would be to install a false wall.
The structure consists of a frame made of steel profiles or wooden slats. Plasterboard panels are installed on top of it. Heating pipes will be located between them and the main wall. This method will allow you to completely hide the lines and at the same time improve the thermal insulation in the room.
But even in this case, it is recommended to install decorative covers on the heating pipes. They will be necessary for air circulation - hot flows will be replaced by cooled ones. To do this, you can use simple ventilation grilles that are installed on the door.
The construction of the false wall is carried out using standard technology. Additionally, to improve heat transfer, a layer of foil foam is mounted on the load-bearing wall. The general scheme for constructing a structure with decorative panels for heating pipes consists of the following steps:
- Drawing up a construction plan. It is built only after the final installation of the pipeline and testing of the entire heating system for operability.
- Installation of the supporting frame.
- Installation of plasterboard panels. Inspection hatches and ventilation grilles are installed in them.
Decorative fencing of heating radiators is made in the same way. However, due to the specifics of operation, other requirements are imposed on the design.
Drywall box
This option is one of the cheapest.
We recommend that you read: Using an American connection in plumbing
To create a box from plasterboard, you will need the plasterboard itself, metal wall and main profiles, a hatch, self-tapping screws and dowels, as well as tools (a hammer drill and a screwdriver with attachments). Additionally, decorative elements can be purchased.
Stages of creating a box:
- Design. First, you need to decide where the box will be located, what its dimensions will be, and where the hatch will be located. The distance between the box and the pipe should not be less than 3 cm.
- Installation of the frame. This stage begins with attaching the wall profiles to the wall or wall and floor, if the box is in contact with one side, using dowels. Then two more ribs of the box are installed at a distance from the pipe so that a square frame emerges. Between the ribs, jumpers perpendicular to them are installed, which are fastened with self-tapping screws.
- Sheathing with plasterboard. This material is attached to the metal box using special small screws. It is recommended to use moisture-resistant drywall. It is suitable for both the bathroom and living spaces, where condensation can also form. Determine the location for the hatch.
- Hatch installation. The hatch is best located in places where wiring, taps and various devices are located. For convenience, it is better to purchase a ready-made hatch with a door, which can be easily installed on the frame between the plasterboard sheathing.
- Finishing work. There are many finishing options. For example, you can seal drywall with putty and then paint or plaster. You can cover it with tiles or wallpaper and decorate the corners with decorative elements. The choice of final coating depends on the overall style idea and aesthetics of the room.
Design requirements
Hanging box
When choosing a decorative element of a heating system, you should be guided by certain criteria
It is important to remember that in addition to the aesthetic side, it should not worsen the heat supply parameters, nor negatively affect the health of those living in the house
- A slight increase in the total volume of the radiator or pipe. Ideally, the distance between the pad and the battery should be 5-7 mm.
- Reliability of fastening. Possible mechanical impacts cannot affect the location of the decor.
- Strength.
In addition, it should be noted that it is easy to install and dismantle
The latter is important when performing repair or maintenance work, i.e. if necessary, decorative covers on heating radiators can be quickly removed
Box options from manufacturers
To mask heating pipes, you can use a ready-made plastic box.
The box for the heating radiator can be made from the following material:
- Plastic. The production uses polymers that are heat resistant and environmentally friendly. Plastic screens are lightweight, flexible and come in a variety of shapes. Channels and slabs are available in different colors, including printed patterns and ornaments. If you wish, you can make a drawing yourself using paints or adhesive film. Don’t forget about the affordable cost of polymer skirting boards for heating pipes.
- Metal. This material is characterized by high strength, reliability and durability. The metal box for the battery is heated by it and transfers heat to the room. Brass, copper, but most often stainless steel are used in production. If an exterior finish is used, the coating is applied with powder paint, which is then baked at high temperature. If desired, the cladding can be changed using aerosol cans of paint.
- MDF. Light and beautiful panels have low thermal conductivity, which is compensated by perforation and arrangement of slots for the release of warm air. For home decoration, the material that best matches the interior is selected. You can also use paint or wallpaper. The disadvantage is that over time, MDF may warp due to changes in temperature and humidity.
- Tree. Products made from natural raw materials are expensive, but have a representative appearance, are durable and environmentally friendly. A beautiful wooden box for a heating radiator fits perfectly into all interior styles. To disguise the heating system, boards, slats, perforated panels and floor plinth channels are used. Wood must be periodically treated with an antiseptic and varnish to protect it from parasites and dampness.
- Decorative boxes. There are many ways to close communications and make them the basis for part of the interior of the room. A shell made of polyurethane foam or polystyrene is put on the risers, which is then finished to resemble a tree trunk. Another option is to paint or tape the pipes to match the background of the surrounding environment. A good solution might be to use colored or frosted glass. It is even better to use monolithic polycarbonate, which is highly durable. It is much easier and safer to process than glass.
Decorative box for sewer pipes. Boxes for heating systems
This is the second group of designs that I will talk about in this review. Situations often arise when you need to hide the pipes of the heating system. This may be caused by both aesthetic considerations and the fact that you have old communications installed, which are easier to hide than to give them an attractive appearance.
There may be several options, we list them:
- Drywall box;
- System of plastic panels;
- Ready-made metal options;
- Ready-made plastic structures.
Since the first two are described in detail above, we will begin our consideration with the third point. These are metal products, they are distinguished by the following features:
- The design is a fine-mesh mesh, which is characterized by high strength and resistance to deformation;
- The shape of the product can be different, which allows you to choose the best option for a variety of interiors;
- The structures are fastened using special corners. The diagram below shows the mounting options, everything is very simple, so there is no need to further explain the essence of the process.
These are removable options that can be quickly removed if necessary.
On my own behalf, I would like to note that this option looks good when the radiators are covered with a box made of the same material. That is, you get a neat design that looks much better than the old cast iron or steel batteries.
Using a box transforms heating communications
Another option is a plastic box for heating pipes; this solution is used very often due to the attractiveness of the products. There are two main types of products:
- Designs that represent a kind of pencil case and are mounted on the wall. The color and size can be very different, it all depends on which pipes need to be closed;
This design allows you to refine pipes located at any height from the floor
- The baseboard box for heating pipes is used in cases where communications are located along the floor. This option is attractive; the surface can imitate a variety of structures.
Skirting box is an excellent solution for any home
As for the installation process, it is quite simple:
- First, the required number of elements is calculated, after which the box is purchased. In addition to this, you will need fasteners, as well as components - external and internal corners and plugs, their quantity is calculated based on the configuration of the room;
- First of all, the wall elements are attached, on which the front part is subsequently fixed. A gap is made where the pipes exit, but the front part snaps into place and creates a continuous covering;
The lower part is attached to dowels
- Lastly, the outer part is installed, this is done very simply, you just snap it into place. The main thing is to do everything carefully so as not to damage the latches and position the elements correctly.
Alternative options for decorating a heating pipe
In addition to installing boxes, other methods are used to hide heating pipes and fit them into the interior of the room. The most difficult option is when the pipes are literally walled up in the walls, having previously made grooves. Experts strongly advise against doing this. Think for yourself - access to the pipes becomes almost impossible. And when heated, communications expand, which can lead to destruction.
Special screens can be a good solution. Their installation is noticeably simpler than installation of boxes. Before you go to the hardware store, you should take measurements of the pipes and radiator. The most common material is plastic. An obvious advantage of this option is the low weight of the structure. In addition, the range of plastic screens is very wide, which will make the interior unique and harmonious.
What to mount - a box or a screen? Here the choice is yours. It is worth considering an important detail - the screen directly covers the communications, while the box can be used as an interior item. For example, turn the top part into a stand or shelf. Heating pipes covered with a box are almost invisible and at the same time look solid.
Wood or MDF is most often used to make overlays. In the first case, the cost may be quite high, but the appearance is usually better. The variety of colors and options is amazing, so you can easily find a product that perfectly matches your interior.
Installation of the overlay takes about 1 minute. It is enough to put it on the pipe in the place that you want to hide and close the ring. After this procedure, all that remains is to adjust the product to the wall or floor.
Options for masking a gas pipe in the interior
It is impossible to tightly sew up decorative panels and hide a gas pipe in the wall (as well as pipes for heating and water supply), since this will complicate repair work in the event of an emergency.
Installation of a camouflage pencil case
Special canisters for gas pipes are commercially available
One of the options for hiding a gas pipe in the interior is to decorate it with an elegant grille, or laminated or plastic panels:
- A frame made of UD metal profile, usually used in plasterboard systems, is mounted along the pipe. When installing it, to obtain a level structure, you should use a level.
- Two UD profiles are connected to each other so that the grooves are directed in different directions, forming a fragment of an angle.
- The resulting fragment is connected using metal screws to the guides located on the wall.
- A plastic starting profile is attached to the resulting frame.
- The length of the panel is measured, cut with a hacksaw and installed in the grooves of the starting profile.
- After decorating the gas pipe with panels is completed, it is necessary to make several holes on each panel using a special cutter.
Other ways to decorate a pipe
Wrapping a gas pipe with hemp rope
The gas pipe can be made less noticeable if:
- Paint the pipe to match the color of the wallpaper.
- Wrap a hemp rope around the entire length of the pipe and tie several ribbons of strong fabric on it.
Pipe decor to match the colors of the wallpaper in the room
- You can use dark paint to make a stadiometer for a child on a gas pipe by simply drawing a vertical scale measured in centimeters.
- Tie a very bright small toy at the very top of the pipe.
- You can stick several multi-colored butterflies purchased in a store or made with your own hands on a gas pipe. You can make your own butterflies from small colored scraps.
- Decorate the pipe when this style is combined with the style of the kitchen or room, purchased from the construction market with halves of bamboo trunks.
Bamboo gas pipe decor
- Glue artificial flower heads of different shades and sizes onto the pipe in a scattered pattern, not along a line.
- Another option on how to disguise a gas pipe that is located vertically in a niche is to build a cabinet, which is also always useful in everyday life for storing various small items. To do this, you need to strengthen a special frame in the niche and then hang the cabinet itself on its hinges. Since over time such a structure can become deformed from gravity, it is advisable to attach small valves from the inside. The finished product is varnished and decorated, for example, by sticking small shells on it.
- Thick pipes can be decorated by using interior mosaics for this purpose, which will create an unusual and interesting element of decor that will look stylish and fresh.
- If you have artistic creativity, how to hide gas pipes will not be difficult for you. You can paint a gas pipe. For example, the pipe will be the trunk of a birch tree, and the leaves will be depicted on the wall. The pipe can be painted with various patterns. You can do the painting yourself, but if you have doubts about your capabilities and strengths, then it is better to entrust this task to a professional designer or artist.
An original method of masking a gas pipe
An interesting design option for a gas pipe is also the use of decoupage technique. To perform this decoration, you will need multi-layer napkins with a pattern, varnish and PVA glue. First you need to thoroughly clean the pipe and paint it. Then, after moistening a napkin with PVA glue, separate the top layer of paper with the pattern. This layer is glued to the gas pipe, while simultaneously smoothing the picture. The result should be a unique ornament on the pipe. The napkins must be completely dry, then the pipe is varnished to give the surface a shine.
There are many ways to decorate a gas pipe in the interior - you just need to use your imagination. But it is always necessary to remember about safety, therefore, when covering the pipe with decorative cabinets, they must, of course, be done without a back wall and with full access if necessary.
Decorative covers for heating pipes
The most problematic area when laying communications is considered to be the area near the entrance and exit of the heating pipe: in this place it is extremely difficult to make a neat cut and lay the flooring evenly.
Advantages of decorative elements
You can avoid an unaesthetic appearance by decorating the joint with decorative overlays specially designed for heating pipes.
Such details not only give the room a neat look and decorate the interior, but their wide range allows you to find a model that matches the style of the room - from classic to art nouveau and avant-garde.
In addition, the pads are extremely practical. When carrying out general cleaning, cosmetic repairs or changing the coating, parts can be removed, and after completion of work they can be washed and reinstalled.
Materials for making overlays
Decorative products can be made from different types of materials. The most common elements for the manufacture of which are used:
- plastic;
- MDF;
- various types of wood.
Depending on the design, decorative products may have a corrugated, smooth, or polished surface; be plain, with patterns or imitation of various materials (stone, mother-of-pearl, cork).
The most expensive are wood overlays. To replace them, you can use MDF parts that imitate wood structure, but you must keep in mind that the service life of the latter is much lower (5 years versus 10 for natural wood).
When choosing decorative covers for heating pipes, you must carefully select their size, which should correspond to the diameter of the pipes, and also pay attention to the consistency of color and texture with the design of the room
Tips for installing decor
Elements in the form of rings (they are also called rosettes) have a collapsible design. As a rule, they consist of two parts connected using internal locks. The structure is disconnected, put into the girth, after which the gap is closed and the element snaps into a fixed position.
Installation of such products takes a minimum of time (no more than one minute) and is not difficult. It can be carried out even by beginners who have never done repair work. If necessary, the element can be easily removed by opening the lock.
In addition to rings, other types of masking of joints can also be used, for example, decorative binding made of jute rope or parts made of special heat-resistant fabrics. Such design options have an original appearance and are also characterized by good thermal insulation properties, which helps reduce heat loss.
Types of accessory
Depending on which installation method is chosen, there are three types of screens:
- three-sided box with lid (stand);
- flat panel;
- hanging screen.
If you need to completely hide the battery, use a design in the form of a closed box with a lid. A radiator in a niche or under a window sill is masked with a shield in the form of a flat panel. If the radiator protrudes from under the window sill, then use a hinged screen consisting of a lid and a flat facade.
When making a decorative shield, you can choose the following materials or combinations thereof:
- metal;
- tree;
- plastic;
- glass;
- MDF boards, chipboard, fiberboard.
A metal shield conducts heat well. A metal product can be given a very sophisticated look using perforation or welding according to the customer’s sketches. But to work with metal yourself, you need skills and equipment.
Wood screens are environmentally friendly and look noble. At the same time, wood is a malleable material, very easy to process. But wooden panels, when exposed to hot air and humidity, are prone to deformation and drying out, so you need to select high-quality, dried wood, and impregnate the finished screen with special products.
Plastic captivates with its availability, rich selection of colors, and ease of processing. But it is short-lived, deforms from high temperatures, and releases substances that are unsafe for humans. Therefore, plastic screens should not be installed where people live.
Tempered glass screens are durable, the glass itself is thick, with already processed edges. You can decorate the glass with almost any design and add LED lighting. Glass screens are classified as elite models and are not cheap.
MDF screens are the most common design option for heating devices. Plates made from the finely dispersed fraction differ little in quality from wood; they are easy to care for and easy to work with. MDF screens are distinguished by a rich color palette, variety of textures and styles.
Types of decorative screens
All means for concealed installation of heating pipes can be divided into 2 groups:
- factory-ready products;
- homemade boxes.
The first group is screens sold ready-made. Their advantage is low cost and ease of installation. There is no need to invent anything for the heating pipes; just assemble the finished structure and attach it according to the instructions. An additional advantage of such screens is that in the event of an accident or the need to replace a pipe, the box can be removed as easily as it was installed.
Factory screens have no serious drawbacks. What makes many homeowners sew up an unwanted pipe with plasterboard or plastic? The answer is simple: a plasterboard box completely covers the riser, making it possible to cover it in any way you like and fit it into any interior. Despite the wide selection, factory-made products are not varied enough to satisfy all homeowners, and some simply do not like them, it is a matter of taste.
In turn, blind homemade plasterboard screens have one technical drawback. The fact is that a riser located in a closed space heats the air inside it 5-10 degrees higher than in the room. At the same time, practically no heat comes from it into the room. If we are talking about an apartment, then blank screens for heating pipes deprive you of your rightful share of heat, for which you pay a lot of money.
The second nuance: the temperature difference between the closed space of the box and the street increases, therefore, the heat exchange is more intense towards the street, and not towards the room. In simple terms, this means that you pay to heat the environment. But there is a way out: this is high-quality thermal insulation of the pipe located under the drywall, which will lead to additional costs.
Kinds
Decorative boxes for heating pipes are divided into two main types:
- perforated;
- sealed.
The first option has the advantage of not disturbing the heat exchange in the room, since the heated air flow is not retained inside, but exits through special openings. Considering that warm air tends to rise to the ceiling, it is advisable to make perforations in the upper part of the structure. However, to increase efficiency, holes can be located in any area of the product.
Sealed analogues are less preferable, since they can only be used as a decorative element. Such products do not solve the problem of heat transfer after installation. As a result, the heating system partially warms the street, and the homeowner will have to pay for the heat loss. In addition, decorative elements differ according to the type of material, which determines the properties and service life of such products.
Such designs can be made with your own hands or purchased ready-made. The second option is more expensive, but its properties are more advanced. When making it yourself, important points are often missed, which contributes to a decrease in the effectiveness of the product. Thus, the need to organize the outflow of heat from communications into the room is not always taken into account.
Drywall box
This method is considered the simplest and most accessible. A plasterboard box is lightweight, and it is advisable to use moisture-resistant material. Additionally, it is processed with special compounds. The classic type of drywall is less suitable if installation is to be carried out in the bathroom. This increases the risk of condensation, which is a common reason for reducing the service life of a structure.
To fix plasterboard blanks, metal profiles are used. To attach the box to the walls and floor, self-tapping screws and dowels are used. Plasterboard blanks are also fixed to the profiles using self-tapping screws. Moreover, it is recommended to maintain a small step - 25 mm. This increases the reliability of the design. To ensure a sufficient level of safety when operating the heating system, you should make 1 or more windows in the front panel.
You can get a soundproofed structure, but for this it is recommended to put special material inside the box. If there are no perforations on the panels, the risk of heat transfer disruption is reduced. For this purpose, a universal sound and heat insulating material is used.
Boxes made of MDF and wood
In most cases, a decorative box for pipes made of particle boards is used. They are easy to install and attractive. To give naturalness to this material, the technology of applying a pattern to the surface of the MDF structure is used. However, this feature is characteristic of products intended for lining heating radiators. The analogues covering the pipes do not have a pattern.
The disadvantage of such products is the lack of perforation. However, when using boxes for radiators and communications, this disadvantage can be partially compensated for by an attractive design. If desired, you can choose any color option, taking into account the preferences of the homeowner.
Wooden analogues are rarely used, because they are highly expensive. Such products are often used to provide support for pipes - as holders. If you use wood when installing a duct for communications of heating systems, the heat exchange in the room will be disrupted, since this material has the property of retaining heat.
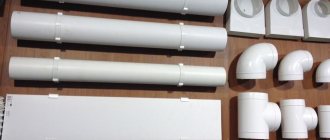
Plastic box
Designs of this type are easy to maintain. Thus, plastic retains dirt less intensively. This material is easier to wash. It is lightweight, does not retain heat, but releases it into the surrounding space. Despite the large number of positive qualities, these products are used more often in the bathroom and toilet.
When choosing a box of this type, you should clarify the presence of features that will simplify operation. So, the color of the material plays a role. It is determined during repairs or taking into account the main shades of the interior, if the finishing work was completed a long time ago. A plastic box is installed using lathing and bars, which are characterized by a small cross-section.
Boxes made of other materials
In addition to the options listed, it is possible to use metal screens. They conduct heat well. Often such products have mesh elements, which speeds up heat transfer. In terms of cost, metal screens are superior to their plasterboard counterparts, but inferior to wooden products. A feature of such structures is their significant weight, which makes it necessary to strengthen the base on which they are installed.
The metal is susceptible to moisture, so it is recommended to cover it with paint and varnish. Contact with moisture or condensation increases the risk of corrosion.
Material of the outer skin of the frame
As a finishing material, you can use:
- eurolining,
- MDF panel,
- plastic,
- perforated metal plates (grids).
The most popular material for finishing boxes is (considered) gypsum plasterboard sheet (GPS). This is explained by the fact that in the future the surface of the gypsum plasterboard box can be decorated with facing tiles, film, wallpaper, or simply painted in any color at will or in accordance with the design project. Despite the fact that masking communications screens and boxes have a sufficient number advantages:
- Very low cost (if installed by yourself). They can be made from leftover material left over from repairs.
- Arbitrary sizes. This is especially true for hard-to-reach areas and non-standard pipe layouts.
- They also have a number of disadvantages:
- If an emergency occurs with a water supply (heating) pipe, to eliminate it you will need to remove the entire lining of the box.
- Restoring the cladding will require new (partially or completely) materials.
Design of pipe joints with bases
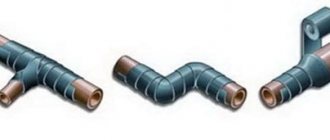
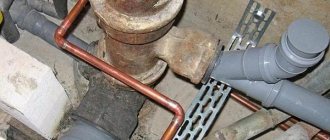
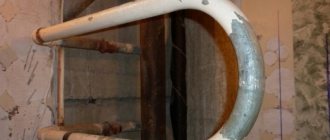
When laying out the heating system, the openings for the inlet (outlet) of the heating pipes into the wall or floor are always made larger than the diameter of the pipeline, so there are gaps around the heat pipe where it passes through building structures, which even after sealing do not look aesthetically pleasing. The problem of designing such connections is very easily solved - for installation on joints, detachable ring and rectangular rosette covers made of plastic, metal or wood are available for sale, differing in size, color and design profile. Installing them in place is simple - the halves of the product are put on the pipe in a girth and fixed by snapping together; first, a drop of any glue is applied to the contact area of the ring with the base so that the product does not move along the pipe. These decorative ring covers for heating pipes are reusable products and can be removed for cleaning or installation in another location.
Subtleties of application
To hide heating pipes in a private house or apartment, you can use several of the most convenient and rational options, these are:
- The process of laying pipes in the floor or walls.
- Creation of a special box for finished pipes.
- Decorating an existing pipeline.
To hide pipes in the floor, they must be completely new; old ones cannot be placed in a closed space
If a plastic pipeline is used, during installation into a wall or floor it is important to take into account the expansion factor of the pipes, leaving room for changing the shape of the entire structure. When placing structures made of metal or plastic inside any of the selected surfaces, it is important to put them in thermal insulating casings so that heat loss is minimal
During the installation process, it is important to leave free access to the fittings.
For the installation process in a wall or floor, you need to think over a layout plan and draw it on the surface. After this, channels are made using a hammer drill with a chisel and brackets are installed in the resulting grooves that will hold the pipes. As soon as everything is ready, the heating structures are prepared, onto which the casings are put on and fixed with clamps
Once everything is assembled and installed, it is important to check the operation of the system and determine if there are any leaks. If everything is in order, the groove is sealed with cement
Working with the floor is done almost the same way. The pipes are routed before the screed, so pipes are installed in the grooves made and everything is filled with concrete
In this case, it is also important to use thermal insulation and check the functionality of the system
If installation in the floor or wall is not suitable, then the easiest way is to build a frame, for which you can use plasterboard, plastic or wood. To hide the pipes using a box, you must first build a frame, for which metal profiles or wooden slats are used.
The design of the box consists of vertical posts and lintels; when constructing such a structure, it is important to ensure that it is positioned exactly at 90 degrees to the wall. Installation is carried out from the side panels, after which the front is mounted
If you use gypsum board, after installation you need to decorate the product, putty it and paint it, or use another method.
Most often, this method is used in those rooms where the space is poorly heated and instead of a full-fledged battery there is only a thin pipe
In this case, it is important not to lose a single degree of heat
The decoration of pipes is carried out using bright paint, which highlights the structure, making it an element of the overall composition; you can add imagination and instead of a pipe there will be a birch tree or any other tree against the wall, for which it will be enough to draw leaves on the wall.
Plasterboard or plastic box
- The first thing to do if you decide to close all the heating pipes is to take measurements and make markings on the walls using them. You can use them as a guide when purchasing the necessary materials.
An important condition when marking and arranging the box is that the structure should not be in direct contact with the pipes - the distance between them should be from two to three centimeters.
- Frames for plasterboard and plastic boxes are made using the same technology. Accordingly, the materials for them will also be needed:
- metal profile or wooden blocks;
— material for sheathing (plastic, plasterboard or wooden lining);
- screws and dowels;
— measuring instruments;
- screwdriver;
- construction knife;
— scissors for cutting metal;
- drill;
— a cutter is a tool used to fasten a metal profile.
A cutter will greatly simplify the work
- The next step is preparing the frame parts, cutting the profile or wooden blocks.
- Next, the frame is mounted on the walls using dowels. If wooden blocks are used, you must first drill holes in them, otherwise they may crack when attaching them to the wall.
- When arranging the frame, we must not forget about the holes for free access to the taps. To attach the doors to them, a frame is also built for the window.
- When making vertical frames that have a large height, for example, from floor to ceiling, jumper ribs are installed in two or three places for rigidity.
- The bars are fastened together with self-tapping screws, and the metal profile is fastened with a cutter or the same self-tapping screws. For metal, special fasteners are provided, with a sharper end.
We mount the frame
- Next, dimensions are taken from the constructed frame, and drywall or lining is cut out from them. If subsequently the drywall is not planned to be covered with ceramic tiles, then when preparing it, semicircular chamfers are removed from the edges.
- The drywall is secured to the frame using the same self-tapping screws.
We attach sheets of gypsum cardboard or plastic to the frame
- If the cladding is made from clapboard, it is nailed to the wooden frame with small nails, and special metal holders (brackets) for the clapboard are used. Therefore, if you plan to cover it with clapboard, then it is better to use wooden blocks for the frame.
- The difficult part is the decorative closure of the pipes located in the corner. It is best to cover them with a frame arranged in the form of a box. Don’t try to make it with a cut corner - you’ll only complicate your task, and it’s unlikely to look neater.
The pipes in the corner are beautifully “packed” in a plastic box
- After completing the installation of drywall, its corners must be reinforced with a special sickle tape, which is applied to the putty. It is also necessary to cover the heads of the screws with putty.
- After the putty has completely dried on the drywall, you can lay tiles, paint it, or simply hang wallpaper on it.
The box can be pasted over, painted or tiled
Ready made plastic box
In some cases, a plastic box, which can be embedded in the wall or fixed to it, is perfect for covering heating pipes. If heating is being re-installed or installed in a new house, this is an excellent way to hide all the pipes.
Ready-made plastic boxes
- Using a long ruler, markings are made on the wall along the entire path of the pipes.
- Next, using a hammer drill, the wall is punched according to the markings, to the width of the box. It should fit freely into this niche, both in width and depth. It is also necessary to provide a distance for applying putty.
- Next, the groove is cleaned of dust, moistened and thickly coated with putty.
- The box is installed in the designated place and additionally secured to the wall at several points using dowels.
- The pipes are laid in the box immediately after the putty in the wall has completely dried.
- After connecting and checking all communications, the box is closed with the included cover-casing.
- When finishing the walls, their covering can be aligned with the protruding part of the box, especially since it should stand out no more than two to three millimeters.
Installing pipes in the box will allow you to control the reliability of communication connections (joints), and in an emergency, the cover can be easily removed and repair work carried out.
Another way to use the finished box is to fix it on the wall, also before starting the heating installation.
Special box-plinth
Heating pipes running along the wall near the floor can be covered with plastic or wooden baseboards specially designed for this purpose. They are available in different widths and will help hide several pipes at once.
Closing the radiators in boxes
Since heating radiators also belong to the category of pipes, you need to consider several options for covering them with a screen box. The radiators do not always have an aesthetic appearance, and since the pipes leading to them are neatly hidden, it is worth transforming these elements of the heating system, which immediately catch the eye.
If earlier you had to come up with decorative screens from various available materials, today similar designs can be found in stores for every taste and for different interiors.
Original box with lighting
This option can become exclusive, since such lighting can be placed inside any screen for radiators. The light installed inside can have different shades and complement the evening room, or even become the main element of a romantic evening.
Such screens will look just as good during the daytime - their wicker surfaces will become a decorative addition to any room.
The screen box blends perfectly with the window sill
A more modest and discreet screen that emphasizes the neatness of the room. It goes perfectly with the window sill and merges with it into one whole. This version of the screen box hides not only the unaesthetic battery itself, but also the space around it.
Box - stand
Not every room can afford such a cabinet box, as it is quite voluminous. It will fit perfectly into a room with a large area, and its top panel can easily serve as a stand for kitchen appliances or flower pots. The aesthetic appearance of the box will decorate any interior, and most importantly, it will reliably hide the entire unsightly picture around the batteries.
DIY making
A communication box made of plasterboard does not require large investments and is simply installed.
Masking the piping and radiator is a simple process, but requires careful and advance preparation.
Conventionally, it can be divided into the following stages:
- Drawing sketches in scale and color. Discussion of details at the family council, selection of the most acceptable option.
- Carrying out measurements, drawing up diagrams, performing calculations.
- Preparing the base. Pipes, floors and walls must be cleaned of dirt and, if necessary, treated with an antiseptic and anti-corrosion agent.
- Making the frame. Depending on the project drawn up, it is made of steel profiles or wooden beams.
- Applying markings to load-bearing structures. Installation of an opening system, if provided for in the plan.
- Applying perforations, decorative details and finishing coating.
- Assembling and securing the structure in place.
For work you will need the following tools and materials:
- roulette, level;
- perforator;
- hacksaw, screwdriver;
- miter box;
- metal scissors, pliers;
- steel profiles or timber;
- fasteners (screws, dowels, bolts, nuts);
- plastic skirting boards for sealing cracks;
- material for the box and screen (plastic, metal, MDF, slats);
- finishing (putty, paint, primer)
Tool
Anyone who has ever made anything will understand from the above that you cannot do without a certain set of special tools in addition to the usual ones when installing a gypsum plasterboard box. First, if you are a DIYer and have your sights set on a ceiling box, you will need to rent a laser level (see also the video above). The unevenness of the finished surfaces of building structures is permissible 3 mm/m. Along the diagonal of a 3x4 m room, up to 15 mm can increase in this way. A box with such a distortion will not be reliable.
We recommend: Polypropylene or metal-plastic pipes: which is better in each specific situation?
Next, you will need a drywall hacksaw, pos. 1 in Fig. The usual one for wood tears and crumbles the material, but for metal it gets stuck in it. If you have or don’t skimp on a jigsaw with a “clean cut” file, pos. 6, generally good: a roughing plane is almost never needed.
Special tools for working on drywall
The next absolutely necessary tool is a mounting knife for drywall, pos. 2. It differs from the usual one not only in its more wear-resistant blade and durable design, but also in the fact that the blade extends and is fixed to a precisely specified cutting depth: to break a plaster board, it is cut to the cardboard layer on the back side, and to break it to obtain a curved surfaces, cuts are made to 2/3 of the sheet thickness.
Planes for gypsum boards, roughing and edging are also needed. The first is to plan the cut or cut until smooth; the second is to form the edges at the joints for putty, see below. It is better for an amateur to take a combined plane (item 3), which can be used both ways. Pros don’t use combi planers: a lot of time is spent resetting the tool from operation to operation. But a good combined plane costs much less than the cheapest complete pair.
The last thing you can’t do without to make a drywall box is a set of polished metal plaster spatulas. The minimum set is an even trowel, a smoothing trowel and a corner trowel, pos. 4.
In production conditions (for example, when cutting according to on-site measurements), profiles are cut into sections for the frame using guillotine cutters (which are called cutters almost everywhere for some reason). A guillotine for a metal profile does not spoil its coating at all, but it is an expensive and cumbersome machine. Craftsmen working on site cut the profiles with metal scissors. It is much more convenient to do this with crocodile scissors, pos. 5, with a beveled working part. Especially if you need to modify something in a partially assembled structure. And simply cutting sheet metal on a workbench with a crocodile is also more convenient and easier.
If you limit drilling of a profile to a minimum, you also need to be careful when choosing a hole cutter in it. Some models of reinforced cutters (below, item 7) cope with structural profiles up to 1.6 mm thick, but they are expensive and can only be cut through the sides of the profile. In lightweight ones (above in position 7) with a punch drum, the punches (beats, strikers) are not lost, but such a tool is intended for lightweight profiles, and already on normal ones it wears out quickly. In addition, one striker has become dull - you need to change the entire drum, which separately costs almost the same as a new instrument, and the same protruding drum often interferes with inserting the cutter into the partially assembled frame.
The best profile cutter for drywall - with a large offset and opening of the jaws, pos. 8. Working with it requires a lot of muscular effort, but you can cut both the sides and flanges of the profiles. And you just don’t need to lose cue balls.
Expert advice
To give the interior of your home a more aesthetically pleasing appearance without reducing the efficiency of your heating system, take advantage of useful advice from experts.
How to hide heating pipes in the floor or wall?
- The size of the groove for heating pipelines in the floor or wall should be calculated taking into account not only the diameter of the pipes themselves, but also increase by the thickness of the thermal insulation layer and the material for sealing the recesses;
- the pipes will be held in the walls if dowels with brackets are secured in the grooves;
- for metal-plastic pipelines, when embedding them into the floor or walls, it is necessary to use a protective casing that will protect them from heat loss;
- Removable fittings must be freely accessible, so they cannot be walled into the wall.
How to cover heating radiators with decorative screens?
There is no need to attach hanging decorative screens. They simply fit onto the battery. For radiators located in a niche under the window sill, you can take a flat screen and secure it using brackets or a chain, making it folding.
Is it possible to cover heating pipes with plasterboard?
Yes, you can. This is the easiest way to disguise elements of heating systems. The material is suitable for making boxes of any shape, as it bends and cuts easily. The advantages of using plasterboard to hide heating communications include the fact that it lends itself to any type of finishing.
How to hide pipes in ceiling structures?
It is prohibited to scrape floor slabs, so pipelines in ceiling structures can only be hidden behind removable structures: a multi-level stretch ceiling, a frame box made of plasterboard, plastic, plywood, cornices, or beautifully decorated using twine, ropes, bamboo, etc.
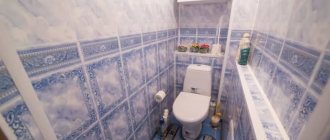
How to hide heating pipes in the bathroom?
To hide heating pipes in the bathroom and kitchen, you can use moisture-resistant plasterboard, screens made of plastic, wood, polycarbonate, disguise them with various cabinets, or decorate them using scrap materials. Examples of decoration can be seen in the video:
https://youtube.com/watch?v=rp_cxKsiZ6k
Materials
So, we will assume that the initial video materials have given you a general idea of the upcoming work, and then we will focus on the details that significantly affect the quality of its final result. The construction of a gypsum plasterboard box is technically quite simple: it is a non-working or only slightly loaded cladding on a load-bearing frame. As always in such cases, the overall reliability of the structure is largely determined by the correct selection of a combination of structural materials from a range of appropriate quality. First of all, you need to choose the frame material, because... Most of the weight and operating loads will fall on it.
Profiles for gypsum boards
In principle, the frame of a plasterboard box can be made from seasoned, shrink-treated wood: its mechanical properties are ideal for this application. But, in addition to the high cost of the material, the wooden frame of the box will be prohibitively labor-intensive due to the need to make a large number of reinforced carpentry joints. Therefore, plasterboard boxes are assembled almost exclusively on the frames of their special thin-walled metal profile.
A typical range of galvanized steel profiles for plasterboard is shown on the left in the figure:
Assortment and some possibilities for using profiles for drywall
In addition to standard sizes (see below), profiles for gypsum boards are divided according to wall thickness into:
Lightweight – wall thickness up to 0.25 mm. They are mainly used in unloaded designer products, because bend easily, but are fragile. Normal – walls up to 0.4 mm. Most commonly used. Reinforced – walls up to 0.6 mm. They are used in reinforced frames of large boxes. Structural for frames of load-bearing building structures – walls from 0.6 mm. Not suitable for installation of gypsum boards on them. These are profiles for metal frame structures. The fasteners intended for them will break the gypsum boards during installation.
Note: the thickness of the profile walls is not always indicated in trade specifications, so when purchasing you need to be guided by its weight. 1 linear meter of normal weighs 0.4-0.7 kg depending on the size.
There on the left and below in the center in Fig. The correspondence between domestic and foreign types of profiles is shown. The correspondence, it must be said, is not entirely accurate, because The fundamental approach to dividing profiles into types is different in both cases. However, the general principles of assembling a frame from metal profiles for plasterboard are the same:
Starter, guide and load-bearing profiles are not nested into each other without notches. You can put all the others (UD, CD) into UW type profiles. Only CD profiles are included in UD type profiles.
Top center in Fig. Typical diagrams for assembling frame elements are shown. Based on all this, the installation of the frame under the drywall is carried out as follows. order:
UW or PNP profiles are attached to the vertical base (support) surfaces; UW or PN profiles are attached to horizontal base surfaces; horizontal frame levels are assembled from PP or UD profiles; if the box is ceiling-mounted, the horizontal frame connections are attached to the ceiling with ceiling hangers, see below; the main vertical force connections of the frame are assembled from PS or CD profiles and, if necessary, additionally fastened in the horizontal direction with ceiling hangers rotated 90 degrees; the joints of the profiles of each level are connected by fastening units, also see below; from CD, PP or PS profiles, vertical force connections between the levels of the frame and additional support connections under the joints of the slabs are cut out, put in place and fastened, see below; from profiles PU, UD, PN or PNP, i.e. not having sides bent inward, support connections of hanging corners are assembled; the frame is sheathed with gypsum plasterboard parts cut to size; PU profiles are applied to the outer corners to reinforce joints for putty. the seams between the plates are prepared for putty (also see below); plasterboard sheathing is puttied for painting, wallpaper or finishing with tiles and other materials.
Note: under each joint of the gypsum plasterboard frame cladding parts there must be a supporting element from a CD type profile, i.e. with corrugated sides. For information on jumpers for joining cladding slabs, see also the video:
Video: types of jumpers for joining drywall sheets
Standard sizes
Each type of profile from the assortment is available in several standard sizes. To prevent it from happening that a piece that, it would seem, should fall into place without anything, just doesn’t fit there without notches, a set of profiles for the frame of the box must be taken as a set from the same manufacturer. An example of a set of profile sizes for drywall is given on the right in Fig. higher. Their recommended purpose:
UD 27/28 and CD 60/27 - ordinary floor, wall and single-level ceiling boxes not for suspended ceilings (simple) in rooms with walls no longer than 5 m. UD 50/40 and CD 50/50 - for reinforced floor and wall boxes (under increased weight load or with the likelihood of mechanical impact on the structure) and multi-level ceilings in rooms more than 5 m on any side, as well as for decorative boxes of complex configuration. UD 50/40 and CD 75/50 - multi-level simple boxes in rooms over 5 m on any side and boxes for suspended ceilings in rooms no longer than 5 m. UD 75/40 and CD 75/50 - the same in rooms up to 8 m on one of the sides. UD 100/40 and CD 100/50 - the same for rooms longer than 8 and for partially open non-residential premises (covered verandas, terraces, courtyards - patios, etc.).
Note: in addition to choosing the appropriate standard size of frame profiles, plasterboard boxes for suspended ceilings are reinforced in other ways, see for example. video:
Video: strengthening a plasterboard box for a suspended ceiling
What if not?
Profiles for plasterboard from one set of standard sizes, firstly, are approximately equivalent in load-bearing capacity, except for perforated PU. Secondly, they were originally designed for lathing under gypsum boards; boxes and design delights with drywall lie entirely on the conscience of craftsmen in the imagination. Therefore, it is permissible and not prohibited by building regulations to use profiles for plasterboard, but not necessarily according to the manufacturer’s recommendations.
Examples of the use of metal profiles in the frames of plasterboard structures
For example, if you try to assemble a ceiling box with a remote shelf for lighting according to standard diagrams, it turns out that there is nowhere to fit the profile reinforcing the hanging corner into the frame (on the left in the figure): a number of short jumpers will be unreliable. Therefore, the hanging corners of ceiling box frames are often reinforced by PN or PNP (UD types) with one flange notched in the center. And perforated PU is used along the lining of the assembled part of the box instead of PNP under the trace. level, on the right in Fig. In this quality, PU is quite reliable if there is no suspended ceiling, and all work is much simpler. In general, knowing the properties of profiles and the basic rules for their use (see above), which frame element to install from which profile is a matter of your working skills and ingenuity.
We recommend: Liquid wood: main components. WPC products. Do-it-yourself composite production
Connectors
While it is still possible to assemble the sheathing for gypsum board wall cladding from profiles alone, it is almost impossible to do without additional connecting elements in the frame of a suspended ceiling and a plasterboard box. The most necessary of them is the ceiling suspension, pos. and in Fig.. In addition to its main purpose: hanging a CD from the ceiling, it is also used for fixing vertical CDs or PSs, bottom right in Fig. In the same place below on the left it is shown how, instead of straight connectors, CDs are fastened with UD segments.
Fastening elements of a metal profile frame for a plasterboard box
The multi-level connector (item b) is suitable not only for assembling horizontal elements of adjacent frame levels across each other. They can be used to connect end-to-end horizontal connections of the same level perpendicularly in reinforced plasterboard box frames, for example. under a suspended ceiling. In the frames of simple boxes, a straight corner connector is used for this, pos. V. To assemble the same horizontal connections of the same level, a crab connector is used, pos. G.
Note: for more information on assembling the frame of a plasterboard box, see the video tutorial:
Video: profile frame for plasterboard
Hardware
The frame parts are connected to each other by threaded fasteners - hardware. They also attach the sheathing sheets to the frame. Therefore, the correct choice of hardware is also important for the durability and reliability of the structure.
Hardware products for fastening plasterboard boxes
The frame parts are fastened with metal threading screws (item 1 in the figure). They are simply called self-tapping screws, which is not entirely true. A metal self-tapping screw (let it be so for brevity) has a shank with a groove that turns the pioneer (installation) hole into a collar in which the thread is held firmly. Therefore, for metal screws, you need to drill or, better, cut (see below) installation holes with a diameter equal to the diameter of the body of the hardware without threads. The frame made of metal profiles under plasterboard is fastened with 4x12 mm self-tapping screws; the installation hole for them needs 2.4-2.8 mm. There is no need to skimp on the length of the hardware: it will sit firmly only if it runs the thread at least 4-5 turns. You need to drill with a screwdriver. The drill bit into the chuck must be new, sharp, and properly sharpened; preferably carbide.
Self-tapping screws
The frame parts are fastened at 1-2 points. The casing is attached at many points, so for this purpose self-tapping screws are used, which are self-tapping screws, pos. 2: they can be used to fasten material “live”, without installation holes. Masters on this score are divided into 2 parties: some, more numerous, advocate fastening for profit, because Vibration during drilling can cause the zinc coating of the profile to peel off. Condensation will accumulate in microcracks, and you will be surprised how quickly the frame can rust through in a seemingly completely dry room. Others require mandatory drilling of pioneer holes: if the self-tapping screw does not immediately bite into the metal, it will pull up the gypsum board thread and crumble the material.
Beginners must definitely stick to the party of “drillers”: without solid experience, a sense of material and hands accustomed to constantly using a tool, it is impossible to correctly set the screwdriver speed in advance, and if you insert the bit into a powerful drill, the hardware can not only crumble the plasterboard, but also distort profile. In such a case: self-tapping screws are needed 6x(24-30) mm; installation holes for them are 4.5-4.8 mm. The distance from the edge of the sheet is 10-12 mm for gypsum board with a thickness of 9 mm (see below), 15-16 mm for gypsum board with a thickness of 12 mm and 20-25 mm for gypsum board with a thickness of 18 mm.
Types of self-tapping screws for drywall
That's not all. Self-tapping screws for drywall need black phosphated, very hard ones. But they also come in different types, see fig. on right. If the frame is made of a lightweight or normal profile, the threads on the hardware need to be smaller and more frequent. And for a reinforced profile and fastening UW or UD to a wooden wall, it is rarer and higher. In the latter case, the penetration of hardware into a wall made of hard wood is 80-100 mm, and from ordinary wood - 110-130 mm.
How to attach gypsum boards
Whether you are attaching the gypsum board to the frame either directly or with a drill, you must use a screwdriver. Twist by hand - the work will also go to waste, because... inevitable distortions of the hardware will crumble the drywall.
You must also use the tools with extreme care. It is unacceptable that the head of the hardware presses the cardboard covering of the slab until it breaks (on the left in the figure). The tool must be removed and stopped as soon as the head has pressed the cardboard to its height, on the right.
How you can and should not attach drywall to the frame of the box
Dowels
But let's get back to the frame. An unacceptably large number of microcracks in the coating of profiles are caused by sawing them with a grinder or a hacksaw. The minimum is the installation of metal screws with an unfolding shank. Black self-tapping screws give a negative effect somewhere in between, so it is undesirable to attach profiles to walls, floors and ceilings with them, and in bathrooms it is not necessary at all. The most reliable way to fasten the frame to the base surfaces is with dowel-nails (item 3 in the figure with hardware) in a metal cage or combined nail-screw-dowels (item 4) in a plastic one. Dowel-nails without a clip (item 5) are designed to be fired from a construction mounting gun (SMP) and are completely unsuitable for working on drywall.
The frame is attached to concrete and brick walls using steel dowel-nails. The caliber of the hardware on the holder is 6 mm. Depth in concrete 60-70 mm, in sand-lime brick 80-90 mm, in red solid brick 90-110 mm. You cannot drive dowel nails into hollow bricks! The spacer rod is driven into the cage with gentle blows of a hammer.
Self-tapping nails and dowels are used to fasten profiles to walls made of wood, cinder block, gas block, foam concrete and other weak materials, for example. to fiber-reinforced concrete. The rod of the combined dowel-nail is knocked down with light blows of a hammer until the thread “grabs” the plastic, and then it is tightened with a screwdriver. The caliber is the same, 6 mm. Penetration into the base material (excluding plaster and other finishing):
Solid fine-grained wood – 90-110 mm. Cinder block – 100-120 mm. Coniferous industrial wood – 110-130 mm. Foam concrete, gas block, etc. – 130-150 mm.
What to do with slopes?
How close is it permissible to drive dowel nails into a wall made of brick or concrete?
Novice amateur builders are often interested in: how close can the dowel-nails be placed to the window or door frame so as not to chip? For brick and concrete walls, the answer to Fig. on right; you need to choose the larger of the obtained values. For wooden ones - no closer than 1.2 times the depth of the hardware into the wall. For cinder block, foam concrete, gas block - no closer than 2 of its depths.
GKL
Since the load-bearing role of the drywall itself in a box made from it is small, it has only now come to its description. It is known how gypsum boards are constructed (see figure): these are 2 layers of cardboard, between which there is building plaster, with reinforcing fibrous additives. The thickness of commonly used slabs is 9, 12 (the most common) and up to 18-24 mm, depending on the manufacturer.
Structure and types of drywall
Regular gray (sometimes light beige), green moisture-resistant and pink fire-resistant drywall are available for sale. A plasterboard box in a bathroom should be made only from moisture-resistant gypsum board, because... others become limp and swell from moisture vapor. Unfortunately, moisture-resistant gypsum plasterboard is not an electrical insulator and fireproof, so it is highly undesirable to install electrical wiring in it. It is better to lengthen the cords from the washing machine and boiler, lead them into the kitchen and install separate sockets for them, connected to the kitchen “dose” distribution box through a residual current device (RCD). If, according to the layout of the house, this is not possible, the wiring should be made from a double-insulated cable with flexible cores increased by 1.5-2 times against the design cross-section, and the socket boxes and other fittings should be made of propylene, see Fig..
We recommend: The main advantages of corrugated sheets
How to do electrical wiring under drywall sheathing
The fact is that it is impossible to make PVC insulation completely non-flammable by introducing a large number of additives into it - the material becomes brittle. As a result, the spread of fire along the wires is not excluded in the case when the circuit breaker is triggered and cuts off the shorted branch. When PVC burns, it releases the deadly poisonous gas phosgene. Its lethal dose is negligible; there is no antidote.
The filler of fire-resistant gypsum board contains so-called. called flame retardants are substances that release a lot of water of crystallization vapor when heated. Borax is most often used as a fire retardant. If the wiring under fire-resistant plasterboard catches fire, the water vapor will cool and extinguish it before phosgene is released in dangerous quantities. Therefore, it is highly advisable to make boxes with electrical communications in dry rooms from fire-resistant gypsum board.
Also, from fire-resistant gypsum board you need to make boxes with lighting using incandescent and fluorescent lamps. Both heat themselves and warm the surroundings with thermal radiation. Gypsum also contains water of crystallization. Although it is much more difficult to “squeeze” it out of it than from borax, a slight but prolonged overheating of the gypsum board makes the slabs brittle; Properly sealed joints crack. In such conditions, fire retardant additives seem to “intercept” the release of moisture, and the entire lining turns out to be quite durable.
Note: white vibration-absorbing (anti-acoustic) gypsum plasterboard is also available on sale, but is not in great demand. It is expensive, does not dampen sounds well, and is not moisture resistant. If you need to muffle a noisy riser in the toilet (see below), then the best effect is achieved by 2 layers (precisely two!) of 9 mm moisture-resistant gypsum board.
What is it and why is it needed?
Owners of apartments and private houses are trying to replace old, outdated steel utility networks with more neat pipes made of polypropylene or metal-plastic. But even they, having a more attractive appearance, are not always able to fit harmoniously into the modern interior of a living space. And here, to disguise them, you can use decorative boxes.
They are a frame structure covered with plastic, plasterboard, perforated metal panels, MDF or natural wood. The box is mounted in such a way that its parts do not come into direct contact with pipes or radiators, but are separated from them by at least 2 - 3 cm. This will preserve the integrity of the system elements during the linear expansion of the materials from which they are made under the influence of high temperatures.
Other options for hiding them - inside a wall, ceiling or in a monolithic floor - can lead to deformation of the building material surrounding the pipe (most often concrete) or to destruction of the surface of the pipe itself.
The box will not only allow the pipe material to expand slightly, but will also provide the possibility of unhindered heat exchange of air flows and protect communications from possible mechanical damage or other negative influences, such as moisture.
Methods for masking pipes
Modern technologies make it possible to turn into reality any, even the most incredible, projects to hide heating pipes. The question is what budget this will cost. Typically, all work on moving heating radiators, replacing pipes or re-laying is associated with significant investments. This applies to both apartments in a multi-storey building and a private house with an individual heating system. But there are also budget options when, at low cost, heating pipes are decorated so that they do not visually attract attention and do not accentuate the interior.
Radical methods
And to understand how much you will have to fork out when implementing this project, it is worth considering all the options for how to hide heating pipes in a private house or apartment.
Radical methods include:
- Laying a line in the wall with pipes exiting only at the radiator;
- Laying pipelines under the floor, installing a heated floor system;
- Ceiling pipe laying;
These methods are the most expensive. This is due to the fact that to carry out repair work in a private house, it is necessary to trench the walls and floors. In an apartment building, the situation is no better - to begin work, you will first need to completely turn off the heating riser, drain the water, and only then begin work. The second point is that in this option you will have to completely change the pipes - when embedding into the walls, you cannot leave the old pipelines. In addition, solid material is used for laying, without threaded connections, and the shut-off valves must be installed in such a way that it is possible to quickly and easily close the section in the event of a breakthrough.
Budget methods
A less radical method of hiding heating pipes is the option of installing a decorative box. It's not ideal, but it offers many types of materials and technical solutions. The simplest option is an overhead decorative box; it is simply placed on the main line and thus covers the steel pipes. Another popular method is to build a plasterboard structure that can cover not only pipes, but also radiators, leaving space with a decorative grille for air circulation. The third option is to change the location of the main line so that it can be hidden in a box near the baseboard or simply covered with a baseboard. And of course, hide the heating pipes under decorative stucco molding made of polyurethane or foam, giving the room an antique style.
And finally, the simplest method from the point of view of materials used, but also the most complex from the point of view of artistic solution, is decoration. In this block of methods, a variety of materials and techniques can be used, from painting the surface to match the walls, to creating decorative compositions using natural materials - tree bark, cord ropes and even rhinestones. There are no restrictions on materials or work methods; everything depends on the imagination and skill of the designer.
Decorative rings for heating pipes
They are round parts, the main task of which is to cover the exit of heating pipes from the wall, floor, ceiling in such a way that the heating communication organically adapts to the design of the entire room. Such devices do not interfere with the operation of the heating system, hide sloppy protrusions from view, and serve as a decoration element.
The decorative ring is designed to neatly disguise the place where the pipe exits the wall or ceiling
The ring can be matched to any pipe
The linings can be solid, installed during heating installation, or detachable, which can be installed on a previously installed pipe
In order for decorative rings to perform their function in the best possible way, it is necessary to correctly select their diameter, color, and material that would suit the texture. The most common raw materials for the production of decorative plugs: wood, metal, plastic.
Use decorative elements
There are several ways to beat a riser:
- Make it in a marine style - wrap it with twine, cover it with shells, pebbles and other attributes associated with the marine theme.
- “Nature” style – decorate batteries with twigs, artificial flowers/fruits, glue miniature birds and butterflies.
- A very original solution is to “hide” the riser in bark or bamboo, thus giving it the appearance of a real tree.
- A useful device - make a scratching post for your beloved pet from pipes with your own hands. It is necessary to first pack them with polystyrene foam, then wrap them more tightly with twine. A satisfied animal is a complete piece of furniture.
Each method is good in moderation. The main thing is not to overdo it with the decor, remember about the thermal conductivity of the batteries.
Decorative elements for radiators
Hinged screens for batteries
A feature of the decorative finishing of heating radiators is the mandatory air exchange. This is why batteries should not be completely covered.
The best way to adapt the appearance of heating heating elements is to install decorative screens for heating radiators. It can be a hinged structure or with a battery-independent mount. For already installed systems, the first option is most often chosen, since it is less labor-intensive. But if the heat supply is done simultaneously with repairs, they make decorative screens for heating radiators with their own hands.
In order to choose the optimal design and material for its manufacture, you should be guided by the following rules:
- Decorative finishing of heating radiators is made only from non-combustible materials. The exception is wooden and plastic panels. Moreover, the former must be treated with a special compound;
- Hinged decorative covers for heating radiators must have special mounting areas;
- The material used is harmoniously combined with all interior items of the room.
The most important criterion when choosing decorative panels for heating radiators is the material of manufacture. The service life of the element, as well as visual adaptation to other components of the room, depends on it.
Metal decorative panels
Steel boxes
For the manufacture of steel panels, stainless or galvanized steel is used. Often the structure consists of a frame onto which a metal mesh is welded.
Depending on the design of the battery, there are several types of decorative panels for heating:
- Facial. They protect only the front part of the radiator;
- With side panels. The best option for remote installation of a heating element.
The main advantage of installing decorative steel fencing for heating radiators is the possibility of uniform distribution of heat flows. They also promote better air circulation.
Buy or make it yourself
Today you can buy a factory-made pipe box with a base that is attached to the wall before installing the system. Then pipes are laid along it, and at the end the box is closed with a lid. If you need to hide the elements of a finished heating system, then it is better to choose the option of a box without a base. It is placed against the wall and secured with self-tapping screws. The manufacture of a homemade box is resorted to mainly for the purpose of economy, and in the case when a design design is required, made in the same style as the entire room.