By what principles is the installation location determined?
It is worth understanding that the question of where the stove should be located in the house is extremely important and responsible, and therefore it is worth approaching the search for an answer to it with special care.
The principles for determining the location are as follows:
- Any stove should be located as close as possible to the central part of the house so that the external chimney pipe does not extend far from the ridge.
- The correct location of the device will be if there are no other communications under it, for example, water supply.
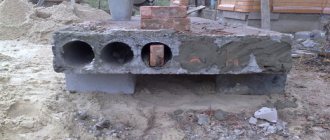
- When installing two furnaces in one zone, it is better to construct a foundation for each in order to protect yourself from the rapid destruction of the products.
Location of the pipe relative to the ridge of the house
In addition, it is worth clearly understanding that one structure must heat at least two rooms, otherwise its installation will not be advisable.
Installation of a metal stove in a wooden house
Modern metal stoves are easy to install, aesthetically pleasing and easy to use. To install such a stove in your home, you need to spend several hours, after which you can safely heat it. Note that most models of metal stoves can be made independently. True, this requires appropriate metalworking skills and tools.
It is important to strictly follow the main rule of installing a metal stove. Namely, do not place it close to the wall, even if it is lined with non-flammable material, for example, tiles. The heater must be located at a distance of at least 25-30 cm from the walls. Also, a prerequisite for installing a metal stove in a wooden house is the lining of all surfaces in the area where the heating device is located with non-flammable material.
Even from brick walls, a metal stove should be located at some distance Source stroyfora.ru
For a compact metal stove, it is not necessary to build a foundation; it is enough to place it on a low base made of non-flammable material, or install it on a dense steel sheet. It is advisable to install additional safety beams under the floor, which will take on the entire weight of the structure.
Varieties and types of fireplaces
Depending on the material used, fireplaces are:
- steel or cast iron;
- stone;
- brick.
Steel or cast iron. Fireplaces with a metal firebox consist of a glass door. As a result, in appearance they look like both a stove and a fireplace. Such equipment is in demand due to its availability, compactness and speed of installation.
Steel or cast iron fireboxes are incorporated into decorative fireplaces made of wood, stone and brick. Drywall is used to disguise the chimney.
Stone is rarely found in residential premises, since the installation process is quite complex and lengthy. In addition, a stone fireplace needs a special foundation. For this reason, it is recommended to install it in larger rooms.
Fireplaces made of stove bricks also have large dimensions and require the construction of a foundation that is separate from the base of the walls. Thanks to the unique properties and characteristics of the material, uniform and pleasant heating of the entire room is ensured.
Despite the high heat capacity of stove bricks, the fireplace must be insulated from the wall. To do this, the thickness of the masonry closest to the wall must be at least 25 cm. In addition, the outermost masonry is insulated from the walls of a wooden house using vermiculite, basalt wool and perlite.
Fireplaces of all sizes and types ideally complement the interior of any living space with their sophistication, atmosphere, warmth and comfort.
Depending on the fuel used, fireplaces are:
- Wood-burning. They use real logs to make them work. Fuel needs to be prepared and a storage location provided. And clean the fireplace itself after each use.
- Gas. They can operate on mains or bottled gas. To install gas-using equipment, a permit is required, and for connection, a representative of the gas service is required. Maintenance is extremely simple.
- Electrical. Easy to operate and run. They are powered from an outlet, but with daily use, the monthly electricity consumption is considerable.
- Eco-fireplaces are easy to maintain and use. They are safe, but their cost is quite high.
There are many options for placing a fireplace in a wooden house. Basically, it depends on the location and its shape.
Corner fireplaces fit perfectly into the free space in the corner of the room, helping to make the most of every square meter.
By type of location, fireplaces are divided into:
- Isolated. Most often they are installed as a separate part of the interior. Insulated fireplaces come in all shapes and are often placed right in the center of the living room because they require a lot of space.
- Direct. Quite popular at the moment. They can be built-in or attached to the wall.
- Angular. Fireplaces of this type are very compact and fit harmoniously into the interior design. They come in small sizes, so their use in small wooden houses is recommended.
Direct fireplaces are divided into built-in and wall-mounted. Built-in ones are often installed between two rooms. Their power allows you to warm both rooms. As for wall-mounted ones, they are placed against the wall and do not require much space.
Types and features of stove foundations in frame-panel and wooden houses
When arranging furnaces, several types of foundations are used, each of which differs in its design features. Before deciding on the type of foundation for furnace equipment, you need to consider the following factors:
- The final price of installing the foundation, which consists of the cost of purchasing materials, preparatory and construction work.
- Structural features of the foundation and type of soil.
- Calculation of the dimensions of the foundation for the furnace, based on its characteristics.
In addition, the construction of stoves in a wooden house may involve the construction of a foundation for them simultaneously with the general foundation of the building. Common types of foundation for a stove or fireplace are concrete, piles and pillars. Note that most stoves can be mounted directly on the floor. To do this, it is necessary to take into account all fire safety requirements and recommendations of the stove manufacturer.
Most often, a concrete foundation is used to install a fireplace or stove Source vbanepar.ru
Video description
Video example of professional installation of a metal fireplace in a finished wooden house:
All work can be divided into main stages:
- Construction of the foundation. It is isolated from the foundation of the house, but is poured simultaneously with the latter even before the construction of housing begins. If it is necessary to introduce a fireplace into an already completed structure, craftsmen remove the floor covering and dismantle part of the ceilings. The depth of the pit should reach the freezing line of the soil; a layer of crushed stone and broken brick is formed at the bottom. The finished height of the formwork should exceed the floor level by 10 cm. When pouring the solution, reinforcing ligaments are used, leveled, and waterproofed after hardening.
- Preparing the walls. They are sheathed with insulating materials, often in multilayer form. The sheets are fixed on metal guides, the joints are sealed using adhesive foil tape. An alternative solution for insulation could be additional brickwork laid flush against the wall.
- Fireplace assembly. The masonry is carried out according to the project, starting from the base, using a special heat-resistant mortar. The internal surfaces are formed from refractory bricks, the rest from solid bricks. The components that form the firebox and door are gradually introduced.
Assembling a fireplace in a wooden houseSource et.aviarydecor.com
Formation of the chimney. It can be internal, passing through the ceiling up to the roof, or external, removing combustion products from the fireplace. In the first case, a combination of two pipes inserted into one another is used
At this stage, special attention is paid to sealing.
Floor finishing. The space around the fireplace with a radius of up to 150 cm is protected using non-combustible materials - marble, porcelain stoneware, facing tiles.
A budget finishing solution is metal sheets. But over time they become uneven and give the room a utilitarian look.
Installation of chimney pipes
Installing stoves and fireplaces in a wooden house necessarily implies the presence of chimneys. Installing them at random is like lighting a fire inside a wooden house. The thing is that when the stove heating system is operating, a short-term temperature may occur in the chimney, which sometimes exceeds 800 degrees. For this reason, fire breaks must be provided in chimneys.
Installation of chimneys is carried out in accordance with the rules:
- the chimney is made of refractory brick, stainless steel or ceramics, which has a heat-insulating layer;
- It is not advisable to place the chimney close to the wall. The places where the chimney pipes will pass must be covered with thermal insulation;
- the junction between the pipe and the ceiling is insulated using basalt cardboard, stainless or galvanized sheet.
TOP design ideas: what a fireplace might look like in a wooden house
The budget category of projects is based on the use of ready-made metal fireplaces. For their harmonious implementation, it is enough to calculate the compatibility of the models with the characteristics of a particular structure, create a foundation, install components and lay the chimney. Such solutions do not always look like the notorious potbelly stoves: manufacturers offer an assortment of elegant products that can fit into both urban and classic interiors.
A laconic copy that only needs proper installation. Source pinterest.com.au
Models mounted in a niche trimmed with stone/brick, on a pedestal, are recognized as slightly more complex in terms of labor and material costs.
Here, when designing, it is necessary to take into account the load created by the materialSource fumat.lt
A fireplace in a wooden house, assembled according to an individual design project, belongs to the premium segment. Non-standard shapes predominate here - fireplaces in the form of an elongated oval, having a decorative panel framing the firebox, or a vertical orientation of the active zone.
Stylish solution implemented into the heating system of the houseSource pechiexpert.ru
Which heating system to choose
A stove in a wooden house can perform not only the function of the main heating system. Another, no less important purpose is cooking. Accordingly, according to the type of use, furnaces have the following division:
- heating system;
- combined system (heating and cooking).
Often in homes the second option is used. However, most owners of country wooden houses are content with installing a fireplace, which looks much more aesthetically pleasing than a stove, but is inferior to it in practicality. The main advantage of a fireplace is its cost-effectiveness, which is why many owners of wooden houses prefer to combine a stove with a fireplace.
Do not forget about the safe operation of the heating system. This indicator largely depends on the design of the stove or fireplace.
The following types of heating systems are well suited for arranging a wooden house:
- Classic Russian stove with a stove bench . Despite the complexity of installation, it is an ideal option.
- A decorative fireplace stove will decorate the interior of the room well. It is a universal and safe source of heat, thanks to the presence of special heat-resistant glass that separates the fire from the living area.
The fireplace stove is equipped with glass doors - and the fire is pleasant to look at and sparks do not fly in all directions Source bauenhaus.com.ua
- A massive cast iron stove will fit perfectly into the interior of any room. It is distinguished by a variety of models, ease of installation and high fire safety.
Important! If the choice was made in favor of a fireplace, you must give your preference to a model with protective glass. An ideal option would be to install a fireplace stove in a wooden house.
Preparing for assembly
Before installing a stove in a country house with a pipe exiting through the wall, you need to prepare. Work requires special clothing and gloves. If you will be cutting metal products, it is advisable to wear safety glasses.
Selection of tools and materials
To complete the work, the following tools are required:
- drill, equipment for cutting material;
- heat-resistant sealant;
- riveter;
- clamps, dowels, corners;
- foil construction tape;
- screwdrivers;
- level, plumb;
- knife;
- ladder;
- When working with concrete walls, you will need a hammer drill.
Components for installing a chimneySource vse-postroim-sami.ru
The materials required are a steel pipe, with which the horizontal fragment is connected to the boiler. You also need a tee for connecting pipes, an elbow (with its help the structure is directed upward), and a support console. Brackets and dowels are used to mount products on the wall. The connection of several pipes is carried out using clamps. You also need thermal insulation material and a protective cap.
Choosing a location
The house has central and side walls. The second is located on the side of the slopes and under the roof overhangs. Liquid gets onto this part when it rains (if the drainage system is not fixed). There is a small roof overhang above the central walls, so the risk of liquid entering from the roof is minimal.
It is better to mount the smoke exhaust structure on the front wall. Here it is taken into account that there should be no windows or balconies on it along the line of the chimney. If you have to install a pipe through an overhang, then high-quality fire protection is installed.
Choosing a location for the chimney outlet through the wallSource stroychik.ru
Calculation of chimney height
Since it is possible to correctly bring a chimney through a wall to the street in a wooden house only if technical requirements are met, the first parameter that is taken into account is the height of the structure. It depends on the number of floors of the house. If the height of the building does not exceed 5 m, then the minimum parameter for the height of the structure is 5 m. If this value is neglected, the structure in the house will smoke in the house, the draft will deteriorate, and the performance of the heating device will decrease.
If the pipe is too long, fuel consumption will increase. When the height of a building exceeds 10 m, the main reference point is its ridge: it should be 0.5 m below the chimney. This characteristic is affected by the cross-section of the pipes and the power of the heating equipment.
Chimney heightSource vosaduly.ru
Pipe diameter calculation
The internal diameter of the structure must correspond to the dimensions of the pipe. Any narrowing of the internal volume of the pipe affects the formation of draft. The presented value is affected by the power of the equipment: the higher it is, the larger the internal diameter. You need to follow standard building rules:
| power, kWt | Internal section, cm | Minimum diameter, cm |
| up to 3.5 | 14×14 | 15,8 |
| 3,5-5,2 | 14×20 | 18,9 |
| 5,2-7 | 14×27 | 21,9 |
If we take into account all the technological features of installation, the structure will last for decades without significant problems.
Choosing the optimal location
First of all, the operating principle of the heating device will help determine the optimal location of the stove in the house. The location may vary depending on whether it is possible to build a chimney in a particular area and arrange the correct operational area.
If you definitely want the stove to be located in this particular place, then before its construction you need to calculate such an indicator as fire breaks: how far away are constantly heating surfaces from walls covered with flammable materials.
You can more accurately determine the place of the stove in the house based on the recommendations given below:
- If the owner of the house has air-heating devices at his disposal, for example. “Potbelly stove” or “Buleryan”, then they should be placed so that air flows penetrate unhindered. This will create a convection system, thanks to which you can warm two adjacent rooms without doors.
- If the heating device has a built-in heat exchanger, then the placement of the stove can be any, subject to fire safety regulations. However, it should be taken into account that the furnace contour must act as the lower boundary of the heating system.
Drawing of a standard log house
- It is impossible to install a stove and at the same time avoid the construction of a chimney and pipe inside the house. In this case, the location directly depends on how easier it will be to connect the heating device itself to the smoke exhaust system.
- An important point is to take into account the free space when opening the combustion chamber door. If there is a deficiency, then difficulties will arise in cleaning and heating the stove in a wooden house.
- Buildings that are supposed to be heated by stoves must have a sufficient area to allow fire breaks from heated surfaces to flammable elements, which corresponds to 1.1-1.25 meters. The rule also states that the distance to the opening door of the combustion chamber should not be less than 1 m 25 cm.
Good to know: How to prepare fireclay clay for laying a stove, how to mix the solution
Where is the best place to install it in the house?
You can stop at a place that is clearly visible from the outside, or at some inconspicuous corner. The main criterion for choosing a place for a good potbelly stove is access to it from literally all sides. The user needs to check whether everything is in order with the device during use.
Try to stick to this pattern
There should be at least half a meter between the pawn, the wall and other objects, including furniture, pipes, etc. This rule must be observed due to the fact that a potbelly stove for a summer house will get very hot, up to 500 degrees (usually up to 200-300, but the result depends on the features of the installation).
What types of surfaces are suitable for installing a potbelly stove for home on it:
ceramic tile; concrete floor; brick flooring (natural or synthetic composition - there is a difference, so it is better to approach substitutes and artificial imitators with caution); tin covering.
An example of installing a potbelly stove in a house
On what surfaces is it prohibited to place a potbelly stove in a country house:
- laminate;
- linoleum;
- soft coverings;
- parquet;
- a floor made of boards (wood, chipboard, fiberboard - does not matter, it is prohibited to install on any wooden surface).
Why is this restriction in place? A potbelly stove in a country house can cause a fire by constantly coming into contact with incompatible material for a long, and sometimes even short, time.
When choosing a place for a potbelly stove in a country house, you need to take into account the height of the room. Choose points that allow you to install the chimney pipe in a vertical position without the need to make joints, turns, or slopes. Please note that you will have to open the door to add fuel, so there must be enough space for the person adding fuel.
More installation examples in the photo:
Photo 1
Photo 2
Photo 3
Choosing a location for installing a stove heating system
When designing a stove or fireplace, it is necessary to take into account the operating features of this heating system and the ease of its operation, the installation option for the chimney, recommendations from SNiP (building codes and regulations) and other regulatory documents. Additionally, it is necessary to take into account the fire distances between the walls and the heating surfaces of the stove.
Criteria for choosing a location for installing a stove in a wooden house:
- Features of the heating system. Air-heating metal stoves, for example, “Buleryan” or “Burzhuika”, must be placed indoors, taking into account constant access to air flows. If it is necessary to heat several rooms, some modernization of the partitions between rooms will be required so that a stove can be built into them. Another effective option is to install additional air ducts in heated rooms.
The Buleryan stove can look very stylish in a modern living room Source goeyvaerts.com
If a stove with a water heat exchanger is used as the main heating system, its location in the room does not play a special role. The main thing in this is to ensure ease of use and comply with all fire safety regulations. During installation, it is necessary to place the heating circuit so that its heat exchanger is located at the lowest point.
- Connecting the chimney to the stove is perhaps the most basic criterion for choosing the location of the heating system in the room. As a rule, a stove or fireplace in a wooden house is located in the place most convenient for connecting the chimney. In this case, all fire safety measures must be observed.
- Ease of use . For effective stove maintenance (cleaning, heating, cooking, etc.), you will need free space directly in the working area. This feature must be taken into account when choosing a location for the furnace.
- Fire safety distances directly from the heating areas of the stove to wooden partitions and walls must be at least 110 cm. The distance from the firebox to the wall is 120-150 cm.
Proper placement of the stove heating system will minimize the process of maintaining a comfortable temperature inside the room and will facilitate the operation process.
Coals falling from the firebox should not fall on flammable objects, they should be at a safe distance Source derevyannyydom.com
See also: Catalog of companies that specialize in the installation of fireplaces and stoves.
Manufacturing recommendations
The easiest way is to make a small portable stove with your own hands - the Robinson rocket, whose drawing is presented below. You will need cutting profile pipes, metal for legs and stands, as well as welding skills. Moreover, compliance with the exact dimensions indicated in the drawing is not necessary. You can take pipes of a different section, but you just need to reduce or increase them proportionally so that the parts fit together.
Drawing of an improved “Robinson” camping stove with nozzles made of a profile pipe, cut lengthwise into 2 parts
The most common versions of large rocket stoves are made from a gas cylinder or a two-hundred-liter metal barrel. You must understand that these ready-made elements are used as an outer hood, and the internal parts of the stove must be made from pipes of smaller diameter or laid out from fireclay bricks. Moreover, from a cylinder you can make both a stationary heater with a small bench, and a unit that can be moved.
Please note that calculating the thermal power of a rocket-type furnace is quite difficult; there is no single calculation method. It’s easier to rely on ready-made drawings of already working samples and assemble according to them. You just need to compare the dimensions of the future stove with the dimensions of the heated room. For example, to heat a small room, the size of a cylinder is enough; in other cases, it is better to take a large barrel. The selection of internal parts for them is shown in the diagram:
2 options for potbelly stoves - from a gas cylinder and a standard iron barrel
Stove rocket from a cylinder
In addition to the gas cylinder itself, to assemble the stove you will need:
- profile pipe 150 x 150 mm for the firebox and loading hopper;
- steel pipes with a diameter of 70 and 150 mm will go to the internal vertical channel;
- the same with a diameter of 100 mm for the chimney;
- insulation (basalt fiber with a density of at least 100 kg/m³);
- sheet metal 3 mm thick.
For a master skilled in welding, this work will not be particularly difficult. The top of the cylinder should be cut off along the seam, after first unscrewing the valve and filling it to the top with water. Openings are cut on both sides for installing a firebox and inserting a chimney. A profile pipe is inserted and connected to a vertical channel, which is discharged through the bottom of the cylinder. Further work on the manufacture of the rocket furnace is carried out in accordance with the drawing:
At the end, the upper part must be welded into place, then carefully check all seams for permeability so that air does not flow uncontrollably into the oven. After this, you can attach a chimney with a water jacket (if available) and begin testing.
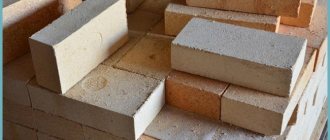
Masonry of a rocket-type heater made of bricks
This stove option will require the purchase of fireclay bricks; ordinary ceramic bricks will not work for a rocket stove. The masonry is done using fireclay clay mortar; it is also sold as a ready-made building mixture. How to make a stationary rocket stove:
- First you need to dig a hole, compact the bottom and pour a foundation measuring 1200 x 400 mm and 100 mm high, as shown in the photo.
- After hardening, the foundation is covered with a sheet of basalt cardboard and the combustion chamber, a bunker for loading firewood and a vertical channel are laid. A door is installed at the end of the combustion chamber to clean the ash pan.
- After the clay has dried, the pit is filled up, and a pre-selected pipe or small barrel with a diameter of 450 mm is placed on the vertical channel. The gap between the brickwork and the pipe walls is filled with fire-resistant insulation, for example, basalt wool, expanded clay, vermiculite.
- At the last stage, a cap made of a large metal barrel with a diameter of 600 mm is put on the structure. First, a cutout is made in its upper part and a pipe is installed to connect the chimney. When the barrel turns over, he will be at the bottom.
Then it’s a matter of technology; you can take the chimney directly outside or build another bench with smoke circulation. For this purpose, ordinary ceramic bricks and clay-sand mortar will do. The order of the brickwork of a rocket stove with a small bench is shown in detail in the video:
Foundation
Stoves weighing less than 750 kg are installed on the floor without a foundation. Only a kitchen stove can be laid on a floor without a foundation. If the strength of the floor is insufficient, it is reinforced with beams that are installed on brick pillars. In this case, sheet asbestos in clay mortar is laid on the floor under the base of the furnace, an iron sheet is nailed on top, and only after that the base of the furnace (foundation) is raised with two rows of brickwork. After this, they begin laying the furnace from the first row according to the drawings. In this case, the distance from the combustible part of the floor to the chimneys will be equal to the thickness of three rows of brickwork. Reducing the thickness of the stove base is unacceptable in terms of fire safety.
Stove without foundation
But most stoves are installed on a specially constructed foundation, which supports the stove body and chimney.
Knowing that the average weight of one brick is 3.5 kg, you can approximately calculate the weight of any household stove. For example, to lay a Russian stove measuring 141x141 cm with a pipe, about 1,500 bricks will be required. The approximate mass of the stove is 1500×3.5 = 5250 kg.
Foundations for furnaces can be solid (Fig. 2, 3), columnar (Fig. 4, 5) and mixed. The foundations should be wider than the base of the stove by 5-7 cm in each direction. The depth of foundation placement depends on the properties of the soil and the groundwater level. Soils can be rocky, coarse, sandy and clayey.
Rocky soils are solid solid rocks and some sedimentary rocks: sandstones, limestones. They have high compressive strength and resistance to groundwater.
Rocky soil
Coarse soils are fragments of rock. They are also solid foundations, since these soils contain a large amount of crushed stone, gravel and pebbles.
Coarse soil
Sandy soils consist of sufficiently dense and strong particles for constructing foundations for furnace foundations.
Sandy soil
Clay soils are determined by their clay content. Clay in its pure form is very rare in nature, so soil that contains more than 25% clay is considered clayey. If the soil contains clay in the range of 10-25%, such soil is called loam, and soil with a clay content of up to 10% is called sandy loam.
Clay soil
Sometimes there are soils with large pores, which are dangerous because when groundwater gets into them, they easily liquefy and lose strength. These are bulk soils that have great looseness.
In dry sandy soils, the foundation depth can be 50 cm, in clayey soils - 75 cm.
The soil on which the base of the foundation rests is called its base. In wet soils, the depth of the pit from the ground level should be at least 1 m. The foundation is laid in them using clay-cement mortar. In dry soils, foundations are laid on a 1:3 lime mortar (1 part lime paste and 3 parts sand). In strong dry soils for furnaces weighing up to 2 tons, the foundation depth can be reduced to 25 cm, and for furnaces weighing up to 3 tons - accordingly, up to 40 cm. In wet soils, it is not recommended to reduce the depth of foundations.
Depth of laying the foundation for the furnace
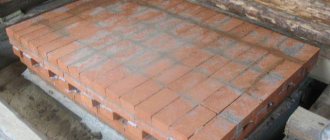
For laying the foundations of furnaces, rubble stone, cobblestone, crushed brick of all types, gravel and pebbles, ordinary clay baked red brick, coal slag, and iron ore can be used.
To construct a foundation, a pit is dug in the ground. The dimensions of the pit should be 10-15 cm wider than the base of the furnace in each direction.
Rice. 1. The principle of foundation construction. 1 - floor; 2 - furnace body; 3 - two rows of brickwork; 4 - protrusion 50-70 mm; 5 - external foundation; 6 — ground level; 7 - foundation in the ground; 8 - base of the foundation
First, material (rubble stone, crushed brick, etc.) up to 10 cm thick is placed in a dug pit, then filled with liquid cement mortar. The rubble stone is laid out, observing the rules for bandaging the seams, the gaps are filled with small stones. In this way, the foundation is brought to ground level. A waterproofing layer (3 layers of roofing felt or roofing felt) is laid on top of the foundation in the ground. An external foundation is built on the waterproofing layer.
Laying the foundation for the furnace
The external foundation can be laid out from the same materials as the foundation in the ground. The height of the masonry depends on the depth of the underground space. When laying an external brick foundation, whole bricks are placed along the edges, and halves are placed in the middle. The external foundation should be 5-7 cm smaller than the foundation in the ground in all directions.
It should be remembered that the outer foundation area should be 5-7 cm wider than the stove base in all directions. The outer foundation is not brought to the floor level by 14-15 cm (two rows of brickwork). The floor is cut to the size of the stove base.
According to the dimensions of the stove base, following the rules for bandaging the seams, lay out one row of brickwork. After this, lay out the second layer of waterproofing (two layers of roofing felt or roofing felt). The second row of brickwork must correspond to the floor level or be higher, but not more than 3-5 cm. At this point, the laying of the furnace foundation is considered complete, then the laying of the furnace body begins.
Foundation for the stove
The figures below (2, 3) show solid foundations. External solid foundations made of small stone, crushed brick and gravel are laid out using boxes made of boards. The boxes are filled with layers of crushed stone up to 10 cm, carefully compacted with a tamper and filled with cement mortar. External slag concrete foundations should be 7-10 cm wider than the dimensions of the furnace base in each direction.
External solid foundations made of small stone, crushed brick, gravel and cinder concrete are also not brought to the floor level by 14-15 cm. The first layer of waterproofing made of two layers of roofing felt or roofing felt is laid on top of the foundation leveled with cement mortar. After this, the first row of brickwork is laid out according to the dimensions of the stove base, then the second layer of waterproofing is laid out. A second row of brickwork is laid on it, which should correspond to the floor level or be higher, but not more than 3-4 cm.
Rice. 2. Solid foundation made of small stone, crushed brick and gravel. 1 - floor; 2 - two rows of brickwork; 3.6 - waterproofing; 4.7 - leveling layers of cement mortar; 5 - external foundation made of slag concrete; 8 - foundation in soil made of crushed brick and gravel; 9 - soil
Rice. 3. Solid foundation made of rubble stone and brickwork. 1 - floor; 2 - external foundation made of brickwork; 3 - waterproofing; 4 - leveling layer; 3 - foundation in the ground; 6 - soil
On rocky and rocky soils, foundations are not made in the ground, but an external foundation is laid out from the surface of the soil. To save building material, external foundations can be erected on two columns (Figures 4, 5). In this case, foundations in the ground can be built solid, as mentioned above, or separately for each column. When laying brick columns, whole bricks are placed along the edges, and halves are placed in the middle. The width of the columns should be equal to the length of 1-1.5 bricks.
Rice. 4. A foundation of two columns connected by laying bricks with separate foundations in the ground. 1 - floor; 2 - waterproofing; 3 - columns made of brickwork; 4 - foundation in the ground; 5 - leveling layer; 6 - soil
Rice. 5. A solid foundation in the ground, connected to an external foundation of two columns covered with reinforced concrete lintels. 1 - floor; 2 - waterproofing; 3 - leveling layer; 4 - reinforced concrete lintels or slab; 5 - foundation in the ground made of rubble stone and crushed stone; 6 - soil; 7 - brick masonry columns
The distance between the columns is covered with reinforced concrete lintels or a reinforced concrete slab. After leveling with cement mortar, one row of brickwork is laid according to the dimensions of the furnace base. A second row of brickwork is laid over the laid waterproofing, which must correspond to the floor level.
If the distance between the columns is no more than the length of two bricks, then the columns can be connected by running bricks into the continuous plane of the foundation. In this case, the columns do not reach the overlap of 5 rows of brickwork (see Fig. 4). After connecting the continuous plane of the foundation, the first row of brickwork is laid according to the dimensions of the base of the furnace, waterproofing is laid on it, after that - the second row of brickwork, which should be at floor level.
During the construction of furnaces, the pressure on the ground gradually increases, and the settlement of the foundation also increases. With the completion of the laying of the stove and chimney, settlement of the foundation stops. Between the foundations of the walls of the building and the furnace, sedimentary joints 5-7 cm thick are left, which are filled with sand. Settlement seams are left due to varying degrees of settlement of the walls of the building and the furnace.
In the upper floors of buildings, furnaces can rest on a lower furnace or on special beams (steel, cast iron, reinforced concrete) embedded in the walls on fireproof partitions, which are provided for by the building design.
Construction device
The main parts of the fireplace are the firebox and chimney.
The main functional parts are the firebox and chimney. There are also other important components:
- heating device;
- valve;
- ash pan;
- lining;
- grate;
- forced convection system;
- safety doors;
- fire cutter.
The external device consists of a cladding and a portal. The latter serves for decoration and maintaining a certain style of the room.
Installation of the fireplace can be done using separate parts purchased in the store, or you can create it yourself from the necessary building materials. An industrial firebox is usually made of cast iron or steel. Do-it-yourself masonry is possible using refractory bricks.
Installation of a stove-fireplace
The simple installation process consists of several steps:
- floor preparation (the base is laid out of brick);
- installation of fire-resistant walls;
- laying tiles on the base;
- construction of a flue or chimney.
How to install the stove? This question is asked by every summer resident who has just built a summer house. First of all, prepare the base. A flat base is mounted with plasterboard, plywood or glass magnesite using self-tapping screws. The base with slabs looks great, smoothly transitioning into a ceramic floor or podium.
Walls in heat-reflecting tiles are made according to the same instructions as the base. Heat-reflecting sheets are primed and tiled. The primer is applied in two layers, and the tiles are glued with heat-resistant glue. Again, it is appropriate to make decorative elements in transition areas. The same ladle can be beautifully decorated so that it does not seem out of place next to the stove.
It is now fashionable to collect smoke waste from ready-made “sandwich” chimneys. They are already ready, they just require assembly into a single structure and mounting. In addition to sandwich chimneys, you can make brick and asbestos chimneys. Brick ones will last you longer than all other types because they do not deteriorate from prolonged use. Exiting a chimney through the ceiling is labor-intensive, but through the wall it is more convenient.
The sequence of actions when installing a chimney looks like this:
- The first part of the chimney without insulation is attached to the pipe so that it does not melt due to prolonged burning.
- The hole for the pipe is made in the right place and, if necessary, treated with thermal insulation around the chimney.
- The height of the pipe is 4-5 meters; as it rises, the chimney is secured with brackets.
- A spark arrestor with a mesh is installed at the upper end of the chimney. It prevents moisture and snow from entering the chimney.
Methods for increasing the efficiency of a brick fireplace
Proper determination of the dimensions of the firebox and proper execution of masonry work allows you to increase the efficiency of fireplaces with an open firebox to 35%. As a rule, this figure does not rise higher. To double the efficiency of the design, it is given some features of the oven - meaning the installation of a door. So that the opportunity to enjoy the burning flame is not lost, the door is made of heat-resistant glass.
In such cases, the fireplace insert with a door often has a “stove” configuration. As a result, a change in the nature of heat transfer is achieved, because the percentage of radiant energy drops by an order of magnitude (with an increase in the degree of heating of the massive masonry). These heat accumulations will gradually enter the home over a long period of time after the flame in the fireplace firebox has died out.
Another option for how to properly install a fireplace stove is to install a fireplace insert in the brickwork. To prevent overheating of the metal structure, its direct contact with the brick is prohibited. In such cases, when installing a stove in a house with your own hands, a small ventilation gap is left in this area. From a functional point of view, this combination can be called a closed firebox in a heat-intensive brick casing.
Video description
This video clearly shows an example of violation of the rules for installing a sandwich chimney:
- The position of the pipe is not observed. It is installed strictly vertically. When insulating main walls with foam plastic or mineral wool, long dowels are used to secure the chimney.
- There is no ebb on the side roof slope. In this case, precipitation can get on the insulation and impair its functions.
- Insufficient overall vertical height. This error leads to poor traction.
Problems arise when using low-quality insulating material. Cheap insulation shrinks over time, so there is a possibility of local overheating of some parts of the chimney.
Compliance with fire safety rules when choosing a location
Determining the location is closely related to the type of materials from which the house is made. If there are surfaces (walls, floors, ceilings, furniture) made of wood and other flammable materials around the intended installation site, then the safe distances at which the fireplace should be removed from them should be taken into account. At the same time, removing the device from a wooden wall is only one of the fire safety rules. It is equally important to ensure reliable thermal insulation of combustible surfaces and the floor in the area where the heater will be located. Insulation around the stove can be made from:
- basalt wool
- drywall
- ceramics
- bricks
- decorative non-combustible materials
- natural and artificial stones
Attention! Reliable thermal insulation should also be implemented in places where the chimney passes through walls, ceilings and ceilings.
If you want to eliminate the need to install insulating surfaces, you can choose a central configuration oven (suspended, round, cylindrical). But in this case, you will still need to insulate the floor (foundation or sheet of non-combustible base).
Expert advice
Before purchasing the necessary materials for arranging an external chimney, the power of the equipment is determined. It affects the diameter of the pipes. You can also use these expert tips:
- if the heating equipment is equipped with forced draft, then it is not necessary to increase the vertical section of the structure; it is enough to remove the horizontal pipe;
- a horizontal section that is too long helps slow down the smoke flow (the value should not exceed 1-1.5 m);
Rules for installing chimney pipesSource krovgid.com
Inspection holes are installed not only on the outer part of the structure, but also on the internal horizontal element.
Service life of the external chimney
The service life of the structure depends on the material of its manufacture and correct installation. When used correctly, ceramic pipes will perform their function for up to 40 years. A brick chimney can be used for more than 50 years. Stainless steel will have to be replaced after 15-20 years, but it all depends on the thickness of the metal. Galvanization has the shortest service life: up to 10 years.
The durability of the structure is affected by the heating temperature of the exhaust gases. A high-quality sandwich system will last up to 20 years. Structures last longer if heating equipment runs on gas or pellets.
Features of installing a stove in a timber house
Regardless of the type of furnace you choose, several basic rules must be followed when constructing or installing it. Firstly, strict compliance with fire safety requirements, the specific list of which depends on the type of product and the structural design of the particular building. Secondly, during operation of the stove, you should strictly follow the instructions for its correct use. Thirdly, it is necessary to regularly carry out maintenance of the furnace, which will increase its durability and operational safety.
Briefly about the main thing...
Chimneys can be single- or double-walled. Based on the material of manufacture, metal, brick structures and structures made of sandwich pipes are distinguished. The last option is optimal for private houses. When installing a chimney, the rules for its placement in the room are observed. Its functionality, as well as the presence of draft in the heating equipment, depends on the correct determination of the diameter and height of the structure.
The installation technology through a wooden and brick wall is the same, but there are some nuances: wood is more susceptible to ignition and requires maximum protection. During installation, you must comply with fire regulations, and also take into account possible errors.
Types of stoves used in log houses
In practical house building today, two types of stoves are used for log houses - metal and brick. Each option provides the owner of the building with certain advantages.
The advantages of a brick kiln are as follows:
- slow cooling, which increases heating efficiency;
- high level of fire safety, since the brick has fire-resistant properties;
- affordable price of material and work on brickwork;
- Possibility of application even for two- and three-story houses.
The main disadvantage of a brick oven is the large mass and large dimensions of the structure, which occupies a considerable part of the usable space of the house and requires the construction of a special foundation. The main advantages of metal furnaces include:
- compact sizes and stylish design of modern products;
- fast heating and use of different types of fuel;
- the relatively small mass of the stove and ease of installation;
- low cost of the product itself and its installation.
The disadvantages of a metal stove are a continuation of the advantages. The main ones are rapid cooling and a higher level of fire hazard.