Dutch oven, its structure and principle of operation
The Dutch oven is one of the most popular wood and coal heating systems. It is still quite common in modern homes. One of the advantages of a Dutch oven is its design. You can build such a stove without experience, just pay close attention to the process itself.
Initially, the Dutch oven had a solid firebox, then the Dutch themselves made changes to the oven, adding a blower and grate. After this, the facade of the stove was simplified; it was no longer arched, which made it possible for people without special qualifications to build such stoves. Typically, coal was used for fuel.
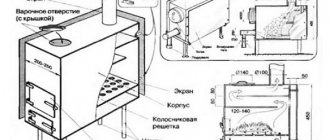
Dutch oven - is a rectangular stove lined with tiles or tiles, designed for heating rooms. It has a vertical chimney and due to this, a large return of heat energy is obtained.
During the time of Columbus (15th century), the Dutchwoman began to resemble a certain design and, from the 16th century, gradually began to gain popularity throughout the world. At the beginning of the 18th century it became very popular in almost every family; and by the 19th century it dominated all types of heating. And to this day it does not lose popularity, fitting perfectly into any interior.
Basic principles of efficient and safe combustion
The question of how to properly heat stoves in order to bask in soft warmth in a country house, in a country house or in a bathhouse worries many. At the same time, I want this process to be as simple as possible, but with maximum heat transfer.
Effective heating depends on three basic principles: the serviceability of the heating structure itself, the use of high-quality fuel and proper kindling.
If you heat the stove incorrectly, you won’t have to wait long for negative consequences:
- fuel consumption will increase by 20%;
- structural elements become clogged;
- the house will be poorly heated even if a large volume of fuel is consumed;
- the chimney will become clogged and it will become impossible to use the stove.
To avoid such problems, it is necessary to follow the basic principles of efficient and safe combustion of a household stove:
- Always check the suitability of the structure and all its components before each use.
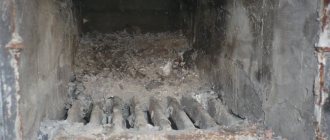
- To increase the flow of air masses for better fuel combustion, regularly clean the grate and ash pan.
- After the stove has been idle for a long time, first warm up the chimney (to do this, light a mini-fire in the firebox), and only then proceed to light the stove itself in the usual way.
- Place firewood, coal or briquettes strictly in the middle of the firebox, not allowing them to move to the rear; it is better to place the fuel closer to the door.
- Regulate the air flow by opening/closing the ashlar and combustion chamber doors.
- To improve draft, push in/out the chimney damper and viewer.
- Do not “gut” the fuel until most of it has burned.
Compliance with these simple principles will allow you to organize maximum heat transfer from the device and its safe use.
How the Dutchwoman works
The operating principle of the Dutch oven is quite simple: by lengthening the chimneys, stronger heating of the stove itself was achieved. This design went through many stages in its formation.
First of all, the occupied space was taken into account; they always did not have enough space, so they began to install the stove in the house itself. And for this we needed a design that did not take up much space.
The second was taking into account the climate of the local population; a stove was needed that could heat up quickly and at the same time use less fuel. This was achieved thanks to a “winding” chimney leading to the firebox itself.
Third, and also important: home owners then paid property taxes “from the smoke.” That is, the more chimneys, the greater the waste. For this purpose, a side outlet for smoke was invented to provide the ability to bring several pipes from other stoves into one pipe.
Fourthly, Dutch stoves reached 5-6 floors in height in the 14th-15th centuries; there were no modern concrete floors then, and therefore the main criterion for stoves was lightness and low fuel consumption.
Types of Dutch women
The first one is classic. Dutch in a classic style fits quite easily into any interior due to its shape and simplicity of decoration. Restored Dutch ovens are very valuable antiques. If we talk about the cost, then they exceed the cost of the building itself in which they are located.
The second is a Dutch oven improved with a fireplace.
The third is a Dutch column oven, these are mainly intended for seasonal use. This is a great option for a summer residence.
The fourth is a heating and cooking stove, with a stove.
In Russia, the Dutch oven is considered to be an analogue of improved heating stoves lined with tiles.
The definition of “Dutch oven” is of Russian origin. And the Dutch didn’t talk much about their stoves. Therefore, the word “Dutch” should be taken as a common noun.
Definition “Russian Dutch” or “Pseudo-Dutch” are ordinary Russian stoves that were decorated with tiles. The tiles themselves appeared in Russia thanks to Peter I, and then the craftsmen adopted the manufacturing technology. Then tiles were used to decorate all stoves and after that they began to be called Dutch, despite the fact that “Russian stove” and “Dutch stove” are practically opposite in technical terms.
Where did the bell-shaped “Russian Dutch women” come from in Rus'? According to history, they originated here. Peter I signed an order in which he ordered the construction of stoves based on Dutch models; in his opinion, this was supposed to help in the fight against frequent fires. But the order did not indicate the exact design and Russian masons took advantage of this. This served as the beginning of modernization and improvement of their Russian stoves. The improved Dutch woman, similar on the outside and completely different on the inside, came out again to Europe. The possibilities for its installation have changed noticeably; it could be either triangular or trapezoidal, which made it possible to install it, for example, in the corner of a room and take up virtually no usable space.
Arrangement options
There are many options for arranging a Dutch oven. Based on the design features, they are divided into three main types:
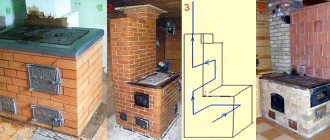
Classic model. Such Dutch ovens can have a rectangular or round shape. The appearance is simple, the finishing is made of brickwork. The interior of the stove consists of a large firebox and six smoke channels. Thanks to them, the heating of the Dutch oven occurs gradually, preventing cracking of the surface or the formation of cracks on it.
Comment! When laying a Dutch oven, special attention is paid to the height of the firebox. Its placement at a level of 25 cm from the floor ensures uniform heating of the room.
Dutch oven with stove. Some craftsmen complement the classic design of the Dutch oven with a stove. Thanks to this improvement, it becomes possible to organize the cooking process. To implement the idea, you will need to install a cast-iron stove over the Dutch firebox and decorate it with brickwork.
Design with fireplace. The key difference between this Dutch oven model is its wide base. The construction of the chimney and the ash compartment for the Dutch oven is carried out in the second row. A hole is also formed here to organize the cleaning procedure for the oven. Experts recommend forming a basalt cardboard gasket in such a stove, which prevents the formation of cracks and performs the function of isolating gas flows.
In addition to the design, Dutch women differ in external design options:
- The most common is classic brick cladding, especially since modern materials look quite attractive.
- Looking back into the past, you can find amazing models of stoves decorated with tiles. In this case, the means of heating the house turned into a real masterpiece of stove art.
- There are options for designing a Dutch oven using natural stone.
Naturally, the classic model of a rectangular stove with a brick lining has become widespread. Round designs of Dutch women have a number of disadvantages during operation, so they are extremely rare.
The difference between a bell furnace and a channel furnace
Among Dutch ovens there are varieties: channel and bell-type ovens. The canal view has a clearly visible hailo in the very center. Bell-type furnaces are much more difficult to calculate. Simple materials are not suitable for them. The main criterion is quality. The main difference between a bell-type furnace and a channel furnace is that all the gases remain under the “hood” for some time, thereby releasing part of the heat energy. The efficiency of this furnace is much greater than the efficiency of a channel-type furnace, this is explained by the fact that when firing a bell-type furnace, you can use various waste materials, as well as high-ash ones. But the advantages of a bell-type furnace do not end there; there is an equally significant element: a gas view. If you forget to cover the main view, then the heat will stop convection, and the air will simply stop inside the firebox and the vent inside, the cap will slowly cool.
The difference between a stove and a fireplace
It is necessary to distinguish between a classic, English fireplace and a Dutch fireplace. The Dutch treat everything quite economically, and this can be seen even in the stoves; they reduced the size of the firebox, but accordingly added the above-furnace part, and did not forget about the chimneys. The very difference between a stove and a fireplace is extremely arbitrary. In fact, a Dutch oven is also a fireplace; you just need to open the firebox doors. Built-in grates, or lack thereof, did not affect the combustion process. This is also a big plus for the Dutch woman. The round-shaped Dutchwoman also originated in Russia, although it is more likely of German origin: we owe its invention to I.G. Utermark. Utermarkovka (as it was called) tends to function in the order of smoldering; it differs from the Dutch one by its blind fireboxes.
In historical descriptions of utermarks the word “burak” appears, which meant smoke circulation. The top of the stove was covered with iron, thanks to this it was possible to save on building materials. They were built with 1/4 brick, this provided not only low financial costs, but also enormous heat transfer.
This stove did not cause much delight, because of the hot channels heating the cold ones, because of this, a lot of heat simply went to nowhere. Having drawn conclusions, we understand that utermarking is a stove for low-income segments of the population. It has quite a lot of negative qualities: it smokes, smokes, accumulates soot, makes cleaning very inconvenient, and as a result it is a fire hazard, but its big plus is its low cost. Mostly, hospitals, orphanages, shelters, and prisons were equipped with utermarks. At the beginning of 1927, V.E. Grum-Grzhimailo finally came up with the most true Dutch woman, of the round type. It turned out to be a bell furnace with grates in the firebox. It competed in efficiency with the Utermark furnace. Especially its heat transfer, since the circulation of heat inside plays into the hands. Based on their design, furnaces are divided into two types: two-stage and single-stage.
Materials for a Dutch woman
For the construction of a Dutch oven, low-quality material, even second-hand ones, will do just fine. As for the solution, it should be a clay solution with a consistency similar to sour cream. In the modern world, ready-made solutions are available in any hardware store. The packages tell you how to use them correctly. To put it together, a little skill in this matter is enough, the main thing is to follow the instructions. Even if it turns out a little uneven, it will not affect the quality of heat transfer.
Design features
The operating principle of a Dutch oven is as follows: passing through the first channel, the smoke transfers heat to the walls, and after cooling, it descends into the combustion chamber. After reheating, the combustion products rise again and then exit through the chimney.
When planning to equip your home with a Dutch brick heating stove, you should consider the following points:
- Possessing significant weight, the stove design requires preliminary arrangement of a foundation located at floor level. Its thickness should be 10-15 cm, the base of the Dutchman is made of concrete based on a reinforcement frame. A solid reinforced concrete slab located at the base of the floors can replace the foundation. Its dimensions exceed the dimensions of the furnace masonry by 5-10 cm in each direction.
- A characteristic feature of the Dutch oven is low requirements for the quality of building materials.
Often the masonry is made from hollow stones that have cracks and were previously used for other purposes. Although not attractive in appearance, such a Dutch oven does an excellent job of heating. Advice! For quality masonry adherents, it is better to stock up on solid ceramic bricks that have undergone a competent firing procedure. - The simplicity of the design allows even an inexperienced stove maker to take on the work of arranging a stove; it is enough to have the skills of bricklaying with dressing.
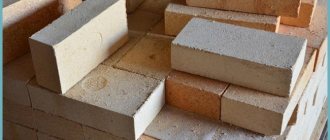
- To form a Dutch firebox, it is advisable to use high-quality refractory bricks. The connecting mixture is a sand-clay solution, brought to the consistency of sour cream. The mixture of sand and clay for laying the stove is mixed in a ratio of 2:1. For these purposes, you can purchase ready-made construction mixture.
Attention! When laying the furnace, it is not allowed to use cement; the mortar based on it will crack as a result of temperature changes.
For heating a dacha, a simple model of a Dutch oven, shown in the diagram below, is suitable:
If it is necessary to increase the height, alternating rows from 17 to 21 and from 18 to 22 is repeated the required number of times . This design is designed to heat a small room up to 20 m2. It is better to equip a spacious house with a more powerful stove design, providing heating of 50 m2. An example of it is posted below:
Furnaces Grum-Grzhimailo
The principle of constructing the Grum-Grzhimailo stove includes: constructing the stove with belts; therefore, its casing is, as it were, divided into compartments. Rows of bricks are laid out in a finished casing, using it as formwork; as they are laid out, the casing is simply increased, and so on until the end. The casing itself is made of durable iron; after installing the casing, it is covered with bricks. If the casing is installed crookedly, it may fall and the entire stove may collapse.
It must be remembered that Grum-Grzhimailo stoves have a rather serious drawback, this is a horseshoe-shaped channel for smoke, it constantly needs cleaning. Therefore, it is necessary to provide two cleaning flaps for this.
Round Dutch women
They are a regular brick oven with a brick casing. The case itself was laid out from facing bricks using cement-sand mortar. For even laying, we used formwork made from boards. Basically, it was laid out with spoon masonry, this gave a smooth outline and less thermal resistance. But this is not as simple as it seems, it is necessary to bandage the seams, both horizontally and vertically, this is the only way to get a good, strong stove. Of course, it will be quite difficult for a person who does not have sufficient skills to calculate the entire masonry, it is necessary that the body of the stove fits perfectly into the case, everything needs to be calculated accurately to avoid mismatches, in practice it happens that the body of the stove may not fit into the case , or vice versa, just fall out of it. There is an acceptable standard for the thickness of the seam between the body and the case of 13 mm. First, lay out 1 or 3 rows of the case (it all depends on the complexity of the selected oven model), leave until the solution dries completely. After drying, they begin laying out the body of the furnace; they do this using the same formwork, only this time using clay mortar. When these rows are dry, the formwork is removed and fixed a little higher, making an allowance downwards, and after that they continue laying the furnace further, strictly according to the scheme.
The top of the openings in the case is reinforced with self-made concrete lintels. Iron is no good there. After two weeks, they begin plastering and lining the stove; after the finish has dried (about another two weeks), you can try to make the first firebox. If everything went well, they check it a couple more times, only this time filling the firebox to the maximum.
Now there are blanks for the construction of round Dutch ovens available for sale. The kit includes: the casing itself, grates, doors, views, valves, as well as detailed instructions for the construction of these furnaces. The only thing that will have to be additionally built is the foundation, preferably with waterproofing.
After all successful firings, the stove is considered suitable for use.
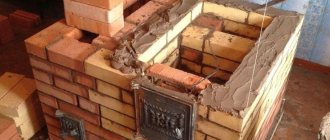
Laying a Dutch oven with your own hands
The Dutch oven is built in rows with your own hands, so we will analyze everything step by step.
1 row. The very beginning needs to be arranged on the top sand cushion, measuring the location of each brick with a measuring tool. We must maintain horizontality. We cover the laid bricks with cement mortar - this is both the beginning of the laying and the final stage associated with the base.
2nd and 3rd row. They are simply laid in layers, naturally, treated with a solution. It is advisable to mark each of them with a number for accuracy. From this moment we begin to deal with plumb lines that will form the horizontal further. Stove makers have a term: “bandaging” is when a fresh row overlaps the joints on the previous one. Dressing needs to be learned at an early stage.
4.5 row. From the fourth row, the construction of the ash pit begins. Assembling from the stand. We lay whole bricks not flat, but on an edge. For your information, the back wall is done dry, because further operation involves adding bricks in this area. Of course, it is not prohibited to install a small door, but this is detrimental to efficiency.
At the same level we install a door that needs to be secured to the base using soft wire. The seal can be easily maintained using an asbestos cord.
6,7,8 rows. Construction of the ash pit continues. We simply cover the top with masonry so that there is space left for the fire grate.
From 9 to 13 rows. This is the gap for the combustion chamber arrangement. Here we install the door using soft wire and asbestos cord as fastening.
14,15 row. We close the firebox next to the brickwork, leaving an opening at the back. Excess smoke should be removed through it.
16, 17 row. Arranging a hole for cleaning, where you will need a small door similar to an ash pan. To save money, you can install bricks without mortar. It will reduce heat loss.
Rows 18–26. More responsible levels, because work is underway with the return channels. Made in the style of a classic coil. There should be no protrusions on the inside of the walls, so it is better to coat the coil with clay.
27 row. The final stage of masonry. All channels are closed. Only the chimney should remain. It is better to move the bricks a few centimeters back.
29, 30 row. A chimney is formed and a valve (view) is installed. The latter will regulate draft and retain heat after complete closure.
For beginners! During each stage, you need to maintain vertical and horizontal.
Chimney for a Dutch oven: we work with our own hands
This is a mandatory element, and the height parameters are always individual. The main thing is to comply with fire regulations.
Those spaces where the chimney borders a roof or other structure must be insulated. Gaps may only be closed with non-combustible material.
The difference between the stove itself and the chimney is the composition of the masonry mortar. If we make rows with clay and sand, then we need to add 1/10 of the cement to the chimney. The end is the installation of a metal cap on an already built chimney.
Final finishing
Finishing work is always organized according to your taste. The stove is whitewashed with your own hands and lined with decorative tiles. You can use tiles. But if the process of creating the stove was careful, then the front part of the brick will look excellent.
For safe operation, a sheet of steel is fixed to the floor, which will protect against accidental release of coals, and, therefore, fire.
Having completed everything that was planned, do not rush to start using or drying. It takes at least 15 days to dry
Moreover, it is important to dry the inside naturally, so the door to the firebox is left open
And after 2 weeks they begin full-fledged ignition. Before starting use, it is better to burn a small amount of paper to test traction. If everything is done correctly, the smoke will pass into the chimney without problems.
https://kladempech.ru/pech-gollandka/
https://pechiexpert.ru/pech-gollandka-kak-postroit-svoimi-rukami/
Pros and cons of Dutch
Pros:
- Small changes have virtually no effect on its strength and efficiency, the main thing is that there are no big changes.
- It is quite functional: a Dutch oven can be made simply as a heating oven, or a hob can be installed. This will not change the heat transfer unless the chimney technology is violated.
- Very compact dimensions - the size of a Dutch oven can be reduced to 0.5x0.5 m. Well, that is if there is very little space.
- Economical consumption of building material - for an ordinary large Dutch oven you will need 650 pieces. bricks, and if you compare at least with an ordinary Russian stove, it will require at least 1300 bricks. The heat transfer of a large Dutch oven is the same as that of a large Russian stove, which will require 2500 bricks.
- The small weight of the stove, due to the economical consumption of building material: which is very important when calculating the permissible weight for many types of interfloor ceilings. This was especially taken into account in Holland, when modern floors did not yet exist.
- The height stretch above the combustion part does not affect the efficiency of the stove and does not impair its performance. A Dutch oven can be “stretched” over 2 or more floors. There were cases of three and four-story Dutch women
- The use of various materials: the thickness of the walls is small and the design of the Dutch itself is not particularly sensitive to thermal deformation. Therefore, high-quality and refractory bricks are used only for laying out the firebox. In the modern world, in many dachas, and in many houses, there are Dutch ovens built even from hollow brick or iron ore (burnt brick), the heat transfer does not decrease, the main thing is to make the firebox from refractory brick.
- A practical temperature difference and a fairly simple gas duct: which will allow you to build in either a heating element for heating water or an oven.
- The Dutch oven heats up quite quickly and its ability to cool slowly. If it is used not for cooking, but for heating the room, then the consumption of fuel materials to maintain the room temperature is minimal.
- There is no need for regular combustion or accelerated heating. If you use a Dutch oven, for example, in a summer cottage, you won’t have to worry about cracks on the stove after a long absence. There is no limit to the consistency of its use.
- Huge heat output, a Dutch oven can heat 60 square meters. m, while an ordinary Russian stove can heat about 45 sq.m.
Minuses:
- The Dutch efficiency is estimated at ± 40%.
- If you forget to close the damper after heating, the siphon principle will operate; cold air instantly draws in, thereby facilitating complete cooling. But this is mainly a minus of channel type stoves.
- Not practical when using quickly burning fuel: branches, straw, reeds. It will burn very well, but it will be of no use, since the heat will go outside. Smoldering is required for optimal performance. This is how it is possible to warm up all the passages and, accordingly, obtain greater heat transfer.
- Not very high heat capacity. To maintain a certain temperature, about two fireboxes are needed per day, and more in winter.
- If you use high-ash fuel in your work, this will contribute to the sedimentation of soot in the chimneys. European cities, until the twentieth century, suffered from the most common problem of soot fires. But the chimney sweeps had enough work.
- Not practical in terms of heating: if this happens, carbon monoxide begins to be released.
Types of fuel for stoves
The most commonly used fuel for home stoves is:
The choice of a particular type of fuel resource depends on its three main characteristics - energy efficiency, availability and cost. Let's take a closer look at how each of the listed fuel types corresponds to these indicators.
Firewood
- They burn for a long time, giving an efficiency of up to 85%.
- Almost complete combustion with the release of only 1% ash.
- The combustion of one kilogram of wood produces 4500 kcal.
- Environmental Safety.
- Low cost.
- The wood must be cut down, sawn into logs or split into small fragments.
- Firewood absorbs harmful substances, so logs from forest belts that are located close to large cities are harmful.
- Chopped firewood needs special storage conditions - they need to be placed over a large area in an area with the least humidity.
Coal
- There is no danger of spontaneous combustion.
- The percentage of ash formation is relatively low - from 25% to 40%.
- High calorific value - approximately 6,000 kilocalories per 1 kg.
- Easy to store.
- Difficulty igniting. Without firewood it is almost impossible to light coal.
- Not every stove can be heated with this type of fuel. To fire coal, the stove must have an additional channel for supplying secondary air.
- Has a high degree of thermal conductivity.
- It burns for a long time.
- Ease of use.
- Does not create a spark.
- After combustion, it leaves peat ash - a useful fertilizer.
At the same time, peat has one, but very serious drawback - easy flammability. Therefore, you need to be careful when using the cake for heating, and do not store it close to a heating device or open fire. In addition, peat produces a lot of surface moisture.
In addition to the listed fuel resources, briquettes, which are a wood processing product, are often used for stove heating. They are environmentally friendly, retain flammable properties for a long time, and do not require special storage conditions.
