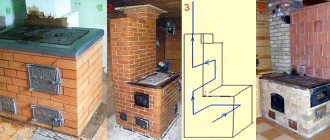
In ancient times, Russian people did not have the opportunity to “dig” into a wide range of building materials for one simple reason: the choice was not rich, but meager. Therefore, they had to build from what was at hand. Brick was a rather expensive, inaccessible material that only rich people could afford. The rest had to choose simpler, cheaper alternatives. One of them was often clay; houses were built from it and stoves were made. Everything comes back: the well-forgotten becomes relevant again, so many designs acquire the right to a second life. Nowadays, several “returned” materials and structures are of increased interest: one of them is a heating device made of clay. Those who find this topic worthy of study may be curious about how to create an adobe oven with your own hands, and what technologies are used.
What is an adobe oven?
If we delve deeper into the topic concerning other building materials used to create heating devices, then ceramic brick can also be classified in the same category, because it is made from baked clay. Our heroine is quite different from a brick structure: ready-made artificial blocks are not used for its construction.
Clay ovens are the most ancient structures, but even now they are traditionally used by many peoples to prepare original dishes of national cuisine. An example is the tandoor, which is becoming popular because of its convenience and practicality. The traditional brick oven was not always the only “Russian” design: peasants could not afford these parallelepipeds, so they made do with clay.
The first designs were very different from today's models. The first adobe stoves were quite large, and the chimney pipe was an element that was not provided for them. For this reason, it was necessary to install miniature windows in the ceiling or walls; the ceiling ones were called “upper windows.” After firing, they were closed with dampers. In addition to constant smoke, such stoves had another serious disadvantage: along with the smoke, the heat quickly left the home.
After some time, we learned to deal with this “imperfection.” Ceiling smokers were invented, which vented gases through wooden pipes, but they were already used with baked brick devices. Old and new cannot be compared: ancient and modern structures are heaven and earth. Nowadays, an adobe stove is a device that has compact dimensions and a chimney, which is not always a necessary element. The success of these structures is due to the ease of their creation and low cost.
Types and characteristics of furnaces
All furnaces according to construction technology are divided into:
- adobe;
- Komi-Permyak;
- round.
They differ not only in appearance, but also in characteristics, construction technologies and scope of operation.
Samannaya
Adobe refers to an ancient building material consisting of: sand, clay, straw. The advantages of such construction include:
- minimum costs;
- aesthetic appearance;
- high performance;
- simple construction technology.
It is a one-piece monolithic structure that can be placed in a country house or in a house.
If you are building a stove outside, make a canopy over it to protect the structure from various precipitation.
Miniature adobe structures can also be made on a long hike. To build it, you need to use plastic clay with a low moisture content.
The construction of adobe structures should be carried out in dry and sunny weather.
Under good weather conditions and with all the necessary materials and tools, you can build such a structure on your own in just one day.
So, to build an adobe stove you will need to prepare the following tools:
- beaters;
- large wooden hammers;
- tamper;
- knife;
- grater;
- scraper.
The construction technology itself is quite simple:
- The formwork is built and the prepared mortar is placed into it.
- The solution forms the firebox and chimneys.
- The oven is molded as if from plasticine until the first stage.
- Next, the overlap of the hogs is formed.
- The clay is laid in a layer of 10 cm and compacted.
- At this stage, the furnace and sub-furnace doors are bricked up.
- Next, using a spatula, the firebox is cut out.
To prevent the walls of the product from starting to deform, a small formwork is made inside and spacers are inserted.
- Next, we cut out the ash pit, combustion chamber, and chimney.
- After this, we install the grates and cast iron plate.
- The finished product must be smoothed with a grater and leveled with a scraper.
You can heat the stove for the first time without removing it from the formwork. When it is completely dry, carefully remove the formwork and carry out additional work: cutting through the doors and whitewashing.
Komi-Permyak
The Komi-Permyak clay oven was built in houses. It was built either on a foundation or simply on the floor:
- First, formwork from boards is laid, then it is filled with clay.
- All this is compacted, crushed stone is poured on top and again a layer of clay.
- When it comes to forming the bed, you need to make a fairly thick layer of clay.
- Next, we install the chimneys and cut out niches in the side walls.
- After heating, it is necessary to carefully remove the formwork and cut out the mouth in the shape of a semicircular arch. That's all, the product is ready for use.
It is best to let the structure dry at natural temperature. But you can also heat it, and if cracks appear after heating, they need to be puttied and can be whitewashed for an aesthetic appearance.
Round
The round clay oven is small in size. It can be built both indoors and outdoors. It is convenient because you can bake bread, pizza, cakes, and prepare various dishes in it.
You can also build a stove from other materials: brick, metal. But it is clay structures that are considered the most practical, functional and affordable.
Clay oven: advantages and disadvantages
If the owners are interested in the topic of “DIY adobe oven,” then most likely they are seriously considering this ancient alternative to traditional brick construction. Therefore, before making a final decision, it doesn’t hurt to find out about the pros and cons of a clay oven.
Advantages
The first and undoubted advantage is the availability of the material and its low price. For future builders living in rural areas, it is possible to independently prepare clay and sand. It is impossible not to mention other advantages of an adobe oven over its brick “rival”.
- The ability to build a heating partition in a shape that will allow it to fit into any place. You can also choose the sizes at your discretion. Brick does not allow you to come up with many options, and giving the structure an unusual shape is either very difficult or impossible.
- Uniform heating in the firebox, special thermal conditions. It is said that the taste of food cooked in an adobe oven is even different from food cooked in a conventional brick structure.
- There is no need for many different tools that become mandatory for the construction of a brick heating device.
- Long service life. If we talk about the distant past, those adobe ovens served their owners for a hundred years.
Eco-friendliness is the last but not the least important benefit on the list. In this case, we can talk about the absolute safety of natural materials used to build an adobe oven.
Flaws
They can be easily found in any design. The first of them is the need to stock up on a large amount of clay. Other cons:
- quite complex preparation of the composition: in order to correctly make the mixture, determine the optimal consistency, you need to experiment with the composition, and without practice and “close acquaintance” with the solution, the operation will take a lot of time;
- creating an adobe oven, it will take quite a lot of time, to a greater extent this concerns the drying period of a structure made entirely of raw clay;
- lack of projects, standards and all building codes: in this case, the author is actually forced to become a “creator”, inventing a stove from beginning to end;
- a risk that always exists: an incorrectly prepared mixture, an incorrect drying mode can lead to destruction of the clay device when heated;
- lack of professionals involved in the construction of adobe stoves: as a rule, such work remains the “task” of amateurs.
If you want to create an unusual design that could well become not only a stove, but also a decoration, then you can begin to become closely acquainted with it and the technology. If difficulties and potential mistakes are scary, then it is better to abandon the idea in time.
Advantages and disadvantages
In modern days, people have again begun to show interest in the original Russian adobe oven. They are built not only in rural villages, but also by people living in the city. The equipment can be erected on the street or directly in the house.
Clay stoves are used not only as a heating unit, but also as a decorative element that can be used to decorate a garden, a country house and similar buildings. The design is very simple, so it won’t be difficult to recreate it in any room. To make it, you only need to have a great desire to build, as well as clay.
The stove is gaining great popularity due to its obvious advantages:
- Maximum ease of construction - there is no need to spend money on expensive materials and tools. The design is created by hand and you don’t even have to use electricity.
- Compact sizes.
- Completely environmentally friendly - only natural materials that do not pollute the environment are used for combustion and manufacturing.
- Low cost. You won't have to buy anything from hardware stores. Even on sand, there is an option to save money - go to the nearest beach and collect the required amount there.
- Great practicality. The oven is used not only for heating, but also for cooking and drying clothes. It is also a good decorative element.
Despite the large number of advantages, any device also has disadvantages. The only downside is that you will need a lot of building material – clay. It needs to be mixed properly to get the right consistency. But if you conduct several experiments and practice mixing small quantities, then difficulties will not arise in this situation.
Technology for creating an adobe oven
The simplicity of the device does not mean that any master will quickly cope with the job and will definitely do it well. There are also plenty of nuances here.
Main material
Almost the most important stage is the preparation of clay. It is its quality that determines how reliable the future oven will be. The main requirement in clay is the ability to sinter even at relatively low temperatures. Craftsmen who are very familiar with this material (stove makers, potters) tend to mix several types of clay. In this case, it is possible to achieve the ideal mixture: both in quality and consistency.
There is one more requirement: clay prepared independently must sit for some time. And we are not talking about weeks and months. You need to store it outdoors for several years so that it freezes in winter and “fries” in the sun in summer. After this, the clay prepared in this way is ground and then passed through a sieve.
Now about the solution. It consists of sand, clay and water. However, there is no exact recipe with proportions, since in each area the clay has slightly different characteristics. The best clay is oily clay, which has a reddish tint. The ratio of components depends on the properties of the material used. Therefore, you have to create several samples, and then choose the best option from them.
If “lean” raw materials are used, then the amount of sand is reduced. For a fatty product, a larger proportion is required. In some regions, sand is not added at all. There should be a minimum amount of water in the mixture: you need to add just enough to get a thick, dense, homogeneous solution that is suitable for installation and does not immediately crumble.
Furnace technology
The structure is constructed using conventional formwork. In this case, the main requirement is dense laying followed by compaction. Decorative elements are sculpted by hand. The traditional material for reinforcement is rods, but for reliability, classic metal reinforcement is recommended.
This method is not the only option used. An alternative to this is making homemade bricks, which are dried in the open air, and then connected “the old fashioned way” - using a similar (clay) masonry mortar. This method is not much different from making a brick kiln, so it is up to the future author to decide which technology to choose.
Drying the structure
This stage is more extended than others in time. The reason is the need for natural drying at normal temperatures. The longer this process takes, the stronger the device will be. The minimum is defined: it is 2 weeks. But it is better to let the stove stand without operation longer.
After this period ends, the structure begins to gradually warm up. On the first day, a minimum amount of fuel is added to it so that the temperature remains low. In subsequent days, portions of “food” are gradually increased. It is recommended to carry out this preparatory procedure for a week or 5-6 days.
Construction materials
The first thing you need when creating a stove structure is a clay solution, of which you need a lot. In addition to the main substance, it also contains sand and water. During construction, they use oily, fine-grained clay, which has a slightly reddish tint. Before use, it is recommended to soak it in barrels or other large containers, then mix well.
Advice! To obtain an almost ideal homogeneity of the mixture, it is recommended to mix the clay with your feet, as they did in the old days.
There is no exact ratio of the ingredients of the clay solution, since in each area the material has its own fat content. In order to obtain a high-quality mixture, it is necessary to make several different compositions in small quantities and practically select the desired option.
Important! The quality of the functioning of the furnace structure depends on the quality of the solution. Therefore, ultimately the solution should be dense, thick and homogeneous.
Materials, tools for solution
First of all, the master needs to prepare a small set of tools and all the necessary materials. First, “a few words” about the latter.
Solution components
As already noted, the classic solution for adobe stoves consists of only three components: clay, sand and water. If a master is afraid to search for the ideal mixture on his own, then it makes sense for him to think about purchasing ready-made mixtures. Fire-resistant masonry mixtures are the best choice. They contain kaolin, fireclay and sand. All that remains is to add water and mix the ingredients thoroughly. In this case, after drying, the structure will be as strong as possible, with the same fire resistance as brick.
The second simple alternative, which does not require long preparation of the clay, is to purchase all the materials separately. If the master prefers this option, then he needs to remember that he will have to make and test several samples. The sand must be fine-grained, clean, and sifted. The ideal material is white quartz. Water is needed clean, without impurities and large amounts of salts, so it is collected in advance so that the liquid has time to settle.
Tools and proportions
To build a furnace (work with solution), you will need the following tools:
- wooden board, shovel;
- container for making a solution;
- electric drill and mixer attachment.
Before mixing, pour the dry ingredients into a container, then pour in water in small portions. There are two ratios for clay and sand: 1:1 and 1:2. The choice of proportion depends on the fat content of the main building material. If it is large, then it is better to use an additional portion of sand. If you have no experience in preparing solutions, then it is better to experiment with samples first.
Garden clay pizza oven
Nowadays, few people build full-fledged clay stoves with their own hands to heat their homes; most often they can be found in the garden in the form of a primitive stove for bread and pizza. This original model easily copes with baking dough products and effectively decorates a country plot.
Primitive pizza oven
The authors of the project used 600 kg of fatty clay and about 950 kg of mountain sand for construction, but the exact proportions depend on the fat content of the available clay. The thickness of the walls of the structure is 15 cm, the size of the internal diameter of the combustion chamber is 40 cm. It is important that the height of the chamber is 60-70% of its diameter. For large volumes of baked goods, it is recommended to increase the wall thickness.
A pipe is provided to remove smoke, but you can do without it. A reinforced concrete slab 6.5 cm thick was used as the base. The base is installed on a strong in-depth foundation. In this particular case, the outdoor clay stove was built on the basis of an outdated outdoor stove.
Construction begins with drawing - the outline of the future hearth is drawn on the slab, observing symmetry. You can make a template and then simply trace it. The contour is then filled with dense blocks made from a mixture of clay and sand, forming a base. Lay it underneath with fireclay bricks, achieving a flat surface. The finished oven door is attached to a concrete slab. Instead of wooden formwork, use a cardboard mold, filling it with wet sand. To prevent the sand from crumbling, it is covered with wet newspapers.
The floor is laid out of brick. The door is attached to the slab. The mold is made of cardboard and wet sand.
The walls of the clay oven are laid from pre-prepared bricks, carefully forming a dome over a sand mold. Having completed construction, it is advisable not to rush and let the structure “settle” for a couple of days. After this, you can clean the combustion chamber from sand. The first fires should be short-lived; you can use brushwood for kindling or burn candles inside. To protect the garden stove, it is necessary to provide a canopy.
The walls are laid out without mortar, achieving solidity. The thickness of the walls should be the same. All that remains is to cover the walls with clay
For curious beginners, we recommend building a miniature clay oven by practicing mixing raw materials, making blocks, and laying them. A smaller copy will decorate the site, and the acquired skills will be useful for baking a full-fledged garden hearth. If things don’t work out, you can turn to professionals and entrust them with the construction of the stove.
DIY adobe oven
The structure, made of clay mortar, is a full-fledged furnace, so the first stage of its construction is also the arrangement of a reliable foundation.
Foundation construction
It is necessary, but in this case the master will not need to make a super-strong foundation, which is often required for solid brick appliances. The work consists of several simple steps.
First, they dig a pit. Its minimum depth is 250 mm, its dimensions are 100 mm larger than the base of the stove. Then it is filled with a fairly liquid clay solution. Stones are laid in rows on top, and the mixture is poured onto them again, which is raised to the same 250 mm above the ground and immediately leveled.
Waterproofing is laid on the dried base: the traditional option is a double layer of roofing material. Two layers of boards (25 mm) are laid crosswise on top. This will allow the load on the foundation to be distributed evenly. The best alternative to wood is fire bricks. To arrange the pole and under, stones or bricks are laid, the height of the 00 layer is about 200 mm. They are also filled with clay mortar, but it is already thick. The mixture should cover the stones: the thickness of this layer is 50 mm.
Creating formwork, hammering clay
The external formwork is a box, its approximate dimensions are 600x1200x1600 mm. The internal part of the structure consists of two circles connected by boards. A hole is made in the front element, which will be necessary when the process of burning out the formwork begins. Its approximate dimensions are 200x200 mm.
Both structures are connected, the outer formwork is wedged. The solution is placed in small portions (100 mm each) into the space and hammered in with wooden hammers. On one side, the instruments have a flat surface, on the other, a wedge-shaped surface. The arch, corners and mouth are reinforced with rods (10-12 mm).
Checking the quality of the solution by drying
This method is a good option for determining the readiness of the mixture. To check the fat content of the solution using the drying method, you need to perform several simple steps:
- Mix the clay with water until thick, and then soften any lumps with your hands, if any. Next, you need to roll a small ball from the resulting mixture and place it between two flat boards.
- Squeeze the lump slowly until cracks appear.
To determine the fat content, it is necessary to take into account the degree of compression of the ball and the shape of its breaks. A normal solution is one in which a round lump begins to crack when squeezed to 1⁄3 of its original diameter.
Clay oven made of brick blocks
This is the second technology that allows you to build a structure from clay, but not buy bricks for this purpose. In this case, the solution is kneaded (preferably with feet) until a dense layer is obtained, on which foot prints are almost invisible. Its optimal thickness is 150 mm. It is cut into bars or bricks, which are used for masonry. The ends of homemade stones are cut “in half a tree” or “on a mustache”.
This kind of work differs from “brick” work. In this case, mortar joints are not made: to securely connect the elements, the same wooden hammers are used. Strong blows are delivered not only from above, but also from the sides. The laid rows are not moistened with water, as these areas will be unreliable. When going on a break, cover the surfaces of the laid rows with a dampened and well-wrung-out cloth.
To create a firebox of an original shape, formwork is used. It is burned 2-3 weeks after the construction of the structure. After final compaction, excess clay is cut off with a scraper. The prepared walls must be checked for horizontal and vertical. Possible wall thickness of the structure is from 190 to 250 mm. The more massive they are, the better the adobe stove will retain heat.
A “real” fire is lit only after 2 weeks. However, in order to give strength to the adobe stove and dry the clay faster, in the first days it is allowed to burn small portions of brushwood.
Clay oven construction techniques
There are two technologies for clay stove construction. In the first case, formwork is used, and in the second, an adobe oven is formed with your own hands from pre-prepared blocks. The first option is complex and is more suitable for small fires intended for baking bread and preparing baked dishes, while the second can be used to build a functional Russian oven.
Preparation of clay solution
To prepare the solution you will need clay, sand and water. In many regions, all this can be found absolutely free. Oily clay of a reddish hue is best suited for construction. Red granular clay is not suitable for kilns. If independent extraction of raw materials is difficult, then you can buy it in construction stores. It’s more profitable to buy in large packaging - it’s cheaper.
There is no exact recipe for the solution - the proportions depend on the fat content of the clay. In some areas, sand is not added at all, while in others it is required twice as much as the main raw material. The output should be a very dense and thick homogeneous solution.
Baking in formwork
It was no coincidence that the name of the adobe oven was given - the construction technology involves beating the mortar that fills the formwork with special wooden hammers. One end of the tool is flat - it is used to compact and level the surface, and the second has a wedge shape and is used for beating clay between the formwork. It will not be possible to build such a hearth alone - in the old days, neighbors were involved in the work, assembling teams of 15-16 people.
Formwork for baking
Making formwork is not an easy process; it is assembled from wood during the formation of the furnace, but all the details are prepared in advance. The most difficult thing is to correctly make the “work” for the firebox. The firebox blank has the shape of half a barrel, while the arc of the arch starts from the base and does not have straight walls - this enhances draft and provides good heat. The boards are sawn from the inside and tied to the parts with ropes so that after drying it is easy to remove the shape.
Modern adobe oven
Before placing the clay solution in a wooden “shirt,” the clay is beaten in small portions on the floor to get rid of lumps and voids. After filling the mold, cover the top layer with pieces of clay measuring 30*40 cm and cover the top. After three days, the spacers are removed, the mouth is cut out with a knife, and the front boards of the mortar are knocked out. The top formwork is carefully removed and covered with the error solution. If desired, stoves are cut out on the walls, which collect heat and decorate the hearth. You can think about the first firebox no earlier than in 2 weeks.
Construction of a clay block oven
To build a clay oven with your own hands using blocks, first make homemade bricks. To do this, the solution is kneaded for a long time, achieving a uniform composition and a dense layer. In the old days, this was done with feet and with the help of horses, later they pressed the clay with a tractor, and now they use all kinds of devices.
A well-compacted clay layer is chopped with an ax into blocks of the required size, without waiting for it to dry. A stove is built from the blocks, but no mortar is used to bind the bricks together, but the joints are compacted with hammers. To obtain a firebox of the desired shape, wooden formwork is made, which can not be removed, but burned during operation.
Stylish clay stove in a modern interior
It is allowed to start a fire only after final drying - after two weeks. In the first few days, small portions of brushwood are burned to dry the clay and give it strength. Over time, a clay oven only becomes stronger - the raw materials are baked and transformed into a monolithic structure.
Alternative - adobe oven
Since a do-it-yourself adobe stove is a topic that should be considered by those who have already chosen a favorite design for themselves, you should get acquainted with all types of clay stoves. Self-made adobe devices can rightfully be classified as such structures.
What is adobe?
This material is the second longest-living material; it has also been used almost everywhere for construction since ancient times. The composition of adobe includes clay, sand and straw. Reasons to choose this option:
- nice looking products;
- relative simplicity of technology;
- good performance characteristics;
- minimal costs for manufacturing the device.
The adobe stove is also versatile. It can be built indoors or outdoors, but in the latter case the device needs protection from precipitation - a reliable canopy. This is one of the popular options for summer cottages, where they prefer to build such devices in the fresh air.
The advantage of adobe construction is the possibility of quick construction in field conditions, if all the raw materials are “at hand” and travelers are in no hurry to “get off the ground.” Another plus is the speed of work.
Making an adobe oven
Stoves made of adobe - decoration of modern interiors
Many people want to build an adobe stove themselves. For those who don’t know what it is, let’s say that adobe is an environmentally friendly building material, the main ingredient of which is clay mixed with straw, hay, wood shavings, manure or other substances that increase its strength. To reduce shrinkage during the drying process, add a little more sand to the mixture. Depending on the purpose of the furnace structure, it can be of different shapes.
Clay → Brick → Kiln
In this article I want to describe my experience in working with clay, making bricks from it (in 1:6 format) and creating a scaled-down model of a typical heating stove PTO-2300
.
Introduction
Let's start with childhood.
I grew up in a stove-heated house. I have absorbed chopping wood, firing the stove, flames in the firebox, the noise of the wind in the chimney in winter, and the nuances of adjusting the draft with the blower and stove dampers from an early age. It was only in adulthood that I was able to return to the opportunity to sit by the fire again and throw some firewood. At the same time, a desire was born to understand the design of furnaces; their types and purpose; operating features; the differences and advantages/disadvantages of one type of heating from another. The reduced format, a kind of miniaturization, was chosen deliberately - with the same educational effect, we benefit in terms of time, volumes of materials used, effort, transportation costs, required space, etc. And you can always increase the scale.
Clay
The oldest natural resource discovered by mankind.
Anything was built from it: wall and roofing materials, stoves, houses, structures and structures, household and kitchen utensils, toys, crafts, works of art. It is available everywhere, it can be obtained in any area, the available reserves are huge. Over several months of research, I managed to find three clay quarries in the immediate vicinity (and I learned about another three or four potential ones, but did not visit). In them I dug up clay of different qualities and colors. I purchased two more types of purified professional clay for modeling at the store. The color palette of clays in nature is very diverse - from white and black - to the entire spectrum of red-yellow, as well as green, blue, etc. By the way, green clay was the first I encountered just 200 meters from home!
The most important thing if you start extracting clay yourself is to clean it from sand, organic impurities, debris and other inclusions. A special term has been coined to refer to this process: elutriation. The technology is very simple: the accumulated clay is dissolved in water and passed through a series of sieves with increasingly finer mesh. Large particles are separated, and at the output we have a suspension with fine clay particles. After settling, draining excess water and final drying of the clay, we obtain raw materials for further experiments.
You can store finished clay in plastic bags (without losing the required moisture) for years. Otherwise, this product does not deteriorate at all - it only gets better over time.
Bricks
After molding a few bricks by hand, I realized that this was an unnecessarily labor-intensive route.
In addition, the size range was too critical. It was necessary to start making molds and introduce standards. In parallel with making the mold, I “combed” the Internet, articles and books to find out what technology could be used to make bricks in large quantities and quickly. The oldest and simplest is hand molding. Extruding the clay mass using screws or hydraulic pushers was also considered, but these too ambitious plans were left for the future
I figured that the stove requires about 300 full bricks (or about 500 with halves, quarters and other parts). Typically, in an hour and a half I was able to make about 20-25 bricks. Those. around 18-22 pm, tamping the clay into a mold and pressing the finished product onto a shelf for drying - and the complete set of products for assembling the oven is ready!
I used fairly dense, hard clay, smoothed out all the folds and irregularities, and at the same time cut quarters and halves (and also estimated the need for them). Therefore, this process was extended. Piece-by-piece production is the most time-consuming.
The Square-Cube Law
Having chosen a reduced scale of bricks, I experienced in practice the “square-cube” law, which says:
If a physical object is increased in size while maintaining the same density of the material from which it is made, its mass will increase in proportion to the magnification factor to the third power, while its surface area will increase by the square of the scale factor.
Example
: A real standard brick has dimensions of 250x120x65 mm and a weight of 3600 grams. The density of the brick is equal to 1846 kilograms per cubic meter. Let's reduce its size by about 6 times. We get linear dimensions of 42x20x11 mm and a mass of 17 grams.
Those. a change in linear dimensions in a ratio of 1:6 led to a change in weight in a ratio of 1:211. Anyone can repeat the experiment at home.
Practical conclusions (in relation to my experiment) - the mass of the entire stove model will be no more than 5-6 kg. Which is very convenient for construction, transportation and storage. Bricks of similar sizes are not yet miniature (tweezers and a magnifying glass are not needed), but they are no longer “cyclopean” - carrying extra weights and dedicating half a room for “construction” is not required. Everything is assembled quickly and conveniently on a table or windowsill.
Burning
Firing - I’m not touching it yet. For masonry, the strength of raw brick is abundantly sufficient. Roasting requires access to fire and ovens. In IT terms, these works can be separated into a separate subsystem and studied later. the Firing()
method contains a temporary “stub” that always returns “true”.
Bake
I began creating the stove by studying the theoretical and practical experience of mankind.
Everything on this topic has long been worked out in detail - fuel is expensive and burning it is expensive (in all respects). Therefore, people have come to a number of optimal designs that allow them to obtain maximum heat from a unit of firewood, coal, peat, etc. As a sample, I chose a standard heating stove PTO-2300
Design parameters:
- weight - 1260 kg
- area of heat-releasing surfaces - 5.5 sq. m.
- convective system - bell-shaped
- chimney - mounted
- type of finishing - jointing
Functional parameters: Heating capacity (with firebox for firewood):
- with a single fire - 1400 W
- with double combustion - 2300 W
Heating capacity (with anthracite firebox):
- with a single fire - 1600 W
- with double combustion - 2500 W
Consumption of materials:
- ceramic brick - 210 pcs.
- fireclay brick - 76 pcs.
In relation to heating stoves, the situation is as follows: it is worth distinguishing between the firebox (the place where combustion processes occur with the formation of heat) and the heat exchanger (the places where heat is removed from heated gases).
The firebox, as a rule, is made of fireclay brick (in my model it is white brick), and the heat exchanger (or a system of channels, an array of furnace that stores heat) is made of red brick. The need to use fireclay bricks is caused by the high temperatures generated during combustion.
Different types of fuel require a firebox of different sizes, shapes and designs. And different air supply. In the case of burning hard and brown coal, peat, a smaller firebox is required and the presence of a blower is required - air supply from below, through the grate.
I designed the stove for wood heating, so I took a larger firebox and chose a hearth type of wood burning. In our area, household stoves are not heated with coal and peat (they are simply not available) - they use only firewood.
The masonry itself is very simple. If you don’t use a binding solution, but simply assemble the furnace structure in rows, of course. Brick by brick, brick by brick... We are making a model, not a real sample, right? This means you don’t have to worry about undoing the seams. In addition, you may want to fire these bricks or use them in another project in the future.
By the way, stove makers say that a properly designed stove does not require mortar in order for all its elements to be held together as a single monolithic structure. Those. Sealing of seams is necessary only to ensure tightness and protect people from combustion products entering the living space.
I made trenches
- small heat-air channels connected to the room in the sub-furnace part, through which the air of the heated room circulates. The trenches increase the heat transfer of the stove and eliminate overheating of the floor on which the stove is installed.
Accessories
Initially, I wanted to mill the combustion and cleaning doors from duralumin, and cut the view valves from tin. Then I changed my mind and quickly assembled and glued these cardboard parts together. Getting into the dimensions and adjusting the appearance using this technology is much easier and faster. We cover everything with glossy spray paint, wait for it to dry - we get the products we need.
Grate or deck oven?
Initially, in ancient times, all ovens were built as hearth ovens.
In the process of evolution, man improved the stove by adding a grate to it (for burning different types of fuel). There are heated discussions about which furnace to build—a grate or a hearth. In grate fireboxes, firewood is stacked on a grate (grid). The grate, accordingly, serves as the bottom of the firebox. Primary combustion air is supplied to the fuel through the grate.
In a deck oven, firewood is placed on the hearth. The bottom is the solid floor of the firebox. In a hearth firebox, primary air is supplied through the firebox door.
I discovered a number of benefits
namely
a hearth firebox
(compared to a grate firebox, when using firewood as fuel):
- The cold core (air duct under the grate) disappears from the oven. The entire furnace array is heated more evenly
- wood burns almost completely, efficiency is higher, we get more heat
- less soot and ash are formed
- the bottom of the stove is heated not only by the flame but also by smoldering coals
- a low level of condensate in the chimney is ensured and tar does not flow. There is no entry of unburned fuel particles into the pipe.
- combustion in this case occurs from top to bottom, the fuel burns more slowly and more evenly, because only the top layer burns, and not the entire mass (as with grate combustion)
Design in 3D
Before starting work, I made a complete model of the furnace in a 3D modeling program. I use FreeCAD (but any other will do, of course). This made it possible to see the upcoming “scope of work”, study the nuances of masonry, imagine the complexity of individual operations and visualize the desired result. And, of course, I really liked the 3D design process itself.
In terms of time: creating a model of the furnace took four to five evenings (one and a half to two hours of work on average). And this takes into account the development of virtual masonry technology. The second time, I think I did it faster. By comparison, I spent ten times more time on the actual work itself. The benefits of 3D modeling and design are evident.
If it is not possible to implement your idea live, you can do it virtually. The brain doesn’t care whether it works with the image or its real embodiment. We get almost the same pleasure (endorphins).
Conclusion
In life there is always room for dreams, the embodiment of your unique ideas and extraordinary projects. Live life to the fullest, don't be afraid to let your imagination fly and follow it.
Features of making at home
making bricks at home
The technology of firing bricks in a ring kiln is slightly, but different. Products made at home are very primitive. The ovens themselves mainly consist of a hole in the ground and a fire, and standing ones can rarely be seen anywhere. Having considered all the options for the production of brick firing, we can conclude that if you do not have special knowledge and skills, then it is better not to take on such a task, because it is a very labor-intensive and complex process.
Let's take, for example, a home-made coal-fired brick kiln and consider statements that have at least a grain of truth:
- This produced building material is not in short supply, and anyone can buy it.
- Bricks can be used a second time. And if you engage in the production itself, it will be much more expensive than the purchase of this building material itself.
- A Hoffmann kiln for firing bricks cannot be created at home, because there will be a huge amount of spoiled and defective material. The fact is that if a product has been fired once, then it cannot be soaked a second time. So it's just wasted money. Of course, there are countries in which bricks are still made at home, but in such families the secret is passed on from father to son, and a certain caste of people does this.
- Some people believe that if you build a house from hand-made bricks, it will give it some special charm. Such lovers of beauty can find a video on the Internet on how to build a brick kiln with their own hands.
If someone decides to independently produce this building material to build their own home, they need to know a few simple rules. Firstly, each new batch of bricks requires its own laying method and firing. Secondly, the quantity of finished products will be significantly reduced. You can also use a non-firing product rather than constructing ovens, as is done in some countries.
Convection ovens made of cast iron and steel
Modern cast iron and steel long-burning cylinder-shaped fireplace stoves are valued for their original appearance and compactness. They are equally suitable for wall, corner and island placement. Metal hearths operate on the principle of convection, so small sizes and low heat accumulation coefficient are unimportant for them.
Metal stove-fireplace
To some extent, round metal stoves include “buleryan” - a popular series of devices for efficiently heating air. The design of this model includes heat exchange pipes surrounding the firebox. Cold air enters the lower openings of the air ducts, heats up and spreads throughout the room.
Operating principle of the Buleryan stove
Any stove equipment for the home requires a connection to the chimney. If you do not have the skills to work in this area, after purchasing a finished stove, you must contact a professional for qualified help.
