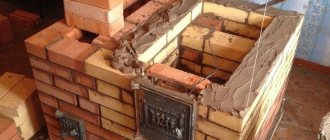
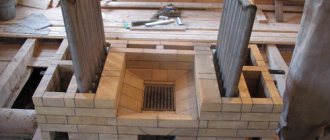
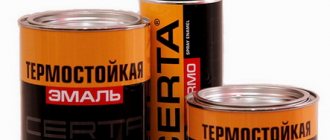
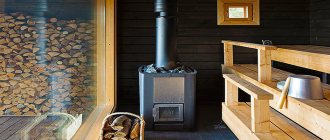
Fireproof paint for a brick fireplace will not only improve the appearance of the device, but also protect it from premature destruction, increase heat transfer, and increase fire safety. You can beautifully cover red brick fireplaces and stoves with painting material yourself. It is important to study the characteristics of paints for stoves and fireplaces and choose the right option for yourself.
Features of choosing a coloring material
Before you start painting stove equipment, it is important to pay attention to the fact that during operation the surface temperature of a stove or fireplace structure can reach 80-100 °C, and not every finishing material can withstand such conditions. Therefore, paint for stoves and fireplaces must meet the following specific requirements:
- The coating should be based on non-flammable components that do not lose their properties at extreme temperatures.
- Finishes for brick stoves are forced to endure temperature fluctuations, because the performance of the heated and cold surfaces is significantly different.
- When heated and cooled, the furnace structure expands and contracts, so the finishing coloring material must be elastic and adequately respond to such changes.
- The painted surface of the device is forced to have high heat transfer, so the bricks can be painted in a dark color.
- Oven paint should not release toxic substances when heated. High-quality heat-resistant paint consists of safe, quickly volatile components, and its base is water or a non-toxic solvent.
- To paint cast iron, heat-resistant paint is selected that can withstand temperatures above 600 °C.
Return to contents
What paints can be used to paint a brick stove in a house?
This type of paint adheres well to the surface of brick and can withstand high temperatures.
For brick kilns, types of paints are used that have heat-resistant, fireproof and toxicologically safe characteristics:
- Silicate. The material is based on liquid glass, mineral pigments and fillers. This is a heat-resistant paint that applies smoothly to the surface and does not require the use of special application techniques.
- Silicone enamel and varnish. This material withstands high temperatures better, does not crack, and retains the original appearance of a Russian stove for a long time. The products are thick in consistency, so they must be diluted before painting.
- Acrylic water-dispersion. The paint is based on water and acrylic dispersion. The material can withstand extreme temperatures, is elastic and durable.
- Fire-resistant paint materials and thermovarnishes for metal elements. The products consist of silicone resins; aluminum shavings are added to give the coating a glossy finish. Such paints are suitable for finishing the internal parts of cast iron or metal boilers, because they can withstand the temperature of an open flame and the red heat of steel.
Return to contents
Traditional painting methods
Homemade varnish
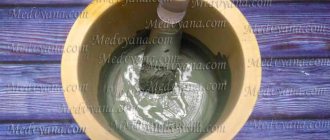
At home or in the country, you can whitewash the stove with paint prepared at home and using safe materials. A homemade solution is prepared in this way:
To make homemade paint you will need egg whites.
- Grind the red brick to a powder, then sift through a sieve.
- Add egg whites and fresh milk to the powder until the consistency of the mixture resembles thick sour cream.
- Mix the ingredients well.
The solution is applied to a warm surface, after which it is recommended to additionally coat the brick with drying oil or varnish. This coating will last a long time because the mortar protects the brick blocks from cracking and abrasion. This option will look great in an interior with natural accents.
To prevent the brick stove surface from getting dirty, it is recommended to first heat the device well, and when it is hot, apply a thick layer of beaten egg whites. Then the whitewash will remain clean for a long time, and any dirt can be wiped off with a damp towel.
Return to contents
Lime-chalk whitewash
This option is considered simple and cheap, but these are not the main advantages. A stove whitened with lime becomes moisture resistant and can withstand temperature changes. To prepare the solution, use:
For finished whitewashing you need to grind the chalk.
- crushed chalk and diluted in water;
- lime;
- gelatin or wood glue.
The resulting solution is applied to the surface in 2-3 layers; before applying it is important to make sure that the previous layer has dried. After this coloring, the stove becomes snow-white; if you want to make a blue tint, it is recommended to add blue to the solution. The stove is also often painted with water-based paint. When choosing a material, you should pay attention that the composition does not contain an emulsion of PVA and styrene butadiene, since these elements react poorly to high temperatures and quickly crack.
Return to contents
Do it yourself whitewashing with lime
Lime whitening is rarely used these days. But sometimes situations arise when you have to do this.
For example, renovation of an apartment with elderly parents who do not recognize other options other than lime whitewash. Or renovating the classroom where your children study.
Where is lime whitening used?
Whitewashing with lime is cheap, and lime has antiseptic properties. Due to the fact that lime is a good antiseptic, lime whitewash is recommended for kindergartens, schools, and medical institutions.
You can whitewash a garage or basement with lime - it’s not expensive, and the white walls and ceiling will make it lighter. Whitewashing of walls with lime is allowed. Once dry, lime whitewash creates a strong film, and the whitewash will not remain on your clothes if you lean against a wall.
Lime whitewash is used for finishing wet areas due to its moisture resistance.
Whitewashing with slaked lime disinfects the surface. For this reason, it is used for whitewashing cellars, chicken coops, cowsheds and other livestock premises.
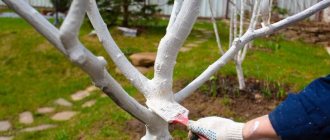
In gardens, tree bark is treated with lime whitewash.
How to whitewash walls and ceilings correctly
Finding a master who will take on this work is now difficult. The work is not the cleanest. The master will not work for low pay. The payment he quotes will seem too high to you. This means you will have to whitewash it yourself.
Do-it-yourself whitewashing with lime is not so much a difficult task as it is unpleasant, and most importantly, dirty. Before starting work, cover the floors and furniture with film if it is not possible to completely empty the room. Prepare protective clothing.
Lime consumption during whitewashing
The consumption of whitewash depends on the method of its application and on the surface being treated. When applying whitewash with a brush, the consumption increases. Brick walls will require more whitewashing than smooth walls.
Approximate consumption is 0.5 liters of finished whitewash per 1 m².
Lime is available in slaked and quicklime varieties. Slaked lime is sold in the form of powder - fluff lime, and in the form of lime dough.
Fluff lime is diluted in a ratio of 3 liters of water per 1 kg of powder. From one package of fluff weighing 2 kg you will get 6 liters of whitewash. This whitewash is enough for 12 m² of surface, provided that it is not brickwork.
Ready lime dough is diluted at the rate of 1 kg of dough per 3 liters of water. Remembering that one liter of whitewash can whitewash two squares of walls, it is easy to calculate how much lime paste is needed.
Quicklime, lump, must first be quenched, then diluted with water.
To slak the lime, add water in a 1:1 ratio. As a result of quenching, you will get a powder. If you add three times more water, you will get a lime dough. The powder or dough for preparing lime for whitewashing is diluted with water. From 1 kg of quicklime you get 10 liters of whitewash, ready for use.
It is difficult to calculate whitewash consumption with an accuracy of square. Lime is an inexpensive material, so nothing bad will happen if you buy a couple of extra packages.
How to dilute lime for whitewashing
Lime is diluted with water according to the proportions indicated above.
Quicklime is first slaked with precautions. When lime is slaked, a large amount of heat is released and steam is formed. Slaking lime may splash out of the container. Rubber gloves, safety glasses and thick clothing will help you avoid burns if lime gets on your skin.
After slaking, the lime is not immediately used for whitewashing; the solution must sit for at least two weeks. And only after you have waited a certain period of time, the solution can be diluted with water and whitewashing can begin.
Painting cast iron elements
During operation of the heating stove device, all cast iron surfaces become very hot. To restore the elements to their beautiful appearance, it is recommended to paint the surfaces with heat-resistant enamel, which can withstand any extreme temperatures. The material contains components that protect metal parts from rust and erosion. This enamel provides reliable protection for stove fittings.
Before painting, the cast iron surface is cleaned of dust and dirt. Next, it is recommended to sand the element with sandpaper, then degrease it with a solvent. Since the paint material for metal parts is sold in aerosol form, it is recommended to protect nearby walls with film or plain paper. Before painting, shake the canister, then proceed directly to spraying.
Return to contents
How to paint correctly?
The paint is applied to the building in several layers.
When we have decided on the type of paint, we begin to prepare the surface. To do this, use a scraper or a soft metal brush to remove uneven surfaces, dust, and dirt. To ensure that the paint is well distributed, it is recommended to further process the masonry with sandpaper. To make the heating device heat resistant, the surface is treated with a special primer. When the masonry is completely dry, apply paint in 2-3 layers with a brush or roller. When the main paint is completely dry, if desired, patterns and ornaments are applied to the surface of the brick oven.
Return to contents
The best ways to whitewash
We have selected four methods that are sure to suit you. Among them are both modern and those who came to us from past centuries.
Milky-chalk composition is the most ancient whitewashing method known today. To prepare the solution, you need 2 liters of milk and 1 kg of chalk. That is, the composition proportion is 2:1. Crush the chalk into dust, use a mortar. Sift through a fine sieve: there should be no stones or large fractions in the material. Pour in milk and immediately begin whitewashing.
Tip: at high wall temperatures, the composition may turn red. To avoid this, add 50 ml of blue to the prepared solution. This is about a quarter of a glass.
Protein and milk composition. To whiten the stove in this way, you will need 100 ml of milk, two chicken egg whites and 2 boxes of tooth powder. Mix the ingredients, you should get a mass similar in consistency to sour cream. Do not make large volumes of the product: the protein coagulates quickly.
Lime-salt composition. Everything is simple here: you will need 1 kg of lime and 40 g of salt (two heaped tablespoons). Prepare the solution as for regular whitewashing, dissolve the salt. After finishing work, light the oven. When heated, the salt melts and covers the surface with a transparent and even layer.
The modern method is putty . If there is a hardware store nearby, buy a jar of putty. Dilute with water in a ratio of 1:2 and start whitewashing. Experienced craftsmen claim that this treatment of the wall surface is durable, does not stain clothes and does not fade.
samanka.ru
Formulation options
There are many ways to whitewash a stove without damaging your pocket. They are all very simple to prepare. Let's start with the most budget formulations that have been tested by time.
Mortar
This composition is inexpensive and can be found in hardware and construction stores. Plays the role of an antiseptic and a high-quality snow-white coating. To prepare it and use it for a long time, you need to dilute 1 kg of lime with 2 liters of water, in which 40 g of salt have previously been dissolved. The solution should be thoroughly mixed and then applied to the surface of the oven without delay.
Lime mixture for whitewashing with good durability qualities Source mrrestavrator.ru
Preparing the oven for whitewashing
The first stage is surface preparation. First of all, the walls of the new oven are covered with a layer of plaster, then coated with clay. If it is old and the plaster is falling off in places, you need to re-plaster these places. You should choose a special plaster that is heat-resistant; you can buy it or make it yourself.
The treated surface is left to dry. This process may take two days. Less is not necessary, since the plaster may not dry out and then it will quickly fall off.
After two days, the stove is heated at least three times. This is necessary so that the clay layer becomes as strong as possible. But at first you should not heat the oven too much: its walls should become slightly warm.
Before whitewashing the stove, it must be covered with a layer of plaster.
If the old plaster holds up well, it only needs to be cleaned of dirt and soot. Soot stains can be easily removed with a wire brush or dish scrubber. To remove greasy marks from the surface, use a caustic solution (2%). Rust stains are removed with a solution of copper sulfate in a proportion of 100 g of powder and 1 liter of water.
Instructions for whitewashing the stove
Before whitewashing the stove, you should decide on the material used. After all, the preparation of the solution and the application process itself depend on this.
To whitewash with lime, you need to follow a few simple steps:
- Carefully remove the old layer of whitewash, especially where there is heavy dirt. To do this, use a wire brush or dishwasher. If whitewashing is carried out for the first time, then first seal all the chips, cracks and seams between the bricks.
- Wet the stove with water. It is better to do this in parts, as the whitewash is applied. If possible, wash off the remaining soot.
- Fill existing cracks and restore chipped plaster.
- Dilute the product with water until smooth and apply it to the oven surface using a brush or sponge. If necessary, apply a second coat. To avoid harmful effects of the material on your hands, you should use rubber gloves.
- Leave the material to dry.
Important! Putty for whitewashing the stove is used in the same way. Only to prepare the solution is to take part of the material and 2 parts of water.
When whitewashing with chalk, powdered material is used for the oven. It is purchased at hardware or construction stores. To prepare the mixture, 800 g of chalk are diluted in a liter of water and applied to the surface. The resulting solution takes on a gray tint, but do not be alarmed. Once the chalk dries, the stove will turn a beautiful white color.
To prepare a mixture of tooth powder you will need: 4 packs of product and egg yolks, as well as 200 ml of milk. Mix all the ingredients and after 10-15 minutes you can spread it on the heated stove. The consistency of the mixture resembles oil paint.
Regardless of what you use to whiten the stove in your home, when carrying out the procedure you must follow several rules to avoid stains on the surface:
- Pre-moisten the oven using a soft cloth or sponge;
- the solution is applied to a cold surface, and when using tooth powder - to a warm one;
- when whitewashing, use a wide paint brush or roller;
- the first layer is applied horizontally, and the second – vertically;
- preferably no direct sunlight;
- To avoid staining the door, cover it with paper.
When choosing how to whitewash a stove at your dacha, you can use proven methods or purchase a ready-made putty composition. The main thing is to choose the right tool for whitewashing and evenly distribute the product over the stove surface.
Methods for whitewashing a stove
After preparing the surface, the question arises of how and with what you can whitewash the stove in the country. Traditional options that come from time immemorial are lime or chalk.
Lime is good because it is harmless to humans and resistant to high temperatures. Lime whitewashing of the stove is non-toxic and can be used even in rooms with high humidity and in a bathhouse.
Lime powder must be diluted with saline solution to the state of liquid sour cream. Salt will make the coating strong and not prone to cracking.
Lime for whitewashing must be diluted to the state of sour cream.
A liter of diluted lime is enough to paint 2 square meters. m area. If drops get on the floor, they can be easily washed off, the main thing is to do it quickly, before the lime is eaten away.
Do-it-yourself whitewashing with chalk allows you to get a bright white beautiful color. The disadvantage of the coating is that upon contact with the surface, white marks remain on the clothing.
It is recommended to dilute it not with water, but with milk. To make the coating stronger and not “whitewash”, you can add wood glue.
The powder is sifted and diluted in milk, mixed, and additional components are added. The mixture with lime is heated, without allowing it to boil, until all components are completely dissolved. The resulting solution must be filtered and only then proceed to coloring.
To whitewash the stove, you can use a roller or a wide brush. There is no need to heat it before bleaching - it should be cold.
First, the surface is moistened with water and the first layer is applied. To paint a wall without streaks, it is applied horizontally. Without waiting for the first layer to dry completely, apply the second, but horizontally. The whitewash should be left until completely dry, and only then proceed to applying a design or ornament to the stove.
Do-it-yourself whitewashing of the stove
When you’ve figured out how to whitewash a stove in your country house or house, it’s time to get down to business. To do this, prepare a small paint brush, sponge or roller (the latter option is suitable for beginners).
- First, prepare the surface, remove all irregularities, and close the seams with putty.
- Dipping the tool into the prepared composition, apply the whitewash evenly to the surface of the oven, first with vertical strokes, and after the layer has dried, with horizontal strokes.
- Before whitewashing, lightly moisten the walls of the oven, and if we use a coloring agent based on tooth powder, warm them up a little (it is enough to heat the oven for 20-30 minutes).
High-quality whitewashing of a Russian stove and organization of decor on it Source masterkamin.com.ua
An old type stove, whitewashed with an aesthetically pleasing appearance Source sovet-ingenera.com
When whitewashing the stove, add a few drops of bluewash or on the tip of a knife Source drive2.ru
If the layer is applied unevenly, and after drying bald spots or yellow spots become noticeable, you should cover it with a layer of whitewash again or think about what else you can use to whitewash the stove.
A special tray or disposable trays are useful for whitewashing Source upak1.com
You can whitewash the surface of the stove with a soft roller with fluffy pile Source parki48.ru
A stove with an unusual design, lined with snow-white whitewash and accent design Source ro.pinterest.com
Whitewashed Russian stove in an ancient night hut Source schci.ru
Beautiful, neatly whitewashed white stove Source berizon.ru
Painting
Initially, beautiful Russian stoves were white, as if symbolizing the purity of the thoughts of the owners of the house. But in the modern world, stoves have not been installed in every home for a long time, so the meaning has gradually been forgotten. Many people find a simple white stove uninteresting, so they often make unusual paintings of stoves.
In order to paint a stove with your own hands, you do not need to be a great artist. Now it’s enough to choose the right stencil. You can find it in the store - a stencil for painting walls. Another option to make a stencil of a design for the stove is to find any image and print it on thick paper. The stencil is fixed to the surface of the oven using adhesive tape (or, if the stencil is “purchased”, it already has a self-adhesive base). It is then transferred to the surface using a colored pencil.
You can apply painting to the surface of the stove using a stencil.
If this is your first time dealing with such work, it is better to choose a simple design for a Russian stove. National patterns may be the best option: they will look harmonious on the stove, and also consist of individual simple elements that can be easily mastered.
You can color the pattern using whitewash, to which a coloring agent is added. It can be simple gouache, but it is better to purchase acrylic paints, which can withstand high temperatures much better.
The drawing itself is applied using ordinary artistic brushes of different sizes. After the drawing on the Russian stove is ready, it is not recommended to heat it for at least two days so that the paint can dry.
Photo gallery
What to whiten?
In stores you can find modern compositions for whitewashing stoves; they are made by different manufacturers, but they go under one name - putty. Before use, such a purchased composition must be diluted with water in a ratio of 1 to 2.
After treating the stove with it, its walls will have a well-groomed appearance for a long time and will not fade. Among the popular manufacturers, it is worth highlighting those whose products come at an affordable price and with a high quality composition.
| Brand | Volume, kg | Description | Price, in rubles |
| Master | 1 | For this product, you need to prepare the surface of the oven so that it is dry and dust-free. They can be used to repair small cracks and whitewash walls, ceilings and stoves. |
30
115
The best way to whitewash the stove in the house is up to everyone to decide for themselves; you can choose the appropriate one from the given means.
Furnace lining
In the old days, in rich houses, stoves were covered with tiles, but now they are almost completely out of use: tiles are more often used to cover Russian stoves in summer cottages.
You can also do the furnace cladding yourself. First, a layer of plaster is removed from the walls. The surface is covered with a mesh and secured with dowels. Then a layer of a mixture of cement and clay is applied. Using a level, level the surface so that it is perfectly smooth. After this, the stove is heated well so that the mixture “sets” and hardens.
After this, you can proceed to surface finishing. The tiles are laid and secured using an adhesive mixture. When tiling the stove, you cannot do without a tool such as a tile cutter - you will need it to trim the tiles. The last stage of work is grouting the joints. This requires a special mixture, but you can use the same one that was used for gluing. At this point, the cladding work is considered completed.
It is enough to put in a little effort - and the result will be a beautiful Russian stove, which will become not only a “heating method”, but also the real soul of a country house.
otdelkagid.ru
Paint selection
Some time ago, when there was a stove in every private home, there were few options for finishing it. Almost always, stoves were coated with chalk mixture or lime. .
In the first method, when using chalk, the masonry stained everything nearby. Therefore, lime was a better option. Both options are currently outdated - the modern construction market offers many products that allow you to finish the stove yourself.
A Russian stove, if it is built correctly, can heat up to a temperature of 80 degrees from the outside - many dyes can withstand such heat, but some can be destroyed under the pressure of temperature.
Note! Many paints based on natural drying oil, according to manufacturers, can withstand high temperatures - in fact, such compositions “do not fall off”, but become covered with dark spots in particularly hot places.
When thinking about how to paint a Russian stove, you need to pay attention to special paints marked “for stoves and fireplaces.”
Only these substances can withstand high temperatures without changing their properties:
- Latex - compositions whose properties include elasticity. Therefore, when heated, they can expand, but after that they return to their original form.
- Silicate paints are based on liquid glass, thanks to which this composition is not only resistant to high temperatures, but also has a beneficial effect on long-term heat retention in the room.
- Silicon-organic – paints that are designed specifically for finishing stoves and fireplaces. The heat resistance declared by the manufacturers is 600 degrees. At the moment, silicon-organic substances are the best option for painting a stove, but the price of such compositions is quite high.
- Water-based paints are also a good option. When heated, the water underlying the substance evaporates - and the surface is covered with a durable, temperature-resistant layer of color filler.
Note! It is not recommended to use oil-based paints - when heated, the oil begins to evaporate and release harmful substances into oxygen. Also, when painting a stove with oil paint, there will always be a smoldering smell in the room.
Preparing the paint
Previously, when heat-resistant paints did not exist, stoves were coated with self-prepared substances. Almost all of them were based on chalk or lime.
Today there is also a method for creating paint yourself - if the required substance is not in the store, you need to mix PF-283 varnish and turpentine in equal proportions.
The prepared mixture will be almost transparent. If colored paint is desired, you need to take gouache of the required color, dry it and grind it into powder. A mixture of varnish and turpentine, when adding gouache powder, takes on the color of the powder
Preparing for painting
Before painting, it is necessary to prepare the surfaces to be painted - preparation methods vary depending on the external stove material:
- Clay - before painting a clay stove, it must be thoroughly dried (if the work is carried out during the non-heating season). Before drying, you can use a wet sponge to slightly blur the top layer of clay - this will help level the surface a little.
Note! It is necessary to heat the oven several times (3-5) to dry it - undried clay tends to shrink.
If the clay shrinks greatly during drying, it is worth applying additional clay putty and drying several more times.
- Plaster – before painting a plastered stove, it must be sanded down with sandpaper. The plastered surface has a smooth, glossy appearance, which contributes to less heat transfer. To increase heat transfer, the surface is matte using sandpaper.
- Brick - if the paint goes directly onto the brick, as in the case of clay, it needs to be dried. If this procedure is neglected, the clay seams will be pulled deep into the brick. You also need to remove greasy stains from the surface - a solvent is used for this.
Furnace painting
Before staining, the selected composition must be prepared in accordance with the manufacturers' recommendations, which are indicated on the packaging. Some paints must be diluted with solvents, others can be applied at certain temperatures - individually for each substance.
To paint the stove, the following instructions apply:
- Applying a thin layer of paint to the surface of the oven;
- Repeat the first step 2-3 times and dry the layer after each application;
- Heating the oven and cooling to room temperature;
- Applying the final finishing coat of paint.
Note! If, after applying the first layer and drying it, the surface of the oven is not visible anywhere, you can reduce the number of paint layers to 2-3.
There is no need to apply fastening compounds, such as primers after plaster or clay, since almost all fastening compounds cannot withstand high temperatures.
To apply paint, you can use any tool - brushes, rollers, spray guns. Compositions with high thermal performance are also available in bottles with a spray nozzle, but the consumption with this method of application is enormous. You need to buy bottles with a reserve, taking into account the need for several layers of paint.
Painting a metal stove
A metal stove is often installed in a bathhouse; it can also be found in old private houses with a classic design, where the stove was used for cooking, and the metal stove was used to heat the room.
Painting a metal stove can be done in two ways:
- Cold painting - the coloring composition is applied to cold metal. The metal must first be cleaned of dirt and rust - it is better to use a grinding machine with an attachment for cleaning metal products.
- Burnishing - paint is applied to metal heated to a temperature of 100-150 degrees. This method is the best - the paint “tightly adheres” to the iron.
However! Carrying out bluing correctly without the help of a specialist is quite difficult. It is necessary to be able to heat the metal evenly to the desired temperature, and to correctly apply paint to the hot iron. That is, some experience is needed in this matter.
It is much easier to paint metal using a cold method - the modern market offers an abundance of thermal paints, for example, fire-retardant paints for metal Polistil - they protect the metal even from open fire.
Coloring elements
Metal elements - doors, dampers, adjacent elements - are painted with protective substances.
Furnace parts must be coated with paints that can withstand high temperatures. Parts that are only adjacent to the stove can be coated with a refractory compound or galvanized - for this, Zinga electrically conductive paint is used, which protects the metal from corrosion and other external influences.
The chimney heats up to a greater extent at the junction with the flame part, gradually cooling down in the upward direction. Also, the chimney is exposed to the influence of natural phenomena in the area where it faces the street.
Before painting the chimney, it must be thoroughly cleaned with a grinding machine. Then it can be coated with compounds - silicon-organic or water-based paint.
Conclusion
Considering that the modern market provides a wide selection of heat-resistant paints, there should not be a question about how to paint a sauna stove or a classic home stove. The main thing is to properly prepare the surface before painting and exactly repeat the technology for applying the composition.
In the video in this article you can see the topic clearly touched upon in the article.
nashaotdelka.ru
I am glad to welcome you, dear reader!
The other day we were relaxing with friends outside the city and the atmosphere was very conducive to peace, sincere conversations and revelations. But simply because we were sitting on this frosty evening near a neat Russian stove: well-groomed and attractive in appearance.
Today I would like to share with you how simply and with your own hands without large financial expenses you can create such comfort.
We will talk about stoves in your private home, or cottage, or bathhouse. It's no secret that, despite rapidly growing technologies, stoves remain an important element of our lives: be it a country house or a bathhouse, a summer house, or a garage. And proper whitewashing can give our stove an attractive appearance.
This could be a simple stove in your garage or an elaborate stove in a country estate.
Today I will try to tell you how and with what to whitewash the stove and turn it into an important piece of your interior. In the old days, all sorts of methods and materials were used for this process. And even now, while walking through the Internet, I came across many strange recipes for making whitewash: milk, honey, and eggs. It feels like something is going to be baked.
I don’t want to judge or discuss anyone, but, guys, if we are already talking about proven and budgetary means for whitewashing (those who have the opportunity and desire can paint the stove or tile it - we will definitely talk about this another time ), this is what we will talk about.
The most common materials for the work we plan are lime and chalk. Each of them has its own advantages and disadvantages. Let's consider lime. What can and should attract you about it:
- affordable price;
- resistance to high temperatures;
- moisture resistance;
- bactericidal properties;
- ability to heal small cracks;
- sticks well to the surface.
The disadvantages of lime include:
- the need to comply with basic safety requirements when working, since it is still an alkali;
- streaks and streaks are possible after applying the first layer.
As for the chalk.
The advantages can be confidently included:
- affordability;
- environmental, and importantly, safety;
- simplicity and safety during operation;
- relatively easy to wash off from the surface.
The disadvantages of chalk as a material for whitewashing, in my opinion, are obvious:
- still the same easy washability;
- possibility of visual defects (stripes, stains).
The choice, friends, is still yours.
However, I will not limit myself to explaining what materials can be used when whitewashing a stove, since I believe that this information is not enough for the task we set at the beginning of the article.
Let's talk further about how to properly and without unnecessary hassle and expense prepare a mixture for whitewashing our still unattractive stove.
If your choice fell on lime, then you can purchase it at any hardware store in the form of a powder, a dough-like mixture, or in the form of lumps. If it is lumpy lime, it must first be quenched. In other cases, you can immediately add it to the solution.
I want to repeat right away: do not forget about the safety rules when working with lime. Remember, your loved ones need you. These are truisms, but nevertheless, use the necessary attributes:
- Overalls and rubber gloves;
- Provide eye and nose protection;
- Use only metal tanks;
- It is necessary to work in a well-ventilated area, preferably outdoors.
So, let's prepare the solution. I can offer two simple options.
For option 1 you will need:
- fluff 400 g;
- water 600 ml;
- table salt – 5 g;
- drying oil – 0.3 tbsp.
Everything must be mixed well and it is highly advisable to pass it through a sieve to remove unnecessary lumps. To give a bluish tint to our composition, you can add ultramarine in an amount of 20-25 g.
For option 2 we take:
- dough 3 kg;
- water 10 l;
- table salt 100 g.
To get lime milk, you need to dilute the dough in half the volume of water. We dilute the salt in 1 liter of water and gradually add it to our solution, stirring constantly. You can also add coloring agents by pre-soaking them separately in water. Before you are ready to use the bleach mass, bring it to a volume of 10 liters by adding the required amount of water.
And then you can proceed directly to the bleaching process.
For work we need:
- A basin for the mixture itself;
- Paint brush or roller;
- Broom or brush.
First, let's clean the surface of the oven from dust and dirt with a broom or brush. If there are serious soot contaminants that have not yet been ingrained into the clay, then they need to be washed away. If the stove has not been restored for a long time, then you can use a metal brush. But be careful not to damage the plaster.
Carefully inspect the surface of the stove for chips and deep cracks. If we discovered such a nuisance, it is better to cover it up immediately so that the final result of our work is not spoiled as a result. I think it is clear that work must be done on a cold stove.
After all the preparations, we will begin the actual whitewashing process. It is completely simple and each of you can do it with your own hands. It’s even better if you involve your children in this activity, which is useful and has visible results, regardless of age. In this case, pay attention! Be careful not to ferment in the whitewash mixture.
More than once I have come across such information that before whitewashing it is necessary to wet the surface, otherwise the whitewash mixture will roll into lumps... To be honest, I have never experienced such problems. Someone will say that you only need to whiten from top to bottom, or from right to left... My friends, do what is comfortable for you and gives you pleasure! After finishing the whitewashing, leave the oven for 1-2 days to dry completely. If the result does not impress you (there are streaks, streaks, gaps) - don’t panic! Just repeat the process again.
Attention! Unlike whitewashing with chalk, lime whitewashing is reapplied to the first layer that is still wet. And, I assure you, you will be satisfied with the result.
If you don’t want to bend over or have physical limitations, or if the work area is large, it doesn’t matter: just use a spray gun or a regular vacuum cleaner.
And now another optional, but very impressive nuance! The finished whitewashed stove can be left plain white or painted with your own paints and in the style that suits you best.
It's very simple. Take 1 liter of water, dilute the gouache in the amount of water until you get the shade you want, when you achieve the desired color, add 1 egg white (we don’t need the yolk). Mix everything thoroughly. If you have a desire to make several shades, the flag is in your hands! You can use a stencil or your own imagination.
Enjoy your work and great results! Dream, dare, achieve!
Well, how did you like the article? If yes, then be sure to share it on social networks and subscribe to blog updates.
With this I say goodbye to you. Take care of yourself and your loved ones. Until next time.
Sincerely, blog author Maxim Aleinikov.
alemaksi.ru
How to whitewash a stove with your own hands in the house and in the country: putty, lime, chalk
Since ancient times, the stove has been considered the heart of the home. It can not only heat the room, but also cook food for the whole family. Our ancestors paid special attention to this item and specially painted it white. It was believed that it protected the house from the evil eye, troubles and kept the family hearth. Therefore, every owner of a private home should know how to whiten a stove.
Why is it necessary to whiten the stove?
According to traditions in Rus', stoves in villages were whitened to protect against the evil eye and misfortunes. It is a big sin if the stove is dirty or has any drawings on it. That's why people painted white. In addition, it was possible to carry out the plan only on certain days and on a waxing moon.
Nowadays, of course, they no longer pay attention to such features and can paint the stove in any color or draw attractive images. At the same time, they still continue to adhere to traditional rules and use whitewash for the stove.
The advantages of this method are as follows:
- quality of the material;
- ease of application;
- attractiveness of the coating;
- low cost of material.
The only drawback that stands out is the constant updating. As a rule, it is carried out 1-2 times a year as needed.
How can you whiten a stove?
Knowing how to whiten a stove, you can avoid further troubles, such as premature shedding of the material or its unsuitability for such work.
Lime
Lime is formed by annealing mountain limestone in mines. By adding water to the resulting solution, a white color is obtained, which is used for construction purposes. This whitewashing method is especially often used in the bathhouse.
The advantages of this method are as follows:
- inexpensive cost of materials;
- the solution has antimicrobial and moisture-resistant properties;
- can be applied to the old layer.
Important! Lime is an alkali, so precautions should be taken when using it.
Shpakril
Putty is a paste for interior work. The only disadvantages include the high cost of the material. At the same time, it has a lot of advantages:
- moisture-resistant material;
- Sold ready-made, all you have to do is add water;
- characterized by increased whiteness;
- the surface will not get dirty;
- small cracks are covered.
Chalk
Chalk is a natural material that is easily applied to the surface and easily washed off. The product produces a nice bright white color. The only disadvantage of chalk is its ability to leave marks, that is, every time you touch the stove, a white spot remains on your clothes.
Dental solution
Tooth powder is not a cheap option than whitening the stove in the house. At the same time, this method has a large number of adherents, since it has the following advantages:
- does not get dirty and does not leave marks on clothes;
- maintains an attractive appearance for a long time;
- the surface of the stove does not crack for a long time;
- You can drown on the first day after the procedure.
other methods
As an alternative, instead of the classic white color, you can use artistic painting. If you have the ability, then you should draw the selected picture yourself, otherwise stencils will come to the rescue. You can make them yourself or purchase them in a store. The template is pasted onto the surface and an outline is drawn, which is then painted with the necessary colors.
The base is the same whitewash with the addition of paints, for example, gouache, acrylic or water-dispersion. They tend not to crack at high temperatures and do not emit harmful substances. The image itself is applied with painting brushes. For large patterns, use cans of paint or a spray gun. After applying the design, it is not recommended to heat the stove for 2 days.
Instructions for whitewashing the stove
Before whitewashing the stove, you should decide on the material used. After all, the preparation of the solution and the application process itself depend on this.
To whitewash with lime, you need to follow a few simple steps:
- Carefully remove the old layer of whitewash, especially where there is heavy dirt. To do this, use a wire brush or dishwasher. If whitewashing is carried out for the first time, then first seal all the chips, cracks and seams between the bricks.
- Wet the stove with water. It is better to do this in parts, as the whitewash is applied. If possible, wash off the remaining soot.
- Fill existing cracks and restore chipped plaster.
- Dilute the product with water until smooth and apply it to the oven surface using a brush or sponge. If necessary, apply a second coat. To avoid harmful effects of the material on your hands, you should use rubber gloves.
- Leave the material to dry.
Important! Putty for whitewashing the stove is used in the same way. Only to prepare the solution is to take part of the material and 2 parts of water.
When whitewashing with chalk, powdered material is used for the oven. It is purchased at hardware or construction stores. To prepare the mixture, 800 g of chalk are diluted in a liter of water and applied to the surface. The resulting solution takes on a gray tint, but do not be alarmed. Once the chalk dries, the stove will turn a beautiful white color.
To prepare a mixture of tooth powder you will need: 4 packs of product and egg yolks, as well as 200 ml of milk. Mix all the ingredients and after 10-15 minutes you can spread it on the heated stove. The consistency of the mixture resembles oil paint.
Regardless of what you use to whiten the stove in your home, when carrying out the procedure you must follow several rules to avoid stains on the surface:
- Pre-moisten the oven using a soft cloth or sponge;
- the solution is applied to a cold surface, and when using tooth powder - to a warm one;
- when whitewashing, use a wide paint brush or roller;
- the first layer is applied horizontally, and the second – vertically;
- preferably no direct sunlight;
- To avoid staining the door, cover it with paper.
When choosing how to whitewash a stove at your dacha, you can use proven methods or purchase a ready-made putty composition. The main thing is to choose the right tool for whitewashing and evenly distribute the product over the stove surface.
Source: https://www.tproekt.com/cem-pobelit-pec/
Methods for preparing solutions for whitewashing
- The first and most ancient method is milky-chalk whitewash. Already from the name it follows that chalk and milk are used to prepare the mixture. The chalk should be finely crushed in a mortar and sifted through a sieve. Sifting prevents foreign particles from entering the solution, so this step should not be neglected. Pour the resulting powder with skim cow's milk. In order to eliminate yellowness from chalk, add a little blue or any blue dye, for example, ink, to the solution. We use very little dye, otherwise the whitewash will have a blue tint. The consistency of the solution should be quite liquid. Recommended proportions: for 1 kg of chalk we take 1.5-2 liters of milk. After mixing, you can start painting immediately.
- The second, no less popular, method is whitewashing using tooth powder. You will need 2 boxes of tooth powder, half a glass of milk and 2 chicken eggs. Separate the whites from the yolks, mix the whites with milk and gradually add tooth powder. Mix everything thoroughly, let it stand for 10 minutes and start whitewashing. The mixture turns out like sour cream, so it is convenient to use a brush for whitewashing. After painting like this, a Russian stove turns out smooth and even. The surface dries quickly and does not stain clothes.
- The third and easiest way to paint a stove is whitewashing using slaked lime. To prepare the solution you will need slaked lime and table salt. For 1 kg of lime we use 35 g of salt. In this case, salt acts as a fixative. After painting with lime, a film is formed on the surface, which protects the surface from premature abrasion.
- The fourth method is whitewashing using putty. Putty is a paste-like mass intended for interior work. To prepare whitewash, mix putty and water in a bucket in a 1:2 ratio. Then mix very well to eliminate all lumps, and you can get to work.
Options for whitewashing a Russian stove
To prepare the solution, you need 2 liters of milk and 1 kg of chalk. That is, the composition proportion is 2:1. Crush the chalk into dust, use a mortar. Sift through a fine sieve: there should be no stones or large fractions in the material. Pour in milk and immediately begin whitewashing.
Tip: at high wall temperatures, the composition may turn red. To avoid this, add 50 ml of blue to the prepared solution. This is about a quarter of a glass.
Protein and milk composition. To whiten the stove in this way, you will need 100 ml of milk, two chicken egg whites and 2 boxes of tooth powder. Mix the ingredients, you should get a mass similar in consistency to sour cream. Do not make large volumes of the product: the protein coagulates quickly.
Lime-salt composition. Everything is simple here: you will need 1 kg of lime and 40 g of salt (two heaped tablespoons). Prepare the solution as for regular whitewashing, dissolve the salt. After finishing work, light the oven. When heated, the salt melts and covers the surface with a transparent and even layer.
The modern method is putty. If there is a hardware store nearby, buy a jar of putty. Dilute with water in a ratio of 1:2 and start whitewashing. Experienced craftsmen claim that this treatment of the wall surface is durable, does not stain clothes and does not fade.
A stove so indispensable in a private home for its practicality of use, independence from gas and electricity, still has its drawbacks. We will not list them all, but according to the thematic feature of our article, one of them is the release of exhaust gases through fittings, cracks, etc., which as a result leads to the deposition of soot on its walls. At the same time, the stove can get dirty; the stove also loses its attractive appearance and stands out from the interior of the house. The solution to this problem is to whitewash the stove.
In fact, whitewashing a stove is not such a complicated procedure; it is similar to whitewashing a ceiling. The difference is that it is usually even more convenient to whitewash the stove, but with the peculiarity of applying a thicker layer of whitewash to certain parts of the stove.
The first step is to remove part of the surface layer where most of the soot has settled. If we don’t remove the soot and start whitening, it will begin to show through, and we won’t be able to whitewash this area to its original whiteness. It is best to remove the top layer with a steel wool for washing dishes or a metal brush, but this must be done more carefully with a brush, since it is harsher and its use can lead to deep scratches on the stove.
Next, you need to wet the oven with water. Applying whitewash to a dry oven surface will be difficult, as the whitewash will roll into balls and be poorly absorbed. The oven can be soaked with water in parts, in accordance with the speed of whitewashing and the areas intended for whitewashing. At the same time, try to wash off any remaining soot if possible.
Now you need to inspect the stove and if there are cracks, or the plaster has crumbled somewhere, then it needs to be restored. You can use a brush to apply the putty. Its advantage in use is that it follows complex surface contours, filling in depressions and chips with hair putty. Or use a more traditional putty spatula. For whitewashing and puttying, you can use putty. More detailed information about putty can be found in the article “Shpakryl”.
We dilute the whitewash solution.
Whitewashing equipment
You can paint a Russian stove using brushes, rollers, and spray guns. The simplest and cheapest way is to use a brush. Before starting work, it is advisable to soak the brushes in water for several hours. This will help prevent hairs from appearing on the surface.
If you are not sure that you can paint the surface evenly with a brush, then use a roller. Apply the solution with a roller in the direction away from the window. If necessary, whitewashing can be repeated.
A spray gun is most often used if the surface has a large area. In this case, it is better to whitewash together, one controls the fishing rod, and the second maintains the necessary pressure in the spray gun. Before whitewashing, be sure to adjust the sprayer so you get a more even application. And remember that the spray gun must be held at an angle of 90 degrees to the surface being treated and the distance should be about 30 cm.
How to whitewash a stove with your own hands?
First, you need to conduct a visual inspection of the stove; if there are deep cracks and chips on it, then they must first be covered in the old fashioned way with clay or specially purchased putty. It will not be possible to beautifully whitewash the stove without preparatory work; you need to carefully eliminate all defects so that your efforts do not go in vain.
Tools for work
Before whitewashing the stove, you should clean its surface with a broom or brush; for old exhibits, you can use a metal brush, but the main thing is not to damage the plastered surface with it. Then you need to determine the method of applying whitewash, for this you can use:
- A brush is chosen by those who have painted any surface more than once and are confident that they will do everything smoothly and without streaks. Before painting, it is advisable to soak the brush in water so that no hairs remain on the surface of the stove during whitewashing.
- A sponge is an alternative method; it does not give a clearly even color; it is used only for small stoves, since it will take a lot of time to obtain the desired painting density.
- Roller - suitable for both beginners and professionals; it covers a larger area with one stroke than with a regular brush. Applying the selected composition with a roller is very simple; the main thing is to move along the surface in the direction of the window to create uniform stripes.
- Spray gun - it is used for large stoves. It is easier to handle with two people: one person will maintain the required pressure in the device, and the second will monitor the uniform application of the composition filled into it. Before using it, you need to check the spray gun, and then constantly hold the spray gun at a right angle to the oven wall, while maintaining an optimal distance of 30 cm from it.
Whitening technology
- Initially, all seams, chips and cracks are sealed using a spatula and putty; the latter can be replaced with putty, using it in its original form, before diluting with water.
- After all the surfaces of the oven are smooth and without visible defects, you can proceed to preparing whitewash for them using putty, lime, chalk or tooth powder.
- The preparation of any of these compositions is carried out according to the recipe; the components are taken strictly in the specified quantities to obtain a mixture that is resistant to heating and cracking. It should be homogeneous and without lumps; its optimal consistency is liquid sour cream.
- The walls of the oven should be slightly moistened before whitewashing, but if a composition of tooth powder is used, they need to be warmed up. Then the selected whitewash option is applied to all surfaces.
- When using a spray gun, painting is carried out as conveniently as possible, but in the case of a brush or roller, a certain technology for applying strokes must be followed: first they are made vertically, and after the first layer has dried, they are duplicated by horizontal stripes. This method of applying whitewash can achieve its most uniform distribution and avoid gaps and yellow spots. If, however, they appear somewhere, then the whitewashing should be repeated, but after the oven has completely dried.
Some subtleties in whitewashing
Whichever whitewashing option you choose, before you start work, you need to prepare the surface of the Russian stove. In those places where there is especially a lot of soot, it needs to be removed. This can be done using a metal brush or a metal dishwashing sponge. If you skip this stage, then there is a possibility that this area will not be painted over and achieved perfect whiteness. After cleaning, the surface of the stove must be wetted with water, otherwise the paint will roll off. Water should not be applied to the entire surface at once, but in parts, immediately before whitening.
teplomonster.ru
How and how to whitewash a stove with your own hands in the house: instructions and tips
Few people can afford to cover the stove with decorative tiles or artificial stone even at home, let alone in their country house. This is why whitewashing the stove remains popular. Its composition must be selected with special care so that when using the stove it does not get dirty and you do not have to worry that cracks and chips will appear on it when heated.
A cracked and dark stove in the middle of the room will evoke melancholy and not create coziness. It should be whitewashed white to visually expand the room and create an additional screen to reflect light.
In addition, on the white surface of the stove it will be immediately visible where the combustion products are leaking. Whitewash solutions act as disinfectants. It is also worth whitewashing the stove so that clothes and dishes do not get dirty when they come into contact with its walls.
What to whiten?
In stores you can find modern compositions for whitewashing stoves; they are made by different manufacturers, but they go under one name - putty. Before use, such a purchased composition must be diluted with water in a ratio of 1 to 2.
