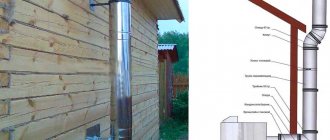
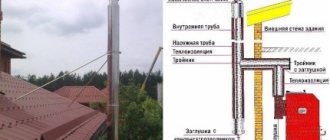
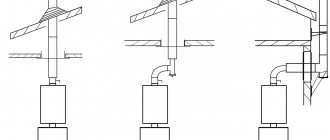
Consequences of poorly executed pipe waterproofing
Heating devices will operate in a safe mode only if the waterproofing is carried out correctly and taking into account all existing rules and recommendations. Waterproofing is carried out taking into account:
- A certain distance must be maintained between the rafter system and the roof, which depends on the materials used. Flammable – 150-300 mm, non-flammable – 100-250 mm.
- The sequence of layers in a roofing pie cannot be disturbed. It is necessary to block the possibility of moisture penetrating inside the prepared cake, since any liquid will cause rapid destruction of the layers. The insulation must be separated from the pipe by a gap. Otherwise, there is a risk of fire, since most insulation materials are flammable.
- The box is the required device for separating the roof from the pipe. The distance should be approximately 150 mm. Inside, the created box is filled with any heat-insulating material that has non-flammable properties.
Films that perform insulation tasks must be cut “envelope”, and then pulled to the cross beam so that it can be attached with nails. Waterproofing must be fixed with lathing, vapor barrier - with a special frame. All joints of the box and insulation layers must be edged with special tapes.
Sealing a chimney is a complex process and requires certain skills and knowledge
If the passage of a pipe or ventilation duct on the roof is not done well, then the following problems may appear in the future:
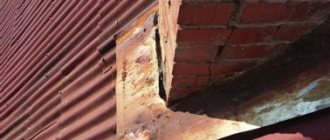
- Leaks. If the chimney is poorly waterproofed, leaks appear on the roof.
- The rafter system begins to rot. Leaking water hits the wooden elements of the roof frame. These elements become damp and then rot.
- Corrosion of roofing material. The inner part of the corrugated sheets, unlike the outer part, is not covered with a protective polymer film. Therefore, moisture getting under the profiled sheets causes corrosion.
- Dampening of the insulation layer. When moisture gets on the insulation, its thermal insulation properties are reduced by half.
The roof covering will last a long time if the joint between the ventilation or chimney pipe and the corrugated sheet is properly finished. For these purposes, a galvanized steel apron, silicone sealant, rubber or silicone elastic penetrations and self-adhesive waterproofing tapes are used.
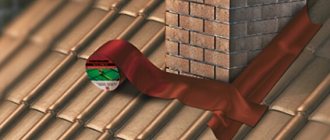
To waterproof a chimney that rises above the bitumen roof, Wakaflex self-adhesive tape is used. The stages of the work are as follows:
- Making cuttings from Wakaflex roofing tape.
- Pressing the cutting with a pipe case.
- Seal the gaps between the connected elements with special bitumen mastic.
Types of ventilation pipes and requirements for them
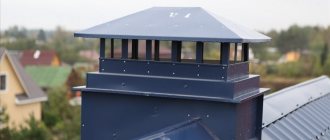
Air ducts located inside and outside the house are exposed to completely different influences during operation. The main requirements are for the final ventilation sections facing the roof of the building. They must meet the following conditions:
- flow area of at least 150 mm in diameter;
- smooth internal surfaces that do not impede air movement;
- structural rigidity to withstand wind loads and the weight of snow in winter;
- at the same time as being strong, have low weight to ensure ease of installation and not load the roof structure;
- corrosion resistance both externally and internally;
- fire safety.
Most of these requirements are met by ventilation pipes made from various plastics or galvanized iron. But each material has its own characteristics, pros and cons.
Plastic air ducts
Their main advantages:
- complete absence of a corrosive component,
- ease of processing during installation - cutting plastic of any cross-section with a regular hacksaw is allowed;
- the absence of welding seams ensures the smoothness of the entire internal surface,
- low cost.
A significant disadvantage of plastic pipelines is their low resistance to fire, which affects the fire safety of the entire structure.
Elements of plastic ventilation pipes
Galvanized air ducts
Their popularity is not inferior to polymer options due to the following advantages:
- small wall thickness (0.5 – 1.2 mm);
- mechanical strength ensures the reliability of external elements;
- high strength/weight ratio;
- variety of shapes and sections;
- availability of additional shaped elements of any configuration.
Galvanized ventilation pipe on the roof
Section shape
According to this parameter, ventilation pipes are:
- round;
- rectangular;
- non-standard section.
Rectangular shapes are considered more convenient when forming a passage through the roof. The original shape can provide additional strength. But for the unhindered passage of air, the best option is a circular duct.
Ventilation pipes with increased rigidity are made of galvanized steel using spiral-wound technology. With the same dimensions, they can withstand much greater loads. But their shape can only be round.
Ways to seal a gap in a slate roof
A slate roof adds its own nuances when it comes to creating a sealed pipe. Because of the slate, it is impossible to use any other parts for insulation, so the protection effect was achieved through a cement-sand apron, which was created as follows:
- All cracks must be covered with galvanized steel collars. This material does not corrode and can last a long time.
- The cement-sand mortar is poured so that it is above the roof level. If a cardboard cylinder was used in the process, then the procedure will be easier and simpler.
- Water drainage must be carried out using an inclined ledge, which must be located on the side of the ridge.
When sealing a chimney, do not forget about water outlets
If, for convenience, when pouring, a cardboard cylinder with plastic film or a plastic side was used, then these parts must be removed after the mass has hardened. Despite its appearance, this method of sealing is in no way inferior to alternative ones, which cannot be used on a slate roof.
Before purchasing slate for roofing, you need to weigh the pros and cons of such a material.
| Advantages | Flaws |
| Long service life. It can be half a century. It is considered the most durable of all roofing materials. | Heavy weight. |
| Not afraid of mechanical loads. Cement, chrysotile and water are used for manufacturing, which affects its strength. To improve this indicator, the slate is made wavy. | May be damaged if struck by a hard object. |
| Resistant to significant temperature changes. In extreme heat and severe frosts, slate does not crack or deform. Has a decent thermal conductivity coefficient. | Over time, waterproofing qualities decrease. |
| Avalanche danger is eliminated due to low thermal conductivity. | Moss may form in places that are constantly in the shade. |
| Meets all fire safety requirements. Does not burn, does not support combustion, can withstand temperatures up to 600 degrees, but becomes significantly brittle. Extinguishing a fire in a building with a slate roof is much easier and safer than with other roofing coverings. | |
| Waterproof. When choosing a standard 6mm slate sheet, it can withstand any precipitation. | |
| Noise insulation. Does not let in outside noise, absorbs sounds well, and blocks the roar of hail and rain. | |
| There is no need to install a vapor barrier, which reduces the cost of the structure being built. | |
| Ecological cleanliness. Does not contain toxic substances, does not pose a danger to human life and health. | |
| Easy to process and install. To work with slate, you do not need to have extensive experience or special education. It is enough to have the appropriate skills in construction. The sheets are cut using a grinding machine that has a saw blade for stone. If you don’t have such a tool, you can use a regular saw. To make mounting holes, you must have a drill with conventional drills or a screwdriver. The installation technology itself is very simple. Certain rules and sequence of actions must be followed. | |
| Beautiful appearance. The gray slate sheets have gone into oblivion. Today, supermarkets offer a wide range of colors of such roofing material. There are both bright shades and muted colors. | |
| Low cost. Unlike other roofing materials, slate has an affordable price. The only cheaper option is an uncut board covered with roofing felt. But this is unreliable and impractical. |
There are several ways to close the gap. Let's take a closer look at each of them.
One of the most convenient ways to eliminate the gap between the roof (tile or slate) and the constructed chimney pipe is to use moisture-resistant cement mortar and a decorative collar. All actions can be carried out independently, with a minimum amount of effort and resources. Moreover, the rafters and attic are isolated from moisture.
Required tools and materials:
- container for mixing the solution;
- ordinary water;
- a certain amount of dry construction mixture;
- collar;
- steel corners.
The procedure is as follows:
- The gap between the pipe and the roof is lined with stainless steel corners. If you have an oval or round chimney, it is advisable to use a sealant with an adhesive backing.
- A decorative collar made of galvanized steel is taken and placed on top of the chimney head. To prevent it from wobbling, it is secured with self-tapping screws.
- A viscous solution is poured into the free space formed between the decorative collar and the pipe, which is pre-mixed. The duration of hardening of the solution is one day.
- After 24 hours, the filling must be checked to ensure complete hardening.
- Sheet steel is taken (one sheet) and a device for draining water is constructed. A hole is cut out in a sheet of steel equal to the diameter of the decorative collar. Then the structure is put on the head and attached to it using self-tapping screws.
Using aprons is a great way to seal gaps between the chimney and the roof. Galvanized steel is used to make the apron. The color is chosen independently. The use of a steel apron will lead to reliable and aesthetic sealing of cracks. The steps for installing such a device are as follows:
- Waterproofing strips, 30 centimeters wide, are wound around the pipe. Moreover, this is done from the bottom up with an overlap. Fixation to the pipe wall occurs using adhesive tape or a special sealant.
- To isolate the place where the chimney exits to the roof surface, they resort to metal wall profiles. The lower fastening shelf is tucked under the roofing material and attached to the rafters using silicone sealant with a moisture-resistant composition. The top shelf is attached to the pipe wall.
- The final touch is the installation of a decorative apron made of galvanized steel and coated with a polymer. In appearance, it is a structure made of additional components interconnected with an overlap. It is attached to the roofing material and to the rafters with self-tapping screws.
This structure can be secured using special roofing screws, which are equipped with a rubber headband. It is valued because it is flattened during the twisting process, preventing water from penetrating inside. In the absence of such screws, it is necessary to take care of the rubber gaskets that are used with conventional self-tapping screws.
| rubber aprons Master Flash | An elastic device that resembles a stepped funnel, inside of which there is a reinforced mesh. This invention is used for any roofs with different slopes and using any roofing material. Thanks to the rubber apron, water will never get into the gaps. Any apron can be adjusted to the diameter of the pipe. To do this, it needs to be cut. The apron is attached to the slope using self-tapping screws. Fixation to the pipe is carried out using steel clamps. |
| sealing tapes Vakaflex | A tape made of rubber and having an adhesive backing. It is used to seal the gaps between the walls of the chimney and the soft roof. To make the structure more reliable, its inner side contains aluminum mesh. The tape is highly elastic and can take any shape. Easily attaches to the ramp. This tape is used along with decorative collars and aprons. |
The most important thing when constructing a chimney is not to leave gaps unfilled. Tightness is paramount, and it must be complete, without even the smallest cracks. All means for this are good, including the use of asbestos-cement mixture. The process technology is as follows:
- A steel sheet is taken that was left after the ridge was made, and a round hole is cut out in it;
- A ring made of sheet asbestos cement is placed on top of the pipe;
- To achieve complete tightness, the joints of the roof and chimney are treated with a solution consisting of cement and asbestos in a ratio of 1:2;
- This solution is used to fill the gap between the pipe and the slate sheet. To make everything go smoothly, you need to build a temporary cardboard limiter.
If it is necessary to seal a gap in a slate roof, an asbestos-cement mixture is used. The process technology is as follows:
- A round hole is cut in a steel sheet, which is used to finish the ridge.
- A ring of sheet asbestos cement is placed on the pipe.
- For complete tightness, it is necessary to seal the joint between the pipe and the roof with a solution of cement and asbestos, which are diluted in a ratio of 1 to 2.
- It is also necessary to fill the gap between the chimney pipe and the slate sheet with asbestos-cement mortar. For this purpose, you can make a temporary limiter from cardboard.
How is it carried out?
If the owner of the property notices that a leak appears near the pipe, then in most cases the cause is poor-quality roof sealing. To avoid leaks, specialists install aprons. Installation must be carried out in accordance with the algorithm:
- It is necessary to lay a drainage gutter. It is required to remove moisture from the pipe.
- To ensure maximum tightness of the joint between the roofing and the chimney, an internal apron is used for the pipe on the roof.
- It is necessary to cut out the waterproofing backing, which should be placed under the lower edge of the apron. If the roof is covered with sheet material, then the edge of the substrate must be brought out between the sheets from below. It is imperative to create a side to direct the water along the slope.
- The roof covering must be laid around the pipe.
- The external apron is installed using an identical algorithm. The only difference is in securing the top edge to the chimney.
- The insulating apron can be created manually or a ready-made version can be purchased. The chimney must pass inside the apron.
Attaching the apron to the pipe
What is the difficulty of arranging the junction?
Experienced roofers know well that one of the most difficult and critical stages is the connection of the pipe to the roof and its installation.
After all, several risk factors are at work here:
- high temperature of the pipe, which can heat almost any roofing material, especially wooden sheathing, to a critical temperature;
- technological gap between the pipe and the roofing, which must be completely sealed;
- a cap of snow that always accumulates on any obstacle it encounters on its way down.
Therefore, the main requirement for a chimney bypass is to be fireproof, durable and 100% airtight.
The chimney protective apron itself is made in two ways: from lead or aluminum flexible tape or steel sheet with a special coating.
The main thing is to do everything right:
The issue of the tightness of the junction of the roof to the chimney is usually solved with the help of an internal apron made of junction strips, and we will try to analyze this issue in detail with you.
Rules for arranging a pipe on the roof
Absolutely all residential buildings, as well as bathhouses, are equipped with boilers and stoves, which makes it necessary to install a chimney. The appearance of a pipe on the roof is a prerequisite and the final stage. But to improve functionality, it must be sealed so that water does not seep into the premises.
- The stove can be installed simultaneously with the construction of the house, or it can be delayed, but in any case, the installation location should be chosen in advance. The place under the stove must be equipped with a reliable foundation.
- The roof located on top of the installed furnace equipment must have a minimum number of beams, rafters and other elements. The chimney has considerable weight, so it will need reliable hangers and supports.
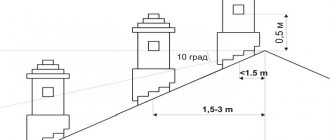
- The quality of traction depends on the height of the pipe, although the higher the pipe, the lower the heating efficiency, so you need to clearly determine the length of the pipe and choose the best option.
- The quality of draft is influenced by the wind, and therefore the pipe is brought out through the roof in close proximity to the ridge. To improve traction, it is necessary to make the upper part of the pipe expanded.
- To avoid the creation of condensation, it is necessary to resort to thermal insulation. The pipe must be made of materials whose heating rate is significant. If this is not done, the inside of the pipe will become covered with accumulated black liquid with an unpleasant odor.
Determination of ventilation pipe outlet points
They largely depend on the location of the air ducts inside the house. If possible, the location of ventilation pipe outlets on the roof should coincide with internal duct risers. The outer final ventilation section itself should be directed vertically. But at the same time, it is advisable to design an exit close to the roof ridge. With this arrangement, a minimum height of the outer part will be required. Therefore, the main air duct will be under the roof and will be protected from frost, snow and gusts of wind. And the entire structure will become more stable. An additional condition is the location next to the rafter beam. It will become an additional support to which the air duct will be attached.
Attaching ventilation pipes to rafters
If the exit point is located away from the load-bearing roof beams, then you will have to create a sheathing in the attic area through which the pipe will pass. And on the roof itself, install additional fastening elements to the roof.
Strengthening the air duct on the roof with guys
Materials used
The materials used for sealing are divided into three types, each of which has its own advantages and disadvantages.
It is a roll or shortened fibers. Positive qualities of vata:
- soundproofing;
- low density;
- fire resistance;
- adheres tightly to surfaces;
- reduced heat capacity;
- reduced thermal conductivity;
- resistance to physical impact (shock, vibration);
- resistance to chemical attack;
- heat resistance;
- elasticity;
- electrical insulation.
Cotton wool is the most common material for insulation
Roll filters
They are a mullite-siliceous composition that is included in the fibers of the composition. Positive qualities of roll filters:
- flexibility;
- it is permissible to use inorganic glue;
- easy to cut;
- the mechanical fastening can be firmly fixed.
In production, mullite-siliceous fiber is used. The disadvantage of the plates is their immunity to alkalis and acids at high temperatures. To eliminate the deficiency, additional insulation will need to be installed. Positive qualities of the slabs:
- soundproofing;
- low density, but higher than that of cotton wool;
- low thermal conductivity;
- resistance to physical impacts, such as vibrations;
- resistance to steam, water and oils;
- resistance to melting non-ferrous metals;
- elasticity;
- electrical insulating properties will be maintained at temperatures up to 800 degrees Celsius.
Sealing cracks on a corrugated roof
Galvanized chimney passage
If you need to seal small gaps between the pipe and the roof, a silicone-based sealant is suitable. Today, any hardware store offers a huge selection of sealants; your choice must be made on a heat-resistant option.
In addition to general recommendations, there are also specific specifics for sealing cracks for various roofing materials. Therefore, the algorithm for waterproofing differs on slate, tile, bitumen roofs, as well as corrugated roofing.
The best way to seal cracks in a tile roof is to use a cement-sand mortar. It is this method of sealing the pipe that will provide reliable protection against any type of precipitation.
Passage through metal tiles
In order to carry out waterproofing, it is necessary:
- Prepare a galvanized steel collar on the roof, thereby creating a space for filling with mortar.
- Fill the gap with cement-sand mortar, making sure that it fits tightly to the roof and chimney.
- Additionally, make an inclined surface on the collar to drain liquid.
If it is necessary to remove a smoke exhaust device through a roof made of corrugated sheets, ready-made pipe cutting Master Flash is most often used. This roofing element is very convenient to use and can be used not only for corrugated sheeting, but also for other roof materials.
Master Flash
Master Flash is an apron-cap, which is a rubber or silicone apron on an aluminum base.
Silicone Master Flash has a wider operating temperature range, but most often rubber is sufficient, which can withstand loads from -50 to 130 degrees.
Sealing cracks on a corrugated roofing looks like this:
- Make a hole in the cap so that it is slightly smaller than the diameter of the chimney.
- Put Master Flush on the pipe.
- Place a gasket under the base.
- All joints should be reliably sealed with heat-resistant silicone-based sealant.
- Attach the base to the corrugated roof with screws.
Sealing cracks in corrugated sheets
There are cases when such waterproofing is not enough and water leaks at the joint. The way out is to use a special self-adhesive tape reinforced with aluminum. It is very convenient to use, because there is no need for preheating before installation.
Choosing the right waterproofing material will help protect your roof from leaks and premature failure. Following the instructions and doing the job diligently will save you from any trouble.
After erecting the stove, it is necessary to begin installing the chimney. The pipe can be installed up to the ceiling without any problems. But then difficulties arise. It needs to be brought out through the roof. There are certain requirements for such a process, including fire safety measures:
- between fire-protected structures and the pipe itself, the distance should not be less than 25 centimeters;
- if the structures are not protected, then the distance to the pipe increases by another 10 centimeters.
Afterwards the pipe should go outside through the roof. Fire safety requirements state that the distance between wooden structures and the pipe cannot be less than 30 - 35 centimeters. Everyone wants to minimize the diameter of the pipe outlet through the roof, making it the same as the diameter of the pipe. But this is prohibited, since the presence of roofing felt and roofing felt in close proximity to a sufficiently hot pipe can lead to their fire. Therefore, the presence of a gap is a prerequisite.
The hole in the roof must be made correctly and in the right place. There is an elementary way. Take thick cardboard and wrap it on top of the pipe. Then the cardboard pipe is lifted up until it collides with the roof. Appropriate notes are made. Afterwards, part of the cardboard is cut off with scissors and the pipe rises up again. Such actions are done until the correct hole is drawn. This method works great for round pipes.
As soon as the pipe appears above the roof, it must be sealed. The main thing is to make sure that the roof does not leak even during heavy rainfall. To make the gap between the pipe and the hole airtight, it is necessary to resort to certain techniques.
Making an apron
It is considered the most common method. It is as follows. The abutment strips are taken. They are located at the bottom of the pipe. The strip must be attached to the pipe in order to mark the outline of the upper part of the strip on its wall. Using a grinder, using the marked line, make a groove. Installation of the internal apron begins from the bottom of the pipe.
The edge of the plank needs to be inserted into the groove. Then comes the process of assembling the apron, with all its elements being overlapped. The overlap of parts must be larger than 15 centimeters. The edge of the strip inserted into the groove must be treated with sealant. If necessary, the lower strips should be trimmed and attached using self-tapping screws.
This is the next step when sealing the gap between the pipe and the roof. It is commonly called “tie installation.” To do this, a material with waterproofing qualities is taken and installed under the lower element of the apron. Thanks to this element, water drains unhindered. It is especially necessary when constructing hip roofs. It is installed in such a way that rainfall flows into the roof drainage elements.
There are three ways to eliminate gaps between the pipe and the roof:
- A special apron with protective properties. It can be purchased at a specialty store or built.
- Stainless steel passage. It is thrown over the pipe itself, after which the joint that appears must be closed with a clamp.
The joint is covered with a rubber clamp
- Silicone sealant. Best suited in cases where the gap is small.
Depending on the materials, sealing methods also change. For example, sealing a pipe on a metal roof is only possible with the installation of an apron. In some cases, depending on the roofing material, individual sealing methods may be used.
Sealing on a roof with such a roof is only possible when using an abutment strip. When sealing a chimney on a corrugated roof, the following procedure must be followed:
- Decide on the installation location of the chimney.
- Partially remove the waterproofing membrane in this area.
- Create a metal apron, which should be assembled from the outer and lower abutment plans.
- Lay roofing material on top.
- The resulting joints must be treated with sealant.
Waterproofing a chimney on a roof covered with metal tiles
Increased ventilation system performance
The best way is to create forced air flow using roof fans. But it is very expensive and difficult.
At the same time, passive additions to the pipe can lead to improved air movement. Here are some of them:
- Deflector. Special attachment for the upper part of the ventilation pipe. Its internal structure, under the influence of wind, creates an area of low pressure at the very outlet of the air duct. This leads to increased traction.
Roof deflector
Practice shows that protection from moisture and installation of a deflector can increase the draft in the ventilation pipe by 10 - 30% in different weather conditions.
Sealing oval and round pipes
The chimney and ventilation pipes on the roof made of corrugated sheets can be made of galvanized steel and have a circular cross-section. It is much easier to seal the joint between them and the roofing material. To waterproof the junction of the pipe and the corrugated sheet, special elastic penetrations are used, for example, “Master Flash”.
- Select an elastic penetration of a suitable size, and then carefully cut the narrow part of the product so that it fits tightly around the chimney.
- It is necessary to remove the protective umbrella or deflectors from the pipe, and then carefully pull the elastic penetration onto the chimney to the very base.
- The base of the penetration is attached to the roof using self-adhesive backing, silicone sealant or roofing screws.
- The finishing is completed by installing a decorative apron on the chimney in the form of a cap to match the color of the roofing material, which protects the elastic penetration from ultraviolet rays, as well as from mechanical damage.
Angle elastic penetration
Installation diagram of elastic penetration
Ventilation pipes and a chimney on a corrugated sheet roof can be round in shape and made of galvanized steel. The gap between them and the roof covering is much easier to seal. For these purposes, elastic penetrations are used. They waterproof the junction of the corrugated sheet and the pipe. Penetrations are made for pitched and flat roofs.
Sealing a pipe on a roof made of corrugated sheets is carried out as follows:
- Purchase an elastic penetration of the required size. Then cut its narrow part so that it fits the pipe very tightly.
- Remove the protective umbrella and deflectors from the chimney. Next, you need to stretch the elastic penetration to the very base of the chimney.
- The base of the elastic penetration is attached to the roof using silicone sealant, self-adhesive base or roofing screws.
- At the final stage, a decorative apron is installed on the pipe. It has the shape of a cap and is made to match the color of the roofing material. This element protects the penetration from mechanical damage and exposure to ultraviolet radiation.
To correctly seal a round pipe, it is necessary to choose the correct size of the elastic penetration. If the product does not fit tightly to the chimney, then to create a seal you need to use a sealant and a steel clamp. It should be noted that the penetration may break during installation if its diameter is smaller than the diameter of the pipe.
When removing pipes through the ceiling, ceiling and roof elements, it is very important to remember fire safety. The distance between the pipe and elements protected from fire should be 25 centimeters. Unprotected elements should be located at a distance of 35 centimeters from the pipe.
It is much easier to install sealing on modern round chimneys. The simplicity of the process is due to the fact that no additional equipment is required, since the pipe is already equipped with everything necessary. Installation takes place in three stages:
- Prime the edge of the pipe where the waterproofing will be attached.
- Make a hole in the waterproofing, then glue it to the pipe using mastic.
- The sheet must be attached to the sheathing. The pipe is passed through a cap, between which a clamp with a heat-resistant gasket must be located.
Round metal chimneys
If there are no caps, then flexible elastic seals for pipes are used instead. The sealant can also be used anywhere else where roof insulation needs to be improved.
Selecting a pipe outlet location
The roofing pie will be airtight and reliable if you choose the right location for the ventilation ducts and chimney through the roof. The finishing of the joint will depend on the location of the passage. For a roof made of corrugated sheets, the pipe outlet is made in the following places:
- At a certain distance from the roof ridge (50-70 cm). This arrangement of the pipe outlet prevents roof leaks and reduces the likelihood of snow pockets. Also, with this arrangement of the pipe outlet, there is no need to disrupt the rafter system. To protect the joint between the roofing and the pipe, elastic penetrations are used, as well as additional elements necessary for assembling the apron.
- On the roof ridge. This pipe outlet location is considered the most suitable. This arrangement eliminates the possibility of snow pockets, condensation and leaks. But there is one significant drawback - a violation of the integrity of the ridge beam. In this case, when waterproofing a chimney on the roof, the joint between the roofing material and the pipe is filled with silicone sealant, and then covered with a decorative apron.
What happens if you leave the bayonet unfixed?
There will always be a gap between the chimney and the slate. It cannot be otherwise. Another thing is its size. Gaps can be significant or small. If they are too large, then the residents of such a house may have problems. It is to prevent moisture from penetrating under the roof or into the room that structures such as decorative aprons and collars and other seals are used, which can either be purchased or made at home.
If you do not seal the cracks, the following troubles may occur:
- The roof covering will wear out quickly. This is due to the fact that almost all materials that were used for roof waterproofing are coated with protective compounds on the outside, thereby being negatively affected by excessive humidity from the inside. The ingress of water leads to premature destruction of the material and, as a result, complete covering of the roof.
- Reducing the service life of the rafter frame. The rafters are made of wood. As soon as moisture gets on the tree, the process of rotting and its rapid destruction begins.
- Reduced efficiency of insulation material. Absolutely all materials used for roof insulation are water-resistant. When wet, they lose their basic properties, becoming unsuitable for further use for their intended purpose.
- Increased humidity level in the attic. When water gets inside the attic, it causes the air to become heavy and stale. This negatively affects the interior decoration of the room.
Bitumen roof waterproofing options
In this case, the chimney must be sealed using Wakaflex tape. In this case, the following procedure is observed:
- Creating a cutting from tape.
- The cutting is pressed using the case.
- Any gaps that appear must be sealed using bitumen mastic.
Bitumen mastic best protects against bad weather
