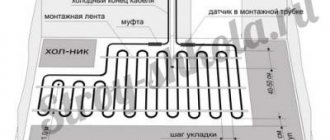
Connecting wires
Electrical diagram for connecting a heated floor
Connection of several strips of heating film is carried out in parallel connection using a distribution box. In the case of using a film with a grounding layer, the grounding wire is connected bypassing the thermostat (connection to the grounding layer is made using a separate terminal). It is recommended to use an 8-fold junction box with a depth of at least 25 mm. After connecting the wires, a control test of the system is carried out.
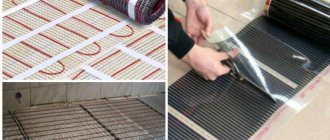
Carefully lift the protective layer and insert one connector plate so that there is reliable contact with the conductive busbar.
After connecting the connectors to the two copper bars, first crimp the clips with your fingers and then with pliers.
Strip the end of the wire and clamp it securely into the barrel connector with pliers.
Use 50x40mm butyl rubber insulation tape to insulate the copper bars. Copper busbars with connected wires are insulated in two sections (top and bottom).
Busbar sections free from connections are insulated with one piece of insulation.
It is necessary to carefully “wash” the contact area with your fingers, while 25 mm of the wires must be covered with insulation.
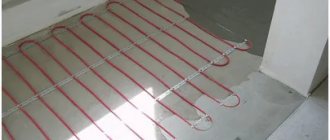
The wires are laid around the perimeter of the room in a 50-mm gap left or in a groove cut into the thermal insulation, starting with the strip of film furthest from the mounting box. Secure the wires with special tape. It is not allowed to lay electrical wires on top of or under the heating film. Route the wires from the heating film to the thermostat or junction box.
Is it possible to install a film floor under the tiles?
To answer this question, it is necessary to take into account the operating recommendations provided by the manufacturer. In particular, it says: “The product can be installed under tiles, wood, laminate, linoleum, etc.”
A thin electric film heated floor under tiles is installed quickly, does not “steal” free space and does not affect the quality of installation.
Since the heating system is resistant to moisture and precipitation, the film can be laid outdoors, followed by cladding with porcelain stoneware. This will forever solve the problem of icy paths, garage heating, etc.
Laying an infrared warm film floor under tiles with your own hands requires a certain level of professionalism and the availability of building materials. Although the technology is fully and thoroughly described by the manufacturer, if you have any doubts about your capabilities, it is better to seek help from a specialist.
Necessary materials
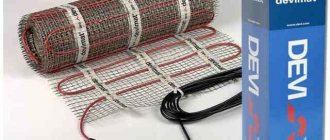
Standard equipment for a film heated floor system
- Thermal film in a roll;
- Contact terminals;
- Set of wires;
- Bitumen insulation on a self-adhesive basis.
- Thermal reflective insulation;
- Heat-resistant polyethylene film;
- Thermostat and mounting box for it. It is selected based on the selected power of the heated floor and the type of installation (built-in or surface-mounted);
- Additional temperature sensor if necessary (one will be included with the thermostat);
- Double sided tape;
- Additional wire for mounting a thermostat. It may also be needed if you install several sets of heated floors in one room (you will need to add up their power to calculate the cross-section). The wire cross-section is selected depending on the power of the system and the material of the purchased wire (see table).
| Wire cross-section, mm2 | Maximum permissible power consumption with copper wire, kW | Maximum permissible power consumption with aluminum wire, kW |
| 1,5 | 3,5 | 2 |
| 2,5 | 5,5 | 3,5 |
| 4 | 7 | 5,5 |
| 6 | 9 | 7 |
How to install and connect film heated floors with your own hands
2017-12-22 Evgeniy Fomenko
The technology for installing film heated floors is perhaps one of the simplest among all types of heated floors. And, without having any special skills, it is quite possible to do it yourself, without resorting to the help of specialists. It is often used as the only source of heating, but if you live in latitudes with harsh winters, it may not be enough.
Infrared flooring can be used under almost any floor covering. Regardless of the surface under which we are going to lay it, the materials used do not change much. But there are slight differences. For example, if we are laying under linoleum or carpet, then in order to avoid damaging the film, we will have to use solid cushioning materials.
While under the tiles you will have to make a cement screed on a reinforcing base. These floors can be laid without preliminary preparation of the surface; it is enough to simply insulate the floor thoroughly so that the heat rises to the top and does not go into the floor. Let's take a closer look at how to properly install an electric heated floor under various materials.
So, for a parquet board or under a laminate, the cake looks like this:
- Primary sex.
- Thermal reflective material.
- A layer of thermal film.
- Polyethylene film.
- Plywood or fiberboard. These plates are used to protect the heating element from mechanical damage.
- Linoleum.
Well, and, perhaps, the most labor-intensive option is to lay it under the tiles. But despite the complexity of installation, this option is the most effective heating method. Because the tile heats up quickly and can maintain the temperature longer.
Infrared film heated floor
In order to understand exactly how high-quality strip flooring differs from other varieties on the market.
Let's take a closer look at its main distinguishing characteristics:
They are absolutely safe for humans; the element that conducts heat in them is carbon. Thanks to this system, you will be able to create comfort and maintain warmth in your home, your loved ones will get sick less and you will forever forget about frozen feet.
This type of heating is more beneficial for our body; infrared radiation is widely applicable in many fields, for example, in medicine. How much does it cost? This is perhaps one of the most expensive heating options, but it is completely worth the cost.
Installation of heated floors made of film
In order to understand how this system works, you will need to understand its structure in detail. It is made of a dense thin film (polyester), divided into segments and filled with carbon paste (carbon), applied by spraying. In the more expensive version, it fills the entire space completely and has a paste-like consistency.
When it is exposed to electricity, it emits infrared radiation. Current is supplied through copper-silver wires, which are connected to the power source. The degree of heating is controlled using a thermostat connected to the floor. And he, in turn, reads the readings from the temperature sensor, which is located on the outside of the film.
To save energy resources, it is more profitable to connect an automatic thermostat; it independently determines the most profitable operating time. This is currently relevant because electricity prices have increased greatly.
The package includes the following components:
- Thermal insulation material that directs heat outward rather than warming up the neighbors’ ceiling.
- Padding material.
- Installation diagram
Let's look at the installation diagram for a film heated floor, namely, how to lay it yourself, without resorting to specialists for help, let's figure out which side to lay it on.
For a quality connection you need to do the following:
The entire installation, if you follow the instructions, will take about 3 hours if the floor is laid under linoleum or laminate. If you have not dealt with electricians before, it is better to use the help of a qualified specialist. Because not all errors can be corrected, and the material is quite expensive.
Pros and cons of IR heated floors
IR heated floors are modern options for heating systems. They have undeniable advantages over previous versions of heating devices. There are also disadvantages that you should definitely familiarize yourself with before making a purchasing decision.
Advantages of IR floor systems:
- Capable of heating hard-to-reach spaces. Heating elements can be placed wherever it is convenient: it is possible to heat only a seating area or a passage. When using the system, you can save a lot on energy by choosing the right heating zones.
- IR floors do not act on the air, like any other systems, but on objects located in the room. They heat up, giving off heat into space. The air does not dry out, the microclimate is not disturbed.
- The full cost of IR floors with all components is lower than the price for a water or other underfloor heating system. Installation is also cheaper.
- The performance of the systems does not deteriorate under the influence of frost. If not used for a long time, performance will remain the same.
- There is no need for preliminary work after installing the floors (draining/filling water, installing additional coverings). The system simply needs to be supplied with electricity to operate.
- After turning on the system, the room temperature almost immediately returns to normal. An ideal solution for periodically heated facilities.
- The efficiency is 80%. Experts have found that electricity is consumed 20% less compared to convection systems.
- Quick installation and dismantling. The work is completed within one day. Installation is carried out without the help of specialists, by hand.
- Experts have found that the IR energy emitted by the systems is identical to solar energy. It is very comfortable to be in a room heated by underfloor heating.
- The room is heated throughout its entire height. The lower part of the room remains the warmest.
Disadvantages of IR floors:
- The system operates on electric current and there is a risk of electric shock. The system includes emergency shutdown and grounding, but these measures do not guarantee 100% safety.
- In terms of efficiency, infrared flooring is much inferior to gas heating and water flooring.
- There is a dependence on electric current. In the event of a shutdown, the room is cooled.
- Heating elements should not be located under furniture. If you want to change the situation, you will need to reinstall the heating elements.
- Installation under soft floor coverings requires the installation of an intermediate layer that has high strength. You will need plywood and drywall.
It is believed that infrared heating is the best option for the home, although it uses a lot of energy. The advantages of using it are much greater than the disadvantages.
Types and types of fastening of quartz vinyl panels
There are several ways to connect tiles:
- Using adhesive locks. Each tile has 4 adhesive strips: 2 external and 2 internal. Thanks to them, the panels are connected to each other. The gap between them is invisible, even by touch it is very difficult to determine. This type of panel must be laid on a flat surface. In the reviews, many write that it is not necessary to remove the old coating, the main thing is that the base is level.
- Glue installation. In this case, the quartz vinyl tiles do not have any locks and are attached to the base of the floor using special glue. This material is attached only to a perfectly leveled surface, preferably on a cement screed treated with a primer solution.
- Glue method. The entire back side of the quartz vinyl panel is coated with a compound that provides adhesion to any type of surface. According to reviews, most people use this method of attaching tile material.
- Groove method. It is similar to the connection of tiles, where there is a tenon on one side and a groove on the other. To install this coating, you also need a flat subfloor surface.
- Connection with a lock. The basis for it is plastic, with spikes located along the edge in such a way as to be fixed in special locks that are located on the adjacent panel. To install tiles with a locking joint, a flat surface is required, since this material is not flexible and ductile enough.
Description
Before purchasing a quartz vinyl board, you need to familiarize yourself with the structure of this material. Several layers are used in its manufacture:
- Vinyl. This layer is located at the bottom. Its task is to achieve high-quality adhesion of the tiles to the floor surface.
The photo shows quartz vinyl floor tiles: - Fiberglass . This material is pressed under the influence of high temperatures. In other words, this is a thin tile that acts as a reinforcing base.
- Quartz vinyl layer. It is applied on top of the frame. It is a mixture of vinyl with fine shell rock or river sand.
- Facing layer . It has a pattern that can imitate natural material. Today, stone and wood remain the most popular.
- Polyurethane is a protective film that is used to determine the degree of wear resistance. This film is transparent, so the design on the front surface is clearly visible underneath it. The service life of quartz vinyl tiles depends on the thickness of the polyurethane layer.
All presented layers are fastened using a special technology using PVC. It is an adhesive component and is completely harmless. Its presence in the finishing material improves performance. The thickness of the tiles can reach 1.6-4 mm. To find the best flooring material, you should check out vinyl interlocking laminate flooring.
On video - quartz vinyl floor tiles:
The process of installing tiles on heated floors
The “underfloor heating” heating system for absolutely all floor covering options is composed of the following elements:
- material for thermal insulation from the bottom of the structure to direct heat and cut off cold surfaces;
- special pipes for the coolant;
- reinforcing mesh and pipe fastening elements;
- concrete screed;
- vinyl tiles for flooring.
Calculations of the location of the heating pipe circuits are made in advance. Their number is limited by the power of the heating boiler to warm a specific volume of liquid. One circuit is no more than twenty-five linear meters of heating pipe.
It is proposed to do the work in the following order:
- A thermal insulation layer is placed over the surface of the rough coating, and a damper tape is used to compensate for the thermal expansion of concrete.
- For fastening pipes - guides. In the usual version, it is enough to lay a reinforcing mesh and fasten the pipes with clamps every twenty to twenty 5 cm. The fastening should secure the pipe, leaving room for thermal expansion.
- Pipe installation near the walls is carried out at a distance of 70 mm.
- The order in which the pipes are laid involves leading the ends to the distribution manifold.
- After pipe laying work, a leak test is carried out and the temperature of the liquid is brought to 20 - 25 degrees, and a screed is made.
- After the final screed has dried, preparation and installation of PVC tiles begin.
- The surface of the screed is thoroughly cleaned of dirt, defects are eliminated, and dust is removed.
- Leave the tiles in a room at a temperature of 20 degrees for a period of at least 12 hours so that they acquire size and straighten out.
- Tiles with a locking fastening system and a self-adhesive backing will not pose any difficulties during the installation process. Install from the farthest corner of the room with a ledge of each row by 1/3 or 1/2 of the slats. At the same time, the protrusions of the following tiles are inserted into the grooves of the locks without excessive effort. Self-adhesive tiles are straightened during installation to allow air to escape under the product and for strong adhesion of the coating.
- Tiles, the installation process of which is planned using glue, requires careful selection, taking into account operating temperature conditions.
Laying option
Having become familiar with the conditions and requirements for the process of installing a hydraulic “underfloor heating” system, the owners of the premises can easily select a material that is suitable for covering the floor
from the point of view of aesthetics and practical use to solve the issue of energy saving.
Of interest is the process of installing a heated floor system under PVC tiles
. The initial costs of purchasing equipment and performing installation work will be more than justified in a short time.
One of the options for laying the final vinyl tile floor covering is shown in the material below.
Vinyl tile installation
Warm floor 'target=»_blank»>')
Pros of vinyl
Vinyl laminate flooring and infrared flooring may be exactly the kind of technology combination that consumers have previously been looking for without success. The surface of the panels is reliably protected by durable layers of transparent polyurethane.
And for greater wear resistance, this film can be reinforced with one of the hardest compounds on earth - aluminum oxide (corundum). This allows you to lay quartz-vinyl laminate on warm electric floors and water heated floors without fear that the coating will have to be changed too often.
Schematic diagram of laying vinyl laminate flooring on an infrared floor
Another plus is the exceptional richness of textures. Modern printing technologies make it possible to obtain exceptionally realistic textures of various types of natural wood, stone, leather, metal, etc. If you require an extremely durable, non-flammable, moisture-proof coating, then you can choose a modern quartz vinyl laminate for a warm water floor.
In general, quartz-vinyl heated floor material has many positive properties:
- panels are flexible, but not brittle;
- have antibacterial properties;
- have a long service life - up to 25 years or more.
At the same time, PVC laminate for heated floors is easy to maintain and does not require expensive cleaning or rubbing products. The panels are quite resistant to women's heels, furniture legs and animal claws.
Electric cable heated floors and PVC tiles
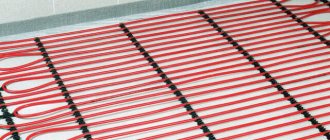
They are a special mesh (cable mat) with a heating electric cable attached to it in a snake-like manner.
A cheaper option is also used, which involves installing only a cable fixed to the base. The system is heated by transforming electrical energy into thermal energy.
It is impossible to lay PVC tiles directly on such a structure, since the installation of the latter requires a level base. Therefore, if you choose this type of heated floor, you will need to hide it under a concrete screed.
The advantages of this system include lower cost installation (compared to a water circuit), temperature uniformity along the entire length, and the possibility of installation in rooms where the temperature drops to zero degrees (country houses, etc.).
Tile and porcelain tiles are very practical materials, but they are cold for walking barefoot. The underfloor heating system solves this problem and also provides additional heating to the room. At first glance, an infrared heated floor under tiles is best suited, since it has the thinnest heating elements. But in reality, the film creates more problems than it is worth when installed in tile adhesive. In this article we will look at how you can install infrared floor heating with your own hands.
Quick navigation through the article
Vinyl flooring installation
Vinyl laminate as a covering for infrared flooring is perfect for bathrooms, kitchens, balconies, storerooms - that is, those rooms where there is a danger of high humidity.
It is not recommended to install classic laminate in these rooms - the combined combination of temperature and humidity will quickly damage the coating.
Laying vinyl covering on a water floor or infrared cable floor is technologically the same:
- First, the heating system is installed.
- Then the rough surface is laid. This can be a dry or wet screed.
- Vinyl “parquet” can be laid on a rough surface (concrete for a wet screed or cement-fiber for a dry screed).
If we are talking about a film infrared field, then the process of laying the laminate is even simpler. A waterproofing film is laid on the installed film floor, and a laminate is placed on top.
If when laying on a water or cable floor there is no fundamental difference in what type of laminate is used according to the method of fastening (lock or adhesive), then when laying on a film floor it is necessary to use a lock laminate.
Interlocking quartz vinyl tiles
When laying interlocking tiles on a “warm floor”, the condition must be met - to leave compensation gaps along all walls from 5 to 10 mm. The gaps allow the tiles to move as they expand without damaging the joints.
Art
East
interlocking tiles are recommended for use with electric heating systems; it is not advisable to use water heating. Heating temperature no more than 28 ° C. In general, interlocking tiles are sensitive to temperature changes and change their size. The temperature gap must be left at least 1 cm. This applies to installation with “warm floors” and use on balconies and rooms on the south side, where heating in the sun may occur.
The manufacturer does not recommend using any kind of backing under the interlocking tiles, both during normal installation and when laying on a heated floor.
Art
East
brand has another
collection ART STONE
class 33/42, which stands out for its structure. This tile uses rigid SPC board as the load-bearing base. This slab is a stone-polymer slab (Stone Polymer Composite).
Unlike quartz-vinyl laminate with WPC (Wood Polymer Composite) board, STONE tiles from ART EAST:
78% consists of calcium carbonate and does not contain a foaming agent, wood flour or plasticizers;
thinner, but at the same time stronger, more resistant to maintaining dimensions when changing humidity and temperature;
more durable due to the same denser structure.
ART STONE SPC is a stone-polymer tile with locks, the superiority of which over floors with WPC slabs has been confirmed by laboratory tests. All these characteristics make the Stone collection tiles the most suitable material for “warm floors” than other PVC interlocking tiles.
Tests show that ART STONE coating can withstand heating to temperatures exceeding 28 ° C. But the brand representative still recommends not to take risks and use this limitation during operation. Art Stone interlocking tiles can be used with any type of floor heating systems.
Floor
Click
interlocking tiles – containing 30% quartz. Compared to other quartz-vinyl coatings, it is soft. Floor Click quartz-vinyl laminate with “warm floors” changes its dimensions and can also expand when installed in rooms with intense sunlight (south-facing, floor-to-ceiling windows, etc.). When laying, be sure to leave a gap of 1 cm. It is also advisable to make expansion joints under the thresholds at the entrances to the rooms and every 8-10 meters of continuous fabric. Use underlay under LVT with a thickness of 1.5 mm or 1 mm. It is not recommended to lay it on infrared heating; the tiles may rise at the joints.
Castle tile collection Decoria
– the material is hard and quite stable, contains up to 70% quartz sand. The manufacturer advises using a backing when laying on a concrete screed, otherwise the floors will begin to crunch. Permitted for use with heating systems, including film ones. Use with water systems where temperatures may exceed 28 degrees is not advisable.
It is possible to lay Decoria interlocking tiles both with and without expansion joints (thresholds).
Alpine
Floor
tiles with locks can be laid over heating systems. It is better to use a cable type to regulate the temperature and keep it no higher than 28°C. A gap around the perimeter of 8-10 mm is required.
Methods for laying quartz vinyl
Installation with glue
Adhesive quartz vinyl tiles are not only water-resistant, like all PVC coatings, but also provide absolute tightness at the joints near the walls , where water can penetrate during heavy flooding if an interlocking floor is chosen. In addition, adhesive vinyl is laid without breaks or sills over an unlimited area. No expansion gaps are required at the walls : there are no thermal micro-expansions. At the same time, the price is on average 20-30% lower, but you need to take into account that you will need to purchase glue and pay for the services of installers if you have no experience in such work.
Lock connections
A more technologically advanced vinyl floor is equipped with locking connections along the perimeter of each plate: click locks snap into place without force, forming sealed seams. There is no need to glue such tiles; the planks are only fixed to each other. Thanks to this installation is simplified ; you can do everything yourself, following the manufacturers' instructions. Note that it is possible to glue interlocking vinyl: this is relevant if, for example, the base is not level enough for adhesive tiles or if the desired decor is available only in interlocking design.
Interlocking quartz vinyl tiles are less demanding on the evenness of the base : differences of up to 2-3 mm per 2 running meters are allowed. In addition, they can be laid on wood, plywood, OSB, gypsum screeds or old floors if the requirements for the base are met.
Advantages of heated floors
Below we will look at perhaps the simplest heated floor - IR flooring under tiles.
Its advantages are as follows:
- The air in the room does not lose its freshness, because this type of heating does not affect it in any way.
- An infrared heated floor under tiles, emitting waves of great length, heats not only the surface of the floor itself, but also the entire body of the person who is currently walking on it.
- This method of heat transfer allows it to be re-released from previously heated objects, which increases the overall temperature in the room even more.
- The content of negative ions in the air increases at least 4 times.
- During operation, infrared film does not emit dust, noise or vibration.
- The amount of electromagnetic radiation generated is so small that it can be neglected.
- This type of heating is perceived much more pleasant by humans at initial low temperatures in the room than in the case of water heating.
So what is a film infrared heated floor laid under the tiles? By and large, infrared heating consists of a thin film 0.3-1 mm thick, equipped inside with an electrically conductive element. Below we will describe methods for installing infrared heated floors under tiles.
Myth 12. Quartzvinyl is harmful to health.
This is clearly a far-fetched statement. They say that quartz-vinyl floors can be harmful to health because they contain polyvinyl chloride and are covered with plastic film. However, the fact is that the potentially dangerous substances contained in quartzvinyl, only when heated to a temperature of 200 degrees, can threaten health. But in everyday life they are completely harmless. Some even consider quartzvinyl to be a slow killer. This applies to products that contain phthalates, lead and other toxic components. However, conscientious manufacturers do not include lead in the composition; they replace it with zinc or potassium. In addition, quality control is ensured at every stage of production.
Pigmenting additives can be hazardous to health. Some manufacturers, wanting to save on the protective layer, include pigment particles in it; they very quickly get into the air. And even in this case, they will not cause serious harm, but they can provoke allergies.
There are also rumors that quartz vinyl flooring releases phenol when exposed to ultraviolet rays. But modern production involves filtering substances as part of the protective layer.
We have dispelled the most common myths that are actively gathering around quartzvinyl. Therefore, be prudent, calmly choose a quartz vinyl coating and start repairing!
Installation of heated floors
Laying the water circuit of a heated floor on an insulating material
When installing a heated floor system under PVC floor tiles, pipes laid in a screed are used. The installation process is as follows:
- The concrete base is cleared of debris, and local repairs are performed if necessary.
- The ceiling is leveled with self-leveling construction mixtures.
- The insulating material is laid on the base with the foil layer facing up.
- A damper tape is fixed around the perimeter of the room.
- The pipes are laid according to the chosen pattern - “snail” or “snake”. To fix the contours, special plastic hooks are used. Pipes can also be laid over a reinforcing mesh, to which they are attached with plastic cords.
- The system is connected to the collector, filled with water and checked for functionality.
- The pipes are filled with screed after turning off the system. It can be turned on only after the solution has completely dried.
If pouring the screed is not possible, for example, on a wooden base, the pipes are laid using the dry method. Channels for the pipes are cut out in the boardwalk, and after they are laid, a flat plywood base is installed under the quartz vinyl tiles.
Typical installation diagrams
Scheme 1. Wooden flooring + water heating system + quartz vinyl
A water-heated floor is installed between the joists, waterproof plywood (at least 10 mm thick) is laid on top, and the finishing coating is quartz vinyl tiles.
If the adhesive type is used, then it is necessary to putty and sand the plywood at the points of attachment to the joists and along the seams. For interlocking laminate, no additional leveling is required.
Scheme 2. Cement-sand screed + water heated floor + PVC tiles
The pipes are sewn into a concrete screed: there is waterproofing on the bottom, and a finishing leveler on top.
Scheme 3. Concrete floor + cable heated floor + vinyl floor
Electrical cables are laid on a concrete base, and on top there is a cement-polymer screed and a finishing floor covering (quartz vinyl laminate).
Water heated floor and PVC tiles
It is a complex, closed structure consisting of pipes, a pump, a distribution manifold, shut-off valves, fittings, an air vent, and fasteners.
One of the main advantages of this model is its minimal heat loss. In addition, it is environmentally friendly and does not create electromagnetic radiation (unlike electric floors).
Most often they are installed in private houses and cottages, since the installation of a heating boiler is necessary. In apartments - hydraulic compatibility with the pre-installed heat exchange system of the room will be required.
Water models are demanding in terms of thermal conductivity of finishing materials. In this context, PVC tiles are the best choice.
Disadvantages include the risk of leakage and labor-intensive installation.
Vinyl Adhesive Tile
Vinyl tiles are a fairly soft material. When heated, the tile expands greatly. Changes in size can be affected not only by the floor heating system, but also by exposure to direct sunlight. But still, some manufacturers consider it possible to use their vinyl tiles and the “warm floor” system.
Tarkett company
gives the following instructions:
Do not install Art Vinyl tiles on a heating system that does not prevent condensation on the substrate.
Do not allow the temperature of the base surface to heat above 27 ° C.
Before laying modular tiles, the heating system is turned off 3-4 days before the start of work.
Laying is carried out at a room temperature of 15-28 ° C, optimally at 20 ° C.
The heating system is connected no earlier than 72 hours after installation is completed.
Experience shows that when heated above 27 ° C, Tarkett, Forbo vinyl tiles become soft, so we, as experts, do not recommend laying vinyl tiles on “warm floors”. We believe that this material can diverge at the joints and deform under the influence of heat.
Warm floor under vinyl tiles
Recently, a new floor covering called vinyl flooring—vinyl tiles—has been rapidly gaining popularity. Consumers have already been able to appreciate all the positive characteristics of this relatively new flooring. In particular, it is attractive that it can be used without restrictions, on any surface. In this regard, many people have a question: is it possible to lay heated floors under vinyl tiles? And if so, how can this be done?
Let's try to comprehensively understand the issue.
You can lay it down! But why?
This question is actually asked very often, since many users want to combine the excellent qualities of vinyl flooring with an increased level of living comfort. Comfort is always associated with warmth underfoot. Manufacturers of various underfloor heating systems constantly talk about this. There is even a popular expression that is often used as persuasion by sellers of these products: “your head should be cold and your feet should be warm.”
But let's figure out what kind of heat is actually comfortable for a person, and then we will draw conclusions about how to lay vinyl on top of a heated floor.
In fact, a temperature that is significantly lower than his own body temperature can be called comfortable for a person. Otherwise, the person begins to experience discomfort. And this primarily concerns the temperature of the surface under the feet. After all, genetically we are accustomed to feeling the coolness of the floor under our feet, and this is understandable, familiar, and convenient to us.
When the ground begins to “burn” under one’s feet, a person’s usual sensations are lost. Those who have purchased a heated floor system will certainly confirm these words, because everything should be in moderation. In moderation, at a generally comfortable temperature in the room, there will be the warmth that an ordinary wooden floor gives, and unpainted (painted is cooler).
So, returning to the topic of conversation, we can say that the thermal conductivity of our vinyl floor is equal to the thermal conductivity of wood. What does this mean? The only thing is that the use of heated floors for this type of coating is simply not required. Although it is possible if desired.
This coating itself is warm, comfortable and therefore does not require any external heating. Well, unless it is laid on a concrete floor, which is laid directly on the cold ground of the lower floor.
Why is it like this?
A reasonable question may arise: why is it so warm, this vinyl covering?
In fact, vinyl tiles are somewhat reminiscent of different finishing materials. For example, it is similar to linoleum without a base - in strength and ability to withstand mechanical stress. The way vinyl is cut and laid is similar to laminate. At the same time, it feels the same as wood. And this is true - vinyl has absorbed the best characteristics of previous coatings today, including:
- the strength of linoleum and its ability to withstand mechanical and other influences;
- ease of installation, characteristic of products made from laminated boards and tiles;
- visual appeal, which is provided by new technologies that make it possible to make an almost unlimited choice of colors and textures of the new coating.
Those who have floor tiles, laminate or still have linoleum in their apartment, when laying vinyl tiles, note its incomparably greater warmth than all other coverings. And this despite the fact that its thickness is only about 5-6 mm! It's all in the composition.
Vinyl tiles consist of several layers of different thermal conductivity:
- vinyl backing - a layer at the bottom that helps the tiles better adhere to the base and increases sound insulation;
- medium dense vinyl layer;
- decorative vinyl layer on which the design is printed;
- polyurethane protective film that preserves the decorative layer and gives additional wear resistance to the finishing material.
All layers are interconnected by a polymer compound polyvinyl chloride, which is harmless and only improves the performance of the coating.
Where should you install heated vinyl flooring?
And yet we are all different people. Some people want it to be hot under their feet, while others have no other source of heat other than heating through a heated floor (and this also happens). Finally, there are places in an apartment or house where the floor really needs to be warmer than traditional flooring. For example, in rooms such as a bathroom, loggia or nursery where a small child is growing up.
In such cases, it makes sense to consider how to install heated floors under vinyl laminate or vinyl polymer tiles.
What kind of heated floors are best laid under vinyl?
In general, almost any heated floor system is suitable for installation under vinyl flooring. When heated, vinyl floors do not emit harmful substances; they do not melt at temperatures up to 80 degrees, although the recommended heating temperature for vinyl floors is considered to be up to 40 degrees Celsius.
Laying a film floor under tiles with your own hands
At the initial stage, preparatory work is carried out. The surface is cleared of debris and leveled. The thickness of the heated floor can reach up to 1.5 cm. An approximate sequential layer of materials to be laid is as follows:
- heat-reflecting substrate – 2-3 mm;
- infrared film – 0.4-0.5 mm;
- painting mesh – up to 2 mm;
- a layer of concrete mortar (or tile adhesive).
You immediately need to decide:
- location of the thermostat;
- effective distribution of film under the tiles.
Installation of a heated floor begins with laying a heat-reflecting substrate. The best option would be to use strips whose size is 0.6 m. If you purchase wide material, it should be cut.
An infrared film is placed on top of the substrate. There are the following requirements when performing this work:
- Do not place stationary furniture on the film (this may lead to system burnout);
- the film should cover up to 70% of the area in the room;
- the presence of a distance from the walls at the level of 10-12 cm;
- the film is not installed overlapping.
It is more advisable to distribute the film along the maximum length of the room. The marked heating material is cut off. It is recommended to cut pieces of film in places where there is no graphite layer. If you still need to cut it along the graphite layer, then this place is subsequently insulated with adhesive tape or tape. The film is attached to the substrate using tape.
Next you need to start connecting the film floor
Particular attention is paid to the correct installation of the thermostat and temperature sensor. It’s worth mentioning right away that one thermostat can normally “serve” a room with an area of 12-15 m²
It is installed next to the supplied wiring.
The cable is secured to the film using copper clamps. The degree of reliability of connections is checked using the halves of the clamps, which must be in contact with each other. Bituminous tape and silicone sealant are used to insulate the clamps.
While the sealant dries, the thermostat is installed. When using an overhead device, the cable is routed outside the wall and placed in a plastic box. If the thermostat is built-in, then a hole is hollowed out in the wall for it and grooves are made for the cable.
The temperature sensor is mounted under the film. To do this, a groove is made in the base, and the sensor itself is placed in a corrugated tube. The sensor wire is laid so that it is located directly under the tile.
The thermostat is securely attached to the wall and connected to an electrical cable. Foil tape is glued obliquely to the film. To ground the floor, one of its ends is connected to a wire.
By testing the heating system, its functionality is checked. All sections should heat up within 5-8 minutes. Using a tester, the places of film cuts and joints are checked.
Next, laying the heated floor is performed in the following sequence:
- holes are made;
- dowels are inserted into them;
- the painting mesh is attached with self-tapping screws;
- a thin and uniform primary concrete screed is created;
- the screed dries completely;
- a final check of the functioning of the heated floor is carried out;
- a fixing screed is applied;
- After it dries, tiles are laid.
Screwing in the screws when attaching the painting mesh should be done very carefully. They can damage the surface of the film or contacts, which will cause a break in the electrical circuit. After final fixation of the mesh, it is necessary to test the heated floor.
When laying film flooring, it is prohibited:
- carry out work at high humidity and air temperature below 0ºС;
- use nails as fasteners;
- connect the film without grounding;
- bend it at an angle of 90º over an area up to 5 cm long;
- install the film in close proximity to other heating devices.
To avoid mechanical damage to the film, it is recommended to carry out installation work in soft shoes. You can use infrared heated floors after about a month, when the concrete base under the tiles has completely dried.
Video on installing a film floor:
Advantages of using quartz vinyl flooring and heated flooring
- Thermal conductivity. Quartz vinyl tiles retain heat.
- Fast heating. Thanks to the small thickness of PVC tiles (up to 7 mm), heat spreads quickly and evenly.
- Environmental Safety. There are no harmful and toxic additives in the structure of quartzvinyl: there is no emission when heated.
- Antistatic. Static voltage does not accumulate on the surface, PVC tiles do not conduct current, and are absolutely safe in combination with a film heating system.
- Stability. Quartz vinyl tolerates temperature changes without consequences.
- Versatility. Quartz vinyl tiles of adhesive or lock type are compatible with all types of heating, except infrared film type.
Structure of quartz vinyl tiles for floor or walls
Quartz sand , mixed with primary or secondary polyvinyl chloride (detailed comparison), makes up the base layer and approximately 80% of the volume of the entire structure. Density, optimal thermal conductivity, crush resistance, water resistance, reduction of impact noise (relevant for quartz vinyl with a thickness of 3 mm or more) are the merits of the quartz vinyl layer.
To prevent quartz from spilling out, one or two layers of fiberglass - stability of the geometric dimensions of quartz vinyl tiles.
The fiber optic layer under the design provides additional wear resistance and also facilitates better application of the decor.
Quartz vinyl top layers are standard for all types of vinyl flooring:
- Decorative layer . Photo printing on film in HD quality. You can reproduce any design - from monocolor to custom photography. But most often there are imitations of various types of wood or natural stone.
- Protective layer . A polyurethane film with a thickness of 0.2 mm to 0.7 mm determines the wear resistance of quartz vinyl tiles. To enhance protection, an additional layer of polyurethane varnish is sometimes applied. It is on the PU film that embossing is performed in accordance with the simulated surface.
- UV treatment: stabilizes the color and gives the decor an even shine.
Typical structure of quartz vinyl using Moduleo as an example
Pros and cons of underfloor heating with quartz vinyl tiles
Quartz vinyl tiles have good moisture resistance
Quartz vinyl tiles are a modern finishing material that has the following advantages:
- Multi-layering. Each layer is made from environmentally friendly, safe raw materials. When heating a heated floor, the finishing coating does not release harmful substances into the environment.
- Moisture resistance. This flooring is universal and can be used in rooms with high humidity. This is convenient, since electric heated floors are often installed in the bathroom.
- Wear resistance. If we compare the coating with laminate, in terms of wear resistance it corresponds to class 32.
- Practicality. The coating is easy to care for, it does not absorb dirt and can be cleaned with simple detergents.
- Fire resistance. This material does not burn and does not support a flame, so it can be used in rooms with high fire safety requirements.
- High thermal conductivity. A system with such a coating will heat the room evenly.
- Soundproofing properties. The multilayer structure dampens shock waves and noise up to 19 dB.
- Maintainability. A separate element can be easily removed and replaced with a new one. You don't need to call a professional to do this. During the operation of an electric heated floor, it may be necessary to replace a section of the cable. The finishing coating is disassembled during the repair and assembled after its completion.
The adhesive method of laying vinyl tiles makes it difficult to dismantle it
Like any other material, quartz vinyl has disadvantages:
With the adhesive installation method, it will be difficult to dismantle the tiles. The surface of quartz vinyl laid on a concrete base is cool and uncomfortable to the touch
Therefore, a warm floor in such conditions will be more than appropriate. Gaps form between the tiles - this is the main difference from rolled materials. It is important to carefully level the base before laying tiles. Otherwise, all its defects will be noticeable.
Advantages and disadvantages
Quartz vinyl floor tiles, the pros and cons of which matter when purchasing a product, have remarkable quality characteristics.
Covering for the studio Source sowpol.ru
Advantages of quartz vinyl:
- Durability and shockproof properties. Has a high degree of mechanical stress. The manufacturer provides a product warranty of up to 15 years and a service life of 30 years.
- Environmentally friendly. The composition of the material is absolutely harmless to human health.
- Temperature resistance (-30*C – +60*C). Suitable for arranging any premises.
- Fire safety. Low risk of fire.
- Waterproof. Does not absorb water and perfectly repels moisture, so it is suitable for swimming pools and saunas.
- No slipping or annoying sound like when using ceramic tiles. Light cushioning.
- A wide range of models and an aesthetic appearance that gives a feeling of warmth and comfort.
- It is possible to repair the damaged part without a general repair of the entire coverage area. Only the required square or rectangle is replaced.
- Variability of styling. You can come up with a pattern yourself.
- Resistant to chemicals and abrasives. There are no contraindications for the use of detergents.
- Convenience, speed and ease of installation.
- Antistatic properties, thermal stability.
Resistance to moisture Source www.modulpol.ru
See also: Catalog of companies that specialize in finishing materials
The disadvantages of quartzvinyl include:
- Increased softness. Marks from very heavy objects may remain.
- Requires installation on a perfectly flat surface, as it can lie in “waves”.
- Material weight: 1 m2 has a weight of 7 kg.
- Some models are not resistant to sunlight and may have poor quality designs.
- High price.
Tile material has more advantages than disadvantages. You can lay the tiles yourself or use the help of a construction team.
Methods for laying film heated floors
As a rule, when laying heated floors with power supply, three methods of their location are used:
- Lay the flooring directly under the covering, as is the case with a film floor.
- Location in the thickness of the screed, on which, after it has dried, the finishing coating is laid.
- Installation of an electric heated floor over a tile screed.
If the floor screed is in perfect condition, you can install a heated floor under laminate or linoleum directly on it, which will significantly save time on additional work. When laying an electric cable floor in the kitchen, bathroom or loggia, the heating elements are hidden in the thickness of the screed, having previously laid a thermal insulating layer.
In the case of laying heated floors in two-story houses, where the floor insulation on the first floor has been completed, additional screed and thermal insulation are not necessary. Ceramic tiles laid on top and a thick layer of glue will serve as protection for the heated floor. True, you should first check the instructions for it.
Where should you install heated vinyl flooring?
And yet we are all different people. Some people want it to be hot under their feet, while others have no other source of heat other than heating through a heated floor (and this also happens). Finally, there are places in an apartment or house where the floor really needs to be warmer than traditional flooring. For example, in rooms such as a bathroom, loggia or nursery where a small child is growing up.
In such cases, it makes sense to consider how to install heated floors under vinyl laminate or vinyl polymer tiles.
Is it possible to lay film flooring under tiles?
Infrared heated floors are intended primarily for “dry” installation under laminate, linoleum, PVC tiles, and carpet. To attract customers, many manufacturers claim that their film can be laid in screed or tile adhesive under the tiles.
There are 3 main reasons why you shouldn't do this:
Firstly, the film has low adhesion. If you immediately pour screed on it or lay tiles, it will turn out to be floating. Because of this, the concrete will have a hollow sound when tapped, and if something heavy is dropped on the floor, the screed may even crack.
Sometimes, for better adhesion of the solution to the top layer, they try to make a lot of cuts and notches. But imagine how difficult it will be to isolate it all. Moreover, you need to insulate it reliably and durablely, so that you don’t break the tiles later if you start getting an electric shock from leaks and the RCD constantly trips.
- Secondly, the composition of the film itself. All tile adhesives and screed solutions are alkaline. Over time, polyester film (PET) corrodes, regardless of the thickness or number of layers. At best, you'll end up with a short circuit and sparking from exposed electrical connections.
- Third, there are rod and cable electric floors that are ideal for under-tile installation. When installing them, you don’t need to invent or invent anything; they are specially made for “wet” installation.
But there are several installation options, which are discussed below.
Types of vinyl laminate
Despite the general presence of polyvinyl chloride, at least three types of flooring are distinguished:
- PVC tiles;
- quartz-vinyl laminate flooring with heated or LVT (Luxure Vynil Tile);
- stone-polymer element coating SPC (Stone Plastic Composite).
In the family of conventional vinyl tiles, the base is a layer of polyvinyl chloride. Quartz flooring material includes a composite consisting of PVC and quartz sand.
Stone-polymer ones have the same composite, only calcium carbonate (limestone) is used instead of quartz sand. Therefore, it would be more correct to call SPC tiles LPS tiles (from “Limestone” - limestone).
These are the three main types of vinyl materials for heated floors, although each manufacturer, promoting its brand, adds some differences, for example, crushed rock instead of quartz sand.
Infrared film heated floors and PVC tiles
They appeared on the market not so long ago, but have already gained considerable popularity.
They are a flexible, thin system, the functioning of which is based on long-range infrared radiation. The heating element is a hexagonal carbon nanolattice, enclosed in two layers of polymer material and connected by silver-plated copper conductive busbars. Installation is quite simple, glue is applied to the leveled base, on top of which sheets of film heated floors are laid, and then another layer of adhesive is applied to the latter, on which adhesive PVC tiles are laid.
The advantages include high efficiency, excellent thermal conductivity, excellent maintainability of the entire complex, both PVC coating and heated floors. In addition, the infrared spectrum is as close as possible to the solar spectrum, therefore it acts as a kind of “native” for humans from a physiological point of view.
An undoubted advantage is that PVC tiles transmit radiation with virtually no loss, which makes the combination of such a heating system with this type of finishing floor coverings effective. It is also worth noting the simple installation, which you can do yourself.
Disadvantages include significant energy consumption (especially in large rooms), heating of furniture (without legs), and dependence on a constant power supply.
Tips from experts on choosing and caring for coatings
It is best to buy tiles at a hardware store, not at the market. The seller will provide a guarantee for the product, and the buyer will be confident that he is purchasing quality material. It is best to choose quartz vinyl for flooring from well-known brands from Japanese, Finnish, British and Korean manufacturers. Any product must have a quality certificate. If it is not there, then the product is fake.
The texture and color should be selected in accordance with the purpose and interior, paying attention to the class. To create a unique pattern, laying tiles begins not from squares, but from the center of the room. If quartz vinyl floors are designed as an alternation of several elements, then they must have common characteristics and be of the same class.
Exterior design of the room Source i5.photo.2gis.com
To ensure that quartz vinyl tiles fit perfectly, it is best to screed the floor in advance. Long preparation time will extend the life of the product. If the base of the floor is equipped with water heating, then the surface temperature before starting work should not reach more than 18*C. The same temperature should be maintained for several days before and after installation work.
After repair, the contaminated surface with glue residues can be wiped off with any solvent, alcohol or vinegar (it will add shine), and then washed with detergent and clean water. Since the manufacturer treats the surface with an antistatic agent, cleaning is easy.
Important ! Despite the fact that quartz vinyl tiles are highly resistant to mechanical stress, it is not recommended to use a metal brush when cleaning, as it can leave micro-scratches.
Original floor design for a beauty salon Source womanadvice.r
Advantages of quartz vinyl tiles
Many people appreciate quartz vinyl tiles for their high strength and phenomenal wear resistance. Among other things, due to the fact that this finishing material contains polyvinyl chloride, quartz vinyl floor tiles acquire natural warmth. In reviews, buyers note that it is pleasant to the touch, unlike ceramic ones. The main advantages of quartz vinyl flooring:
- Environmental friendliness of the material. Harmful substances are not released even at high temperatures.
- Quartz vinyl tiles, reviews of which tell us that they do not absorb water at all, are widely used in rooms with high levels of humidity.
- Fire resistance. It does not support the combustion process, that is, it is a self-extinguishing material.
- High resistance to chemically active substances.
- A high level of wear resistance and, accordingly, durability; the service life of the tiles is 25 years.
- Resistant to temperature changes.
- Impact resistance.
- Has noise-absorbing properties.
- Easy to maintain and repair. The tiles can be washed with any detergent. If repairs are necessary, individual tiles can be easily removed and replaced with a new panel.
- Excellent aesthetic properties.
- If desired, you can make a “warm” floor under quartz vinyl tiles; there is no need to lay a substrate.
- The material does not conduct electric current and is antistatic.
Combination of warm and vinyl flooring
Structure of quartz vinyl tiles
Quartz vinyl tiles are a multilayer material:
- The bottom layer is vinyl. Provides adhesion of finishing material and base.
- The reinforcing frame consists of fiberglass compressed at high temperatures.
- River sand and shell rock mixed with vinyl form a durable, moisture-resistant coating.
- The next layer is decorative. Externally, it imitates natural material.
- The protective front layer consists of a thin transparent polyurethane film. Its thickness determines the wear resistance of the finishing material.
How suitable PVC tiles are for heated floors, whether they are harmless when heated and whether they will not lose their properties are of concern to those who choose quartz vinyl as a floor covering.
When choosing a high-quality material made in compliance with technology, the flooring will be safe. It can be used in residential premises, bedrooms, children's and medical institutions. The advantage of this coating is its non-flammability and dielectric properties.
It should be borne in mind that quartz vinyl is included in the category of expensive finishing materials, so unscrupulous manufacturers can save on raw materials. The buyer should be wary of the low cost of the material. When using it, harmful substances may enter the room during heating.

