Deflector functionality
Properly designed ventilation with a Tsaga deflector
The operation of all existing models of deflectors comes down to one principle.
In operating condition, the installation deflects air flows forced by the wind. The air flows around it, forming a space with reduced pressure near the outlet. Exposure to outside air reduces its pressure on the air flow inside the ventilation duct. According to the laws of physics (in particular, Bernoulli), compensating for the “shortage”, the internal air column in the pipe tends to rise upward. In this case, air is sucked in from the rarefaction zone of the channel. The whole system will be effective if the deflector is used correctly. In this case, the actual thrust can be increased by another 20%, which is very significant.
Purpose and characteristics
So, the collet deflector is designed to increase the draft of a chimney or ventilation system.
Its operating principle is as follows: it is known from the laws of physics that hotter air is lighter than colder air. If the air is heated from below, then unheated air begins to press on it from above, since its mass is greater, and accordingly, the warm flow rises upward. A conventional chimney system is based on this, that is, smoke, like more heated air, rises upward by gravity. However, it is prevented by colder air, since the chimney is a closed system. So, in order to reduce this cold air pressure, that is, reduce the resistance, a deflector is installed that cuts the air flow, thereby establishing a low-pressure area (a vacuum area) above the chimney or ventilation pipe. This naturally increases cravings.
Tsaga deflector
Increased draft ensures that the efficiency of the underlying device, for example, if we are considering a chimney, it could be a stove, increases by 20 percent. This means that the combustion process will be much better without the use of additional combustible substances.
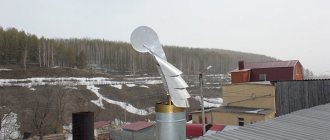
From all this we can conclude that the collet deflector is intended only to increase thrust. However, there is a special group of such devices. We are talking about rotary products. Their essence is that the central part rotates, which creates even greater rarefaction of the air around, and accordingly, the thrust increases.
Such deflectors also serve for forced ventilation, removal of gases and vapors from the room.
A conventional chimney deflector is a device placed at the end of a chimney pipe or ventilation duct to increase draft (see How to improve draft in a chimney). With the correct selection of the optimal size and type of this device, you can achieve an increase in the efficiency of the heating unit (up to 20%). It should also be noted that the chimney deflector serves as excellent protection against rain, snow, dust, debris and birds getting inside the chimney. So it’s worth spending time installing the deflector, especially since it’s not difficult to do this work yourself.
The principle of operation of the deflector is quite simple - air flows hit the outer surface of the diffuser, flow around it and thus create a slight vacuum (Bernoulli effect - when the speed of air around an obstacle increases, a vacuum appears), which increases the draft in the chimney duct.
This device is designed to perform several functions:
- Basically, the deflector is used to enhance draft in the ventilation shaft (duct);
- Can serve as an umbrella to protect the ventilation duct opening from rain and snow.
TsAGI deflector – “classic of the genre”
The design of old residential buildings was necessarily carried out taking into account the installation of ventilation systems with natural stimulation of air movement. This explains the dependence of natural air exchange on the vagaries of nature. The TsAGI deflector is a simple ventilation shaped device with an open flow path, developed by the Central Aerohydrodynamic Institute. He uses natural factors of weather changes in his work, but sometimes he works in a system and with mechanical motivation. It works for both ventilation and heating (used in chimneys). Installation options – hidden (in the channel), external.
Objective assessment
Like any technical device, the TsAGI design has its pros and cons.
- Effective protection against the penetration of dust, precipitation, small birds, insects, and rodents inside the ventilation duct.
- Protecting the head of the outlet pipe from destruction.
- The cylinder-shaped screen prevents the occurrence of back draft in the air outlet of even the largest cross-section.
- Manufacturing material options allow you to replace a more expensive one with a cheaper one. Thus, affordable plastic can be installed instead of stainless metal on ventilation streams with cold air escaping.
Difficulties in operation are observed during severe frosts, when ice forms on the inner walls of the outer cylinder. Its layer can completely cover the flow area. The TsAGI deflector is sensitive to the direction of the wind: it creates resistance to traction when there is complete calm or a slight blow of wind.
Device
Design design diagram
The design of a simple device follows the shape of the ventilation shaft. Essential elements:
- The lower pipe installed on the head of the ventilation outlet (pipe).
- A diffuser is a part of a pipe where the air flow changes its parameters due to its cone-like narrowing. Expansion occurs from the pipe to the top. The narrow end of the truncated figure is attached to the pipe.
- The shells or outer shell of the device.
- Ring, brackets as fastening elements. With their help, a visually visible ring is fixed from the outside to the diffuser.
- The upper protective cap (umbrella) in the classic version of a conical shape is protection against the penetration of pollutants from the outside.
- Legs for fixing the umbrella.
Attention! The outer diameter of the air outlet on which the TsAGI deflector is installed must be in the size range of 100-1250 mm.
How the deflector works and works
Before we begin the production and installation of the deflector, we will learn about its structure and operating principles. The device has three main parts. Cylinder, diffuser and cap (also called an umbrella). They can also install ring fenders on it. The deflector options are very diverse, differing from each other in shape and size, but they all work on almost the same principles. What are these principles? The upper cylinder stops the air flows, they beat into it and later surround it. Some portion of the air flows, rising up the cylinder, picks up the flowing smoke flows and sucks them in. Traction increases. Moreover, this does not depend at all on the direction of the wind. The traction will always be good.
The upper cylinder has slots, thanks to which the smoke flow is sucked in. Thanks to these principles, deflectors have gained popularity in the chimney product market, as well as due to their other positive qualities.
Design parameters and drawings
The ventilation system element, which is simple in design, is available in the retail chain. Any deflector must comply with TU 36233780. In order to save money, you can make a TsAGI deflector with your own hands from stainless steel or galvanized steel. At the same time, you need to remember: galvanized construction is not used to extract aggressive air.
Tsaga deflectors of various sizes
Preliminary preparation is required. In particular, familiarization with special literature, which gives the calculated dependencies of aerodynamic parameters, summarized in tables. The preliminary stage also includes clarification of dimensions. They comply with the standards of SNiP 41012003. The deflectors are made in climatic version “0”. Selected depending on the cross-section and shape of the ventilation channel.
If the deflector is round, then the calculations and drawings take into account:
- The internal diameter size of the shaft head is identical to the smallest section (narrow section) of the diffuser.
- The diameter of a wide section of a channel with varying flow characteristics.
- The height of the ring and its diameter.
- The width of the umbrella.
- To manufacture the deflector, TsAGI is determined by its shape. Must be identical to the shape of the outlet ventilation pipe.
- The material chosen is: galvanized is cheaper, stainless steel is more expensive.
To simplify calculations based on the initial data, the height of the deflector and the width of the diffusion section are selected from the tables for the internal diameter. When calculating other parameters, the following remarks are taken into account:
- the height of the entire product is in the range of 1.6-1.7 times the internal diameter of the product;
- the diffuser width is selected in the range of 1.2-1.3 of the same diameter;
- The protective cap must cover the hole in size and be 1.7 times larger in size than the diameter.
The standard numbering of deflectors for ventilation is 3-10. The numbers encode the diameter of the ventilation shaft (dm). When making a product yourself, standard shapes and sizes should not be completely changed so as not to violate its technical characteristics.
How to make a turbo deflector with your own hands
When creating a sketch (drawing), the diameter of the internal part of the chimney - D is taken as a basis;
Then, using the table, the width of the diffuser is selected - D, as well as the height of the deflector - H.
Calculation of the dimensions of the Tsaga deflector
Most often the following data is taken as a basis:
- Diffuser width:1.2 – 1.4 d
- Top hood width: 1.6 – 1.9 d
- Height: 1.6 – 1.7 d
Note: d is the diameter of the smoke channel inside.
Normal operation of any heating unit necessarily requires the presence of a smoke channel. Without normal draft, not a single boiler, fireplace, or stove will work.
Deflector on a steel chimney
However, very often there are various problems with traction, especially in strong winds. To solve most of these problems, a chimney deflector installed in the upper part of the pipe was invented and is actively used.
A conventional chimney deflector is a device placed at the end of a chimney pipe or ventilation duct to increase draft (see How to improve draft in a chimney). With the correct selection of the optimal size and type of this device, you can achieve an increase in the efficiency of the heating unit (up to 20%). It should also be noted that the chimney deflector serves as excellent protection against rain, snow, dust, debris and birds getting inside the chimney. So it’s worth spending time installing the deflector, especially since it’s not difficult to do this work yourself.
The principle of operation of the deflector is quite simple - air flows hit the outer surface of the diffuser, flow around it and thus create a slight vacuum (Bernoulli effect - when the speed of air around an obstacle increases, a vacuum appears), which increases the draft in the chimney duct.
Types of deflectors
Grigorovich design deflector: 1
TsAGI deflectors are mainly used. This is a universal type that is suitable for installation on any pipe - ventilation or chimney. A channel larger than it in diameter is attached on top of the chimney pipe; this channel forms a diffuser flowing around the wind. As a result, high-pressure zones appear on the sides, and vacuum zones appear in front and behind, which contributes to increased traction. To prevent debris from falling into the chimney, a cap is attached over the diffuser.
The disadvantage of any deflector is that in calm weather this device provides some resistance to draft.
For the manufacture of deflectors, materials are used that are not prone to corrosion and can withstand high temperatures. Most often, it is galvanized or stainless steel or copper.
Deflector structure
Structure of the TsAGI deflector
All deflectors have almost the same structure.
A typical chimney deflector consists of the following parts:
- Inlet pipe.
- Diffuser (upper outer cylinder).
- Deflector housings.
- Brackets for fastening the cap - umbrella.
- An umbrella cap with a cone shape.
The main material for the manufacture of deflectors is galvanized iron sheets. Recently, deflectors have appeared on sale, where the metal is coated with enamel or a protective layer of plastic. For installation on ventilation ducts where there is no hot air outlet, plastic deflectors can be used.
Deflector calculation
Before you make a chimney deflector with your own hands, you need to make a calculation and draw a drawing with all dimensions set. The calculation is based on the internal diameter of the chimney pipe (d) and using a special table, the height of the deflector (H) and the width of the diffuser (D) are selected.
Main dimensions of the deflector
Deflector size selection table
Where d is the internal diameter of the smoke channel.
Important: when making a deflector with your own hands, you must adhere to these proportions. If you make a device that does not meet these ratios, the deflector will not work properly.
Once the drawings are ready, you can begin preparing the necessary tools and materials
In order to make a deflector for a chimney pipe with your own hands, you need the following tools and materials:
- roulette;
- metal scissors;
- welding machine;
- Bulgarian;
- electric drill;
- set of open-end wrenches;
- galvanized iron sheets;
- bolts with nuts;
- clamp;
- metal strip.
After carrying out the calculations, we proceed to the manufacture of all components of the deflector:
- Using a pencil, draw the corresponding parts of the deflector: the outer cylinder, diffuser and cap. We draw strictly according to size.
Tip: you can make life-size patterns from cardboard and simply trace them along the outline on the metal.
- Using metal scissors, we cut out all the parts - the lower cylinder, diffuser and umbrella cap, reverse cone.
- All parts must be connected using welding, rivets or small bolts.
- We cut out brackets from a metal strip to secure the cap.
Tip: to save material, the steel strip can be cut lengthwise into thin strips.
- The hood mounting brackets are attached to the outer surface of the cone diffuser.
- A reverse cone is attached to the umbrella cap.
After all the main parts are made, you can begin assembling the deflector directly on the chimney.
Installing the deflector
Let's consider the option when deflectors for a chimney pipe are installed on a metal chimney with an internal diameter of 120 mm.
The assembly work will proceed in this order:
- The lower cylinder is installed on the chimney and secured in a fixed position using a bolted connection.
- A diffuser (upper cylinder) is attached to the lower cylinder using a clamp.
- The umbrella cap with a reverse cone is mounted on brackets.
Tip: be sure to place a reverse cone under the hood. It allows the deflector to work effectively even in low winds.
Important: if the chimney pipe has a large diameter, then for reliable fastening to the chimney it is necessary to use additional braces made of steel wire.
Chimney and ventilation ducts play a very important role (see Chimneys and ventilation). It is devices such as chimney deflectors that make the operation of these channels stable and eliminate the problem of lack or weak draft.
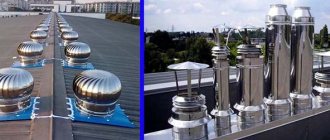
A deflector is a piece of metal pipe with a kind of steel umbrella attached to it. The cap, in turn, is put on the end of the chimney pipe. Such devices can be seen on almost all modern chimneys and ventilation ducts.
According to the laws of physics, warm or hot air weighs less than cold air. In a heating system, the smoke rising from burning wood has a high temperature. At the top of the smoke channel there is a cold mass of air, which sinks under the influence of gravity, and hot smoke rises. Thus, air exchange or draft occurs. On its way, the cold stream creates counteraction to the hot smoke.
The head is designed to reduce cold air pressure and cut the flow. What a deflector is can be understood if we list all the functions it performs:
- protects the chimney opening from leaves, snow drifts, atmospheric moisture, and other random objects;
- enhances the effect of forced exhaust;
- o draft in the chimney or ventilation duct;
- reduces the possibility of a reverse flow of carbon monoxide directed into the room.
Draft plays a major role in the combustion process of fuel and the removal of smoke and gases. If you increase this indicator, the efficiency of the fireplace will increase by 17–20%. This means that the heating unit is used in an economical mode and there is no excessive consumption of firewood, coal or gas.
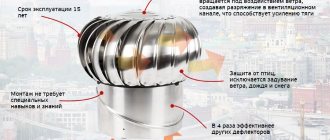
Some deflectors are made in the form of a rotational coil. Their difference is that the central part rotates, this causes a strong rarefaction of the air, which allows most of the combustion products to be pulled out of the furnace mouth. If such a rotary deflector is placed at the end of a ventilation hood, then they can serve as a forced hood or enhance the work of an existing one. The deflector cuts the air flow above the pipe, thereby creating a low-pressure area at the chimney outlet, where heated smoke tends.
To make a pipe head with your own hands, you need to decide on the design and purpose of each part or assembly of the collet deflector:
- a pipe or lower cylindrical section, designed to be placed on the end of the chimney pipe and serves as a mount for the diffuser;
- the diffuser is a cone, with the narrow end attached to the pipe, and the wide part suitable for the top of the product;
- the outer shell is called the shell;
- a cone or cap is located on top of the entire structure and serves as protection;
- supports for installing the cap;
- brackets to strengthen the entire deflector.
All of the above parts can be easily made with your own hands from stainless steel, galvanized or plain metal.
First you need to make a calculation, then make a drawing, and only then begin to manufacture individual parts for subsequent assembly. The indicators are determined:
- shape and type of deflector;
- what material the product will be made of;
- diameter and head dimensions.
To describe the sequence of work, we take the standard design described earlier. If we talk about the shape, it will be determined by the cross-section of the chimney pipe. Options can be oval, round, square and rectangular. The material used is steel or galvanized metal.
Product dimensions
The dimensions of the deflector depend on the parameters of the chimney or ventilation pipe. To simplify, standard size dependencies are used:
- with an internal diameter of 120 mm, the height will be 144 mm, the diffuser width will be 240 mm;
- diameter 140 requires a deflector with a height of 168 mm and a diffuser width of 280 mm;
- a chimney with an internal size of 200 mm works with a head 240 mm high, a diffuser 400 mm wide;
- large chimneys with a diameter of 400 and 500 mm are protected by a deflector of 480 and 600 mm, respectively, with a width of 800 and 1 thousand mm.
When making calculations for making a head with your own hands, you need to take into account several rules for determining dimensions:
- an acceptable height is considered to be the size of the internal diameter multiplied by a factor of 1.6–1.7;
- the diffuser is made with a width ranging from 1.2 to 1.3 of the diameter;
- the width of the cap is taken with a coefficient of 1.7 to the internal diameter of the pipe.
| № | internal diameter, mm (d) | deflector height, mm (H) | diffuser width, mm (D) |
| 1 | 120 | 144 | 240 |
| 2 | 140 | 168 | 280 |
| 3 | 200 | 240 | 400 |
| 4 | 400 | 480 | 800 |
| 5 | 500 | 600 | 1000 |
| Author | Share | Rate |
| Victor Samolin |
Work algorithm
- Take measures to carry out work safely: wear gloves and safety glasses.
- Prepare equipment: ruler, drill, scissors or grinder, marker.
- Purchase material: metal sheet 0.3-0.5 mm thick.
- Mark the dimensions on the cardboard. Don’t get confused: the internal cross-section of the cylinder must be the same as the external diameter of the ventilation pipe.
- When drawing the diffuser, an extra 0.2 cm is added from the edge to the joints.
- All elements are compactly placed on a metal strip and cut out with a hacksaw or scissors.
- The cone is formed from a cut out circle. From the border (along the radius - from the edge to the center) an incision is made with scissors. One edge is overlapped with the other until a cone is formed.
- The edges of the rolled diffuser body are connected along the edge with a margin of 10 mm.
- Holes are drilled at the joints. The parts are fastened together using a bolted or riveted connection.
- Self-made brackets are strips of galvanized steel 1.5-2.0 cm wide.
- Install the assembled structure on the upper section of the pipe: the lower cylinder is fixed with bolts, the diffuser is secured with a bracket.
- The cap is mounted on the clamps.
- All structural elements are firmly secured with bolted connections or rivets strictly according to the drawing.
- The draft in the channel during strong winds is adjusted by a special valve installed in it.
Attention! The deflector is placed above the roof in the area of free wind blowing. It is prohibited to place it in the area of an aerodynamic shadow created, for example, by a nearby building.
If you follow the manufacturing and installation rules, as well as master the work skills, installing a TsAGI deflector on the roof will not require much effort and time.
Chimney deflector - DIY
According to experts, it is enough to install a deflector to increase the efficiency of the heating device by 15-20%. Of course, this device will make sense only when the chimney is installed correctly, of sufficient height, with the correct cross-section. The location of the pipe on the roof is also important.
Why does the chimney smoke?
Three reasons explain the problem of pipe smoke. Firstly, air currents created by a strong, gusty wind enter the chimney and literally crush the smoke rushing upward. As a result, we get smoke in the room and loss of draft. Secondly, the reason for smoke from the pipe lies in its incorrectly chosen diameter.
Depending on the design, the following varieties are determined:
- Grigorovich deflector;
- TsAGI deflector;
- round deflector “Volper”;
- open type deflector Astato;
- deflector in the form of a star "Shenard";
- H-shaped deflector.
Device
Before you learn how to properly install a deflector on a chimney, you need to understand how it works.
A typical deflector consists of 3 main parts: a cylinder, a diffuser and a cap. Also, ring guards are installed on it. Designs can be very different, differ significantly in shape and size, but the operating principle of all modifications is always the same.
We talked about the design of a chimney deflector, and now let’s look at how it works. The operation of the deflector is based on the following principles:
- The walls of the upper cylinder stand in the way of air flows, which, when hitting it, simply encircle it.
- Part of the air from the general stream rises up the cylinder and picks up the smoke coming out of the pipe.
- The intensity of movement in the smoke pipe, sucked in by external air, becomes more productive for increasing draft.
- Regardless of which direction the wind flows towards the deflector are directed from, the draft in the heating device is of good quality. There are gaps in the upper cylinder through which smoke is sucked in by air.
At the same time, with a low wind, air flows form turbulence under the deflector hood, slowing down and preventing smoke from escaping from the chimney. This drawback, unfortunately, is inherent in all such devices. However, to solve this issue, we can recommend placing an upside-down cone under the deflector umbrella. Such a simple trick will help to reflect, dissect and bring out air currents mixed with smoke.
Before you move on to making a chimney deflector, you need to stock up on the following materials and tools:
- sheet of steel 0.5-1 mm (galvanized or stainless steel is suitable);
- metal scissors;
- drill;
- riveter;
- cardboard.
First we need to draw up a drawing of the deflector for the chimney. Without this important stage, work cannot be started.
TsAGI deflector drawing
It is necessary to measure the diameter of the chimney and structural elements as accurately as possible. Calculations must also be verified. This determines how successfully the deflector can be installed and how it will perform its functions. The shapes of the pipe and the deflector must match. That is, if the chimney has a square cross-section, the deflector must be made the same way. True, this form will lead to less efficient operation of the device.
The sequence of actions is as follows:
- First, all the details are drawn on paper in full size and cut out.
- The paper elements are connected as they should be in the finished product. Deflector diagram
If everything is adjusted correctly, you can do the same on a sheet of metal.
- Paper elements are laid out on metal and outlined with a marker. Then the parts are cut out with scissors. In the cut areas, the metal must be bent with pliers and tapped with a hammer.
- At the bends the metal is riveted to make it thinner.
- The diffuser is made from a piece of metal that is rolled into a cylinder. Holes are drilled to connect the edges. The edges are fastened with rivets, bolts or welding. But welding must be semi-automatic, not arc, so as not to burn through the metal.
- The outer cylinder is made in the same way. Next, a cap is made (a cone is rolled up from a piece of metal, the edges are connected).
- Then 3-4 strips about 20 cm long and about 6 cm wide are cut out of a sheet of metal. The strips are folded along the long sides and beaten with a hammer. Holes for bolts are drilled in the cap at a distance of 5 cm from the edge. The strips are attached to the cap and bent in the shape of the letter P.
- The resulting brackets are used to attach the umbrella to the diffuser. The resulting structure is then inserted into the outer cylinder.
Grigorovich deflector
If you are assembling the Grigorovich deflector with your own hands, then you need to supplement the design with a reverse cone. In this case, the protective umbrella should be 3-4 cm in diameter larger than this cone. When both parts are made, the smaller one must be placed in the larger one and circled with a marker. Then cuts are made on the larger cone to the drawn line to get about 8 strips at the same distance. The strips bend inward. With their help, the reverse cone is securely fixed in the protective umbrella, without the use of fasteners or welding.
When using a reverse cone, it is better to attach the umbrella to the diffuser using pins. To do this, first 3 holes are drilled in a circle in the reverse cone. Studs are inserted into them and secured with nuts. The cone is then attached to the umbrella as described above. At the top of the diffuser, hinges made of tin or aluminum are attached to the outside.
You can choose any design; it is important to make the correct drawing of the deflector according to which the product is manufactured.
Deflector drawing
To install the deflector on the chimney, 3 holes are drilled at the same level. The device is inserted into the pipe and secured with bolts. Then the bearing, cylinder, weather vane and protective cap are assembled on the axis. Everything is fastened together with rivets.
In order for the deflector and weather vane to function normally, you need to monitor the condition of the bearing. It must be well lubricated, otherwise its rotation will be difficult. In winter, the structure should not be allowed to freeze.
So, in order to make a collet deflector with your own hands, you need to calculate it in advance. To do this, you should know some of the technical characteristics that such devices may have:
- Deflector shape;
- Material of manufacture;
- Deflector dimensions;
- His type.
Since we have decided on the type - this is the design of the collet, the design described above, it remains to decide on all the other parameters of the future deflector, made by ourselves.
So, the calculation begins with establishing the desired form. Everything is simple here. The shape of the deflector directly depends on the shape of the pipe for which it is made. Next, we determine the material. Here, too, everything should be clear, since the optimal materials for DIY work were suggested above.
The next step is to determine the dimensions of the deflector. They, like the shape, directly depend on the size of the chimney or ventilation system pipe.
After carrying out the calculations, we proceed to the manufacture of all components of the deflector:
- Using a pencil, draw the corresponding parts of the deflector: the outer cylinder, diffuser and cap. We draw strictly according to size. Tip: you can make life-size patterns from cardboard and simply trace them along the outline on the metal.
- Using metal scissors, we cut out all the parts - the lower cylinder, diffuser and umbrella cap, reverse cone.
- All parts must be connected using welding, rivets or small bolts.
- We cut out brackets from a metal strip to secure the cap. Tip: to save material, the steel strip can be cut lengthwise into thin strips.
- The hood mounting brackets are attached to the outer surface of the cone diffuser.
- A reverse cone is attached to the umbrella cap.
After all the main parts are made, you can begin assembling the deflector directly on the chimney.
