Good afternoon, dear readers! Today I will continue the topic of central heating batteries. We will talk to you about the operation of heating batteries. Almost everyone needs this topic, and my task is to help you understand this issue once and for all. So, I hope you have already read my article: Correct installation of a central heating battery in an apartment. We will assume that the battery has been installed for you. What's next?
How to turn on the radiator correctly for the first time
A very important point is to turn on the central heating battery for the first time in your home. When a long period of time has passed, and the thermal power plant begins to supply water to our batteries, then usually the first water flowing through the heating systems is the dirtiest and rustiest. Imagine. You have just installed a brand new battery, one might say, off the assembly line, and suddenly a powerful stream of dirt is thrown in there. It is not surprising that many batteries become clogged precisely from the first such inclusion, and then we are surprised that out of 12 battery bends, only 8 are heated, the rest remain cold. To prevent this from happening, a jumper (bypass) is needed when installing the battery. If you have done the installation correctly, then set the position of the ball valves as shown in the figure:
In this case, the entire flow of dirt when turned on for the first time will go through the jumper, keeping your battery intact and safe. In this option, it is better to keep hot water running for several days. Of course, many are looking forward to when it will be turned on. However, my advice is, if you can’t wait a few days, wait at least one day. By the way, here is a detailed article on how to turn off the battery.
In what order should the taps (valves) in the batteries be opened and closed?
There are two taps on the battery. They say that if you close them in the wrong order, you may experience water hammer.
For heat to enter, it is first necessary to bleed air from the radiator, so first we open the Mayevsky valve (bleeder) and make room for further steam (water) to enter.
As soon as the air is released, open the main valve (at the inlet) and wait for the batteries to start warming up. Water hammer is a real phenomenon, but it happens extremely rarely in apartments, so to avoid an accident you must follow simple instructions.
- When starting the heating radiator, you first need to bleed the air from the battery.
- Therefore, first we open the air valve, then the tap to open.
- Once water flows from the battery through the air valve, this will mean that the air has been released.
- We open both taps fully, the system will start working (water will circulate).
“>
How to regulate heat in batteries
Suppose you put a battery of 10 bends in the room, and you feel good with it when it’s -20 degrees outside. But now, the cold has passed and now it’s been -2 degrees for several days. Hot water, as often happens with us, at the same temperature continues to flow through our pipes in a powerful stream and a gas chamber is formed in the room, from which there is no escape. In this case, the temperature regulator comes to the rescue. There are many of them in nature. In the picture below you see one of them.
What brand of thermostat should be is the topic of a separate article. And now it is important for you and me to understand the principle. The figure shows one of the simplest thermostats. It has a knob on top that you can rotate and set values from 0 to 5:
5 - means that the entire flow of hot water will pass through the battery; 4, 3, 2, 1 - means that the regulator will reduce the diameter of the flow pipe, providing less hot water flow through the battery per unit time. Thus, at 4 the battery will be colder, at 3 even colder, etc.
If you want to disconnect the battery altogether, you can set it to “*” - the water current will be very small. Practically it will not exist:
Or you can simply close the ball valves on the battery. The effect will be approximately the same:
If you have 2 windows in your room and 2 radiators under them, then during installation it is advisable to install them wisely. For example, you need 20 sections for the entire room. Then it is better to put, for example, 12 sections on one battery, and 8 sections on the other. In this case, in addition to the regulator on each battery, you can completely turn off or turn on 8, 12 or all 20 sections at the same time.
Correct “starting” of batteries + Installation curvature
Good evening!
This is the situation. The batteries were replaced during major renovations in the 5-story building (there is no water in the system now). Radiators are bimetal. The inlet valve is on top (opposite it, the Mayevsky valve is on top), the return valve is below the inlet valve (i.e., not diagonal). There are bypasses (the horizontal parts of the risers go into two “tees” from above and below, the “tees” themselves are connected to each other by a bypass pipe of the “squeeze” design, i.e. there is no welding, this design remains from a previous repair not very long ago, i.e. now only the taps after the indicated “tees” and the radiators themselves have been changed). Now absolutely all taps are closed. The question is: how to properly prepare for the upcoming pressure testing of the central heating system (September) and then correctly enter the heating season itself? The question “how” is in terms of correct manipulations with taps/valves (when/which ones to close, when/which ones to open, in what sequence, etc.), so as not to harm yourself and your neighbors. I haven’t seen any taps/valves before, they turned them on in the fall CO - and that’s good, so I somehow have no experience at all with modern systems. Oh, another little thing - in the lower taps ("American" with a hexagon under a plastic plug) - how big is this hexagon, 10?
And another question (about curvature). On one battery, the upper underwater pipe (the already horizontal part of the riser) goes at an angle, as a result, the “American” installed after the “tee” (the main part / the tap itself) stands coaxially with this pipe (and therefore at an angle to the horizon), part / tube The “American” that goes into the radiator is also practically coaxial with the rest/main part of the valve (tightening the “American” nut apparently gave this alignment), but since At the same time, the radiator itself is “level”, then the “American” tube entering it relative to the axis of the upper part of the radiator turned out to be at an angle, a type of zigzag. Is this really scary? The entry into the radiator was made using tow and paste, it looked well done. I don’t know how they managed, with such an angle between the assembled “American” and the futor (or whatever it’s called, that boss on the gasket with a hole that was screwed into the radiator with a terrible hexagon) to even put on/tighten the nut on the “American”, but it’s a fact Apparently, the thread inside the futor has somehow become crumpled, or the corner of the radiator has bent (although it doesn’t seem to be visible visually), or in general, on one side of the thread, now only tow is holding everything in place, and the turns of the “American” and the futor are “hanging” at a distance from each other . At the same time, the heating system was already filled with cold water (though, as I understand it, without much pressure), and there were no leaks (or drops, or wetting of tow) in this “beautiful corner”. Is it possible to somehow try to start this battery after the start of the heating season, or would it be better not to even try, because... In case of failure, will there be no cold water in the system at all? Is it possible to somehow correct the “angle”, for example, “distribute” this angle in half between the upper and lower parts of the “American”, slightly shifting the supports (hooks) of the radiator so that there are already “angles” at both the top and bottom, but not the same large, like now there is one and only on top (from below everything is OK, horizontal and concentricity are available)? Or is it better not to move this upper “corner” at all now and just see how this structure behaves (otherwise it’s easy to unscrew everything, but won’t you have to change the fittings and taps later, if everything was already tightly screwed in there and so on? b. has something already deformed / taken a new shape)?
Thanks in advance for your answers!
Very important information
Below we will describe situations when one or another inclusion of the battery may be undesirable, and sometimes unacceptable!
4.1.You cannot use the thermostat without a jumper
In point 2 we talked about the thermostat. However, you need to understand that experiments with a temperature controller are only possible with a jumper! If it is not there, and you reduce the diameter of the flow pipe, then the total flow of hot water through your apartment will decrease. Which of course is unacceptable, otherwise your neighbors will come to you!
4.2. The thermostat may become clogged
If you are using a jumper, but for some reason it was turned off for a while and the thermostat was set to position 5, i.e. provided a full flow of hot water only through the battery, as shown in the figure:
then everything seems to be fine. However, we must accept reality as it is. Even if we turned on the central heating radiators correctly for the first time, there is no guarantee that, for example, in a month or two a new mud flow will not pass through the pipes. But then, if the jumper is turned off, then the splash of dirt will go straight to your thermostat, which, in fact, is very sensitive to it. As a result, a blockage forms in the thermostat, and water will not flow into the battery at all. It won’t go into the jumper either, because you closed it. Therefore, in this situation, water will stop flowing through your apartment; in the house, through your heating riser, the water will also stop and begin to cool in the cold. As a result, a squad of evil neighbors, together with the chairman of the HOA or housing cooperative, is guaranteed to enter your apartment.
It is clear that switching on according to the above figure is similarly not acceptable for the regulator positions 4,3,2,1,*
4.3. The jumper must always be on
Make it a rule that it doesn’t matter whether you use a temperature controller or not, but the jumper should always be on. This way, you will always ensure hot water flow through your apartment. When does it make sense to turn off the jumper? For example, when you feel that the battery is clogged. Then you let all the water flow through the battery by disconnecting the jumper. Perhaps a more powerful stream of hot water will be able to push through the stuck dirt. But this needs to be done for a short time and only under your control - you cannot leave the situation like this and go to sleep. The fact is that if the dirt cannot be pushed through, then a congestion will form again: water will not be able to pass through either the battery or the jumper.
4.4. During installation, the thermostat must be installed behind the jumper, i.e. directly in front of the battery
This is mega important, because if it is installed before the jumper, then when you first turn it on, dirt will definitely clog your thermostat, and you will start the heating season with a complete rewiring of the battery:
4.5. Avoid outright carelessness when installing ball valves in different positions
This installation of ball valves in your system will again ensure that your neighbors come to you:
You just completely turned off the water :).
Well, that's all, dear readers! I tried to tell you in as much detail as possible about the nuances of operating heating batteries!
Have you ever accidentally blocked the heating pipe in your house?
Finding out the heating scheme of the house (apartment)
There are two fundamentally different heating schemes: collector and pipe. Both are easy to identify by visual inspection.
With a manifold heating scheme, a separate pipeline connects to all radiators in the apartment. All heating pipes are brought together into a common distribution unit called a manifold. In large apartments there may be more than one such collector.
This is a very successful heating scheme and if it is done correctly, it adjusts and works perfectly. However, completely redoing such a heating scheme will be much more expensive.
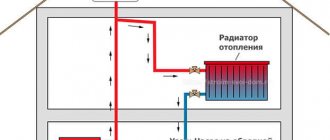
The pipe circuit can be two-pipe or one-pipe. In new apartment buildings, a two-pipe heating system is used. With this scheme, heating radiators are divided into groups, each group has its own heating risers. The risers are clearly visible in the corners of the rooms.
This heating system is dependent, that is, in the absence of bypasses (jumpers) on the radiators, a heating failure in your neighbor will lead to a heating failure in yours. In addition, the quality and cleanliness of each of your radiators will affect the performance of the radiators of its group. Repairing or replacing such a heating system is easier and cheaper. Installing bypasses and high-quality radiators solves all heating problems in a new building.
