Not only the temperature regime, but also often the health and even the life of the inhabitants of the house depends on what kind of ventilation system is installed in the premises and how well the chimney is constructed. Quite stringent requirements are imposed on the installation of a chimney. It must be reliable, durable, heat-resistant. Its main purpose is to provide air to heating systems and devices and remove carbon monoxide generated during fuel combustion. The danger of carbon monoxide is that it is difficult to immediately notice, since it has no taste or smell. If the chimney does not provide good draft, gas can enter the room and cause poisoning to the people there. The process of installing a chimney must comply with fire safety standards, which include, among other things, a high level of resistance to the aggressive effects of substances arising during fuel combustion and high-quality thermal insulation.
Modern materials for chimneys
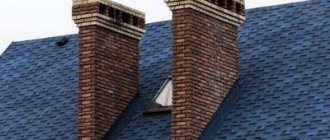
The traditional material for installing a chimney system is brick. The material itself is quite cheap, but the installation of a brick chimney requires significant costs. This is a long and labor-intensive process that requires a high level of skill. However, brick chimneys are not completely a thing of the past, especially if the building style requires the presence of such an exterior detail as a classic chimney on the roof. Often, brickwork serves only as an external decorative element, while the chimney itself is made of modern materials - stainless steel or ceramics
The most commonly used material for chimney installations is stainless steel. This is explained by its high performance qualities - strength, lightness, ease of installation, resistance to aggressive environments. Condensation, which occurs when cooling air combines with the products of fuel combustion, settles on the walls of the chimney. The condensate contains a large number of acids hazardous to health, which actively destroy the surface with which they come into contact. This is especially evident in chimneys made of brick.
The stainless steel chimney is a modular single-circuit or double-circuit design. The first option is used to install a steel chimney inside a brick shell. A double-circuit system consists of pipes of different diameters inserted into one another with a heat-insulating basalt layer between them. It is needed to protect pipes from overheating.
The ceramic system has a more complex structure and consists of three layers: The top one is made of expanded clay concrete, the inner one is made of fire-resistant ceramics. Between them there is a heat-insulating layer.
The combined version includes elements from both materials. The disadvantage of such systems can be considered their high cost.
Types of chimney pipes
Modern chimneys differ in the material used in the production of pipes and other parts, and in their design. Let's look at the features of the varieties.
Chimneys made of black metal
Ferrous metals include steel alloyed from iron and carbon, for example, galvanization and cast iron:
- Galvanized pipes are not used today as a chimney, as they emit harmful fumes when heated. Due to their low heating temperature, gas boilers are the only type of heating equipment that can be equipped with galvanized chimneys. In addition, galvanization is less resistant to condensation and acidic environments, and therefore requires careful insulation.
- Cast iron pipes are more resistant to high temperatures and moisture, but their rather impressive weight and fragility make installation and maintenance of the chimney structure somewhat difficult. The advantage of cast iron for pipes is its low thermal conductivity coefficient, so using a cast iron chimney is safer.
The absolute advantage of black rolled steel is its low price. The performance characteristics of these metal products for chimneys are significantly inferior to modern materials.
Asbestos cement chimney pipes
Asbestos cement chimneys are cheap and can be made yourself. But today they are practically not used in private construction; even on an industrial scale they are replaced with modern materials for chimneys.
Peculiarities:
- Asbestos chimneys are used in conjunction with low-power gas heat generators, since they cannot withstand heating above 300 °C; if overheated, the pipe body cracks. It is allowed to install asbestos-cement pipes at a distance from the heating device, at the outlet, where the temperature of carbon monoxide cools down to an acceptable level.
- However, this leads to another difficulty - the complexity of achieving absolute tightness of pipes when joining with other materials. In addition, asbestos cement is quite fragile, which makes it quite difficult to cut out an inspection hatch in its structure.
- The rough surface to which soot literally sticks, forming build-ups, worsening the traction force, and increasing the risk of fire, is another disadvantage of asbestos-cement chimney ducts.
- The porous structure of the material tends to absorb condensation, which provokes the destruction of the pipe when it freezes.
- The asbestos contained in the composition is carcinogenic, especially when the chimney is heated.
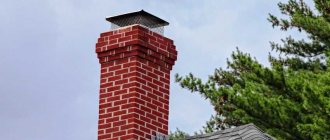
Brick chimney
Brick chimneys are a classic solution, but with the advent of innovative materials they fade into the background or their design is complemented by modern pipes.
Among the advantages of brick chimney contours are:
- Fire resistance, ability to connect to gas and solid fuel heat generators.
- Long period of operation (from 50 years or more).
- Aesthetic appeal.
However, they also have many disadvantages:
- The complexity of calculation and installation, which, in fact, should be carried out at the time of construction of the house.
- The impressive weight of the chimney structure requires a separate foundation.
- The rough surface of the pipe walls tends to accumulate soot.
- Susceptibility to an acidic environment is perhaps the main reason for the gradual destruction of brickwork;
- The complexity of chimney maintenance.
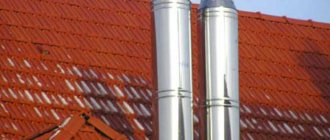
Stainless steel chimneys
Due to their versatility and ease of installation, stainless (alloy) smoke ducts are popular.
Advantages of stainless steel chimneys:
- Heat resistance (500-700 °C).
- High anti-corrosion resistance.
- Light weight.
- Fast warm-up, minimizing the likelihood of condensation forming in the circuit.
- The low pipe roughness coefficient minimizes soot deposits.
- A wide range of shaped elements that allow you to set the pipeline in the desired direction, complete with ready-made modular parts. The use of special socket pipes speeds up installation.
- Long period of operation of the chimney (minimum 15 years).
Before talking about the disadvantages of stainless steel chimneys, it should be mentioned that their range is divided into 2 categories:
- Single-circuit (single-walled).
- Double-circuit (sandwiches).
So, the main disadvantages relate specifically to single-circuit products. Due to the small wall thickness, their scope of application is limited. They are used only indoors or for lining brick chimneys. To prevent the formation of condensation, single-circuit pipes require insulation.
Sandwich chimneys are a modular design of two pipes of different diameters with an intermediate layer of mineral wool insulation with a thickness of 2 to 6 cm. They are completely devoid of the above-mentioned disadvantages.
There are a variety of grades of alloy steel, so you can choose a product to suit the individual characteristics of your heating equipment. So:
- For a gas boiler, the AISI 304 brand with an operating temperature of up to 300 °C is suitable.
- For a wood stove - AISI 439 or AISI 321.
- For a stove unit operating on liquid fuel, AISI 316 is used, and for peat briquette circuits, AISI 310 is used.
Ceramic chimney pipes
Modern ceramic chimneys are made of refractory clay and can withstand temperatures reaching 1000 °C. Fast heating and slow cooling prevent the formation of condensation and reduce energy costs.
To the listed advantages of chimneys we can add:
- Immunity to temperature changes.
- Anti-corrosion resistance.
- Chemical inertness to acids.
- Ideally smooth surface of the pipe walls.
- Easy installation of the circuit and the ability to do the installation yourself.
- Ease of maintenance.
- Service life - from 50 to 100 years.
The high cost of pipes and components for them leaves an imprint on their demand. After all, there are cheaper analogues that are not inferior in technical characteristics to ceramic ones.
The large weight of the chimney circuit requires the construction of a separate foundation. Smoke ducts made of ceramics can be exclusively straight.
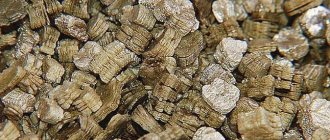
Vermiculite and perlite chimneys
Vermiculite and perlite pipes for exhaust gases are the same as steel sandwich chimneys. The classic mineral wool insulation has been replaced with expanded vermiculite or perlite, a fire-resistant mineral.
This modern material for chimney pipes has a number of positive characteristics:
- Light weight.
- Moisture resistance.
- Resistance to corrosion, acids.
- Resistance to extreme high temperatures.
Some models of vermiculite and perlite chimneys have a two-layer structure, that is, they do not have the usual inner metal layer for sandwiches. The compressed block is usually 5 cm thick and impregnated with a special moisture-resistant compound. However, the relief of a block uncovered by a metal sheet causes rapid overgrowth with soot.
Compared to classic sandwich chimneys, vermiculite and perlite pipes are 10% cheaper and, according to manufacturers, the circuits can last at least 25 years.
Aluminum and steel corrugated chimneys
Corrugated metal chimneys are made from aluminum or stainless steel. Materials have different strength characteristics, and therefore their scope of application is strikingly different:
- Aluminum circuits are less resistant to high temperatures. Not able to withstand temperatures above 110 °C. They are used as household air vents for kitchen hoods or chimney ducts for gas fireplaces and water heaters.
- Stainless steel corrugated pipes, even though they have a thinner wall compared to their rigid counterparts, withstand high temperatures well. Can be installed in conjunction with solid fuel heat generators.
The particular advantage of corrugated products for chimneys is their extreme flexibility, which allows you to quickly:
- Set the chimney contour in the desired direction.
- Connect straight sections of pipes at the desired angle.
- Lining up an old brick chimney.
Plastic chimneys
Heat-resistant plastic is a fairly popular solution for exhaust circuits of low-power kitchen stoves and condensing, gas and pyrolysis boilers. Sometimes plastic pipes are used to line brick chimneys, but only in those areas where the temperature of the flue gases drops to an acceptable 120-200 °C.
Non-corrosion, smooth walls, ease of installation and low price of pipes are the advantages of plastic chimneys.
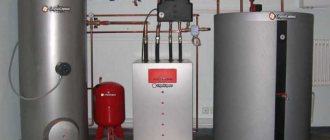
Heating systems are different, but the safety rules are the same for everyone
For different types of heating systems, there are certain rules for installing a chimney system.
The arrangement of the chimney of a gas boiler is associated with the need to remove waste gas and prevent it from entering the room. The ventilation and removal system of combustion products must be reliable and have access to check the condition of the chimney, since gas equipment is a high-risk system. Few modern country houses are complete without a fireplace. This is not only a source of living heat that warms you up so well in the winter cold, but also a beautiful element of the interior of the house. In order for it to bring only joy, it is necessary to take care of the high-quality arrangement of the fireplace chimney. It is necessary to ensure that soot deposited on the walls of the chimney does not ignite, which can lead to a fire. To prevent this from happening, you need to periodically clean the chimney. The material for the chimney system is selected depending on the style in which the fireplace is made.
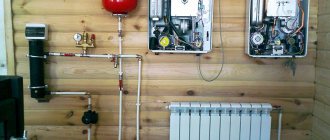
Particular care should be taken when arranging the chimney of a bathhouse. High levels of temperature and humidity in the room, intensive use of the heating device require constant monitoring of the condition of the chimney. To reduce the intensity of condensation on the walls, the chimney must be insulated. In this case, it heats up much faster. The opening of the chimney pipe must not be allowed to be blocked by any foreign object or soot build-up on the walls.
Video - How to properly install a ceramic chimney
Installation of chimneys in Moscow and the Moscow region
Correct installation of chimneys ensures correct and efficient operation of the boiler.
And it makes it safe to live in the house - residents will not be exposed to the danger of fire and carbon monoxide poisoning. In this regard, the important issue of installing a chimney can only be entrusted to specialists who have studied the technical aspects in detail. Our employees have all the necessary knowledge, experience and are authorized to carry out work - to implement even the most complex project at the highest level in terms of quality and safety.
The apparent simplicity of the chimney
There are certain requirements for installing a chimney on the roof. It should be taken into account that the total length of the chimney structure must be at least 350 cm, otherwise the draft will not be strong enough. The diameter of the pipe depends on the power of the equipment, as well as on the width of the outlet of the heating system.
The upper part of the chimney - the head or cap - must be located above the roof at a height of at least 50 cm to avoid backdraft. The height of the pipe is calculated depending on the type of roof and the presence and height of neighboring buildings. Also, to ensure normal draft, it is necessary to insulate the chimney pipe rising above the roof. The upper part of the pipe must be covered with a cap to protect against precipitation and foreign objects entering the chimney. The junction of the roof and the pipe must be protected from possible leaks.
Find out what types of chimneys there are and how to install them in a private home, because everyone wants to sit by the fireplace, and a good chimney is absolutely necessary for this.
The chimney plays three main functions in the heating system of a house. Below we will look at these functions in more detail.
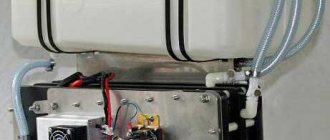
Parts for prefabricated chimney
The sandwich pipe can be installed both on a house under construction and in an existing building. Often new heating is installed when renovating a house or when a brick oven fails. The convenience of a stainless steel pipe is that it can be installed anywhere.
Note! Upon purchase, you will receive a product passport, which should indicate the steel grade (the corresponding markings should be on the parts themselves), pipe wall thickness, diameter, other quality characteristics, and purpose.
To install the chimney you will need the following parts:
- The pipe segments that are connected into a socket have different lengths, but not more than 1 m.
- Elbows (45 and 90 degree bends) for installing chimney bends.
- Gate - a furnace damper for adjusting the draft and shutting off the pipe when the furnace is stopped.
- Transition adapter – for mounting the transition from a single section to a sandwich pipe.
- Inspection (tee) to clean the pipe from condensation and possible internal deposits.
- Head (deflector) on the top of the pipe.
- Crimp clamps to strengthen connections.
- Brackets for attaching the pipe to the wall if installation is not carried out through the roof.
- Galvanized sheet or stainless steel for installation of insulating boxes.
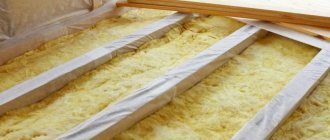
- Thermal insulating materials: mineral (basalt) wool, asbestos sheets.
- Heat-resistant sealant for processing joints.
- Support brackets for installing and fixing the chimney.
We recommend that you familiarize yourself with: Features of the device and types of three-way valves, application in heating systems
Additionally, you can purchase ready-made parts for installing passages through the ceiling and roof, and flanges for external waterproofing of the chimney outlet to the roof.
Assembling the smoke exhaust structure begins from below, from the stove. According to the design, the segments are connected sequentially, strengthening the connections with crimp clamps. To prevent air from being sucked in from the outside, all seams are coated with heat-resistant sealant.
Types of chimneys
Based on the type of material used, chimneys are divided into ceramic, metal and brick.
. The chimney is also made of composite materials and has a multilayer structure.
Choose a chimney modification that more closely matches your home.
The cheapest and most common option is a metal chimney
. It is ideal for installing heating systems for baths or non-residential premises. This economical approach is not advisable to use for installing a chimney in a private house. Metal structures have poor joint sealing, making it difficult to get rid of smoke in the room. Installing a metal chimney is not advisable, since they have a short service life and are not resistant to moisture.
Chimney pipes made of composite multilayer metals
more reliable and resistant to aging. A special fire-resistant material is placed between the layers of this pipe. Many manufacturers, deciding to save money, place low-quality material in the intermediate layers, which begins to crumble over time. Therefore, when purchasing this pipe, carefully study the manufacturer.
The cheapest type is to build a chimney pipe from thin stainless metal
. The low weight of this pipe allows it to be fixed using minimal fastening material. In addition, stainless steel pipes are easy to process - they can be cut with ordinary metal scissors. Installation of stainless chimneys is perfect for private homes.
Ceramic chimney pipes
They are very complex to install, since their installation is carried out together with the entire house. Therefore, they are rarely used, because to build them in a finished house, builders will need to partially dismantle the floors.
To install a chimney with your own hands in a residential building, you will need the following tools:
- for metal;
- for drilling holes;
- chisel and spatula;
- electric jigsaw and ;
- Phillips screwdriver and hammer;
- safety glasses and gloves.
Problems due to external causes
We have listed the reasons that can be partially or completely influenced during the combustion process. Next, let's look at the circumstances we have to put up with. This is usually due to weather conditions. Sudden changes in pressure, humidity, wind force, and other factors also affect the quality of the furnace.
Strong wind outside
Experienced stokers know very well that during strong winds it is very difficult to fight back draft. The wind creates turbulence in air flows. If such flows exceed the strength of the combustion gases, this will force the smoke to return back into the room. Another reason could be an open window in one of the rooms of the house during a strong wind. If the window is open on the side where the wind is directed, this will increase the effect of reverse draft.
To protect against wind, a cap is usually installed on the pipe. In the case of metal pipes, this additionally protects against rain and snow drops entering the pipe. If you have a brick chimney pipe, installing a cap will not look very aesthetically pleasing.
Presence of tall objects near the house
In the private sector, such objects could be two- or three-story houses built by your neighbors, which will change the natural direction of the wind. This can even be affected by certain roof angles of a neighboring house if it is close to yours. The construction of a multi-story building near your home can have a strong impact on the operation of the furnace. It is also not recommended to plant tall trees close to your house. Over time, you can feel their influence on the operation of the furnace in the same way as the presence of tall buildings affects it.
Important points when installing a chimney yourself
Depending on the construction method, all chimneys can be divided into two main groups: internal and external.
Below we will consider in more detail in which cases one or another option is chosen.
Internal chimney structure
used for the construction of heating systems based on heating boilers or. These systems are usually installed inside walls. After installation is completed, the chimneys are closed in the thickness of the wall and decorated. The advantages of this system are that it is not susceptible to condensation and is perfectly protected from atmospheric moisture.
Combustion products passing through the chimney have a high temperature. And the section of the wall that runs next to the chimney becomes very hot and may even catch fire. Therefore, internal chimneys should not be installed in walls made of flammable building materials. These systems are also not recommended for powerful boilers.
External chimney
installed in industrial enterprises with large heating systems. They are usually installed in a heated room area of over 600 square meters. Such a chimney is also installed if the installation of an internal chimney is associated with a number of difficulties. For example, in a room with concrete floors and walls, it will be easier to break through a slab than to gouge out a channel in the wall.
Installation of stainless steel and cast iron chimneys
A simple and cheap way to install a chimney is to install a metal pipe. Installation can be divided into several stages:
- Preparation of the channel for the chimney;
- Chimney installation;
- Installing insulation around the pipe.
The channel for the metal pipe must be several times larger than its diameter. To leave room for insulating material.
A metal chimney can be divided into several main parts:
condenser, metal pipe, head and adapters for installing tufts. To increase traction, a gate unit is installed in the system.
Chimney installation
Before installing the chimney, you need to adjust all pipes to length
. The resulting structure must be placed in a previously prepared channel. Next, connect the condenser and stove to the system. The finish is considered to be the installation of the head.
To firmly fix the pipe, it is attached to the wall every one and a half meters.
When installing steel or cast iron pipes, it is necessary to ensure good thermal insulation of the chimney pipe. This will prevent adjacent ceilings from catching fire due to a leaky chimney pipe. For high-quality insulation of a metal pipe, fire-resistant clay is used. Clay is also used to decorate the joints of the pipe and chimney.
When using a metal pipe, you need to attach it to the ceiling every half meter. In addition, the mounting holes must be made wider, about two pipe diameters.
Installing chimney pipes made of cast iron is justified, since such pipes will last much longer. But their installation is associated with certain difficulties. For example, cutting a cast iron pipe can only be done with a grinder.
Do-it-yourself sandwich chimney installation
Combined chimneys, made of several materials, perfectly replace conventional metal pipes.
Multilayer structures make it possible to reliably insulate floors from overheating by the combustion products of the furnace. When installing this chimney, no additional insulation is required, as a result of which the mounting holes are made equal to the diameter of the pipe. When installing metal pipes, they are mounted like nesting dolls, and no additional fasteners are required to fix the pipe bends. The pipe elbows in these chimneys are connected to each other using construction glue.
Chimney pipes are very sensitive to condensation, so they are not used when installing external chimneys. If a sandwich chimney is installed correctly, the pipe will last up to 60 years.
Self-installation of an external chimney
The optimal material for the external chimney pipe is stainless steel.
. It is light in weight and can be easily processed with simple tools.
To install an external chimney made of stainless steel pipes, the following is required:
- Punch a hole in the pipe adjacent to the boiler. It should be located half a meter from the top;
- Place fasteners on the outer wall at a distance of a meter from each other;
- Connect the chimney inlet to the boiler;
- Remove the bent pipe elbow from the room;
- Install the capacitor;
- Fix the pipe on the wall;
- Install the chimney head and its protection.
This completes the installation of the external chimney. We hope that our article will help you understand the installation and selection of a chimney pipe.
A chimney is an essential part of the heating system of a private home. It ensures the proper functioning of the stove or boiler and organizes the removal of harmful combustion products outside the home. We will try to figure out how to install a chimney with our own hands so that heating communications are safe for both people and the home.
The installation of heating devices is subject to the requirements set out in the regulatory documentation.
Installation of devices is regulated by the provisions of SNiP 2.04.05–91 and DBN V.2.5-20-2001. Also, before drawing up a project, it is advisable to study materials on heating systems (SNiP 41-01-2003), on heat generation devices (NPB 252–98), on technical conditions for the operation of heating devices (GOST 9817–95), on the rules and regulations for the operation of smoke ducts (VDPO).
The design of the chimney and installation features must fully comply with the requirements specified in SNiP, otherwise you will not receive a construction inspection certificate, which is issued after commissioning
Some of the requirements are addressed specifically to the installation of chimneys. The design of the structure can be anything, but the material must be non-flammable.
The materials used for the construction of chimneys can be:
- steel;
- ceramics;
- brick.
Without exception, all structures are prefabricated, and the installation itself is fragmentary, since the chimney passes through several rooms (for example, a room and an attic).
In order for a structure to meet fire safety requirements, its parameters must be correctly calculated, and all component parts must be sized accordingly. When installing factory equipment, you must follow all the recommendations set out in the instructions, including the assembly procedure and methods for installing parts.
The documentation contains certain provisions that also need to be taken into account, for example:
- the length of the chimney can be any, but not less than 5 m (the height of the ventilation ducts is not less);
- the cross-section of the pipe must correspond to or exceed the inlet hole in the generator;
- each heat generator requires a separate chimney;
- the speed of flowing air inside the pipe is from 15 m/s to 20 m/s;
- the thickness of the pipes is determined by the material of manufacture (the norm for steel is at least 0.5 mm);
- for regular inspection and cleaning activities, chimneys are equipped with pockets (niches) 0.25 m deep;
- the maximum number of chimney turns is 3;
- the radius of curvature must exceed the diameter of the channel;
- the height of the pipe above the roof is regulated by the roof structure: on a flat one – 0.5 m; 0.5 higher than the roof if it is located at a distance of 1.5 m (or less) from the ridge; equal to or greater than the ridge axis if located at a distance of 1.5-3 m.
The order of construction of the structure has been established - always from the bottom up, that is, from the heat generator (boiler, furnace) through the floors to the roof. In prefabricated structures, each subsequent pipe part is inserted into the previous one. The operating temperature of sealants used to fix parts must be at least 1000º. The connections are equipped with clamps on the outside; fastening material should not get inside the chimney.
Support brackets are provided for fastening the tee, and in order to avoid sagging of the channel, clamps must be fixed to the wall every 2 m to support the pipe
The regulatory documentation defines the places where chimneys are allowed to be installed. The wall material must be non-flammable, but if this condition is not met (for example, in a building with wooden walls), then during installation, for protection purposes, cap or crown pipes should be used.
Problems in the chimney of stoves
In addition to the design of the stove itself, smoke in rooms can occur due to problems in the chimney. There may be several reasons. Let's look at each of them.
Insufficient height
One of the most common reasons for lack of traction. The pipe must be located at least 50 cm above the peak of the roof. This rule is often neglected. Many people do this for aesthetic reasons, wanting to give their home a spectacular look, which a chimney towering above it will only spoil. Here you have to choose between beauty and efficiency.
Chimney height
Miscalculations in design
Most often, this is the choice of the wrong diameter of the smoke passage. As a rule, for private houses it is recommended to use at least 150 mm. Homeowners who ignore this advice risk problems with the further operation of the furnace.
We described the technology for laying a brick chimney here.
The chimney is not insulated
This usually applies to metal chimneys. People believe that the gases from the stove are already hot, and there is no point in insulating the chimney additionally. Sometimes they do this to save money. This contributes to the formation of a large amount of condensation inside the chimney and the subsequent occurrence of the problem.
Chimney blockage
We have already discussed the blockage of the chimney with bricks and other elements of collapsed masonry. Here we will consider the blocking of the chimney with soot. This is partly due to ignoring the need to insulate the chimney, as well as the use of certain types of fuel that emit too much soot. This may be some types of coal, briquettes containing too resinous components.
Soot in the chimney
Soot often causes fires in chimneys. To clean chimneys, technical openings are provided through which accumulated soot is removed. Don't forget about the good old metal brushes that chimney sweeps have been using for hundreds of years.
You can also use chemicals that, during the combustion process, also destroy soot accumulated in chimneys. The most affordable of them is diesel fuel. To do this, wrap a piece of rag around a metal rod, wet it with fuel, set it on fire, and insert it into the hole for cleaning. In a couple of minutes you will get rid of soot deposits in the chimney.
For those who like more environmentally friendly methods, it is recommended to use rock salt during heating. But the efficiency of this method is lower and takes more time.
Excess condensate in combustion products
The problem may occur due to certain types of fuel. For example, wet wood itself burns poorly, while emitting a large amount of smoke and moisture, which increases the amount of condensation, interferes with normal draft, and contributes to the appearance of smoke in the room. The problem can be partially solved by using dry firewood, while adding a small amount of damp logs to it.
Three ways to clean a chimney from soot in the author's video:
Instructions for laying a brick chimney
The most ancient chimneys known to mankind were made of stone, and then of brick, along with the first stoves. Natural material is still used to this day for the construction of heating systems in private homes. Let's look at the main stages of constructing a brick chimney.
Design features of a brick pipe
There are two options for connecting a brick pipe. The first, lighter one, is installed directly on the stove, the second is built nearby and connected with an adapter. The fact is that the weight of a brick chimney with a height of 5 m or more is quite large, and not every heat generator can withstand it. To build one pipe, from 500 to 800 bricks are required (depending on the height of the ceilings and roof), each of them weighs 3.8 kg.
In any case, a chimney is not just a hollow structure, but a complex structure consisting of several functional parts.
The working part of the pipe, located below the ceiling, is the internal chimney. It starts immediately from the surface of the stove (boiler) and ends at the very ceiling (4 rows of masonry)
When the chimney passes through the ceiling, a fluff is created, which is a thickening. The next thickening of a similar configuration is constructed when the pipe passes through the roof. It's called "otter". The part of the pipe from the fluff to the otter is the outer chimney. A neck rises above the roof, ending with a cap (an alternative to a deflector).
The main safety condition is the distance from the internal channel through which hot smoke and gases pass to the surface of the walls and ceiling elements. It is equal to 0.25 m - this is exactly the length of one building element, a red solid brick.
The second condition concerns the location of the chimney. It must be erected strictly vertically, the maximum possible error is 3 degrees. And the third condition is the ideal tightness of the masonry, in which there should be no through holes or cracks.
The dimensions of the chimney depend on the power of the heating device. Usually they choose one of the traditional masonry: with the smallest section - “four” (12.5 cm x 12.5 cm), rectangular - “five” (25.0 cm x 12.5 cm) or a large one - “six” (25 cm x 25 cm). The latter option is preferable for Russian stoves, rectangular - for fireplaces. For low-power cookers, the first solution is suitable.
Selection of material and preparation of solution
A stove chimney is installed together with a brick stove. If another unit is installed, the pipe is built on after its installation. For construction you will need brick and mortar, as well as tools: a trowel, a plumb line and a special hammer for tapping. The bricks are pre-soaked. To install the fluff and otter, you will need pieces of bricks measuring ½, 1/4, 1/8, ¾.
Regular cement mortar is not suitable for masonry; a mixture of clay and sand is required. This is justified by the characteristics of clay, which has a coefficient of linear expansion close to the parameters of brick. Depending on the type of clay (lean or oily), its ratio to sand may vary: 1:3 or 1:4.
The clay is pre-prepared - soaked in water and kept for about 3 days. Before use, the material must have a consistency reminiscent of liquid sour cream and be free of foreign inclusions. Special requirements apply to sand. The best option is rough, with grains of 0.9-1.0 mm.
Clay and sand are mixed in small portions as the masonry progresses. Sometimes you need to add water. The quality of the solution can be easily determined by how it contacts the trowel: the mass should leave marks on the surface, but not flow off it or stick in large pieces. If you have problems preparing the mixture yourself, you can buy a ready-made one.
The order of laying the main parts
If the boiler is installed or the stove is finished, you can begin to build a brick chimney. The procedure is traditional: applying the mortar, then installing the brick, adjusting it relative to adjacent parts with your hands and a small hammer. The vertical position is checked after laying each row using a plumb line. The wall width is 12.5 cm. The straight pipe element is finished 4 rows before the fluff - expansion in the ceiling.
To expand the thickness of the walls, it is necessary to fold 4 rows one above the other, so that each subsequent row moves by 1/8. Which parts of the brick are best to take are indicated in the diagram
It is necessary to eliminate the pressure of the ceiling structure on the masonry, so a gap of 2-3 cm wide is left between the ceiling and the fluff. It is used for installing insulating material, for example, mineral wool slabs.
A straight section of pipe runs through the attic again, then an otter is made. Its bottom row must be laid out when the outer edge of the chimney has passed through the roof. At this stage, cement is often used to prepare the solution, which is stronger and more wear-resistant than clay. The otter consists of 6 rows, the indentation of each next one is 1/8 of the whole brick. The holes around the pipe are insulated and covered with steel roofing sheets.
The next stage is again straight - the neck, which is crowned by the head.
The shape and size of the head may vary, but the traditional option is two rows, the first of which is shifted by 1/8, the second by ½ of the whole brick
A deflector is necessary to prevent clouds of smoke from returning back into the chimney. Along the perimeter of the head, fastenings for a cap are installed - protection from precipitation. Caps are often used as a decorative element, so they are given an interesting and beautiful shape.
Causes of smoke from a stone stove
Disadvantages of the furnace combustion chamber
The presence of cracks in the chamber or the firebox door not closing tightly can cause smoke to enter the room. This typically occurs in older furnaces where design defects develop over time. Natural wear and tear of parts and materials, and deformation due to high temperature can also affect. This reason can be eliminated by replacing outdated parts and covering areas with cracks with a solution of clay and sand.
Incorrect size and shape of the firebox or ash pan is a common cause for new stoves that have had a design error. In this case, you can try to make minor adjustments. But this applies to furnaces in which the combustion chambers need to be reduced. If any of the chambers is too small, you will have to disassemble the oven and rebuild it.
You can read about brick kilns in our separate article.
No distribution box
In stoves that use one common flue for two combustion sources, counter-draft or turbulence can often occur that causes the smoke to move in the opposite direction. This indicates flaws in the design. The problem is solved by adding a distribution box. It prevents the two streams from mixing and correctly directs the gases into the chimney.
Collapse of the chimney or its parts
During operation, a situation may arise when a piece of brick appears inside the chimney, which will interfere with normal operation. This can happen as a result of the collapse of part of the pipe on the roof, which is constantly exposed to precipitation. The cause may also be destruction inside the chimney. Such cases are typical for old stoves. To fix the problem, inspect the pipe from the outside and, if necessary, remove remaining bricks through the technical holes to clean the pipes. If necessary, repair the chimney in areas of damage.
Presence of large cracks and cracks
Under normal conditions, it is difficult to imagine the presence of cracks so large that they would interfere with the normal operation of the stove. This feature is also typical only for old stoves. Gaps can affect changes in air flow and disrupt natural draft. Correct such defects before problems with the furnace occur.
Errors in well design
This problem may only be noticeable when the firebox door is opened. And many may not pay attention to this. After all, when the stove is closed, no smoke comes into the room. This indicates miscalculations in the creation of the well, which changes the correct path for the gases to escape. The well will have to be rebuilt. There is no other solution to the problem.
You can also learn about the causes of smoke from the video:
How to make a ceramic chimney
Prefabricated ceramic chimneys have become popular due to their strength, safe composition, environmental friendliness, and ease of installation. They borrowed the best technical characteristics from steel and brick models. The only negative is the high cost of the kits. Let's look at how a ceramic chimney is installed in a private house.
Prefabricated design
Unlike brick chimneys, ceramic ones are assembled from ready-made elements, gluing them together with a special solution. It is not possible to make ceramic parts yourself; ready-made kits are purchased for construction. Manufacturers present standard kits from which you can assemble a chimney for a fireplace, stove or boiler.
A ceramic chimney element is a sectional part of a pipe. The sizes of pipes vary from manufacturer to manufacturer; one of the standards is 3 pieces per 1 m of chimney
In addition to ceramic pipes, the kit includes the following parts:
- base element with condensate drain;
- connection part with a pipe (angle 90º or 45º);
- inspection chamber with door;
- lightweight blocks for external framing;
- set for external decoration (on the roof);
- non-flammable insulating material for installation;
- paste glue.
Additionally, fasteners (brackets) and non-flammable material for cladding are required: plaster, natural stone, ceramic or clinker tiles.
Assembly and installation rules
According to the standards for the installation and operation of a ceramic chimney, it should be located no further than 2 m from the heat generator (the closer, the better), as far as possible from walls and ceilings made of flammable materials, and should not cross load-bearing elements.
During installation, you should adhere to these rules:
- a prerequisite is the construction of a foundation coated with a fire retardant;
- installation begins from the bottom part - the base, then sequentially continues towards the roof;
- the parts are glued together with a special glue, which is included in the kit;
- the diameter of the pipe must be larger than the outlet pipe of the heat generator;
- Mineral wool and plaster are used for thermal insulation;
- the junction of the pipe and the roof is protected with a metal apron;
- If the roof is covered with flammable material, it is necessary to equip a spark arrester.
If the chimney duct is installed without fasteners for more than 3.9 m, it must be reinforced with steel rods. Especially for this purpose, holes are provided in the pipe parts in the corners.
One of the design options for a ceramic channel. The thermal insulation layer increases the degree of protection, the outer cladding serves as a barrier between combustion products and building elements
The upper part of the head is equipped with an umbrella to protect from rain, debris and strong wind.
The nuances of installing and connecting pipes
The elements from which the chimney is assembled are made from ceramics with the addition of fireclay - this composition tolerates high temperatures, and parts made from it have a long service life. They cannot be used as independent units; external protection is required.
The lower part of the chimney - the base - is equipped with a hole for draining condensate, which is formed during the removal of combustion products. The accumulated liquid moves into the sewer, which is connected in advance. It should be remembered that moisture from the chimney is detrimental to septic tank bacteria, so it is better to prepare a separate container to collect the liquid.
A tee with an inspection hole is installed on top of the base. During fuel combustion, the hole is closed with a door. The main purpose of the tee is the ability to inspect and clean the chimney
The elements are installed one on top of the other according to the instructions, without changing the order established by the manufacturer. The correspondence between the dimensions of the chimney and the parameters of the house must be checked in advance.
How to prepare and apply glue
To ensure that the chimney parts are hermetically connected, special acid-resistant glue is used. This is a thick mixture that is prepared by hand from dry powder and water in a 7:1 ratio, preferably at room temperature. At first the solution looks unusually dry, but after about 7-8 minutes it takes on the desired pasty appearance.
The finished mixture must be quickly and carefully applied to the junctions of the pipes, trying to use it within an hour and a half. Then it loses the necessary properties, and the drying mass cannot be diluted with water.
One of the nuances of applying glue is pre-wetting the ceramic surface. It is impossible to save the adhesive mass - only hermetically filled seams guarantee the full functioning of the chimney. Remains of glue must be removed: from the inside - to prevent soot from accumulating, from the outside - for aesthetic purposes.
If subsequently there is a desire to disguise the pipe with a decorative partition, the technical inspection hole must be accessible.
Conditions for smoke
We looked at the causes of possible smoke in the room and methods for eliminating them. Let's discuss the conditions under which they can manifest themselves.
The oven has just been installed
In this case, you will have to check several factors at once. In the case of a factory boiler, you can be sure that its design is correct, that is, you will have to check for problems with the chimney and its design. If we are talking about a stove, then we will have to check both the correct operation of the stove itself and the correct design and installation of the chimney.
The stove was installed a long time ago and has worked for one or more seasons.
No changes were made to the design. If the stove worked properly for one or several seasons and there were no problems with smoke, you should check the chimney for permeability. If necessary, remove soot and debris.
The stove was installed a long time ago and worked for more than one season, but changes were made to the design
Here you will have to deal with the changes that were made to the design of the furnace. This means that the adjustments were made incorrectly, and some mistakes were made in the project. Try changing the height of the firebox. Remove significant design modifications, or try to reduce their impact.
Changes have appeared in the room where the stove is located
For the room in which the stove or boiler is installed, there are a certain number of requirements. The main one is the presence of additional ventilation for fresh air. In the case of old windows, the stove can operate without ventilation. The necessary air will flow through the cracks in the windows and doors of the room. If you installed plastic windows, this can greatly change your working conditions. Now the room can be called practically sealed and the main rule is violated - access to air in the amount in which exhaust gases are released. Due to the lack of air, the stove will emit a certain amount of smoke back into the room, thus compensating for the shortage. The problem can be solved by installing a proper ventilation system for uninterrupted air access, as well as installing small valves to circulate air in the room. Temporarily it is enough to at least open the window.
New buildings appeared near the house, tall trees grew
We partially touched on these conditions above. Over time, a tree planted near the house can create certain obstacles to the operation of the chimney. The house may need to be inspected for such obstructions. Trim off excess branches. You should also pay attention to your neighbors' new buildings. You may need to adjust the height of your chimney.
Presence of drafts. In winter conditions, open windows and strong drafts in the house are difficult to imagine. Usually everything possible is done to conserve heat. But we will consider cases when the stove is used in the summer for cooking. In such cases, the windows in the house will most likely be open. If there is a strong wind, there is a possibility of smoke entering the room. In this case, the direction of the wind should be taken into account. It will be enough to close the window from the direction the wind is blowing. This usually fixes the problem.
Construction of a metal sandwich chimney
Steel chimneys are popular both in industrial construction and for landscaping in the private sector. Their installation is reminiscent of assembling a ceramic structure, and accordingly, it is easier than building a brick pipe. Let's take a closer look at how to properly make a metal chimney, avoiding mistakes.
Materials for installing a metal structure
A sandwich chimney is a sealed system of pipes and adapters leading from a heat generator to the roof space. It can pass inside the building (internal) and outside, along the wall (external).
A sandwich pipe is a three-layer part consisting of two steel pipes, between which a layer of insulation is laid. Stainless steel fragments are connected by welding
Non-flammable thermal insulation material has different thicknesses - on average from 2.5 cm to 10 cm. Manufacturers most often use one of the best materials - dense basalt wool (from 200 kg/m³).
To assemble a chimney, you will need to connect several parts of various shapes, using the method of connecting tapered ends and sockets. Simply put, one element is inserted into another. From the outside, the joints are reinforced with overhead clamps, which are tightened tightly after installation.
Advantages of a three-layer design: protection of the smoke exhaust channel, minimal condensation formation, organization of stable draft, possibility of installing the system both from the inside and outside of the house
When installing a steel chimney inside a building, the holes in the ceilings and roof are much smaller in diameter than for brick or ceramic analogues.
Sandwich chimney installation diagrams
Let's consider two installation schemes for a sandwich chimney: with an internal arrangement, which requires the organization of holes in the roof and ceilings, and with external installation, which is carried out from the outside and installed parallel to the wall of the house.
Each of the schemes has advantages: the internal equipment produces less condensation, the external device is easier to design and is made with only one hole
The internal installation scheme is often used in bathhouses, since a steel pipe can simultaneously heat both stones and a tank of water. If the bathhouse is not installed separately, but is an extension to the house, this is the most appropriate and effective option. The disadvantages of the internal system are the need to make holes in the ceilings and roof, as well as a reduction in usable space.
To install an external system, it is enough to make one hole in the wall and ensure the pipes are positioned vertically using brackets. Taking the pipes outside reduces the risk of poisoning from combustion waste. The downside is the provision of additional protection from the influence of the external environment.
Installation procedure:
- connecting an adapter to the boiler (or other heat source);
- punching a hole in the wall (average size - 40 cm x 40 cm), upholstery with fire-resistant material;
- installation of a passage block with thermal insulation in the wall;
- installation of a horizontal section of pipe from the boiler (furnace) to the hole in the wall;
- arrangement of the support unit from the outside (platforms on brackets);
- installation of a vertical pipe;
- fastening in the upper part of the cone and head.
When assembling, it is necessary to rely on the technical documentation prepared during the project preparation process.
When choosing an internal model, you need to remember some technological nuances. For example, it is important to install a valve in the transition area from the boiler so that heat can be retained.
Transitions through floors and roofs require the use of fire-retardant thermal insulation materials, such as mineral wool, and the installation of protective blocks, which can be called a “sandwich within a sandwich”
The joining of two adjacent elements in the transition area is prohibited. The location of the attic rafters and beams should be taken into account: the further they are from the chimney, the better.
Chimney cleaning
An important point is to clean the chimney yourself. To do this, a metal door is installed at its lower points, providing the opportunity to select ash. Cleaning proceeds as follows:
- the heating device turns off;
- time is given for the ventilation system to completely cool down;
- the rain cover is removed from the top of the chimney structure;
- a wooden pole is selected, a length equal to the length of the chimney, and a rag is wrapped around it;
- this design is inserted inside the pipe and it is cleaned;
- after this, the lower door opens and the soot is removed, this action occurs several times until the pipe is completely cleaned.
We can consider the work finished. The door is closed and the rain cover is put in place. A match checks traction. After which the heating device starts.
Chimney cleaning must be done before each heating season. This allows you to remove foreign objects from the pipe cavity, remove cobwebs, and sweep away oily soot.
As a result, the thrust of the heated device and its efficiency increase.