Why is chimney insulation necessary?
The chimney is mainly protected from two main negative factors that affect it:
- High temperature in the sauna.
- Moisture ingress through poorly made joints in the roof.
To eliminate negative factors, you can wrap the chimney pipe with a heat insulator. This will help prevent heating of the metal structure, as well as eliminate the appearance of condensation, which also has a detrimental effect on iron elements.
Chimney insulation allows you to:
- Make it safe to cross where the pipe comes into contact with the roof or wall.
- Avoid heat loss.
- Extend the service life of metal structures.
- Use all types of finishing materials to create your own unique style and cozy atmosphere in the bathhouse.
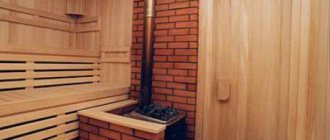
Metal hood in a sauna
In principle, carrying out work on insulating a chimney structure is not particularly difficult, the main thing is to know how to insulate a metal stove chimney pipe in a bathhouse. To choose the right type of insulator that is suitable for you, you need to understand their technical characteristics.
Insulation materials
When choosing insulation to insulate a chimney, it is important to pay attention to its properties. The material must have good thermal insulation characteristics and not be flammable. It is desirable that the insulation has low hygroscopicity.
The best options for insulating a chimney in a bathhouse or house are several types of materials.
Mineral wool
Mineral wool absorbs moisture over time and becomes unusable.
It is a fibrous material that has an air layer. Thanks to special treatment, mineral wool does not ignite, but retains its shape even when exposed to high temperatures. It's inexpensive.
Mineral wool insulation has several disadvantages:
- susceptibility to deformation over time;
- ability to absorb moisture.
Mineral wool is used less and less as external insulation, since it is necessary to well insulate open areas and place it in a hard shell (frame).
Basalt wool
Basalt wool can withstand high temperatures and lasts a long time.
This insulating material has the following technical characteristics:
- Low thermal conductivity, which can be compared with polystyrene, cork materials, and rubber.
- High level of fire resistance. Basalt wool can withstand temperatures of more than +1000 °C without losing its thermal insulation properties.
- Excellent waterproofing properties. Water is not able to penetrate inside the basalt wool.
- Resistance to mechanical stress. When producing basalt wool, the fibers in it are alternately arranged vertically and longitudinally. This design allows it to withstand fairly high compressive loads.
Basalt wool is produced mainly in slabs. Therefore, to insulate the chimney, you will have to build a special outer box.
Kaolin slabs
Kaolin board is suitable for protecting a brick chimney from destruction.
Kaolin is absolutely safe for human health. Does not emit toxic substances into the atmosphere even at high temperatures. Kaolin boards are resistant to fire, so they can be used to insulate chimneys of fireplaces and open-fire stoves.
Working with viburnum slabs is easy because they are light in weight. The peculiarity of the insulation is that, with a minimum density, its insulating ability is quite high. This means that when carrying out repair work, it is possible to preserve the usable area around the chimney inside the room.
Roll filters
Externally, they are cylinders, the outer part of which is made of foil material, and the inner part is made of foam. Roll filters are especially good for galvanized steel pipes. Such insulation can withstand high temperatures, is resistant to fire and high humidity. The only condition for installing roll filters is reliable sealing of the joints in the upper open part of the roll from atmospheric precipitation.
Folgoizol
It is a two-layer material consisting of a heat-insulating component and foil. Thanks to the reflective layer, the room does not cool down so quickly, because up to 90% of the heat is retained inside the bath, so it is a very high-quality insulator.
Folgoizol is highly environmentally friendly, because thick food foil is used as a raw material. This material is not afraid of ultraviolet radiation and strong temperature changes - the operating range is from -65 ºС to +175 ºС. Therefore, it will be a completely worthy choice for wrapping a pipe in a bathhouse.
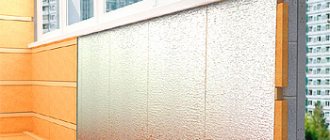
Note that foil insulation is often installed not only around the chimney, but also on the walls and ceiling of the steam room. It serves for high-quality vapor and waterproofing, and also insulates the bathhouse well.
The sauna, lined with foil insulation, can be compared to a thermos based on its operating principle. It heats up quickly and cools down very slowly.
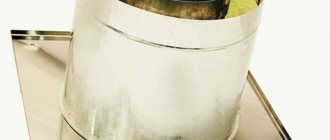
Sandwich pipe as a chimney
Recently, various manufacturers have begun to produce new safe sandwich pipes for baths and saunas. With such a design, there is no longer any need to worry about how to protect the pipe in the bathhouse (for more details: “Advantages of a pipe for a sandwich bathhouse when building a chimney”). The design of such pipes involves quick and convenient assembly of sections inserted into each other. Moreover, it is optimal to use such pipes with an iron stove.
Ceiling trim for a bathhouse: installing the chimney correctly
The correct ceiling cut for the chimney is the key to the safety and longevity of your bathhouse. In a matter such as fire safety, it is better to overdo it with safety measures than to underdo something. It is unlikely that anyone will argue with this. Therefore, we study the recommendations of the fire service and make a chimney passage through the ceiling of the bathhouse according to all the rules.
The passage of the chimney pipe through the ceiling of the bathhouse must be done in accordance with all fire safety rules
For the pipe in the bathhouse, you need to make a special passage through the ceiling. This is a device that provides safe distances from the outer surface of the pipe to the ceiling materials. They are regulated by SNiP 2.04.05-91. The recommendations are as follows (paragraph 3.83):
- from the outer surfaces of brick and concrete pipes to combustible rafters and sheathing - at least 130 mm;
- from ceramic pipes without insulation - at least 250 mm, from them with thermal insulation - 130 mm.
These numbers must be taken into account when installing floor beams. Their pitch is usually taken to be small - about 60 cm. With this pitch, the recommended distances will only be maintained when using pipes with insulation. For example, sandwiches.
The diameter of the furnace outlet pipe is most often 115-120 mm. If you use a sandwich with an insulation thickness of 100 mm when passing through the ceiling, the outer diameter will be 315-320 mm. There must be a distance of at least 130 mm on all sides. It turns out that in this case the distance between adjacent beams should be 130 mm * 2,315 mm = 575 mm. We just fall into the gap of 60 cm.
Combustible materials need protection
There are a lot of sandwiches on the market with insulation thicknesses of 35, 40, 45 and 50 mm. You can find a layer of 100 mm mainly in stores specializing in sauna stoves. Only in sauna chimneys there are temperatures from which it is necessary to protect with a 100 mm layer of mineral wool. Is it possible to use a 50 mm layer? You can, but if you want to take it easy, take 100 mm - it’s more reliable.
The distance between the beams in this case should be 250 mm * 2,115 mm = 615 mm. It may be a little, but it doesn’t go away. But this calculation is for not the largest diameter of the smoke channel. There are many more.
In any case, if the ceiling has not yet been made, calculate the installation pitch of the beams taking this factor into account.
At the same time, mandatory Appendix 16 contains recommendations on the setback (distance from the outer surface of the pipe to combustible materials):
- for a fire-protected partition: with a pipe thickness of 120 mm - 200-260 mm;
- with a pipe thickness of 65 mm - 380 mm.
- with a pipe thickness of 120 mm - 260-320 mm;
This application deals with wall setbacks. After all, very often chimneys pass close to walls. And their material also needs protection: the temperature of the flue gases at the outlet of the furnace can reach 500°C.
If wood walls are not protected by anything, they will char and then burst into flames. Therefore, a layer of thermal insulation is laid on the walls (cardboard made of mineral wool is suitable), and a sheet of polished stainless steel is stuffed on top.
When crossing the ceiling, it is necessary to protect the “pie” materials from heat, and also somehow fix the pipe in a certain position. This task is accomplished by a ceiling cutout or, as it is also called, a “passage unit.”
The pass-through units are industrially manufactured. They are a box made of metal or mineralite, to which a stainless or galvanized steel plate is attached on one side.
It also serves as a support for the heat insulator, which is used to fill the gap between the pipe and the floor beams for better thermal insulation.
This is a mineralite ceiling penetration. View from the attic
There is no disagreement regarding what material to use for the penetrations in the bathhouse: only stainless steel. The fact is that at temperatures that are typical for steam rooms, galvanization releases far from the most useful substances. Therefore, there is only one option: stainless steel.
Everything is installed simply. If the ceiling was made without taking into account the passage of the pipe, a square hole is cut in the right place (between the beams), which is 1-2 cm smaller than the size of the decorative panel. Beams and boards are covered with a layer of thermal insulation.
We suggest you familiarize yourself with How to properly install a chimney from sandwich pipes. Selection of overall dimensions. How does a sandwich chimney work?
If available, you can nail down strips of mineralite, basalt or asbestos cement cardboard (asbestos is harmful, so use it only as a last resort), just a strip of stone wool insulation.
You can't do that - you had to cut a square hole. And the lining on the ceiling near the pipe is already charred...
When installing a pipe on a stove, the device is placed on a straight section that will cross the ceiling. The passage unit simply rises to the desired level. A strip of thermal insulation is placed under its edges that touch the ceiling boards, then everything is fixed with self-tapping screws. In many units, manufacturers even make perforations for self-tapping screws, so even this is not a problem.
The configuration of these products varies. Sometimes a metal cylinder is made around the hole for the pipe. The edges of the decorative plate protrude significantly beyond this cylinder. When installing a pass-through unit of this type, the hole is still cut in a square shape.
In addition, with this form of passage through the ceiling, it is imperative to protect the wood of the ceiling not only with heat insulators, but also to cover it with strips of metal.
Pass-through units through the ceiling come in different configurations
There are passage units in which there is no cylinder around the pipe, but there are outer sides around the perimeter. They are made of metal, and can also be made of mineralite.
So additional thermal insulation of the edges of the cutout is not necessary (but you can play it safe).
When planning the size of the chimney, consider several rules:
- Immediately after exiting the sauna stove, you can only install a thick-walled metal pipe without insulation. Its height must be at least a meter: the outlet temperatures are too high, so even stainless steel and mineral wool cannot withstand it. Above, you can use sandwich pipes.
- A pipe in a protective sheath is passed through the ceiling. This may be a factory-made sandwich, but you can insulate a single-wall panel yourself. Another option on how to protect walls and ceilings from heat
- There should be no joints at the intersection of floors: only before or after. Choose the height of the sections so that all connections can be visually inspected.
- The maximum length of the horizontal section is 1 meter.
- There are no more than 3 elbows on the entire chimney.
- The pipe should not be rigidly attached to the ceiling. As temperatures change, it changes size and must be able to move freely.
After the device is fixed to the ceiling, they go up to the attic or second floor and fill the gap between the outer wall of the pipe and the beams with heat insulator.
Basalt wool can be used as thermal insulation. But be sure to check that the operating temperature range should be greater than 600°C.
You can use mineral wool or clay to insulate the pipe.
Some people think this option is not the best. Firstly, during production, resins are used as a binder, which release formaldehyde when heated. Secondly, condensation sometimes runs through the pipe. And mineral wool (and basalt wool too) lose their heat-shielding properties when wet. And when they dry, they are only partially restored. So this option is really not the best.
The penetration is also covered with expanded clay of medium and fine fractions. This is a natural material that is relatively light in weight. Even if it gets wet, it then dries and restores its properties. When wet, the thermal conductivity increases slightly, but it is already worse for expanded clay than for mineral wool.
In the past, sand was often used. The option is not bad in all respects, except for one detail: it gradually wakes up through the cracks. Refilling the sandbox is not difficult, but constant sand on the stove is annoying.
One of the heat insulators is expanded clay
“Clay rules in cutting! I dismantled the chimney in my bathhouse. Or rather, I took apart what was left: there was a lot of snow, and when it melted, it blew off the entire top.
Once you change the top, you need to look at the bottom: the pipe has been standing for 7 years. So here it is. There is zero burning inside, and there is no burnout of the pipe either. Condition: as soon as installed.
My penetration is lined around the perimeter with basalt wool, and then everything is covered with clay. This is definitely the best option."
Not everyone recommends using insulation in the passage unit. There is an opinion that it is better to leave the gap unfilled: this way it will be possible to avoid overheating and burning out of this section of the pipe - it will cool better due to air blowing. This may be true, but the radiation from the heated pipe will dry out the nearby wood, and in this case the temperature of spontaneous combustion is significantly reduced - to 50°C.
As you can see, the pipe burned out
One way to avoid overheating is to place stones on the pipe
- Make a water jacket on the metal chimney and use hot water for showering or heating. The system is not so simple; it also requires a remote tank, as well as pipe connections, cold water supply, etc. But temperatures above the water jacket will not be nearly as high, and the pipe will not burn out.
- You can also heat water, but it’s easier: install a samovar-type tank. Hot water is also provided, the chimney does not overheat and is protected. But there are some nuances here: do not let it boil, drain the heated one in time, add the cold one. And doing this is not entirely convenient, since the tank is located quite high: above the stove on a pipe.
- Adapt a net for stones. The water will have to be heated in a different way, but the advantage here is this: after the procedure is completed, the stones dry the bath. Here, too, difficulties may arise: the weight of the stones is considerable, it is unlikely that you can do without support, unless you use the factory version (on the right in the figure). In a homemade version, a structure will be needed to redistribute the mass.
What is the best thing to do?
First of all, the chimney pipe must be protected from two main negative influences: overheating and moisture ingress through the joints.
In this regard, the two main stages that must be completed in the process of insulating a chimney in a bathhouse are:
- Fire protection;
- Waterproofing.
Thermal insulation of the pipe in the bathhouse, which runs through an unheated attic, allows you to prevent heating of the structural elements of the roof, as well as to avoid the appearance of condensation, which has a very negative effect on the metal.
Important! It is worth considering the option of comprehensive insulation, since it not only solves the main problems, but also increases the level of operation.
Waterproofing also performs a very important function, because it can protect the truss system of a bathhouse, as well as other wooden elements, from rotting. Thanks to waterproofing, a pipe subject to constant wetness will not collapse.
Fire insulation
Of course, the safest option would be to install a sandwich pipe for the chimney, since this design already includes insulation.
This option is not suitable for everyone, since high-quality sandwich pipes cost a lot. That is why classic metal pipes are more popular.
Insulation of a single metal pipe is done by installing boxes and winding the pipe with basalt wool insulation.
Of course, you can do without using thermal insulation, but in this case the design will be less safe. It is worth noting that fire cutting is carried out without fail and in accordance with all the rules.
Methods of waterproofing from the ceiling and roof
Insulation against moisture penetration into the roof is carried out at the point where the pipe exits onto the roof.
The number and complexity of tests for a chimney pipe depend directly on its height and dimensions.
The fact is that the larger the pipe, the more influence it will have from wind, rainwater, and snow flows.
If you allow a misfire in the waterproofing process, natural precipitation will eventually begin to penetrate the roof, causing leaks and rotting of wooden structures.
The actual method of insulation from moisture depends on the material of the roofing and the shape of the pipe. Thus, when waterproofing round pipes, polymer grooves are used, and in the case of rectangular and square shapes, metal aprons and junction strips are used.
How to route a bathhouse pipe through the roof
The construction of a chimney duct to the stove requires its passage through the ceiling and out to the roof. The bathhouse pipe through the roof must pass in full compliance with fire safety rules. Otherwise, the possibility of fires increases, which will cause harm to human health.
Chimney outlet to the roof
We suggest you familiarize yourself with the Blind area around the house on heaving soils
The passage of a pipe through the ceiling of a bathhouse is regulated by SNiP 41-01-2003. This document states that:
- the passage of the bath pipe in the ceiling should be located at a minimum distance of 350 mm from flammable structures and 250 mm from difficult to flammable elements;
- It is considered ideal to leave this distance not closed (air). However, such a design will lose a large amount of heat;
- the specified distance is filled with non-combustible materials;
- the hole must be covered with metal sheets (stainless steel is more often used, which does not spoil the appearance of the room);
- the pipe in the bathhouse through the ceiling and roof should not have joints. This factor must be taken into account when designing a chimney;
- the maximum length of the pipeline passing through the ceiling or roof should not exceed 1 m;
- The chimney should not be attached rigidly to the ceiling or roof.
The following materials can be a heat insulator:
- basalt or mineral wool. The insulation can withstand heating up to 600ºС. The main disadvantages are: the release of formaldehyde, since the material contains resins and the instability of protective qualities when wet, which is possible in the event of condensation formation;
Basalt wool
- expanded clay The material has excellent properties. When wet, expanded clay quickly restores its functions. However, to arrange the ceiling, you will have to additionally install containers in which the material will be located;
Middle fraction expanded clay
- mineralite The material consists of cement, cellulose and mineral fillers. Minerite tiles can withstand temperatures up to 600ºC. When heated, it does not emit harmful substances, and when exposed to water, it does not lose its properties;
Minerite insulation
- asbestos. It is a good insulating material, but when heated strongly it releases substances harmful to humans;
- sand or clay. The materials were used as heat insulators earlier, before the advent of modern insulation materials. However, some experts prefer to use natural materials rather than artificial ones.
To make the joints airtight, use:
- high-strength sealants that can withstand large temperature changes;
- special clamps made of the same material as the chimney.
How to remove a pipe from a bathhouse through the ceiling? To arrange the transition you can:
- purchase ready-made cuts;
- build the crossing yourself.
The finished shelf assembly is designed to facilitate the installation of a ceiling transition. You can purchase such a chimney element at any specialized store. Ready-made passages come in two types:
- containing insulation;
- without insulation.
The pass-through unit with finished insulation consists of:
- two plates;
- a piece of insulated pipe;
Finished ceiling assembly with insulation
An adapter without insulation consists of metal boxes that need to be filled with insulating materials and holes for pipes.
Unit for arranging a passage through a ceiling without insulation
How to install a pipe in a bathhouse through the ceiling using ready-made cutting? The whole process consists of the following steps:
- make a hole in the ceiling of the required dimensions (depending on fire safety requirements and cutting dimensions);
- in the right places, the cutting is insulated with the previously selected material;
- the finished unit is installed in the ceiling passage;
- a pipe is connected to the ceiling in the bathhouse. The length of the pipe should be 10 - 15 cm less than the height;
- The next section of pipe is connected in the attic.
- pipe joints are sealed.
Installation process of finished cutting
To make your own transition unit you will need:
- metal plates;
- insulation;
- chimney pipe.
The pipe in the bathhouse through the ceiling is installed according to the following scheme:
- a hole is made in the ceiling, the diameter of which is 130 - 180 mm greater than the diameter of the stove pipe used;
Additional reinforcement of ceiling beams
- the chimney goes into the attic. In this case, the pipe connection must be higher or lower than the ceiling;
- a metal plate is installed on the ceiling on the inside of the bathhouse;
Attaching the support metal plate
- the entire distance from the plate to the attic floor is insulated.
Structural insulation
The pipe in the bathhouse is laid through the wall in a similar way. You can see the process in more detail in the video.
Before you remove the pipe in the bathhouse through the roof, you need to take care of two factors necessary for the operation:
- select the location of the output;
- purchase the necessary items.
Protective materials for wooden structures
Due to the fact that the chimney and stove heat up quickly, a fire may occur. Moreover, according to tradition, the material for the bathhouse is wood. Back in the old days, it was customary to insulate the walls, ceiling, stove, chimney with an asbestos layer, clay and other available materials that conduct thermal energy rather poorly and are resistant to elevated temperatures.
So how to cover the stove pipe today? Insulation of the chimney structure is necessary both for fire safety and protection from condensation, so that cooling occurs more slowly and the smoke exhaust system lasts longer.
It is a mistaken belief that several metal sheets used to cover the ceiling around the chimney will be enough to insulate from fire. After all, metal also heats up quickly, so it will not protect against fire, and it will also not be suitable as a heat insulator.
Red brick is not always needed for pipe lining, although it is endowed with excellent thermal insulation properties. The reason is that such a design does not match the design of every bathhouse.
To better understand how to wrap a chimney pipe against fire, consider two options for insulating materials in the form:
- thermal insulation;
- folgoisol.
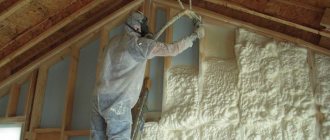
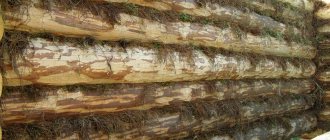
Insulation for a traditional Russian bath
A wooden roof structure may ignite if it comes into contact with a hot pipe. To avoid a fire in the bathhouse, it is isolated. Most often, mineral wool secured with wire is used for this purpose. The top of the pipe is plastered with clay-sand mortar and covered with a layer of galvanized steel roofing. Fix it with self-tapping screws and then perform installation. Insulation helps the roof and wood floors to be protected from overheating and fire .
If the pipe is properly insulated and sealed, moisture will not enter the attic. It is recommended to insulate the pipe outlet in the ceiling and roof area with asbestos sheets. They have good protection against high temperatures. The walls near the inside of the pipe are lined with galvanized metal sheets. Ordinary iron ones are not suitable for such work, as they are susceptible to corrosion. It is advisable to make a box around the pipe where it passes through the ceiling. Expanded clay is poured inside the box, which will serve as good protection against fire for the wooden floor. Expanded clay will also retain heat. Experts recommend that in addition to insulating the chimney, you should also not forget about the ceiling, walls and stove in the bathhouse.
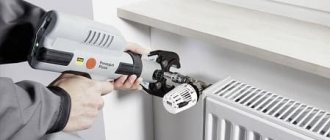
It is recommended that before starting work on insulating a metal chimney pipe, treat its outer part with a heat-resistant sealant . The special sealant can withstand temperatures up to +1000 o C. The applied product will prevent insulating materials from sliding on the outer surface of the metal pipe.
Source
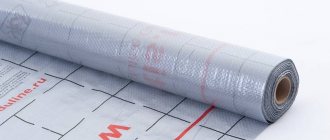
Furnace pipe insulation: teploizol
This is a unique material, the structure of which includes foamed polyethylene, located between a pair of sheets of foil. Using thermal insulation, you can qualitatively insulate a chimney, and do it yourself.
The thickness of the thermal insulation varies from 2 to 10 mm, and the thicker the material, the greater its resistance to high temperatures.
The top layer of foil serves as reliable protection for the pipe from significant overheating. Using wire or adhesive tape, a metal craftsman attaches thermal insulation, which is then wrapped around the chimney.
You can wrap the chimney with foil insulation
Modern material includes two layers: heat insulator and foil. The second one plays a reflective function and can save up to 90% of the thermal energy in the building. Folgoizol is a harmless material compared to other analogues, since the foil is compacted food grade. The material is resistant to ultraviolet radiation and elevated temperatures within the range of -65 to +175 degrees Celsius, a good insulator.
For those who don’t yet know how to insulate a chimney pipe in a sauna, we recommend covering the steam room ceiling, walls and chimney with foil insulation. As a result, you will get a room whose design resembles a thermos. The heat will remain in the sauna, but the bathhouse will quickly gain temperature and then slowly cool down. Sometimes a mesh is installed on the pipe for stones in the bathhouse, which is very convenient and practical.
Protecting the roof from contact with a hot pipe
The main task facing builders in the process of bringing the pipe to the roof surface is the fire safety of the house. Cutting the pipe on the roof is of great importance.
When using a brick pipe, this issue can be solved by increasing the thickness of the pipe walls. The recommended wall thickness is 35-40 centimeters. This thickness of the pipe guarantees the safety of the roof in terms of fire.
The roofing pie is a layer of successively placed layers:
Roofing pie device
- vapor barriers,
- insulation,
- waterproofing,
- roofing material.
It is extremely undesirable to violate its integrity, in order to avoid water getting inside the roof and gradual destruction of the entire pie.
For this purpose, an additional box is made from wooden rafters and cross beams, located between the pipe and the roof.
- The distance between the walls of the box and the chimney should be about 15 centimeters.
- This gap is filled with some non-flammable material.
- All components of the roofing pie are cut and secured with nails or staples to the rafters and cross beams, and the waterproofing is pressed with sheathing or counter lathing.
- If necessary, all suspicious joints can be sealed with sealant.
This will ensure insulation of the chimney in the ceiling.
Proper waterproofing of the chimney, ensuring the fire safety of the entire structure, and the correct choice of where the chimney exits to the roof are the main conditions, the fulfillment of which guarantees your home safety and the proper level of comfort.
Basic rules and regulations
Before insulating a pipe in a bathhouse from the ceiling, you should study the following SNiP requirements:
- To ensure optimal draft force, a chimney pipe with a height of at least 5 m should be erected;
- A minimum distance of 250 mm must be maintained between the chimney pipe and the nearest combustible elements;
- If materials with insufficient fire protection are used for roofing, a spark arrester must be installed;
- A certain distance must be maintained between the upper stove ceiling and the ceiling: for metal pipes - more than 1.5 m, for brick chimneys - 0.5 m.
Insulating a pipe in a bathhouse: how to do it?
Folgoizol material is recognized today as the best insulation for bath pipes - it is often used for heating mains, pipelines and air duct insulation. It does not emit any harmful impurities at high air temperatures.
But if everything is done thoroughly, then you need to make a “sandwich” out of the pipe: inside it there is a stainless steel pipe, on it there is a layer of basalt and again a second, already external contour. Such a pipe in the bathhouse will heat up much weaker than a single-circuit pipe, which in turn will become an obstacle to the formation of condensation (which can even begin to flow into the firebox).
The bottom line is that this insulation layer is based on basalt rocks, which can withstand quite serious temperatures, and even when heated seriously do not ignite or emit any unpleasant odors. That is why such a pipe for a bath is called “warm” - it will never allow the metal pipes to quickly cool down from the outside air, and therefore all the water vapor that is invariably present in the smoke will not cool down and will not settle on the inner walls of the pipe along with soot. Thus, the flue gases from the sauna stove easily escape without clinging to anything.
On the other hand, the outer pipe for the stove in the bathhouse, thanks to the inner layer of insulation, practically does not heat up, which ensures complete fire safety of the bathhouse. And finally, such a chimney significantly improves the operation of the stove - it quickly warms up, and the stove immediately reaches the desired mode. And the traction is much better due to the absence of various obstacles-turbulence, like brick pipes.
Correct fireproof chimney protection
But, if it seems to you that the pipe is getting too hot, it is better to check the temperature not of it, but of the material surrounding it. For example, sprinkle drops of water on the apron and see if they hiss, touch the boards with your hand.
In extreme cases, it wouldn’t hurt to additionally wrap flexible asbestos around the pipe to be on the safe side - preferably so that there is a small air gap left. And the outer edge of the pipe must be hidden under the fungus to protect it from moisture.
Metal pipe: step by step process
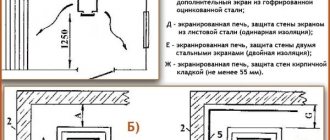
In bathhouses with an installed heater, it is better to use brick chimneys, since refractory brick retains heat for quite a long time.
Many people wonder how to decorate the walls in the bathhouse near the stove, because these places also need protection.
Typically, sheets of asbestos or galvanized steel are used where the chimney comes into contact with the roof and ceiling.
Galvanized steel sheets are also used to protect walls near the stove.
Information. To insulate walls from a hot stove, it is better not to use iron sheets, since they are quite susceptible to corrosion.
A metal pipe without a heat-insulating layer is the most fire-hazardous option for arranging a chimney.
In this case, there should be a distance of 60 cm, no less, between it and the nearest combustible elements. Important! Even maintaining the optimal distance between the pipe and flammable elements will not protect you from burns when you come into contact with its surface.
That is why you should take care of your own safety in advance by installing a high-quality thermal insulation layer. The most popular and simplest option for pipe insulation is the use of heat-resistant insulation for its winding. Basalt wool is most often used as such insulation, which is protected on top with plaster or a metal sheet.
Isolation occurs as follows:
- The first step is to stock up on mineral wool slabs, the thickness of which should be more than 5 mm. Next, the insulation material is used to completely wrap the pipe. The insulation is secured with steel wire, which also needs to be wrapped around the pipe;
- On top of a pipe equipped with a heat-insulating layer, it is necessary to construct a reinforced mesh. Next, a cement-limestone mortar is made, with which the mesh is plastered;
- Instead of plaster, you can use a metal sheet.
To do this, you need to roll it around a pipe with insulation and rivet the edges at the fastening point.
What pipes are used
You need to know that the likelihood of using the sauna without a threat to your health depends on how the chimney of the sauna stove is installed.
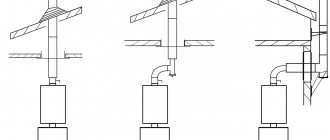
The chimney installation scheme comes in two configurations: internal and external. Depending on this, the chimney elements are selected.
Types of installation
Installation can take place on brackets through the wall or straight through the roof.
In the first case, the entire system is carried into the wall, and then rises, adjacent to the bathhouse, but without passing through it. This looks more aesthetically pleasing, and has the following advantages:
- the free space of the steam room is not used;
- there is no risk of getting burned on steel or stone;
- less chance of fire;
- It’s easier - you don’t have to make a hole through the entire attic.
- cases of smoke are easier to detect, as well as to track the general condition.
But at the same time:
- heat loss increases, since steam actually immediately enters the outside;
- the installation itself is more difficult due to the need to comply with the dimensions of the connection between the hole in the wall and the parts of the product;
- The heating of the pipe is greater due to the fact that the gases escape in the horizontal direction. With this arrangement, the resistance of the flue gases when moving through the channel increases;
- In terms of the number of elements, this option is 10% more expensive than the usual one.
When installing smoke exhaust systems in a straight line through the roof, the chimney is located straight, without bends, it departs from the boiler and goes upward, where it crosses the ceiling and exits on the back side of the roof. Advantages of such a connection:
- Stable draft due to the location of the chimney closer to the roof ridge.
- The condensate container is kept warm, so its cleaning pocket is dry and clean. This extends the service life.
- Cold bridges do not form in the walls, and thermal insulation is not compromised.
- The stability of the smoke exhaust duct is higher due to the fastenings to the roof. The fasteners themselves can be chosen cheaper than for the option on the facade.
- The aesthetics of the structure are not spoiled by side smoke outlets.
- Only a small part of the structure is located outside, which deteriorates over time from snow and rain. You can inspect and clean most of it without leaving the building.
- You can use non-insulated parts of the chimney that are located inside the bathhouse.
- This option is easier and 10% cheaper to install than when outputting through a wall.
- Flue gases go up, there is no obstacle to their exit. Heating is less than with a horizontal connection, since the resistance to smoke flow is minimal.
However, there are also weaknesses:
- The probability of “missing” the occurrence of a fire is higher, since smoke occurs in the ceilings that are located in the attic and on the roof, and they are simply not visible until the fire appears.
- Heat loss through the roof. Tightness is restored when waterproofing is installed before coating.
- Reduction of usable area, since according to safety requirements there should be nothing around the stove pipe for a bath.
- Increased costs for changing the roof and ceiling of the steam room, in particular, after finishing the final finishing.
- If the integrity of the smoke exhaust structure is damaged, the bathhouse begins to smoke.
- Condensation leaks and accumulated soot spoil the appearance of the roof.
- Burns from heated parts are possible in emergency situations.
When deciding on the installation method, the following nuances must be taken into account:
- dimensions of the building - if it is very small, then it is logical to make an external structure;
- the steam room is built from scratch or in an old room - in the first case, you can immediately think about the issue of insulation;
- Do you need to heat adjacent rooms?
External placement
An external smoke channel device is more expensive and difficult to install. This is due to increased requirements for compliance with the dimensions of the connection between the hole in the wall and parts of the product. For external installation, it is necessary to use double-walled chimneys to avoid the formation of condensation and fire.
It is external structures that are the least flammable, since the smoke is instantly directed outside, rather than circulating through a pipe located in the building. The advantage of such a system is the absence of the need to make a hole in the ceiling and roof and saving of internal space. This reduces the risk of carbon monoxide poisoning.
The main advantage of the internal location of the chimney is the easy provision of draft in the chimney structure, which is achieved by the vertical direction of the exhaust gases. In this design, the main part will be located in the interior of the building, which allows the bath room to heat up much faster.
Roof and ceiling passages
It is very important to treat with the utmost care and responsibility the places of passage through the ceilings of the bathhouse.
These areas are insulated, regardless of the type of chimney used, be it sandwich pipes or ordinary metal ones.
To ensure that passage through the ceilings is as safe and high quality as possible, a special box is used. You can either make it yourself or purchase it in a store.
During the installation process, the following should be taken into account:
- The diameter of the hole for the pipe should be much larger than the diameter of the pipe itself, since there should be a distance of 25-30 cm from the surface of the chimney to the ceiling structure;
- There should be no free space left around the pipe, since all of it must be tightly filled with insulation;
- The edges of the pipe connector should be treated with metal sheets before installing the box;
- Nearby wood elements must be treated with fire retardants.
Making boxes
Many people are afraid to make a metal box for the chimney pipe themselves. But it doesn't contain much complexity.
When making a box you need the following tools:
- Metal scissors.
- Galvanized sheet.
- Self-tapping screws.
- Compass.
- Drill.
Further sequence of actions:
- The hole is being prepared. Its edges need to be secured with support beams. They will create support for the box.
- A couple of parts are cut from a galvanized sheet. Along their edges, at a distance of five centimeters, a 90-degree bend is made. These U-shaped parts are fastened with self-tapping screws to prepared holes in the ceiling covering.
- Two more U-shaped blanks are prepared in the same way, and they are overlapped onto the existing sheets. The result is a solid frame for the exit made in the ceiling covering.
- The next part of the action is the bottom for the box. An element is cut out from the same galvanized sheet, the dimensions corresponding to the opening made. In its center, draw a circle with a compass for the entrance of the smoke exhaust billet.
- From the central part of the bottom of the box, 4 fasteners are placed (each of them has a two-centimeter width). Next, they are cut out and bent at an angle of 90 degrees. As a result, a base is formed with a hole and 4 strips for fastening.
- The bottom is attached to the walls. A chimney is inserted through the exit and secured with a clamp. The empty space is filled with an insulating layer.
We invite you to familiarize yourself with the do-it-yourself sauna barrel drawings
Using the suggested instructions, making a box is not difficult. If you follow everything exactly, the work will not be difficult even for an inexperienced layman.
Tips for choosing
To build a chimney in a bathhouse through a wall, you need to choose metal with a thickness of at least 2 mm. The pipes must be made of a high-alloy steel alloy that is resistant to corrosion.
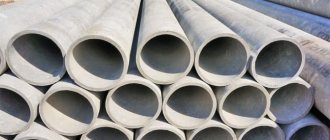
Sandwich pipes are becoming more and more popular, but their price is quite high. If you want to save money, you can take two pipes of different diameters and place thermal insulation material between them. The cost of such a design will be significantly less.
Maintenance and cleaning
Over time, the walls of any type of chimney become covered with a coating of soot, which reduces the size of the passage, which leads to a decrease in draft in the stove. There is another danger - when heated, soot can ignite, leading to a fire. Therefore, the pipe must be cleaned regularly.
There are several ways to clean a sauna chimney:
- mechanical cleaning. It is performed using a special rod, preferably a collapsible one with brushes. This is a rather labor-intensive, and most importantly, dirty method. Therefore, before starting work, it is necessary to empty the bathhouse of things, and cover the surface of the walls, ceiling and floor with sheets of plastic film;
- using chemicals. A special product called “Chimney Sweeper log” is placed in the stove, which creates good draft and intense heat during combustion. The soot will burn off and come out through the chimney as ash. This method is mainly used for preventive purposes to increase the time interval between mechanical cleanings.
Do-it-yourself insulation installation
Chimney insulation using mineral, basalt or glass wool can be done in two ways: insulation under a casing or insulation of a chimney without a casing.
In order to insulate a chimney using mineral wool mats, you need to cut out several pieces of slab from them that will correspond to the sides of the pipe from the outside.
Then, using wire stitching, secure them to the chimney.
After securing the insulation to the chimney, it is recommended to make a casing to protect the insulation from atmospheric agents or to carry out the process of lining the chimney with bricks or asbestos-cement slabs.
Important! There should be no voids left between the layer of thermal insulation, otherwise the insulation will lose its effectiveness.
To insulate a metal pipe, you need to wrap it with basalt wool and secure it with wire around the entire perimeter. After that, put a second pipe of larger diameter on the chimney to make a kind of sandwich.
This method of thermal insulation of chimneys is the most effective and simple, but it allows reducing heat loss by more than half, as well as significantly reducing the fire hazard and the formation of condensate in smoke exhaust systems and protecting them from destruction.
Thus, thermal insulation helps to increase thermal efficiency and safe use of stoves. At the same time, it gives the building and the structure itself a more aesthetic appearance.
Chimney installation
Video
Do-it-yourself sandwich chimney installation: nuances, tips
The problem of how to properly install a chimney from metal pipes is not as easy to solve as it seems at first glance. It is very important that it functions as it should.
Otherwise, combustion products will not only damage furniture, but also harm the human body.
Any construction of this type is done according to the following principles:
- Regarding the smoke. In this case, a tee is installed in the network, which removes condensate.
- Regarding condensation. In this case, this tee is not used.
First stage. This is the choice of project and selection of materials. At this stage, it becomes clear what kind of construction the building will be (straight or with transitions and bends).
Second phase. This is an assembly. All joints, elbows and tees must be securely fastened with clamps.
Third stage. Passing through the roof. Exit through the roof occurs using special cutting.
Video
How to install a chimney yourself? Features, calculations, drawings, dangers
It is selected according to the level of the roof slope. Then the location where exactly the workpiece will pass is determined.
Next, an opening is cut and the pipe is brought out. From the inside, the passage is protected by an under-roof sheet, and from the outside, a roof cut is exposed.
The slope angle is adjusted with part of the cutting, and its extreme parts are “adjusted” to the ridge. Insulation is laid along the walls of the pipe.
Fourth final stage. An adjustable apron is attached to the pipe and the pipe is extended to the required length. Its edges are covered with a lid - an umbrella. It will protect from precipitation.
Chimney fastening
After passing through the attic, the workpiece is discharged onto the roof. In this case, the gaps between the roof and the pipe must be closed with waterproofing. It is recommended to raise the building above the roof in accordance with existing rules.
Video
Chimneys.
When carried out from the outside of the structure, the problem of how to secure a metal chimney pipe is not acute. Because for this they use an elbow, which sets the vertical direction.
For reliability, the chimney is secured to the wall with special brackets. They may already be included in a ready-made kit upon purchase, and it is also not difficult to make them yourself from a metal corner.
When the structure rises to the level of the roof ridge and is securely fixed to the wall, an umbrella must be placed on top of it. It protects against clogging by fallen leaves, rainwater and snowfall.
Transition from a brick chimney to a metal one
How to extend a brick chimney with a metal pipe? This question is asked very often.
Video
Lesson No. 12. Pipe laying. How to lay brick pipes?
To extend a brick chimney, you should make a flat steel platform with a pipe. The diameter of the pipe must correspond to the diameter of the workpiece for extension.
This extension platform must be securely fixed. To do this, take dowels and screws. But such fastening will not be reliable without sealant.
And now all the lengthening actions are in order:
- On the brick base, it is necessary to mark all fastening points. These places should not be located on the masonry seam. Also they should not be on the edge of the brick.
- Next, holes for self-tapping screws are drilled in the site, and holes for dowels are made in the bricks.
- The platform is placed on a brick base, onto which a fire-resistant sealant will first be applied.
- After this, the platform is evenly tightened along the entire perimeter with self-tapping screws.
- This transition can then be installed only after the sealant has completely dried.
Now a brick building can be extended to any desired distance using a metal blank.
Some installation rules
- If the smoke outlet rises above the roof by more than 1.5 meters, then it is recommended to additionally secure it with guy wires.
- The length of the pipe from the stove to the tip should not exceed 5 meters.
- To clean condensate, special plugs are installed.
- The structure should be extended no less than 1.5 meters beyond the roof.
- When installing a smoke exhaust pipe, its diameter must not be narrowed.
- Nearby structures made of combustible materials should not heat up more than 50 degrees.
- The smoke outlet must be located at a safe distance from the electrical wiring.
Video
Chimney stove long burning theory rules diagram / Chimney stove / Chimney stove long burning
When deciding how to insulate a metal chimney pipe, everyone makes a decision based on their preferences and financial capabilities.
The main thing in this matter is to do everything in accordance with the standards and requirements, and then the work will please you with a high-quality result.
Fire protection of the furnace
Modern metal stoves are mounted on a foundation, while sheathing the walls on the back and sides with sheets of the same material. If you cover the stove yourself with only metal, its appearance will not be very aesthetic. It is better to make external masonry with red brick, which insulates the stove from fire and retains heat in the bathhouse.
Due to the fact that asbestos releases toxic substances at elevated temperatures, it is not recommended for use in a steam room. Natural felt is considered harmless and is also a good insulator. In terms of price, this material is more expensive than asbestos sheets, and when smoldering it emits a specific smell (felt does not catch fire), which can be immediately felt.
If you intend to install the stove on a wooden floor, then first it is better to lay felt material in a couple of layers, then lay brick in three rows. For walls and floors, it is recommended to lay metal sheets as an insulator, the height of which varies from 50 to 70 cm.
By following all our recommendations correctly, you will extend the service life of the entire smoke exhaust structure and protect it from fire. And you will no longer have questions about how chimney pipes are wrapped.
- Types of pipes
- Ventilation
- Plumbing and drainage
- Sewer
- Chimneys
- Gas
- For heating
- Pipe connection
- Insulation and heating
- Installation and repair
How to make a chimney: choosing insulation
Fireproof plate
We believe that special attention should be paid to the choice of insulation. We repeat: most will put expanded clay or mineral wool inside the box, and cover it on the outside with mineralite (its analogue is Flamma sheets) or basalt cardboard. This is a valid solution. It is doubtful to use asbestos instead of mineralite .
asbestos cardboard (asbestos cardboard)
ADVICE! Do not make an internal backfill of sand, because it transfers heat perfectly, and when the chimney heats up to 400 degrees, even this is a guaranteed fire. Because wood lights up at 330 degrees, but if you heat it for a long time, it will light up at 150-170 degrees. Sand will do a very bad job.
However, in our time, other refractories have appeared - the same calcium silicate, known commercially as superisol or Silca slabs. But it is a slab material.
The chimney in the ceiling of the bathhouse in the area of the polyurethane foam can be lined with other materials, such as cotton wool or felt. If we talk about stone derivatives, these are basaltine and Basfiber, which are technologically more advanced modifications of mineral wool.
But now you can buy not only them, but also ceramic fibers, in particular, Supersilica, which is a silica fiber from which either cotton wool or mats are made. It has no binding substances at all, which in mineral wool burn out over time, causing it to crumble. The manufacturer's website directly states that this fiber is suitable for insulating the ceiling passage in a bathhouse.
Below is a video that shows a funny stress test of everything that can be stuffed into a PU foam assembly:
There is also mullite-silica wool, but this is a real refractory that can withstand temperatures twice as high as the maximum for a chimney.