The constant rise in energy prices forces people to look for ways to help reduce heating costs.
Energy-efficient home insulation is one of them. Not long ago, a new technology appeared on the construction market - insulation with sprayed polyurethane foam. It's hard to believe, but foam can be an effective insulation material! The material has a large number of features and advantages over classic insulation materials such as stone wool or extruded polystyrene foam. Judging by the growing interest of developers in this method of insulation, sprayed polyurethane foam is a high-quality material that allows you to create a comfortable and warm room.
Types of polyurethane foam and its properties
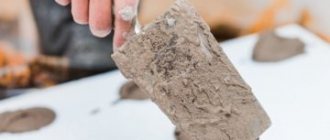
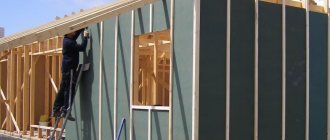
Thermal insulation of the facade is a quick and reliable way to insulate a house. Thanks to its technical characteristics and method of application, it is possible to process smooth or textured facades of any geometry. Polyurethane foam (PPU) consists of polymer compounds that are foamed with an inert gas, which provides more than 85-90% of air cavities.
Figure 1. Insulation of the facade of the house with polyurethane foam.
Depending on the composition of the thermal insulation material, the structure of polyurethane foam can be:
- Semi-rigid - has a cellular and open, but quite dense, structure and is used for insulating facades with a wooden base, that is, buildings made of timber, logs or plywood.
- Rigid - has a closed structure and is used for permanent structures made of concrete or brick. Due to its high density, water is not absorbed by the material.
Both types provide excellent moisture protection. PPU does not allow the walls to cool down in winter, even in the most severe frosts, or heat up in summer, and with a well-designed heating and air conditioning system, the house will have an ideal microclimate all year round. In addition, the material also has good soundproofing properties.
Description and advantages of using PPU
Polyurethane foam is a polymer that belongs to the group of gas-filled and porous. Its basis is, as the name suggests, polyurethane. The thermal insulation material in question is manufactured in the form of ready-to-use products, such as slabs, blocks or panels, or as a liquid composition, which is applied in one of two ways. The first is spraying polyurethane foam, and the second is pouring.
For buildings made of timber or logs, liquid polyurethane foam is most often used. It, in turn, also comes in two types: one-component and two-component. The first option is a conventional polyurethane foam, widely used in practical house construction. The second type of liquid polyurethane foam requires pre-mixing two initial components before use. It is used for large areas and serious volumes.
A strong argument in favor of the decision to insulate a wooden house with polyurethane foam are the obvious advantages of this thermal insulation material, which are as follows:
- Low level of thermal conductivity. In this key parameter, polyurethane foam is noticeably superior to all the most popular insulation materials today, including polystyrene foam and mineral wool;
- Low density and, as a result, weight. The insulation layer practically does not load the load-bearing structures of the building;
- Good adhesion. Foamed polyurethane adheres well to almost any material, including wood;
- Elasticity. Constant temperature and humidity deformations, characteristic of wooden structures, do not pose any problems for polyurethane foam;
- Fire resistance. Polyurethane foam does not support combustion and does not emit toxic substances when heated, which is extremely important for buildings made of wood;
- Environmentally friendly. The use of the material is not accompanied by any negative effects on humans;
- Resistance to mold, rot and mildew, that is, factors that are potentially dangerous for wooden buildings. In addition, rodents are not interested in polyurethane foam, which is another important advantage;
- The absence of seams and joints in the created insulating coating or layer. In this case we are talking about the use of liquid polyurethane foam;
- Durability. The standard service life guaranteed by the manufacturers is 30 years. In fact, it will probably be noticeably longer.
Such an impressive and long list of advantages of PPU is accompanied by only two significant disadvantages. Firstly, the material has low vapor permeability. Therefore, its use requires effective working ventilation and the creation of technologically necessary ventilation gaps. Secondly, polyurethane foam does not withstand exposure to ultraviolet rays from the sun. Therefore, mandatory protection of the material with some kind of finishing coating is required.
Advantages and disadvantages
Let's start with the advantages:
- Today, polyurethane foam insulation is the most effective. This is due to the cellular structure of this insulation and the carbon dioxide contained in the cells. Ideally, this system gives a thermal conductivity coefficient of 0.02, which is even lower than that of air (0.022).
- Continuous, seamless spraying, which eliminates the presence of cold bridges, further increasing the efficiency of insulation.
- Possibility of spraying on surfaces of any, even the most complex shapes.
- Low hygroscopicity. Simultaneously with insulation, you improve the waterproofing characteristics of the surface. This property is used for insulating foundations, wells and other similar structures.
When insulating the foundation of a house with polyurethane foam, the problem of its waterproofing is also solved.
- Excellent adhesion to any surfaces and materials except polyethylene. Excellent adhesion (adhesion) in some cases can be considered as a disadvantage - it cannot be washed off with anything, since there is no solvent for polyurethane foam. It can only be cleaned mechanically, often with fragments of the surface on which it was applied.
- Long service life - up to 25 years with the declared characteristics, later carbon dioxide is replaced by air, thermal conductivity increases, but not catastrophically, sprayed thermal insulation continues to work.
- If during the first year the insulation with polyurethane did not cause any complaints, there will not be any for the next couple of decades.
- When using high-pressure installations, polyurethane spraying takes a short period of time, without compromising quality.
- The vapor permeability of polyurethane foam is quite high - 0.05-0.06, which allows excess moisture to be removed through the walls, as before insulation (if the walls are vapor permeable).
- Does not support combustion (self-extinguishing).
As you can see, there is a decent list of advantages that contribute to the fact that thermal insulation with polyurethane foam is gradually becoming more and more popular. But there are also disadvantages:
- High price - 1.5-2 times higher than when insulating with mineral wool. But if you calculate it per year of service, it won’t be more expensive.
- The final result depends greatly on the equipment used and the experience of the duster. Good results are achieved only with full compliance with the technology.
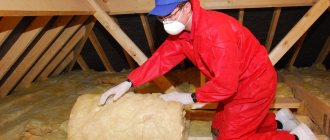
Thermal insulation of polyurethane foam ceilings in the attic
- Due to the use of high-tech equipment, polyurethane foam insulation is very, very difficult to do with your own hands. There is a way out - to buy equipment together for several owners - there is a reason for this, considering the prices. But the question of experience remains - achieving normal performance on your own is very difficult.
- The material does not burn, but when burned it emits a lot of caustic and harmful smoke.
- Fear of ultraviolet radiation. When exposed to sunlight, the foam melts and the white surface turns dark brown. But a film of a certain thickness protects the underlying layers from further destruction, so if the polyurethane foam is thick enough, it can even be left open. But the appearance of the surface insulated with polyurethane foam is far from the best, so finishing is still required.
The main limiting factor in the spread of polyurethane foam insulation is the high price. Although, when compared with the cost of insulation with extruded polystyrene foam, the prices do not seem so high, and this despite the fact that sprayed thermal insulation is installed many times faster and gives a better result. Overall, if you are planning to insulate your home, this technology is worth exploring.
Features of the use of polyurethane foam
In frame house construction, polyurethane foam is the most in demand from sprayed insulation. Therefore, we will consider in detail the properties and features of the use of this heat insulator.
Composition and technical characteristics
Polyurethane foam insulation is a combination of two polymer components: polyol and isocyanate. As a result of their connection, carbon dioxide is released, which foams the structure of the heat insulator. After hardening, the material forms an insulating layer filled with many cells with carbon dioxide.
Characteristics of closed cell polyurethane foam:
- thermal conductivity coefficient – 0.019-0.025 W/m*K;
- the number of sealed cells is about 90%;
- density – 25-250 kg/m3;
- moisture absorption – 1-3%;
- vapor permeability – 0.02-0.05;
- sound absorption – average;
- There are waterproofing properties.
The density of open-cell polyurethane foam is 8-18 kg/m3, moisture absorption is up to 60%, thermal conductivity is 0.025-0.045 W/m*K. Foam with an open structure absorbs sound well .
Closed cell polyurethane foam is excellent for insulating basements, foundations and other structures in contact with the ground. The material is also suitable for external insulation. Open-cell polyurethane foam is acceptable for thermal protection of roofs, ceilings and walls, but requires a water-repellent finish .
Advantages of polyurethane foam insulation
Strengths of PPU insulation:
- thermal efficiency - the coefficient of thermal energy loss is very low, an additional plus is the absence of cold bridges;
- sound insulation – sprayed thermal insulation fills cracks and holes, reducing the penetration of street sounds ;
- high adhesion – polyurethane foam adheres well to different surfaces (wood, concrete, brick, etc.);
- metal protection – resists the occurrence of corrosion processes, protects the treated surface from external aggressive influences;
- versatility - can be used to insulate any structural elements of a house;
- light weight - polyurethane foam does not weigh down the roof and floors, the load on the foundation increases insignificantly;
- spraying speed – application and hardening of the foam occurs very quickly ;
- resistance to rotting - polyurethane foam is not afraid of mold and is not attacked by rodents.
With proper organization of external finishing, a layer of polyurethane foam will last about 50 years.
Useful: Choosing a facade for a frame house: 11 options
Disadvantages of using polyurethane foam
Weaknesses of sprayed insulation:
- high cost – purchasing material and renting equipment will be expensive;
- in the process of applying polyurethane foam, high demands are placed on personal protection; protective equipment is required;
- the difficulty of uniformly distributing the foam mass - you need experience in performing such work;
- polyurethane is slightly flammable, but when burned the material produces a lot of toxic smoke , dangerous to humans;
- exposure to ultraviolet radiation leads to the decomposition of polyurethane foam, resulting in deterioration of characteristics and the release of harmful monomers.
The polyurethane foam layer cannot be left unprotected for a long time - the sun's rays destroy the structure of the heat insulator.
Application conditions and surface preparation
Even with good adhesion, which is characteristic of polyurethane foam insulation, surface preparation will not be superfluous. First of all, you need to remove everything that is crumbling - and first of all the old paint. Grease stains must also be removed and neutralized. They shouldn't exist.
Polyurethane foam is applied to dry, grease-free surfaces
Everything that should not be covered with foam should be covered with polyethylene secured with tape. It must be secured carefully, without gaps - it is difficult to remove the foam.
When insulating a roof with polyurethane foam, there are two ways to apply thermal insulation. The first is to make a permanent continuous sheathing onto which foam is poured. The second is to make a temporary frame consisting of two parallel planes.
If the outer walls of a building are insulated with polyurethane foam, a finishing finish is assumed. And after cleaning the surface, you need to make sure that you can strengthen it with something - it won’t work with foam. To do this, most often, wooden or metal strips are placed on the walls, to which the exterior trim is then attached. This completes the preparation. But applying polyurethane foam is only possible on a completely dry surface, at temperatures above +10°C. There are no other conditions.
Types of polyurethane foam
, mainly two types of polyurethane foam are used as a heat insulator :
- Rigid with a closed cell structure. When applied in a layer 10 cm thick, it creates excellent heat, steam and waterproofing, as well as noise protection.
- Lightweight, open-cell. Cheaper, but requires applying a layer of up to 20 cm, as well as additional moisture and vapor barrier.
PPU consists of two components , which foam when mixed and after application significantly increase in volume, creating a coating in the form of a layer several centimeters thick. One of the components is widely produced in Russia and is quite cheap. The other is imported; we produce little of it.
In general, polyurethane foam is not the cheapest material, but the speed, ease and low cost of work add up to an acceptable result, and high performance and savings on heating in winter and air conditioning in summer quickly pay for the costs.
Features of works on insulating facades with polyurethane foam
Insulation of the facade using polyurethane foam is carried out by spraying. Liquid polyurethane foam is poured into a tank and, using a pneumatic spray gun connected to a compressor, the mixture is applied to the facade under pressure. As it cools, it turns into foam, which fills all the cracks on the facade and then hardens. To ensure good adhesion, the walls must be cleaned of dirt and dust before application. Since the foam does not form a uniform surface, after the polymerization process is completed, the master carefully cuts off the excess so that the cladding can be made with plaster.
Analysis of the material in comparison with analogues
Modern technologies offer many options for insulating facades. Compared to other thermal insulation materials, liquid polyurethane insulation has very high thermal conductivity levels. For example, a layer of 1 cm of polyurethane foam has the same thermal conductivity as 5 cm of mineral wool or 30 cm of reinforced concrete.
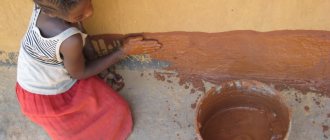
Figure 2. What liquid thermal insulation looks like.
Unlike expanded polystyrene , which is of course very popular because it is very easy to install, PU foam is extremely difficult to ignite. Thanks to fire retardant additives, even with deliberate arson or prolonged exposure to temperatures above 500 degrees, the material self-extinguishes.
To apply, you do not need to somehow treat or level the surface, and the procedure itself is extremely simple. Even insulating the facade of a large house will take much less time than with other popular insulation materials.
Advantages and disadvantages of insulating facades with polyurethane foam
Polyurethane foam for insulating facades has both pros and cons, which must be carefully weighed before deciding to apply it.
The benefits include:
- The quality of the facade does not matter, since liquid has high adhesion.
- The structure of the material creates monolithic protection of the entire surface.
- High sound insulation properties.
- Resistance to mechanical and chemical influences.
- Due to its liquid state, the substance eliminates the risk of the formation of “cold bridges” near the sheathing.
- Ideal for insulating houses with complex geometry and a large number of parts.
- High parameters of resistance to open fire.
- Due to its low weight, it is suitable for application to buildings with dilapidated foundations, and in addition, it will create additional rigidity for the walls.
- Surface treatment is extremely fast and simple.
- There is no need to use additional vapor barrier or windproof films.
- Resistant to the formation and development of fungal lesions, destruction by rodents or insects.
- Service life is at least 50 years.
The disadvantages include:
- To insulate buildings with polyurethane foam, you need to have special, expensive equipment.
- It is necessary to have special protective equipment: gloves, masks, goggles, overalls.
- Fire safety regulations must be observed.
- The insulated surface of the facades must be covered with finishing materials.
Special cases of insulating floors with polyurethane foam
PPU is equally good for insulating floors of any type, location, made of any materials - concrete and concrete prefabricated and monolithic slabs, metal beams, wood... In fact, thermal insulation of a roof, attic, driveway is just special cases. The principle is the same for all options, although in each polyurethane foam reveals its advantages in the best way. Let's look at the most typical ones.
Insulation of the attic floor with polyurethane foam
Insulation of the attic floor with sprayed closed-cell polyurethane foam is carried out “on the floor”. The foam is applied directly to a cleaned and dust-free base. Vapor barrier is not required, since polyurethane foam does not get wet. At the same time, it is possible to insulate pipelines, ventilation and sewer risers, and seal entrances to the building. Closed-cell polyurethane foam can withstand constant heating up to 80-100 C, does not allow water to pass through or accumulate. Therefore, in the event of an emergency roof leak, thermal insulation provides temporary protection for the rooms below.
If there are utilities, it is preferable to insulate the attic floor in the areas where the equipment is located under a screed. Closed cell rigid polyurethane foam has sufficient structural strength to withstand occasional foot traffic. For frequent movements, as with other materials, you can lay walking boards. For old houses with wooden floors, the weight of the finished thermal insulation is critical. But, as we mentioned above, polyurethane foam interacts well with all traditional building materials. That is, it can be used to insulate the attic floor over a reinforced concrete slab, including a monolithic one, over wooden or metal beams with hemming, etc. Anyway:
- All defects of the base are leveled out, the foam envelops the mounting loops, seals joints, and fills potholes.
- Simply fulfill the requirements for additional perimeter insulation in the wall area. At the same time, the solidity and integrity of the heat-insulating carpet is preserved.
- The foam layer is usually a maximum of 10 cm, its weight will not exceed 4-6 kg/m2, that is, thermal insulation creates only minimal additional load on the building structure.
Insulating the ceiling above the basement
Insulation of the floor above the basement is usually carried out without finishing. Therefore, foam is sprayed from below directly onto the slabs after they have been cleaned. No vapor barrier required. As in the case of attics, at the same time it is possible to seal the entrances of utility lines into residential premises and insulate hot and cold water pipelines. In the first case, this will reduce heat loss, in the second, it will eliminate condensation. PU foam does not rot, is resistant to mold, and is not afraid of water and steam. If necessary, it can be treated with disinfectant compounds. Polyurethane foam can also be painted or coated with fire retardant. If the premises are warm and they are planned to be used for commercial purposes, it makes sense to soundproof them.
Insulation of concrete and metal floor beams
Effective insulation of concrete and metal floor beams can only be provided by sprayed polyurethane foam.
The disadvantages of beam structures for floors are their high thermal conductivity and sensitivity to corrosion processes. Therefore, if the floor lying on “cold” beams is insulated from the inside, then the load-bearing structures also need to be insulated. Otherwise, in extreme cold, condensation will literally flow from metal or concrete beams. And since their cross-section is significant, they are “huge” cold bridges and significantly reduce energy efficiency and increase heat loss of the building. Due to the impossibility of insulating such spatially complex structures with slab insulation, at least with a compromise quality, they are often left without thermal insulation at all. Sprayed polyurethane foam for insulating concrete and metal beams and trusses is simply ideal. A layer of foam of the calculated thickness is applied to the ceiling and a thin layer to the supporting structures. After such treatment, the metal does not sweat, does not rust, the concrete does not get wet, and the contribution of cold bridges to the overall thermal conductivity of the insulation is reduced.
Insulation of floors over through passages
Since the insulation of the floor above the through passage is carried out under the finishing coating, before applying the foam it is necessary to build a structure to which the decorative elements will be attached. The technology makes it possible to reduce the thermal conductivity of point cold bridges that arise during the installation of fasteners for finishing. For the insulation itself, no additional fasteners are required in principle. As in other cases, a vapor barrier is not needed. Compared to other materials, effective thermal insulation requires a 1.5-2 times smaller layer of insulation.
Options for thermal insulation of buildings with polyurethane foam
There are 2 different ways to insulate the walls of a building with this material, differing in thermal conductivity and vapor permeability properties:
- Insulation with rigid polyurethane foam can significantly increase the heat, steam, sound and waterproofing of a house. Spraying thickness varies from 50 to 80 mm. It adheres perfectly to the surface, and all subsequent facing work can begin the very next day. The use of a vapor-permeable moisture-proof membrane in this case is not required;
- The second way to insulate a house is by spraying light polyurethane foam. The main difference from the first option is that the material must be covered with a vapor-permeable moisture-proof membrane, since it is a “breathable” insulation. In addition, a higher thermal conductivity coefficient than that of rigid polyurethane foam indicates that it is applied in a large layer, equal to 100-120 mm.
Dense hard polyurethane foam
Breathable, porous, lightweight PU foam
Features of insulation
First, it is necessary to make one important clarification: floors mean not only attics and roofs, but also slabs that separate the floors. Simply put, the floor can also be insulated using polyurethane foam.
How to insulate the floor of the first floor
This ceiling is one of the most important in the house. Spraying is carried out from the subfloor. Your task is to fill the subfloor with polyurethane foam. In this case, it is necessary to carefully process the logs. This will increase the life of the wooden floor.
Attention! Spraying polyurethane foam onto the floors for insulation will not allow moisture to rise from bottom to top.
When creating a layer of insulation for the PPU floor only between the joists, the temperature at the top will be more than 20 degrees, and at the bottom about 5. Because of this, condensation and rot will form. Therefore, you need to fill the entire subfloor with polyurethane foam. This will significantly extend the life of the structure.
How to properly insulate an attic
Insulating the attic with polyurethane foam allows you to ensure normal temperature throughout the house. But in order to achieve a truly high-quality result, you must follow certain rules:
- Using the regulator on the gun, set the desired supply force of the substance.
- Apply polyurethane foam from top to bottom. As a result, you should have a monolithic carpet in the attic.
- Carefully fill the space between the joists. The logs also need to be covered with polyurethane foam. And not so much for insulating the floor, but for protecting it.
When you complete these three simple steps, you will receive a layer of polyurethane foam that will perform both vapor barrier and thermal insulation functions. The applied layer of insulation will protect the floors from icing in winter. This will also prevent moisture accumulation.
How to insulate reinforced concrete floors
Structures of this type are found extremely often in construction. Therefore, it is very important to know how to properly insulate this type of floor using polyurethane foam. Spraying can be done both from above and from below. The fact is that such engineering structures are practically immune to the influence of moisture. As a result, some precautions may need to be waived.
When insulation of reinforced concrete structures is carried out using polyurethane foam, it is necessary to close the thermal insulation contours. It is important to know how thermal insulation is made around the entire perimeter of the house.
It is best to use a substance whose density is 30 kilograms per cubic meter or higher. In this case, the insulation of the floors will be able to withstand a load of 20 tons. This is more than enough for household needs. If construction work is being done at a production facility, then it is better to make polyurethane foam with a higher density.
In order to implement high-quality insulation of floors using polyurethane foam at a production facility, it is best to use polyurethane foam, the density of which is at least 60 t/m2. In this case, the coating will be able to withstand about 60 tons per square meter.
If you use polyurethane foam to insulate reinforced concrete floors, you don’t have to do any additional waterproofing. The properties of the substance will be more than enough to provide high-quality protection.
Attention! By comparison, if you use mineral wool, you will definitely have to waterproof it.
Thanks to the high adhesive properties of polyurethane foam, which is used to insulate floors, it is possible to achieve a strong connection with the screed. Due to this and many other qualities, polyurethane foam is most often chosen when it is necessary to carry out insulation work on concrete.
The main task when insulating reinforced concrete floors with polyurethane foam is to reduce heat losses. The fact is that most of the heat escapes through the ceilings. As a result, the energy efficiency of the heating system decreases. But processing of interfloor slabs allows you to significantly save on heating.
Advice! Using polyurethane foam you can also hide utility lines in the form of cables and pipes that run along the floor.
What thickness should it be for insulation?
The thickness of the layer is determined individually, depending on the type of construction, the desired result and the material from which the house is built.
Inside
The thickness of the insulation depends on many factors. For example, the material from which the house is built (if it is a private building) plays an important role. Aerated blocks have thermal insulation properties, therefore, if a house is built from them, 2-3 cm of insulation is enough to create complete comfort in the home.
Before spraying the material, the sheathing is pre-attached to the walls. As a rule, the average distance between the main wall and the profile is 5 cm; there is no point in making it thicker, because it takes up space in the room, but it will not make it warmer.
To calculate the consumption of a material, you need to know its density. For interior work, polyurethane foam 32 kg/m³ is most often used. To calculate the volume of foam on the wall, you need to multiply its area by the density of the material and multiply by the thickness of the layer, for example, 0.05 meters. To make it more clear, let's look at a specific example:
- for insulation, polyurethane foam with a density of 32 kg/m³ is used;
- thickness of the applied layer – 5 cm;
- it is necessary to treat a wall with an area of 18 square meters. m.
The calculation is carried out according to the formula: 32x0.005x18=28.8 kg. In terms of volume, this is 900 ml, that is, 1 liter (needs to be rounded) is needed to insulate 1 wall.
Outside
Polyurethane foam is popular for insulating the external walls of buildings, balconies, attics, gazebos and other buildings.
The material carefully retains the heat of the building and protects it from hypothermia and aggressive external factors.
As for the thickness of the layer, based on the characteristics of polyurethane foam, 2 cm is quite enough, but in practice, craftsmen put at least 5. You can calculate the consumption in the same way as for interior work.
When performing work, it is worth remembering that the foam increases in volume as it dries, so you do not need to apply the first layer too thick.
Insulation by pouring method
Insulating the walls of a house with polyurethane foam using the pouring method involves pouring the foam mass into places that require thermal insulation. In order to insulate the wall of a house with polyurethane foam by pouring, it is necessary to drill small holes in the place of insulation, and the material must be poured using a special system that supplies polyurethane foam in an aggregate state.
The insulation foams, filling all the cracks and gaps, creating a dense hydro- and heat-insulating layer.
This method is used to insulate modern multi-storey new buildings, and also to restore dilapidated buildings, regardless of the materials from which they are made.
Technology of facade insulation with polyurethane foam
External thermal insulation of buildings with polyurethane foam is usually used for houses with a small number of floors. The procedure for applying material to the facade consists of the following stages: preparation of the base, spraying, wall reinforcement and finishing work.
Selection of equipment for spraying polyurethane foam
The equipment used to create polyurethane foam from two components and spray it onto walls is considered quite complex to use. However, nowadays manufacturers offer to purchase devices that are not professional and are suitable for one-time household use. The kit for spraying polyurethane foam includes the following elements:
- Two cylinders with high-pressure liquids that are needed to form polyurethane foam;
- Hoses used to connect cylinders and a special spray gun;
- A spray gun that releases foam;
- A set of interchangeable nozzles for the gun, which have various modifications;
- Keys used to assemble the device;
- Special technical lubricant.
This kit also comes with instructions that describe the rules for assembling and using the device. It usually takes a few minutes to assemble the device. It is enough to connect the cylinders with hoses, put the desired nozzle on the gun - and you can start working. Most disposable units do not have a component heating feature. Also, the supply hoses are not heated. This limits the scope of use of such equipment, since the optimal temperature for applying foam is 20-30 degrees above zero. However, dependence on the temperature outside can be eliminated using “folk methods”. Flexible hoses are placed in pipe thermal insulation made of energyflex. The cylinders are placed in buckets or barrels with water heated to 30 degrees. The area that can be treated with polyurethane foam depends on the size of the cylinders. It is important to remember that after the start of work on applying the material and during a forced pause, the equipment, assembled and ready for use, can only be used for a maximum of 30 days. After this time, the installation becomes unsuitable for use. For this reason, it is not recommended to buy cylinders with a larger supply of polyurethane foam than may be needed for thermal insulation. As a last resort, you can use the remaining insulation for spraying in domestic premises - garage, greenhouse, balcony. When working with a machine for applying polyurethane foam to walls, you must follow the technical safety rules:
- To carry out spraying, choose clothing that covers the entire body, as well as a hat. This way you will protect yourself from foam getting on your skin or hair, which is very difficult to remove after hardening.
- Use a respirator mask to protect your respiratory tract. It will prevent small particles of foam from entering the respiratory system. This rule is especially true when working at heights or when the gun is located at an angle to the wall.
- Wear gloves on your hands to avoid contact with foam. Usually a pair of gloves is included with the installation, but it is recommended to have a few spares with you.
Preparation for applying polyurethane foam
Before spraying polyurethane foam on the facade of the house, you need to carry out preparatory work. They include a set of measures to clean the surface of old coatings, unreliable elements and peeling parts. If there is finishing, it must be dismantled to the building frame. You should also remove all external lighting fixtures, sills, ventilation grilles, and decorative elements. Existing glazed windows must be covered with paper and its edges sealed with tape. Next, we install the sheathing on the walls. It can be made of wooden beams or metal profiles. The distance between the guides should be approximately 20-50 centimeters, depending on the dimensions of the building and the thickness of the polyurethane foam layer applied. Lathing can also play a leveling role for uneven walls. It must be installed using a building level and a plumb line. All openings in the sheathing will subsequently be filled with foam, and the surface will become smooth.
Instructions for spraying polyurethane foam on the facade
On average, the thickness of the sprayed polyurethane foam layer is three centimeters. Depending on the climatic conditions of the area where you live, the layer can be reduced to two centimeters or increased to five. If this is your first time spraying, it is recommended that you first imitate the movements of applying polyurethane foam from a gun to the wall. This will give you an estimate of how many times you will need to reposition and re-position the gun to cover a certain surface. Because as soon as you pull the trigger of the device, the foam will almost immediately harden in the nozzle, after which it will need to be replaced with a new one. The number of nozzles in the set is limited, so it is recommended to work with a minimum number of breaks. We insulate the outside of the house with polyurethane foam according to the following rules:
- We open the taps, after which the substance is supplied to the gun through the connecting hoses.
- We pull the trigger and polyurethane foam begins to spray onto the wall.
- We start spraying from the bottom of the wall. First of all, we fill in the gaps in the sheathing.
- We hold the gun at a distance of about 25 centimeters from the facade.
- Hand movements should be smooth and uniform. This way you are guaranteed to get an even layer.
- If necessary, we move to a new place of work. In this case, we turn off the gun and replace the nozzle with a new one.
- The intensity of application can be adjusted. If you need a thin layer, then set up the equipment so that the polyurethane foam is supplied in a small stream.
- If the thickness of the first layer is not enough for you, then after it hardens, you can apply a second one.
- Keep in mind that the foam grows in size, so the second layer should not protrude too far beyond the sheathing. This way you will avoid problems with finishing work in the future.
- Each new layer of insulation must be laid in such a way that its surface is as smooth as possible. The second (or third) layer should be applied along the joints of the previous one.
Polyurethane foam hardens in a matter of minutes. Therefore, almost immediately after completing the spraying work, you can begin trimming the protruding reliefs. This can be done by focusing on the crate. Use a mounting knife when doing this.
Rules for façade reinforcement
In order for the finishing materials to lie smoothly and beautifully on the insulated surface of the facade, as well as to avoid the appearance of cracks in the corners of window and door openings, the wall must be covered with a layer of reinforcing mesh. First of all, we lay the perforated corners. They are made of aluminum or plastic, and have a reinforcing mesh attached to the edges. We carry out work according to the following scheme:
- Lubricate the corners and mesh, as well as the corners of the building, with mounting glue.
- We apply it to the corners of the house and press it with a spatula onto the layer of thermal insulation.
- Smooth the glue protruding through the mesh and perforations over the surface with a spatula.
- In the corners, we connect the profiles tightly and cut the mesh and shelves at a 45-degree angle.
After you have processed all the corners on the facade, you can begin to secure the main reinforcing layer. To do this you will need a special fiberglass mesh. It has good resistance to chemical and mechanical stress. To fix the mesh to the wall you will need a special adhesive solution. It can be purchased at any hardware store. We work according to the instructions:
- We pre-grind the surface of the polyurethane foam with a special grater or coarse-grain sandpaper.
- We cut the reinforcing mesh into pieces. Their length should correspond to the height of the wall.
- We clean the surface of the facade with dry brushes and apply a thin layer of glue to an area that corresponds to the width of the mesh. Remove the excess mixture with a notched trowel so that grooves remain on the wall.
- We apply the mesh to the surface and embed it in glue. Use a grater or smooth spatula.
- Smooth out the area from the middle to the edge. We distribute the excess adhesive solution over the wall.
- Do not strain the mesh too much or press it into the insulation layer.
- After you have reinforced the entire facade, do not wait for the adhesive mixture to dry, but apply a new layer about two millimeters thick. In this case, leave a free edge of about ten centimeters. We put a second strip of mesh on it.
- The top adhesive layer should completely cover the reinforcing mesh so that it does not show through.
It takes one day for the solution to dry, after which finishing work can begin.
Carrying out finishing work
After insulating the house with polyurethane foam, it is not recommended to install finishing material on the building that requires fixing with fasteners. For example, when installing siding with dowels and screws on top of a layer of polyurethane foam, the integrity of the layer will be destroyed. “Cold bridges” will appear in the coating, which will lead to increased heat loss and the appearance of condensation. The best option for finishing a house insulated with polyurethane foam is plastering. You can choose any decorative composition that will create an interesting effect on the external walls. In addition, the walls can be painted. True, for this the surfaces must be perfectly flat. This must be taken care of at the reinforcement stage. You will also need to apply a layer of finishing plaster. How to insulate a facade with polyurethane foam - watch the video:
Insulating the walls of a house with polyurethane foam is one of the most effective methods of thermal insulation. To spray a foam-like substance, you will need special equipment and certain skills. Therefore, carefully weigh all the nuances before taking on such work yourself.
Insulating a house with polyurethane foam: instructions and what critical mistakes should be avoided
Polyurethane foam can rightfully be called a new generation of insulation. In recent years, this technology for thermal insulation of buildings has become increasingly popular among owners of private houses. Do-it-yourself insulation with polyurethane foam is quite possible, but only if you have the necessary equipment and the master has studied the technology of applying this material well enough.
Do-it-yourself insulation with polyurethane foam
Polyurethane foam is suitable for insulating buildings both from the outside of the walls and from the inside. The material has a large number of positive qualities, which is why it has been used more and more recently. However, you need to be aware of the negative aspects that may arise when using this type of thermal insulation.
How is polyurethane foam used for insulation?
Insulation with polyurethane foam is most often done by spraying a heat-insulating layer onto almost any surface. By adhering well to it and gaining volume, the foam composition increases in size several times. Polyurethane foam, expanding, penetrates into all, even the smallest cracks, creating a dense and almost airtight coating, thanks to which the walls and roof are not afraid of cold and wind.
The most common method of using polyurethane foam is to spray it on the walls.
The most common method of installing it is spraying, but it should be noted that the pouring method is sometimes used. Most often, this technology is used at the stage of production of thermal insulation structures. Polyurethane foam is poured into special molds, and the resulting parts are used only after complete hardening.
Insulation can be carried out by filling cavities in structures with foam
Another filling option is to fill individual horizontal areas or voids with foam composition where spraying is not possible. For example, this method is used when it is necessary to fill a cavity between already installed or erected walls, or the space between installed layers of finishing material.
The foam composition is formed by mixing two components
Polyurethane foam is a product of mixing two of its constituent polymers, which are usually in liquid form - a polyol and a polyisocyanate. These components are mixed together without air access during the spraying process, foaming when exposed to carbon dioxide and heated to high temperatures.
The finished mixture is fed through hoses into a spray gun and applied to the structure thanks to the high pressure created. The foam composition adheres perfectly to the prepared surface and begins to actively expand, forming an insulating layer of the required thickness.
Video - Modern method of thermal insulation - spraying polyurethane foam
Properties of polyurethane foam
This material is used for insulation of both industrial and residential premises. Spraying of polyurethane foam is carried out on the floors of houses, the inner surface of the roof, various partitions, floors and walls. It is especially popular for insulating walls of frame structures.
Polyurethane foam is universal - it can be used to insulate walls, floors, ceilings, roofs, etc.
During the period of its active use, polyurethane foam has shown its unconditional effectiveness not only as insulation, but also as a waterproofing and soundproofing material. It perfectly protects the premises of the house from freezing, moisture penetration and external noise.
The main advantages of polyurethane foam
So, the remarkable properties of polyurethane foam include:
- Excellent adhesion, that is, reliable adhesion to almost any surface, be it concrete, wood, metal or roofing coverings made of other materials.
- The low thermal conductivity of polyurethane foam allows you to retain accumulated heat in rooms if insulation is done from the inside, and creates a reliable barrier against the penetration of cold air if the material is sprayed from the outside of the walls.
- Polyurethane foam tightly fills all holes and cracks, which helps isolate the room from extraneous sounds from the street. When sprayed onto the inner surface of the roof, the insulation is able to muffle the sounds of raindrops, which is especially important for rooms located in the attics of houses.
In addition to high insulating qualities, polyurethane foam has excellent noise absorption
- This insulation resists the appearance of corrosion on metal structural elements and protects the surface from the negative effects of an aggressive external environment.
- When sprayed with polyurethane foam, it not only covers large surfaces, but also neutralizes cold bridges that arise at the locations of the sheathing guides. They cannot be closed as reliably by any other type of material, therefore, even if insulation is used in mats or slabs (for example, mineral wool or polystyrene foam), the cold bridges are still treated with polyurethane foam.
- Spraying can be carried out on the most complex structures in their configuration, on which it is simply impossible to install conventional insulation.
- Polyurethane foam is a low-flammability material, since one of its components includes polyol substance A. One of the fire retardants is added to it, which gives the insulation the ability to self-extinguish and stop burning even if the material enters the fire zone. Fire of polyurethane foam is possible only at temperatures not lower than 450-500 degrees.
- The low weight of polyurethane foam allows it to be sprayed onto any roofing material from the attic side or onto the attic floor without fear of making these building structures heavier. Moreover, the applied layer of insulation after complete hardening will also give them additional rigidity.
Video - Using polyurethane foam for roof insulation
- When sprayed, the material forms a seamless surface, which cannot be done with other insulation materials without using additional means for their connection (mechanical or adhesive).
- Polyurethane foam is applied very quickly, expanding and hardening in a short time. Therefore, the entire insulation process will take little time - only one or two days, depending on the area and complexity of the structures being insulated.
- Due to the moisture resistance of polyurethane foam and the ability to seal surfaces, its use eliminates the need to use a vapor barrier and windproof film.
- Polyurethane foam is not susceptible to rotting, mold, or damage by rodents and insects.
- Leading manufacturers establish a guarantee for the service life of polyurethane foam of 50 years. However, judging by its components and application technology, the insulation will last much longer without losing its qualities if the foam spraying and its external finishing are done correctly.
- Not a single existing insulation material has such high performance, since none of them has such adhesive properties.
Disadvantages of the material
It is impossible not to mention the disadvantages of polyurethane foam - when insulating it independently and during further use:
- The big disadvantage of this insulation technology is its price, since purchasing or even renting equipment for applying polyurethane foam is not cheap.
- To work on spraying, you need to purchase personal protective equipment - a special suit and a respirator to protect against damage to the respiratory tract. All areas of the skin, mucous membranes, and eyes must be covered.
Working with polyurethane foam will require special safety precautions and the use of special protective equipment
- If there is no experience in installing such insulation, the work may take a long time, and its quality will not be guaranteed.
- Polyurethane foam is not flammable, but when it comes into contact with fire it smokes heavily. Moreover, the smoke contains a large amount of substances harmful to humans.
Polyurethane foam should never be left exposed to sunlight for a long time - ultraviolet light quickly “kills” the material
- If the insulation is applied to the outside of the building and is not covered with finishing materials, then it quickly begins to deteriorate under the influence of ultraviolet radiation, decomposing into monomers that are dangerous to human health.
How to insulate with polyurethane foam
Many would like to carry out the process of insulating their own home with polyurethane foam on their own, however, you need to know that this is quite possible only theoretically, and in practice it will require specific equipment, materials and certain work skills. It should also be noted that the technological equipment requires certain settings before spraying begins, and it is necessary to be able to do this correctly.
One of the main difficulties is the need for special equipment for spraying polyurethane foam
If you have an idea of how the whole system works, but there is no equipment, you can rent it, for which, however, as mentioned above, you will also have to pay a lot.
So what can we conclude? It will probably be easier to invite a specialist with his own equipment - he will quickly, without delay, complete all the technological stages of insulation, freeing the homeowner from a lot of problems.
If you still decide to test your own strength, then you need to take into account some features of this process:
Insulation with this material can be carried out during the construction of a building or in an already built house. In addition, spraying is carried out on individual areas or on the entire surface. Or, if necessary, fill the cavities with polyurethane foam.
Expert opinion: Afanasyev E.V.
Chief editor of the Stroyday.ru project. Engineer.
We have insulated the house from the outside, and now find out how to insulate the wall inside a country house, and also consider options on how to choose the right insulation from our new article.
When carrying out work, it is necessary to take into account the region where the building is located, since the thickness of the sprayed insulation layer will depend on climatic conditions.
Measures for insulation with polyurethane foam include the following actions:
- Insulated surfaces require certain preparation. For example, walls need to be cleared of existing old coating if it is clearly unstable (for example, old crumbling plaster or peeling paint).
- Next, on the wall you need to arrange a sheathing of wooden bars or metal profiles. The thickness of the guides is selected depending on what layer of insulation should be applied to the surface.
Wall surface lathing
- In addition, the lathing can play a leveling role for the wall. It is mounted on the wall surface level and plumb, and the openings between its elements are then filled with polyurethane foam, which will fill the unevenness and bring the coating to the proper level.
- Foaming insulation is sprayed onto the prepared surface using a special gun.
- The intensity of spraying also needs to be adjusted, since if you need a layer that is not too thick, then you need to adjust the device so that the composition is sprayed in very small jets. The sheathing, in this case, must be made from beams or profiles having a small thickness, since they will determine the thickness of the insulation layer.
- Spraying polyurethane foam always starts from the bottom of the wall, and applies it to the surface between the sheathing elements.
Spray gun for applying polyurethane foam
- Polyurethane foam is applied in a thin layer, which immediately gains volume. If the thickness of the first layer is not enough, then another layer of insulation is applied on top.
The insulation is applied in layers, from bottom to top.
- After the polyurethane foam has hardened and the hardened coating has been leveled along the sheathing guides by cutting off the protruding insulation reliefs, it is fashionable to install siding and lining. Nothing prevents you from doing the outside and brickwork or plastering the walls of the house.
- If it is planned to plaster the wall after insulation, then it must be tightened with a chain-link mesh, securing it to the sheathing guides. Then apply the cement mortar to the wall using the throwing technique. After it has set and initially hardened, it will be possible to apply any leveling composition of the plaster, as it will fit well on this base.
Video: the process of applying polyurethane foam to the wall yourself
In conclusion, I would like to note that in any insulation work two factors are very important - the quality of the material used and the experience of the craftsman. Therefore, it is best to entrust the work to a trusted specialist who will relieve you of unnecessary worries and carry out the spraying quickly and efficiently.
Prices for popular models of air compressors
Air compressors
Step-by-step instructions for polyurethane foam insulation using the disposable PENOGLAS™ KIT
The appearance in stores of disposable kits for applying polyurethane foam has significantly expanded the horizons of using this effective insulation. It is possible to do without inviting a team of specialists with their equipment. The kit includes everything you need, including personal protective equipment, without which it is not recommended to work with polyurethane foam.
One of the striking examples of such equipment is the domestically produced kit “PENOGLAS™ KIT”.
With this “PENOGLAS™ KIT-400” kit you can perform high-quality thermal insulation on an area of 20 m² with a thickness of 50 mm
The entire set is placed in three boxes, with a total weight of about 30 kilograms. Everything is very compact, so a regular car trunk is sufficient to transport the entire set.
The entire set fits easily into the trunk of any sedan
The manufacturer declares the following physical and operational characteristics of the thermal insulation being created:
- The system is two-component, producing foam with a closed cell structure, which minimizes possible water absorption.
- The density of polyurethane foam after complete hardening is from 35 to 40 kg/m³.
- Thermal conductivity coefficient is 0.024 W/m׺С.
- The number of closed cells is at least 85%.
- The full volumetric expansion of the “PENOGLAS™ KIT-400” kit is 1 m³, which will correspond to an area of 20 m² covered with a layer of thermal insulation 50 mm thick.
- The period of complete hardening of polyurethane foam is 1 hour.
The kit includes:
- Two cardboard boxes, each containing a cylinder with one of the components. Both the boxes and the cylinders themselves have clear color and letter markings: component “A” is indicated in red, component “B” is indicated in blue. The components are contained in cylinders under a pressure of 8 atmospheres.
When working with the kit, the cylinders are not removed from the boxes - the design of the packaging itself allows all operations to be carried out without completely removing it.
At all stages of working with the kit, cylinders are not removed from the boxes.
- The third box contains all the equipment, tools and spare parts necessary for the work. It contains:
The contents of the small box are everything that may be required to assemble the system and work with it
- a spray gun, in which the components are mixed. Two flexible transparent hoses are connected to the gun, ending with fittings with union nuts - for connection to cylinders. Typically, the hoses are also color-coded so that when reusing the kit, there is no confusion with the “polarity” of connection to the cylinders. The length of each hose is 3 meters.
— To spray the mixed composition, special replaceable heads with a spray nozzle are put on the gun. The kit includes ten of these heads.
To facilitate the connection of the heads to the gun and ensure a reliable seal of this connection, silicone grease is used - a small package of it is included in the kit.
Connecting the hoses to the cylinders requires tightening the union nuts using a wrench - it is also provided in the accessory kit.
The kit includes a set of eye, skin and respiratory protection - goggles, gloves and a respirator
— The manufacturer also thought about compliance with safety measures - the basic kit always includes a set of personal protective equipment - gloves, goggles and a respirator.
Working with the PENOGLAS™ KIT-400 system is quite simple and does not require any special user qualifications. All assembly and preparation of equipment for use takes just a few minutes. There is no need to use any power sources - the kit is completely self-contained. More details about this can be found in the instruction table below:
| Illustration | Brief description of the operation performed |
| The kit is delivered to the work site. When a small box is opened, you need to take it out and immediately put on protective equipment. | |
| Gloves can be rubber or polyethylene. You can, of course, use your own, but the use of protective equipment is a prerequisite, since the components of polyurethane foam are very toxic, and the resulting foam is very difficult to wash off from the skin. Not included in the kit, but it is strongly recommended to use a disposable work suit - foam that gets on ordinary fabrics cannot be washed off. | |
| Boxes with cylinders are being prepared for work. You can open the top lids of the boxes completely by cutting a strip of adhesive tape with a knife... | |
| ..and then - loosening the locking connection of the lid. | |
| Or you can even simply push the windows on the lid, perforated around the perimeter, inside. By the way, these windows are also convenient for carrying boxes - immediately below them there are metal handles for the cylinders. | |
| On the side wall of the box there is another window - round in shape. It is also easy to push it inward - there is cardboard perforation around the perimeter. Directly behind this window there is a cylinder fitting with a PPU component. | |
| The illustration clearly shows the threaded fitting of the cylinder and the tap for opening the supply of the PPU component. | |
| A spray gun with hoses attached to it is taken out of the box. | |
| The hoses assembled into a coil must be unwound along their entire length. | |
| The ends of the hoses with connecting fittings (with union nuts) are located near the windows of both boxes. Please note that the hoses may be color coded and it is recommended that you adhere to them. Of course, by and large, there is no particular difference which hose is connected to which cylinder now. But it happens that work needs to be suspended, postponed (the contents of the cylinders are allowed to be used for one month) or moved to another site. In this case, the system can be temporarily disassembled. It is also common practice that for large-scale work, several pairs of cylinders and one set of accessories are purchased. This is where it will be extremely important to maintain the same “polarity” that was in the original assembly. And color marking will help with this. By the way, there are kits that do not have color markings on the hoses - you should pay attention to this. | |
| The ends of the hoses are inserted into cardboard boxes through round windows. | |
| Then the union nuts of the hoses are screwed onto the fittings of the cylinders with PPU components. First, as far as possible, twisting is done by hand... | |
| ... and then the connection is tightened with the included wrench. The operation is repeated in exactly the same way on the second cylinder. | |
| Next, you need to make sure that the trigger lever of the pistol is locked. The spray nozzle should not be on it yet. After this, open both valves on the cylinders completely. You need to take an empty plastic bag (or any other unnecessary container) and test release the components into it for two to three seconds. This ensures that the pressure of the components is uniform in both hoses, and that nothing prevents their free passage through the gun. | |
| Next, you need to put the spray nozzle on the gun. To facilitate this operation, use the special silicone lubricant included in the kit. They coat the end part of the pistol with it... | |
| ...and the cylindrical part of the removable nozzle and the nozzle at the edges. | |
| Then the spray nozzle is inserted into the gun and pressed tightly so that the connection is securely fixed by the stopper located at the top of the gun (well shown in the illustration - yellow). | |
| The cylinders are placed in a place convenient for work, taking into account that the length of the hoses is three meters. It is allowed to move cylinders only by the metal handles located on their bodies. Carrying by the crane is strictly prohibited! | |
| You can proceed to applying polyurethane foam. The gun is aimed at the area to be insulated. The optimal distance from the spray nozzle to the surface of the building structure is considered to be 600 mm. Spraying is carried out sequentially, in a thin layer, gradually moving the stream of polyurethane to untreated areas. | |
| Often they start from places that are traditionally difficult to access or vulnerable from the point of view of the formation of “cold bridges”. This illustration shows that the craftsman first processed the corners between the floor beams and the rough covering, and then moved on to filling the free space between them. | |
| And this illustration demonstrates the filling with foam of the often ignored area of connection between the mauerlat, floor beams and rafter legs. The use of polyurethane foam allows you to cope with this task. | |
| This technology is also excellent for filling other voids formed at the joints of building structures. For example, the figure shows the insulation of the junction of an old partition with a newly erected ceiling - filling this gap with polyurethane foam will provide both insulation and the necessary sound insulation. | |
| Polyurethane foam also fits perfectly on metal structures, which, due to their very high thermal conductivity, are always the most pronounced “cold bridges”. | |
| You should not try to immediately apply a thick layer of thermal insulation. Foam increases in volume very quickly, and without experience working with such material, it is very easy to make the mistake of unnecessary waste of material. The optimal solution is to apply a thin layer, and after about 20 minutes evaluate the degree of expansion of the foam. If necessary, then briefly bring the insulation layer to the thickness required by calculations. (Calculations of insulation thickness will be discussed below). | |
| During the work process, it is necessary to monitor the quality of the applied foam. So, if it does not rise well or has changed in color (it has become darker or a pronounced brown tint has appeared), it means that the mixing proportions are incorrect. If the cylinders are not empty and everything is in order with the hoses, there is a high probability that one of the channels in the mixing and spray head is clogged. The kit contains spare heads, which means replacement is necessary. To do this, the release lever is locked. The replacement head stopper then lifts up. | |
| The head is gently moved forward with the help of your fingers. | |
| Its cylindrical guide protrusions come out of the gun channels, and then it is completely removed and put away when not needed. | |
| To install a new head, the above-mentioned lubrication of the mating areas with silicone grease is carried out. Then the head is inserted into place... | |
| ... and pushes it all the way through with your fingers, so that the upper stopper, fixing the sprayer in the gun, is activated. | |
| After this, you can again proceed to spraying polyurethane foam - normal mixing of the components and good spraying of the jet will be restored. |
When working, it is necessary to ensure constant compliance with safety precautions. If components or finished foam get on unprotected areas of the body or, even worse, on mucous membranes, it is necessary to immediately rinse with plenty of clean water. When washing off the skin, you can use regular soap. Foam that has frozen on your hands will not succumb to soap - you can wipe it off with a rag soaked in a nitro-based organic solvent (acetone or 646).
What should be the thickness of insulation with sprayed polyurethane foam?
In order to determine this parameter, you can independently carry out a thermal calculation. Its meaning is that any building structure (wall, ceiling or roofing) after insulation must have a total heat transfer resistance not lower than the standardized value established for a given area, taking into account its climatic characteristics.
The initial data will be:
- Parameters of the insulated structure. This refers to its thickness and the thermal conductivity coefficient of the manufacturing material. In addition, the structure may have a multilayer structure. For example, a wall (ceiling, the inner side of a roof slope) has a continuous finish (cladding) made of material, which also makes its “mite” to the overall thermal insulation. Those layers that are separated from the outside of the building from the main structure by a ventilated gap (ventilated facade or roof) are not taken into account.
- Normalized value of heat transfer resistance. It can be determined by the schematic map offered to your attention - for your region.
Diagram map for determining the normalized value of thermal resistance for building structures
Please note that three values are indicated for each location - separately for walls (purple numbers), floors (blue) and coatings (red). They vary significantly, and it is important not to confuse the values when calculating the insulation thickness of a particular structure.
Find out how to insulate a wall inside an apartment from our new article.
Knowing the listed values, you can carry out the calculation using a special formula. However, the formula will not be given, because below is a convenient calculator for quick and accurate calculations. All necessary dependencies and table values are already included in it.
Calculator for calculating the thickness of insulation with sprayed polyurethane foam
Go to calculations
The obtained value will become a guideline for planning the purchase of the required amount of material and for independently applying polyurethane foam to the insulated structure.
Insulation of walls by pouring
In the case when the interior decoration of the house has already been completed, but you forgot to take care of saving heat in the house and the walls from the inside are not insulated with anything, there is a wonderful way to fix this problem by pouring liquid polyurethane foam between the outer wall of the house and the sheathing.
Insulating a house with polyurethane foam has a fairly simple technology; there is absolutely nothing complicated in this process. The most important thing is to correctly calculate the required volume of polyurethane foam that will be needed for each wall.
Pouring polyurethane foam between the outer wall and the sheathing
Calculation
For example, the thickness between the wall and the sheathing is 5 cm , which is a multiple of 0.05 m. Now let’s calculate the area of the insulated wall.
For a room 6x4 m , with a ceiling height of 3 meters, the area of the larger wall is 18 m² .
Now it remains to find out the density of polyurethane foam; it varies from manufacturer to manufacturer. Let's take the most common indicator, which is 32 kg/m³ .
Multiplying the resulting numbers we get 0.05x18x32 = 28.8 kg. or 0.9 liters. Rounding the resulting number, we find that one 6x4 will require approximately 1 liter of raw materials.
Preparation
- On the outside of the house, mark a section of the wall as follows. Draw a conditional diagonal line from any lower corner. At a distance of 50 cm, mark a point on it.
- Next, repeat the same procedure with the second corner. The resulting points formed a segment that must be divided into proportional parts, the length of which will be as close as possible to 50 cm.
- Using the same method, mark the rest of the wall all the way to the top. If necessary, the dimensions can be slightly adjusted.
- Using a hammer drill, drill holes that will serve as filler holes. Use a drill of the same diameter as the spray nozzle.
Important! If the walls are made of brick, then the hole must be drilled into the masonry joint. In block walls, the hole is made in the block itself.
Fill
There is nothing complicated here. Bring the gun to the hole and, starting from the bottom, slowly fill each of them. The required amount of composition that needs to be poured into each hole is also not difficult to calculate. For example, there were 20 ⊗ . We divide the previously calculated volume by the number of holes, we get 1:20 = 0.05 l. or 50 ml. for each hole.
Pouring polyurethane foam between walls
Advantages of external insulation of a wooden house
Which insulation method should you choose - internal or external? It does not interfere. If the interior of the house is supposed to be finished with clapboard or plasterboard, then the installation of insulation under them is implied by itself. Many people limit themselves to this, believing that the desired result has been achieved. Of course, when the walls of the house are made of high-quality rounded timber, it is a pity to hide this beauty from view.
If these are ordinary logs, unplaned timber or wooden panels, then you can significantly decorate the exterior of the building using external cladding with clapboard, block house, wall panels or siding.
In addition to improving the decorative qualities of the house, this will protect its walls from the harmful effects of the external environment. When finishing, a layer of thermal insulation made of mineral wool board is usually installed under the casing. This additionally protects the walls of the house from freezing in winter, shifting the point of negative temperatures outward, which also has a positive effect on the durability of the tree. But the mineral wool board also has its disadvantages :
- absorbs moisture well, which significantly reduces the heat-shielding properties;
- releases tiny particles into the surrounding space, which, when entering the lungs, are quite harmful to health;
- It does not burn itself, but when burned it can release harmful gases.
Other materials are also used for external insulation, for example, polystyrene foam, but they are even less technologically advanced and can also increase the fire hazard. Recently, foamed polymer plastic—polyurethane foam (PPU)—has become increasingly popular
However, it has been known for quite a long time, just remember the widely used cans of polyurethane foam, but as a material for wall insulation it has only now begun to be used in our country, despite its obvious advantages.
Insulation of a wooden house from the inside. When it is necessary? You will find the answer here. And this article talks about cork insulation for walls.
Care
Polyurethane foam does not require any additional maintenance.
The material tolerates temperature changes well and has a long service life. To avoid causing mechanical damage and to protect from exposure to ultraviolet rays, it is not recommended to leave the foam in an open layer. That is, you need to cover it with additional panels, paint or putty.
As practice shows, all shortcomings or “defects” in the work become noticeable in the first year after insulation. If all is well, then the material is guaranteed to last for about 50 years without problems.
Drawing conclusions, it should be noted that polyurethane foam is one of the best building materials for internal and external wall insulation.
Advantages of polyurethane foam over other insulation materials
They are obvious :
- Uniquely low thermal conductivity . PUF consists of 80-90% air, which is a very good heat insulator.
- Low density . This results in a very low weight of the applied layer of material, which creates virtually no additional load on the walls of the building.
- High adhesive qualities . Sticks well to almost any surface except wet ones. Fills the smallest irregularities and microcracks.
- Manufacturability . It can be applied by simple spraying to any surface that does not require preliminary preparation. Creates a continuous, seamless coating.
- Durability . The material is quite durable. Thanks to good adhesion, it perfectly binds together the building elements to which it is applied.
- Plasticity . When surfaces are deformed, temperature changes in their dimensions, compression or bending, it does not crack or collapse.
- Fire safety . Non-flammable, does not support combustion.
- Environmental friendliness . It does not emit harmful substances; the highly volatile solvents used during application evaporate within three days. Suitable for both exterior and interior decoration.
- Durability . Polyurethane foam has been known for about 50 years, during which time structures created using it continue to exist successfully.
When applied by an experienced craftsman, the material can create a self-sufficient decorative surface that does not require further processing other than painting.
But there is one drawback - it is destroyed by the direct action of ultraviolet solar radiation. And regular painting can protect it well from this.
You will learn how to insulate the outside walls of a wooden house by reading this article. And here is an article about thermal insulation of a house.
Some tips
If you still decide to insulate your frame, brick or wooden house with polyurethane foam, then you need to take into account a few tips from professionals:
- insulation of walls and floors using PU foam spraying technology should be carried out only from the outside;
- provide maximum protection of the heat insulator from the outside from moisture, UV, air and monitor its reliability throughout the entire operational period;
- If it is decided to insulate the walls of a frame house with polyurethane foam - filling the voids formed during its operation due to wear and tear of the insulation, then it is necessary to ensure complete tightness of the internal premises, i.e. The wall finishing material should not allow air to pass through;
- When choosing a contractor, you should take into account not only the company’s advertising brochures; it is better to try to find ready-made objects with the longest possible service life.
Attention! The environmental safety of using polyurethane foam in refrigerators is guaranteed by the tightness of its packaging!
Insulation of walls outside a wooden or brick house with polyurethane foam, filling of voids in a frame structure can also be done with mineral wool, polystyrene foam or other material. The main thing is to focus on the characteristics of the structure itself, the features of its operation, and climatic conditions
Spray insulation technology
At first glance, the work methodology seems simple and understandable. However, to do the job well, you need relevant experience. It is important to set up the equipment correctly , calculate the optimal spray thickness and evenly treat the surface.
Tools and equipment
To operate, you will need a low or high pressure electro-pneumatic installation. As a rule, the kit already includes hoses and a spray gun. Consumable tanks must be ordered additionally.
When choosing equipment for insulating a frame house with polyurethane foam, you need to take into account a number of parameters:
- Possibility of heating the composition. The operating temperature for the chemical reaction of the components is +20-25°C; when lowered, the polyurethane may thicken - this will increase consumption and reduce the quality of the coupling.
- Mobility and compactness. This quality is especially important when performing high-altitude work.
- Performance. To process large areas, it is not advisable to purchase or rent a low-power unit.
In addition to equipment, you will need protective equipment : a respirator or gas mask, cotton or rubber gloves, shoes, overalls, goggles, overalls.
Calculation of insulation thickness
It is better to entrust calculations to specialists. When calculating the thermal insulation layer, many parameters are taken into account:
- type and thickness of building material;
- type of structural element: wall, roof, ceiling, etc.;
- thermal conductivity coefficient of building material;
- climatic conditions of the region;
- qualitative characteristics of the polyurethane foam itself: type, density.
Average insulation thickness values for the central region of the Russian Federation when using polyurethane foam with closed cells:
- walls – at least 50 mm;
- roof, attic – 120-140 mm;
- basements, floors – 50-70 cm;
- foundation – 30-70 mm.
Preparatory activities
Before applying the solution, the walls of the house must be cleaned and dried - residual dirt, dust and other debris will interfere with the normal adhesion of the foam to the surface. Check the integrity of the coating; dents and cracks with a diameter of more than 5-6 mm must be removed. They must be covered with cement mortar.
The next step is to install the frame for the upcoming cladding. Make a sheathing from a wooden beam or metal profile. The frame posts must be placed strictly vertically and have a single plane.
Useful: 9 options for exterior finishing of a frame house
If on the day chosen for work there is high humidity or there is rain in the forecast, then the “foam” treatment must be postponed to another time. Optimal conditions are a sunny but not hot day, the surface temperature should not exceed +30°C.
Spraying polyurethane: step-by-step instructions
The preparation of the composition depends on the form of its release. Polyurethane foam in cylinders (Polinor) is ready for use. The container must be placed in the mounting gun and shaken well.
Two-component mixtures sprayed under pressure require special preparation:
- Mix the first mixture with a mixer.
- Shake the second element (hardener) well.
- Combine the components according to the instructions, usually the proportion is 1:1. When preparing, you must avoid getting debris and moisture into the mixture.
- Fill the tank with the finished product to feed into the spray gun.
Rules for spraying polyurethane foam:
- First of all, foam is applied to hard-to-reach areas: areas near the chimney, ventilation holes, walls of complex configuration.
- Each subsequent layer of polyurethane foam is sprayed only after the previous one has completely hardened.
- It is advisable to complete all work in one day. For large processing areas, you need to enlist the help of an assistant.
- The maximum thickness of one layer is 15 mm, the minimum number of coatings is 3.
- Areas that do not require thermal insulation must first be covered with dense material.
- Polyurethane foam is applied from bottom to top, the composition is distributed between the elements of the sheathing.
Filling walls with polyurethane foam
There is another way to insulate walls with polyurethane foam.
It involves pouring material into wall cavities. This is done mainly in frame houses, for example, those built using sandwich technology.
Pouring material under the front cladding of the building - the holes passed are closed with plugs
Carrying out such work also requires knowledge of the matter and the ability to handle complex equipment. Even if you rent such an installation, there is no guarantee that you will get a decent result, so it is better to trust professionals in this matter.
It is worth noting that such insulation does not require high pressure units. The mixture can actually flow into the cavities, but no one can cancel the uniformity of mixing of the components.
Installations designed for spraying can be used after they have been reconfigured, but ideally special units with a delayed foaming function are needed. They give time for the polyurethane foam to flow into the walls, and only after that does the active phase of changing its structure begin.
The hole leads under the front trim - after insulation it will need to be sealed
To fill the wall, holes are made in it at a certain level. Through them, polyurethane foam is poured inside and visual control of the filling of the cavities is carried out. It is not difficult to guess that it is very easy to make a mistake when pouring and leave cold bridges, so in this process the qualifications of a specialist who will prepare the material with the required ratio of components are very important. He must be well versed in the properties of polyurethane foam and calculate the volume of its secondary expansion, find the time for its hardening and volume gain.
If a professional company operates, it will use thermal imagers to monitor the quality of its work.
In general, this insulation option is definitely worth considering if you are not constrained by a budget and want to get a warm home. At the same time, you need to be very careful and not run into charlatans.
What kind of material is this, what characteristics does it have?
This new heat insulator appeared with us relatively recently. But to speak of it as “new” would be misleading. It was invented in Germany back in the 30s. First used in military technologies, and then in the 70s they began to be used as insulation. If you compare the structure, it resembles polyurethane foam but in larger volume cylinders. Having appeared on the market, polyurethane foam immediately won the hearts of specialists. It is used for insulating any elements of houses made of timber, logs, cinder blocks, bricks, etc. Using insulation, you can foam the roof, floor, interior and exterior walls. It easily adheres to any building material and is considered the most effective in its properties: heat and sound insulation. Thanks to its liquid, foamy texture, it fills even the smallest crevices.
Has high adhesive properties. It will easily lie on smooth metal, such as corrugated sheets. It also has protective qualities, so the metal under the foam does not rust, and the wood does not rot. It also has high performance characteristics, so its service life is at least 50 years.
If we compare it with all previously known insulation materials, there are simply no analogues. But how this material will perform in practice can be said no earlier than in 10 years. So far the reviews about it are positive. The only thing that users are talking about more and more is whether a wooden house will remain as environmentally friendly? And I am outraged by the high price of polyurethane foam insulation work. The video explains it in more detail:
Comparative analysis of the thermal conductivity of various materials:
| Type of insulation | Thermal conductivity |
| Polyurethane foam | 0,019 — 0,03 |
| Mineral wool | 0,04 — 0,05 |
| Foam concrete slabs | 0,056 — 0,098 |
| Styrofoam | 0,03 — 0,037 |
Experts talk about a number of advantages of insulating a wooden house with polyurethane foam on the outside:
- Due to the fact that the pores of the material are 98% closed, it has high waterproofing qualities. Maximum moisture accumulation 2%.
- Adhesion occurs with all substances: iron, paper, wood, concrete, brick, etc.
- Neutral to any chemical effects of alkali and acid.
- Practically does not burn. In terms of flammability, it has a class G 1-3. It burns only in direct contact with fire, but as soon as the source is removed, it goes out immediately. At the same time, it will not smolder and release toxic fumes. This is an indisputable plus for a wooden house. This process is captured on video:
- Tolerates temperatures from -150 to +150 C.
- You can easily adjust the insulation density from 8 to 750 kg/m3.
- Acoustic insulation is 5 times higher than that of polystyrene foam.
- Excellent protective qualities.
- Not afraid of rodents, mold and mildew.