Gypsum fiber materials have proven themselves to be excellent when performing work on horizontal foundations. Due to its stable characteristics, the resulting surface is suitable for cladding with various products. Most often, the installation of gypsum fiber board on the floor under the tiles in the house is complemented by the installation of heated floors. But to obtain a high-quality result, certain rules must be taken into account.
Characteristics and features of the material
Gypsum fiber panels have a lot of parameters that set them apart from other sheet products:
- Strength. The homogeneous structure ensures high performance. This is explained by the composition: gypsum and cellulose fibers, which give a reinforcing effect.
- Viscosity. Elements can be processed in various ways: sawing, milling, etc., this will not damage the structure or deform the parts. It is due to this that a good result is achieved when installing a heated floor.
- Fire safety. The product does not support the spread of fire, which allows the slabs to be laid on various communication systems.
- Low thermal conductivity. The resulting gypsum fiber surface can be used as additional insulation. But this significantly complicates the process of installing a heated floor, since the system has to be literally built into gypsum fiber board sheets.
- Wide range of applications. The slabs are suitable for concrete and wood bases, as well as for dry screeding. The sheets are relatively light in weight, so they do not put a significant load on the base . The material can be laid with your own hands without the involvement of specialists.
Gypsum fiber sheet, in comparison with its main competitor - gypsum fiber board, has improved characteristics.
Gypsum fiber sheet includes two main groups of products used for flooring on horizontal bases: the standard version and moisture-resistant gypsum fiber board for flooring - GVLV. The resulting floor covering will be reliable and durable, but only if the variety is chosen correctly.
On a note! Waterproof material is used for flooring in rooms with high humidity (bathroom or kitchen) and is the best solution when laying a heating system.
Unlike conventional gypsum plasterboard, moisture-resistant sheets incorporate a fiberglass reinforcing mesh
Area of use and varieties
If you need a high-quality finished bathroom, finishing with glvv plates will be the best option for leveling the walls, floor and ceiling. GVLV, like drywall, is divided into several types. By area of application it is divided into:
- floor;
- wall.
According to physical characteristics, it is divided into: Are you thinking about how to cover a bathtub with plasterboard? Work procedure and installation recommendations
- ordinary;
- moisture resistant.
Floor or wall slabs differ from each other not only in thickness, but also in size. For the convenience of laying dry screed, smaller slabs of 1500 x 1000 millimeters are used, while standard wall sheets are produced with dimensions of 2500 x 1200 millimeters.
The use of gypsum fiber has already become widespread among large construction companies, so the advantages of this material when finishing rooms with high humidity are obvious. Strength allows you to build not only various wall structures with increased load, but many people even use this material to build steps on a metal or wooden frame. The surface of each slab is finely porous and has a non-uniform structure, which promotes good adhesion of any decorative finishing material using standard adhesive solutions. Using moisture-resistant gypsum fiber for the bathroom would be the best option.
Don't miss: What and how to drill tiles on the wall so that they don't crack?
Installation of gypsum fiber board floors
The technology assumes that special small-sized products will be used for installation: width - 100 or 120 cm, length - 150 cm, thickness - 12.5 mm. Working with such dimensions is much easier and more convenient, and it also eliminates significant trimming.
Initially, the surface needs to be prepared:
- The base is cleared of all unnecessary things, the room should be free. To obtain a high-quality result, it is advisable to completely remove the old coating.
- The cracks are sealed with cement mortar. Particular attention is paid to the junctions of walls and floors.
- The surface is cleared of construction debris.
Also, the sheets must be kept at room temperature for 24 hours.
When preparing a concrete screed, the main thing is to properly seal cracks and potholes, if any, and then remove the debris
Methods of preparation
1. The dry method allows you to obtain a base in a fairly short time; the work does not involve complex processes. There are several installation options depending on surface defects:
- If there is no deformation, GVL can be glued directly to concrete, but the surface must be primed first.
- For minor differences (3–4 mm), an intermediate layer of cardboard or foam is laid on the floor.
- If deviations are about 1 cm, a layer of expanded clay is poured. It is used when there is no need for additional thermal insulation of the base.
- If the blockage exceeds 20 mm, a prefabricated structure is created: an expanded clay layer, complemented by a foam pad.
Dry screed based on expanded clay is considered the most common method of installing flooring made of GVLV
2. With the wet method, specialized “repair” mixtures are used for leveling, which can be replaced with cheaper cement compositions with the addition of sand and modifiers. But this method is inferior to bulk options, since it requires more preparation time.
You should know! The dry method is suitable not only for working with concrete floors, but also for wooden floors, which must be more carefully processed.
Wet installation of GVLV with glue is possible, but the work is quite dirty, and most importantly, the base must be perfectly flat, so this method is not popular
Preparing the foundation from the logs
This process will take longer than backfilling. It is necessary to install the timber with extreme precision, which must be well dried and treated with protective compounds. The logs are leveled using backings directly to the walls and floor, and the elements are connected to each other by jumpers. The peculiarity of this process is that the gypsum fiber must be mounted not on the base, but on the created sheathing. For this purpose, a beam of small cross-section is used, fixed perpendicular to the logs. The resulting gaps can be used to place loose or solid thermal insulation.
GVL slabs can be mounted on joists or laid on old wooden flooring
GVL installation procedure
Regardless of the chosen preparation method, the slabs are laid according to the following scheme:
- As waterproofing, a polyethylene film with a thickness of at least 0.2 mm is laid on the base, which must extend onto the walls. The material should be placed with an overlap of 15–20 cm to prevent the ingress of moisture and loose components. Instead of film, a universal vapor barrier can be laid on a wooden floor.
- Soundproofing tape is glued around the perimeter to prevent contact between the gypsum fiber board sheets and the walls.
- The surface is leveled using a suitable method.
- Next you can lay gypsum fiber. It is recommended to lay it in two layers. To avoid unnecessary expenses, the first layer is created from large-format parts, and a floor gypsum board with special chamfers is mounted on top. This structure will allow for greater reliability. The process should begin from the doorway. The layers need to be glued together and secured with self-tapping screws in increments of 20–25 cm.
For a novice craftsman, the most problematic is leveling the dry expanded clay backfill along the beacons.
It is taken into account that the small-format panel undergoes preliminary preparation: with an electric jigsaw it is necessary to cut off the fold that will face the walls.
Attention! You should use adhesive suitable for gypsum plasterboards and specialized double-threaded self-drilling screws. Conventional self-tapping screws or options for gypsum plasterboard are highly likely to become unscrewed, which can lead to damage to the decorative coating.
To fix the GVLV, it is advisable to use self-tapping self-tapping screws with double threads, otherwise you will have to separately drill out the countersunk under the cap, because the density of the plate will not allow the cap to sink when screwed in
Technology of working with GVL
- Preparatory work stage
- GVL installation work
- GVL cladding works
Modern finishing work today cannot be imagined without gypsum fiber sheet (GVL). The popularity of this finishing material is due to a number of its advantages, such as environmental friendliness, strength, fire resistance, affordable cost, and simple installation. Laying gypsum fiber board on any surface, as well as tiling it, makes this surface perfectly flat, giving an aesthetic appearance to any room. Therefore, this type of finishing work is most widespread. The technology for working with GVL consists of several successive stages.
Types of drywall and their color markings.
Laying tiles on gypsum fiber
To lay tiles, you need to prepare the necessary materials and tools in advance. The general procedure is as follows:
- The premises are being marked out. To do this, lines are drawn from corner to corner and between the center of adjacent walls. This will allow you to stick the products with the pattern adjusted.
- The base is treated with two layers of primer to ensure good impregnation and dried.
- The starting point of installation is determined and a diagram of the arrangement of elements is created. Pre-layout is often required.
- Glue is applied to the surface. You can mix it yourself or purchase a ready-made mixture. The mixture is spread over the base using a notched trowel.
- The parts need to be glued in a clear sequence; to do this, the element is pressed and, if necessary, tapped with a mallet and adjusted to the level.
- The parts are placed at intervals, the joints are formed using plastic crosses or a tile leveling system (SVP).
- The outermost fragments are trimmed taking into account the gap from the walls.
- The coating is left until it dries, after which it is necessary to rub the seams with a special mixture of the desired shade. The composition is applied to the joints and spread with a rubber spatula, the excess is removed.
When working with GVLV, the tiles are laid using regular tile adhesive.
If you do not violate the process technology, the surface will last a long time.
Installation features
In order to give the room your own style, you should lay the tiles in a non-standard way. This will give the shower room its individuality, as well as highlight some interior details, for example, a washbasin, sink or large mirror. Before finishing work begins, ceramic tiles must be carefully prepared for installation.
Layed tiles on gypsum plasterboard sheets, secured with tile adhesive
To do this, you need to have certain knowledge or become familiar with the features of this process:
- It is necessary to purchase and put in order all the tools and necessary materials.
- Take measurements of the area of the shower room, and also calculate the required amount of tiles. The calculation should be carried out not in square meters, but according to piece parameters.
- It is best to think in advance about the shape of the pattern, the color scheme of the images, the geometry of the angle and the brightness of the lighting.
- It is necessary to decide on the type of installation and choose the most interesting or suitable option, based on the characteristics of the room. For example, diagonally, classic, i.e. straight or horizontal, herringbone, square and others.
- Today, the most popular styling method is classic. It is carried out from the far corner of the wall or floor, after which the coating is laid towards the exit. Or the center of the room is determined using ordinary cords, and then the resulting area is visually divided into 4 zones and installation occurs.
- In addition to a wooden base, GVL can be laid on various reinforced concrete coverings. However, this will require careful adherence to the specifics of the technology.
Finishing work on the internal space from gypsum fiber board allows you to eliminate many unnecessary and unnecessary problems associated with arranging the floor. The most common example is leveling the coating using a wet screed. After installation, you need to wait for complete drying, which will take several weeks. This makes it possible to finish laying the surface in a short time.
Which will ultimately lead to the quick completion of the main stage, after which it will be possible to proceed to the next one in a couple of days. It is best to fix the ceramic products with a reliable adhesive that does not allow the tiles to change their location or partially detach from the base. To do this, it is necessary to clarify the shelf life of the adhesive solution, as well as its ability to be used on GVL surfaces.
Warm floor under tiles on GVL
The creation of such a design has the following features:
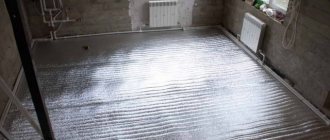
- The electrical system is installed most quickly. To do this, mats are laid on the GVL base and all sections of the future heater are connected. It is important to cut the tapes correctly when turning so as not to damage the power cores. After checking the functionality, the tiles are laid.
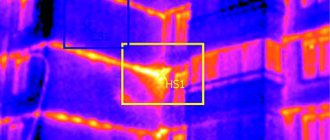
Electric heated floor mats are laid under the tiles, the only difference is that heat-resistant tile adhesive is used and it is applied in a thicker layer - A hydronic underfloor heating system will require much more effort because the pipes must be placed on top of a moisture-resistant gypsum board. This can be done in two ways: Milling for the line elements along which they will be located. The process is quite labor-intensive and is only suitable for two-layer structures. Subsequently, the areas are filled with tile adhesive.
- The alternative method does not involve milling, but its disadvantage is that many small parts will need to be cut out. The technology involves laying GVL elements between pipes. Stacked adjacent layers should be located in the same plane and completely hide the communications, but not touch them. The gaps are filled with the mixture and leveled.
A heated water floor with GVLV flooring is more difficult to install, but it is considered a more reliable option, and the design pays for itself faster.
Regardless of the method, the resulting surface must be primed to ensure reliable fixation of the tiles.
Correct completion of all stages will allow you to cover floors made of gypsum fiber sheets with tiles without much difficulty.