Advantages and disadvantages of wall insulation with penoplex
This material has a number of the following positive qualities:
- Thanks to its low thermal conductivity, even wet penoplex provides complete thermal insulation, perfectly maintaining its performance characteristics.
- It does not rot, eliminating the possibility of mold and mildew.
- Its light weight makes it easy to cut the material according to the required dimensions, as well as carry out the installation process without much difficulty, even with your own hands. In addition, the insulation is easier to store and transport, and after installation it does not load the walls.
- Penoplex tolerates severe frosts and significant temperature changes. It is intended for use in the range from -50 to +70°C.
- The insulation contains no toxic substances that can harm health.
- The foamed structure of penoplex ensures its complete moisture resistance, due to which water does not penetrate through it. In view of this, the material can be effectively used to insulate roofs and foundations in conditions of increased humidity.
- Manufacturers indicate a service life of at least 50 years.
- Some materials contain fire retardants, which prevent them from burning.
- Affordable price, thanks to which a significantly larger number of people can choose it.
In addition to the above advantages, penoplex also has certain disadvantages:
- When exposed to fire, it begins to melt and emit acrid toxic smoke.
- Weak adhesion with adhesive mixtures. Wall mounting is done using fasteners.
- Under prolonged exposure to sunlight, the material deteriorates, which is why it needs to be covered on the outside with a protective layer, which will also make it possible to achieve greater strength of the penoplex, which is not initially too high.
- The insulation has a low level of vapor permeability. Because of this, after installing the material on the walls, they stop “breathing.”
Application and characteristics of penoplex
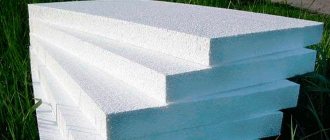
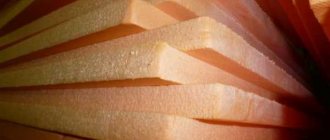
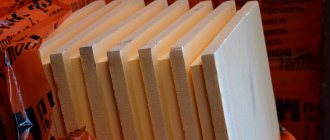
Penoplex, like polystyrene foam, is a type of processed polystyrene foam. It is produced in the form of a plate and has good protection from mechanical stress and the influence of external factors.
In addition to all this, this material can be used for finishing rooms with a high moisture content. It is often used to insulate rooms.
The material is often used to insulate balconies and loggias.
You can lay such insulation in any conditions both inside and outside the house. It is used to finish the foundation, walls, ceiling or floor. The material will be the optimal solution for thermal insulation of balconies or rooms with high humidity.
For insulation outside and inside the room, it is better to use material of different sizes. For interior finishing, slabs with a thickness of 30-40 mm will be sufficient. For external cladding, a coating with a thickness of up to 100 mm can be used.
Fixation methods
The ease of installation of penoplex is one of its main advantages, thanks to which not only a specialist, but also any other person, if desired and knows the correct sequence of work and its observance during the process, can insulate the walls outside the building properly. The material can be fastened in several ways, both outside and inside the structure.
With the construction of the sheathing
In this case, you need to build a special frame or, when fastening, you can resort to using thermal insulation between wood planks or aluminum profiles. Giving preference to this method, it is best to select sheets with dimensions that will correspond to the distance between the components of the sheathing, which will significantly reduce the amount of waste.
In such a situation, during installation it is necessary to lay insulation in the gaps, after which it is necessary to seal the perimeter using polyurethane foam, which also simultaneously secures the material to the wall. Finishing is installed on top of the penoplex, which can be a block house, siding and wall panels.
Using special adhesives
Without erecting the sheathing, the insulation can be fixed using a special cement-based adhesive, which is also used when using mineral wool and polystyrene foam.
These formulations are sold dry in paper bags. Subsequently, the mixture must be diluted with water. In addition, you can use bitumen-polymer mastic, liquid nails or polyurethane foam, the application of which must be carried out using a special gun, which is often used when spraying the latter. It is necessary to cover the sheet with the selected composition in a zigzag, around the perimeter or crosswise. The surface of the panels is corrugated on the inside, providing better adhesion. If the sheets are smooth, then they need to be rolled with a needle roller.
If the material does not fit tightly, the seams should be taped with foil tape, which prevents heat leakage. Before the adhesive mixture hardens, you have about an hour to make adjustments or remove the layer. To prevent the penoplex from sliding down, its lower part must be attached to a starting bar, which must be installed in a strictly horizontal position.
Using special fasteners
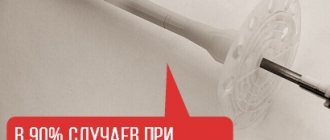
To fix the slabs, special dowels with wide plate-shaped caps are used. To fasten one sheet, you need to use 5-6 such fasteners. With the help of dowels it is possible to make a reliable and long-lasting fixation. Their large-width caps themselves do not lead to a violation of the integrity of the insulation. The use of these elements is optimal if it is necessary to finish large areas or in cases where there are uneven surfaces on the walls.
Drilling holes in the rough base must be done using a hammer drill. The length of the dowels must be at least 10 cm, depending on the thickness of the insulation used, which in many cases includes self-tapping screws of the required size.
It is better to additionally cover the joints of the plates with adhesive and cover the seams with foil tape. Due to this method of fixation, a loose fit occurs, which causes the formation of fungus under the penoplex itself. To avoid this negative consequence, the rough base should first be treated with an antifungal mixture.
Fastening methods
Surfaces made of different materials can be insulated in different ways. The process of covering a building includes several steps:
- surface preparation;
- insulation fastening;
- finishing.
In order to perform high-quality thermal insulation, penoplex should be installed correctly. First, the starting bar is screwed strictly horizontally. The bottom row of insulation is laid on it.
It is recommended to install a factory additional element (perforated, metal). You need to buy a strip that matches the width of the insulation and the required number of corners.
Before installing penoplex, a horizontal level is drawn along the walls of the building. The starting bar is screwed to the line. It holds the insulation and maintains the “geometry” of the installation.
Base insulation
This part of the building is most susceptible to the negative effects of dampness. It is for this reason that penoplex is excellent for insulating the foundation, which does not allow moisture to pass through and tolerates temperature fluctuations well.
When carrying out this work, a number of the following materials and tools are required:
- Penoplex. Basically, when insulating, sheets with a thickness of 5 cm or more are used, the choice of which must be made in accordance with the characteristics of the climate and the structure itself.
- Bitumen mastic. In this case, it is used to fix the material. If the mastic will also be used as waterproofing, then it must be purchased 1.5 times more than required. This amount of mixture will be enough to pre-treat the walls and fix the penoplex on them.
- A construction knife or hacksaw with small teeth that will allow you to cut sheets.
- A spatula or other tool with which bitumen mastic will be applied to the insulation.
The work itself should be done as follows:
- Surface waterproofing. This step must be completed before installing the insulation. To do this, you can resort to the use of mastic or roll materials, which can be used simultaneously together. The slabs should not be fixed to an unprepared surface, since in this case moisture can penetrate through the joints.
- Applying mastic to slabs. 6 points with a diameter of about 10 cm should be applied to the surface of the penoplex in a layer of 1 cm. To apply the mastic, it is convenient to use a narrow spatula, but you can also resort to using another suitable tool.
- Complete surface covering. If there are protrusions on the base, then the insulation must first be cut into pieces of the required size and only then glued. Before applying the adhesive composition, it is imperative to try on the material and make sure that the cut is correct. If necessary, it is necessary to trim the necessary areas. It is better to complete this stage before installation, thanks to which it will be possible to quickly fix the penoplex and avoid a number of mistakes.
- Filling cracks with polyurethane foam. Thanks to this, you will be able to achieve an ideal result. In this case, the polyurethane foam not only insulates all the cracks, but also provides additional fixation, which ensures reliable gluing of each processed joint after hardening.
- After a day, you can backfill the foundation. No additional fastening should be done, since the soil will press the slabs better than the auxiliary fasteners used, which can be dowels.
- The part of the insulation that is located above the soil surface can be additionally secured. You can use dowels for this. If there is a need for even greater insulation of the structure, then you can lay foam sheets under the blind area, reinforce the surface and fill it with a solution. In this case, it is possible to more reliably protect the building’s foundation from the negative effects of cold.
Phased work
To insulate walls, methods are used that differ in the installation method and location of insulation.
For carrying out work outdoors, there are: For insulation inside, the following methods are applicable:
Each method involves a step-by-step process of work, the violation of which will lead to the appearance of dampness.
Surface Requirements
Before you insulate a wall with penoplex, you need to prepare it. Basically, insulation goes on sale with a smooth surface. The adhesive mixture does not stick to the back side, there is no adhesion. To do this, you need to treat the back side of the insulation:
- pass in one direction with a needle roller;
- wipe the surface with sandpaper - roughness will appear;
- pass with a router (if available).
By doing one of the above actions, the back side will become rough, this helps the adhesive mixture stick and adhere better to the wall.
Preparing the walls
To install penoplex, you need to prepare the surface, which means:
- Level it - remove excess mortar, protruding pins, dust, cobwebs.
- Peeling plaster and old whitewash are removed from the walls of a private house.
- If there are traces of dampness or blooms, you need to dry the wall, then apply an antiseptic composition (the usual treatment with diluted bleach will do).
- Apply primer 2 times. The second layer is applied only after the first has completely dried.
Wooden walls should not show signs of rot. If such are found, then you need to replace this part.
Is vapor barrier necessary?
Depending on the location where the thermal insulation material is used, a vapor barrier is used.
- Outside . This should be done in rare cases. If the house is located in a damp area, in a lowland, near water pits. A vapor barrier is also installed outside when insulating a bathhouse or sauna. Basically, vapor barrier is not carried out. Penoplex provides the necessary protection (water-repellent property).
- Inside. A vapor barrier layer is a mandatory layer if the outside walls are not insulated. There is a shift in the dew point in the design. Condensation will leak into the room from above the insulation. This will lead to constant dampness, destruction of the wall, and the appearance of fungi.
The material from which the walls are made also plays a role. For concrete and brick structures, a vapor barrier layer is required, but for wooden walls it is optional.
Lathing
To create a frame base, wooden slats of 50x50 mm are required.
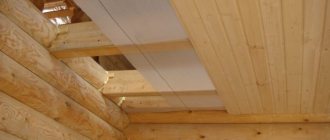
In this case, the width of the slats should be equal to the width of the slab. First, fix the bottom rail horizontally with self-tapping screws. Vertical slats are mounted from it with a step equal to the size of the slab. The insulation should fit tightly between the slats. Next, attach a second horizontal rail for the second row of penoplex. So to the top. In some cases, metal profiles are used instead of wooden beams.
Glue attachment methods
There are various materials for gluing foam boards.
- Mastic for gluing extruded polystyrene foam boards. The use of a bitumen-polymer composition is an economical way to fix insulation to the wall. Mastic is used in buildings with high humidity.
- Adhesive dry mixtures. These materials are based on cement. The solution must be made according to the instructions on the package. Apply the solution with a notched trowel over the entire surface of the slab and fix it on the wall. For strength, additional fixation with dowels is required.
- Adhesive foam. It has good adhesion. The work is carried out quickly and without debris or dust. The foam is applied from a gun to the slabs and fixed to the wall.
- "Liquid Nails". Used when insulating a small area.
After selecting and applying the glue, the foam boards must be additionally secured with mushroom-shaped dowels.
Preparing walls before insulation with penoplex
Before fixing the insulation sheets, it is necessary to clean the surface from dust, oil and mastic contaminants, as well as poorly retained old mortar or a layer of paint. Only those coatings that cannot bear the load should be removed.
The old paint layer must be removed to a solid base mechanically or using special compounds. If fungus, mold or other negative microorganisms are present on the surface, then to eliminate them you should use appropriate mixtures with bactericidal properties.
Next, you need to thoroughly check the evenness of the walls, using a building level 2.5-3 m long. If recesses, holes, cracks or irregularities larger than 2 cm are found, then in order to avoid breaking the penoplex during the installation process, you should first plaster the surfaces with cement-sand mortar. After complete hardening, the walls need to be opened with a primer in 2 layers.
Note! Smooth sheets do not always fully adhere to the adhesive mixture, which is why before installation you need to go over them with a needle roller, which is designed for drywall, or use an ordinary metal brush. In addition, before starting work, it is imperative to fix window sills, ebbs and make slopes.
The procedure for insulating walls using penoplex
Most work is carried out on concrete surfaces. To carry out this operation you will need the following tools:
- perforator;
- hammer;
- plumb and level;
- construction knife.
The insulation process consists of the following stages:
- Surface preparation. Preparation involves removing the old coating, eliminating defects in the form of unevenness, cracks, etc. You will also need to clean the wall from dirt and dust. If mold is found, you need to get rid of it and treat the affected area with a special antiseptic.
- Penoplex fasteners. Since the coating of such a material is smooth enough to fix it well, we recommend treating the material with a needle roller, this will increase the roughness index. 5 fasteners should be used for each slab. If a method with a combination of fasteners and glue is used, the holes for the dowels are pre-drilled and only then the glue is applied. The solution is applied in the center and along the perimeter. We recommend pre-filling the holes for fasteners with foam.
- Finishing. To implement such a finish, a reinforcing mesh is attached to the surface. After which the finishing material is applied. The best methods are screws, dowels, foam or glue. We recommend using the latter methods only for surfaces with low pressure. For more information about the process, watch this video:
As you can see, attaching penoplex is a fairly easy task. The main thing is to choose the right installation option and use only high-quality materials.
Attaching penoplex to the wall from the outside
Initially, it is necessary to paste the base, on which the subsequently installed insulation will rest and lie evenly. If the fixation is carried out in a high-rise building, then it is better to install the starting strip at the lowest point. This is not necessary, but in this case it will be possible to more accurately and efficiently mark in advance the boundaries of the surface that must be processed during the process.
The further work itself must be carried out in the following sequence:
- After preparing the surface and material, it is necessary to prepare the adhesive composition. To do this, you need to pour water into the container and add the powder mixture to it in accordance with the proportions indicated by the manufacturer on the packaging. It is very important that the mixing is done thoroughly and that there are no lumps or dry mixture left at the bottom. To do this, it is best to use a construction mixer or a drill with a special attachment. It is better to prepare the mixture in small portions, since after some time (usually about 1-2 hours) there is a significant deterioration in the adhesion between it and the material.
- Next, glue should be applied to the back side of the foam board, which can be identified by its corrugation. The solution must be applied using an ordinary spatula, after which the layer must be evenly distributed using a serrated tool, which also allows you to eliminate all excess.
- Then the first sheet and all the others must be glued to the wall, pressing them to the surface. In this case, it is necessary to check the evenness of the installation of the slabs, avoiding distortion. Sheathing of doors and window openings should be done exclusively with solid slabs. To make it easier to join corners, sheets when insulating slopes must be glued with a protrusion of 1 cm.
- After the glue has completely hardened, which generally occurs within 3 days, you can begin to additionally fix the penoplex with dowels. The best option is to secure each sheet at 5 points - four in the corners and one in the middle. Initially, using a hammer drill, you need to make holes with a drill of a suitable diameter and length. In a brick wall, the depth should reach 5 cm, and in a block surface - 7 cm. After making the holes, you need to install dowels, and then drive in their expansion nails.
Upon completion of the above steps, you can begin further finishing by fixing the reinforcing mesh, which should be covered with an adhesive mixture for thermal insulation. The composition must be applied to the surface, then the mesh must be pressed into it, and then it must be re-opened with a layer of solution so that a flat plane is obtained and the material present in the gap is not visible.
Having learned how to properly attach penoplex to the wall from the outside and following all the specified recommendations during the preparatory and main work, you will be able to achieve a high-quality result with your own hands and avoid possible mistakes that can negatively affect not only the appearance, but also the service life and efficiency of the laminated insulation .
Video:
Features of fastening to different types of walls
Houses and industrial buildings are built from various materials, each of them has features of wall insulation technology.
Brick
Rough brickwork has pronounced differences in height and unevenness, which interfere with the tight fit of the penoplex and reliable fixation with glue. Therefore, experts recommend combining different fastening methods:
- assembly adhesive;
- liquid Nails;
- dowels;
- self-tapping screws;
- cement mortar;
- polyurethane foam.
Before installation, the rough base should be prepared and primed. Use a hammer drill to drill holes for the dowels.
To attach penoplex to a brick wall, it is recommended to combine methods, for example, use glue and dowels
Wooden
It is better to insulate wooden walls from the outside to avoid reducing the space of rooms and excessive humidity inside the house. Walls insulated with penoplex stop breathing - this is a disadvantage of such insulation. Under the influence of changes in humidity and temperature throughout the year, wood changes its size and remains unstable. A wooden house must last at least one year and shrink.
Preparation of the base consists of leveling the surface with a plane, sealing cracks and impregnation with antiseptics and fire retardants.
For fastening, a two-component adhesive is used that retains elasticity after drying; it prevents the sheets from detaching during thermal expansion of the wood.
Additionally, the sheets are fixed with self-tapping screws. If the final cladding of the facade is planned using a frame, then the insulation panels are laid in the cells of the sheathing.
It is recommended to cover wooden walls with insulation on the outside
Block
Aerated block walls cannot be left open; they absorb moisture and become damp. Before insulation, be sure to treat the wall with impregnation, which reduces glue consumption and strengthens the structure of the base.
If the wall is uneven, it can be processed with a drill with a chisel attachment, cutting off the protruding parts. Fastening is done on the sheathing if the finishing is chosen in the form of wall panels and on glue and dowels if frameless cladding is planned.
Before attaching penoplex, the block wall must be treated with a special impregnation
The joints of the slabs should not coincide with the technological seams; each subsequent row should be fastened with an offset. The adhesive composition should not contain aggressive chemicals that can damage the penoplex.
Concrete
The concrete base is very porous and highly absorbent. In this case, glue consumption is increased and adhesion is low. To solve this problem, it is necessary to treat the concrete with impregnating soil. It will fill micropores and strengthen the structure of the material, increase adhesion, and also save the adhesive composition.
For more reliable fastening of the insulation, dowels are used
To avoid moisture penetration into the concrete, foam sheets are laid in a checkerboard pattern with the seams offset.
Which penoplex to choose for wall insulation? Which one is better for external insulation?
Penoplex is divided into several main types. They differ from each other in composition and characteristics. The better the properties of the material, the higher its price. The name of each brand speaks for itself, so it is easier for the builder to choose the option that suits him:
- Roofing – used for thermal insulation of all types of roofs;
- Wall - used for thermal insulation of walls and the inside of the house;
- Foundation – used for insulating the foundation of a building or basement. The main advantage of this type is its water resistance, specially designed for such work;
- Penoplex comfort - is more popular when decorating balconies and apartment rooms. It has fairly good characteristics, but a high price for the material;
- Penoplex 45 is the highest sheet density. It is used in the construction of highways and airport runways. This type of penoplex is resistant to even the most critical temperatures.
Types of dowels
Disc-shaped dowels differ in size and diameter of the cap. The main classification affects the material of manufacture. According to this criterion, they distinguish:
- Polymers are characterized by low strength. Therefore, the cost is low. This option is suitable for concrete and brick. Such dowels are unable to withstand increased loads.
- Metal dowels are more durable, but have high thermal conductivity, which negatively affects the result of insulation. This leads to the formation of cold bridges. The susceptibility of metal to corrosion causes yellow spots to appear. To avoid this phenomenon, you will need to treat the rods with an anti-corrosion compound.
- Metal ones with a thermal head are designed as an alternative to metal dowels. Coating the cap with metal with a low thermal conductivity coefficient eliminates the appearance of cold bridges. This feature affected the price of the products. The cost of metal dowels with a thermal head is high.
Disc-shaped dowels are selected taking into account the characteristics of the insulated surface, which will allow you to get the maximum benefit from thermal insulation and extend the service life of the insulation.
Liquid Nails
When insulating surfaces of a small area, it is advisable to use liquid nails. You will need a glue gun for application. The composition is applied to the foam board around the perimeter, as well as in the center. Fixation is almost instantaneous, just press the sheet firmly to the surface. To use this type of fixation, you will need to perfectly level the walls and also prime them. When thermally insulating surfaces of a large area, using liquid nails is irrational from a financial point of view, since the cost of the material is high.
Self-tapping screws
The easiest way to attach penoplex is with self-tapping screws. This installation method is only suitable when working with wooden bases or when insulating with lathing.
The use of self-tapping screws leads to the appearance of cold bridges and deterioration of thermal insulation performance, since the fastener heads are small and it is necessary to use about 8 pieces to fasten each plate.
Polyurethane foam
Polyurethane foam is used as an additional fastening for thermal insulation using dowels or self-tapping screws. They help seal the joints of the insulation and improve adhesion to the base. The foam is applied to the slab in the same way as liquid nails: along the perimeter and in the center.
Examples of improper insulation with penoplex boards
The photographs clearly show that the process of insulating the facade was carried out with a complete violation of the technological process. Namely, it is clearly visible:
1) Penoplex slabs were attached only with the help of dowels, while gluing with glue was apparently omitted for reasons of economy.
2) when installing the penoplex slabs, a grave mistake was made - the vertical and horizontal seams were combined. (The principle of brickwork is lost).
3) the base was not prepared properly; installation was carried out directly on bare brick walls, as evidenced by the visible difference between the joints of the slabs.
4) The gaps formed between the slabs are not sealed properly.
Penoplex - advantages and disadvantages, technical characteristics
In recent years, construction has increasingly begun to use
penoplex. All thanks to the special properties and unique manufacturing technology.
This is an inexpensive, synthetic thermal insulation material that is much easier to install than, for example, glass wool.
The standard dimensions of a penoplex sheet are length 1.2 m, width 60 cm. Only its thickness can be different, from 2-10 cm.
From a technical point of view, penoplex has the following characteristics:
- Thermal conductivity according to GOST. the standard should be 0.03 W/m*C;
- Vapor permeability should not exceed 0.008 mg/m*hour/*Pa;
- Sound insulation at 41dB;
- Moisture resistance no more than 0.6%;
- The density of the material varies between 28-45 kg/m 3 ;
- The maximum pressure when compressing the sheet between the plates should be no more than 0.18 MPa;
- Temperature difference range from –100 to +55 C 0 .
When choosing a material for better thermal insulation, focus on these characteristics. This guarantees you high-quality insulation of the facade of a brick house with a low rate of liquid absorption.
Like any building material, penoplex has a number of advantages and disadvantages.
Advantages:
- The best thermal insulation performance in comparison with other insulation materials;
- High protection against vapor formation due to the unusual structure of the material;
- Good moisture protection, so the material can be used to insulate baths and saunas;
- The material is durable, withstands heavy loads both in compression and in rupture;
- Excellent soundproofing characteristics;
- The material is treated with special solutions at the production stage, therefore it is resistant to fire;
- Protected from the development of fungal parasitic organisms;
- Easy to carry out installation work without additional assistance;
- Processing of penoplex can be carried out using improvised means without additional purchase of special devices, for example, for cutting sheets;
- The material is very light;
- Long service life - up to 50 years while maintaining the basic properties of the material.
Flaws:
- Although the material does not ignite, during a fire it melts, releasing toxic and dangerous smoke, and even after extinguishing it continues to smoke for a long time;
- The material is afraid of direct sunlight, and loses its properties when exposed to the sun for a long time.
- Susceptible to the use of solvents, destroyed;
- The price depends on the properties and qualities of penoplex;
- Practical zero vapor permeability, therefore not recommended for insulation of wooden and frame houses .
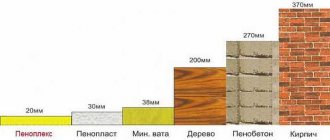
Comparison of penoplex with other insulation materials
