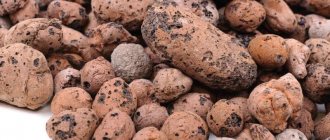
For dowels
In 90% of cases, mineral wool and other materials are attached to the wall using dowels.
Now we will simply describe the sequence of work when using this method.
First of all, if adhesive was initially used to fix the insulating boards, they must be well secured. Most often, fastening with dowels can be carried out 2-24 hours after gluing. A more accurate figure can be found in the instructions for the adhesive composition.
- Select and purchase an umbrella of the required length;
- We drill a hole into which the fastening element will be driven;
- Insert the dowel into the hole;
- Using a hammer, hammer in the anchor (with plastic nails you need to be especially careful when applying force).
Our sheet is securely fixed.
In the case of laying mineral wool, namely its rigid slabs, on the slabs themselves you will have to pre-drill not only holes, but also round recesses for the hats of umbrellas. Otherwise, these caps will protrude above the surface of the insulation, which will create difficulties when installing the finishing trim.
We discussed the most popular ways to attach insulation to the wall. Thinking about the difficulties and features of installation, they are increasingly choosing another material for insulation - polyurethane foam. It doesn't need to be attached at all.
Dowels allow you to attach the material to a brick wall and surfaces made of concrete and wood.
How to attach basalt insulation to a wall for facade thermal insulation?
Let us consider in detail how to attach basalt thermal insulation to walls in plaster facade systems:
- Preparing the base . Basalt insulation slabs are glued to the walls, so their surface must be fairly flat. To do this, repair chips and potholes. Before fixing the basalt wool, priming is performed to strengthen, remove dust from the structure and improve adhesion.
- Gluing mini-slabs . Why are special adhesive compositions selected, designed to both attach basalt insulation to the walls and ensure its tight fit to the surface. Such dry mixtures ensure maximum adhesion of thermal insulation to brickwork, concrete walls and other surfaces, have frost resistance of the hardened layer, and special modifications make it possible to attach mini-slabs at sub-zero atmospheric temperatures. The glue is applied according to a special scheme, carefully working out the perimeter and applying the composition in the middle, after which the slab is pressed to the surface. The position of the miniplates is maintained using a level. After installing the first row, the second is fastened with staggered seams so that the joint of the slabs falls in the middle of the bottom line of the slabs. The rule must be followed for all subsequent stripes.
- Doweling . The basalt insulation should be attached to the wall using disc-shaped dowels after a certain time allowed for the glue to dry. Then all work is carried out both on the installation of plaster and decorative layers, and on the final painting of the facade.
To understand the intricacies of attaching mineral wool slabs to facade walls, we invite you to watch a video about installing a thermal insulation system.
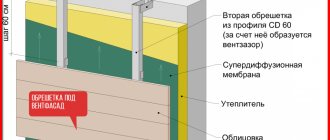
Facade insulation using technology with a ventilated gap has a slightly different approach to fixing basalt wool.
- Installation of a vapor barrier . A special film coating that supports the removal of moisture and fumes from the walls of the house.
- Frame structure . The design feature of the ventilated façade involves installing the finishing at a distance from the insulation, so initially a rigid frame system is installed from a profile resistant to corrosion and mechanical loads.
- Laying slabs . It is quite simple to lay mini-slabs between the frame guides. Having chosen products with a certain rigidity and insulating properties, they are installed with light compression of the edges. After leveling, practical basalt insulation for the facade fills the allotted space, which ensures sufficient fixation strength.
- Doweling . Supporting disc dowels must be installed according to the pattern and quantity specified by the slab manufacturer or system designer. Particular care should be taken to attach two-layer thermal insulation due to its increased weight.
- Installation of a hydraulic barrier . The membrane is able to protect thermal insulation from drops of water condensing in the air gap of the ventilation facade.
Features of thermal insulation of wooden buildings
When carrying out work on thermal insulation of walls made of round timber or timber yourself, you will notice that these surfaces are not perfectly flat. This is a significant problem, since finishing work on such walls requires non-standard solutions. Existing deviations in the geometry of the walls make adjustments to the process of selecting and fastening thermal insulation materials.
Another difficulty that you will have to take into account and foresee even before you start finishing work is the instability of wooden walls. Natural materials, especially wood, can cause minor deformations associated both with the process of shrinkage of the house and with the operation of the finished building.
The use of low-density materials can only be fixed on internal surfaces that are located horizontally. As you understand, this does not apply to walls. A way out of a difficult situation can be the use of thermal insulation for facades, produced in the form of slabs.
During installation, these plates must be installed close to each other. The installed insulation requires additional protection in the form of a film or nailed penofol with foil, which provides wind and vapor protection. This approach will protect the space located between the insulation material and the surface of the tree itself.
Selection of materials for thermal insulation
Currently, there are two main types of thermal insulation materials on the building materials market that are suitable for outdoor work. This is polystyrene foam in sheets or polystyrene foam and mineral wool.
It was noted above that the use of high-density materials, such as polystyrene foam, for insulating log buildings is not recommended, since such thermal insulation cannot guarantee a good degree of adherence to a large area of the insulated wall.
Insulation of wooden surfaces using expanded polystyrene is fraught with an increased likelihood of developing the process of rotting and subsequent destruction of the wood. For this reason, you should opt for mineral wool slabs.
This group of insulation materials is widely represented by a range of products produced by foreign brands. The insulating material can be produced in the form of slabs. If its thickness is small, then the products are formed in the form of rolls.
For processing vertical surfaces such as walls, it is more convenient to use slabs. Their shape and density are more convenient to use; they do not slip or change their shape. One of the good options is the Techno Nicole brand, produced in Russia. Particularly interesting is the type of mineral wool for facades, which has dimensions of 1200*600*50 mm.
Calculation of the required amount of materials
The typical thickness of mineral wool is 50 mm. If during the cold season the temperature in the region of residence does not fall below -20°C, then laying in one layer will be sufficient. In case of more noticeable frosts, it will be necessary to install two layers of insulation with a total thickness of up to 10 cm.
To correctly calculate the amount of materials, you need to measure the area of the facade; for this, the height of the wall is multiplied by its length. Insulation is also sold with a calculation of the number of square meters; when purchasing, we focus on the obtained value. In the same way, the required amount of material for wind protection is calculated. Such materials are sold in the form of strips rolled into rolls. When purchasing them, remember that the strips will need to overlap each other by at least 10 cm.
To insulate a wall made of lumber, you will need to take mineral wool-based insulation with a density of 15 to 35 kg/m3. And:
- wooden blocks, 3 to 5 cm thick;
- adhesive tape for sealing joints of insulation boards;
- a membrane film that will protect the insulation from the harmful effects of the external environment;
- moisture-resistant composition for gluing protective membrane film;
- self-tapping screws of various lengths that will be used to attach the sheathing to the wall;
- decorative material for cladding the facade of a house (this can be siding and other types of materials) and all related materials for its installation (guides, screws, etc.).
Installation of plaster
Special “warm” plaster mixtures can also be used as insulation. It must be said that this material has no thermal insulation advantages over other insulation materials. But still, insulation with plaster has its place.
To increase the thermal insulation properties of a wall using plaster, it must be applied to the surface in three layers. To do this, the wall must be cleaned of old cladding, if any, and all damage such as cracks and chips must be repaired. Set the plane level using beacons, a plumb line and a horizontal level.
How to install correctly
In order to start insulating walls, you will need the following tools:
- a screwdriver (preferably a cordless one, since you will have to move around a lot);
- self-tapping screws with galvanized coating;
- tape measure, building level and various rulers - corners;
- fastenings - umbrellas for insulation;
- jigsaw with wood blade;
- metal profiles and corners.
The insulation process occurs as follows:
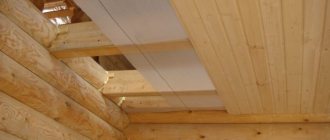
- It is necessary to attach a frame made of wooden (metal) profiles to wooden walls in increments of at least 50 cm. The distance between the beams is dictated by the width of the insulation - it must fit tightly into the opening. The frame is erected using a building level and attached to metal corners.
- This is followed by the first layer of ecowool or mineral wool. Install the insulation tightly to the base of the frame. Loose insulation materials should be laid in a special way: a special membrane fabric is attached to the finished frame so that a bag is formed. Insulation is placed on top and secured with a construction stapler.
Minslabs or basalt slabs are the second layer after the membrane fabric. Secure the insulation pie with plastic dowels in the form of a fungus for the stability of the structure. Install membrane thermal insulation on the sheathing. Secure it to the wooden frame using construction staples or small self-tapping screws. This substrate prevents excess moisture from entering the insulation, which reduces heat loss. Now you can start finishing: siding, brick or building slabs.
Since siding tends to expand in direct sunlight, do not tighten the screws all the way and leave a small distance between the profiles so that they can “walk” in hot weather. If this is not done, the plastic will begin to bend, which will lead to depressurization of the facade.
Watch the video in which the user demonstrates in detail the process of attaching insulation to a wooden wall:
How to attach basalt insulation for internal thermal insulation?
In general, insulation from the inside is undesirable due to a number of thermophysical processes occurring in external enclosing structures. Moisture from the air and frost can lead to both the accumulation of condensation under the insulation and freezing, as well as damage to the masonry and even concrete structures. However, if a thermal insulation system is the only possible solution, it should be done wisely.
- Alignment of walls . Preparing the base before installing basalt thermal insulation eliminates differences in the walls and, accordingly, eliminates the formation of an air gap between the certified mini-slab and the wall, in which, as is known, destructive condensate can accumulate.
- Installation of the frame under the sheathing . Subsequently, the mineral wool insulation is covered with plasterboard or other materials; for this purpose, guides made of metal profiles should be initially attached. In addition, the mineral wool itself will be easier to place in the frame.
- Installation of waterproofing . A film is unwound directly over the profiles, which will protect the basalt insulation from external moisture and remove vapors from the insulation structure.
- Laying mini-slabs . The cotton wool is measured in the required layers, taking into account the springing properties of the canvas, and placed in the resulting gaps between the profile.
- Vapor barrier layer . This is a special film that prevents even the smallest drops of water in the form of steam from penetrating its inner layer. After this, you can finish the walls.
Consistent placement of layers will protect the thermal insulation from getting wet, and therefore from losing its insulating properties.
Features and secrets of the insulation process
Experts recommend that when filling the sheathing, which is made from construction boards 25 mm thick, use a template strip, which will ensure an equal distance between the sheathing boards over the entire surface.
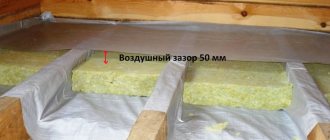
It is also important when installing the insulation layer to provide a ventilation support strip, which will ensure not only the free passage of air in the ventilation space, but will also serve to remove condensation if it appears. Another universal way of laying mineral wool is to lay it under a supporting metal profile, as shown in
Another universal way of laying mineral wool is to lay it under a supporting metal profile, as shown in
Using mineral wool subsiding
Using mineral wool for siding. The versatility of this method is that the insulation boards are attached directly to the wall.
Before fastening, the walls must be cleaned of roughness and technological irregularities must be eliminated.
After this, the slabs are laid on an adhesive basis. Also, at the joints, the plates are secured with a special dowel-fungus
Particular attention should be paid to laying slabs at the corners of the building, which are laid with overlap, as in brickwork
It is very important that the laying of slabs begins from the lower left or right corner of the outer wall of the structure as shown in
Scheme for laying mineral wool on a brick wall
Scheme of laying mineral wool on a brick wall.
Next, metal profile guides are used, which are inserted into the support bar and additional fastening. It is on this additional body kit that the plastic lining for outdoor work is mounted.
You should also carefully consider the issue of choosing a lining fastening system and arranging a ventilation and condensate drainage system
This is important, because if an error is made in laying insulation slabs and temperature bridges appear, then the resulting condensation can gradually destroy the integrity of the load-bearing wall, which can shorten the service life of the building, or even lead to its complete destruction. Therefore, the issue of laying slabs should be approached thoroughly, because in the future they will all be hidden from view by a decorative layer
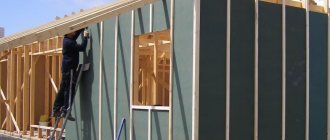
(
Covering walls with siding with insulation under metal sheathing.
Covering the walls with siding with insulation under metal sheathing.)
Another secret to the quality of laying insulation slabs is the treatment of the base walls with special deep-penetrating primers, which, on the one hand, have high surface waterproofing properties, and also increase the level of adhesion of the adhesive base, the mineral wool slab and the base of the load-bearing wall surface.
Also, when choosing mineral wool, you should take into account the climatic zone in which the structure is located, the level of humidity in the environment (houses near a river or lake), as well as the lowest temperature level in winter. This affects the thickness of the sheets used and its density.
The highest quality connection of mineral wool slabs with the base of the insulated surface is achieved by using adhesive bases recommended by the mineral wool manufacturer.
Another unique way of processing the insulation layer is to apply a reinforced mesh to the insulation surface, on the basis of which decorative plaster or plaster for painting is performed.
Also, as practice shows, in the case of installing a drainage system at the corners of a structure, it is necessary to provide points for attaching drainage directly to the load-bearing wall. In this case, the height of the fastening studs is selected taking into account the thickness of the fastening and further decorative finishing.
It’s easy to carry out such insulation on your own. After all, the installation technology has a simple algorithm. However, before starting work, you should carefully calculate the scope of work and the technology used, not only for insulation, but also for subsequent finishing. After this, you need to carry out detailed markings and perform insulation.
Necessary tools
To perform the work, the following construction tools are used:
- hacksaw for metal;
- drill with drills;
- hammer;
- Bulgarian;
- wood hacksaw;
- mounting nails with dowels;
- container for adhesive base;
- putty knife;
- primer brush.
Compliance with the chosen technology for laying the thermal insulation layer in the future will return significant savings on heating the house, and will also preserve the morning coolness inside the house on hot summer days without using air conditioning.
Basic methods of attaching insulation
The fastening method is chosen based on the characteristics of the insulation; sometimes combined schemes are used.
The method of fixing the insulation depends on its structure and the surface on which the material is installed. Soft heat insulators are conveniently fastened using lathing. Insulation is fixed to concrete and brick walls using dowels and glue.
Fixation with lathing
This method is used for laying soft insulation (mineral wool). A frame is created from bars, which are located at a distance equal to or slightly less than the width of the thermal insulation. The result is cells into which the slabs are laid.
The most common area of application is the insulation of internal walls, floors, roofs and ceilings. On the street it is used when it is necessary to make a ventilated facade. The frame in this case is made of a metal profile. If the cladding is made in the form of a wet facade, this method is not suitable. A soft heat insulator will not support the weight of the facing plaster layer.
Fixation with dowels and nails
The insulation is fixed to a hard surface using dowels and nails. Dowels come in three types - plastic, with a metal nail and with a metal nail with a thermal head.
When choosing thermal insulation clamps, it is important to choose their size. When attaching thermal insulation to a brick wall, the length of the holder should be 70 mm greater than the thickness of the insulation board. Plastic products are used if the maximum length does not exceed 120 mm.
Fixation with glue
This method is optional. There are a large number of adhesive bases for installing insulation. They have minimal differences, but it is important to ensure that the adhesive is suitable for the specific type of heat insulator and surface. When working, it is important to look at the composition. It shouldn't be rough. If the glue has such a consistency, it can be judged that it was improperly stored and unsuitable for use. Suitable for installing foam plastic on walls.
Glue mount
Dowel mounting
Main types of insulation installation
To insulate a building, it is better to opt for external installation of mineral wool. Experts recommend this method as the most effective. One of the common methods is to install slabs with the creation of a ventilated gap. This method has been described below.
There are also other ways to insulate walls from the outside:
The wet method consists in the fact that after installing the mineral wool, a reinforcing mesh with plaster is applied to it. After this, the facade of the building is painted. More details about the wet insulation method can be found in the video. In the video you can more clearly see the correct installation of sheets, which will help you complete this process without outside help.
Installation of mineral wool according to the “Well” type is carried out using the following technology: the insulation is mounted between the double wall of the building. To do this, sheets of material are mounted to a brick wall, and then a cladding is made of concrete, brick or other materials. Thus, the insulation is contained in the gap between the double wall of the building.
Specifics of fastening to different types of walls
Penoplex is an effective insulation material that is popular due to its performance qualities and ease of installation.
One of the key factors influencing the choice of fastening method is the type of surface. The slabs are fixed to different bases using various compounds and additional devices. The correct choice of installation method is the key to the durability and efficiency of the heat-insulating material.
Concrete
Concrete surfaces are porous, which affects the degree of absorption of mixtures. Before attaching penoplex to concrete, the base should be treated with a primer. This will reduce glue consumption and improve the adhesion of materials. To attach penoplex to a concrete wall, you will need not only a layer of glue, but also additional dowels. This increases the reliability of insulation fixation. To prevent moisture absorption by the concrete wall, you will need to lay the slabs in a checkerboard pattern.
Brick
There are many options for installing penoplex to a brick base. Professionals recommend not stopping at this method, but combining different methods. The difficulty in fixing the insulation is the unevenness that has a base. To minimize the negative consequences of this phenomenon, before attaching penoplex to a brick wall, it is worth priming it. The following methods are used to fix sheets:
- glue;
- foam;
- liquid Nails;
- cement mixture;
- dowels;
- self-tapping screws
When using dowels as additional fastening, you will need to pre-drill holes in the brick wall with a hammer drill.
Block
Professionals highlight several rules for attaching penoplex to a wall made of aerated concrete blocks. This is due to the special structure of the material, since block walls are more susceptible to the negative effects of moisture than other types of foundations.
Types of materials for external insulation
strength properties, destroying them.
Mineral wool is a fibrous thermal insulation material based on a synthetic base. Contains formaldehyde glue.
Advantages:
- has a high temperature threshold;
- does not melt or burn.
Flaws:
- does not protect wood from mold;
- At high temperatures it releases toxic substances.
Glass wool is a type of mineral wool that contains components such as quartz sand and recycled glass.
Advantages:
- has strength;
- does not burn.
Flaws:
- melts at high temperature;
- releases toxic substances;
- promotes the growth of fungus.
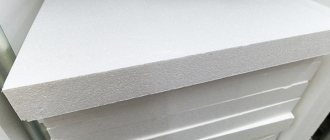
Penoplex is an insulation material that has a cellular structure and is made of foamed polystyrene.
Advantages:
- strength;
- retains heat well;
- low moisture absorption;
- environmental friendliness;
- not subject to rotting;
- fire resistant;
- ease of installation;
- durable.
Flaws:
- easily destroyed when exposed to solvents;
- difficulty in fitting and cutting;
- vapor tightness is often a disadvantage rather than an advantage.
Polystyrene foam - insulation consists of a large number of balls filled with air.
Advantages:
- excellent sound insulation;
- ease of installation;
- withstands temperature changes;
- density;
- not subject to swelling and rotting;
- durability.
Flaws:
- low vapor permeability;
- not fire resistant;
- is not environmentally friendly.
Ecowool is a modern insulation material made from 80% cellulose and 20% antiseptic, a substance that protects it from rodents and mold. They can insulate any room.
Advantages:
- reliability;
- inedible for rodents;
- prevents the formation of mold and fungi.
- low thermal conductivity;
- environmentally friendly.
Flaws:
- installation requires special equipment;
- undergoes shrinkage;
- When exposed to high temperatures, it smolders.
There are other thermal insulation materials that can be used to insulate the outside of wooden houses.
Attaching thermal insulation to the wall
In some thermal insulation designs, the fastener is not defined as a separate component independent of the rest of the structure, but rather represents a single system with it. At the same time, the efficiency and performance of this insulation system, high-quality heat conservation for a long time, depends not only on such a factor as the thickness of the insulation. This is only possible if all parts used in this system are compatible.
In conditions of such strict interconnectedness, the fastener design is subject to any changes and additions only within the framework of general improvements that take place in the insulating structure.
Unlike the insulation of facades, fastening the insulation at the time when the thermal insulation of pipes is being installed looks somewhat different. The issue of aesthetics of appearance, as a rule, does not arise here; the main task is to preserve heat and nothing more. In the course of home insulation work, for example, when the fireplace insert needs to be thermally insulated, installation of insulation fastenings, on the contrary, the main task after fire protection involves the organicity of the fireplace in the interior.
Types of mineral wool
The type of raw material from which mineral wool is produced, as well as the processing method, affects its type. Depending on the material from which the insulation is made, mineral wool is divided into:
- Stone.
- Glass wool.
- Slagovat.
Stone is the safest due to the fact that its fibers do not splinter. It is extracted from rocks, then melts and breaks into individual thin fibers (density 30-220 kg/m 3, thickness 3-5 microns, length 16 mm). Adding a binder to the resulting fibers allows you to obtain finished layers of a pale yellow color.
Glass wool is made from limestone, sand, soda and etiboron, which are melted and then passed through special devices and inflated with steam. As a result, thin glass threads are formed, which are then processed with polymer materials. The output is amber-colored layers.
Slag wool can be obtained from blast furnace slag waste. The raw materials for the finished product are melted and broken into individual threads to obtain fibers (density 75 - 400 kg/m 3, thickness 4 - 12 microns, length 16 mm).
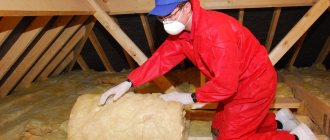
Insulation of internal walls
If you have a wooden surface without any finishing, then insulation must be carried out in several stages:
Secure the metal mesh to the wall using metal brackets. It is better to choose a mesh with cells from 20 to 50 mm. At the joints of the metal tape, you can secure it with construction tape. Preparation for applying heat-insulating plaster.
Check the walls for bumps, drops and bends - in these places, the amount of mortar needs to be increased. Apply the mortar onto the wall, then plaster the wall with even and smooth movements. Set the level to 0, which you will focus on. Seal all the cracks and holes so that the entire surface of the wall is smooth and even. Let the solution dry.
The drying time is indicated on the packaging with construction mixtures - usually it is at least 12 hours. After the rough layer has dried, you can begin to apply the final layer of plaster. In order to obtain the desired consistency of the finishing solution, it is necessary to dilute the rough solution with two portions of water. Check the smoothness using a building level: apply it to the wall in different directions.
Next, if desired, the walls are puttied and primed with a water-based solution.
What to do if there is already old plaster on the walls? In older houses, shingles were often used instead of metal mesh. If the plaster is unreliable and crumbles, then it should be knocked down completely. Although the clay retains heat well, however, it is not advisable to attach a new structure on top of the old one.
Insulation of external walls
There are various materials for insulating the facade of a house.
All of them differ in thermal insulation properties, degree of flammability and installation method. Let's look at the most popular:
- Polystyrene. This material is very light and compact. Reasonable price, ease of installation and environmental friendliness are the main advantages of expanded polystyrene (polystyrene). Thanks to the production technique, it has low thermal conductivity. The only drawback can be considered low vapor permeability.
Please note: you should take into account the fact that a wooden house breathes and allows moisture to pass through, and polystyrene foam attached closely to the wood will prevent the removal of fumes, which can lead to dampness and mold.
2. Ecowool. The naturalness and environmental friendliness of the material combined with an affordable price is an excellent option for new residents! The composition includes only natural components from wood and paper processing, which have good ventilation properties.
Thanks to the presence of antiseptic and glue impregnation, ecowool is not afraid of rodents and other insects. Research has been carried out on the thermal conductivity of wool: a layer of 10 cm of wool is equal to a wooden beam 40 cm wide. The advantage of insulating walls from the outside is obvious - saving space inside the house is about 10% of the total area.
3. Mineral wool. Mineral wool is a natural insulation material that comes in the form of slabs. It is convenient to install; however, you should wear a construction mask while working, since the mineral wool insulation contains small dust particles.
4. Brick or stone. An ideal option for those who love simplicity and reliability.
It should be remembered that brick requires an additional strip foundation around the entire perimeter of the house.
Between the wooden house and the brickwork, it is necessary to leave a distance of 20 cm to ventilate the facade, in order to avoid the appearance of black fungus.
Please note: since brick or stone is the heaviest façade material, a mesh of reinforcement is attached to the foundation.
5. Basalt insulation. Natural insulation with long and elastic fibers glued to each other. It has good thermal conductivity and a low degree of flammability. Flexible and lightweight basalt protects a wooden house well from drafts and freezing.
Mineral wool for wall insulation - technology, fastening, video
It has become widespread solely because of its ease of installation and low cost. It has relatively good sound insulation performance, but in other respects it is inferior to other types of insulation.
- Fiberglass. They are waste from the glass industry, which during processing becomes inert to chemical reagents and thermal effects. Absorbs sounds well and prevents moisture from entering
If you decide to insulate a house with wooden walls, it is recommended to use basalt insulation (mineral wool). It will not allow moisture to get onto wooden walls, and good thermal insulation will prevent the walls from overheating in the summer and freezing in the winter.
Step-by-step instructions for insulating walls outside with your own hands
After preparing the materials, the insulated area of the house is calculated. Step-by-step instructions for insulating a house with a ventilated gap are presented in the video
The video contains recommendations that will help you easily insulate a building.
When everything is ready, the mineral wool is installed using the following technology:
- The walls are being prepared.
- A vapor-tight membrane is installed.
- Wooden or metal slats are mounted.
- Insulation is installed in the installed slats.
- A waterproofing film is installed.
- A ventilated gap is created.
Preparation begins with cleaning the walls from plaster layers if the wall is concrete or brick. The wooden surface is impregnated with an antiseptic to protect against mold. Window slopes and platbands are dismantled.
The vapor-tight membrane is installed with the smooth side facing the insulation. Its installation is carried out to remove vapors from the wall of the building. The insulation can be installed without the use of such waterproofing, but only if the surface is perfectly flat.
Then vertical slats are mounted to the wall of the building using self-tapping screws.
Insulation is installed in the spacer between the slats. If necessary, the mineral wool is cut with a knife to the required size. If installation is carried out on a wooden wall, the material is secured with dowels. And if on a concrete surface or on brickwork, then the use of glue is allowed.
If necessary, you can use a second layer of insulation. It is necessary to ensure that the seams of the 2 layers of insulation do not coincide in order to avoid the occurrence of an air gap.
The waterproofing film is installed on top of the insulation. It ensures moisture removal from the material. The film is secured to the slats using dowels. The seams are additionally taped with special metallized tape.
The ventilated gap is mounted on top of the slats. For this purpose, additional counter rails are installed. Various finishing materials are then installed on them: block house or siding.
Step-by-step insulation of a wooden house with your own hands
The technology for laying heat insulation on the walls of a wooden house lies in the correct sequence.
Wood preparation
Preparation work includes cleaning the wood surface and treating it with specific solutions with antiseptic properties. This is necessary in order to prevent the possible occurrence of fungal infections on lumber. This composition should only be applied to a dry and clean surface. All subsequent work can be carried out only after the antiseptic has completely dried.
Tip: You can save on the purchase of special products for wood processing by using pre-purified used machine oil. Its cost is relatively low.
Frame structure
The assembly of the frame involves the installation of wooden beams, the height of which will be in accordance with the thickness of the insulator slabs. They are mounted so as to form a sheathing.
- First, attach the vertical bars. The installation of the first beam occurs at the edge from the section of the wall that protrudes forward. After this, the bar is set strictly at an angle of 90 degrees to the horizon using a level. A holder (wood inserts) of appropriate thickness is installed in the gaps between the wall and the beam.
- The end beam is installed in the same way. I pull cords between the outer beams, according to which the other intermediate beams are then placed.
- The distance between the beams corresponds to 60 cm, but it is possible to use a different distance, the main thing is to focus on the width of the insulation boards. After this, horizontal beams running across are fixed. The gap between them should correspond to the length of the insulation boards.
Installation of insulation
The slabs are installed in the resulting sheathing. Installation is carried out with the expectation that the insulator fragment should fit tightly into the cell space. If the calculations turn out to be slightly incorrect, one of the edges of the slab can be cut to the desired size.
The insulation is attached to a wooden wall with a fungus using special long-length screws. One piece of mineral wool slab measuring 1200*600mm requires 8 fungi, 6 of them are attached around the perimeter and 2 in the central part.
The mount for the thermal insulator to a wooden wall must be screwed in, avoiding gaps, otherwise the slab may subsequently bulge forward.
Wind and water protection
Wind protection and vapor barrier film are laid on top of the equipped frame. It is convenient to secure the film using a stapler.
The strips must be placed strictly vertically with an overlap of 10 cm at the edges. The film should be stretched tightly and not move away from the frame.
Decorative finishing
After installation of the insulation is completed, the ventilated façade is attached. It can be made either on the basis of siding or using a block house or economical plastic lining.
On glue
As the only method of fastening exclusively with adhesive mass, it is rarely used and only under ventilated facades. For plastering work, additional reinforcement with umbrella dowels is required. However, this method has its own characteristics that need to be considered separately.
Firstly, there are two types of adhesives:
The dry mixture is sold in bags and requires dilution. Adhesive foam is sold in cans and does not require preliminary preparation. The latter is a little more expensive, but the convenience is worth it.
Sets the bottom bar, which will be the starting point of thermal insulation. The dry mixture is applied to the slab itself.
In the case of a dry mixture, you need to apply the glue to the slabs in several pieces and spread it evenly over the entire surface using a comb. After this, the insulation board is fixed to the wall. Typically, the installation of mineral wool or other materials begins from the corner and always from the bottom row.
Adhesive foam is applied around the perimeter of the slab and in several strips in the middle. After application, press the slabs flat. The foam hardens in 30 minutes to 2 hours. During this time, it is possible to slightly adjust the position of the slab using a level.
Dry mixtures are often used:
- EK THERMEX;
- Ceresit CT 190;
- Ceresit CT180.
Popular foam options:
- Ceresit CT 84;
- Soudabond EASY;
- Insta STIK.
The cost of one cylinder is from 200 to 500 rubles.
We discussed the basic principles of how to attach insulation to a wall using adhesive. You can decide what exactly to use by reading a couple of opinions.
For large differences in walls, it is recommended to use polyurethane foam, specifically for polystyrene foam. It is also called “liquid foam”. If the wall curvature is one to three centimeters, this is not a problem at all. I bought it at Epicenter a year ago, glued the sheet on just for fun - a year has passed, everything is holding together, the sheet cannot be torn off. The foam breaks, but holds up.
Preparing surfaces for insulation
Before fixing the insulation to the wall, its surface must be prepared. This is due to the fact that the thermal insulation process ensures complete coverage of the wall material for a long time, and only proper processing can ensure the required durability.
In the process of preparing the surface for fixing thermal insulation panels, the standard instructions recommend performing the following operations:
- The base is cleaned of old finishing, plaster and putty . In some cases it is possible to retain the plaster layer, but it should be carefully inspected.
The wall needs to be cleaned - as shown in the photo
- Detected weak sections of the wall are dismantled using a hammer drill or chisel . The cracks are opened with a grinder to a depth exceeding the size of the crack. After this, the damaged areas are repaired either with cement mortar or quick-hardening epoxy mixtures.
Advice! Fasteners for insulation can only be fixed in a sufficiently strong base. If the wall has a tendency to collapse, then insulating it is pointless.
- For thermal insulation using high-density polymer panels, carefully level the surface using plaster . If insulation is carried out using mineral wool or other loose materials, then leveling can be dispensed with.
- To avoid damage to the hay material by fungi, treat the base with a fungicidal composition . This must be done even in cases where vapor-proof materials (foam plastic, polystyrene, penofol, etc.) are used for insulation.
Installation of the base profile
As an auxiliary device for the installation of many types of thermal insulation materials, the so-called base profile can be used. It is a perforated metal plate that is mounted at the bottom of the wall.
The plate is rigidly fixed to the base and serves as a reliable support for the slab heat insulator, preventing it from sliding under its own weight.
Advice! The base profile must be selected depending on the dimensions of the insulation used.
Is polystyrene foam good as insulation?
Scheme of thermal protection of various materials for insulation.
Due to its characteristics, polystyrene foam (polystyrene) has found very wide application in construction. It has low thermal conductivity, relatively good steam conductivity, and is also lightweight, which does not additionally load the building structure. In addition, it has the ability to withstand high mechanical loads while having low density.
Other positive qualities of polystyrene include its good interaction with other building materials, resistance to moisture, fairly low thermal conductivity (or high thermal resistance), low noise resistance, extraordinary ease of processing and relatively low price.
Today, many are arguing: will it be good if you insulate a wooden house from the outside with polystyrene foam?
They pay attention to its low vapor conductivity, which supposedly leads to moisture and rotting of wooden walls. Therefore, it is not recommended to insulate with polystyrene foam, and when choosing insulation, it is recommended, if possible, to replace polystyrene with other insulation materials
But the approximate indicators of vapor permeability of materials they give show that expanded polystyrene has approximately the same vapor permeability as pine wood.
Therefore, the use of polystyrene as insulation for buildings with high internal humidity (for example, baths) is not recommended. And if the humidity inside a wooden house is normal and controlled, then the use of polystyrene foam as insulation will fully justify itself.
Scheme of foundation insulation with polystyrene foam.
There is an opinion that it is better to use penoplex as polystyrene insulation. Let's consider this question. Penoplex is extruded polystyrene foam. That is, most of its characteristics are similar to those of foam plastic (heat and sound insulation, resistance to aggressive substances, specific gravity, ease of processing, etc.). It is characterized by greater density, increased mechanical resistance to loads, and the ability to self-extinguish upon fire.
The disadvantage of penoplex is its low vapor and air conductivity; moreover, it has a higher cost compared to polystyrene foam. The disadvantages of polystyrene over penoplex are eliminated by working to protect the foam from fire using fire-resistant facing materials and putties. In addition, the vaunted fire safety of penoplex approaches zero during a fire itself, since the burning of the insulation will be supported by the burning of the wood of the walls. Thus, the use of polystyrene foam for insulating a wooden house is more profitable than penoplex.
Foundation insulation
Insulation of the foundation. It can be performed both in a building under construction and in an already constructed one.
Despite the fact that the foundation is the underground part of the building and is closed from cold air, the soil can freeze quite deeply. In addition, the cold rises to the wall (cold bridges).
This type of work consists of three stages:
- Insulation of the foundation (vertical and horizontal).
- Base insulation (vertical).
- Insulation of the blind area (horizontal).
This is important: for maximum efficiency of the process of insulating the foundation of a building, none of the above stages should be neglected.
The process of insulating the foundation with penoplex slabs is as follows:
- Before installing Penoplex slabs, it is necessary to apply a waterproofing layer.
- Using an adhesive mixture, which is applied to the surface with a notched trowel, thermal insulation boards are mounted. The device is performed starting from the bottom row.
- If necessary, a second layer of heat insulation is installed using the same glue.
- Insulation is carried out up to and including the base.
- The soil is being backfilled.
- To avoid soil freezing, it is necessary to provide horizontal thermal insulation under the blind area along the entire perimeter of the building.
- A fiberglass mesh is laid on the base part and the finishing of the structure is carried out.
Scheme of foundation insulation with penoplex
The procedure for insulating a house with mineral wool
do it yourself.
Before starting work on insulating the house, it is necessary to prepare the surfaces of the walls: clean them of dust, various contaminants and treat them with an antiseptic.
The procedure for insulating the outside of a house with mineral wool involves five stages:
- Stage one is the installation of a vapor barrier, which provides ventilation and prevents rotting of the house. For vapor barrier, a special film, roofing felt or aluminum foil is used. It is impossible to lay vapor barrier material directly on the wall, so as not to expose the walls to fungus or mold. To do this, it is necessary to leave a ventilation space between the wall and the vapor barrier material.
- Stage two involves the manufacture of a wooden frame for the insulation material. The frame is made of wooden slats, which are attached vertically to the wall and should be 1-2 cm smaller than the size of the mineral wool slab.
- Stage three consists of laying a layer of insulation. It is recommended to lay insulation with mineral wool in two layers so that the joint of the first layer lies in the middle of the second. The formation of cracks is not allowed. For reliability, the insulation is secured with metal or plastic anchors.
- Stage four consists of waterproofing, which prevents water from entering the insulation and walls.
- And the final fifth stage is cladding the outside of the house. The sheathing material is attached to a wooden sheathing made from a 4x5 cm block. Thanks to new modern technologies, the market offers a wide selection of exterior coverings that will give the house an aesthetic appearance.
Insulating a house under siding: installing insulation
The process of preparing for construction is almost complete - you have selected the necessary materials, collected everything you need to build your own home. And even the frame has already been assembled, there is a foundation and other essential elements of the object.
At this stage, there is a need to select thermal insulation materials that will provide reliable protection regardless of weather conditions.
Immediately after this, a whole series of questions arise: what to use as insulation? How to properly install insulating material? We will tell the reader all the information that will be useful and will definitely help him.
Application and characteristics of penoplex
Penoplex has proven itself well in humid conditions.
Penoplex, like polystyrene foam, is a type of processed polystyrene foam. It is produced in the form of a plate and has good protection from mechanical stress and the influence of external factors.
In addition to all this, this material can be used for finishing rooms with a high moisture content. It is often used to insulate rooms.
The material is often used to insulate balconies and loggias.
You can lay such insulation in any conditions both inside and outside the house. It is used to finish the foundation, walls, ceiling or floor. The material will be the optimal solution for thermal insulation of balconies or rooms with high humidity.
Floor insulation
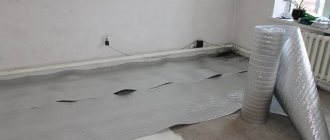
Floor in the bathhouse. Insulation is carried out on a flat surface
Penoplex is excellent for insulating floors in a wooden house. Due to the fact that it almost does not absorb moisture, it can be used effectively in a bathhouse. This can be done even without a screed. If installed in a steam room, it is necessary to ensure that the thermal insulation is not adjacent to the stove or other heating elements.
Sheathing a balcony from the inside, especially if it is on the upper floors, is easier to do by gluing Penoplex slabs to its inside. Next, you can hide the slabs using lining, plastic or MDF. Penoplex is an excellent thermal insulation material. Due to its lightness, it is convenient to install on any structure, especially since there are many installation methods. To the question: is Penoplex harmful to health, you can safely give a negative answer.
Penoplex installation
It is used to insulate walls both inside and outside the house. In terms of its properties, it is the same foam plastic, only foamed, and completely airtight. Its mounting is absolutely no different from the installation of its older brother (foam plastic).
Penoplex can be attached with both glue and umbrellas, and you can also combine these two methods. What is worth paying attention to is that usually slabs made of this material are large in size, so they need to be fastened conscientiously, sparing neither glue nor dowels.
Fastening foam with glue
The first thing you need to do is find out how smooth the wall you are going to insulate is; a lot depends on this, for example, the method of applying the glue. If the surface is flat, then glue is applied to the insulation, but if the surface has differences, then the adhesive mixture is applied to the wall itself using a spatula. If the load-bearing surface is heavily littered, it must be leveled by plastering.
If doing this is beyond your means or simply too lazy, then I recommend replacing the insulation with mineral wool; in this case, the evenness of the surface does not matter.
So, let’s say the wall of our hypothetical house is more or less even, we can begin installation. We clean the wall from dust and debris, repair cracks and chips, and prime it thoroughly.
While the primer dries, you need to secure a support strip at the bottom of the wall, with a thickness equal to the size of the slab. This is necessary to ensure that the slabs do not slide under their own weight. After the primer has dried, mix the glue as described above, following the instructions written on the package.
Using a needle roller, go over the inside of the insulation and apply glue. It should be left at five points, in the center and in the corners, do not skimp on the glue, the points should be quite massive. After this, proceed to install the foam plastic, from bottom to top, holding each slab for about a minute so that the glue sets.
Other technologies
If insulation is carried out with chipboard or OSB panels, then the slabs of this material are attached to the surface with special brackets. Some roll insulation, for example foil, is sometimes produced with an adhesive composition already applied to the inside of the insulation.
Sometimes, fasteners, as such, are not needed at all. This occurs when insulation, usually loose insulation such as mineral wool, is laid flat against a special wooden frame.
Some insulation materials are glued to the wall, just like wallpaper; for example, cork insulation. There is also heat-insulating paint, which is applied to the surface using an ordinary brush or roller.