Do-it-yourself floor insulation in a private house under a screed. Instructions for use
Preparing the base
Before insulation, it is necessary to prepare the subfloors throughout the house. There are the following types of subfloors for screeding in a private house:
- priming;
- reinforced concrete slab.
To prepare the soil foundation for insulation, it is first necessary to carefully level and compact the surface of the earth. Then lay a 30 cm thick layer of inert materials: gravel or crushed stone. Next is a sand cushion 10 cm high.
Elimination of unevenness on a cement base by grinding
As for the preparation of the concrete base of the floor, it is enough to ensure the evenness of the surface by cutting off the convex parts with a grinder, wiping out cracks and holes with putty or mortar. The next step is to remove construction debris, dust and coat the surface with two layers of primer.
Floor insulation technology
Laying damper tape around the perimeter
- The joints between walls and floors are insulated with sealant or cement mortar.
- A damper tape is glued around the perimeter of the room to compensate for the thermal expansion of the screed during operation.
- Before insulating floors, it is necessary to install communications. Grooves are cut out in the insulation for the laid pipes and wires, and the heat-insulating material is tried on in place. The insulation should fit tightly to the damper tape, to each other and to the base of the floor without gaps.
- It is advisable to lay the insulation in a checkerboard pattern. This will help avoid temperature corridors. The thermal insulation material is attached to the base of the floor.
- Installation of waterproofing material over the insulation is carried out with an overlap. The sheets are fastened together with tape or construction tape.
Screed device
Laying reinforced screed on foam plastic
- When insulating the floor with polystyrene foam and penoplex, a reinforcing mesh is laid on top of the waterproofing, the mesh size of which is 10 cm. The mesh is laid with overlapping sheets, which are connected with wire. Reinforcement of mineral wool insulation can be done using a fiberglass mesh. It will also ensure the strength of the surface.
- Placing beacons from aluminum corners will ensure even pouring of the cement screed. The slats act as formwork.
- The screed mortar is prepared from a purchased mixture or by mixing sand, cement and water yourself in a ratio of 3:1:1.2. Cement and sand are mixed, a depression is formed, and water is poured into it. Gradually, the water is filled with the dry mixture, thereby mixing the components until a homogeneous mass is formed. To reduce dust, the surface of the mixture is moistened with water. The use of polymer binders will give the solution plastic properties. The technology for mixing the solution from a purchased mixture is specified in the manufacturer's instructions.
- A cement-sand mortar is applied and distributed evenly over all floor surfaces. The mixture is smoothed using a rule that relies on the beacons, ensuring the evenness and smoothness of the base. Having leveled the first strip of screed, you need to move on to the next part of the floor and so on until the end of the room. Gradually the solution will be laid over the entire prepared surface.
- The hardening period for the screed to gain strength characteristics is 14–28 days. To avoid cracks when the solution dries, you need to periodically moisten the surface.
- Now the concrete base in a private house is ready for laying any floor covering: ceramic tiles, laminate with underlay, linoleum and more.
Scope of application
The material reflects 97% of heat when installed behind a radiator
Penofol can be used as primary or additional reflective thermal insulation. As the main material, it is used to insulate walls from the inside, and in wooden houses for heated floors.
The material is used as additional thermal insulation in the design of residential and industrial premises.
The use of Penofol allows you to simultaneously solve several issues:
- reflection of dissipated heat;
- waterproofing;
- vapor barrier.
The material can be used not only for interior work - the insulation is also effective for insulating the walls of a house outside.
The scope of application of penofol extends not only to internal insulation, but also external. This type of insulation is also used for thermal insulation of residential premises, civil and industrial production:
- country house or apartment in a multi-storey building;
- roof;
- ceiling coverings;
- attics and attics;
- basement and basement structures.
- underfloor heating system (water, electric) and roof insulation;
- building facades;
- water and air pipes;
- insulation of refrigeration structures;
- ventilation and air duct system.
Sometimes the wall where the battery is located is covered with foil material. This is done so that the heat is not absorbed by the wall, but goes inside the room.
For domestic needs, three types of penofol are used: A, B, C. The scope of application of this material as a heat-insulating building material is very extensive: walls, ceilings, floors, insulation of concrete surfaces, loggias, insulation of wooden and frame buildings.
You can easily do the installation of penofol with your own hands without the involvement of specialists, the main thing is that the safety instructions are followed.
On the floor
Before you begin fixing the insulation, you need to prepare the base of the floor with a concrete screed. For this purpose, a liquid cement solution is used, which is poured onto the surface and leveled.
The following actions are related to the selected type of penofol:
- If type A penofol is used, then a fixing adhesive is applied to the foam in an even layer, after which the penofol is fixed.
- If type C foil material is used, then no adhesive is applied. This type of material is already equipped with an adhesive solution on the back of the building material. To prevent the waterproof adhesive solution from drying out prematurely, it must be covered with polyethylene. Before starting work, the plastic film is carefully removed, and then the foil material is laid out on the foam.
We suggest you familiarize yourself with How to glue foil insulation to metal
The building material is laid in such a way that the foil overlaps the walls (about 5 cm), and the resulting joints are sealed with aluminum insulating tape.
When installing a heated floor system, there are 2 main types of installation: the use of logs or concrete screed. Logs are used if a wooden floor will be installed on top of the insulation. In this case, wooden logs are installed along the floor on top of the heating elements.
The horizontal position of the beams must be controlled using a building level. Then a wooden covering is mounted on top of the logs. Thus, the foil material will heat up and transfer heat from below to the wooden coverings.
The second variation is to install a warm floor system under the tiles. In this case, the special heating elements are covered with reinforced mesh and filled with concrete mixture. For this type of installation it is necessary to use penofol type ALP.
For walls
To insulate internal walls, type B foil material is used. Its installation is more complex than other types of penofol, but this insulating material can create the most effective thermal insulation of a room.
Material with double-sided metal special coating is mounted as follows:
- Using dowels, you need to secure the bars to the concrete wall (thickness 1-2 cm).
- A layer of type B penofol is mounted on them using screws or mounting brackets.
- A plasterboard product is laid on top of the insulating building material, which is fixed to the slats with self-tapping screws. To leave gaps for ventilation, wooden blocks are installed on top of the insulating material, the thickness of which is similar to the previous slats. Then the drywall is fixed.
To avoid drafts, the joints of the foil product must be taped with damper tape. Instead, you can use penofol, which is cut into strips of the required width.
For the ceiling
Insulation of indoor ceilings begins with fixing a thin layer of foil material onto the base coating. Wooden slats are screwed onto the primary insulating layer, which act as a frame for the main insulating building material. The main thermal insulation layer is fixed on top of the slats using a construction stapler or screws. If it is necessary to install a third layer of insulation, then its installation is carried out similarly to the previous variation.
After carefully studying the technology for insulating ceilings, walls and floors, performing thermal insulation in rooms such as a balcony will not cause difficulties. In this case, the material must be laid on the rafters, and fastening must be done using staples. The main thing is that the insulating material for the balcony does not have much weight, otherwise an accident may occur.
The technology for installing penofol is no different from other types of insulation. But it is necessary to take into account the fact that fixing penofol to wooden surfaces both outside and inside is carried out only in the summer, and it is advisable that several hot days pass before starting work.
Balcony insulation with foam plastic
This type of thermal insulation is recommended to be installed at temperatures ranging from -5 to +30 degrees. To securely fasten it, it is recommended to use glue and fasteners. An adhesive is applied to the sheets and then pressed against the wall.
Typically, builders glue the foam using a gun filled with polyurethane foam. One cylinder is enough to treat 10 square meters.
Dry adhesive mixtures are suitable for insulating a balcony with polystyrene foam inside and out; they can be used to attach the sheets to a wooden sheathing. But dry mixtures are not suitable for fastening to concrete.
It is not recommended to use liquid nails; they do not create sufficient fixation. But nails harden quickly, so they are often used in combination with long-drying foam or glue. In this case, you will not have to put up supports to prevent the sheet from falling before the foam hardens.
To secure the foam securely, it is advisable to use fasteners. They can be combined with glue or used instead. For this operation, a mushroom dowel is used, which does not cause deformation of the thermal insulation.
Insulating a balcony with polystyrene foam step by step:
- Select the dowels according to their length - they must pass through the material, a layer of glue and old plaster. Next, the fasteners penetrate the concrete to a depth of at least 50 mm, and the curvature of the wall must be taken into account. Typically, for foam plastic 50 mm thick, a dowel 110 mm long is enough.
- Holes are drilled in the foam that will be used for fixation. For 1 m2, six holes are enough - four in the corners and two in the center.
- Screw the mushroom dowel using a screwdriver; if fasteners with a nail are used, it is simply driven in with a hammer.
After installation, it is recommended to cover the foam with a mesh and apply reinforcing glue on top. You can attach trim on top of it. It is advisable that the reinforcing adhesive be made by the same manufacturer as the fastening adhesive.
When insulating a floor with polystyrene foam, logs from timber are first installed, then sheets are laid between the sheathing. The remaining gaps are sealed with polyurethane foam. The material should be flush with the wooden beam. The top is covered with plywood.
You can insulate the floor without installing a frame. But in this case, you will have to put a reinforcing mesh on top, and then make a concrete screed. This method is rarely used, since performing the screed requires some skills.
Both frame and frameless methods are suitable for attaching polystyrene foam to the ceiling. If wooden lathing is used, a layer of film must be placed between the frame and the material to avoid the formation of condensation. The foam is cut exactly to the size of the cells, since it is not subject to deformation. If the sheets are glued with glue, several additional fasteners are installed. For finishing you can use sheets of plasterboard.
Nuances of fastening and installation
When laying foil insulation, you may need the following tools and materials:
- nails with large heads;
- stapler;
- hammer;
- construction tape.
When installing insulation with foil, it is important to avoid the mistake of laying the material with the shiny side down. In this case, the material will not perform its heat-reflecting functions.
The foil side must “look” into the room in order to be able to return thermal energy to the room.
An example of laying lag on foil insulation
It is also important to remember that the insulation does not overlap. The sheets should be placed end to end and secured with tape or nails, depending on the type of base
Insulation with an adhesive layer may not be additionally fixed, but it is still recommended to secure it with fastening materials. All joints after laying the material are taped.
Thermal insulation for heated floors
Work on laying insulation can be dry or wet. In the second case, the material will be filled with concrete screed. In the first one, it is advisable to install an additional waterproofing layer.
Penofol pros and cons
Insulation with penofol is easier to perform, and due to its smaller thickness and high thermal insulation characteristics, the material has received many positive reviews from users.
What is penofol?
Penofol is know-how in the world of materials for insulating wooden houses, loggias and baths. It refers to reflective insulation with a top layer of special polished foil material. The base is foamed PVC. The heat-saving properties of the material depend on the density, thickness and quality of the foam base. The foam base has a thickness from 2 to 40 mm. The most common for insulating a wooden house inside is 10 mm. The 40 mm material is used only in the northern part of Russia, where the climate is very harsh. On top (on both or one side) foil is welded to the material, which is polished to a reflectivity of 97%.
A little bit of history
The material was invented in the USA and was used to produce spacesuits
In Russia, they paid attention to the high thermal insulation properties of the material and began to use it in the construction industry. For insulation of wooden houses, the material is used both inside and outside.
Insulating a wooden house from the inside with penofol is similar in design to a thermos. A wooden house, the walls of which are covered with foil thermal insulation, retains heat in winter and cool air in it in summer. At the same time, the internal insulation does not block the supply of oxygen to the tree, and the house does not stop breathing. And the thickness is several tens of times smaller than mineral wool or polystyrene foam, which made it possible to use insulation in the smallest rooms.
About the advantages and disadvantages of the material
Insulation can be used in combination with other materials or independently. And its lightness allows you to easily carry out insulation with your own hands alone. Positive reviews about penofol insulation are associated with its advantages:
- Environmentally friendly. The material is made of film and foil, which are used in the food industry. Some sources claim that it is capable of blocking radiation, but this fact has not been proven.
- Greater thermal insulation with a smaller layer thickness. According to scientific research, penofol with double-sided foil 4 mm thick is comparable in its thermal insulation properties to 10 cm mineral wool, 4 cm expanded polystyrene and 18 mm wood.
- Since the material does not allow steam to pass through, installation can be carried out without additional thermal insulation of the structure.
- It does not allow moisture to pass through or absorb, therefore it does not spread rot and mold on the wood.
- It has high soundproofing qualities, so it is used in frame construction for finishing children's rooms and bedrooms.
- It does not crumble or break; you can cut it with simple scissors or a sharp knife.
- Easily mounted on wooden walls of the house using small nails, construction foil tape or a stapler.
- It does not burn, as it has a fire hazard class that is difficult to combust and difficult to ignite.
- You can transport the material alone in any passenger car. It is lightweight and rolls into a soft roll.
- Due to the thin layer, rodents will not make burrows in the material, as, for example, in polystyrene foam or mineral wool.
- Certified by specialists of the Sanitary and Epidemiological Institute, and suitable for use in children's institutions.
Despite all the advantages, there are many negative reviews about the material. They are associated with the following qualities:
- Softness. After installation, the inside of a wooden house cannot be immediately plastered or wallpapered.
- It is difficult to install using special glue, and using nails or a stapler, the material breaks through and loses part of its thermal insulation. You can only exclude group C, which includes insulation on one side covered with an adhesive composition, like adhesive tape.
- It should not be used for facade insulation, as the material will not release steam from the house and condensation will accumulate under the film. This will quickly destroy the walls.
With high-quality installation and proper insulation, Pefonol insulation provides long-term protection to the walls, floors and ceiling of a wooden house. For each part of the structure, a certain grade of material is used.
Penoplex (extruded polystyrene foam)
The most common sheet material for insulating balconies. Its composition is a frozen foam, the closed pores of which contain air. For insulation, foam plastic 5 cm thick is usually used; for harsher climates, it is recommended to choose thicker sheets up to 10 cm.
The material has a number of advantages that determined its popularity:
- low thermal conductivity coefficient, which ensures high thermal insulation of the room even without the use of other materials;
- high water absorption rate, which makes it possible not to lay an additional layer of waterproofing;
- sufficient strength makes it possible to use dense and heavy finishing materials;
- environmental friendliness - no dust is generated during operation, no harmful substances are released during further operation;
- hygiene – mold and mildew cannot form in polystyrene foam;
- ease of use and ease of installation - the sheet can be cut into parts of any size;
- low cost compared to other insulation materials;
- service life up to 30 years, subject to compliance with installation technology.
The main disadvantages of polystyrene foam:
- low air permeability – when insulating a loggia with this material, it is necessary to provide additional methods of ventilation, otherwise it will not be possible to ensure a comfortable microclimate in the room;
- poor sound insulation properties;
- insufficient resistance to certain types of drying oils, varnishes and other chemicals based on petroleum products and alcohols - this requires special care when choosing finishing materials;
- high flammability and, accordingly, fire hazard.
To insulate a balcony, you must choose construction foam made by extrusion with a density of 35-40 kg/m3. Types with an indicator of less than 25 kg/m3 are packaging materials and are not suitable for construction work. To determine the quality of the material, break off a piece from the sheet and look at the structure. Construction foam has cells in the form of polygons, packaging foam consists of easily detachable balls.
Penoplex is a close relative of polystyrene foam, but with much better properties and characteristics. The special production technology of this material makes it possible to obtain a porous, almost uniform structure with uniform distribution of air in isolated cells. Thanks to this structure, the material has a lower thermal conductivity compared to conventional polystyrene foam and other insulation materials. This is the main advantage of penoplex; in other respects, the material is close to polystyrene foam.
There are several types of penoplex on the market, which are labeled according to their purpose:
- “Foundation” – intended for insulation of building structures buried in the ground; is particularly durable and able to withstand high soil pressure after backfilling;
- “Wall” – used for insulation of external walls, partitions located above ground level;
- “Roofing” is a special type for attic spaces; with a high thermal insulation rate, it is a rather fragile material, therefore it is not intended for areas with increased load;
- “Comfort” is the optimal variety for insulating the walls of balconies and loggias; differs in balanced technical indicators for internal use.
There is no point in comparing this line of insulating materials with previous thermal insulators, because they are in different price ranges, and the newly introduced insulators are much more expensive than their counterparts made of foam plastic or mineral wool, as well as their subtypes. However, we should pay tribute to the fact that penoplex and penofol belong to the category of modern generation insulation materials with excellent operational and technical characteristics.
We suggest you familiarize yourself with which boards are best for laying plank floors and how to prepare them
And the flagship among them is penofol, made in the form of a multifunctional insulating material, which, thanks to its three-layer design, is capable of simultaneously providing waterproofing, thermal insulation and vapor barrier to a room. This insulation is glued to the wall surface using a special glue, unlike penoplex, which is fixed to the wall surface with fungal screws.
Penofol and roof insulation
Penofol is placed with the reflective surface inward.
The main requirement when insulating the attic and ceiling of a house is a good vapor barrier. In the absence of this, moisture that accumulates indoors will penetrate into the insulating material. This phenomenon is explained by the difference in steam pressure inside and outside the building. Gaseous water, accumulating in the insulation layer, leads to a deterioration in the technical characteristics of the latter. As a result, over time the entire thermal insulation pad has to be replaced. In the worst case, moisture affects the wood floors and beams of the house. They rot and lose their strength.
When organizing a vapor barrier, a ventilated gap is required. After all, there is always a possibility of moisture penetrating into the upper layers of the thermal insulation pillow of the ceiling. The air gap will allow the accumulated condensation to be removed from the insulation. When the ceiling is insulated with penofol, there is no need to create a ventilation gap between it and the main layer of heat-protecting material. Penofol has low vapor permeability. In addition, this product is coated on one side with an adhesive substance, which simplifies the installation process.
Insulating the attic with penofol also has its advantages. If external work is carried out, then penofol can replace the waterproofing barrier, plus additional thermal insulation of the attic is provided. Inside the attic, penofol is installed below the insulation, protecting the latter from water vapor. The use of penofol also helps to reduce the thickness of the layer of the main thermal insulation material. For example, a layer of penofol 4 mm and mineral wool 100 mm are equivalent to a layer of mineral wool 200 mm.
Only original material can provide complete protection of the building from heat loss. How to choose the right penofol is described in the video:
Characteristics and advantages of the material
The penoplex manufacturing process was invented more than 50 years ago by American technologists. The structure of the material consists of many small granules (0.2 mm), which form a smooth surface. A foaming additive is introduced into these cells. Under high pressure and when heated to a certain temperature, these granules are combined.
This material structure provides high technical characteristics - strength and excellent heat-saving properties. Other advantages of penoplex:
Low water absorption. Moisture penetrates only into the outer layer of the material, but the internal structure remains dry
This is a very important property for insulation. Wet material swells from water, it loses its air layer, and its basic qualities are lost.
Such insulation becomes useless. Low thermal conductivity. The thermal conductivity coefficient of penoplex is one of the lowest among similar materials. This allows it to be used for rooms with high humidity (attics, basements), thermal insulation of external walls of buildings and foundations. Resistance to mechanical loads. The manufacturing technology ensures that the structure of the material is homogeneous and durable, but to maintain the integrity of the penoplex it must be laid on a flat surface. Low vapor permeability. In terms of resistance to various types of evaporation, penoplex is not inferior to roofing felt, which has long been used for waterproofing floors. This makes it possible to use penoplex for bath insulation. Light weight. The material easily rises to any height; it can often be seen on the external walls and balconies of multi-storey buildings. Fixed slabs do not weigh down the structure, so special permission is not required for insulating balconies and facades. Easy to install. You can cut penoplex with a regular knife; this does not require special tools.
Lightweight material is quickly installed; even rainy weather does not interfere with this, as it is not afraid of moisture
Long service life. The results of experiments carried out in laboratories (multiple freezing and testing at high temperatures) prove that penoplex can last up to 50 years. Resistant to many chemicals. Most drugs used in construction do not have any effect on penoplex. These include alkali, alcohol, ammonia, propane, butane, freon, and water-based paint. However, there are compounds that can destroy the integrity of this insulation; you need to know about them before starting construction. These include gasoline, acetone, enamel, formaldehyde.
Among the disadvantages of penoplex, one can note its ability to melt and release toxic substances during combustion. Low sound insulation characteristics lead to the fact that the material does not retain noise well. It cannot withstand prolonged exposure to the sun; it must be covered with cladding.
You will learn how to properly insulate a loggia with modern penoplex material from this video:
Insulation of ceiling and floor with Izolon
Metallized lavsan film Izolon.
The simplest option for insulating a floor with Izolon is to use it as a lining under a laminate, although it is also possible to lay linoleum on top of foamed polyethylene. In addition, this material can be used in structural elements of a building, for example, on the ceiling and wooden floor laid on joists. The installation technique in both cases is very similar, so we will consider them together.
Naturally, Izolon thermal insulation as an independent insulation gives insignificant results, since its thickness is too small. Therefore, in order to get a high-quality thermal insulation cake, you need to use more solid insulation materials, for example, mineral wool. In this case, in addition to auxiliary protection against heat loss, foamed polyethylene can act as a vapor barrier. Mineral wool, especially glass wool, is prone to absorbing moisture from the air, especially if it is laid on the ceiling. Therefore, insulating the ceiling with Izolon in some cases is not only desirable, but necessary.
Correct insulation method:
- Mineral wool is laid between the floor or ceiling joists;
- Izolon is tensioned along the joists;
- the counter-lattice is stuffed;
- finishing is being installed.
It is quite acceptable to lay this material directly under the finishing, as sound insulation. To do this, it is enough to secure the material with a construction stapler on the working surface end-to-end and seal the joints with tape. If it is technically possible, it is better to leave a gap between the polyethylene foam and the finish. Even if there is moisture on the insulation, it will successfully evaporate and will not be absorbed into the finishing materials, which will significantly extend their service life. Many people are interested in the question of whether it is possible to insulate the floor with Izolon in a wooden house. This is allowed, but again, as independent thermal insulation, it gives almost no results.
Rigid thermal insulation cylinders made of mineral wool are used to insulate communications.
You can read about which non-flammable insulation materials for roofing are best.
Drywall and mineral wool - what's the difference?
From time to time in materials on thermal insulation one comes across such a concept as “insulating a loggia with plasterboard.” Insulating a balcony with penoplex is the same as insulating the creation of a screed on the balcony on the floor. It doesn't really correspond to reality. Nobody bothers you to take plasterboard and cover bare walls with it.
This approach will provide some heat-saving effect. If you nail a rug to the outside wall, that will also do something. The changes may be minor, but they will happen.
But drywall is not insulation at all. The material is classified as finishing and is usually placed on top of the surface formed by polystyrene foam and penofol. Mineral wool is a self-sufficient insulator. Insulating a loggia with mineral wool is one of the methods we talk about in the article.
Accordingly, plasterboard insulation should be considered in the context of the overall work package. Sheathing of products is carried out at the finishing stage. The materials themselves protect the insulation from the effects of various negative factors.
With mineral wool everything is more complicated. Insulation and finishing of the loggia on your loggia or balcony, create a video from and. Sometimes it is installed like polystyrene foam, that is, it is attached with glue and other elements. All you need is a special type of material. In other situations, insulation with mineral wool is carried out according to different principles. Let's say the insulation is placed in a special frame.
Which material is better?
As you know, heat is transferred from product to product in 3 ways:
- heated air;
- thermal conductivity of materials;
- radiation - heat transfer from one product to another occurs using electromagnetic waves in the infrared spectrum.
Let's look at some differences between penofol and other thermal insulation materials.
Most thermal insulation building materials (mineral wool, isolon, penoplex, tepofol) interfere with one type of heat transfer. A distinctive feature of foil material from other types of insulation is that it has a complex effect: foamed polyethylene is an obstacle to convection, and thanks to aluminum foil, the thermal reflection rate reaches 97%.
Penofol can be compared with only one group of thermal insulation materials - isolon. Comparing isolon and penofol, there is no significant difference in the quality and method of their use. To determine the winner, you need to look at the availability and price category of a particular building material. The only advantage of Izolon is that the range has been expanded with sheet building materials, the thickness of which ranges from 15 to 50 mm.
Penofol is mounted using glue, and the penoplex is fixed using fungal screws. Also, foil insulation does not accumulate heat, but rather reflects it.
Mineral wool is attached only to vertical slats. The price category of penofol is significantly lower than that of mineral wool.
Using penoplex instead of penofol
Insulating the balcony from the inside with penoplex is also a common option. This material is produced in the form of lightweight, compact slabs that are convenient to install with glue. You can also use plastic dowels with a special plate for installation.
When laying out the next row, shift it. Avoid matching vertical seams, otherwise the structure will leak.
Penoplex slabs are easy to cut, so you can adjust the size of the slab to the area of your structure, cut out a part of any shape using a stationery knife or a metal file. The technology of insulating a balcony from the inside using penoplex involves filling all joints with polyurethane foam. Thanks to this, it will be possible to make the room airtight, getting rid of all the cracks.
Loggia insulated with penoplex
Balcony insulation with penoplex can be combined with penofol. This approach will allow you to obtain additional insulation, reflect warm air, and increase the room temperature by several degrees. After you have secured the penoplex, glue penofol on top of it. As a result, you will receive reliable sealing of the balcony, the thickness of which will be minimal.
Zoning
Designers do not advise giving in to fashion trends and copying design ideas without taking into account dimensions, location and other nuances. Before planning and arranging furniture, every detail is thought through.
There are several simple rules that experts advise you to follow:
- Let the room have natural light. To do this, remove excess walls (except for load-bearing ones).
- If the rooms in the apartment are small (12 sq. m or 16 sq. m), the layout of the kitchen combined with the dining room will be the right solution.
- If the ventilation system is not designed correctly, the smell of food will spread throughout the apartment.
Penofol and floor
Is it possible to insulate the floor with penofol in a wooden house, as well as the walls, roof and ceiling of the building? After all, as you know, a wooden house has good air exchange with the environment, and the low level of vapor permeability of penofol can disrupt it. As practice shows, the above material does not affect the technical and operational characteristics of a wooden building. The main condition is the organization of a ventilation gap. Also read: “Do-it-yourself floor insulation on a balcony: what materials to choose?”
It is necessary to leave a ventilated gap.
Thermal insulation of the floor in a wooden house. Floor insulation with penofol in a wooden house is carried out along logs. In this case, material types A and B can be used. The installation method depends on the type of thermal insulation chosen. We have already written about the comprehensive insulation of a wooden house according to modern technology.
Method using type A insulation. Work progress:
- surface preparation;
- choice of timber;
- organization of vapor barrier;
- laying the lower tier of logs;
- installation of the main insulation;
- laying penofol;
- second tier of logs;
- floor finishing.
The previous coating is completely removed down to the foundation. The surface is cleaned of debris and dust. To do this, it is advisable to use an industrial vacuum cleaner.
The height of the beam should be commensurate with the height of the selected main insulation plus 5 cm to create a ventilated gap. In most cases, beams of 100 mm by 100 mm or 100 mm by 150 mm are suitable, where the first value is the height, the second is the width of the product. If necessary, the height is increased. The length is chosen arbitrarily. Experts recommend choosing the length of the beam in accordance with the size of the room. Otherwise, the logs will have to be extended, which will negatively affect the stability and strength of the structure.
The joints are taped with special tape.
The vapor barrier can be a polyethylene film or a special membrane. In some cases, penofol type B is used. The previously selected beams go on top of it. They are laid across the width of the room in increments of 35-40 cm. At the same time, a distance of 1-2 cm is made from the walls. This is needed to compensate for the thermal and operational expansion of the logs. A gap of 1-2 cm is maintained between the last lag and the wall, regardless of the pitch of laying the beams.
The main insulation material is installed by surprise. In this case, there should be no gaps between the joists and the thermal insulation. Penofol is laid on the insulation with the foil layer down. Floor insulation with penofol in a wooden house is not overlapped. This will have a bad effect on its protective functions. Only an overlap of about 10 cm is made on the walls. The joints between the sheets are glued with adhesive aluminum tape. Next, a second tier of lags is arranged on top of the foil material, along which the rough floor and finishing go.
Thermal insulation of the concrete base. If insulating a wooden floor with penofol is impossible without organizing double logs, then with a concrete or cement base everything is much simpler. The main requirement is a perfectly smooth rough coating. For residential and administrative buildings, the presence of an additional layer of thermal insulation under the rough floor screed is mandatory. The next condition is the ventilation gap. It should be located above the foil part of the penofol. Otherwise, condensation will accumulate on the foil, which will negatively affect the protective properties of the thermal insulation pad.
The joists are placed on top of the reflective insulation.
Experts tell you how to insulate a floor with penofol correctly on a concrete base. All work is carried out in several stages:
- rough floor screed;
- installation of penofol;
- installation of a metal frame;
- organization of the second layer of penofol;
- floor finishing.
Penofol is laid on top of the rough concrete floor screed. Here it is advisable to use type C material, since it already has an adhesive composition on one of its sides and is easier to work with. Penofol is mounted end-to-end on the floor, an overlap of 10 cm is made on the walls. All seams are taped with foil tape. Next, a metal frame is organized on which the second layer of penofol is laid. There is another metal frame on top. It will act as a support for rough and finishing flooring.
If you are insulating unheated rooms or buildings that are used only in the warm season, one layer of penofol is sufficient.
Nuances of foam installation technology
Thermal insulation construction with penofol provides a preparatory stage and selection of the necessary tools. The condition of communications and the structure itself is first checked. If there are grooves or other defects on the base, they need to be repaired with putty. There should be no dust or dirt on the surface. It is thoroughly cleaned with sandpaper.
Tools and materials
To insulate a structure with the specified material, the following tools are required:
- building level, knife, tape measure;
- stapler and staples;
- spatulas;
- marker;
- electric drill;
- screwdriver;
- sandpaper.
Dowels are often used to secure the material. During preparation, a primer must also be applied to the base. If the base is wooden, then it requires additional antiseptic and fire retardant treatment.
Insulation of house walls from the inside
Insulation of walls from the inside is carried out in the following order:
- Making a frame from wooden slats. In this case, a space of 2 cm should remain on both sides of the penofol. Thus, the effect of the insulation will be maximum. The sheathing must be secured using dowels. The pitch between the slats is 1 m.
- Insulation of electrical wires. The aluminum foam layer has a high level of electrical conductivity.
- Fastening the material. A furniture stapler and staples are used for fixation. Strips of the required width or length are cut with a construction knife. To improve the thermal insulation properties, the seams between the elements are taped with masking tape. It is not recommended to lay strips overlapping.
After the insulation is secured, the wooden frame is reinstalled. Chipboard or MDF can be fixed on it for subsequent finishing.
External wall insulation
To insulate a house from the outside, it is better to use a perforated type of material. It not only provides good insulating properties, but also helps remove steam from the room. Exterior finishing is done if there is no desire to change anything inside the building. Work should be carried out in warm weather on a dry base. Installation involves the following steps:
- Treating walls with antiseptic.
- Making a wooden frame. Self-tapping screws are used for fastening.
- Laying the insulation while maintaining a two-sided gap of 2 cm. The joints are connected with metallized tape.
Now you can make another wooden frame and begin finishing the building.
Ceiling insulation
Installation of insulation on the ceiling is carried out in the following sequence:
- Fastening the frame from wooden planks or metal profiles. Dowels are used for fixation. The step between elements is 1 m.
- Preparation of penofol fragments. There is no need to cut a large number of strips at once, since the ceiling area may have deviations.
- Fastening the material. The first strip is nailed onto the frame close to the wall. In this case, the foil side should be facing inside the room.
- The remaining fragments of penofol are laid end to end. All seams are covered with foil tape.
Chipboard sheets can be mounted on top of the material and the surface can be finished.
Floor insulation
Penofol is used as an insulating layer when arranging floors, as it is unpretentious in installation and operation. The base does not require special preparation. It needs to be smooth, clean and dry. The insulation must be laid so that there is a ventilation gap between the surface and the material. This will make it possible to avoid condensation.
Penofol must be secured with glue or double-sided tape. The use of a construction stapler is permitted. As in previous cases, the insulation strips are mounted end-to-end, and the seams are connected with metallized tape. The foil should “look” inside the rooms.
So, penofol is a new generation of insulation that provides a high level of insulation not only from heat loss, but also from noise and moisture. At the same time, the material consumption is relatively small. However, you need to choose the material correctly.
Floor insulation with penofol
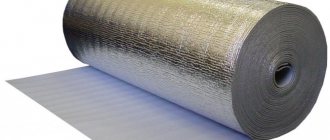
Penofol looks like a layer cake. Foamed polyethylene is covered with pure aluminum foil. Available for sale in large rolls. The penofol sheet has a thickness of three to ten millimeters. It retains heat perfectly, provides high-quality sound insulation, and is safe for the environment of the home.
Foil penofol is an easy-to-work material
The effectiveness of penofol is based on the reflection of thermal radiation. This is how heat is retained indoors. This is due to high quality aluminum foil. Here its properties are close to those of precious metals.
I distinguish between penofol with two and with one layer of foil. In addition, there is self-adhesive penofol.
Penofol is susceptible to moisture. However, it is not capable of absorbing moisture on its own.
Penofol does not support combustion
The disadvantages of the material include low rigidity, which can create additional difficulties when working with it.
Attaching penofol may also require additional effort. Punch-out fasteners cannot be used, because this will lead to deterioration of properties. All that remains is special glue, which will also have to be purchased.
To work with vertical and inclined surfaces, it is advisable to use self-adhesive penofol.
Recommended for use as additional insulation. Serves no more than 5 years.
Types, advantages and disadvantages of penofol
Three types of penofol, designated by letter indices, are suitable for a balcony or loggia.
Type A has foil on only one side, as a result of which it is most often used in combination with other insulation materials.
Type B is foiled on both sides, which greatly improves its thermal insulation qualities.
Type C is convenient due to the presence of an adhesive layer on one side of the polyethylene foam sheet. This greatly simplifies and speeds up working with the material.
The ALP type is used in agriculture to make greenhouses.
Type NET – industrial penofol.
Also on sale you can find penofol type K, characterized by the presence of one layer of corrugated foil. The presence of relief makes the material even more effective, especially as part of complex thermal insulation.
All types of this insulation are capable of reflecting 95-97% of heat and maintaining performance in the temperature range from -60 to +100 degrees.
Vapor permeability is very low and does not exceed 0.001 mg/mchPa. Moisture absorption does not exceed 1% in 24 hours when fully immersed. A cubic meter of material weighs from 44 to 74 kg, depending on its type.
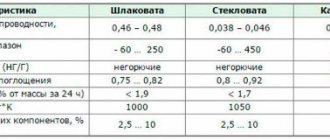
More detailed characteristics of penofol can be found in the table:
The main advantages of foil insulation:
- Fire safety ensured by non-flammable manufacturing materials;
- Environmental friendliness,
- High level of noise insulation due to the presence of a layer of foamed polyethylene;
- Unattractive to insects and rodents;
- Ease of installation;
- The thin thickness of the material allows it to be installed in hard-to-reach places and in limited space;
- Low thermal conductivity (20-25 times less than that of stone wool).
The disadvantages include the following:
- Difficulty in fastening. Penofol cannot be nailed down, as this will break the tightness of the material and reduce its heat-saving qualities. Installation is carried out only using staples (with the exception of self-adhesive type C);
- Impossibility of installation under wallpaper or as independent external insulation on facades. This disadvantage arises from the low mechanical strength of the material.
