Insulation of walls with foam plastic
It is very simple and yet effective to insulate the walls in the bathroom using sheet foam. It can be attached to the wall without additional sheathing using dowels with special attachments or regular tile adhesive. Since the second option is less labor-intensive, we will consider it in more detail.
In addition to the foam and glue itself, you will need several spatulas, a construction knife, a rubber roller, a primer and finishing putty for the final finish.
Before starting work, the walls must be cleaned of the old coating and any remaining dust and debris. After this, the walls are primed with an antiseptic primer. It is recommended to apply the primer in at least two layers.
After the primer has dried, you can begin gluing the foam sheets. To do this, dilute the tile adhesive in accordance with the instructions included with it.
Next, apply glue using a notched trowel to the foam sheets and glue them to the wall. Please note that the foam material is quite fragile, so you need to press the sheets carefully. Finally, you need to “roll” the glued sheet with a rubber roller so that the glue is evenly distributed over its entire surface.
If entire sheets of foam plastic do not fit on the upper section of the walls, they can be easily reduced to the required size with a regular construction knife.
When all the walls are covered with foam plastic, all that remains is to putty it. To do this, you can use almost any finishing putty. If in the future tiles will be attached to the polystyrene foam, it will be enough to use one layer. If you are going to paint the walls, then you need to apply putty in at least two layers.
Insulating the floor in the bathroom
This part of the bathroom can be insulated using heated floors, but we will consider the option with foam plastic. For this purpose, you should choose foam with a density of 25 kilograms per cubic meter or higher. We will mount the sheets on the floor with tile adhesive, after gluing damper tape on the sides. In this case, reinforcement in the form of a mesh is laid on top of the foam plastic and the screed is poured with a layer of at least 3 centimeters. The latter will be the basis for the final finishing - most often with tiles.
Before pouring the screed, it is important to make sure that the foam sheets do not spring, otherwise the finish here may crack in the future.
https://www.youtube.com/watch?v=xc7T99cXd6E
How to insulate bathroom walls
There is no need to overdo it with glue foam; a layer of 2 cm is enough.
Before insulating a bathroom in an apartment, you need to remove all surfaces from finishing. Ideally, they should be even, but this is not necessary. An antiseptic is applied to the walls to prevent the formation of harmful bacteria there, or at least delay this process as far as possible. Insulation is applied to the treated surface.
Before insulating a bathroom in an apartment, you need to choose a thermal insulation material. Possible options:
- Styrofoam;
- extruded polystyrene foam;
- penoizol;
- cork agglomerate;
- stone wool.
It is better not to consider mineral wool or glass wool at all, since you need to insulate the wall in the bathroom from the inside with a moisture-repellent material. There is no point in sticking to mineral wool when there is plenty to choose from. Stone wool (aka basalt) practically does not absorb moisture, but it still requires a vapor barrier. It is laid between the ventilation gap and thermal insulation. The ventilation gap is the distance between the finishing and the insulation.
It is better, of course, to use this material to insulate a bathroom in a private house from the outside, then the result will be generally excellent. We wrote about how to insulate a facade with stone wool in one of the previous articles. If we are talking about a wooden house, then it is necessary to protect not only the insulation from moisture, but also the structure itself. In this case, basalt wool will also be very practical. The insulation of a bathroom in a wooden house is carried out from the inside, and the basalt wool is insulated with a vapor barrier. At the same time, the material breathes and the moisture that somehow gets into the thermal insulation will successfully leave it, and the wood will conduct it out, since it is also a breathable material.
It is better to insulate a wooden house from the outside with stone wool.
In an apartment, it is still better to insulate the bathroom from the inside with expanded polystyrene or its derivatives. They say that cork agglomerate is a good material, but too expensive. You have to pay mainly for the exotic nature of the material (cork oak bark) and environmental friendliness. Its indicators are no better than those of penoizol:
- conducts air;
- does not absorb moisture;
- does not support combustion;
- thermal conductivity 0.4.
In other words, nothing special, and even more so there is no point in putting cork agglomerate under the finishing. This means we choose from polystyrene foam, penoplex and penoizol. It will be easier and cheaper to do everything with polystyrene foam 5cm thick, no less. You will probably need to lay tiles on top of the insulation. Tiles can be laid on foam plastic immediately, but only if it is secured with fungi. Considering that the walls are very thin, it will not be possible to hammer in dowels, which means that you need to make a rigid structure and cover everything with moisture-resistant plasterboard.
How to insulate bathroom walls with foam plastic:
- metal guides are installed;
- polystyrene foam is glued underneath them using mounting adhesive foam;
- everything is covered with moisture-resistant plasterboard;
- The tiles are being laid.
Adhesive foam is a new method of installing polystyrene foam boards. It holds the insulation perfectly and if it comes off, it will only be with meat. The degree of adhesion of adhesive foam is 0.3 MPa, and the degree of cohesion of foam is 0.15 MPa, which is two times less.
After the foam sheets stick to the wall, the joints also need to be foamed. Insulation of walls in the bathroom should be carried out in conjunction with thermal insulation of the ceiling, and better yet, the floor.
Why is it cold in the bathroom?
Insulation of walls in the bathroom
Of the heating appliances in the bathroom, only a heated towel rail is usually installed. If the owner built his house himself, then there may be a radiator in the bathroom, but it is installed only in cases where the area of the room is large enough. A room may be cold simply because it is not heated well enough. There are other reasons for low temperature:
- Powerful hood. There is high humidity in the bathroom, so you have to take care of normal ventilation. Together with air and condensate, heat also evaporates through the hood. If a room is poorly insulated but well ventilated, it will be cool.
- Slots in the windows. Many private houses have wooden frames. Over time, they dry out and cracks appear. Insulating the frames alone will not be enough, because... Air circulation through the cracks continues.
- Gaps in walls, floors, ceilings. The building may shrink. The result is the appearance of cracks and crevices in building structures. If they are not insulated, the rooms may be cool even when the heating system is operating normally.
Installing a heat insulator on the walls in the bathroom
Common mistakes at the initial stage of repair
Errors arise for two reasons: great haste when making the final decision and lack of practical experience in performing such work.
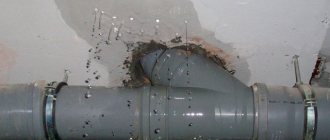
Be sure to redo old sewer and water pipes. The fact is that they have a guaranteed service life; in such buildings it is at its limit. Worn pipes may develop leaks several months after major repairs. It takes a lot of money and time to fix problems. It is much more profitable to anticipate the occurrence of force majeure situations than to eliminate them later. sewer pipes
The electrical circuit in the bathroom must be thought out before starting work. At the same time, install sockets not only for the existing equipment, but also for the future. Increase the number of sockets, select the cable cross-section taking into account the possible increase in the total power of electricity consumers.
Install the bathtub in such a position that its dimensions allow you to place a maximum of household appliances in the room, do not interfere with the connection of the sink, etc. It is better to have one piece of free space next to the bathtub with a fairly large area than several small ones. The bathtub should not divide the room into several zones.
When decorating walls with ceramic tiles, it is not recommended to get carried away with a large number of decorative elements: borders, special internal and external corners. Such elements are very expensive. In terms of area, they occupy no more than 10–15% of the walls, and in cost they can exceed the price of the rest of the tiles. In addition, decorative elements often have various convexities, which create difficulties during the installation of plumbing fixtures - the fixation planes of sinks and toilets are flat and must be mounted on the same flat walls.
The dimensions of the doorway must match the dimensions of the doors. There are times when it is necessary to install non-standard doors, but the opening has already been made and the walls are tiled. To expand the opening, you have to not only saw off part of the partition, but also the tiles
As a result of such actions, it cracks and a complete replacement of the adjacent row is required.
Pay special attention to the position of the partition on which the door will be installed. Theoretically, the tiles can be laid on a sloping wall, although it is better to avoid this
And installing a door on a slanting wall is even theoretically impossible. There will always be a gap between the wall and the platband; it will not be possible to make it invisible.
Consider ways to install inspection hatches. The use of cheap plastic models is currently not recommended even for budget bathroom options. Modern hatches with magnetic covers look much better. Installing them is not a problem; you just need to plan the specific placement at the stage of marking the tiles.
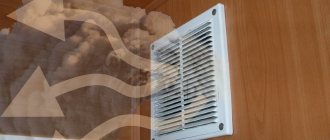
Bathroom ventilation must be reliable and efficient, with an air exchange rate of at least 7. In order to save thermal energy, it is recommended to install an electric fan in the room and turn it on only during water procedures. Just keep in mind that connecting such fans to existing general house systems is strictly prohibited; issues should be resolved with specialists.
It’s not difficult to follow the recommendations; don’t be lazy to think and weigh your decisions. Remember that it is always much easier and cheaper to do quality work than to eliminate defects later.
Floor insulation
It is best to start insulating a bathroom floor with waterproofing. After all, all the moisture that gets on the walls still flows onto the floor. And if an accident suddenly happens, the water will quickly penetrate into the neighboring apartment.
To prevent this, you should use penetrating or adhesive-type waterproofing materials. But it is best to apply liquid rubber to the surface, because as soon as the material dries, it completely isolates the building structures from moisture penetration. It is not very practical to insulate the bathroom floor with polystyrene foam. The fact is that the floor will rise, and an additional screed will have to be built above the insulating structure in order to lay tiles or laminate. Therefore, it is best to install a heated floor system.
At the moment, there are many options for heating the floor in the bathroom. For example, you can heat the floor using hot water; you can also install an electric heating cable or special heating mats into the base of the floor.
Insulating the floor using the first method is not very practical, because the hot water in the pipes gradually cools. In addition, process water is not purified; it contains many impurities that precipitate and clog pipes. When there is no hot water in the system, it will not be possible to heat the bathroom floor.
So, in order to insulate a room with electric mats, you first need to level and clean the base under the mats, and in some cases a concrete screed is specially made for the structure. The mats need to be laid on concrete, they are already protected from moisture by special materials, after which the system should be filled with concrete. The design includes a thermostat, with which you can regulate the amount of heating of the room, while the entire system operates from a regular electrical network
It is recommended to entrust the installation of an electric floor heating system to specialists, because it is very important that the electrical wires are insulated correctly. If you have a choice between water floor heating and electric mats, then it is better to give preference to the latter
Warm floors guarantee high reliability and long service life, and they are also quite cheap.
If you do not have the opportunity to install heated floors, then you can insulate the floor in the bathroom using insulating material. However, in this case, the structure will need to be covered with a concrete screed. To begin with, the floor is leveled and cleaned, then a layer of waterproofing is applied and left to dry. At the next stage, the structure needs to be filled with concrete, after which you can lay tiles or other facing material
Remember that, despite the simplicity of installing the floor, you must be careful when performing work and follow all safety requirements
This completes the insulation of the bathroom from the inside. Properly performed work will significantly improve the feeling of coziness and comfort that occurs when taking various water procedures, since it is quite difficult to call being in a damp, cold room comfortable.
Determining the power of the heating system.
To obtain the most accurate information regarding the optimal operating mode of an electric floor, you need to consult with a specialist, however, the vast majority of companies that produce underfloor heating elements recommend equipping bathrooms with heating systems with a power of 160 W/m2.
By means of simple mathematical calculations, namely multiplying the area of the heated surface by the heating power of one square meter, we obtain the total power that must be provided when installing an electrical “warm floor” system in the bathroom.
How and with what can you insulate a bathroom floor?
As thermal insulators, you can choose polyurethane foam, mineral wool, regular or extruded polystyrene foam. Some home owners opt for the cheapest option - polystyrene foam. However, you should always remember that the insulation is installed under the screed, and fragile foam sheets do not always successfully cope with the loads. They burst, and moisture penetrates into the cracks. The result is dampness and fungus.
The best choice for insulating the bathroom floor is polyurethane foam. If your budget is limited, you can buy extruded polystyrene foam. It is rigid, tolerates loads well, has high thermal insulation properties, and is vapor permeable.
For high-quality insulation, it is necessary to install a thick layer of extruded polystyrene foam, which means raising the floor level. A reinforcing mesh is placed under the concrete screed. The material needs good waterproofing. To do this, use a waterproofing film or penetrating compounds.
Bathroom floor diagram
Material selection
Is it possible to use polyurethane foam in the bathroom?
Yes, but the main condition when choosing it is the presence of moisture resistance. After all, condensation from hot water will gradually accumulate on surfaces, and if the selected sealant is not resistant to moisture, it will quickly shrink and become unusable.
You also shouldn’t skimp on the manufacturer, because you only need 2 cylinders to operate. If you look for a cheaper sealant, you will only win 100-200 rubles, but there can be many problems with low-quality foam. Up to the need for its complete replacement. It will also be much more convenient to use it with a special pistol.
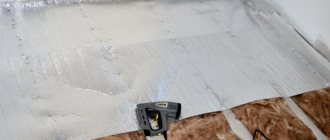
What you need to do to keep your bathroom warm
It is necessary to minimize all cold bridges; in the photo there is insulation with gypsum board sheets
There are several rules, following which you can be sure that the bathroom will be warm and comfortable:
- Insulating a bathroom from the inside requires high-quality exhaust ventilation of the room;
- When installing insulation, voids and loose fitting of the material should be avoided, as this will lead to it getting wet and sagging during operation;
Waterproofing insulation
- The thermal insulation layer must be protected from direct exposure to water using a water barrier;
- Seams in decorative finishing must be treated with a water-repellent sealant;
- All “cold bridges” are additionally insulated using special moisture-resistant mastics and putties.
Naturally, only the main points in the thermal insulation of a bathroom are considered. More detailed information on installation can be found on our website.
Tiles for a small bathroom
Tiles in the bathroom are almost mandatory. How to find the best option for a hygiene room, even if it is small? In recent years, the bathroom has become one of the most important in the home. Today its importance is much greater than it was several decades ago, since the room is not only functional and easy to maintain, but should also provide good rest.
Choose a neutral tile color for a small bathroom. Use similar shades for wall and floor tiles. Dark colors in a small bathroom will make the room feel more cramped. If possible, use towels and bath sets of the same color. Install built-in wardrobes, wall shelves in niches, and a mirrored cabinet. In a small bathroom, you can also introduce natural materials such as wood and stone. Their colors are very suitable for small spaces and give a small bathroom an especially comfortable atmosphere. To add chic to the room, the walls and floor should be made of the same materials. It also opens up a small bathroom and makes it more attractive.
Mosaic
Noble mosaics are not only very popular nowadays, but also give every bathroom a glamorous, high-quality look
Another plus is the numerous tiny tiles that attract everyone's attention and thus distract the eye from the narrowness of the room. When it comes to the size of tiles for small bathrooms, there are two options: small mosaics, which can be used to create complex patterns, and large tiles measuring 30 x 60 cm
White tiles
It's no secret that in small rooms you should focus on light colors. So even the tiniest bathroom with white tiled walls looks more spacious, bright and airy. This choice is especially recommended for the interior of bathrooms without windows.
Black and white bath
If you have a small bathroom, you must make the room look cohesive. The fully tiled bathroom with open shower is inviting. When placing furniture in an oversized space, you should also ensure that the furniture is not rearranged. Otherwise, furnishings can act as barriers in small bathrooms and create an undesirable effect. Choose large and wide tiles, they also make the room appear larger. Your bathroom will have a calm atmosphere when the tile joints are tight. If you want to bring dynamics to the room, you can alternate black and white. To prevent a small bathroom from appearing too dark, there should be more white.
Patterned tiles
Just because your bathroom is a little smaller doesn't mean you have to go without stylish patterns.
On the contrary, these patterned tiles have the same effect as the original mosaic: their attractive appearance attracts all attention and makes it possible to forget about the small number of square meters
Do you like bright patterns and rich colors, an ethnic vibe and a certain retro style? Then colorful folk tiles are what the bathroom needs, no matter how small it is. However, to avoid over-coloring, you should be careful not to cover all the walls in this manner. One surface in a folk print is enough. The rest should be restrained.
Wide tiles
In general, small bathrooms with large tiles look more spacious. In this case, you can even use darker flowers. The feeling of space becomes even more uniform and open when walls and floors are made using the same materials and colors.
Marble tiles
As mentioned, small bathrooms can work well with large tiles. You can easily make your dream of noble marble come true in a mini-bath. Tiles should only be laid on a small area, so it won’t take a lot of money to decorate a luxurious bath.
Warm floor system
How to insulate a bathroom floor? A floor covered with ceramic tiles is itself cold. Therefore, electric mats are often installed under this facing material. They heat the surface of the flooring and maintain a constant surface temperature.
The entire overall system, together with electric heating mats, is called a “warm house”. On the construction market, this material is sold in different sizes.
In addition to mats, hot water is used for thermal insulation of the floor. But since the total area of the bathroom is small, and the water has low purification quality in plumbing systems, insulating the bathroom floor using this method is a difficult task. Therefore, floor insulation is best done using heating elements.
The work intended to create a “warm floor” system is divided into several actions:
- The floor surface must be strong and dry, and there must also be an intermediate layer of cement (screed).
- Then you need to correctly install the heating elements.
- Before you begin installation work, you need to remember that each electric heating mat has exactly two wires, each four meters long. The voltage of all systems is 220 Volts.
- Proper installation will ensure reliable thermal insulation of your bathroom floor.
Electric mats are already programmed to a regular temperature. Hot water heating has significant differences from electric heating:
- Low price of installation work.
- The "warm floor" system is completely independent of central heating.
- Huge service life.
- High level of reliability.
- The thickness increases slightly. Heating with hot water raises the surface of the flooring by several centimeters.
Although the installation work is quite simple, floor insulation must be carried out carefully and certain safety rules must be followed.
Proper insulation of the bathroom from the inside will allow you to create unique comfort and coziness in this room. You will be able to freely take water treatments, because cool air in the bathroom can be detrimental to your health.
Glass mosaic
- the most expensive option;
- reliability and durability;
- ideal moisture resistance;
- incredibly beautiful decorative effect.
A solution for those who do not count the money in their wallet. Glass mosaic is perhaps the most expensive option from a material point of view to decorate the walls in the bathroom. But how many advantages:
- you can decorate a separate fragment on the wall by selecting elements of similar color;
- easily emphasize rounded surfaces;
- an indispensable material for finishing niches and partitions.
We will not remain silent about the disadvantages. Along with the extremely high cost of such finishing, we also need to talk about complex installation, with which laying ordinary ceramic tiles seems like innocent fun. In addition, you should not place the mosaic in places open to direct contact with water: the sight of constantly flowing drops on the wet glass of the mosaic elements is not the most pleasant sight, alas.
The process of insulating a room
Many people have felt discomfort while in the bathroom, as cold air flows into the room through the ventilation.
In order to get rid of this feeling, it is necessary to use only high-quality materials for thermal insulation:
- First you need to insulate the floor (this will be written below). If you want to cover the floor with tiles, you must remember that you should not slip on wet tiles. Or lay down some kind of rug.
- Then the procedure of thermal insulation of the walls is carried out. The insulating material in this case should be polystyrene foam (foam), because it is not exposed to water. Mineral wool will not be very suitable for this particular room, because this material absorbs moisture well. As a result, its thermal insulation characteristics will deteriorate. It is also worth remembering that insulating the walls in the bathroom will reduce the total space in it.
Algorithm for insulating a bathroom:
- At the very beginning, the walls must be completely cleaned.
- Then they need to be coated with a specially designed preparation that will protect the surface from fungus.
- Extruded polystyrene foam is glued to the wall.
- Immediately after installing this material, moisture-resistant plasterboard sheets are applied on top.
- Ceramic tiles must be laid on top of the plasterboard sheets.
This was the first method of insulation, there is another:
- Thermal insulation material must be laid in two layers.
- On top of the insulation it is necessary to install a system of materials that solve problems associated with waterproofing and vapor barrier (isospan).
- Again, moisture-resistant plasterboard sheets are glued to the top.
- We complete all the work by finishing the surfaces.
- Thermal insulation is also necessary for the ceiling. The best option is installation work with a suspended plasterboard ceiling. The distance that remains between the plasterboard sheets and the ceiling must be insulated using foam boards.
- It is important to take care of the correct ventilation system. Ventilation must effectively remove all vapors that form in the room. How to achieve this? A specially designed grille must be installed on the ventilation. The grille includes a fan. The fan will draw out any vapors that form. But outside air will not be allowed through.
- The sewer shaft will also need to be insulated. For what? The sewer shaft is the main source of drafts, and it also draws out all the heat, so the bathroom cannot heat up.
Vibroplast
The material absorbs vibration well and consists of a layer of embossed aluminum foil and a sticky polymer layer covered with anti-adhesive paper. Easily sticks to uneven surfaces without additional heating. Vibroplast does not absorb moisture and has the properties of a sealant. Suitable for use in the temperature range from -45 to +100°C. Good noise and heat insulator.
- a piece of the required size is cut from vibroplast
- remove the protective paper
- Place it on the surface of the bath and level it
- roll with a roller
Advantages of vibroplast:
- non-toxic
- low price
- withstands a wide temperature range
- moisture resistant
Stages of installing insulation on walls
Before insulating a bathtub in a wooden house, it is necessary to carry out preparatory work: clean and treat the logs with antiseptics.
On the walls of a house built of timber, it is necessary to create a frame of slats. In a log house, there is no need to do lathing, since the structure of the material itself creates air gaps so that the walls can breathe.
Selected insulation is placed in the space between the slatted frame or sprayed over the entire surface of the log.
Waterproofing is installed to protect the wood from the destructive effects of moisture. The following materials are used for this:
- A membrane film with which the insulation is overlapped and secured with slats. The seams are additionally treated with sealant.
- Mastics or emulsions. They are applied in several layers with a roller, keeping in mind that each layer must be allowed to dry.
A sheathing is mounted on top of the insulating pie, onto which the main finishing material is attached. If the room is tiled, then moisture-resistant plasterboard is first installed on the frame.
Insulating and arranging a bathroom in a wooden building may seem like a complicated process. But, using the information received and understanding the installation features, you can complete the arrangement of the bathroom yourself. The main thing is to carefully consider the choice of material for insulation and finishing, taking into account their features and your design ideas.
Notes and additions for craftsmen
To reduce humidity in the bathroom, it is allowed to install a low-power suction fan on the ventilation grid.
The installation of wall cladding with ceramic tiles of various types is not always one of the types of its insulation due to the small layer covering the walls and the inappropriate properties of the facing materials.
Perhaps a sufficient condition for a comfortable temperature in the bathroom will be the installation of water-type heated floors; sometimes, to increase the temperature, it is enough to add heating radiators.
In the upper floors it is rare, but still sometimes it is necessary to use ceiling insulation. The technology and materials for ceiling work are the same, but the work is somewhat more complicated.
And most importantly: doing insulation work yourself is not a very labor-intensive and complex process; you just need to choose high-quality, convenient material and tools.
Warmth and absence of condensation in the bathroom are the key to comfort
Greetings dear readers of this blog. Today I’ll tell you about how to insulate a bathroom in an apartment or country house.
It would seem, why do we need additional insulation? It turns out that there are several reasons, including ensuring the comfort of the room, preventing heat loss and, as a result, saving on heating.
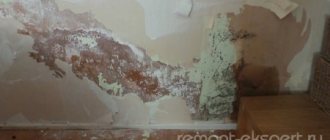
In addition, high-quality insulation helps prevent condensation on the walls and ceiling. As a result, there will be no mold in the corners and you will not have to make cosmetic repairs year after year.
How to keep your bathroom warm
Before you start insulating the walls, you need to take care of the heat that will need to be retained. In this case, heating through radiators is not able to fully cope with this task. In addition, they heat only during the heating season. It is for this reason that experts recommend installing an electric heater in the bathroom, for example in the form of a heated floor.
To install a heated floor, a two-core cable is used, which is laid on the floor at a certain frequency. The more often the heating wire rings are located, the more effective the floor heating will be. The laid structure is filled with a concrete screed; only one wire remains outside, intended for connecting to the network.
Heated floors in the bathroom allow you to enjoy the warmth even after the central heating is turned off.
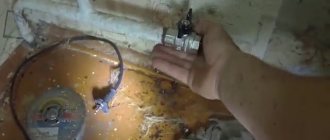
Instructions on how to properly foam a steel hot tub?
Typically, this method is used to insulate and soundproof steel bowls, but it can also be used for acrylic bathtubs.
Be sure to read articles about other methods of insulating and soundproofing bathtubs.
STEP 1: Place the bathtub upside down on the floor. Don’t forget to first place pieces of cardboard underneath it so as not to scratch the enamel surface.
STEP 2. Be sure to thoroughly wipe off dust from the surface on which you are going to apply foam. Then you need to degrease it; for this you can use a universal degreaser, alcohol or dishwashing detergent.
STEP 3. Before use, it is better to prepare the balloon. It needs to be shaken well and heated a little by placing it under running warm water for 5 minutes. It would be enough.
Under no circumstances should you heat the cylinder in a kettle or boiler, as many resources advise. Due to a significant increase in pressure, it can explode.
STEP 4. Spray the bath generously with water using a spray bottle. This way the foam will stick to the surface much better. If the bowl dries out during application, repeat the procedure.
STEP 5. Place the can on the gun and get to work. It is better to apply the foam in dense layers using a snake. Start with flat surfaces and gradually work your way up. There are no special recommendations for the sequence of surface coating
It is important not to leave any spaces
Sometimes the drain needs to be replaced, so it's best to leave a little space around the hole.
STEP 6. Now you need to leave the font until completely dry for 5-6 hours. After the foam has completely dried, cut off any excess foam at the leg attachment points using a knife.
Warm floors in the bathroom - how to do it right
If we are talking about insulation, then the floor is a surface whose insulation is just as important as walls and ceilings. To understand how to insulate a bathroom floor, you don’t need to be an experienced specialist. The work algorithm is simple and understandable even for a beginner in this field.
Bathroom floors are most often insulated with penoplex. Polystyrene foam and mineral wool are not suitable for several reasons. Firstly, the materials will affect the change in floor level, which is not acceptable. Secondly, in terms of resistance to moisture that gets abundantly on the bathroom floor, penoplex is more reliable and stable. The material is resistant to liquids and does an excellent job of retaining heat.
To ensure that the floor in the bathroom not only retains, but also releases heat, performing the functions of a heater, a “warm floor” system is installed. In the bathroom, this particular method of insulation is optimal, allowing you to maintain the level of coverage almost unchanged. Heating communications are carried out inside the floor, under the screed. These can be electric or water heaters.
Infrared flooring is especially popular - the optimal solution for insulating a bathroom in a private home. But it is more appropriate to install a water floor in a house with an autonomous heating system with communications included in the general wiring. Electric heated floors are the choice of apartment building residents. In such cases, a cable is laid under the floor, and a control system with sensors is brought out to monitor the operation of the system.
Insulation of the bathroom
Many people have experienced a feeling of discomfort while in the bathroom. This is due to the fact that cool air enters from the sewer shaft and other cracks.
To avoid such unpleasant sensations, the bathroom must be insulated correctly, using only high-quality materials:
- The wall is cleaned and coated with a preparation that prevents the formation of fungus;
- Glue penofol or extruded foam to the wall;
- Moisture-resistant drywall is glued over the glued material;
- Ceramic tiles are laid on top of the drywall.
There is another way to insulate bathroom walls:
- In addition, it may be necessary to insulate the bathroom ceiling; the best option is to install a suspended plasterboard ceiling. The space between the ceiling and drywall is insulated with foam plastic.
It is also important that the bathroom ventilation effectively removes the vapors generated in the house outside. In order to insulate the ventilation, you should prevent air from the street from entering the bathroom through it. This is achieved by installing special grilles with a fan on the ventilation openings, which draws out vapors without allowing outside air into the room.
In any case, the sewer shaft should be insulated, since it is a source of drafts that draw out heat and prevent the bathroom from warming up properly
This is achieved by installing special grilles with a fan on the ventilation openings, which draws out vapors without allowing outside air into the room. In any case, the sewer shaft should be insulated, since it is a source of drafts that draw out heat and prevent the bathroom from warming up properly.
Features of internal wall insulation in the bathroom
In addition to the fact that internal insulation is always less preferable than external insulation, in the case of a bathroom there is another difficulty - a high level of moisture. Consequently, the material used for this must not be afraid of moisture and not become saturated with it, reducing its performance characteristics.
Important! It is often necessary to insulate not only the walls, but also the ceiling, since large heat losses also occur through it.
In addition to this, you must also keep in mind the following:
- When insulating walls in a bathroom, the vapor permeability indicator is often violated, so you should install a good ventilation system in the room;
- Before finishing with insulation, walls should be treated with antifungal impregnations. It doesn’t matter whether we are talking about a wooden wall structure, or brick or concrete, the risk of mold formation is equally high;
- The formation of cold bridges must not be allowed, so pay close attention to the absence of gaps between the insulating boards;
- To prevent moisture from affecting the insulation, it is necessary to use a water barrier.
How to insulate a metal font with your own hands
Below are detailed step-by-step instructions for insulating an iron bathtub using foil polyurethane foam (penofol).
For detailed instructions on thermal and sound insulation of a bathtub using polyurethane foam, see our special article.
Step 1. Place the bathtub against the wall or lay it upside down on the floor, after covering it with cardboard or cloth. This is necessary to avoid damage to the enamel.
Step 2. The next step is to degrease the surface. A universal degreaser is perfect for this. But if you don’t have it, it doesn’t matter, you can use alcohol or regular dishwashing detergent. Wipe the entire surface thoroughly and let it dry for 10-15 minutes.
Step 3. If you have insulation in rolls, cut a piece of the required length so that the bowl is covered crosswise from side to side, as shown in the photo. Don't forget to peel off the film from the adhesive layer.
After you have glued the sheet to the bathtub, you need to trim off the excess and once again iron the insulation tightly with your hand so that there are no bubbles.
Step 4. Measure the width of the most even areas and cut strips of 15-25 cm. Then glue them to the bowl in the same way, cutting off the excess.
Step 5. Next, glue the remaining empty spaces with the same small strips.
Don't forget to cut a hole for the drain.
Step 6. Tape the insulation joints with reinforced tape.
Step 7. Remove the insulation from the mounting points of the legs.
Insulation with polyurethane foam: advantages of use, application technology
Achieving optimal energy efficiency in a bathroom will be achieved by using liquid polyurethane foam thermal insulation as insulation.
Achieving optimal energy efficiency in a bathroom will be achieved by using liquid polyurethane foam thermal insulation as insulation. The advantages of the material include high strength, vapor permeability, heat and sound insulation, fire resistance, and moisture resistance. Polyurethane foam is low weight, so it does not place additional load on the ceiling and walls of the bathroom. The properties of the material make it possible to spray insulation directly onto insulated surfaces; polyurethane foam adheres well to any materials. Thanks to the structure of the insulation, free circulation of air masses in the heat-insulating layer is ensured, therefore, there is no need to lay hydro- and vapor barrier films.
The low thermal conductivity coefficient of the thermal insulator allows you to apply polyurethane foam in a thin layer. The result is a monolithic, uniform coating that completely eliminates the formation of cold bridges and the accumulation of condensation under the heat-insulating layer.
Polyurethane foam is sprayed onto insulated surfaces using special equipment, and the technology of its application makes it possible to insulate even rooms with a complex configuration.
Polyurethane foam is sprayed onto insulated surfaces using special equipment, and the technology for its application makes it possible to insulate even rooms with a complex configuration. The biological and chemical resistance of polyurethane foam prevents the destruction of the thermal insulation layer, as well as the formation of fungus and mold.
The polyurethane foam layer is sheathed with moisture-resistant finishing materials, for the fastening of which a frame is constructed. The small thickness of the thermal insulation layer allows you to save the usable area of the bathroom, and you can begin finishing the insulated surfaces within 30 minutes after applying the thermal insulator.
The polyurethane foam thermal insulation layer does not lose its characteristics under the influence of high temperatures, therefore, there is no need to additionally shield the places of its contact with heating equipment.
Video about how polyurethane foam is sprayed from Ecotermix:
Costings
The estimate for installing the system includes the following costs:
- materials - basic and heat-insulating: damper tapes, films, adhesive tape and others;
- components: sensors, thermostats, fasteners, hardware and others;
- screed solutions, glue, etc.;
- surface preparation;
- installation work, installation of wiring, sensor, thermostat;
- screed and cladding.
This is a very approximate list, rather a rough diagram, since the list is individual for different types of sex. This will be discussed in more detail below. It is difficult to name exact costs, since the price of different types of materials fluctuates significantly. And the cost of installation depends on many factors. We can say that the entire set can cost 2–5 thousand rubles per “square”. Laying can cost about one and a half thousand rubles per square. Consultants on our website polaremont.ru will help you choose the appropriate option and outline its cost.
The harm from electromagnetic radiation from heating mats is greatly exaggerated
Waterproofing and insulation of floors under tiles
One of the ways to waterproof a floor when laying tiles
This option is suitable for thermal insulation of a bathroom on the first floor in the presence of durable wooden floors. This method involves insulating the lower part of the floor structure at the location of the beams.
- All wooden elements are treated with an antiseptic. Next, waterproofing of the base is carried out. To do this, a waterproofing film is spread on the joists, and then insulation boards are laid in the spaces between the beams. A layer of vapor barrier is laid on top and a counter-lattice is installed on which the boards are laid.
- Dust and dirt are removed from the subfloor. This is necessary to ensure good adhesion of the material to the wood.
- Next, internal waterproofing is carried out using a self-adhesive bitumen-polymer film. First, a concrete primer, which is a water-soluble emulsion, is applied with a roller to the entire surface of the floor. It is also necessary to grab the lower part of the wall to a height of approximately 20 cm.
- The composition dries very quickly, at room temperature it takes no more than half an hour. Waterproofing should be done immediately after the primer has dried.
- A piece of the required length is cut from the roll, rolled, and placed on the floor. Carefully removing the protective film, unwind the material in the opposite direction, gluing it to the base and immediately removing any air bubbles that have formed with a brush.
- The next canvas is laid with an overlap, the joints are coated with bitumen emulsion.
- After laying the waterproofing on the floor, the material is applied to the pre-treated wall. It is necessary to cut strips 30 cm wide, of which 20 cm go to the wall, and 10 cm are glued to the floor, previously lubricated with mastic.
- A reinforced concrete screed is poured over the film, and then, after the solution has completely dried, ceramic floor tiles are laid on waterproof glue.
Wall insulation
The simplest but most effective method of insulating a bathroom from the inside is to cover it with foam boards. First of all, you need to stock up on tile adhesive, foam sheets, a rubber roller, finishing putty, putty knives of different sizes, a serrated trowel and a utility knife.
First of all, it is necessary to prepare the walls, clean them of dust and old coating, and then apply several layers of antiseptic primer. The glue, previously mixed with water, should be applied to the foam sheets with a notched trowel. Then the foam needs to be installed at the attachment point so as not to break the sheets, and then rolled with a rubber roller. Once all the sheets are glued, you can begin to putty. The mixed finishing putty is applied in an even layer to the walls. After it dries, the walls will need to be painted or finished from the inside in other ways.
“Warm” plaster is a cement-based insulation material that has appeared on the building materials market relatively recently, so not all craftsmen use it to insulate walls. To reduce the thermal conductivity of the coating, it is advisable to use special additives instead of sand. Warm plaster can have the following compositions. The sawdust composition usually uses sawdust and cellulose, so insulation with this material is best done in dry rooms to avoid mold on the walls. As a filler for the vermiculite composition, a mineral is used that has poor thermal conductivity and low weight - expanded vermiculite. It is better to choose this plaster for wet rooms, as it has antiseptic properties. In polystyrene foam composition, polystyrene foam granules are used as filler.
Insulating a bathroom with “warm” plaster occurs quickly, since in this case there is no need to level the walls, moreover, the material has excellent adhesion to all materials and does not form cold bridges. But to achieve a good effect, the plaster will have to be applied in a thick layer, about 2 times thicker than when applying the composition to foam plastic. Plaster is not a finishing coating, so it is necessary to finish it with another material.
Before applying “warm” plaster to the walls, they must be thoroughly cleaned of dust and old coating and primer applied. After this, a composition should be prepared from the dry mixture and water, which should be applied to the walls with a wide spatula. Remember that the plaster should not be applied immediately in a very thick layer; the optimal thickness should not exceed 2 cm, and each layer should be allowed to dry for 4-5 hours. If you do not adhere to this rule, then soon the plaster will begin to crack and peel. Insulating the walls of the bathroom from the inside will allow you to stay in the room comfortably, and will also prevent the appearance of condensation and, accordingly, dampness.
Floor insulation. Warm floor
Considering that the tiled floor will be cold, you can also insulate it. What is a “warm floor”? This is a system that allows you to evenly distribute heat throughout the room. At the same time, you can regulate the temperature yourself. Special electric mats are placed on the floor, which heat the floor surface. When installing an electric heated floor, there will also be no risk of leaks. There are different electric floor heating systems. They mainly differ in the structure of the heating elements. In the photos of bathrooms you can see different underfloor heating systems.
How is a heated floor system installed? Installation consists of several stages:
- You need to prepare a solid and dry base. Such a base could be a cement screed or an old bathroom floor.
- Electric mats are secured.
- Installation of an electric heating system.
When installing, you must remember safety precautions. The system operates from an electrical network with a voltage of 220 V.
After arranging the floor, walls and ceiling, you should move on to choosing plumbing fixtures. We will dwell on the nuances of choosing a bathtub, washbasin and compact toilet.
Floor insulation options
Typically, ceramic tiles are used as flooring in the bathroom or a warm water floor system is installed.
But to lay tiles, it is necessary to pour a concrete screed or install a DSP. If the bathroom is on the first floor of a house with a concrete foundation, then there are no problems with arranging the screed. However, in a wooden house, as a rule, the floors are made of wood, which leaves its mark on the arrangement of the insulation pie and further finishing. Wooden floors may not withstand the weight of concrete or slabs and bend. Therefore, in this case, the screed is excluded. You can make a heated floor using the dry method, lay boards on top and cover with linoleum.
A good option is to insulate the floor with expanded clay in bulk, but even in this case you cannot lay tiles on top.
How to make a heating floor is described in detail in the article “How to install an underfloor water heating system in a wooden house.” A hydronic floor structure is best used at the bottom of the house. It is advisable to install an electric floor on the upper floors.
What can be insulated
When planning a major renovation of a bathroom, you can insulate:
- metal bath;
- ceiling and walls;
- floor base.
Let's take a closer look at how to do the above work with your own hands without the help of professionals.
Making a metal bath less noisy and warmer
Don’t rush to buy an acrylic bathtub, as a metal one can be insulated
First, I’ll tell you how to insulate a steel bathtub and how to make it less noisy.
Steel or cast iron have high thermal conductivity, so the water in such bathtubs cools faster than in acrylic counterparts. A casing made of polyurethane foam prevents the transfer of temperature from the metal to the external environment, as a result of which the thermal conductivity of metal frames is equal to the thermal conductivity of acrylic analogues.
The main stages of insulation are listed in the following diagram.
Instructions for insulation with polyurethane foam
When carrying out the planned work we will need:
- Dismantled bathtub with communications removed;
- White spirit and lint-free rags;
- Polyurethane foam and a gun for working with it.
Thermal insulation instructions are as follows:
If the bathtub has already been used for its intended purpose, disconnect the drain and overflow pipes from it;
Applying foam to pre-cleaned metal
We dismantle it from the base and turn it upside down;
Drain hole
After the thinner has completely dried, we moisten the working surface with water and apply polyurethane foam;
Hole for overflow
After about a day, the foam will dry completely and the bathtub can be installed in its original place and all previously dismantled communications can be connected to it.
At the bottom of the bath we leave recesses for brick counters
Explanations for installation:
- It is necessary to wet the metal in order to ensure better adhesion of the foam to the surface;
- There is no need to be afraid of corrosion due to moisture under the insulation layer, since the foam will absorb all the water without leaving a trace;
- Before use, shake the foam container for a minute;
- Adhered foam can be washed off within 10 minutes after application with a rag soaked in thinner, after which this will be difficult;
- In order not to stain the bathtub with foam, the sides around the perimeter and the holes for the drain/overflow should be taped with masking tape.
The principle of insulating walls and ceilings in the bathroom
The principle of insulating walls and ceilings in a bathroom directly depends on the type of insulation. So, for example, if it is foam plastic, then the sheets can be fixed directly to the wall, previously prepared and cleaned, or with the help of additional fasteners. In the first case, soil mixtures and glue are used, evenly distributed with a spatula over the surface of the insulation. In the second, dowels are used to make the structure more reliable.
Insulated surfaces of walls and ceilings can be finished with decorative plaster, but ceramic tile finishing should be excluded in this case - foam plastic will not support its weight.
If it is so important to increase the strength characteristics of the structure to expand the capabilities at the finishing stage, use lathing. It can be wooden or metal. In this case, the insulation is installed in the cells of the sheathing, blowing out the cracks with foam.
As already noted, a good choice for insulating walls and ceilings in a bathroom is mineral wool. The material is more expensive than foam, but has improved properties, both in terms of resistance to moisture and temperatures, and thermal conductivity. The insulation is installed in the same way as foam sheets - on the sheathing. Lay the cotton wool in strips, additionally using a vapor barrier film.
The ceiling in the bathroom is insulated only after the walls are ready. They begin with the installation of a suspended frame, where sheets of insulation are placed for finishing.
Bathroom in a private house from scratch
Repairing a bathroom and toilet with your own hands is not an easy task. And if the bath is made from scratch in a new room, it’s even more difficult. We have just such an option. Living in a private house has many advantages, one of them is that you can plan any premises yourself in the right place, guided by various motives. We used to make a bathroom combined with a toilet from scratch, but elsewhere in the house it wasn’t as beautiful. We decided to change its location because we wanted to create an even more comfortable kitchen in the house.
I will tell you how to make a bathroom and toilet in a private house with your own hands using our example and show you a photo.
We started by building a light, durable partition. I won’t repeat myself, read the article “Redevelopment, making a partition with your own hands.”
Since the house is his own, and the sewerage system was previously laid from another room, the husband had to hollow out the foundation, dig a trench along the outside wall and lay a new pipe into the septic tank on a sand bed of 20 cm with a slope of 2 cm per meter (according to standards). Experienced plumbers always follow the rule of not making 90 degree turns. All turns and drains are assembled from two 135 degree angles! It’s good that they told us how to do it right.
Bathroom wall decoration
They brought a sewer pipe into the room, installed a tee: drain from the toilet, drain from the bathtub and sink, and ventilation vertically upward, which was led into a pipe on the roof. If ventilation is not done, the smell from the septic tank will be present in the room.
Then they laid a layer of expanded clay and filled the floor with a cement-sand mixture using a building level. It is advisable to make the floor under the bathtub and sink a little higher so that the water flows to the center of the room without stagnating. It is necessary to check how smooth the walls are and, if necessary, level them with moisture-resistant plasterboard or cement-sand plaster. Gypsum plaster is not suitable for wet areas.
Then you need to install cold and hot water pipes for the sink, bathtub and toilet flush. It is advisable to install polypropylene pipes on welded polypropylene fittings. I had to buy a welding machine for polypropylene.
Pipes behind the bathroom, tap connections
The work is not difficult, but you need to work carefully, strictly according to the instructions, so that the pipe does not overheat and the diameter of the passage hole does not decrease.
Our water pipes are mounted behind the suspended ceiling and run down the wall to the bathtub. They are attached to special fastening clips. It is advisable to insulate exposed cold water supply pipes to prevent condensation from dripping.
Ventilation and heated towel rail
Next we do the electrical work. This is a very individual matter. We have 2 sockets installed, leads for mirror lighting and niche lighting, wiring for ceiling lamps. Electricity must be done by a specialist! It’s good that my husband is an electrical engineer.
Ventilation of the bathroom and toilet in a private house is mandatory! However, as in residential premises. My husband previously punched a hole in the ceiling for the ventilation pipe and installed a plastic sewer pipe into it. You can use a metal pipe. If the attic is cold, the ventilation pipe must be insulated. When the ceiling was ready, I installed an adjustable ventilation valve. Our ventilation is natural.
How to insulate a floor
A cold floor always creates inconvenience, especially a bathroom floor on which you have to walk barefoot. Therefore, its insulation is very important for the overall thermal insulation of the room. This can be done by laying a thermal insulation layer or installing a heated floor system.
The base of the floor must be lined with waterproofing material or covered with liquid rubber.
Extruded polystyrene foam, which is characterized by rigidity and vapor permeability, can be used as a thermal insulation material. It should be noted that to ensure proper thermal insulation, the layer of this insulation must be over 5 cm. A more practical material is polyurethane foam, the thermal insulation properties of which make it possible to reduce the layer to 2 cm.
The heated floor system uses electrical elements, the distance between which is filled with special mixtures. Such a heating system has a high heating capacity even at a relatively low heating temperature.
Thus, by carefully considering the insulation system for a bathroom in a private house, you can independently make the room comfortable for your stay.