Advantages and disadvantages
Advantages of the material:
- Thin and invisible material.
- It is possible to paste both plastic and wooden windows.
- Simplicity and speed of installation - no auxiliary labor or special tools are required.
- Low cost.
- Environmentally friendly material.
- The film does not burn, but melts at high temperatures.
Some disadvantages:
- The material may tear (burst) upon strong physical contact.
- The service life is not long - 1-2 years.
Do-it-yourself window insulation
There is nothing complicated in the process of finishing a window with film - not only a qualified specialist, but also the owner of the house can handle this task.
No special skills or tools are needed, but some rules must be followed. Required materials and tools:
- film;
- special colorless double-sided tape;
- roulette;
- long ruler;
- pencil or marker;
- construction knife or scissors;
- cotton gloves;
- regular hair dryer;
Step by step guide:
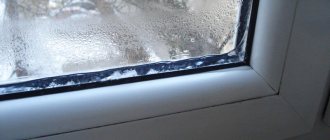
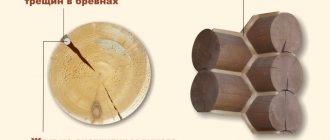
Initially, you need to make sure that there are no cracks in the window frame. In plastic windows this unpleasant nuance practically does not occur, but in wooden windows it may be present.
Wooden windows contain frames in their design, which entails the presence of many joints through which cold air can pass through. For high-quality sealing of seams and other cracks, transparent sealant or silicone is used.
You can proceed with further actions only after they have completely dried:
- The inside of the window frame needs to be washed. To do this, you can use household chemicals or soap solution.
- Afterwards, the frame is treated with degreasers (preferably ethyl alcohol 96%).
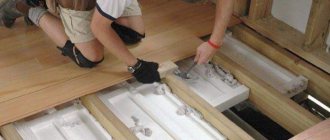
- Double-sided tape is glued along the edge of the frame (along the perimeter).
- Next, the film unfolds on a large table. If it is folded in half, it needs to be stratified. To do this, it is advisable to blow on the joints. Holding the two edges, it gradually separates.
- It is necessary to measure the horizontal and vertical dimensions of the glass unit in advance with a tape measure.
- The recorded indicators are transferred to film, with a tolerance of 1.5-2 cm for attaching it to tape.
- You can cut the material with a knife or scissors, because it is very pliable to cut.
- The protective paper layer is removed from the adhesive tape attached to the frame.
- First, the cut out area must be leaned against the upper horizontal plane of the tape and pressed carefully.
- Next, you need to pull it a little and press the edges of the film against the vertical strips of tape.
- In the lower part, the fastening process is identical to the previous ones. Thus, the film is fixed in the desired position and is ready to serve for a long time.
Recommendations in progress:
- Before completely sealing the window with film , you must thoroughly wash the glass.
- (fingerprints or other contaminants) remain on the canvas,
- If folds appear on the surface of the material during the process , this can be corrected using a regular hair dryer. To do this, it is necessary to spray the film with a stream of hot air escaping from it - which causes shrinkage.
- During the process of gluing the film , it is not recommended to stretch it too much, because the surface may burst. And it is almost impossible to repair it, unless you stick a strip of tape, but over time the defect will become noticeable.
- If the window is large enough , it is better to carry out the work together.
- Do not allow the film to sag or touch the glass - this will not provide good heat conservation.
Instructions for installing heat-saving film
The installation procedure for an auxiliary product is not complicated and does not require the purchase of special tools; you just need to follow a number of rules.
Materials and tools
In the process you will need:
- film;
- roulette;
- marker or pencil for marking;
- cotton gloves,
- transparent double-sided tape;
- scissors or stationery knife;
- long ruler;
- an ordinary household hair dryer.
Before starting work, you should make sure that there are no gaps or cracks in the frame structure. This problem is not typical for plastic profiles, but it occurs often in wooden ones. In the latter case, the presence of bindings leads to the formation of numerous joint zones through which cold air penetrates. This effect can be avoided by using silicone or any transparent sealant. After application, they should be left untouched until completely dry.
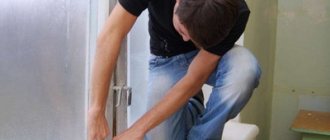
First of all, the window is thoroughly washed
Step by step guide
Warming is carried out in the following order:
- It is necessary to thoroughly wash the windows from the inside, preferably using a soap solution and household cleaning chemicals.
- The frame must be treated with any degreasing compound and double-sided tape applied around the perimeter.
- The film roll should be unrolled on a clean horizontal surface, preferably on a large table. A product folded in half must first be delaminated by gently blowing on the joints. Next, you need to grab the edges with both hands and pull so that they separate without damage.
- You need to measure all the parameters of the glass unit using a tape measure, then you should mark the film based on the obtained geometric parameters. You need to leave an allowance of 1.5-2 cm on all sides so that you can properly fix the product with tape. The material is cut according to the markings.
- Remove the protective layer of paper from the tape already attached to the frame. Next, fix the cut piece of film, starting from the top, carefully pressing the edges to the adhesive strip.
- The fabric needs to be stretched a little before aligning the edges with the vertical adhesive strips.
Double-sided tape is glued to the frame along the perimeter.
The last step is to fix the bottom edge, followed by additional smoothing along the perimeter.
The canvas needs to be stretched a little before aligning the edges with the vertical adhesive strips
To make the process easier, you should use the following recommendations from the experts:
- to ensure complete sealing of the opening, the glass must be thoroughly washed;
- cotton gloves will help avoid the formation of fingerprints, streaks and marks on the film;
- If during installation the surface of the material becomes covered with folds, they can be removed using a household hair dryer. The fact is that the product will inevitably shrink if it is sprayed with jets of hot air. In this aspect, shrink film is most convenient for installation;
- Do not over-tighten the product during installation, as it is easily deformed and torn;
- The arrangement of a large window is easier to do with two people.
Types of heat-saving films
Experts distinguish types of energy-saving film based on product manufacturing technology:
- with application of rare earth metals or noble alloys to the base;
- with ceramic surface coating of polyester.
According to the installation method, thermal films are divided into:
- Wet glued. The energy-saving film is applied after preliminary preparation and degreasing of the surface by pre-wetting the glass with detergents, soap solution or colorless shampoo.
- Dry glued. Installed on a previously prepared surface, in places of contact with the surface of the frame, double-sided tape is glued to it, after which the surface of the film is treated with a hairdryer, due to which the effect of heat shrinkage is achieved.
The second method of insulating windows with film has become very popular due to the ease of installation while ensuring absolute tightness of the connection and the absence of areas with an accumulation of air bubbles after treatment.
Price
The cost of the material is influenced by several factors, the most important one was mentioned above. The rest are:
- Manufacturer of heat-saving film - German and Polish versions are often more expensive than domestic ones;
- Canvas size - larger materials are cheaper (in terms of size-price ratio).
Countries producing heat-saving films for windows:
- South Korea;
- China;
- Türkiye;
- Ukraine;
- Russia;
- Germany;
- Poland;
- Other.
Most often, the following brands can be embedded in online stores:
- Thermo Tap;
- NANOFILM;
- USB (Ultra SolarBlock);
- ESB technologies (Russia);
- Heat technologies (Poland).
The screenshot below from one online store shows prices for energy-saving (more expensive) window films.
There are, of course, cheaper options. For example, film from the Polish brand “Heat Technologies” can be purchased at a price of 500 rubles per set. There are two types of sets: 1.1 by 6 meters and 2 by 3 meters. The average price per square in this case will be 85 rubles. As a bonus, the set contains a 20 meter roll of tape.
The cost of insulating one window with film
A window measuring 1400 by 1300 mm will require approximately 1.82 squares of film and 5.4 meters of tape. Thus, the cost of thermal insulation with Polish film will be 150 rubles per window.
Where can you buy energy-saving film today?
There are three options:
- It can be bought in any construction department, on the construction market;
- In a store with a hardware department;
- Through any online store in the relevant industry.
Some manufacturers of metal-plastic windows began to produce their products with a protective film already glued to the surface of the glass.
The cost of the film starts from 150 rubles / pack (about 16 rubles / linear m) or is approximately 1900-2100 rubles / m2. Prices vary depending on the manufacturer, the quality of the raw materials used, the total thickness of the film and other technical characteristics.
Thermal insulation film
Thermal insulation film is an affordable and reliable thermal insulator for windows, which is manufactured using new technologies. The thinnest layer of this material is coated with a special molecular substance, which provides a thermal insulation effect. At the same time, it is absolutely transparent and does not damage the surface of the glass.
Main characteristics of this material:
- Can repel dust.
- It can be used both in the summer and winter seasons.
- They can be used to insulate not only windows, but also greenhouses, doors and loggias.
Also, the thermal insulation coating can have an opaque structure, which makes it stronger. This material can be used several times.
Installation of this material is carried out using the following technology:
- First you need to prepare the surface of the window - clean it from dust. You will also need the following tools:
- Hair dryer.
- Knife.
- Scissors.
- Scotch tape (double-sided).
- If the window has gaps or cracks, they should be repaired.
- After this, you need to glue double-sided tape to the frame.
- Next, take out the covering and cut off the desired part. Carefully stick it on the tape. At the same time, it is very important not to forcefully pull the film itself, otherwise its integrity may be damaged, which will lead to deterioration of thermal insulation.
- The material must be glued tightly so that it adheres well to the entire surface of the glass.
- Next, you should turn on the hairdryer and heat the material so that it “fits” even better to the glass and seems to completely merge with it.
Polyethylene film
This is the simplest and cheapest way to reduce heat loss.
This material has the following advantages:
- Low cost.
- Easy to install.
- Easy to care for.
Its disadvantages are:
- Insufficient heat conservation.
- The opacity of a material that does not transmit light.
- Possibility to use only once in one segment.
- It will collect dust.
Installation of polyethylene covering is carried out according to the following principle:
- Measure the required length of material based on the size of the window.
- Prepare the frame itself.
- Using sharp pins or tape, carefully attach the film along the entire frame, leaving no gaps through which heat could escape.
It is not difficult to care for such material; you just need to remove dust from it in time.
Energy saving film
It is considered the most practical and effective because it has the following advantages:
- Maintains the desired temperature in the room.
- Increases sound insulation.
- Keeps out the cold.
- Does not allow moisture to pass through.
- Protects the window from freezing, which increases its durability.
- Increases strength in glass (especially if it has a third glass effect).
- Does not transmit infrared rays.
However, energy-saving insulation also has its disadvantages:
- In spring, it may limit the amount of sun rays.
- If installed incorrectly, it will be difficult to re-glue the film.
Installation of this material is carried out according to the following scheme:
- Degrease the surface of the window frame with alcohol.
- Apply double-sided tape around the perimeter and remove the protective strip.
- Layer the film itself (it is folded in half).
- On a clean surface, cut it to the size of the window (also allow for a few centimeters to add for tape).
- Carefully (it is better to do this with someone’s help) glue the film with tape, holding it on the top and bottom sides. In this case, the material itself should only be glued to the frame and not touch the glass!
- Use warm air from a hairdryer to heat it up until the insulation itself stretches across the window.
Film installation
Necessary tools: stationery knife, scissors, household hair dryer. If wind blows through the frame, you must carefully seal the joints with foam rubber. It is advisable to carry out the installation together.
The ideal option is to remove the handles and stick the film on the window frame (around the perimeter).
- Apply special double-sided tape to a clean, grease-free surface (along the perimeter of the frame).
- Separate the 2 layers of film from each other. Your kit contains film folded in two layers.
- Let's cut the film (on a clean table) according to the size of the windows, taking into account the overlap of at least 2 cm on the tape. Check the correctness of the measurement by attaching the resulting piece of film to the window.
- Remove the protective paper strip from the double-sided tape. This is easier to do if you separate the edges of the paper and tape before pasting.
- Carefully (with two people, holding it from above and below) glue the film onto the tape. We recommend starting with small windows. Ignore the wrinkles. The main thing is to glue the film around the entire perimeter to the tape.
- The film is heat-shrinkable. To achieve ideal transparency and smoothness, use a household hairdryer to evenly blow warm air onto the surface of the film until the desired effect is achieved. Attention: do not stretch the film too much - it will then reach the ideal tension on its own.
- If the film breaks during operation, repair it with transparent tape.
If the film is inflated by the sail, the joints of the frames are poorly sealed. Remove the film, repeat the sealing job and stick it again. But it may not turn out beautifully.
When direct sunlight hits the film, it stretches to fit the window without losing its qualities. Unfortunately, this quality sometimes manifests itself during transportation, reducing the linear size by 10-15%. The film does not lose its properties over time.
Reflective film
It differs from others in that it may not allow the sun’s rays to pass through at all, but at the same time effectively retain the heat that is in the room. It can be used all year round.
The advantages of this material:
- Durability.
- Big choice.
- Effect even at a temperature of -35 degrees.
- Suitable for any interior.
- Retains heat coming from radiators and heaters.
- Minimizes heat loss.
- Thanks to a special aluminum coating, it reflects the heat emanating from the outside.
- Protects furniture, wallpaper and plants from overheating and loss of color from the sun.
- Creates a comfortable microclimate in the room.
- Thanks to light reflection, it protects from prying eyes from the outside, but, nevertheless, does not in any way impair visibility from the inside.
- Helps eliminate the problem of overheating and has an air conditioning effect.
- It has absolute transparency, exactly the same as ordinary glass.
- Softens the light and makes it more pleasant to the human eye.
The main disadvantage of reflective insulation is its high cost.
This material should be glued in this way:
- Prepare window cleaner, a knife, a rubber spatula and a spray bottle of water.
- Thoroughly wash the entire surface of the window and glass on both sides. Wipe dry so that there are no streaks.
- Using a spray bottle, apply a soap solution, which was previously diluted with water, to the adhesive film surface and glass. At the same time, you don’t need to shake it too much, otherwise a lot of soap bubbles will appear. This is necessary so that the soap makes it possible to calmly move the film along the surface of the glass to the desired position.
- Apply the film to the stack. As soon as it “sits”, it should be carefully smoothed with a spatula from the center to the edges, and all bubbles should be removed from there.
- After the entire surface becomes smooth, you need to let the film dry.
- Finally, trim the edges with scissors or a knife.
Features of applying energy-saving film to windows
If you have to install the material yourself, it is advisable to order a variety for soap solution. Film coatings with a self-adhesive or heat-shrinkable base must be applied by specialists; lack of experience will most likely affect the quality of the result.
Before gluing the material, it is necessary to perform the following preparatory steps:
- Wash the glass and wipe thoroughly with a dry cloth.
- Degrease surfaces using alcohol or a product based on it.
- Take measurements of the glass unit, lay the canvas on the table and trim off the excess with a utility knife or scissors.
- Apply soap solution to the glass surface using a brush or spray.
After this, you can stick the film; work is carried out starting from the top. The material is smoothed with a spatula with a rubber working surface or a roller, working from the center to the edges and from top to bottom. It is important to remove all air bubbles before the adhesive hardens. After this, the treatment is carried out with a household hairdryer, turning on the flow of hot air: the insulating coating will be completely straightened.
To install the variety on a self-adhesive base, you will need to degrease and clean the surface of the glass unit in the same way, cut it to size and place it on the window as evenly as possible. The backing layer is removed starting from the top side, the corners are first fixed, then smoothly removed further, while gluing the film.
The process is complicated in that it is necessary to carefully monitor the uniformity of application, immediately straightening the material and preventing the formation of bubbles. As for the shrink film, it is fixed with a special tape located around the perimeter.
DIY installation
It is better to glue the film yourself using a soap solution. To install the coating you will need a tape measure, a stationery knife, scissors, a hair dryer, and laundry soap. Operating procedure:
- Wash and dry the windows.
- After washing, it is advisable to degrease the glass with a composition containing alcohol.
- Take measurements of the window, then place the canvas on a wide table, carefully straighten it and cut it with a stationery knife.
- Apply the soap solution to the glass. It can be made from shampoo or baby soap. When applying, it is convenient to use a regular household sprayer.
- The cut cloth is placed on the glass. First, glue the upper part, and then, using a soft rubber spatula or roller, glue the middle part of the film, expelling excess soap solution from under it. First, the roller is applied from top to bottom, and then from the center to the sides.
- The canvas will stick firmly if there are no large air bubbles left underneath it.
- The last step is to blow the film with a hairdryer.
Heat-retaining film is an excellent modern way to save on insulation or air conditioning of an apartment or house.
At the same time, its installation is quite simple, and the cost is affordable.
Let's find out one way to make your home or apartment warm. Thermal film on windows will help maintain the desired temperature in living rooms and save on heating costs.
On the eve of cold weather, many owners of houses and apartments are thinking about insulating them. Creating a comfortable temperature in living rooms and saving on heating are important tasks. One of the options for solving them is to use thermal insulation film, which is glued to the double-glazed window. Experts say that windows account for about 60% of all heat loss in a home. Moreover, even if the profile of the double-glazed window is of high quality, the installation is carried out correctly, the slopes are hermetically sealed and insulated, the glass itself still accounts for up to 30% of heat loss. A thermal imager will help you make sure this is true.
Anti-fog PET film for windows: pros and cons
Thermal-saving material has many advantages:
- Effective protection against cold. Your apartment or house will have a comfortable microclimate both in winter and summer; you won’t need to spend a lot of money on heating or buy a split system or air conditioner.
- Preserving the integrity of glass under minor mechanical impacts. If, however, the window breaks, for example, from a stone, the fragments will hang on the film and will not spill into the room. This reduces the risk of accidental injury.
- The applied coating does not create glare, protects textiles, floor coverings and furniture from fading when exposed to sunlight.
- Relatively low price, due to which you don’t have to spend too much on insulation. Installing such a film is cheaper than installing reinforced double-glazed windows with several cameras.
- Easy installation. On sale you can find self-adhesive window film, the application of which takes a minimum of time.
- A rich list of insulation films available on the market, produced by both Russian and foreign brands. In stores you can purchase products from A-Solar and other companies.
It should be noted that the use of insulating film for insulation is not without its drawbacks. The disadvantages include the following factors:
- It becomes difficult to keep indoor plants on the windowsill. The amount of ultraviolet radiation decreases, so they begin to wither. To solve the problem, you can install phytolamps that provide a 12-hour lighting cycle. The disadvantage of this option is the increase in energy costs, which makes the energy-saving properties of the film meaningless.
- Reduced effectiveness of thermal protection coating in spring and autumn. It prevents the room from heating by the sun's rays, and if the heating has already been turned off or has not yet been turned on, the room will be cold. In some cases, condensation also forms on the windows.
- Some films that create a “thermo” effect are capable of reflecting most radio waves, and cellular communications will work poorly in the room.
Pros and cons of insulating windows with film
Among the positive qualities of window film with heat-reflecting characteristics, experts highlight:
- reducing costs for space heating and air conditioning;
- protection of interior items (curtains, carpets, furniture) from fading, achieved by preventing the entry of 30-90% of ultraviolet and infrared radiation;
- increasing the strength characteristics (up to 8 kg/cm2) of the window;
- reducing the brightness of daylight entering the room, which is an irritant that tires the eyes;
- ensuring a comfortable indoor microclimate;
- ease of installation - anyone can do it without special skills;
- the possibility of applying film to double-glazed windows, providing thermal protection for the floor and using material for insulating the balcony;
- Duration of operation - more than 10 years.
The disadvantage of heat-saving film is that it limits access to ultraviolet radiation (it captures up to 97-99% of UV radiation), as a result of which plants grow poorly on such a window due to disruption of the photosynthesis process.
The application of the film limits the passage of acoustic and electromagnetic waves, providing a feeling of comfort for people, creating a feeling of “home like a fortress.” The insulation film also interferes with wiretapping and video surveillance from the outside.
Heat-saving film for windows “third glass” - recommendations for selection
Before ordering material, you need to pay attention to the main characteristics of the coating.
Based on the method of application, window film is divided into several types:
- Self-adhesive . It is similar to protective film for screens of mobile equipment and electronics. The material comes with a hard backing; you need to be very careful when gluing it yourself, otherwise there will be bubbles or wrinkles on the surface.
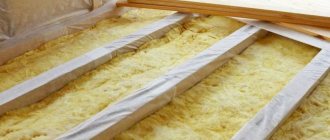
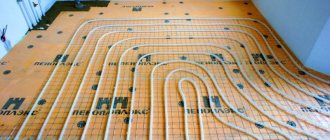
- Heat shrink . For installation, a special consumable material is used - thermal tape. Due to this, a layer of air is formed between the glass and the film, which perfectly retains heat. When applied, the surface has a crumpled appearance; when heated with a regular hairdryer, it smoothes out and acquires an ideal texture.
- Under a soapy solution . It is similar to film for tinting car windows, durable, practical, and retains heat well. This heat-insulating film is very easy to use; for gluing you need to use simple soap without aromatic fragrances.
The most effective are self-adhesive varieties that block most infrared radiation. In addition to the application method, you need to pay attention to other criteria:
- Manufacturer. The most reliable products are those of German, Polish, British and American origin; Chinese and Russian materials cost less.
- Size, delivery form (in sheets or rolls).
- The presence of an anti-reflective surface, dimming, and other additional effects.
Categories of heat-saving film
It is not recommended to purchase cheap thermal insulation coating that will crack or peel off when exposed to the sun.
It is worth paying attention to strong and durable materials. High-quality thermal protective film for windows is divided into three categories:
Self-adhesive. It resembles the film that is glued to the screens of phones and tablets. It's not that easy to stick on. This work can be done efficiently by specialists or those who have extensive experience.
Usually this material comes with a backing, the edge of which is carefully removed and the coating begins to be applied to the window. Gradually moving the backing away, glue the entire canvas
This work is difficult to do on your own; there is a high probability of material distortion. Heat shrink. Attached to the window frame using double-sided tape. An air gap is formed between the window and the material, which is a good heat insulator. The attached film at first looks like a wrinkled plastic bag. To smooth it out, you need to direct hot air from a hair dryer onto it. Under the influence of heat, the coating smoothes out and takes on a normal appearance. Film for soap solution. Externally, it resembles car tinting and forms a durable thermal insulation layer. Anyone can apply this canvas. It is advisable to use soap without aromatic additives (laundry soap, baby soap).
See also: insulating windows using thermal film.
Advice from the experts
Most experts recommend applying this material to windows for warmth only during the winter season: in March or April it is worth removing the film to reduce heat loss. During the period from October to February inclusive, the difference between the temperature outside and inside the house is most significant, so an additional heating surface is most useful. The rest of the time there is no point in leaving the coating on. If carefully removed, the film can be reused in the future.
During installation and operation, it is necessary to protect the material from damage: it is afraid of the impact of piercing objects, especially when deployed. It is advisable to trim the film with a margin; excess can be removed after application, using, for example, a stationery knife.
It is also important to make sure that the glass does not have external defects that could negatively affect the quality of the anti-fog film after installation.
If it is necessary to remove the material, carefully pull it by the corners, this allows you to remove the coating so that there are no traces of glue left on the glass surfaces.
When is it advisable to use film?
Most manufacturers recommend sticking heat-saving film on the windows of an apartment or balcony only during the cold period - from October to March. It is during this period that protection against heat loss through windows takes effect. The rays of the Sun, trying to penetrate into the room through the windows, carry practically no heat with them in winter, so the reflection of the UV part of the Sun’s light does not cause discomfort, since the films are absolutely transparent and do not give a tinted effect. But the IR (infrared) rays emanating from heating devices, trying to leave the room, are, on the contrary, reflected into the room. This is where the heat-saving properties of the film manifest themselves. Another important factor in which the heat-saving effect is most fully manifested is the technology of applying heat-saving film to glass.
How does heat-saving film work?
The metal layer of the film reflects infrared rays emanating from heating devices, and the heat remains in the room. This layer is practically invisible to the naked eye, so the lighting of the room does not suffer, especially since in winter you cannot do without additional light sources. In extreme heat, the film has the opposite effect: it acts as an air conditioner, leaving the room cooler than the air outside. An additional advantage of the heat-insulating film is that it strengthens the glass body, making it more durable and does not allow the glass to shatter into pieces upon a strong impact: even if the glass breaks, it remains attached to the film.
Negative properties of film
In addition to the positive ones, the film also has negative properties.
The most serious of these is the almost complete reflection of the sun's UV rays. Indoor plants growing on a windowsill or balcony suffer the most from this negative property of the film; they begin to wither and die. Therefore, if you use heat-saving film on windows in winter, be sure to provide 12-hour illumination with phyto-lamps for the plants located on your windowsills, which provide the correct radiation spectrum necessary for normal plant growth and allow you to compensate for the lack of natural light from the Sun. True, in this case, there can be no talk of any “energy saving” in your apartment. Even very economical phytolamps on LEDs, with daily illumination of plants for 12 hours, will completely “absorb” your savings on heating the room.
The second negative effect of heat-saving film applied to the windows of an apartment or balcony is its complete ineffectiveness in the spring and autumn. When the heating in the apartment is not yet turned on, or is already turned off, the film prevents the penetration of the sun's heat from the street. It becomes cold and damp on the balcony and in the apartment, especially in spring.
Another disadvantage of heat-saving films is their ability to reflect radio waves. The radio signal coming to your television antenna or mobile phone will be reflected by the metal coating of the film, and the signal coming from your mobile device will also be reflected inside the apartment.
Therefore, cellular communication in houses where heat-dispersing film is glued to the windows is, as a rule, very poor.
Advantages and disadvantages of heat-saving material
The use of thermal film has many positive qualities, among which it is worth noting:
- Strengthening. Heat-saving material increases the strength of glass up to 8 kg/cm². When broken, the glass does not crumble into fragments, but remains glued to the film.
- Saving. After gluing the film onto a single-chamber double-glazed window, its energy efficiency becomes comparable to a two-chamber design.
- Protection of interior items from fading.
- Almost 100% UV blocking.
- Blocking IR radiation within 30-99%.
- Depending on the type of material, one-way light transmittance.
Thermal film protects well from sunlight and retains heat.
However, thermal film also has disadvantages. The most basic is the almost complete reflection of ultraviolet rays, which negatively affects indoor plants. Therefore, if you use heat-saving film, then provide your plants with additional lighting with photo lamps that provide the radiation spectrum required for their normal growth and development.
The second drawback is the lack of effectiveness in spring and autumn. At a time when centralized heating has not yet been started, the thermal insulation coating will prevent the penetration of heat from the sun's rays into the room.
The film also has the unpleasant property of reflecting radio waves, which can affect the quality of signal reception going to a mobile phone or television receiver. This is due to the fact that metal spraying is used in the production of thermal insulation film.
How to mount film
It depends on what kind of film you are using - heat-shrinkable, self-adhesive or soap-based. In any case, you will need an assistant. The film can be sold in sheets folded in half or in rolls.
The first preparatory stage is washing and drying the window.
After which a layer of soap solution is applied to it from a household sprayer. To prepare it, you can use children's shampoo not colored with pigments or colorless dishwashing liquid. After that, a film cut to the size of the glass is applied to the generously moistened glass of the window. Be sure to first use the top edge, and use a soft rubber roller or a rubber scraper for washing windows to remove excess soap solution from under the film. First, from top to bottom - in the middle of the glass, and then - from the glued middle of the film to the sides. If possible, avoid the formation of large air bubbles. The film will not stick in these places. Small wrinkles and liquid bubbles will disappear on their own as the film dries and the film will completely straighten out.
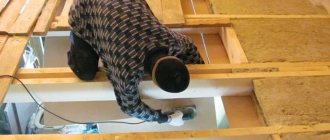
Self-adhesive films are also applied in a similar way. Only the base protecting the adhesive layer is not removed from the entire film at once, but a narrow strip is peeled off from the upper edge of the film. It takes two people to work. Having glued the top edge, the person at the top smoothes the glued film with a soft cloth, and the person at the bottom gradually removes the protective layer, pulling it towards himself. The main thing is not to rush.
Installation of shrink film is also best done by two people. Double-sided tape is glued along the perimeter of the window frame, a blank 2 cm larger than the glass is cut out of the film and glued to the tape along the entire perimeter. Top first, while an assistant must pull the bottom edge of the film by the corners, preventing premature gluing of the film. The resulting wrinkles and folds are not scary.
After gluing, the film is blown with hot air from a hairdryer, and it straightens and stretches itself. Shrink film is especially effective on the balcony, where it acts as a second or third glass.
Types by installation method
The method of gluing heat-saving film for window insulation is selected depending on the presence or non-special layer. The product can be of 3 types.
- Self-adhesive. Reminds me of the protective coating on mobile phone screens. The coating is glued carefully so that there are no wrinkles or bubbles on the surface.
- Heat shrink. When working, thermal tape is required; after attaching the film, a free space is formed between it and the glazing, which reduces heat loss. After gluing, the crumpled film is heated with a hair dryer, and it smoothes out perfectly.
- No special layer. Heat-saving film for windows resembles the material used to tint car windows. It is practical, lasts a long time, and protects well from loss of thermal energy. It is glued using a solution of ordinary soap that does not contain aromatic additives.
It is better to cover windows with film in cold weather; in summer it will not bring any economic effect.
Manufacturers of heat-saving film, their prices, the cost of insulating one window with film
We list the main manufacturers and the names of their thermal films:
- USB heat-saving film (manufactured by ultra solar block) is distinguished by its gray tint and the ability to block up to 2/3 of infrared and thermal radiation. You can purchase the product at a price of about 1,500 rubles per linear meter.
- Energy-saving tint film (manufactured by Sun Control Ice Cool) 70 GR has a thickness of 56 microns and is capable of transmitting up to 70% of the rays of the visible spectrum, the cost is about 1200 rubles / linear meter.
- Energy-saving shrink film “Third Glass”, 6 m2, having a thickness of 20 microns can be purchased at a price of 600 rubles/set (covering, double-sided tape). A film with a thickness of 30 microns costs about 800 rubles. for 6 cu. m.
- SaveEnergy 30 has a long service life of up to 10 years, the cost of 1 linear meter is about 600 rubles.