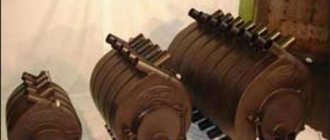
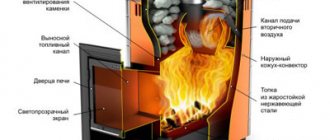
Scheme of construction of a single-fuel two-story furnace
Let's look at how to make a stove that extends over 2 floors. This is a very successful project - efficient and economical.
Construction of the foundation
Such a structure is much heavier than a conventional, single-tier one. Therefore, you need to take care of a strong foundation. It should be slightly larger than the stove base. Since the latter according to the project has dimensions of 900x900 mm, the dimensions of the “pillow” are 1000x1000 mm.
You will need:
- cement/sand/crushed stone;
- formwork boards;
- fittings;
- waterproofing material (for example, roofing felt).
The base can be either level with the floor or rise above it by several centimeters. The layout of the foundation is simple - first they make a sand cushion, then formwork is done and reinforcement is installed, and then the structure is filled with concrete.
After pouring, the foundation should be allowed to stand for about a month. Then the base is waterproofed. To do this, lay a roofing felt sheet - 1 or 2-3. Only after this is the heating stove laid out on two floors. The surface of the “pillow” must be strictly horizontal.
Construction of the furnace
For construction you will need high-quality materials and additional stove elements. The required quantities of both are presented in the tables.
Table 1. Masonry elements
Table 2. Additional elements
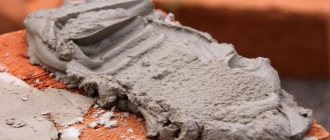
Masonry mortar is made from clay and sand. The ratio of components is from 1:1 to 1:2. It all depends on the type and quality of the clay. To determine the exact ratio, make several mortar balls or cakes with different proportions of the components. After this they are left to dry. Those balls that are not cracked demonstrate optimal parameters.
Layout diagram in rows (the numbers correspond to the row number):
- Attaches to the waterproofing layer. First it is laid out dry.
- A blower door is installed on the second and third rows.
- Installation of the firebox chamber. Fireclay bricks are used. The doors of the cleaning chambers are also installed here.
- An asbestos cord is installed on the sides of the bottom of the firebox. Afterwards a grate will be installed over it.
- Install the firebox door.
- From the 7th to the 10th rows - masonry according to the scheme.
- A corner is attached to the front part. Here the firebox is covered with a hob.
- From this to the 16th row, the cooking chamber is built.
- Mount corners that serve as support for solid brickwork.
- This and the next row are solid masonry. The integrity is violated by the three smoke exhaust openings indicated in the diagram.
- The door of the next cleaning chamber is mounted. The drying chamber is laid out along the 23rd row.
- A series of corners on which the chamber ceiling will rest.
- Installation of the cleaning chamber door. Along the 29th row - masonry according to the pattern.
- They brick up a couple of valves.
The diagram shows that after the 38th row there is a new numbering. These rows belong to the next tier. Rows 1-26 – laying according to the pattern. On the 27th, the final valve is installed. 27-30 – everything according to the picture. 31-32 – start of a chimney resting on the ceiling. If the latter is higher, rows are added. The “attic-roof” part of the chimney is laid in a similar way. If there is an attic, the scheme is the same. The output is a two-story attic oven.
Construction of a two-story oven with a hob
A two-story stove with a hob is undoubtedly a more interesting design option, combining in itself both a heating device and a device for cooking. Unlike the simplest design, designed only to produce heat, this stove is equipped with a cast iron plate with round holes and ring dampers. This option allows you to use not only wood, but also coal to produce heat, which makes the project quite attractive in terms of rational use of energy resources.
A special feature of the design is that it is large compared to conventional dimensions, firstly, and greater strength, secondly. The increased number of vaults in the project with a hob rationally distributes the heat obtained from burning fuel without overheating the brickwork, which is very important given such a large weight of the building.
Stoves on two floors
The main task of the stove maker when constructing a two-story stove is to, taking into account the characteristics of the room, distribute the heat in such a way that it will not be too hot on the first floor and not too cold on the second. When calculating the stove, you need to remember that warm air rises, which means that heating the second floor requires less heat than the first. Based on this, on the first floor you should not get carried away with the long length of the channels, but it is better to save them for the second floor. If the room on the second floor is not large, then a cap that accumulates heat after passing through the channels of the first floor will be quite sufficient for heating.
Double-deck furnaces should not be equipped with horizontal channels, as this significantly slows down the speed of gas movement, and therefore contributes to increased soot formation. If the smoke channels are excessively long, the temperature of the gases at the outlet of the pipe may drop below 100ᴼ C, which will inevitably lead to the formation of condensation.
The second floor stove must rest entirely on the first floor stove; it is strictly forbidden to place the second floor stove on wooden floor beams, since a wooden house will shrink over time and will tear the masonry at the junction of the stoves. Two-story brick stoves must be equipped with a direct stroke valve to facilitate ignition after a long break between fireboxes. If the design does not allow for a direct stroke valve, you can pre-ignite the furnace through the last cleaning door.
Is stove heating possible in an apartment building? Yes, the designs of furnaces make it possible to heat even fairly large buildings, if they are no more than two floors in height. There are several options for arranging the heating of two-story buildings, and, despite the new types of equipment that have appeared, stove heating is not losing ground. The stove can be used as a hob, as a fireplace, and as a regular solid fuel boiler, if it is equipped with an additional water circuit.
Dimensions
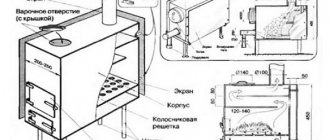
The dimensions of the firebox are designed for a single loading of approximately 50 kg of dry logs 50 cm long and up to 10 cm thick. Moreover, the logs are placed vertically in the firebox. From the firebox, gases rise upward through the first ascending chimney. At a height of about 3.2 m from the floor level, part of the gases is separated into the smoke circulation of the heating panel of the first floor, and the other rises to the top of the stove and enters the smoke circulation of the second floor. In the lowering channels of the smoke circulation of the heating flaps of both floors and in the last lifting channel of the first floor, special heat-exchange nozzles (outlets) are made - bricks protruding from the masonry into the channel. They increase the heat-absorbing surface in the smoke circulation and the rate of heating of the furnace masonry. The last lifting smoke channels of both floors (see rows 60 to 88 in Fig. 1 and 2) have a cross-section of 120x190 mm and end in the upper part of the furnace with a common chamber (rows 89 and 90 in Fig. 2). In this chamber, control bricks are installed, with the help of which the corresponding quantities of flue gases are distributed into the smoke circulation of each floor. These adjustment bricks rest on special protrusions 1.5-2 cm wide, made when laying out the channels in the 88th row. Adjustment of the distribution of flue gases is done once during the first test fires, moving the bricks and achieving uniform heating of the furnace masonry on the lower and upper floors. After the final installation of the adjustment bricks, the side windows of the chamber are tightly closed and covered with clay. The chimney is a mounted one, built directly above the stove. The pipe channel is closed and the draft is controlled by two valves installed in series. In places where soot may accumulate and ash settles in the chimneys, cleaning holes are made, closed with cleaning doors.
Video two-story oven:
Devices
The list of instruments and materials required for the construction of this furnace is given in table. 2. Its design is not particularly complicated, but requires quite high qualifications and accuracy from the performer
Particular attention should be paid to the quality of the masonry not only of the firebox and external walls of the stove, but also of the internal chimney channels, since communication between the stove’s smoke circulations not provided for by the design can lead to its inoperability.
TABLE 1
CHARACTERISTICS OF A TWO-STORY HEATING OVEN WITH SINGLE FUEL
Dimensions of the furnace in plan: fuel section……………………………………..890×1150 mm panel of the 1st floor……………………………………… 770×1020 mm shield of the Nth floor………………………………………. 770×950 mm Furnace height*…………………………………………………………………………………………………………7150 mm Heat-dissipating surface……… …………………………………………………………………………………..20.0 m2 Average heat transfer with a single firing of the furnace per day………………………. 5500 kcal/hour Total daily heat transfer…………………………………………………………..~ 132000 kcal Amount of fuel burned per day (dry firewood)………………… …………………………59 kg Heat transfer time after one fire ……………………………………………………24 hours * The full height of the stove is indicated for the ceiling height 3.4 m. It can be changed by reducing or increasing the number of rows in the masonry from 26 to 46 and from 60 to 82 rows.
TABLE 2 LIST OF DEVICES AND MATERIALS
Solid red brick (selected)……………………………………………………….1900 pcs. Fireproof bricks…………………………………………………………………………………………………………170 pcs. Red clay…………………………………………………………………………………………………………….2.1 m3 Fire-resistant clay………… …………………………………………………………………………………0.2 m3 Sand……………………………………………………… ……………………………………………………………………………………2.3 m3 Fire door 350×350 mm……………………………… ………………………………………………1 PC. Blower door 135×120 mm……………………………………………………………………………………….1 pcs. Cleaning doors 135×120 mm……………………………………………………………………………………………….5 pcs. Furnace valves 130×260 mm……………………………………………………………………………………………….2 pcs. Pre-furnace sheet 500×700 mm……………………………………………………………………………………1 pc. Grate 400×400 mm………………………………………………………………………………………..1 pc.
1. 2. 3. 4. 5. 6. 7.
Heating a two-story cottage with a stove is quite simple, and such a system will not require any special treatment. The only condition that must be observed when using any stove: regular heating. Stove heating of a two-story house is very convenient to use, but the price for this ease will be the complexity of installation, therefore, before constructing a stove heating system, it is necessary to draw up an accurate and specific work plan.
Stove heating can operate autonomously, and in this case there will be no shortage of fuel. True, you should always take into account the fact that the stove occupies a fairly large area, and you need to think about this in advance. In addition, being an excellent decorative element of the house, the operating temperature of the stove is practically impossible to adjust, which is why there is an uneven distribution of thermal energy.
Selection of coolant and method of transporting thermal energy
The most rational solution in two-story houses, in which there are a large number of rooms and there is an overlap between floors, is the implementation of water heating. With a complex building configuration, in the vast majority of cases, there is no alternative to such heating. The system is a looped structure of pipes through which coolant flows, and heat is transferred through radiators or air heaters.
Also, heating using a heated floor can be installed as an additional or sole source of heat. Its operating principle is similar to heating using radiators.
The choice of coolant is extremely important
The use of heated floors powered by electricity throughout the entire house is a theoretically feasible option. However, a number of problems arise in its implementation. Firstly, from an economic point of view, heating organized in this way is not always profitable. Secondly, there is a possibility that it is technically impossible to carry out the task of air heating.
Warm floor
Air can be used as a coolant in multi-level houses. In this case, it is necessary to solve the problem of its transportation. To implement such a project, it becomes necessary to create a system of channels in the space of the building, as well as equip them with fans to force air flow. Only in this way can organized heating ensure the delivery of heat to remote rooms and rooms located on the second floor.
Heating and cooking two-story stove
This two-story stove can heat two rooms on the ground floor and a room in the attic in small country houses. And the presence of a two-burner stove allows you not only to cook food if necessary, but also to quickly heat one of the rooms on the first floor. The photo shows the process of laying the stove and the stove in its finished form.
Rice. 1. Drawing of horizontal sections (orders) indicating the layout of bricks in each row.
From rows 1 to 4, an ash pit is formed and a blower door is installed.
Cleaning doors are installed on the 4-5th row, a grate is placed on the 5th row, and a combustion door is installed on the 6-8th row.
All doors are attached to the masonry using wire dia. 2 mm, and the frames of the combustion door are also wrapped with asbestos.
Please note that inside the firebox, the threshold and walls can be lined with refractory bricks placed on spoons, which are not tied with the rest. They turn out to be “independent” of the main masonry
During stove repairs, they can be easily replaced by first removing the stove.
A two-burner stove is installed on the 11th row. And since its length is slightly more than two and a half bricks, on the 12th row on the left and right the bricks are hewn or cut off so that the slab can be freely removed during routine repairs of the firebox.
Vertical smoke channels have a size of 13.5×13.5 mm
Particular attention should be paid when laying to thoroughly grouting their internal surfaces.
On the 16th-17th rows, a piece of pipe with a plug is embedded in the masonry or a standard 140x140 mm door is installed to ventilate the cooking chamber, which on the 18th row is covered with bricks resting on steel corners or metal strips.
Rice. 2. General view of the furnace and its sections
In the space from the 20th to the 24th row, you can, if desired, make a niche shelf for various household needs.
On the 20-21st and 25-26th rows, to clean the horizontal sections of the smoke duct, two more cleaning doors should be installed or two halves of brick should be laid instead.
On the 30th row, two valves are installed.
The stove option offered here is designed for a house where the ceiling height on the first floor is 2 m 60 cm, and on the second floor - not lower than 2 m 40 cm.
The design of the stove can be changed so that it can easily fit into a room with other dimensions if you add (or reduce) the number of rows in the masonry.
After completing the laying of the fireproof fluff in the ceiling, proceed to laying the second floor of the furnace by installing a cleaning door on the 2-3rd row, and a valve on the 27th row.
In order to light the stove, all valves must be opened. Hot gases, having passed the hob, begin to move in two directions: along the stove mass of the first floor and along the mass of the second floor. And if you close valve No. 1, only the first floor will heat up. To heat the array of the second floor, valve No. 2 should be closed, but valve No. 1 must be open.
I would like to warn you: it is possible to smoke through the gaps in the frames of valves No. 1 and No. 2. To avoid this, it is recommended to replace these valves with rotary valves (gates).
Rice. 3. Furnace layout plan.
To build such a furnace (excluding pipes and foundations), the following materials and equipment are required:
Red brick M-150—1080 pcs. Clay - 185 kg. Sand - 77 buckets Corner No. (70×70 mm) 80 cm - 2 pcs.; No. 94 (40×40 mm) 80cm - 6 pcs.; No. 4 (40×40 mm) 40 cm - 2 pcs. Furnace casting: fire door - 1 pc. blower door - 1 pc. cleaning door - 5 pcs. valve - 3 pcs. grate - 1 pc. two-burner stove - 1 pc. Steel wire dia. 2 mm - 20 m Asbestos cord dia. 5 mm - 10 m Roofing iron - 1.5 m2
Step-by-step instructions for building a two-story stove
The initial stage is pouring the foundation of the building. The depth of the foundation should be 10-20 cm below the freezing point of the soil. Above the level of the house foundation, the stove foundation should rise 50-70 cm to the level of the subfloor.
On top of the waterproofing layer, the first row of red brick is laid according to the row layout pattern. The masonry is done dry. Further construction proceeds according to the scheme for laying rows using clay mortar:
- The second row is placed on the solution. The masonry is done in conjunction with the bricks of the lower row.
- The next row forms the bottom of the blower;
- The blower door is installed. Wire tying is done.
- 4-5 rows form the walls of the blower. The internal walls of the ash pit are made of fireclay bricks.
- On row 6, firebox doors are installed. Starting from this row, the walls of the firebox are built with refractory bricks. An asbestos sheet screen is installed between the brick walls and the red brick masonry.
- Starting from the 9th row of masonry, the firebox arch is narrowed.
- From row 16 to row 20, chimney channels are formed.
- From the 21st row, an expansion is made and a distribution unit with dampers and views is formed.
- Two main channels are located at the level of the interfloor ceiling - for the summer flow of smoke and for the heating channels of the floor.
- Starting from the first row of the second floor, the row numbering starts from row zero.
- From rows 1 to 26, the masonry is carried out using the classic “stove-chimney” scheme.
- From the 31st row, a vault and a chimney are formed through the attic to the roof.
Thus, by adhering to the orderly scheme of brick laying using classical stove masonry techniques, it is possible to build a reliable heating device that can reliably provide heat to a large two-story house. Such a stove, finished with facing bricks or tiles, will always attract attention and be the central element giving warmth and comfort.
Important points related to the installation of solid fuel heating systems
You should choose the location for the stove with special care. It is advisable that it be erected against a load-bearing wall. This optimizes the operation of this equipment.
When you have to create stove heating for a building consisting of several floors, you should pay close attention to the design of the home. Installation of equipment for heating rooms can only be carried out taking into account the characteristics of the cottage
If the house is built of brick, then the role of the foundation for the furnace can be played by metal beams that are embedded in the masonry. This is done using concrete mortar.
Perhaps you decide to do everything yourself. I would like to warn you against such a step. The fact is that the construction of the furnace must be carried out by professionals. An unskilled approach can seriously affect its properties. To avoid having to overpay, it is better to immediately use the services of a specialist in this field.
Features of stove heating systems
It is necessary to understand that stove heating is a rather complex system that requires taking into account many nuances. If the craftsmen make one mistake or another, the owner of the house will have to pay. Below we will dwell on common problems that arise due to improper construction of the stove structure.
What are the advantages of heating a private house with wood, peat or coal? It should immediately be noted that they differ in autonomy. The oven can be built anywhere. She does not need access to communications. In some areas this is the only option available.
If there is no gas main at the location of the house, an alternative heating option may be a stove, which can be completely autonomous. Such heating is a classic option for organizing heating in a wooden house.
Undoubtedly, stove heating of a private house also has disadvantages. Firewood can be bought anywhere, but it needs to be stored somewhere. A small closet is clearly not suitable. A separate building will have to be erected. What can we say about space for flammable materials if the stove itself takes up a lot of space? In addition, to warm up a room with this device, you will have to spend a lot of time.
The stove takes up a lot of space in a wooden house. The larger it is, the warmer it is. In other words, it will be truly cozy in a large cottage. For example, it would be advisable to heat a wooden house using a stove if the building has enough space to accommodate it.
The low efficiency of this equipment often becomes the reason for searching for another way to maintain a comfortable temperature in the home. As a rule, the alternative is gas boilers, which we have already mentioned above.
Despite this, many still build such heating systems. Perhaps this is due not only to its good consumer properties, but also to the fact that the stove creates a special comfort that is difficult to put into words. You can only feel it. In addition, food cooked in it acquires a unique taste.
List of materials
Brickwork is a classic option for a furnace, as the material heats up evenly and slowly.
- single red brick M-200 – 1600 pcs;
- fireclay brick Ш-8 – 250 pcs;
- wedge-shaped fireclay brick Ш-44 – 100 pcs;
- smoke valve 26x26 centimeters – 2 pcs;
- smoke valve 13x26 centimeters – 3 pcs;
- damper (dimensions are determined by location) – 1 piece;
- two-burner hob (dimensions are determined as you go) – 1 piece;
- grate 20x28 centimeters – 5 pcs;
- combustion door 21x25 centimeters – 1 piece;
- blower door 14x25 centimeters – 1 piece;
- cleaning door 7x13 centimeters – 2 pcs;
- steel corner 60x60x5 millimeters - 1.5 m;
- steel strip 50x5 millimeters - 20 m;
- fireclay clay – 100 kg;
- sand, ordinary clay - the amount is determined according to the need for the material.
Advantages and disadvantages of stove heating
But the stove heating system also has a number of disadvantages. Firstly, dimensions and weight: a stove installed in the house will look good, but a significant reduction in usable space will still be noticeable. The large weight of furnace structures necessitates laying a foundation. Secondly, the system warms up for a long time. Of course, this quality works both ways, because prolonged heating subsequently leads to equally long cooling. The efficiency of stoves is also their disadvantage, since most of the heat will go either into the chimney or to heat the walls.
The hood of the first tier must be closed, but the holes for cleaning it and cleaning the lower passages are located on the second floor. The furnace and lining are usually made of fireclay bricks, and basalt cardboard must be laid between them. This solution helps prevent the possible occurrence of cracks in the masonry.
Video about stove heating:
Types of two-tier ovens
Brick structures can be of two types:
- With one firebox.
- With two fireboxes.
The main firebox is on the first floor. If you plan to add additional elements (cooking stove and stove bench), then all this is placed on the lower floor.
On the second floor you can install a fireplace, making the room a place of relaxation. Some owners add a false fireplace, but in any case, no matter what the design is, it speeds up the heating of the room.
Main types of brick kilns
So, depending on the functions performed, brick stoves in country houses are divided into the following main types:
- Heating stoves. As is clear, such a device is intended exclusively for heating indoor air. It can heat one room or the whole house if it is built into the wall.
- Cooking stoves are created for purely utilitarian purposes for cooking. In addition, you can dry mushrooms, berries and fruits on a brick cooking stove. Often such stoves are installed in summer kitchens.
- Cooking and heating furnaces. A classic structure that can not only heat a room or the entire house, but also be used for cooking food. A multifunctional multicooker with a solid history.
The technology of building brick stoves, proven over centuries, allows you to create a highly efficient device that will quickly heat the room, be safe to use and become the center of attraction of the entire house.
heating and cooking stove
Russian stove with heating, ordering and finishing
Creating Drawings
A Russian stove with a fireplace is quite a rarity. The scheme that will be considered combines a Russian stove with a firebox and a fireplace. If the stove is laid according to the attached drawings, the stove can easily heat approximately 40-50 square meters of living space.
The stove is built using a “two-tier hood” system and heats evenly on all sides.
A modern Russian heater (stove) with a heating element meets some household requirements. On a cast iron stove it is possible to cook a wide variety of food, and in the crucible - dishes of traditional Russian cuisine. The oven is quite convenient for drying various fruits, mushrooms and berries.
This design provides a very comfortable bed, on which, if wooden floors are attached, there may be enough space for two adults.
A variant of the Russian stove, in which there are arched ceilings of the openings.
The drawing contains the facade of a Russian stove (an option in which there are arched ceilings of the openings).
On the side of the stove at the base of the furnace there is a very large oven niche, which is heated from above and from the sides. First of all, it is done so that the stove has greater heat transfer - additional heat will flow into the room from it. In winter, our ancestors warmed young domestic animals in a similar oven.
Wood chips, which are built on the sides of the fireplace, will store wood chips so that the stove can be lit. In different places of the array, seven stoves of various sizes are provided, in which it is possible to quite conveniently store or dry small items. In addition, the stoves decorate the stove: together with a cascade of shelves and arches, they will give the fireplace an elegant look.
If desired, some of the arches can be replaced with straight jumpers. The stove can also be decorated by laying shelves and arches made of bricks of a different color or a more intense color.
Furnace operating modes
Externally, “Teplushka” is almost no different from an ordinary Russian stove. except that there is a firebox in one of the corners.
The Russian heated vehicle can be heated in two modes. With a traditional (Russian) firebox, you will need to remove the damper and open the valve. In order to switch to the second mode, in which the furnace will heat up somewhat more intensely, you will need to open the valves, then the combustion door of the hob. In this case, one of the valves will have to be closed, and the valve will close the crucible. In such a case, the combustion door will act as a blower.
From the furnace, flue gases through the valves, which are open, will be directed into the chimney.
The cooking stove can be heated in three modes. Firewood must be burned on firebox grates. In the first mode, hot smoke gases will directly enter the chimney through open valves and chimneys, heating only the stove and bricks of the combustion chamber.
The mouth must be closed with a damper so that the flue gases flow from the furnace into the lower heating chamber of the furnace.
In order for the heater to switch to the second mode, in which the stove bed and furnace will warm up, you will need to open one of the valves and close the other. The furnace is closed with a damper. Hot smoke gases will change their direction and enter the furnace through the window. After it warms up, gases will flow into the chimney through the open valves.
To switch to the third mode, simply close the valve. The hot smoke gases in front of the window will change their direction and descend into the smoke circulation of the lower heating of the stove. Having passed along the entire perimeter of the lower mass of the stove and given off heat in this place, the flue gases will enter the chimney through the window, after which they will escape into the atmosphere through the open valve. In the third mode, the lower part of the outer perimeter and the oven niche will be intensively heated.
Do-it-yourself Swedish oven
A Swedish stove can be built with your own hands only if the home craftsman already has strong mason skills and at least a little experience working with stoves.
The Swede itself is a rather complex structure, clearly not intended for primary training in such technologies.
Whatever furnace model is chosen, work still begins with the construction of the foundation.
The key material for building a heating and cooking unit with your own hands is red ceramic brick.
It is strictly forbidden to use previously used bricks for masonry, for example, from an old disassembled stove. For the firebox, use fireclay bricks.
To make a small oven you may need the following materials:
- Clay;
- Red and fireclay bricks;
- Doors of various types (blower, combustion, inspection);
- Valves;
- Cooking cast iron stove;
- Grate;
- Steel corners and strips;
- Mertel.
Like other types of brick ovens, the Swede should be laid on a foundation, which must first be prepared.
Its installation does not differ from the installation of a similar one during the construction of other heating, cooking and other types of stove and heating structures.
Remember that the size of the foundation must exceed the size of the furnace. It is laid out on a base of crushed stone and broken brick, then filled with concrete in layers.
The last layer of the foundation is subject to waterproofing and then bricks can be laid according to the order of the structure.
It is recommended to do the foundation at the stage of laying the foundation of the house itself, where the stove will be located.
But the stove is not always planned at the stage of building a house, so you often have to make holes in the finished floor. But in any case, the foundation of the stove and the base of the concrete building must be separated from each other. Otherwise, if the shrinkage of one side is unsuccessful, the other side may also warp, thereby deforming the entire masonry.
To build such a powerful unit, you need an appropriate foundation, which will go almost a meter deep into the soil, or more precisely 70 centimeters. If the soil freezes deeper, then the hole, accordingly, should be dug deeper. This information should be taken care of in advance.
If the construction of the stove takes place in an already finished house, and not at the construction stage, then marking the future Swede should be done directly on the floor with the condition that the hole in it should be 10–15 centimeters larger than the size of the foundation in all directions.
After the marking and hole in the floor are made, you need to mark the soil and dig a pit. Cover the bottom with sand moistened with water. Compact it too. The thickness of the compacted sand layer should be 10–20 centimeters. Specific data depend on the depth of the excavated pit.
Then there is a layer of crushed stone of 15–15 centimeters, also well compacted.
Next, install the formwork and attach roofing material to its walls for waterproofing. The formwork should rise above the soil layer to the entire height of the foundation, which is either 1 layer of brick short of reaching the floor, or rises 8–10 centimeters above it.
When laying, it is necessary to maintain the evenness of the surface and strength. The inside of the channels should have a smooth surface, and the seams should not contain voids or excess masonry mortar.
The seams should be controlled using a level; they should not be too thick. If ceramic bricks are used, the permissible parameter in this case is half a centimeter, and if fireclay bricks are used, then 0.3 cm, respectively. They should be bandaged by half a brick.
The main heat accumulator in a Swedish stove is the chimneys lined in the wall or rear wall of the stove.
The main option is vertical wells, the number of which depends on the desire of the owner and the length of the wall.
The lower part of the wall warms up worse, but less soot is formed, and cleaning the channels is much easier.
Horizontal channels warm up the lower part of the room better, but for cleaning you need to install more doors and soot accumulates much faster.
Both options do not require special knowledge and extensive experience; their laying is carried out based on the specific dimensions and design of the furnace.
Be sure to monitor the cross-section of the smoke channel so that it does not change during operation of the stove. If it begins to narrow even slightly, flue gases will not be able to escape properly and may enter the room, forming smoke.
The laying begins from the first row and it is very important to lay it out with maximum precision, because it is this that determines the reliability and strength of the entire stove. When laying it, use a level to check the evenness.
After the first row is laid out, install the door for the blower. Next, follow the order when laying subsequent rows.
To form the internal space of the blower, firebox and other internal elements of the furnace, the bricks should be cut down a little.
It is very important that the upper masonry part and the height of the doors match. In the next row the doors overlap.
Remember that bricks and metal have different configurations in terms of thermal expansion, when installing them next to each other, maintain a gap of one and a half centimeters.
Fill the gaps with dry sand, and seal the space around the combustion chamber and the firebox itself with fireclay.
Avoid deviations and distortions at this stage of work so that you can easily place a cast iron hob on the masonry for cooking.
Any Swedish stove is a heating and cooking stove. This means that the firebox is covered by a cast iron stove with burners on which you can cook.
A standard size stove is used; naturally, the device is adapted to our two-burner product 410 X 710 mm.
For culinary manipulations, two modes are used - winter and summer. The summer direct passage opens when the main smoke circulation is cut off using valves, this allows you not to overheat the kitchen in the warm season.
To ensure that the surface heats up well, the firebox is made relatively small in height - from 280 mm to 330 mm. Its width is up to 350 mm, and its length is up to 505 mm.
In most designs, an oven is a mandatory element. It is designed both for baking dishes and for transferring heat into the room. In fact, this is the main function.
The box plays the role of a convective heat exchanger: when the heat generator is ignited, you don’t have to wait for the bricks to warm up, a hot wave of air will immediately come out of the oven.
The oven is a steel box with almost the same dimensions as the firebox itself. The oven is installed immediately after the combustion chamber, but at some distance from the grate, so that the flame does not particularly touch the metal.
A distance of about 25-30 cm or a little less is considered acceptable (it can be moved closer if the wall closest to the burning firewood is protected with vermiculite or fenced off with refractory bricks or quarter-thick masonry).
A gap of about a quarter of a brick is left between the back wall of the oven and the masonry, so the product will be “washed” by hot gases on three sides.
In most Swedish home ovens, several large niches are created on the front side (as wide as a stove and 5-8 rows high). One is usually located above the stove, and the other is above it. Their direct purpose is drying clothes, shoes, berries, mushrooms, etc.
Below, during heating, the heat is more intense, because the cast-iron stove gets very hot, while the upper niche works only due to heat transfer from the brick.
And, for example, in the “Swedish simplified” model, a second niche is not formed; the only overlap above the hob is simply a convenient shelf.
Floors are mostly made straight horizontal, only occasionally they resort to the use of arched structures, which look more elegant, but require more materials and are more difficult to construct.
Sometimes, to preserve heat for a long time, the opening of the niches is closed with metal doors or wood inserts, resulting in a kind of low-temperature oven.
It is better to complete the construction of the stove with your own hands in the warm season, since it must go through a drying period, otherwise you will have to dry it with an electric fan, which will lead to additional costs.
First, preliminary drying is carried out for 2 weeks. Then - warm drying (the Swede is heated with a small amount of firewood for 12-14 days).
And at the final stage, it is necessary to hot dry the device, that is, bring the temperature to maximum and back several times a day.
A Swedish stove is an ideal option for heating a country house or small cottage.
Its design can be easily combined with other heating devices, for example, with a fireplace, and anyone can put it together with their own hands. The main thing is to have the desire, the material and the necessary tools.
Furnace laying process
- The foundation of the structure is laid out from two continuous rows of red bricks, which are installed in a horizontal position. Using a square, you need to check the accuracy of the angles made.
- On the 3rd row, it is necessary to provide for the laying of the ash chamber, the installation of the door, the laying of the lower chamber of the furnace, as well as the bases of the channels. This level of ordering is also made of red brick, while the blower is made of fire-resistant elements.
- Row 4 provides for the further formation of previously laid structural parts: vertical channels, ash chamber, bottom heating chamber.
- It is necessary, as before, to lay out the blower from refractory bricks, and the remaining elements are made of red. At the level of rows 3 and 4, the channels are interconnected.
- In the 5th row, the laying process begins from left to right. At this level, the ash door is closed and the ash chamber is finally formed.
- When installing a grate, be sure to take into account the expansion of the metal due to heating of the furnace. To do this, a small gap of 1.2-1.6 cm wide is left between the masonry and the grating. This gap is filled with sand. The Swede's ash pan is lined with fireclay, and all other elements continue to be formed from red brick.
- On the 6th row, the base of the firebox is laid and a door is equipped for it. An oven is installed on the same level. A wall is made of fireclay between the fuel chamber and the oven; the rest of the masonry continues to be made of red brick.
- The previously connected vertical channels are separated at this level. 3 are made from one U-shaped channel.
- Row 7 involves the further formation of a firebox made of refractory bricks.
- On the 8th row, they continue to fire the furnace, and also close the first vertical channel.
- Row 9 is located at the top level of the firebox door. So that the smoke from the combustion chamber smoothly passes into the chimney, on the 9th row the bricks from the bottom and top are cut at an angle.
- On the 10th row, the inner part of the oven is formed from fireclay, and at the same level the oven door is closed. Just as in the case described above, the bricks are cut at an angle. When laying this row, there is no wall between the firebox and the oven.
- The finished 9th row is leveled strictly horizontally, after which a hob is installed on top of it. When installing the stove, you should provide a cutout with a small margin, approximately 1.2-1.6 cm, since the metal will expand when the oven heats up. A metal corner 45x45 cm is installed flush with the outer wall of the structure.
- On the 11th row they begin to lay out the cooking chamber. The hole to the right of the slab is filled with brick. The row is made of red brick. At this same level, a door is sometimes installed so that the cooking chamber can be used as a second oven.
- The 12th row is formed from red brick. At this stage of work, the left vertical channels are combined into one.
- The 13th row is performed by analogy with the previous one, but during the installation process the vertical channel is again divided into two parts.
- The 14th and 15th rows are laid out similarly to the previous one; red brick is used in the work.
- On the 16th row you can block the cooking chamber. For this, metal corners measuring 45x45 cm are used. The level is made according to the same pattern as the previous rows.
- On the 17th row, the cooking chamber is blocked. To ensure that steam has somewhere to escape during cooking, when closing the chamber, you need to leave a hole the size of half a brick.
- The 18th row is carried out according to the ordering scheme; at this level a safety metal corner is laid, which will serve as a reinforcing element of the lower part of the drying chambers.
- In row 19, exhaust ventilation from the cooking chamber is formed, and drying chambers are also installed during operation.
- In rows 20 and 21, the installation of the furnace continues in the same way as the previous level.
- Row 22 is performed according to the same scheme, but at this level the smaller drying chamber is covered with a metal plate.
- On the 23rd row, the drying chambers are completely formed and the place where the exhaust duct valve will be located is prepared.
- In row 24, the first and second vertical channels are connected.
- When laying the 25th row, the hood is combined with the third vertical channel.
- The 26th row is formed according to the order rules. The chambers for drying clothes are covered with a metal corner and an overlap is made over it. A metal reinforcing mesh is laid on top of the structure.
- In the 27th row, the upper part of the Swede is completely closed, leaving only the third vertical channel open. During the work, the perimeter of the masonry should be increased by about 3-4 cm.
- In the 28th row, a side is formed on the stove and the perimeter is increased by another 3-4 cm.
- When completing the 29th row, the perimeter is returned to the previous values.
- On the 30th row, the base of the pipe is laid; a place is provided in the masonry for installing a valve. The further work process is aimed at forming a pipe of the required height.
The finished stove should be dried. If it was laid out in the summer, the structure will dry naturally, but in winter you can use a fan and then heat the stove for 2 weeks.
Operating rules for the stove
Like any other stove, before it is put into operation, the Swede requires compliance with basic requirements:
- Do not light the stove immediately after installation. She needs time for everything to freeze and dry thoroughly. It is very important to take weather conditions into account. If it is raining outside, you should wait until it stops.
- During the first fourteen days it is heated in small portions. This is necessary for the entire structure to dry thoroughly.
- By placing crumpled newspapers in the doors, you can maintain the required temperature. A structure can be considered dried only when the paper has stopped smoldering and is completely dry.
Sometimes problems arise after installing the furnace.
For example:
- The structure “fell over” to one side. This means the foundation is not dry enough. This is a big nuisance. The oven will have to be disassembled and reassembled.
- The bed doesn't heat up. This means that the air exchange system inside the furnace is not installed correctly. It is likely that the stove will have to be dismantled and checked according to the diagram to ensure that everything is done in strict accordance with it.
- The stove or oven does not heat, which means that the open fire is too far away from them due to the large number of rows. They need to be reduced; to do this, the system must be disassembled.
- Smoke remains in the room - the chimney and pipe do not function. This issue needs to be resolved urgently to avoid an accident. The stove is disassembled and checked for compliance with the diagram. The chimney can be very narrow and sometimes needs to be widened.
- The oven heats up very quickly and cools down quickly. Perhaps the wrong and low-quality brick was chosen, which does not meet the state standard. To solve the problem, you will have to redo all the work.
- Do not operate the furnace structure if the unit is not functioning properly. It is better to take the time and redo it than to suffer from carbon monoxide or a weak firebox.
Stove heating of a two-story house
Today, Yuri Mikhailovich Kishulko, a hereditary stove maker, gives us advice on stove heating. Yuri Mikhailovich's father, a self-taught stove maker from the Vitebsk region, spent his entire life improving his skills. The son helped his father from early childhood, absorbing the wisdom of the stove business. Today Yuri Mikhailovich is a virtuoso and a true enthusiast of his craft, easily building complex stoves capable of heating a two-story house and fireplaces in small living rooms.
When arranging stoves indoors, you should strive to ensure that they are located primarily near the internal main walls. It is not recommended to install stoves near external walls, as this complicates and increases the cost of building chimneys. If possible, the stove should be open and freely heat the room. To heat the kitchen, living rooms and utility rooms, stoves should be grouped into a so-called thermal unit. In this case, the chimneys are combined into one brick riser.
Compact stoves and hearths up to 700 kg can be installed directly on a solid floor. If this is not enough, the floors are reinforced with additional beams. Furnaces weighing more than 700 kg are placed on a foundation. The foundation is buried into the ground at least 0.5 - 0.6 m for one-story furnaces without mounted pipes and at least 1 m for two-story furnaces and main pipes. The foundation of the furnace cannot be tied to the masonry (foundation) of the building wall, as different shrinkage is possible.
If you have two floors...
The designs of the bases for the furnaces of the upper floors are chosen depending on the structures of the building walls, the relative position of the main walls and the orientation of the furnaces themselves. The simplest solution is to install the upper floor furnace on top of the lower floor furnace, however, when repairing the furnace on the first floor, it becomes difficult to maintain the upper furnace. To more evenly distribute the load on the lower furnace, a reinforced concrete slab is laid on it (at the level of the interfloor ceiling). Sometimes, during laying, racks made of square, round or profiled steel are embedded into the mass of the lower furnace (in the corners), and the lower ends of the racks are embedded in a solid foundation. A solid platform is made from channels and corners on top, on which the upper stove is installed.
In brick buildings, it is widely used to install products on rails or steel beams of various profiles embedded in brickwork to a depth of at least 38 cm (one and a half bricks). To prevent the brick from collapsing, sealing is done using spacers. The space between the beams is filled with lightweight concrete or brickwork. When laying out the stoves themselves, it is better to use a clay mortar; when heated and cooled, it will work in unison with the brick, which means your stove will remain intact and functional for many years. The brick is laid in the form of a vault. The beams are fastened with ties. If you have a dacha, the most practical way to heat the second floor is to install a small hood or shield fired by a stove located on the first floor. Sometimes the shield can be interlocked with a small fireplace (if the height of the chimney allows). If stove heating is the main heating system in your home, then you need an option with stoves on the first and second floors, which can be heated separately. Based on this, a house design is made, rooms are assigned, etc.
Let's take a closer look at a heating two-tier thick-walled stove with heat output on the first floor - 3.7 kW and on the second - 2.7 kW, its dimensions are 64x115 cm. If desired, on the first floor you can install a heating-cooking stove with a stove and an oven, or, if necessary, a heating larger oven with built-in oven.
Fire-resistant bricks (fireclay) are not produced in Belarus. Only imported bricks from neighboring countries are sold. The average price for it is 2000 rubles per piece. Tiles for cladding stoves in Belarus are produced by the only enterprise, KUP Volkovyskstroy-materials. Ceramic tiles are intended for cladding and laying the front surfaces of heating household stoves, kitchen stoves and fireplaces.
The design of the tiles is strong, durable, and securely attached to the brickwork. Tiles are sold in ready-made sets, their cost starts from 800 thousand Belarusian rubles for the simplest option.
Features of designing houses with stove heating
Central placement
As already mentioned, one of the most acceptable options for installing a stove in a house where a water circuit is not used for heating is central placement. The most common way is to make the stove become a single point for all adjacent rooms. In such cases, the hearth is installed in the wall between the rooms, and the firebox is installed either in the kitchen or in the corridor.
Multiple heat sources
Another option that is offered to those who want to get a house with stove heating is the creation of several heat sources. The disadvantage of the idea is that each of them will need to be heated separately and, accordingly, more fuel will be spent to heat the premises. Centralized placement of the stove solves the problem much more effectively.
Sword size
Another nuance that is not taken into account by many customers who want to build their home with stove heating is the size of the stove. There is often a misconception that the larger the stove, the more heat you can get from it, and the more efficient it will be. On the one hand, this is indeed true. However, you must understand that the larger the stove, the more difficult it will be to heat it to the required temperature. At the same time, it will spend much more fuel than a small one.
The optimal solution in this situation is to build a small stove, but of a design that will allow you to retain heat longer and lose less heat. Then heating will be more affordable.
Two-storey house
If you have to deal with a two-story house that uses stove heating, then a different approach is applicable here. A special stove system is installed, when the lower part has all the necessary attributes - a stove bench, a hob and an oven - and on the second floor only a heating panel is used. Such a house requires very durable materials and precise calculations so that the brick structure on the second floor does not lead to damage to the house.
Some oven designs can be designed so that only the cooking portion is used. In this case, heating is not produced, which is very convenient in the warm season.
Air heating
In this category we include all methods of heating without the mediation of a coolant - water, oil, antifreeze and any others. The air in the room is heated through direct contact with the heating element.
Buleryan
The stove is a firebox surrounded by thick pipes with open ends up and down. The pipes heat up and provide convective mixing of the air in the room.
Directing them in different directions speeds up the process. If it is necessary to heat several isolated rooms from the buleryan, air ducts with natural or forced circulation are installed.
Advantages:
- Existing furnaces ensure almost complete combustion of fuel due to the fact that they provide long-term smoldering with a limited supply of oxygen. This ensures efficiency that is unattainable for traditional stoves.
- Buleryan does not take up much space and does not require its own premises. A stove for heating two floors can easily fit in the living room or dining room. There will be no soot or odors.
- Installing air ducts will cost less than installing a water heating system. Although, taking into account the necessary thermal insulation, not by much.
Flaws:
- It is almost impossible to lay air ducts after finishing the final renovation without spoiling the aesthetics of the room. The heating plan for a two-story house - both the heat source and the wiring - will have to be thought out in advance.
- Any stove heating of a two-story house is associated with the need to store reserves of firewood, coal, pellets or peat briquettes.
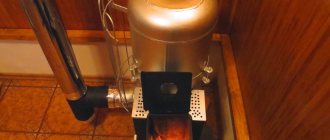
In the photo there is a buleryan stove in the living room.
Brick oven
An ordinary Russian stove usually has very impressive dimensions.
It occupies up to a third of the house’s area and is quite capable of heating several rooms. It is clear, however, that two-story heating stoves are somewhat more complex structures.
In general, there are almost no standards in the field of designing brick kilns. The specific implementation depends on the size of the room, the location of the stove, the imagination of the stove maker, or, alternatively, the order of a ready-made solution found on the Internet that was invented by someone else.
A typical two-story heating stove has a firebox located below and a cap or duct chimney that makes several turns on the second floor.
Execution options can be varied. For example, it is enough to place a cast-iron stove on the firebox, laying an asbestos cord under it to isolate the room from combustion products - and you will get a heating and cooking stove on two floors.
The stove can be placed in the middle of the room or in the corner; finally, if desired, you can even organize water heating of a two-story house with natural circulation by simply placing a coil in the firebox.
Dignity:
In the absence of gas, stove heating is the cheapest heating method. A brick stove pleases its owners with its great thermal inertia: it is usually heated once a day for 2-3 hours, and the rest of the time it releases the accumulated heat.
Flaws:
- Again, you will need a supply of fuel, which will take up a fair amount of space in the yard.
- Folding a stove so that condensation does not seep through the masonry, so that the stove does not crack and smoke into the room is an art that is gradually being lost.
If you are not afraid of experiments, you can try to do this work yourself; but in the absence of any experience, it is better to be prepared for various surprises.
With one firebox
A special feature of a two-story oven is its high heat capacity. It has good heat dissipation. It reaches 5.5 thousand kcal/hour. At the same time, for constant heat, you can heat the stove once a day for 2-2.5 hours, while the bricks heat up well and the air in the room will be warm for a long time. Firewood consumption is no more than 60 kg.
Firewood for one firebox
Description of design and materials
The design of a single-fire stove is designed in such a way that its operating period is significantly shorter than that of stoves with two fireboxes.
The internal structure consists of chimney channels. On the second floor the chimney is laid out vertically. To separate the interfloor heating system, metal dampers are installed. They prevent the free passage of combustion products in the form of gases.
As they linger, the gases begin to cool, forming condensation on the inner walls of the chimney. As a result of exposure to moisture, the masonry begins to collapse. Double-furnace models are better because they ensure quick heating of the furnace, and condensation does not form.
Description of single-fuel design:
- There is one main firebox on the ground floor.
- In terms of dimensions, the building has the following dimensions: 89x115 cm.
- Height – 715 cm.
- Heating panel on the first floor 77x102.
- The second floor is equipped with a shield with smaller dimensions - 77x95.
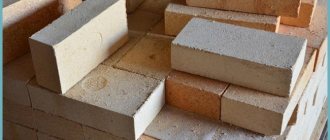
In order to start laying the stove, you need to stock up on the following tools and building materials:
- To line the stove you will need red ceramic bricks.
- The interior is lined with refractory fireclay bricks.
- To work with facing material, red clay is useful.
- To line the inside of the furnace structure, use refractory clay.
- When mixing clay mortar, you cannot do without sand.
- Grate for furnace equipment (stacking firewood in the stove).
- To prevent accidentally flying coals from falling on the floor and damaging the coating, a steel sheet is laid in front of the firebox.
- Door for the firebox.
- Blower door to regulate the air supply, which is necessary for good combustion of the flame.
- Cleanout doors for installation in the chimney in order to have access to the channels (the number depends on the length of the chimney and design features).
- Valves in the chimney to regulate the release of warm gases.
Sections of the building and masonry diagram
By carefully examining the cross-sectional drawing of a two-story stove, you can see the structure of the smoke exhaust channels and how gases should move through them.
Internal organization
In cross-section, it is easy to distinguish refractory bricks from facing bricks - they differ from each other in color.
It is unacceptable to use ceramic bricks for bonding with a refractory row. The same applies to tying the facing row with refractory bricks.
The design is completed by a mounted pipe, which is erected above the furnace.
If you use the presented diagram, then the structure shown in the drawing is erected with ceilings 3 m 40 cm high. If necessary, the height of the furnace structure can be easily changed. To do this, you need to make appropriate adjustments during construction in rows 26 to 46, as well as from 60 to 82.
Attention! Changing the data that was entered into the project will result in a deterioration in the performance of the finished furnace.
Construction of the foundation
A two-story structure weighs much more than a brick oven for a one-story house. For this reason, the foundation on which the structure will be erected must be more massive, capable of withstanding significant loads.
Foundation for the stove
The size of such a foundation exceeds the base of the stove. For example, if the base is 1000x1000, then the pillow will be 1100x1100 mm.
Before pouring the foundation, you need to prepare the following building materials:
- For concrete mortar, sand, cement and crushed stone.
- Before pouring concrete, formwork is built. To do this, you will need boards (old ones will do, but they must be strong and able to withstand the load from the expansion of concrete).
- The ligament is reinforced using reinforcement or reinforced mesh.
- To protect concrete from moisture, waterproofing is laid on the surface of the soil. It could be roofing felt.
The foundation area can be higher than the base of the floor or at the same level with it. To do this, you need to do the following:
- Fill the sand bed.
- Assemble formwork from durable boards.
- Reinforce the site.
- Fill with concrete mortar.
The foundation needs to be dried. The drying period lasts at least a month. Then several sheets of roofing material are laid on the base for reliable waterproofing. The construction of the stove begins on them. The base must be level, without slopes.
Construction of the furnace
The construction of a stove is impossible without additional elements such as grates, doors and other parts. The most important thing is to prepare a high-quality clay solution. The quality of work of the entire structure depends on this.
Due to the violation of the proportions of clay, sand and cement, the stove will crack, carbon monoxide will penetrate into the room, and this is dangerous to human health.
The number of components in the solution depends on the fat content of the clay: the mixing is done either 1:1 or 1:2, but there is very fatty clay that requires a ratio of 1:3.
To conduct testing, you need to make several different solutions and roll them into balls, leaving them to dry. After drying, the material from which the balls do not crack is selected.
Exterior finishing
The outer side of the object can be lined with fire-resistant bricks and, after plastering it, painted or applied other fire-resistant finishing compounds.
Finishing option
Some people prefer simple facing masonry made of ceramic bricks. There are several color options for this finishing method.
We can recommend ceramic tiles, but for a stove of this size you will need a lot of this material.
You can learn more about laying a stove on two floors from this video: