Almost every person's day begins and ends in the bathroom. A morning invigorating shower helps you gather strength before the working day, and an evening aromatic bath helps relieve the fatigue accumulated during the day. But if the bathroom is cold, then these pleasant procedures can easily turn into a burdensome duty. Therefore, it is very important to insulate the bathroom, and first of all this applies to the floor. Today, there are several ways to insulate a bathroom floor - from laying various insulation materials to installing “warm floor” systems. Let's take a closer look at the most popular options.
Floor insulation with mineral wool
Mineral wool is one of the most common and fairly effective insulation materials. The material can withstand sufficient mechanical loads, is resistant to fire and has excellent thermal insulation properties. However, for a bathroom, mineral wool is not the best insulation option due to its increased hygroscopicity, or, more simply, its increased ability to absorb moisture, which as a result can lead to an undesirable increase in humidity and the formation of various fungi.
If you nevertheless decide to use mineral wool as insulation for the bathroom, you should make sure that waterproofing work is carried out along with the insulation, and at the highest level.
Insulation of walls using plaster materials
“Warm plaster” is excellent for thermal insulation. A distinctive feature of this material is that it has a high level of vapor permeability, as well as a low level of thermal conductivity. A high level of vapor permeability is formed due to the cement base. A low level of thermal conductivity is achieved thanks to certain additives in the overall composition.
Plaster materials are divided into several types:
- vermiculite;
- sawdust;
- polystyrene foam.
The main advantage of “warm” plasters is that you can get a uniform coating that will not allow the cold air ceiling to pass through. There is no need to level the surface of the bathroom walls. Also, thanks to excellent adhesion, plaster materials can be safely applied to absolutely any surface. The main disadvantage of this material is that it applies a thick layer to the surface of the walls, which can visually significantly reduce the area of the bathroom.
Before applying “warm” plaster materials to the walls, the surface must be primed.
It is necessary to pay attention to the sealing of seams in the bathroom. To seal the seams, you need to use foam. Seams and joints should be sealed correctly. Be careful when sealing.
Application of foam plastic
Polystyrene foam is relatively inexpensive and at the same time a fairly good way to insulate a bathroom floor. Unlike mineral wool, it practically does not absorb moisture and can be laid on any floor surface, be it wood, concrete or old ceramic tiles. The leveling screed can be placed directly on top of the foam, having previously covered it with a special reinforcing mesh.
Choice of insulation
Since there is constant high humidity in the bathroom, you cannot use natural types of insulation, and those that absorb moisture. When the insulation gets wet, it loses its properties and becomes useless. That is, in the bathroom floor insulation cannot be done using mines. cotton wool or regular foam.
Extruded polystyrene foam is well suited for such conditions. It has a high density, almost does not absorb moisture and has one of the best thermal insulation properties. The price of this material depends on its thickness and density and starts from 100 rubles per square.
Characteristics of extruded polystyrene foam
In addition, usually the bathroom is not just insulated, but also has floor heating. Provided that there is a heated room under the floor, foil floor insulation will be suitable as a layer of insulation. It consists of several materials: a thin layer of aluminum foil on top, and a layer of polyethylene foam inside. This material not only protects well from heat loss by reflecting thermal radiation, but also insulates moisture.
Note! In order for the aluminum insulation layer to be protected from the alkaline effects of cement, it must be covered with polyethylene on top. It is worth buying only these types, since only they are suitable for use with a screed. Otherwise, you risk losing the heat-reflecting layer - in a couple of weeks, it will simply corrode.
The photo shows a foil backing
The greater the thermal resistance under the heating elements of the warm floor of an apartment or house, the more heat will go upstairs. This is especially important for water heated floors, since they have less power than electric ones. For other types of heating mats, insulating the floor in the bathroom will reduce energy consumption; you will not heat the ceiling of your neighbors below.
Penoplex as a material for insulation
Another insulation suitable for use in the bathroom is penoplex. It is made of specially foamed polyethylene, therefore it is absolutely resistant to moisture, and the air bubbles filling it provide fairly low thermal conductivity. In addition, the material is flexible, easy-to-cut sheets, so there are practically no difficulties when laying it. Another advantage of penoplex is that this material will provide fairly good waterproofing.
Selection of material for insulation: main characteristics, installation methods
The material for thermal insulation should be selected according to its main characteristics:
- minimal vapor permeability - to keep the walls dry;
- thermal conductivity should also be minimal;
- flammability class of insulation and cladding – G 1;
- the material must not contain or release toxic substances ;
- An important indicator in many cases is the speed of installation of insulation and its cladding, the availability of technology for carrying out insulation work independently.
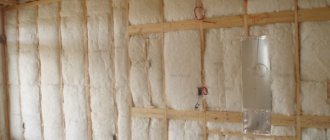
Use of polyurethane foam
This method of floor insulation is quite popular primarily because of its cost-effectiveness. Polyurethane foam is applied by spraying, which eliminates the consumption of excess material and the appearance of “residues”. In addition, polyurethane foam is an excellent vapor and water insulator. Its only drawback is that to work with it you will need special equipment, which does not make sense to purchase for the insulation of one bathroom, so it is almost impossible to carry out insulation with polyurethane foam yourself.
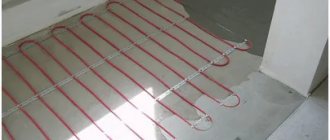
Warm floor system
All of the above methods of floor insulation, of course, can be used in the bathroom, but they all have one common drawback. The fact is that each of these methods leads to a fairly noticeable increase in the floor level, and in accordance with safety requirements, the floor in the bathroom must be lower than in other rooms. Therefore, the most acceptable way to insulate the floor in the bathroom is to install a “warm floor” system.
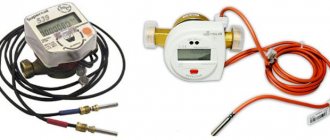
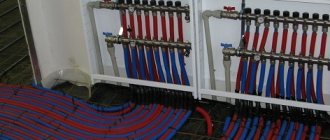
There are two types of underfloor heating systems: water and electric. In the first case, the heat comes from hot water, which circulates through pipes laid in the floor, and in the second, from a special cable connected to the electrical network. Of course, the choice of a “warm floor” system is a purely individual matter, but it must immediately be clarified that water systems require the installation of an additional water heating boiler, since the “warm floor” system is strictly forbidden to be connected to central heating systems . Naturally, this significantly increases the cost of a “warm floor”, so the most popular today is the electrical system.
It is worth making a reservation that if we are talking about a private house with an autonomous heating system, installing a water heated floor can be quite economically justified.
Installation of an electrical “warm floor” system is quite simple and consists of the following steps.
Selecting and preparing a place to mount the thermostat
Work on laying heated floors begins not on the floor, but on the wall. The first step is to choose the place where the thermostat will be located and drill a hole to mount it. It will also be necessary to make a groove for laying the power cable and temperature sensor wires.
When gating, it should be taken into account that the power cables are in plastic or corrugated protective casings, so the groove must be of sufficient width and depth.
Preparing the floor surface
The floor must be cleaned of dust and debris, and cracks and potholes must be sealed with cement mortar or screed.
Laying thermal and waterproofing
To prevent heat from being wasted in the “wrong” direction, it is necessary to lay a layer of thermal insulation before laying the heated floor. Considering that its task will not be full heating, but only the prevention of unnecessary heat loss, for this purpose you can choose thin thermal insulation materials, the thickness of which does not exceed two centimeters. The penoplex or polyurethane foam described above is perfect for these purposes.
Thermal insulation is laid not only on the entire surface of the floor, but also on adjacent sections of walls 10-15 centimeters high.
It is necessary to lay waterproofing on top of the thermal insulation layer. This is especially true in multi-storey buildings, since this significantly reduces the risk of flooding neighbors. living below.
Pre-screed
To avoid overheating of the cable, as well as to create a solid base for laying heating mats, it is necessary to make a cement screed on top of the waterproofing layer. Its thickness should be at least three centimeters, since otherwise there is a fairly high probability of the solution cracking during the drying process.
To reduce the overall height of the structure, the screed can be replaced with a metal mesh with a cell width of 1-2 centimeters.
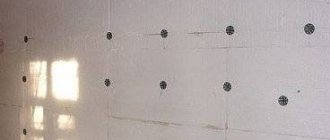
After the screed has dried, the floor is covered with a layer of mounting foil, which will reflect heat in the right direction and also allow it to be evenly distributed over the entire floor area. The edges and joints of the foil are secured with special foil tape.
Laying heating mats
Before starting this stage, you need to carefully study the instructions supplied with the heated floor!
Laying begins with the “cold end”, which is tucked into a protective corrugated casing and secured with tape in a pre-prepared groove.
Be sure to leave enough cable to attach it to the thermostat.
When laying, be sure to ensure that the heating cables do not cross or touch. The bending radius at the cable turning points should not be less than five centimeters. A “terminal coupling” is attached to the end of the cable. It should be positioned in such a way that it will subsequently be completely hidden by the final screed.
When the cable is laid, it is necessary to install the thermostat. It, like the power cable, is installed in a corrugated pipe, the end of which is attached to a prepared groove. The end of the pipe located on the floor must be closed with a plug in order to prevent contamination of the thermostat with the final screed solution.
The use of a “corrugated pipe” in this case is very important, since if the thermostat fails, it can be pulled out and replaced without any problems.
It is very important that the pipe with the thermostat is laid parallel to the power cable and does not cross it.
Test run of the system
Before making the final screed, it is imperative to make sure that the entire system is working. To do this, turn it on for a short time.
It is recommended to sketch, or even better, photograph the installed system, and attach the photo to the warranty card. Naturally, it makes sense to take photographs only when the entire system is working correctly.
Final screed
The last stage of installation of a heated floor is the installation of the final screed. For this, you can use ordinary cement mortar, but it is better to purchase a special ready-made mixture recommended by the manufacturer.
After the screed has dried, you need to cut off the hydro- and thermal insulation protruding along the perimeter of the walls and you can begin laying the floor covering.
Insulation of concrete floor
Foamed sheet materials
If the height of the room allows you to raise the floor by 15-20 cm, remove the covering and remove any remaining adhesive. Fill up any uneven surfaces. Cover the entire floor with insulation. Use thick polystyrene sheets, rigid foam and other dense materials. The thickness of the sheets is 3-5 cm. Place a two-layer reinforcing mesh made of steel or fiberglass reinforcement with a diameter of 10-15 mm on top of them.
Install beacons from boards measuring 25*125 mm. These boards will provide a smooth horizontal surface of the screed and provide temperature compensation for the concrete. The drying time of the screed is 25-30 days. After drying, lay down the covering. But whether a floor screed is needed in a panel house, where the ceiling height is already low, is up to you to decide.
If the ceiling height does not allow such an increase, use wooden blocks measuring 30*30 or 30*60 mm. Lay them across the room along the entire length. Secure with anchor dowels. The distance between the bars is 20 cm. Fill the space between them with foam plastic 25-30 mm thick.
Cover the floor with vapor-permeable film and cover it with 20 mm thick plywood. Join plywood only on blocks. Secure with self-tapping screws 35-40 mm long. Recess the screws by 0.5-1 mm. Lay laminate, parquet, solid board, cork or linoleum on top.
This technology is used to insulate the floor in an apartment on the first floor, because the height of the ceilings does not allow laying two screeds.
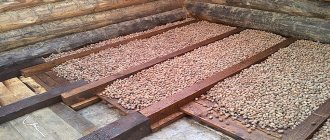
Mineral wool or expanded clay
Expanded clay has the following characteristics:
- excellent heat and sound insulation;
- high strength;
- fire resistance;
- frost resistance;
- environmental friendliness and durability.
Carry out insulation in the same way as for foamed sheet materials, when you cannot increase the height of the floor.
Reflective foil insulation or technical cork
Remove the coating, clean the concrete from traces of glue, and fill in any uneven areas. After four days, cover the room with insulation. When using multiple pieces, ensure there are no gaps. Place the insulation with the foil facing up.
Lay plywood 25-30 mm thick on top of the insulation, securing it with anchor dowels in the amount of 9 pcs per square meter. The permissible gap size between sheets is 1 mm. Lay parquet, laminate, solid wood or linoleum on top.
Liquid floor
The use of “liquid floor” material gives the worst thermal insulation parameters of all those described in the article. At the same time, self-leveling floors make it possible to create a strong screed that does not require reinforcement and reduce the pressure on wooden floors. The cost of such a screed is 5-7 times higher than a traditional one.
Self-leveling flooring can be used as a coating - such floors look beautiful and are highly wear-resistant.
Linoleum
In terms of thermal insulation properties, linoleums are on par with self-leveling floors. Therefore, the use of insulated linoleum alone will not give a noticeable effect. By using linoleum to cover the floor with any insulation, you will improve thermal insulation by 5-10 percent.
Floor insulation requires an individual approach. There is no single standard for the best materials or technologies. It all depends on the conditions, condition of the floor and financial capabilities. Sheets of foam materials provide good insulation, but are not suitable for all floors. Foil reflective insulation has 10-20 times worse thermal insulation parameters, but is used to insulate any floor.
The wrong choice of material will lead to the fact that the strength of the floor and the height of the room will be greatly reduced. Don't try to save money by using cheaper technology. It’s better to find material from a lesser-known manufacturer or use thinner insulation.
Video - thermal insulation of the first floor floor: