Properly carried out insulation can protect the house from the cold and reduce the cost of heating the premises. In developed countries with cold climates, numerous energy saving systems have been used for a very long time, allowing to reduce heating costs several times.
However, it happens that for some reason the work was not completed in the warm season, and the owner is faced with a choice: leave the house without insulation until spring or try to finish the work now. Is it possible to insulate a house in winter, and what materials are used for this?
Is it possible to insulate a house in winter?
In winter, work becomes difficult not only due to low temperatures, but also due to precipitation and high humidity. Rain and snow will not allow the adhesive solution or plaster to dry, so you can’t work with all insulation materials.
We have to look for workarounds and installation methods that will not be affected by cold weather.
Advantages and disadvantages of the process in winter
Insulation in the cold season is faster. You don't have to wait long for the walls to dry. In winter, the dew point moves outside, so moisture does not accumulate in the thickness of the frame or masonry. The disadvantages of such insulation include:
- the difficulty of performing work due to high air humidity;
- impossibility of using some materials.
The disadvantages of insulation in the cold season include the difficulty of performing the work.
Winter insulation: is it necessary to do it and close the insulation for the winter?
Whether to insulate it or leave it until spring is, of course, up to the owner to decide, but if you plan to use heating or even live in the house, then the clear answer is to insulate it! When heating an uninsulated house, heating costs increase sharply, freezing of structures, increased humidity, low indoor temperatures and an unhealthy microclimate are possible. Therefore, despite the difficulties of winter insulation, it is still highly advisable to complete this work as soon as possible.
The greatest difficulty during winter insulation is created by low air temperatures, at which it is difficult to work outside, especially with numerous small or fragile parts, of which there are a lot when attaching wall cladding. In winter, the surfaces of the walls will also be cold, which is critical when carrying out “wet” work with cement mortars, such as when performing a plaster facade. In addition to cold, negative factors include precipitation in the form of snow or rain, which will prevent the mortar mixtures from drying out and can also get into the structure.
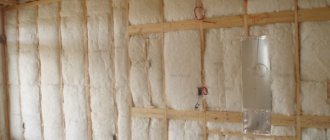
EKOVER basalt slabs are made from stone wool with a small amount of polymer binder. At low temperatures, the properties of the insulation practically do not change: the slabs do not become brittle and do not change their elasticity, unlike plastic insulation - polystyrene or polyurethane. Due to the properties of stone fiber and water-repellent impregnations, the material is practically not exposed to atmospheric moisture, and in the event of getting wet or freezing, stone wool slabs are easily dried due to their highly porous structure and completely restore their thermal insulation properties.
Often the developer is faced with the question of whether it is possible to leave the insulation uncovered until spring. It should be remembered that mineral wool insulation is intended for insulation in structures, subject to protection from moisture and ultraviolet radiation. The stone base of the material is not afraid of such influences, however, the binding and modifying components, like any organic substances, will be destroyed under the influence of the sun and moisture. Of course, in winter, the intensity of solar radiation and the ingress of liquid moisture are limited, but still, the faster the insulation is covered, the higher its performance and durability will be.
Mechanical fastening of insulation and frame structures
With the “dry” method of fastening, that is, using dowels or when installing slabs by surprise, there are no special requirements for winter installation, except for adjustments for frozen hands and the increased fragility of the plastic parts of the dowels. It is necessary to avoid getting snow under the insulation and into the joints between the slabs, and also try to cover the thermal insulation layer with cladding or a windproof membrane as soon as possible. By the way, when externally insulating main walls, no films are placed between the wall and the insulation, and vapor barriers are not applied from the inside. On the outside, a hydro-windproof membrane can be used (marked with index A in the range of many domestic film manufacturers), although due to the low compressibility and low air permeability of ECOVER slabs, it is allowed not to install any flammable films. When insulating frame walls, as well as in the case of insulating walls from the inside and in any ceilings and floors on the side of a warm room, it is necessary to use vapor barrier barrier films (usually marked with the indices B, C or D).
Plaster facades
The so-called “wet” processes are associated with the insulation of these facades. The insulation boards are glued using cement glue containing water, and a reinforced preparatory layer and then a textured decorative layer are applied on top. Plastering technology for facades involves significant financial expenses for mixtures, more durable insulation, fasteners, and work, so it is better to postpone the installation to the warm season. If winter work cannot be avoided, then you can proceed in two ways: use anti-frost additives or make a warm contour around the building.
Antifreeze additives in cement mixtures can reduce the freezing point of water and speed up the setting of the mixture in the cold. Such additives can be purchased separately and added independently when mixing mixtures. In this case, there is a risk of not maintaining the proportion or of the additive becoming incompatible with polymer modifiers of plaster mixtures. Antifreeze additives can be introduced into the compositions during their production - these are special “winter” mixtures. Nevertheless, this method with anti-frost additives has the possibility of white efflorescence, cracking and less strength as a result of hardening of the mixtures. In addition, the “painless” temperature range for supplementation is usually limited to -10°C.
A more reliable, but also costly way is to create a “warmhouse”, that is, install scaffolding with a protective film stretched around the perimeter. Under the curtain there is no risk of precipitation, and thanks to heat guns you can maintain the temperature above +5°C around the clock.
Preservation of the plaster facade for the winter (up to 6 months) is possible according to technical regulations at the stage of finishing the preparatory reinforcing layer, which will protect the insulation from the effects of precipitation and sun, and after priming will remain a reliable basis for applying decorative plaster in warm weather.
Winter insulation, of course, requires higher costs from the developer compared to summer, but these costs will still be covered by an increase in payments for heating the house. The most economical thing is to insulate the house using traditional methods with the creation of ventilated gaps. Plastering technology will require significant investments and skills, so if possible it should be transferred to the warm season.
Material selection and characteristics
Manufacturers offer many types of insulation. When choosing, you need to consider that the material should:
- have low thermal conductivity;
- suppress noise coming from the street;
- be safe for humans and nature;
- extinguish independently in case of fire;
- It is easy to pass air in both directions;
- resist the spread of pathogenic microorganisms;
- do not absorb water.
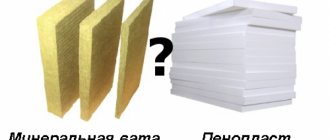
Mineral wool
Due to the fibrous structure of the boards, air passes through. At the same time, mineral wool creates a barrier that prevents heat from escaping into the surrounding space. It can be used for both external and internal insulation. The main disadvantage is the complexity of installation. To lay mineral wool, you need to build a frame.
Mineral wool is a convenient material for insulation.
Glass wool
The material is supplied in rolls or slabs. Glass wool contains small particles that irritate human skin. Therefore, when working, you need to use protective equipment - work suits, gloves.
The insulation does not ignite in a fire, so it can be used for interior work. Installation also requires the creation of a wooden frame.
Cellulose
The main advantages of such a heat insulator are:
- multifunctionality;
- safety for humans and the environment.
Cellulose insulation is an ideal option for residential buildings.
The insulation does not accumulate moisture, which prevents the formation of mold. Manufacturers impregnate cellulose with antiseptic compounds and fire retardants to prevent fire.
Styrofoam
The inexpensive material is often used for insulating facades. Polystyrene foam is lightweight and pathogenic microorganisms cannot multiply on its surface. To install the slabs, special glue is used. However, in winter, such compounds take longer to harden.
Expanded polystyrene
Despite its high strength, the insulation easily allows steam and air to pass through. The coating goes well with facade tiles, plaster, and siding. Polystyrene is not used in combination with organic compounds and resins. Installation of the material is carried out using the “wet facade” technology.
Expanded polystyrene is a modern insulation material.
Fibrolite
The material is obtained by pressing wood shavings. To improve performance characteristics, a binding component is added - magnesium salts or Portland cement. Fibrolite is easy to install; just fix the boards with self-tapping screws.
Cork material
The presence of a large number of pores allows the cork to retain heat. The material is resistant to damage and is not subject to significant shrinkage. The decorative properties of cork allow it to be used for finishing and insulating rooms. The slabs are not susceptible to rotting and mold, and do not emit harmful substances when burned. The main disadvantage is the high price.
Cork material is a natural insulation material.
Liquid insulation
Thermal insulation impregnation is a modern material that allows you to work in hard-to-reach places. When covering a house with liquid compounds, the construction of a frame is not required. Application is carried out using special tools.
Insulation technology
The procedure for insulating walls includes several stages.
It is important to go through all the steps and follow the recommendations to obtain high-quality insulation. After all, in the future the log house should retain heat for a long time
Surface preparation
The use of mineral wool from the outside involves preliminary cleaning of the surface and cutting off protruding areas. The next step is to close the holes, gaps, and cracks using polyurethane foam. After the applied foam has dried, remove any remaining product with a knife. After this, you need to treat the outer surface with special compounds. These are fire retardants and antiseptics.
All preliminary preparation operations are carried out in dry weather.
Laying a vapor barrier layer
The vapor barrier layer is designed to self-regulate the microclimate of the tree and at the same time protect it from water. How to properly lay this layer. First you need to select the appropriate products.
The following vapor barrier products are sold on the market:
- isospan;
- polyethylene;
- roofing felt
When choosing, it is necessary to take into account that the product must allow air to pass through so that the wood does not rot. Therefore, it is better not to use polyethylene products.
Vapor barrier material can be mounted on top of the wall surface using staplers. But if there are uneven surfaces, it is better to arrange a sheathing on which the vapor barrier will be attached. The constructed structure also creates a ventilation space. For the design, slats with a minimum width of 2 cm are selected. The gap between slats is 1 m.
After arranging the sheathing, a vapor barrier is laid, secured with a stapler. The joints of the material are sealed with tape.
Laying the material
Mineral wool is laid on the vapor barrier layer. But first it is necessary to make a frame sheathing for it. The slats are selected in size 40x100 mm. The basic rule of the frame is that the width of the groove formed should be less than the width of the plate used (approximately 15 mm).
When choosing metal slats or wooden blocks, it is better to choose the latter. This is due to the fact that a wooden house is insulated. To fasten the frame, use nails to ensure the “walking” of the wood.
After arranging the frame, the stage of laying the cotton material begins:
- Mineral wool is available in the form of slabs or rolls. The rolled material is cut with a knife into the necessary elements.
- When laying on flat surfaces, mineral wool does not need to be fixed on top. If the slabs are mounted on sloping areas or recesses, the material is secured with anchor nails.
- Laying is done from bottom to top.
- When laying two layers of insulation, the second layer should be placed offset, avoiding the coincidence of the joints.
In case of improper installation, the material can be easily dismantled.
Location of waterproofing
The waterproofing layer is designed to prevent moisture from entering the structure. For this purpose, a special windproof membrane is selected. The use of polyethylene film is not advisable due to the fact that it will allow water to accumulate in the insulation.
The membrane is secured using a stapler or nails. The joining areas are sealed with tape. A counter-lattice is placed on top of the membrane, allowing air ventilation to be achieved. The width between the waterproofing and the installed facade is at least 5 cm.
All work on insulating the material is completed with the installation of the facing coating. Mineral wool is suitable for external insulation under siding, lining or brick. In case of repair, removal and renewal of the material is easy.
Other insulating materials can be used on the basement or foundation, which is located above the ground.
Now many will know how to insulate the facade of a house. With the right approach, the warmth of a wooden house will not escape outside, but will remain inside. Moreover, all the work can be done with your own hands.
Options and step-by-step instructions for insulating a house outside in winter
When using any method of thermal insulation of a building, work begins with the creation of a protective circuit that increases the air temperature to acceptable values. A durable film is stretched around the building sheets to trap cold air. Powerful heaters are placed inside the circuit.
Dry method
The use of this method in winter is preferable. Plastic dowels are used to install foam boards. Materials containing water are not used in this case. The work order includes:
- cleaning and leveling the facade;
- installation of sheathing made of wooden bars or metal profiles;
- laying insulation;
- installation of a waterproofing membrane;
- finishing of the facade.
“Dry” insulation is a universal method of thermal insulation.
Wet facade
External insulation of a house using this technology is performed as follows:
- Clean the walls from old insulation and cladding. Eliminates pronounced irregularities.
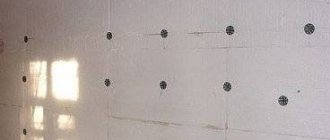
- Prepare the adhesive composition. To do this, gradually add the dry ingredients into the water and stir the solution thoroughly. Apply the mixture to the foam board, leaving gaps.
- Apply the elements to the walls, starting from the corner. The panels are pressed tightly, after which they are additionally fixed with special dowels.
- Apply a second layer of adhesive. A reinforcing mesh is installed on top, which is necessary to form the finishing coating. The material is laid with a slight overlap, pressing into the solution.
- Wait for the composition to harden, maintaining a positive temperature inside the thermal circuit.
- Apply plaster or other decorative coating.
Mistakes that are made when insulating wooden walls
When independently carrying out facing work and pre-insulating a wooden house, mistakes are often made, which we will consider below. The result is ineffective insulation, dampness in the house, destruction of wood and loss of its performance properties. The following 7 errors can be considered typical - they occur most often.
No. 1: installation of insulation without wood preparation
Old log houses are often subject to external insulation. Over the years, the log house has undergone final shrinkage, and its parameters will no longer change, which means they will not affect the front finish
But it is important to understand that the years of wood exploitation “in the open air” could not pass without a trace
Due to the fact that the insulation and sheathing will completely cover the walls, before starting work it is necessary to inspect the enclosing structures in order to identify weak areas that need to be repaired and treated. It is necessary to treat the wood with antiseptics and anti-feathers
It is important not to leave untreated areas. The solution should be applied 2-3 times
Each layer must dry completely. Insulation should begin when the wood is dry.
In order for wood to last a long time without being subject to biological decomposition or damage, it should be treated with a special antiseptic impregnation
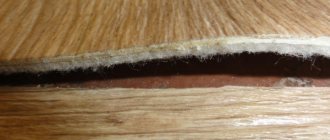
No. 2: neglecting caulk
To prevent the log house from being blown through, use caulk. At the same time, the insulation of the structure is ensured. When inspecting walls before insulation, it is necessary to carefully inspect all areas where caulk is used - whether it sticks out, how tightly it is held. It happens that protruding, loosely twisted material is pulled apart by birds.
Insulation caulk
No. 3: wrong side selected
Log houses are insulated exclusively from the outside. This is a rule that must be strictly followed. Only this method allows you to ensure the correct use of wood and thermal insulation material. If you choose the other side and fix the insulation inside the house, then both the wood and the insulation will get wet. As a result, disruption of the microclimate in residential premises and increased humidity.
Log houses are insulated exclusively from the outside
No. 4: the insulation is incorrectly selected
The construction market offers insulating materials in a wide range of prices and performance characteristics. Of all the variety, however, only a few are suitable for insulating wooden houses: mineral wool (basalt and glass), as well as extruded polystyrene foam. The latter has excellent performance, except that when melted it releases substances that are extremely dangerous to humans. Therefore, the only alternative for insulating a wooden house is mineral wool.
One of the best insulation materials is mineral wool.
No. 5: improper transportation and storage of insulation
When purchasing, it is important to check the tightness of the heat insulator packaging. It must not be damaged and the contents must be dry.
If the insulation gets wet, its thermal insulation properties will decrease significantly. It is recommended to remove the insulation from the packaging one day before installation. And after it is fixed to the wall, it is necessary to immediately continue working on the walls so that the insulation does not remain “open”.
Check the material carefully before purchasing
No. 6: using roll insulation instead of slab insulation
Mineral wool works best for insulating wooden walls. You can find slabs and rolled material on sale. Why are mats not recommended? Because, being in a vertical position, over time the insulation will inevitably sag and gaps will appear through which cold air will rush into the house. The slab insulation maintains its shape throughout its entire service life, does not deform or sag.
The slab insulation maintains its shape throughout its entire service life.
No. 7: Incorrect calculations
Too thick or thin a layer of insulation will cause disruption of the microclimate in the room. Typically, the heat insulation is laid in two layers of 5 cm. In the south, one layer is enough, and in the north, three are required.
Correct calculations will allow you to maintain the correct microclimate in the room
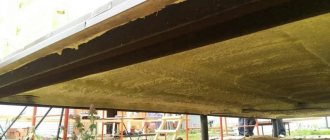
How to work with a ventilated facade
In this case, external wall insulation in autumn or winter is performed as follows:
- Install vertical sheathing bars. The distance between the elements should not exceed 30 cm. The beams are secured with dowels. The aesthetics of the finished coating depends on the quality of installation of the lathing.
- The selected heat insulator, for example basalt wool, is placed between the beams. Each canvas is secured with umbrella dowels. There must be at least 2 fasteners per slab. A vapor barrier is not installed between the base and the insulation.
- Cover the façade with wind-protecting fabric. This prevents moisture from entering the thickness of the insulation without reducing the vapor permeability of the wall pie. The fabric is fixed to the beams with construction staples.
- The outer layer of the sheathing is formed. This is done to create a ventilation gap. At this stage, the wooden sheathing can be replaced with metal profiles.
- Install decorative covering elements.
The ventilated façade is a universal multi-layer insulation system.
This method of insulation is used in any weather, including autumn and winter.
Why is it recommended to insulate a house from the outside?
According to sanitary standards and rules SP 23-101-2004, wall insulation should be carried out from the outside of the building, although there is no specific ban on carrying out interior work. Moreover, in some cases it is impossible to carry out facade work. For example, if the building is on the list of architectural buildings and the bureau responsible for it does not give permission for work, if the facade is a complexly decorated structure.
Preference is given to insulating walls from the outside, since useful living space is not taken away
Helpful information! If it was decided to insulate the facade of the building, a continuous vapor-permeable layer should be created in the room. Otherwise, when warm air hits the insulation and then hits the cold wall, condensation will form, which will cause mold and rapid growth of fungus.
If possible, most owners prefer to insulate the walls from the outside. Firstly, useful living space is not taken away, and secondly, the building frame is reliably protected from negative atmospheric influences. Other functions performed by external insulation of facades include:
- Attractive appearance of the building, even if after the construction of the box it did not have a very aesthetic appearance.
- Creating a special microclimate inside the house due to the fact that properly executed insulation will play the role of a thermos when cold does not penetrate inside in winter and heat does not penetrate in summer.
- Extending the service life of the carrier box. A frame that is not constantly wet/dry will last much longer.
- Elimination of so-called cold bridges, which inevitably arise when the rules for constructing walls are violated or when the wrong choice of building material is used.
- Ensuring reliable sound insulation. An additional layer on the facade prevents excess noise from entering the premises.
- Prevention of condensation in the thermal insulation layer.
- A simple solution to the problem of sealing seams in a situation where the house is made of panels.
The only disadvantage of insulating walls outside is the cost of material and labor
Before insulating the facade of a house, you need to know about the disadvantages of external insulation. The main disadvantage can be considered the costs not only for the purchase of material, but also for ordering high-rise work, if we are talking about a multi-story building. In a private house, for proper installation, you will have to acquire a good sawhorse, a stepladder, or scaffolding if the building has more than one floor.
Insulation of the facade of a wooden house
The log house is subject to rotting at high humidity. Therefore, wooden buildings require not only thermal insulation, but also protection from atmospheric factors. If insulation is carried out in winter, take into account the following points:
- foam boards must be treated with protective compounds to prevent destruction;
- “wet” technology can only be used if a thermal circuit is formed;
- You can begin finishing the facade of a wooden house after complete shrinkage, which takes 3-5 years.
Insulating boards must allow air to pass through easily, be resistant to moisture, and retain heat. It is best to choose mineral wool, polystyrene foam or polyurethane foam. Warming is done as follows:
- Treat the walls with antiseptic compounds. Lay a waterproofing layer.
- A sheathing is formed from thick timber. The voids are covered with insulation, which is secured with dowels.
- Cover the structure with a vapor barrier membrane. A metal mesh is installed to protect the house from rodents.
- Assemble the frame for the facing layer. Install clapboard or siding.
Is it possible to insulate a wooden house from the outside in winter - tips on thermal insulation
If you need to insulate the outside of a wooden building in winter, remember about changes in the properties of materials under the influence of natural conditions. In principle, thermal insulation measures can be carried out, but there are nuances associated with the characteristics of the materials.
For example, when asked whether polystyrene foam can be left open for the winter, experts do not give a positive answer.
This is due to the following points:
- destruction under the influence of ultraviolet radiation;
- changes in properties due to hypothermia and high humidity;
- increased fire hazard of an unprotected heat insulator.
Where winters are long and cold, foundations need insulation on both sides: internal and external
If you need to make a wet facade in winter, remember that preserving a wet facade for the winter is a mandatory measure. It allows:
- protect the insulation from destruction;
- ensure the durability of thermal insulation;
- avoid the formation of cracks.
Let us dwell on the specifics of performing certain types of work.
Protecting the bottom of the base with insulation
Sequence of actions for insulating the lower crown with expanded clay:
- Extract the soil along the contour of the building, forming a trench 80-100 cm wide.
- Place a layer of waterproofing material on the base of the intake.
- Fill the space with expanded clay granules.
- Protect the insulation with waterproofing.
- Fill the expanded clay with sand and fill the blind area around the perimeter.
Thermal insulation of the foundation with expanded clay is easy to do on your own.
Using penoplex for external thermal insulation of the base
They sell the material in slabs, but for its installation they often use some tricks
Perform thermal insulation of the base with penoplex according to the following algorithm:
- Prepare a circular trench 50–80 cm wide.
- Treat the foundation surface with bitumen mastic.
- Glue sheet insulation.
- Waterproof the surface with moisture-proof material.
- Fill the trench with sand and concrete the insulated perimeter.
Use frost-resistant additives when pouring concrete at subzero temperatures.
Making a wet facade in winter
If the ambient temperature does not drop below -5 ⁰С, you can make a wet façade in winter. The technology involves the following stages:
- Preparation of the wall surface.
- Insulation fastening.
- Mesh reinforcement.
- Plastering the surface.
- Coloring.
The use of special modifiers makes it possible to increase the frost resistance of plaster. You should not leave a wet facade in an unfinished state for the winter. It is advisable to preserve the façade with a quartz-based adhesive primer.
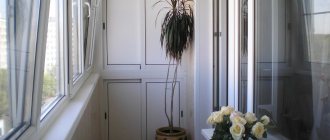
Features of insulating a loggia in winter
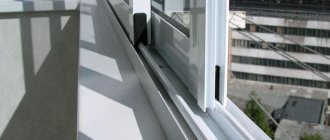
First, the balcony needs to be glazed. Double-glazed windows are considered a profitable option. Insulation work is carried out as follows:
- All seams are covered with foam, especially carefully treating the gap between the wall and the window sill. After this, the sheathing is fixed, and foam plastic slabs are inserted between the bars.
- A waterproofing coating is formed from foam rubber or other material.
- Finishing is done with siding or clapboard.
An insulated loggia becomes a comfortable room for relaxing or storing things.
Let's sum it up
Based on the information received, we can conclude that insulation of the facade in winter is allowed. But for a number of reasons, it is recommended to implement the project in warmer times of the year. The main reason for this is the high risk of obtaining a result of lower quality than that specified by the manufacturers of all materials used.
If you still have to approach the issue of insulation in winter, then you need to study the weather forecast and choose a time interval for insulation with minimal cold, as well as without precipitation or strong wind.
You may have to use the services of a team of professionals to carry out insulation work as quickly as possible.
The main task of external wall insulation is to save material resources on utility bills by retaining and concentrating more heat indoors. Once you think about whether it is possible to insulate external walls in winter, you should immediately study the main advantages of the procedure. In the most developed countries, similar energy saving actions have long been used, which can significantly reduce heat costs.
Insulating the exterior of a house façade: top 3 best ways
In fact, insulating the facade of a house is one of the most popular topics among homeowners. Every owner wants to have a beautiful, warm and cozy home that will inspire admiration among passers-by.
In Russia, the most popular methods of facade insulation are:
- Wet facade
- Ventilated facade
- Siding
Each of these types copes with the tasks assigned to them to the maximum:
- Creating protection against sudden temperature changes
- Protecting walls from excess moisture, mold and mildew
- Possessing thermal insulation properties
- Aesthetic correction of external walls