Pros and cons of using potbelly stoves for heating
The potbelly stove is characterized by a whole list of positive qualities:
- Using the product you can not only warm up a large room, but also cook food;
- 30 minutes is enough to warm up the space;
- no matter in which corner the device is located, any corner is evenly heated;
- economical consumption of material for kindling, in contrast to heating the room with electricity (firewood, coal, and waste are used as kindling);
- can be made from scrap materials;
- the device is easy to use;
- installation does not require large material costs.
But, like any other device, there are negative sides:
- it is necessary to consider the chimney system;
- to maintain cleanliness, periodic cleaning of all parts, including the chimney, is required;
- A metal potbelly stove cools down quickly, so the heat is poorly retained.
The device has few disadvantages. If installed correctly, it will not be difficult to keep the stove in good condition.
Advantages and disadvantages of a potbelly stove for installation in a garage
The potbelly stove has proven itself well in its work. This is a convenient option for heating a room in the autumn and winter seasons. The design is small and can be carried. It easily heats even large rooms, regardless of the weather outside or climatic conditions.
Note! The installation of a potbelly stove in a garage is carried out strictly according to technology so that it works properly.
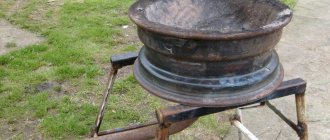
A product made from old cylinders.
Nowadays such a stove is used exclusively for garages and outbuildings. This is due to the following disadvantages:
- the metal quickly gives off heat and cools down (such a heating device is not used for residential premises, where it is necessary to constantly maintain a certain temperature regime);
- This is not an economical option;
- fire hazard (during installation and installation, care must be taken to protect the walls and floor).
You can use a variety of fuels for your potbelly stove, so you can minimize costs and expenses. This device has an almost 100% efficiency level.
No foundation required for installation
Preparatory work
Preparatory work involves:
- determining the dimensions of the future device;
- choice of material;
- location of the device.
Only after this the main work begins.
Drawings and dimensions
Each structural element is pre-thought out, determining the dimensions:
- It is important to choose the correct pipe diameter. The drawings note that its diameter should be 2.5 times the volume of the firebox. The volume of the firebox is measured in liters, and the volume of the pipe is measured in millimeters.
- It is advisable to install a metal screen around the stove at a distance of 60 mm. As a result, the heat will remain longer. In addition, such a design will protect against fire.
- The floor under the stove must be finished. Install a metal sheet that should protrude 50 cm from all sides of the heating device. This stage should not be neglected. A sheet of metal will protect against fire and retain heat.
- The chimney consists of two parts: vertical (1 meter) and inclined or completely horizontal (3-4 meters).
Given these dimensions, it will be possible to build a safe and useful heating structure for the garage.
Calculation of basic parameters with drawings and dimensions
Drawing of a stove for a garage.
As with any complex mechanism, the correct design of all elements is important for a furnace. Let's take a closer look at how you can independently design a potbelly stove for your garage.
Pipe
The main criterion is the diameter. In order for the stove air not to disappear, but to heat the room, it is necessary that the throughput of the chimney be less than the productivity of the firebox. The diameter should be 2.7 times the volume of the firebox, in the ratio millimeters: liters.
If grates are installed, the height of the firebox is calculated from the top of the grate.
Screen
Since the fuel must be burned by partial pyrolysis, this requires a very high temperature. In this case, a metal screen on the sides and back of the stove will come to the rescue. It must be mounted at a distance of 50-70 mm from the walls of the potbelly stove.
As a result, the maximum amount of generated heat will be returned to the stove. Having a screen will also reduce the risk of fire.
Litter
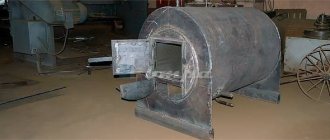
Upgrading the garage furnace.
The threat of fire still remains. For this purpose, as well as for the sake of increasing heat transfer, bedding is created at the base before installing the potbelly stove. It consists of an asbestos sheet or basalt/kaolin cardboard, 6 mm thick, on which a metal sheet is placed with a projection of 600 mm (or at least 350 mm).
Chimney
The chimney has two parts:
- Vertical (height - 1-1.2 m), we recommend wrapping it with heat-insulating material (for example, basalt cardboard).
- Hog (can be horizontal or slightly inclined), minimum length - 2.5 m, optimal - 4.5 m. It should be at a distance of 1.2 m from the ceiling and walls not covered with fireproof material, and at 1.5 m from wooden surfaces. There should be at least 2.2 m from the bottom of the hog to the floor.
Required materials and tools
To make a heating device, the following tools will be useful:
- Bulgarian;
- welding machine;
- sledgehammer;
- sandpaper;
- chisel;
- centimeter tape, marker;
- hammer drill
To make a potbelly stove, improvised materials are often used. This could be an empty gas cylinder, a metal barrel, or a milk cylinder. A simple option is to lay the device out of brick.
Advantages and disadvantages
Homemade garage stoves have both advantages and disadvantages. Positive properties include:
- Economical and compatible with different types of fuel. Firewood, coal, peat and briquettes are loaded into the potbelly stove.
- Easy to make with your own hands and low cost.
- Compactness. Due to its small size, the stove can be installed in small buildings.
- No high maintenance costs.
- Possibility of installation without arranging a base and a capital chimney.
- Functionality. Optionally, the potbelly stove is equipped with a hob, which expands its scope of application and allows it to be used for cooking.
- Fast ignition and uniform distribution of thermal energy.
A potbelly stove has a lot of advantages, the most important of which is efficiency.
The disadvantages of such stoves include:
- The need to organize a ventilation system and exhaust hood in a heated room.
- The need for periodic cleaning of the chimney pipe from soot. If the stove is used every day, the chimney will have to be cleaned at least once every 7 days. Otherwise, the soot will impair traction and may ignite.
- Increased fuel consumption due to the inability to accumulate thermal energy. Metal surfaces heat up quickly, but they also lose heat quickly. Therefore, the surrounding air can only heat up when fuel burns.
- Rapid cooling of potbelly stove walls and pipes. Because of this feature, home owners should have easy access to fuel supplies.
To reduce fuel costs, consumers use specific designs where the outlet pipe is installed on the lid, and combustion products move into the outlet pipe only after heat is transferred.
We recommend reading: Job Description Items for Electric and Gas Welder
Fuel selection
The size of the potbelly stove can be very different, but the mechanism of operation is similar for all. The combustion material is placed in the firebox.
The cheapest option is to heat the room with wood:
- In the firebox of a potbelly stove, logs are placed in a cage or in rows.
- Then wood chips or paper are placed in the very bottom row to light the logs.
- The door is closed and the intensity of combustion is controlled by blowing.
- Wood fuel smolders for several hours, so the room warms up completely and for a long time.
When installing some models of potbelly stoves, the use of waste oil as fuel is allowed.
Design and operating principle
For a garage that does not have electricity or gas, a potbelly stove is the optimal solution. There is also no need to build a foundation under it.
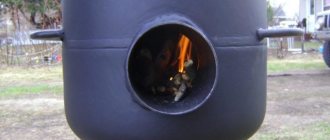
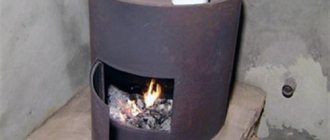
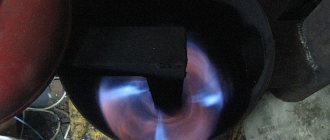
Most often, a potbelly stove has a cylindrical shape. The main elements of the standard design of such a stove are a metal body and a chimney. The oven itself can be divided into two compartments. The top one is the combustion chamber (furnace) where fuel is placed. A pipe is also installed there to drain combustion products into the chimney.
The lower compartment, the ash pan, is separated by a grate. Proper oxygen supply ensures proper combustion of wood. It is recommended to install loading doors in both compartments. The amount of air entering the furnace, and therefore the intensity of fuel combustion, depends on them.
It is important that the chimney pipe is welded close to the hole and is solid and thick-walled.
Step-by-step DIY instructions
A traditional stove consists of an iron container with a door and a smoke outlet pipe that is vented to the outside of the room. All varieties can be made from scrap material, but the basic elements will be the same.
Classic brick
A brick potbelly stove in a garage must be installed on the foundation:
- For the foundation you need to dig a hole and fill it with a layer of sand and gravel. Then the layers are filled with cement mortar. The hardened cement is covered with waterproofing material.
- The first two brick rows are laid horizontally.
- Starting from the third row, a hole for the firebox is formed and a grate is installed.
- At levels 3 to 6, a space is created for laying firewood.
- Then several rows are made in horizontal masonry.
- The ninth, last row is laid out edgewise.
- At the last stage, the chimney and doors are installed.
It is important to ensure the flow of fresh air into the room, which is necessary for better combustion of fuel in the potbelly stove.
A brick stove is durable, does not require repairs, warms up quickly and does not cool down for a long time. The heat from the stove is distributed evenly, and the room does not cool down for a long time.
From a milk can
If you follow the instructions in the instructions, then making a stove from a milk can will not be difficult:
- prepare and clean the container (it serves as the basis for the firebox);
- make a hole for the firebox;
- when the hinges are welded, install the door;
- Closer to the bottom of the container, make a hole (11 cm in diameter) for the chimney;
- A grate made of wire is installed inside the can;
- At the last stage, the chimney is welded.
The finished stove is installed in a prepared place and lined with fireproof bricks, which will protect against fire and increase heat transfer.
From a gas cylinder
At the preliminary stage, an approximate drawing of the product is made with determination of the dimensions of the parts:
- Using a bright marker, markings are applied to the surface of the cylinder in the place where the hole for the door, firebox and ash pan is supposed to be cut. The firebox is located approximately in the middle of the structure. The blower is placed in the lower part under the firebox door.
- Draw a line that will run between the two doors. Using a grinder, cut the balloon along the marked dotted line.
- For further work, iron rods with a diameter of 15 mm are needed. A lattice is made from them and welded to the lower, cut part of the cylinder. After this, the parts of the cylinder are welded together again.
- Using a grinder, holes for the doors are made along the marked lines. Hinges are attached and doors are installed.
- At the last stage, a chimney is made. The upper part of the cylinder is cut off with a grinder and a pipe with a diameter of 11 cm is welded to the place. After that, the pipe is taken outside, making a hole in the wall or roof.
To increase durability, a layer of heat-resistant composition can be applied to the surface of the cylinder.
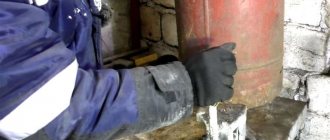
Construction of a chimney for a potbelly stove
Making a pipe for a potbelly stove in the garage is not difficult. We have already left the pipe for installing the chimney; all that remains is to punch a hole in the wall or ceiling. We remind you that the height of the pipe should be 4-5 meters. A lower chimney for a potbelly stove can lead to loss of draft or air blowing in the opposite direction.
The pipe for a potbelly stove in the garage can be straight or curved in an L-shape - it all depends on the characteristics of the garage space. For example, if there are some rooms above the garage, the pipe is led out of the wall, then bends and goes up. It is desirable that it be higher than the roof of the entire building. The upper part of the chimney is closed with a tin or metal cone to prevent water and snow from getting inside.
Installing a chimney in a window is quite possible, but unsafe. A wooden window frame can catch fire if it comes into contact with an overheated pipe. Therefore, it must be insulated - for example, with mineral wool running between the metal and the frame. When venting the chimney through the roof, it is necessary to isolate it from the roofing and seal all cracks.
Operation technology
When using a potbelly stove, you should follow important rules:
- maintain a safe distance between the stove and the walls;
- the chimney should only be taken outside;
- the place where the pipe goes outside is covered with solutions;
- It is recommended to place a box of sand and hang a fire extinguisher next to the device.
These recommendations will extend the life of the stove and improve safety.
Safe installation of the heating device
It is extremely important to follow fire safety rules when installing a potbelly stove. The best place is the far corner of the room, opposite the gate. The chimney is led only to the street.
You cannot place a potbelly stove near a car. The minimum distance should be 1.5 meters. It is best to lay a brick wall on the sides and front of the structure. This will not only ensure safety, but will also increase the efficiency of the stove.
If the garage walls are made of wood, then the stove is installed at some distance. The wall itself near the device is covered with a metal sheet or concreted. It would be correct to attach a metal sheet at the base of the stove.
Preparation of heating material
A popular fuel for potbelly stoves is wood. They need to be thoroughly dried and sawn. The size of the firewood should be approximately 25 cm. Store the firewood in a dry, ventilated area, protected from precipitation. Oak, birch, apple, and cherry warm up the room well. Do not use spruce or pine. They produce little heat and produce a lot of soot during combustion.
Cleaning the oven
The stove should be cleaned periodically to prevent dirt and soot from accumulating in the chimney. For the work, purchase a special chimney brush. But you can make the device yourself. A brush with stiff bristles is attached to the end of the stick:
- Before starting work, cover the opening in the firebox with a rag.
- Initially, make several movements in the chimney.
- Then they take out all the accumulated garbage.
All actions are carried out carefully so as not to damage the surface of the structure.
Garage stoves with the best heat transfer - what heats...
Ordinary potbelly stoves that can be placed in the garage suffer from one significant drawback - too low efficiency. The outgoing gas simply does not have time to give off heat and flies out hot into the chimney. Meanwhile, there is often not enough heat in a workshop or garage, so it would be nice to make a wood-burning stove that could produce 1.5 times more energy, i.e. raise the efficiency from the region of 35 - 40% to 60%. Achieving this is not so difficult, you just need to slightly transform the known designs, and many have already done so...
Ways to increase heat transfer from a wood or oil stove in the garage
Heating in a garage is usually done without a water circuit. The heat of burnt wood, coal or oil is transferred from the stove body and from its chimney directly to the air. Obviously, if you increase the area of contact of heated parts with air, the heat transfer will increase, and the efficiency will accordingly increase. What can be done?
- To make the heated body of the stove itself much larger - no need to spare any metal...
- Weld fins 3–5 mm thick onto the body, so the heat transfer area can be increased several times…
- To increase the length of the chimney indoors, make an inclined pipe along the wall. Partially equip the chimney with fins and place a heated water tank on the chimney.
- Redistribute infrared radiation from the oven.
Radiant heat reflection in garage
Potbelly stoves often heat up well beyond 300 degrees, which is why the share of infrared radiation is significant. And it spreads from the heated parts in all directions, including into the cold corner, which is of little interest to users.
If you reflect infrared radiation from the corner in which the stove is located in the garage into the center of this room, where there are heated people and objects that can absorb infrared heat, then the increase in useful output from the heater will be significant - probably 1 kW from 20 kilowatt combustion...
It is enough to place a layer of foil on the wall behind the stove, focusing the reflection where needed.
An example of a stove design with increased heat output
The approximate dimensions of a typical wood and coal stove, with a tall body and two gas passages, are shown in the figure. In this case, increasing the height of the body will only increase heat transfer, and therefore the efficiency of the furnace.
Any metal welder can make such a design inexpensively.
Welding on the fins increases efficiency and increases heat transfer...
Features of a solid fuel stove for a garage or workshop.
- The difference from a sauna stove is that it is not permissible to spill high-temperature coals from the combustion chamber onto an open tray or onto the floor. Therefore, the garage structure is always equipped with an ash pan, closed by a door.
How to take energy from a chimney and prepare hot water in the workshop
A chimney stretched along the wall at the upper level, according to various estimates, increases heat transfer by 8 - 15%, i.e. increases efficiency by 6 -7 percent on average. But for many, such a design is not convenient - it clutters up the garage, and is also not cheap - i.e. doesn't seem like a worthwhile undertaking.
But many owners of workshops, and garages too, support the idea of having warm water with which you can wash anything, as well as wash your hands or even take a shower...
A tank with a pipe for the passage of flue gases is inserted between the stove and the chimney, takes energy from the gases, heats the water, and generally increases the efficiency of the device. All that remains is to coordinate the diameters of the smoke pipe on the stove, etc.
But this section of the chimney can also collect dew, so it can become very dirty...
Making it with your own hands is no more problematic than making the stove itself.
New design of oil furnace
Burning waste in a garage is a well-known method of heating; a stove for this action is made immediately, as soon as conditionally free waste oil becomes available. But the stove itself has low efficiency, the body is small, and a sufficient amount of heat is obtained due to the high calorific value of the oil, first of all.
Another design is proposed, which is distinguished by a large body made of a cylinder, which can be additionally finned, high efficiency, and it also implements a drip mode of supplying fuel to the combustion zone. Therefore, water in oil or other impurities will not simply get into the fire and will not cause dangerous explosions with splashing of burning oil as in a conventional oil stove...
Drawing of a productive oil stove.
The operating principle of a garage oil drip stove is shown in the figure.
Another advantage is that you can heat it with diesel fuel, too. Therefore, if you run out of “free” oil, you can switch to purchased diesel fuel instead of freezing.
But the design of an oil stove for a garage is, of course, more complicated than a classic one. The same stove also requires a stable, more powerful draft - therefore, a longer chimney is needed - at least 4 meters in height from the burner level...
Setting the register
You can make water heating using a boiler welded from sheet steel or a coil from pipes with your own hands if you have the skills to work with a welding machine. When making it yourself, you need to take into account that the thickness of the sheet metal or pipe walls must be at least 3-5 mm. Heating of such a coil will occur slowly compared to thin-walled devices, but its service life will be much longer. Burnout of thin metal walls will lead to a major overhaul of the furnace in which the heating element is installed.
In self-made coil designs, an old battery (heating radiator) made of cast iron can be used. To use it as a heat exchanger, preliminary preparation is required: the radiator must be disassembled into sections, washed from the inside to remove scale and rust with appropriate compounds and checked for defects (leaks). Reconnect the serviceable sections, using an asbestos cord impregnated with drying oil as a seal between them. The prepared radiator can be installed in the firebox of a brick or metal stove, either on the side or above the flame. In the latter case, the battery must be located in a horizontal plane.
The welded heat exchanger of a water heating system can have different shapes. If the oven is not planned to be used for cooking, the register or boiler can be made in the form of a U-shaped structure from pipes or sheet metal. So the efficiency of a homemade boiler can be increased by increasing the surfaces heated by the flame. To allow cooking on a stove located above the firebox, a different design will be required. In this case, the containers located on the side surfaces of the furnace and the stove, located as it is usually installed in cooking structures, will heat up.
The dimensions of the boiler or register are set individually. When installing a heat exchanger in a furnace with water heating, you need to leave a gap between it and the walls for expansion when heated. The gap size should not be less than 1-1.5 cm.