Any owner of a private home has encountered a heating problem. Floors are a particularly important heating element. Proper floors do not allow dampness into the house and retain heat in it for a long time. Recently, ground floors have been rapidly gaining popularity.
They are effective because they are practical, reliable and relatively inexpensive. If a basement is not planned during construction, then heated floors on the ground in a private house are one of the best options for thermal insulation.
This structure is built directly on the ground, taking into account all its unevenness and will help prevent cold from entering from its surface. This option is far from the simplest, but it can be implemented independently, without hiring workers or equipment.
What is a heated floor pie on the ground?
Such floors have nothing to do with baking. They are called "pies" due to the fact that their thermal insulation has many layers and they look slightly like a layer cake. If you still decide to build, then keep in mind that heated floors on the ground require some measurements.
For example, groundwater should not be too high, because this will cause your “pie” to “float”. You should also make sure that the soil is strong enough, because the entire structure can simply settle. You should also remember that the “pie” reduces the height of the room, and dismantling such a structure is a difficult task, so everything must be done correctly the first time.
Advantages and disadvantages of underfloor heating
- Of course, the main advantages of underfloor heating include its reliable protection of the house from cold and frost. Regardless of the temperature, the soil on which the heated floor is placed always has a positive temperature;
- Almost any thermal insulation material can be chosen as floor insulation on the ground. For waterproofing, roofing felt or a special film is perfect. And the surface of such a floor can also be finished with any of the floor coverings you choose;
- When installing such a floor, the load goes directly to the ground and there is no need to make special calculations. In places where the load will be significant, it is best to increase the thickness of the heated floor pie;
- In addition, you can make the thermal insulation layer thicker yourself, or change something in this design;
- Underfloor heating can be used as the main heating in the house. and as an additional one;
- these floors quickly heat up and distribute heat evenly throughout the room, thereby preventing the occurrence of drafts, which is fraught with health problems for the residents of the house;
- heated floors on the ground have excellent sound insulation;
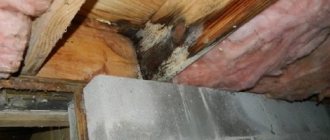
- excellent protection against mold, dampness and various microorganisms.
- heated floors, depending on the design features, can significantly reduce the height of the room;
- in the event of a malfunction of this system, it will be very difficult and expensive to dismantle the floor layers;
- sometimes this is a rather lengthy and complex procedure. which it is advisable to carry out during the construction of a house;
- the need to take into account the position of groundwater.
Preparing the base
The structure of your structure includes several layers, and therefore several stages too.
Do not proceed to the next stage without completely completing the previous one.
The first thing we must do is prepare the foundation directly on the ground itself. To do this you need:
- remove a layer of soil. This must be done necessarily, because the fertile layer is usually loose, and the remains of vegetation can then begin to rot and decompose - this will cause an unpleasant odor, and it will be impossible to stay in the room. The floor pie requires about 20 centimeters, or even more (depending on the region).
Tip: measure each level and calculate how deep the soil needs to be removed. Leave marks on each level to make it easier to navigate;
- remove all debris and stones. This is also very important, because one unnoticed pebble can cause unevenness;
- The remaining clean soil should be leveled and compacted. This must be done very evenly - according to the level.
Installation of a warm water floor on the ground
At the first stage, it is necessary to determine the level to which the excavation will be carried out. It is necessary to remove the top fertile layer in any case, since plant residues tend to decompose and smell unpleasant. Regardless of whether the subfloor is poured or not, the top layer of soil must be removed.
In addition, the fertile layer is less dense due to the presence of living beings and microorganisms in it, so under the weight of the layers of water-heated floor it will begin to sag. As a result, the overlying layers will again suffer.
The height of the heated floor pie along the ground can be more than 20 cm, so the countdown must begin from the mark where the finished floor will be located. Place a corresponding mark at this point and measure the required depth. In this case, it is better to mark the level of each layer so that it is easier to navigate during the arrangement process.
Separating layer
To prevent anything from moving apart, the base of the pit must be lined with geotextile or dornite. It is better to choose the first one, because it also protects against weed germination.
The correct underfloor heating pie must be separated from parts of the foundation and plinth (the lower part of the building wall lying on the foundation) with a special layer. It is strictly forbidden to rest the slab on protruding parts of the structure.
The correct floor should be made in the form of a floating screed.
Warm floor pie. Peculiarities
What it is?
The heated floor pie on the ground is a multi-layer structure suitable for all types of foundations, except pile and columnar. The layers of such a floor are laid in a clearly established order. Each of them performs its own specific functions.
Flooring on the ground involves pouring a floor slab onto the prepared base:
- rigidly connected to the foundation;
- not connected to the foundation (floating screed).
There are no stresses in such a structure, so in the event of shrinkage, the likelihood of cracks occurring is practically zero.
What does it consist of?
- Base
Purpose: drainage and prevention of groundwater rise, leveling and protection from subsidence.
- ground surface;
- well compacted sand;
- large crushed stone.
- Waterproofing layer (optional)
- Rough screed
- Waterproofing layer
- Thermal insulation layer (insulation)
- Finish screed with underfloor heating system (water floor, cable mats or heating cable)
- Finish coating
Advantages
- excellent thermal insulation properties;
- excellent sound insulation properties;
- the prospect of using any insulation and moisture-proofing material, a wide selection of flooring (here it is important to remember that laminate and porcelain tiles have the best thermal conductivity properties);
- structural reliability: the load is placed directly on the ground;
- fast heating and protection of the house from drafts;
- ability to replace central heating;
- protection against dampness, fungus and various microorganisms.
Flaws
- the high cost of dismantling such a floor if necessary;
- high requirements for the soil: dry, motionless, with groundwater not higher than 5-6 meters from the surface. Sandy and chernozem soils are not suitable for these purposes;
- long production time;
- reducing the height of the room.
Substrate
Further, some variability is allowed. To ensure that the floors do not settle properly on the ground, there are several installation options. The underlying layer must be selected taking into account the height of groundwater, expected loads, the same looseness of the soil, and so on.
Most often, a concrete layer is used - this is the most reliable and proven option. But there are cases when it is impossible to use concrete, then the following materials can be used:
- sand. It is used exclusively on dry soils to avoid water absorption through small holes in the sand. It is noteworthy that such a process can occur even in cases where dew forms on the surface. It will also be more difficult with sand because it needs to be compacted perfectly evenly, again, this needs to be done with the help of a level;
- crushed stone Crushed stone works well at high groundwater levels. Capillary suction is completely impossible in the crushed stone layer. Laying should also occur evenly;
- natural soil. It is used quite rarely and is most often coarse sand or gravelly soil (soil containing grains larger than 2 mm, but less than 50 mm). It will do if there is no groundwater or particularly loose soil.
- expanded clay This will do too.
Mineral wool slabs (a thermal insulation material made from mineral wool and a synthetic binder) will be an excellent insulation material. They have a high density, are quite strong and live a long time. Such slabs are laid in two layers; they can be vulnerable to moisture, so they need to be treated with a water-repellent substance.
Calculator for calculating the required thickness of floor insulation on the ground
The floors of the first floor of a private house require a special approach to insulation. And especially those that are installed directly on the ground. Its heat capacity is enormous, and with insufficient thermal insulation, the soil can literally pull out all the accumulated heat from the premises, even if the weather outside is not the coldest.
Calculator for calculating the thickness of floor insulation on the ground
For thermal insulation to be truly effective, high-quality materials must be used and the calculated thicknesses of the insulation layers must be observed. How to carry out these calculations yourself? You can arm yourself with thermotechnical formulas - they are easy to find on the Internet. But it’s easier to take advantage of the opportunity offered - this is a calculator for calculating the thickness of floor insulation on the ground.
Below are some important recommendations for its use.
Calculator for calculating the thickness of floor insulation on the ground
Go to calculations
Explanations for calculations
So, we proceed from the fact that the building structure (the floor in this case) must have a certain resistance to heat transfer so as not to serve as a heat loss pipeline. For each of the regions of Russia, these values are calculated taking into account climatic features. They are called normalized heat transfer resistance values and are measured in m²×K/W.
You can find out the value for your region of residence at any local construction organization. Or follow the map diagram below:
Map-scheme of normalized values of heat transfer resistance for building structures
What immediately attracts attention is that three such values are indicated for each area. In this case, we are interested in only one thing - for floors. It is highlighted with blue numbers. It is this value that should be entered into the corresponding field of the calculator.
Now let’s move on to the insulation scheme itself.
Expert opinion: Afanasyev E.V.
Chief editor of the Stroyday.ru project. Engineer.
The total value of thermal resistance is made up of the resistances of each layer of the insulated structure. If the planned structure of the insulated floor on the ground and the materials used for these purposes are known, then there is no big problem in calculating what thickness of insulation will be sufficient to achieve the standardized value.
When applied to a floor on the ground, it makes sense to take into account only the insulation itself (or a combination of several materials) and the floor covering, if it has any significant thermal insulation qualities. This includes, for example, plank covering or cladding with thick plywood. There is no point in taking into account concrete screeds or ceramic cladding - their thermal conductivity is very high. And thin floor coverings (laminate, linoleum and the like) will not have a significant effect on the thickness of the insulation simply due to their small thickness.
So, in the calculator you can calculate using two options. Moreover, the second option is divided into two more “subspecies”.
- The first option is to use only expanded clay for insulation. The backfill is covered with a reinforced screed, over which the finishing floor covering is subsequently laid.
When calculating along this path, you only need to indicate the parameters of the finishing flooring. If there is no point in taking them into account, the layer thickness value is left at the default value of zero.
The final value will be shown in millimeters. This is the required thickness of expanded clay backfill.
- The second option is to use the insulation selected from the list for thermal insulation. It can, for example, be laid under a reinforced finishing screed. Or, logs for the plank floor are mounted on top of the screed, between which the thermal insulation material will be placed. This difference does not particularly affect the calculation.
But here, too, two approaches are possible.
— The insulation is used in combination with an expanded clay “cushion.” This is often useful - it allows you to reduce the thickness of the material used. This means that in the additional data entry fields that open, you will need to indicate the thickness of this expanded clay backfill, and then select an insulation material from the proposed list. With the final floor covering, the approach does not change - as described above.
— Only one insulation is used. Everything is the same, but only the thickness of the expanded clay backfill is left equal to zero by default.
The result in both last cases will show the thickness of the selected insulation in millimeters. This is the minimum value, which, if necessary, is increased to the standard thickness of thermal insulation materials.
What is USP?
Among the most energy-efficient structures is the insulated Swedish slab (USP), which is both a reliable foundation and a well-insulated floor of the first floor, immediately equipped with a water heating system. more about the technology of constructing an insulated Swedish slab in a special publication on our portal.
Footing
Whatever bonding material you use, you will still need a footing. You will need a lean concrete mix B 7.5. We remind you that lean concrete is concrete in which the content of cement and water is reduced and the content of filler is increased.
This material is much “weaker” than its “fat” counterpart, but at the same time cheaper. In our case, it is not advisable to use a stronger concrete composition.
The footing is not reinforced, but must be separated from the base or parts of the foundation. Pieces of foam plastic or special tape are suitable for this.
If you want to further reduce the cost of laying a floor on the ground, you can use saturation of the upper layers of crushed stone with cement laitance. The resulting crust should be perfectly smooth and its depth should be several centimeters. This trick will help make a waterproof concrete crust.
Pressure testing of a heated floor system
Before the screed is poured, which completes the floor layer on the ground with insulation and contains the heating circuit itself, it is necessary to perform pressure testing of the installed equipment and pipes.
This procedure is performed as follows. The pipes connected to the collector must be filled, the air from them must be forced out through the drain valves, and the air vents must be kept closed.
Metal-plastic pipes are tested using cold water, and polyethylene pipes are tested by doubling the pressure in the system. This action is repeated twice and it is checked what the difference was between the pressure for testing and the value after it was reduced. If this range is not very large, then everything is in order. Additionally, the entire circuit is checked for leaks.
A thermal stability test is also performed. The coolant temperature rises to +85 degrees Celsius for half an hour. Then the places where the pipes join and connect to other elements of the system are checked. If everything is in order, then you can start pouring the screed.
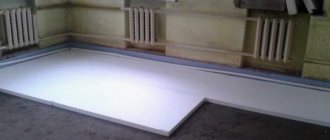
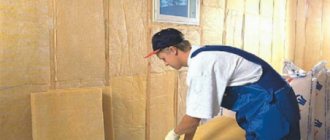
Waterproofing and insulation
Finally we got to waterproofing and insulation. At this stage it is necessary to isolate yourself from moisture. We will do this using a waterproofing film or a special membrane. Lay the film overlapping, and seal the cracks at the joints with construction tape.
The first thing you need to put is waterproofing material, not thermal insulation.
Use a layer of expanded polystyrene foam or dense polystyrene as insulation. You can also use special plates, but we recommend doing this only if the load on the surface of the structure is large.
Might be interesting
Thermal insulation
How to insulate a roof from the inside and not make mistakes?
Thermal insulation
Roofing and drainage: heating rules
Thermal insulation
Insulated Swedish stove: pros and cons
Thermal insulation
Penoizol: self-production
You can choose the thickness of the layer yourself depending on the climatic conditions of the region, usually from 5 to 20 centimeters. Fill joints and cracks with construction foam.
Lay another layer of waterproofing material or just roofing material on top of the resulting “sandwich”. This is not necessary, but if you live in a humid region with high groundwater, it is better to be safe.
Damper layer
Lay a damper tape over the walls, which will be slightly higher than the planned thickness of the screed. This is necessary in order to isolate the future screed from the load-bearing elements of the foundation or plinth.
We remind you: the floor on the ground is strictly prohibited from being rigidly connected to the elements of the base.
Instead of tape, you can use strips of polystyrene foam, which also need to be laid a little higher. The excess pieces can then be trimmed off.
Thermal insulation layer
You can get a base protected from freezing and heat loss by creating a high-quality thermal insulation layer. And the underfloor heating system will be additionally protected from external influences of low temperatures. The functional essence of the design of a heated floor on the ground is that the thermal insulation layer blocks heat leakage (about 20%) and directs it straight upward into the heated room.
A high-quality thermal insulation layer has a number of features:
- low thermal conductivity;
- high strength;
- preservation of basic characteristics at high humidity, etc.
Today, you can choose many types of materials for laying thermal insulation. Particular attention should be paid to polystyrene foam.
There are several options for using this material:
- pure polystyrene foam needs to be coated with polyethylene on both sides;
- expanded polystyrene coated with aluminum foil - the easiest to install and does not require additional fastenings;
- extruded material does not require additional coating.
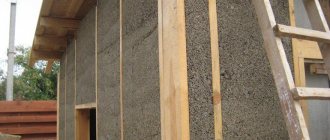
Floating screed
This screed performs several functions at once: it produces thermal insulation and sound insulation at the same time. The design feature of this screed is that the solution is placed on the surface of the insulation, and not on the base.
Well, or on a layer of roofing felt, if you covered the insulation on top with it. Here's what you need to pay attention to:
- It is advisable to do everything at once. In large rooms this will not be possible, so separate the finished and unfinished areas with partitions. This will create an expansion joint and help the screed to fully adhere;
- if possible, pour along the plaster beacons;
- The thickness of the screed should not exceed 20 centimeters, the minimum – not less than 5. Focus on the expected operational loads and the type of future floor covering.
Floor reinforcement on the ground
Reinforcement is an important step that will help strengthen the concrete screed. The metal mesh will also serve to secure the pipes on it.
The reinforcing mesh should be a wire with square cells with a thickness of 5 to 10 centimeters. Depending on the design features, the thickness may vary.
The mesh is laid as follows:
- There is a protective layer underneath – a polymer material. The thickness of this layer should not exceed 1.5 - 3 centimeters.
- mesh installation;
- installation of special beacons (this is not necessary in small rooms);
- pouring the mixture.
Walking on unhardened mixture is not advisable; it is better to install special paths along which you will move. Even when the mixture is taken, it is better to continue walking along these paths, metal mesh has a much lower density and can bend under the weight of a person.
Stiffening ribs under the partitions
In order for the warm water floor to hold better, it needs to be strengthened. This is done due to stiffening ribs. To create them, extruded polystyrene foam is placed under the partitions - a material that consists entirely of closed small cells.
The material must be laid intermittently, and the resulting voids must be used for laying reinforcement. Thus, it should turn out that the entire structure is evenly reinforced with reinforcing bars.
How to make a heated floor on the ground with a high groundwater level
When the groundwater level is high, it is necessary not only to correctly position the layers of the heated floor. It is very important to organize the drainage of water from the foundation.
For floors on the ground with a warm water floor, the level of which is located below the passage of groundwater, it is necessary to arrange drainage. In this case, a drainage system is installed at least 30 cm below the floor level. River sand or free soil mixed with crushed stone is poured onto the bottom.
The material is poured in layers of no more than 10 cm, each layer is generously moistened with water and compacted thoroughly. In most cases, three layers are enough, but more can be added if necessary. Geological textiles are laid on top of the sand or soil, which prevents water from penetrating the heated floor layers. Geotextiles are a modern material characterized by high tensile strength and resistance to damage by rodents. In addition, it is able to compensate for the mechanical loads that will be exerted on the heated floor on the ground in a private house.
Heated floor contours
For even greater savings, you can install pipes in a warm floor along the ground, this will create a literally warm floor. The reinforced mesh has just the right dimensions for placing a heating pipe on it.
To connect to the collectors, the pipes are led outside near the walls. The walls must be covered with protective tape. As for all other communications, they require a similar system.
After the final filling of the “pie” everything will be ready. Then you are free to make the floor the way you want. This design is just one of the possible options; if you wish, you can modify any of its elements. It all depends on your finances and construction conditions.
Preparing the subfloor on the ground
Scheme of floor installation on the ground.
The future heated floor begins with choosing the base of the floor based on the ground. There can be several options for foundation on the ground. The first is coarse river sand, poured in a layer of at least 30 cm, instead of the removed layer of soil. This thickness of sand is quite justified, the fact is that it is precisely 30 cm that moisture rises by capillary seepage upward, so a thickness of 300 mm is the minimum possible; doing less is simply pointless. The only difficulty with such sand is that it is quite difficult to purchase coarse river sand for the base of the soil, it is not available everywhere, and besides, removing the same volume of soil from your site for the future floor is also a dubious pleasure.
Therefore, the second option for preparing the base of the floor on the ground is to leave the same soil as it was. But only if this soil does not consist of black soil or peat, the last two options are categorically not suitable as a base for floor insulation over the ground. A layer of bulk soil with a loose structure less than 200 mm thick must simply be compacted. And if a thickness of over 200 mm is envisaged, then it is necessary to add crushed stone with a size of about 20-40 mm to the soil and carefully compact this base under the floor. To ensure proper looseness, you need to add a little wet sand to the soil.
The third option for preparing the base of the floor on the ground is insulation with expanded clay. Expanded clay can significantly improve the insulating properties of the base, and this will contribute to maximum insulation. After all, the insulating properties of expanded clay are 2.5 times higher than those of wood and 10 times higher than those of brickwork. So, as an insulation material, expanded clay is a very good choice when building your home. A layer about 10-15 cm thick is filled with expanded clay, and in the future the whole technology is similar to the previous varieties above.