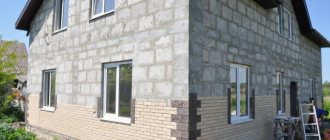
Aerated concrete blocks are widely used in modern construction both in our country and abroad. Despite the fact that aerated concrete has good thermal insulation qualities, walls made of this material must be insulated (to reduce the cost of heating the house and increase the energy-saving performance of the entire building). Insulating aerated concrete with polystyrene foam is a very effective and inexpensive way to achieve this goal.
Selection of insulation material
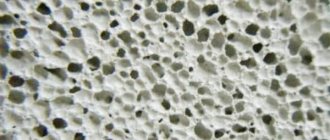
Experts say that it is more expedient to insulate a structure made of aerated concrete from the outside than from the inside of the house: firstly, the usable area of the room is not lost; secondly, the “dew point” shifts beyond the aerated concrete blocks. To insulate aerated concrete buildings from the outside, a variety of materials are used: mineral wool, extruded polystyrene foam (penoplex), polyurethane foam and polystyrene foam (expanded polystyrene). Expanded polystyrene is the most popular due to its low thermal conductivity, durability and low cost. This material is fireproof due to the fact that it contains anti-foam. Also, the advantages of the material include ease of processing and installation: it is easy to cut into pieces of the desired shape, and slabs of standard sizes (0.5 x 1, 1 x 1, 1 x 2 m) are conveniently attached to aerated concrete walls. The thickness of the material (from 20 to 100 mm) allows you to create a sufficient heat-insulating layer (if necessary, the panels can be folded in half). Also, to order, factories produce non-standard sheets of expanded polystyrene with a thickness of up to 500 mm. That is, for insulating aerated concrete with polystyrene foam, there is a large selection of finished products.
Calculation of insulation thickness
To determine the thickness of the thermal insulation layer, you need to make a simple calculation. We take data for calculations from reference tables. SNiP standardizes the total required heat transfer resistance for walls (Ro) depending on the region (measured in m²•°C/W). This value is the sum of the heat transfer resistance of the wall material (Rst) and the insulation layer (Rth): Ro = Rst + Rth. For example, we choose St. Petersburg (Ro=3.08).
Heat transfer resistance is calculated by the formula R= δ ⁄ λ, where δ is the thickness of the material (m), λ is the thermal conductivity coefficient of the material (W/m•°C). Let's say our house is built from aerated concrete blocks of the D500 brand, 300 mm thick (λ = 0.42 - we take it from the reference table). Then the wall’s own heat transfer resistance without thermal insulation will be Rst = 0.3/0.42 = 0.72, and the heat transfer resistance of the insulation layer Rt = Ro-Rst = 3.08-0.72 = 2.36. As a thermal insulation material, we choose light polystyrene with a density of 10 kg/mᶟ (λ=0.044 W/m•°C).
The thickness of the heat-insulating layer is calculated using the formula δ=Rут•λ. The thermal conductivity coefficient of polystyrene with a density of 10 kg/mᶟ is λ=0.044 W/m•°C.
The thickness of the insulation is δ=2.36•0.044=0.104 m, that is, according to the rules and regulations, standard polystyrene slabs with a thickness of 10 cm are suitable for our house.
We check our calculations for the “dew point” temperature (formation of condensation in the wall):
The graphs show that the condensation zone (the area where the wall temperature lines coincide with the “dew point” temperature) is located in the heat-insulating layer and even at an outside air temperature of -30˚C does not reach the aerated concrete. Conclusion: our thermal insulation layer is calculated correctly, that is, even at the lowest temperatures, a wall made of aerated concrete will not be saturated with moisture.
Let's say you don't want to make any calculations, and you decide to just buy a material 5 cm thick. Let's see in what area the condensation zone will be located at this thickness and all other conditions being equal. For clarity, here is a graph:
We see that moisture is formed not only in the heat-insulating layer, but also in aerated concrete. The presence of water, the thermal conductivity of which is significantly higher (λ≈0.6) than that of aerated concrete and expanded polystyrene, leads to a decrease in the heat-saving characteristics of the walls of the structure, that is, the result is a “cold house”.
How to glue foam
The gluing technology depends on the installation conditions of the foam and the material to which it is attached.
To the foam
Polystyrene foam is attached to other foam plastic using the adhesives described above.
There is a specialized brand called Styroglue. It will best glue together two parts of foam plastic and other substrates. It is not as widespread on the market as other brands, but the price is not the highest.
Advantages:
- Styroglue is transparent in structure and will be invisible on light or white polystyrene;
- it dries quickly (from 20 seconds to 1 minute);
- resistant to moisture, frost, fungal formations, used indoors and outdoors.
Flaws:
- It is necessary to work with protective gloves, the glue sets quickly and is difficult to remove from your hands;
- cold affects the properties of the glue, it becomes thicker. In cold weather, keep the container in heated water.
When using PVA, it is applied to both parts/surfaces. Allow time to dry slightly, then apply another layer and squeeze the parts for a few minutes.
The parts are also fixed:
- epoxy resin with hardener;
- glue sticks and a heat gun.
The heat gun is suitable for fastening several parts of polystyrene foam into one structure. Extremely hot hot melt adhesive can burn through the material. It hardens quickly, you have to work the same way.
The method does not require professional skills. A beginner can work at home.
When attaching regular foam to extruded foam, the latter is treated with a needle roller for better adhesion.
To concrete
It can be attached to concrete without lathing. Tools and consumables you will need:
- primer mixture;
- spatula (for application);
- electric drill with a mixing attachment (for mixing the solution);
- glue.
A powder mixture is selected for gluing . It is diluted with ordinary water. The proportions are indicated in the instructions. The water in the container is mixed with a drill with a mixing attachment and powder is gradually added. If you don't have a drill, replace it with a construction mixer. The mixture must be allowed to brew so that it acquires adhesive qualities.
The effectiveness of adhesion is achieved by preparing the concrete base. The surface is thoroughly cleaned, all dirt, dust, stains are removed, and a primer is applied.
Next, apply the mass onto the foam block:
- if the walls have slight unevenness and defects, the glue is applied in continuous lines, with indentations of 2 cm made from the edges of the sheet;
- when the walls are curved more than 2 cm, apply with dotted lines (to get rid of excess air);
- the middle of the slab is also lubricated with the solution.
The sheet is then pressed tightly against the concrete wall or floor. Excess glue that appears along the edges is removed with a rag.
Builders advise fastening polystyrene slabs with dowels in each corner and in the center.
In addition to the dry mixture, you can use adhesive-sealant, liquid nails and dowels, and a polyurethane-based composition.
To metal
It will be possible to properly glue the foam to the metal if you lay burlap between them.
The metal must be clean and free of traces of corrosion (rust).
For gluing the following are used:
- adhesive sprays (aerosol, in cans);
- silicone sealants;
- polyurethane foam or polyurethane based;
- powder dry compositions;
- small areas can be glued with double-sided tape.
The best option would be polyurethane aerosol adhesive, available in cans, or foam adhesive. The foam adhesive composition is especially good when installing foam plastic on surfaces that are located at an angle or have uneven surfaces. Foam is applied pointwise (minimum 5 points). Solid strips are smeared with powder solutions.
To the tree
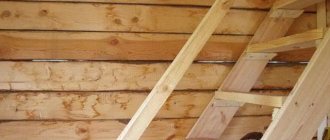
Polystyrene foam can be attached to plywood, boards, lining, OSB boards. Polystyrene sheets are glued to wooden bases in the same way.
The only thing is that nuances are observed due to the characteristics of the tree.
- The wood is cleaned, dirt, dust, grease stains are removed, and completely dried.
- The wood is primed in two or three layers. It is advisable to apply an antifungal primer.
- When fastening under windows, a reinforcing mesh is applied to a wooden base using a stapler.
- The cracks and empty spaces are sealed with polyurethane foam. After the foam has hardened, excess parts are removed.
- Any protrusions and irregularities are corrected.
- If the wood is varnished, it must be removed, since the composition of the varnish coating can corrode the foam.
- It is better to attach polystyrene foam to wood using anti-fungal and anti-mold additives.
The adhesive mixture is applied in strips along the sheet. Indentations of 2 cm are made from the edges. Then diagonal stripes are drawn. The sheet is pressed against the wood, and any residual glue that appears is removed with a rag.
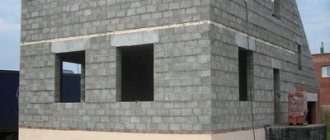
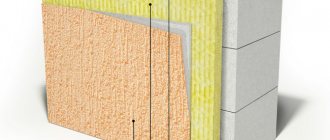
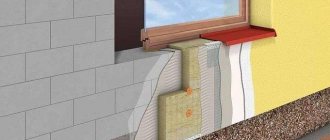
Insulation of walls made of aerated concrete blocks
Despite the fact that the use of polystyrene foam boards to insulate a house made of aerated concrete from the outside reduces its “breathing” properties, this material is widely used. The technology for arranging a thermal insulation layer is quite simple and can be easily done independently.
Preparing the walls
The surface of aerated concrete blocks is quite flat, so preparing the walls comes down to removing the buildup of adhesive mortar in the area of the interblock seams. Potholes (if any formed during the construction process) are sealed with repair cement mortar. Then we cover the entire surface of the wall with an antiseptic solution (to prevent mold and mildew formation). After the antiseptic has dried, we prime the walls to improve adhesion when gluing polystyrene slabs to aerated concrete.
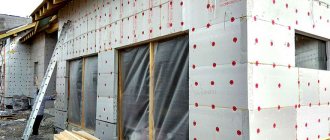
Installation of thermal insulation boards
We cover the walls of the building with sheets of expanded polystyrene using special adhesives. As glue, you can use ready-made dry mixtures (Ceresit CT 85, T-Avangard-K, Kreisel 210, Bergauf ISOFIX), liquid adhesives (Bitumast) or ready-made assembly adhesives in aerosol packaging (Tytan Styro 753, Ceresit CT 84 “Express” , Soudal Soudatherm, TechnoNIKOL 500). We apply glue to the slabs along the perimeter and additionally in several places on the surface.
Important! The adhesives should not contain solvents or other chemical components that can damage the surface of expanded polystyrene or disrupt the structure of the material.
Many adhesive compositions allow installation of slabs at ambient temperatures from -10˚С to +40˚С. However, experts in the field of house construction recommend carrying out thermal insulation work at a temperature not lower than +7˚С and in dry, windless weather.
First, we glue the first bottom row of foam plastic boards along the entire perimeter of the building, then we attach the remaining rows. We press the slabs with force against the wall surface and lay them in a checkerboard pattern. We check the correct installation with a level.
Important! In the corners of the structure, the panels are laid end-to-end, that is, in such a way that in one row the panel from the end of the building extends to the thickness of the sheet, and the panel located at an angle of 90 degrees rests against it. In the next row, the operation is performed in reverse order.
After the adhesive composition has completely dried (about 1 day), we additionally fasten each sheet using special dowels with large caps (“umbrellas”), which should not contain metal parts. The fact is that they rust and create additional cold bridges in the heat-insulating layer: that is, the dowel itself and the central nail must be plastic. Depending on the size, 5-6 dowels are needed for each sheet.
Using a hammer drill, we make a hole in the thermal insulation layer and the aerated concrete wall, then use a hammer to hammer in the dowel and insert a fixing nail.
After the installation of all fastening dowels is completed, we proceed to finishing the walls.
External finishing of polystyrene foam insulator
Since expanded polystyrene has low strength and is susceptible to the negative effects of ultraviolet radiation, finishing work must be carried out after its installation.
First, on top of the polystyrene foam, using a special plaster mortar (or adhesive composition), we attach a fiberglass reinforcing mesh, which prevents cracking of the plaster and improves adhesion. After complete drying, apply a layer of finishing decorative plaster. Such external finishing is quite sufficient to give the heat-insulating layer the necessary strength.
Types and brands of adhesives
For gluing are used:
- dry (powder, plaster-adhesive) and ready-made liquid mixtures;
- liquid Nails;
- adhesive foam (polyurethane);
- sealants.
Dry (powder)
These are plaster and adhesive mixtures. Packaged in large bags up to 30 kg per package. To prepare, the powder is diluted with water in the proportions specified in the instructions. The composition is based on the inclusion of cement, gypsum and polymer components. Externally, the powder is similar to putty or plaster, but the gluing result is more durable.
Suitable for indoor and outdoor use. Adhere well to concrete, wood and other substrates. Used as a seal for cracks, joints and seams. Consumption per 1 m2 ranges from one and a half to two kilograms.
For a reliable result, the walls are processed before gluing: they are cleaned of dirt, dust, dried and primed.
When diluting the powder with water, the liquid is added gradually in small quantities, and the water itself is constantly stirred. This will prevent lumps from forming. Application is possible in a continuous layer over the entire surface or in separate lines with a small distance between each.
Powder adhesives:
- Ceresit ST-83;
- Knauf Perlfix;
- Avangard-K;
- Primus;
- Volma";
- Armierungs-Gewebekleber.
Avangard-K allows gluing not only to concrete, but also to brick walls. Packaging 25 kg in one package. There is a frost-resistant option for the street.
Another Bergauf ISOFIX cement-sand mixture, which contains fillers and special additives, plasticizers. Apply a layer up to 3 mm thick. After mixing the solution, it can be used for one and a half hours, and the position of the EPS can be adjusted for a quarter of an hour. Can be used indoors and outdoors.
Polyurethane adhesive foam
Polyurethane adhesive in the form of foam (foam glue) connects all types of plastic, including polystyrene foam, with any substrate (OSB, metal, concrete, plaster, wood, aerated concrete and foam blocks). You can glue the foam together.
There are specialized formulations on the market. They are marked with an inscription on the packaging (for polystyrene foam).
The gluing plane is not important. Both horizontal and vertical surfaces are glued. The connection holds firmly both indoors and outdoors.
Installation is possible only with a construction gun, on which a cylinder is placed on top of the legs. The application technology is shown in the figure.
It is convenient to use foam adhesive. The work is done quickly. Has low consumption per sq. m. The cylinder is enough for 10-15 m2. Foam adhesives are resistant to moisture, do not freeze, and have high adhesion.
There is no need to prepare, the cylinder is ready to use. The maximum result of the coupling is evident after half an hour, while pressing the parts is enough for only 20 seconds.
Popular brands:
- Tytan Styro 753;
- Penosil;
- Ceresit CT-84 Express.
PVA
PVA is cheap, so it is often chosen for gluing extruded polystyrene foam (EPS). The reliability of the adhesion is not the highest, so it is more suitable for gluing crafts. It is better to give preference to specialized mixtures.
PVA fills voids in walls well. Additionally, foam plates are attached to dowels. Usually PVA is applied in two layers.
Suitable polyvinyl acetate adhesives include Moment Stolyar and PVA-MB.
- Moment Joiner. Universal composition for repair. Supplied in packages of different volumes, from 100 g to 30 kg. The drying time is fast and the seam is reliable. It does not destroy the structure of polystyrene.
- PVA-MB. The composition contains special plasticizers that improve the quality of adhesion. The hardening time of the seam is longer than that of conventional PVA.
Polyurethane foam
An effective composition, but it has another purpose - sealing seams, cracks, strengthening concrete structures.
If you glue with polyurethane foam, the following consequences may occur:
- the foam after complete drying increases in volume, which can damage the foam and deform the entire structure;
- Foam can increase in volume in different ways, so voids form in some places and the thermal insulation properties decrease.
Polyurethane foam has a high consumption per square meter. m of surface, which increases the cost of gluing.
Recommendations for use:
- make sure that the foam is suitable for gluing foam and does not destroy it;
- install the polystyrene itself with a different composition;
- seal the joints with polyurethane foam;
- the foam dries quickly, so you need to work in the same way;
- Reducing consumption is possible with a glue gun.
Liquid Nails
They have a high price, but the gluing result is very high quality. The best choice would be specialized polyurethane adhesives.
Liquid nails have an optimal balance of qualities (ease of use, service life, adhesion). Polystyrene foam attaches perfectly to polystyrene foam, metal, plastic, concrete, wood, and other materials.
Professionals recommend gluing metal using a combination of liquid nails and polyurethane mixtures.
Increasing adhesion to the surface is achieved by preparing it: cleaning, degreasing, priming.
the high price causes the use of nails only on small bases.
The most popular composition is “Moment Montage”.
We insulate the floor with polystyrene foam
Insulation of a concrete floor with polystyrene foam is carried out in sheets with a density of 20-30 kg/mᶟ. We make flooring of polystyrene foam boards as follows:
- do a preliminary leveling fill (this is done if the difference in height of the base exceeds 5 mm), let it dry;
- prime the surface;
- We attach a damper tape along the entire perimeter of the room to the bottom of the walls;
- We lay a layer of waterproofing on top of the screed (ordinary polyethylene is quite suitable: at the joints the material is overlapped - at least 10 cm, on the walls we add at least 20 cm; we fasten everything with construction tape);
- we lay polystyrene sheets on the floor according to the groove-tenon principle in a checkerboard pattern (the tenons must fit completely into the grooves);
- We lay a vapor barrier and reinforcing mesh on top of the thermal insulation layer;
- We make the screed of the required thickness.
On a note! This method of insulation is very effective, but the height of the room is reduced by 10-15 cm.
Floor insulation can be done not only using expanded polystyrene slabs, but also using expanded polystyrene concrete, making a screed out of it (since the thermal conductivity coefficient of polystyrene concrete is low - λ=0.05÷0.07 W/m•°C). We prepare the solution for such filling ourselves by mixing the necessary ingredients: 20 kg of cement, 12.5 liters of water and 0.125 m³ of polystyrene foam granules, or we buy a ready-made dry mixture. After insulation with polystyrene concrete, we make a finishing screed (if necessary) and lay the floor covering.
Description of brands
Among the highest quality brands:
- Ceresit Ct 83 Strong Fix;
- Ceresit Express Ct 84;
- Tytan Styro 753 Gun;
- Knauf Klebespachtel;
- Prospectors Teploizol;
- TechnoNIKOL Professional;
- Penoplex Fastfix;
- Bitumast.
Ceresit CT 83
Ceresit ST 83 brand adhesive is very durable, can withstand heavy loads, and has high adhesion. The mixture is vapor-permeable, so moisture does not linger in the room where the heat-insulating boards were attached with the plaster-adhesive mixture. Does not ignite when exposed to fire. The composition is used to attach heavy slabs of large thickness (up to 20 cm) to the wall outside the house.
You can work with the ST 83 brand at zero temperatures, but then the powder is diluted in heated water to +30 °C.
Advantages:
- environmental friendliness;
- low consumption;
- vapor permeability;
- speed of preparation.
Flaws:
- price;
- inadmissibility of gluing on other paints and varnishes;
- sticker on concrete only three months after it is poured;
- You can mix a good solution without lumps only with a mixer or a drill with a mixing attachment at 400-800 rpm.
Ceresit CT 84
This is polyurethane foam, the basis of the composition is polyurethane and flammable gas. ST 84 – frost-resistant glue. Used at sub-zero temperatures down to -10 °C. In cold weather, the composition hardens several times longer, up to 7-10 hours. While in warm weather, hardening takes only 2 hours.
ST 84 is applied first along the perimeter of the heat-insulating sheet, then diagonally. Presses against the surface. Exposed mixture residues can only be removed with a solvent.
Advantages:
- absence of freons;
- moisture and water resistance;
- consumption;
- simplicity and speed of installation.
Flaws:
- poor adhesion to paint and varnish coatings;
- mandatory fastening with dowels;
- Before applying to foam blocks, the latter require priming.
Tytan Styro 753 Gun
Titan Styro foam in 750 g cans. Application requires a construction gun, which speeds up installation.
The foam layer is no more than 5 mm, this is a drawback, because outside the house such fastening is unreliable. Additionally, fastening with dowels is required.
Bonds EPS sheets to brick, concrete, mastic, plaster and cement bases.
Advantages:
- economical consumption;
- the foam is ready to use, does not require preparation;
- simplicity and speed of application (with a construction gun);
- good adhesion to metal, concrete, brick, plastic and wooden surfaces.
Flaws:
- price;
- requires additional fastening with dowels;
- operation only at t °C above zero.
Knauf Klebespachtel
Powder that is diluted with water. Packaging: 25 kg. For interior and exterior work.
Application is possible by machine using G4 and Monojet pumps. This significantly speeds up coverage of large areas.
Suitable for EPPS.
Advantages:
- Can be used for reinforcement;
- setting time – 1 hour;
- the presence of a machine application method;
- operating temperature range.
Flaws:
- consumption;
- packaging is heavy, inconvenient for transportation;
- takes a long time to apply by hand.
Prospectors Teploizol
Manufacturer – Russia. Release form: powder. Fixing foam plastic to the wall outside the house. In original packaging the shelf life is up to one year.
Advantages:
- no need to pre-treat the surface;
- low consumption;
- used for reinforcement;
- After mixing, the solution is suitable for three hours.
Flaws:
- high price;
- discomfort during transportation;
- slow period of complete hardening (three days);
- operating temperature only above +10 °C.
TechnoNIKOL Professional
TechnoNIKOL Professional adhesive foam has a polyurethane-based composition. Used as a sealant. Fastens all types of polystyrene foam.
Operating temperature up to 30 degrees Celsius, but not below zero.
Advantages:
- price;
- resistance to water, moisture, fungi and mold;
- the ability to correct the position of the slabs within 20 minutes after fixing;
- high adhesion;
- Suitable for external and internal installations.
Flaws:
- installation only at positive temperatures °C;
- installation only with a construction gun;
- chem. reaction when interacting with silicone and polyethylene;
- the required humidity level is 50% for rapid hardening.
Penoplex Fastfix
Penoplex is produced in 750 g cylinders, inside of which there is foam material. Used in conjunction with a mounting gun for fastening extruded and foamed polystyrene foam. Fixation is possible on concrete, brick, ceramic surfaces, and aerated concrete blocks.
It is used both outside and indoors for insulating loggias, rooms, and roofs.
Has a light blue tint. Dries in 10 hours and withstands 100 frost cycles. Installation temperature from -10 °C to +40 °C.
Apply with a construction gun in vertical continuous strips with a distance of 5 cm between each. Press the insulation sheet after 5-7 minutes and strengthen it with dowels.
Bitumast
Resinous bitumen for extruded polystyrene foam. Half a kg of mixture is consumed per 1 m2. Bitumast dries for two days. Withstands 100 freezing cycles. The gluing temperature is only above zero, up to +30 °C.
Cannot be applied to facades or inside rooms or buildings.
Bitumen adhesive needs to be pre-diluted with water. Has good adhesion to any type of substrate. The setting time is long compared to other mixtures. The sheets will have to be pressed until the polystyrene holds on itself and does not slide off. Very high price.
Ceiling insulation
Polystyrene foam can be successfully used to insulate indoor ceilings. As a rule, thin sheets 5 cm thick are used for these purposes. Attaching the slabs to the ceiling is similar to laying them on an external wall. The only difference is that you can use adhesives and plaster mixtures that are intended for indoor use (they are cheaper than for outdoor use).