Purpose of the material
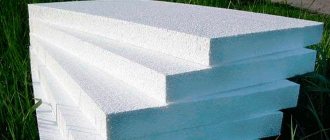
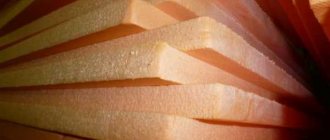
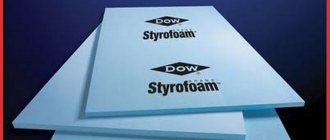
Penoplex is made from polystyrene granules, subjecting them to high temperature and strong pressure. Under the influence of a foaming catalyst, the lumps turn into a finely porous foamy mass. It is then formed into slabs and sent to the end user.
Using expanded polystyrene, a person does not harm the environment and his health, since the raw materials are environmentally friendly. The material is also not afraid of adverse weather, does not decompose, does not rot.
Penoplex does not interact with alkalis, paints, acids, ammonia, alcohol, and lime. May come into contact with gasoline, oil paints, formaldehyde.
Distinctive soundproofing characteristics of expanded polystyrene:
- high moisture resistance;
- excellent compressive elasticity - up to 35 kg/m³;
- low level of thermal conductivity - 0.027-0.031 W/m;
- high-quality work in a wide range of temperatures - from -50°C to +75°C;
- average degree of fire resistance - G3, G4;
- almost completely waterproof - after 28 days, moisture absorption by volume is only 0.5%.
The main issues solved with the help of Penoplex:
- Insulation of balconies, loggias, roofs.
- Thermal insulation of basements, garages, outbuildings.
- Protection of foundations of industrial and residential premises.
- Soundproofing of hotels, cottages, saunas, baths, cottages, factories.
- Heat and sound insulation of interfloor partitions, floors, walls.
Insulation and soundproofing of premises
Often, residents use Penoplex sound insulation to insulate their home and place it under the laminate. To do this, a few slabs 2-3 cm thick are enough; on the first floors it is better to lay 5 cm blocks. Expanded polystyrene mats are often used in conjunction with other soundproofing materials to improve insulation efficiency. In this way, you can suppress noise levels reaching about 60 decibels.
Inexperienced people often use foam plastic as insulation for walls and floors. This expanded polystyrene is not at all suitable for solving such problems, in particular in wooden houses. They use mineral wool sound insulation made from basalt fibers, but it is very expensive - 1600-4000 rubles. for 1 sq. m.
Sound insulation with extruded polystyrene foam is the best option in terms of price and quality. Prices for one sheet measuring 1185x585x50 mm and area of 0.7 sq. m starts from 185 rub. The sheets are quite durable and difficult to break. They can withstand heavy loads, and in terms of thermal conductivity they can compete with mineral wool.
Types of polystyrene foam sound insulation
Is it possible to soundproof with polystyrene foam? Penoplex and expanded polystyrene are the most popular soundproofing materials on the construction market. Both products are produced using polystyrene foam.
Penoplex is a derivative of expanded polystyrene. It makes excellent sound insulation.
Expanded polystyrene is an environmentally friendly, harmless, heat-resistant, soundproof material. Its quality characteristics have been known for a long time and are in great demand. This material is easy to use and economical.
Floor soundproofing diagram.
Another type of foam is polyurethane foam. The cells of this foam are of arbitrary shape with fairly strong walls. In this regard, very high strength of the foam is achieved. This type is flexible and has excellent thermal insulation. One of the disadvantages is destruction from penetrating ultraviolet radiation.
The next type of foam is polyethylene foam. This type is characterized by a high level of flexibility, increased strength and elasticity. Outwardly it looks like a translucent panel up to 2 cm thick. It is not used for the installation of soundproofing structures, but is good for packaging materials.
Soundproofing technology
For greater heat retention in an office or living space, a layered floor covering is recommended. It will also completely absorb noise and unwanted sounds. Laying Penoplex as soundproofing for floors is often combined with materials such as:
- ceiling in the form of a concrete slab;
- Penoplex layer;
- waterproofing pad;
- reinforcing mesh;
- concrete screed;
- decorative coating in the form of tile ceramics, laminate, carpet, linoleum.
We recommend: Features of the selection of materials and installation of sound insulation for walls in an apartment
Expanded polystyrene Penoplex here acts as a substrate that dampens all kinds of noise and protects the floors from the cold. Sometimes, when constructing this type of floor, frames made of wooden blocks are used. The bars are a kind of stiffening ribs and at the same time cells for inserting polystyrene foam sound insulation.
Sound insulation materials
Ceiling soundproofing diagram.
Insulation of internal walls is necessary primarily to ensure that peace and quiet reign in the house. Therefore, when working on sound insulation, choose:
- extruded polystyrene foam;
- products based on basalt fiber;
- drywall;
- steel panels;
- plasterboard membranes;
- polyurethane foam materials;
- polystyrene insulation boards created by extrusion;
- rigid boards made of extruded polystyrene foam. In their production, polystyrene of the highest strength is used.
To install foam panels, they must first be cut. And this is not easy, since the foam crumbles when cutting. But there are several options thanks to which you can easily cut a piece of the required shape without deforming it.
To complicate the design and improve the soundproofing of the room, plasterboard is added to the base of foam boards as a frame. This method can achieve very good results.
Typically, the problem of increased noise transmission in domestic premises arises after unsuccessful repairs (redevelopment). Therefore, for sound insulation, it is imperative to carry out measuring work to establish the noise level. Such calculations will be done better by a specialist - an acoustician.
Soundproofing process
The ideal soundproofing properties of Penoplex allow you to forget about the cold, noise and moisture in any room for many years - an office, an apartment, a private house. The sheets fit perfectly together, resulting in a durable structure. This further increases the resistance of the material to heavy loads.
When arranging rooms with sound insulation Penoplex, extruded polystyrene foam with a product thickness of 2-3 cm is mainly used. Despite their modest parameters, they have high protective qualities from noise and cold, while other materials to obtain the same effect have to be laid in layers up to 15 thick cm.
Stan
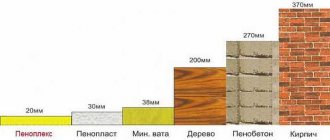
Penoplex protects walls from moisture, cold and extraneous sounds better than mineral wool or other materials. This is due to the small thickness of the mats, which are easy to install into the thickness of the wall. By comparison, with similar wall insulation with a mineral wool board, the insulation layer would be 10-15 cm. This will significantly reduce the usable area of the room.
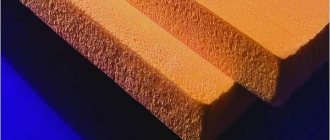
Extruded polystyrene foam Penoplex, or EPS, is suitable for soundproofing external and internal wall spaces. It is shock-resistant, not afraid of moisture and direct sunlight.
Paula
Finishing the floor with Penoplex will protect residents from noisy neighbors below and help conserve heat in the apartment. The material does not create excess load on the floor, even in tandem with a concrete screed, and does not in any way affect the overall structure of the floor. The method of insulating a home with polystyrene foam directly depends on the floor covering.
If the room has an old wooden floor, then it should be dismantled, the joists should be strengthened, and stiffeners should be installed. After this, the cracks and gaps are treated with polyurethane foam and reinforced with construction tape. However, Penoplex is often combined into one layer with a concrete screed. Installation of such floors looks something like this:
- The old coating and glue residues are removed from the surface.
- Remove dust/dirt, fill gaps and cracks with construction foam or seal with putty.
- The concrete floor surface is primed.
- Markings are applied to the slabs, taking into account protruding pipes and communications, and then cut.
- A sand-cement mixture or a 2 cm thick layer of sand is poured onto the concrete floor. Not all slabs are sprinkled at once, but 2-3 at a time.
- Penoplex sound insulation is laid on the embankment, lightly pressing it against the bottom layer. Fill the entire area of the room.
- Overlapping reinforcement mesh is laid on top of the polystyrene foam.
- Fill everything with concrete screed.
We recommend: Detailed instructions for soundproofing floors under laminate
Ceiling
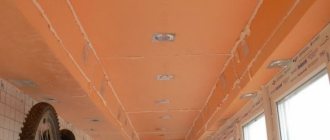
Is polystyrene a decent sound insulator for ceilings? Yes, no doubt. With the help of Penoplex, it is possible to permanently get rid of mold and mildew, as well as reduce the noise level from neighbors above, and maintain heat in the apartment. Ceiling preparation begins with removing the old coating, sealing cracks and voids, and ends with priming the surface.
Further stages of work:
- prepare the adhesive solution;
- cut polystyrene foam boards into segments according to the shape and area of the ceiling;
- Lubricate each piece of mat with glue, but not completely - first walk around the perimeter, then drop a few dots over the entire area;
- firmly press the piece of material to the ceiling, as if pressing it into the base, hold for several minutes;
- fill the entire ceiling.
Complete the insulation of the surface with decorative elements: plasterboard, plaster, beautiful panels.
The use of penoplex for sound insulation
The material is produced in slabs with a thickness of 2 to 10 cm. For sound insulation, penoplex 5 cm thick is used. Installation is carried out on the floor, walls, ceiling, but it is not at all necessary to cover all these surfaces to avoid unnecessary costs. First you need to find out where the source of the annoying noise is: from above, below or from neighbors through the wall.
Soundproofing walls and ceilings
The principle of laying penoplex on walls and ceilings is similar. First you need to prepare the surface: clean it of the old layer of plaster, level it, treat it with an antiseptic, and prime it. Then the slabs are glued end-to-end without gaps onto a smooth surface, secured in several places for strength with special dowels with wide heads, the joints are treated with polyurethane foam and leveled. Then a layer of plaster is applied to the walls or ceiling, after it has dried, they are puttied, primed and then a finishing coat is applied or wallpaper is glued.
Soundproofing the floor
First of all, the old floor covering is removed and the logs are dismantled. If glass wool insulation was laid underneath them, then that must also be removed. Before laying the penoplex, it is necessary to assemble a wooden frame for the stiffeners with cells according to the size of the slabs. Treat all cracks with polyurethane foam and seal with special tape. Then install the slabs, insulate all joints with foam and tape. The next stage is the installation of a base made of plywood or other material. And only after this the finishing floor covering is laid.
How to avoid mistakes
To achieve maximum effect, you must adhere to the following rules:
- To insulate the walls of a room, sound insulation from polystyrene foam is laid in rows, from bottom to top.
- Particular attention is paid to those areas that transmit sounds and cold the most.
- For better adhesion of Penoplex and the base, go over the mats with a needle roller or sandpaper.
- When attaching mats with dowels, calculate the length of the nails: add the actual difference in the fastening surface to the thickness of the glue and sheet, then add a couple of centimeters to the depth of the hole left for the dowel.
- The dowels are fastened in a checkerboard pattern touching each other.
- Penoplex products are reinforced with reinforced mesh, placing it on an adhesive layer. The glue is leveled with a spatula, completely immersing the mesh in it.
- The cracks/gaps are filled with foam without the slightest omission.
Before work, select polystyrene foam mats that exactly match the parameters of the specific room.
Ceilings, their sound insulation with penoplex
Soundproofing work requires an integrated approach , only then will everything be done efficiently and reliably.
- The surface of the ceiling is cleaned of plaster so that the working surface of the ceiling is better and of higher quality.
- To prevent mold and mildew from appearing over the years, the prepared ceiling should be treated with an antiseptic.
- Apply a layer of liquid waterproofing agent.
- The reinforcing mesh must be fixed to the ceiling surface.
- Using special glue, attach the penoplex to the fixed mesh.
- Next, cover everything with plasterboard, after which finishing work is carried out over the entire surface of the ceiling, depending on wishes and taste.
During the work, we must not forget about such things as cracks on the surface of the ceiling , as well as where the most noise comes from. You may have to sew up not only the ceiling, but also the floor, and maybe the walls. Some surfaces may not provide the desired soundproofing effect, since extraneous sounds do not travel through them, and the work done will be unnecessary.
Experienced builders use penoplex foam with a specially shaped edge to work on heat and sound insulation. This feature of the material makes installation much easier, avoiding the formation of “cold bridges”, and sound insulation is more effective.
Mineral wool is also used for good sound insulation of rooms. Working with it will require certain experience and skills, and it will cost more than penoplex. It is much more convenient to work with penoplexes, since they have minimal weight, are easy and quick to cut, and are also fixed in place. The material slabs are plastic and elastic, so they are easily attached to the frame. The material is always affordable, which is also important for most consumers. Over the years of using penoplex, it always shows itself positively in many residential premises.
If you resort to the help of specialists who carry out work on insulation and soundproofing of the ceiling in 2 layers, then the price on average can be about 1800 rubles for a room up to 30m2 . The cost of the work usually includes all necessary materials, delivery and loading and unloading operations.
Reviews of sound insulation made of polystyrene foam
Buyers who have tried Penoplex in action note the light weight but large volume of the panels. The mats take up a lot of space in the room, but are easy to cut and, if desired, quickly transported to the next room. If soundproofing is installed correctly, your home can be finished in one day. The work does not require special tools or special skills; all steps can be easily completed with your own hands.
According to reviews of Penoplex sound insulation, the material does an excellent job of thermal insulation of floors. It is a good layer between other layers, together with them forming an impeccable coating that completely retains heat in the house. Carpets, runners, and other coverings are no longer needed, since the floors are warm and your feet do not freeze when in contact with them.
Penoplex sound insulation
This material is known to many as an effective heat insulator, but it also has other advantages, one of which is sound insulation.
Penoplex is considered the most popular in the construction market; it is made from extruded polystyrene. The strong walls of penoplex with insulated cells, filled with air, have an arbitrary shape, and this structural feature provides high strength. In the USA, penoplex foam began to be used as a building material more than 50 years ago. Penoplex has many positive characteristics, such as:
- Low water absorption
- Minimum thermal conductivity
- Low vapor permeability
- Flexural and compressive strength
- High level of sound insulation
It’s worth talking about this quality of penoplex in more detail. Given this characteristic of the material, it can be used to insulate any surface in the room. It can be called the most advantageous soundproofing material, since to work with it you do not need to have special tools or extensive work experience; all installation work can be easily done with your own hands.
When working with penoplex, it is necessary to lay it correctly, without leaving gaps, and foam the joints well. Even after years, the soundproofing qualities of the material do not decrease; for a maximum time it will also retain its other advantages. Penoplex will not rot, so the walls, floors or ceilings will be reliably protected from destruction.
Features of installing penoplex on walls: recommendations from experts
Among modern insulation materials used to improve the thermal insulation properties of building walls, the greatest interest among consumers.
Manufacturers produce two main types, each of which is intended for a specific installation location . One of them is intended for insulating the walls of a house from the outside, and the other will be an excellent material for internal thermal insulation of premises.
Consumers who have little understanding of the nuances associated with the quality of thermal insulation materials sometimes call this insulation foam, unknowingly making a mistake .
If you compare these materials to the touch, they will really be similar. And in appearance they resemble each other. However, if you look at the materials in cross-section, their differences will immediately be visible .
When cut, penoplex looks like a monolithic material. It is immediately clear that one of its properties is strength. Polystyrene foam, consisting of bubbles that are not held together too tightly, cannot be called durable - it breaks easily when bent. However, it can easily withstand significant pressure.
It is important to know that for high-quality insulation of the walls of a building, you need not only high-quality insulation, but also strict adherence to the technology of its fastening.
Methods for attaching penoplex to walls
When installing penoplex panels, they are fastened with a special compound designed for its fastening.
After placing the panel coated with an adhesive composition on the insulated surface, additional fastening of the material is carried out using dowels.
Penoplex adhesive is selected depending on the specifics of the work, the type of finishing (external or internal), as well as the type of room.
If the insulation is installed in rooms with high humidity, it is better to use a polyurethane adhesive. When choosing an adhesive, it is necessary to take into account the material of the base of the walls on which the penoplex will be glued.
Types of glue for penoplex
To select the correct adhesive when purchasing it, you should be guided by its technical characteristics. All their parameters are indicated in the instructions provided by the manufacturer complete with the glue packaging.
The instructions must contain the following information about the adhesive material :
- temperature parameters required when working with glue and operation;
- air humidity indicators;
- type of base on which insulation will be carried out.
These characteristics will determine how well the penoplex will be fixed to the insulated surface.
Depending on the base used to prepare adhesives, they are divided into several groups. Each of them is best used in certain conditions:
- mineral (contains cement) and gypsum adhesives are used when working on dry surfaces. It can also be used in damp spaces, but in this case the composition must be prepared for use in small portions. At high humidity, the composition hardens quickly;
- waterproofing adhesives (made from bitumen) are used only for external work. Due to the presence of properties harmful to human health, the use of such adhesives in enclosed spaces is prohibited;
- polyurethane and polymer composite compositions are universal adhesives.
It should be borne in mind that it is customary to carry out indoor insulation with penoplex in the warm season so that ventilation is possible. All glue compositions, until they are completely dry, have an unpleasant, corrosive odor .
Attention! The adhesive for penoplex should not contain organic solvents! They quickly destroy the insulation. Acetone, gasoline, kerosene, white spirit and toluene - these substances should not be in adhesives for penoplex.
The developers of this insulation recommend working only with adhesives made on a cement, polyurethane or acrylic base.
Selecting adhesive for installation
When purchasing an adhesive composition for working with penoplex, some consumers believe that the more expensive the glue is, the better the work will be done. This is not entirely true.
It often happens that the purchased glue has properties that are not necessary. For example, if finishing with penoplex is done indoors, then there is no point in buying an adhesive composition with frost-resistant additives included in it, overpaying a substantial amount for properties that are useless in this case.
For this reason, when choosing glue, you should carefully study the attached instructions, having previously decided on the characteristics of the premises and the quality of the wall surfaces where the insulation will be carried out.
Most often, consumers purchase the following brands of adhesives :
- ATLAS STOPTER K-20 kley - made on a mineral basis, optimal consumption 4.5 kg per square meter. meter, the cost of a bag of dry mixture is from 310 rubles.
- "T-Avangard-K" - designed for surfaces that require waterproofing, consumption 5 kg per square meter. meter, bag (25 kg) costs 270 rubles.
- Polyurethane adhesive "TITAN" - for reinforced concrete surfaces, per 1 sq. meter takes a tube of glue with a volume of 750 ml, costing from 405 rubles.
Consumers who do not have experience in gluing penoplex should purchase the adhesive with a reserve , since its actual consumption will be significantly greater than that specified in the instructions.
Not long ago, manufacturers developed a new composition for installing penoplex - adhesive foam . It perfectly connects penoplex with any surfaces, as well as with each other.
A high-quality composition for installing insulation is liquid nails , however, the cost of this glue is quite high.
Additional mounting methods
To increase the strength of the installation of insulation, dowels are used together with the use of an adhesive composition.
In their design, they resemble nails with wide heads. They are made of metal or plastic .
To attach insulation to building facades, only metal dowels are used; plastic products are used only for indoor work. The use of dowels significantly improves the quality of installation of penoplex, but the need to drill holes for their installation violates the tightness of its sheets.
are used as an additional fastening element . This is a very reliable mount. Some manufacturers complete with foam sheets and supply the number of self-tapping screws required for their fastening. However, just like dowels, they violate the tightness of the insulation.
Soundproofing of the floor. Underlays for laminate
The main misconception when it comes to floor sound insulation is the belief in the possibility of increasing sound insulation with thin underlays for the finishing coating (laminate, parquet and other coatings). The sellers themselves attribute mythical “soundproofing” properties to the substrates: “Place this substrate and you will stop hearing your neighbors below!” In the section on floor soundproofing, we already noted that none of the underlays are able to reduce the noise from the neighbors below!
| If you need high-quality sound insulation and professional installation, please contact us! Our specialists will put together proven circuits that will reliably protect you from the noise of your neighbors. The visit of a specialist for measurements and consultation is free in Moscow and the region! Dmitriy. Installation engineer 8 (916) 575-26-10 Nikita. Physicist-acoustics 8 Email: [email protected] |
The life of a modern big city resident is a frantic pace and a continuous series of events bordering on stressful situations. It becomes quite understandable and natural to want to be in comfortable conditions upon returning home in order to be in time for the coming morning to the maximum extent possible and restore your own strength and put your psycho-emotional state in order. It would seem that what could interfere if you have your own home, a strong family with good relationships, an established life?
Unfortunately, neighbors, especially those living on the floor above, can make very significant “adjustments” to this evening idyll.
these may not be “violent” youth groups with never-ending “holidays” and fun. Very often, the cause of the worries is the most ordinary family, which, moreover, has young children. It’s just that the design of many of our multi-storey buildings is so imperfect that the sounds of footsteps, fallen objects, rearranged furniture, a working TV, and often even people’s conversations are clearly transmitted through the ceilings, especially if they suddenly switch to “raised tones.”
A completely natural reaction is the desire of the owners to protect their homes as much as possible from such inconveniences. The search begins for options that would be simple and short in implementation, would not entail serious material costs, and at the same time would be effective. Perhaps, having once heard about the wonderful qualities of extruded polystyrene foam, a person enters a query into a search engine - Penoplex soundproofing of the ceiling - and receives an array of information that seems to confirm his expectations. But is everything so clear?
What do some sites recommend?
Many articles tell how you can get rid of noise yourself, quickly and inexpensively, by using foam boards. But if you look closely, all these publications are like “twin brothers.” They describe the process of installing penoplex on the ceiling and promise that such measures are enough to ensure that noise from upstairs neighbors ceases to be a cause of concern.
Indeed, if you take this at its word and choose this option for noise protection, then the process itself is quite simple and understandable, and can easily be done on your own.
- The ceiling surface is cleared of unstable peeling plaster (if any), wallpaper or bubbling paint coating. Ideally, it is best to get to a clean floor slab - the extruded polystyrene foam slabs will stick on it more easily.
You can use spatulas, hard brushes, washing with water and other methods that are most convenient in a particular situation. The end result should be a consistently clean surface.
- All surface defects such as cracks, cracks, potholes and chips are repaired on the ceiling. Particular attention should be paid to the joints between floor slabs - defects are most often found there.
How to eliminate defects in the ceiling surface?
Any ceiling finishing involves preliminary preparation of its surface. How to seal joints between floor slabs - read in a special publication on our portal.
- In order to prevent the appearance and spread of mold and at the same time increase the adhesive qualities of the ceiling surface, it is treated, preferably in two layers, with a special primer with antiseptic properties.
Priming is usually carried out with a roller, and in hard-to-reach places (in corners) - with a brush.
- After the surface is ready, you can attach slabs of extruded polystyrene foam - penoplex - to it.
The clear geometry of the slabs and the presence of special lamellas significantly simplify this process. To fix them to the ceiling, use one of the adhesives. This can be a dry construction mixture for a specific purpose - specifically for expanded polystyrene, or adhesive foams in plastic tubes, which are applied with a gun.
Depending on the type of glue, it is applied to the back of the panels in different ways.
Thus, an adhesive solution prepared from a dry construction mixture is laid out pointwise in slides (pos. “a”) or distributed evenly over the surface using a notched trowel (pos. “b”). When using a special polymer adhesive, it is enough to apply it in stripes around the perimeter and additionally in the center parallel to the long side of the panel (pos. “c”).
After applying the glue, pause for 2 ÷ 3 minutes, and then the panel is pressed tightly to the ceiling surface in the right place. The plate is held in this position for a minute - this should be enough for its initial fixation. If necessary, the duration of the clamp can be slightly increased.
- Final fixation can be carried out using dowels - “fungi”. For which the corresponding holes are drilled directly through the foam plastic in the floor slab. Typically, 4 ÷ 5 dowels are enough to attach a standard panel.
- This continues until the entire ceiling plane is completely covered. When installing subsequent panels, the locking parts of the panels - lamellas - are combined. To obtain a completely monolithic coating, the seams between the installed slabs will be filled with polyurethane foam, the excess of which is cut off after it hardens.
In fact, at this point the installation process of the penoplex layer can be considered complete; all that remains is to resolve the issue of finishing. Such a ceiling can be plastered using reinforcement using fiberglass mesh. Another option is to cover it with decorative panels or “sew up” it with plasterboard, on which any finishing can be done.
It would seem that everything is simple and logical. It becomes even unclear why such an accessible method is not widely used?
But it turns out that the whole point is that such ceiling cladding with penoplex has nothing to do with high-quality sound insulation. To understand this, it is worth taking a closer look at the physics of sound transmission in a multi-story building and the properties of the material itself.
Why shouldn't this be done anyway?
An inquisitive apartment owner should not limit himself to the first recommendations he comes across. A “walk” through the forums of specialists in construction matters can bring much more benefit, and here an unexpected “surprise” may await you. Almost all experienced craftsmen call this method of soundproofing absolutely ineffective, “hacky”, which not only does not bring the desired silence to the apartment, but can even aggravate the situation. You can understand this yourself by delving deeper into the problem.
How does sound travel in high-rise buildings?
Noise propagates in a multi-storey building in two main ways.
- Airborne noise is transmitted by air vibrations. This is the normal range of sounds audible to the human ear - conversations, turned on TVs or audio centers, playing musical instruments, and the like. The penetration of such noise through ceilings is not so pronounced, since the air needs to “swing” a massive membrane, which in this case is played by a slab, which, in turn, transmits these vibrations further.
However, such a disturbing factor may still exist. Often such problems are solved simply by “administrative” methods - you can try to come to an amicable agreement with your neighbors on mutual observance of the required silence regime. By the way, it is in this matter that the location of the apartments does not matter at all - sound waves travel in all directions, and those living above may suffer no less from the increased noise of the lower neighbors.
- Impact noise is the propagation of sounds of a slightly different kind. Its source is mechanical - shock or vibration effects on the surface. In this case, vibrations are transmitted to the ceilings, which themselves become both a carrier and a source of noise, directly transmitting sounds into the premises. Moreover, these vibrations are perfectly transmitted from the slabs to all adjacent structures, and such noise is the most difficult to deal with.
This could be the sounds of footsteps or children jumping, falling dishes, working with construction tools, rearranging furniture, or folding out a sofa. By the way, low-frequency vibrations from, for example, a loudly turned on home theater subwoofer, an unsuccessfully installed washing machine, etc., propagate in the same way.
- There are also structural noises that are caused by equipment operating in the building - this can be ventilation or air conditioning units, boilers, pipelines, etc. Such vibrations can have both air and shock (vibration) propagation.
The transmission of sounds in different types of houses also has its own characteristics.
- Panel reinforced concrete houses, which at one time were massively erected everywhere to quickly solve the problem of the housing crisis in the country, are the worst in terms of noise insulation.
We can say that impact noise propagates through such a structure unhindered. The density and massiveness of the walls and ceilings are approximately equal, and sounds spread without problems throughout all parts without encountering much resistance.
- Brick houses (if they are actually made entirely of brick, and not lined with it) are the most favorable in this regard. There are massive thick walls and relatively thin interfloor ceilings.
Impact noise is poorly transmitted from lighter to heavier structures, and the walls themselves dampen the airborne propagation of sounds well. But the “problem of upper neighbors” still does not disappear.
- In houses built using the now widely used monolithic frame construction technology, noise insulation problems are very acute. True, it is much more difficult to “sway” very massive floors, but vibrations from them are transmitted to light wall partitions with virtually no losses.
Reducing the “noise” of such apartments is a very complex process that requires a comprehensive approach, and soundproofing only the ceiling surface becomes “like pellets to an elephant.”
Now let's see if penoplex can help in these situations.
