Types and features of outlet ventilation ducts
Ventilation outlets always operate in conditions of high humidity. Because of this, condensation accumulates on the pipe walls in winter. During warming or sudden cold weather, it settles in a dense layer and interferes with the proper operation of the entire system. The technical parameters of the ventilation system suffer. Ventilation outlets help avoid unpleasant consequences due to weather changes:
- The calculated ventilation requirements are significantly lower than the actual capacity. They always have a reserve volume to minimize the negative consequences after condensation accumulates or freezes.
- The internal surfaces of the walls are constructed in such a way that they create minimal resistance to the movement of air flows. This fact has a positive effect on the cost of the structure and the ease of its maintenance.
- Low weight and very good strength reduce the operating forces. Roofs made of metal sheets reach a thickness of 0.45 mm. Additional loads on such sheets are undesirable. The lightweight output design does not create stress or surges in any way.
- The material is resistant to any weather and sudden changes in conditions. Even ultraviolet rays and chemicals are not afraid of him.
Advice
There are many ventilation outlets on the market. To choose, you need to familiarize yourself with the properties of the material from which the structure is made, determine the dimensions, and installation location.
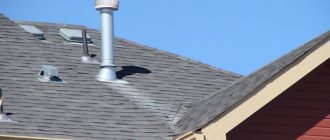
How is the ventilation passage through the roof arranged?
The passage unit consists of the following elements:
- A hole in the roof having the appropriate shape and size.
- An air duct passing through an opening.
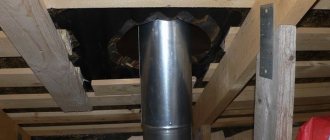
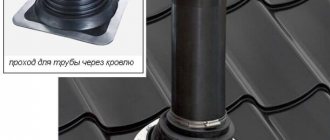
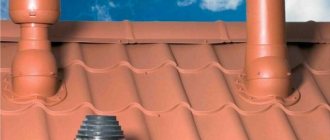
- Penetration , tightly installed on the passage section of the air duct, having a support ring and a connecting flange. It has a certain angle of inclination, as well as a specific relief that repeats the pattern of a particular type of roofing.
The main element of the software is the penetration itself, which ensures the functionality of the device. There are different designs of penetrations.
Recently, elastic structures have been gaining popularity because they are versatile and can be used on any type of roof. Source orchardo.ru
Elastic penetration is made from special types of rubber or other flexible materials that are resistant to atmospheric influences, changes in temperature and humidity, and exposure to ultraviolet rays. It has a corrugated connecting sleeve that allows you to change the shape and is suitable for different angles of inclination. The height of the sleeve can be different; the greater the angle of inclination, the higher the penetration sleeve should be.
In addition to elastic structures, there are plastic products. They are resistant to moisture, tolerate temperature changes and exposure to ultraviolet rays. As a rule, plastic UP are produced for various types of roofing as additional elements.
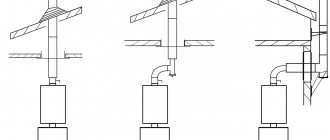
It is necessary to clearly distinguish between the passage through the roof for the air duct and for the chimney. Despite the similarity of functions, these elements have one fundamental difference: ventilation passages work with air flows of normal and low temperatures, and chimneys remove hot combustion products and require fire-resistant protection.
Chimneys need fire-resistant protection Source proroofer.ru
Reasons for putting it on the roof
The ventilation outlet to the roof in the form of a pipe ensures maximum air draft. This leads to more effective cleaning of the surrounding space, delaying and removing foreign odors from the room. Natural draft occurs due to the difference in temperatures indoors and outdoors (how to independently make ventilation on the roof of your house?).
According to SNiP standards, ventilation to the outside is necessary for the following reasons:
- to supply fresh air and saturate the apartment with oxygen;
- installation of the drainage part of the sewer shaft (the drainage pipe connects the sewer riser with ventilation to remove unpleasant odors);
- for air exchange in the attic part of the house and in the attic.
Stages of installation work
Before installing the ventilation pipes on the roof, it is necessary to complete the installation of the ventilation system wiring inside the building. The air duct itself must be securely fixed. The list of tools depends on the roofing material of the house. To carry out the work comfortably, you will need the following basic list of tools and materials:
- chisel;
- electric drill;
- building level;
- jigsaw (highly preferably electric);
- Screwdriver Set;
- insulation material;
- metal scissors or grinder;
- marker;
- hardware for fixing;
- sealant;
- rags;
- pass-through unit;
- individual protection means.
When performing independent installation of ventilation outlets on the roof, you should use the assembled passage unit, thereby greatly simplifying your work. The sequence of actions is as follows:
- Marking. Using a marker, make marks according to the template (depending on the cross-section and size of the ventilation outlet pipe to the roof) in the place where the ventilation shaft will exit.
- Creating a slot. You need to cut a hole in the roof using a tool for processing a certain roofing material (usually a grinder).
- Removing the top layer of the roof.
- Drilling holes for fastening the outlet segment of the ventilation shaft.
- Marking for installation of the passage unit.
- Creation of grooves into which self-tapping screws will be placed in accordance with the previously made markings.
- Installation of the passage unit.
- It is fixed using self-tapping screws.
- Installation of the ventilation pipe, securing it using appropriate hardware.
- Insulation of all cracks and openings.
Installation Features
When planning and installing a ventilation system, it is first necessary to check the calculations for compliance with technical regulations. It is strongly recommended to entrust the design to specialized specialists who understand all the features and technical nuances of the building.
There is a difference in temperature at the inlet and outlet of the ventilation duct. An increase in draft occurs inside the channel due to the difference in temperature inside and outside the room. This is the main reason that in winter ventilation tends to work with higher productivity than in summer.
Even at the design stage, you need to think about the thermal insulation of the channels that run under the roof. This is required so that the air draft does not decrease over time. This solution effectively protects the exhaust ducts from moisture accumulation. If the ventilation pipe is located along the chimney, it is necessary to take care of its heating (the quality of operation of the ventilation system as a whole changes positively). On the other hand, there is also a minus here. In such channels, the draft is different, so if the calculations are made incorrectly, you may encounter a malfunction of the ventilation.
Properly designed ventilation outlet contributes to effective air conditioning indoors. Self-installation is not difficult, provided you first familiarize yourself with the specifics of the work.
Securing the top of the ventilation riser
Consequences of installation errors
Proper installation of the ventilation pipe on the roof is the key to the full operation of the entire system. Failure to comply with recommended installation standards will result in the following negative consequences:
- weakening of traction;
- the presence of unpleasant odors in residential premises;
- accumulation of moisture in rooms;
- condensation inside the system;
- lack of oxygen;
- the appearance of fungus on the surface of the walls;
- soot deposits on facing materials installed in the kitchen;
- increasing the incidence of diseases in all residents;
- freezing of certain building structural elements.
Correct installation is the main factor that determines the usefulness of air exchange and living comfort.
What to consider when making a device?
It is advisable to plan placement during the construction stage of the house. But in practice, people approach the reconstruction of existing parts with a finished building, with doors and windows.
A pre-compiled project will help to correctly reconstruct the ventilation and bring it outside:
- Simple metal pipes are placed in a pre-made hole and attached with fastening tools.
- It is best to equip the roof penetration with a locking valve with a ring. They collect condensation on themselves.
- The outlet channel is connected to the bottom of the pipe. A flange is used for this.
- A deflector or a regular protective umbrella is placed on top.
- If you need to insulate the structure, you can do this with mineral wool.
The exits are made sealed and durable. Their correct installation and fixation on the roof guarantees the efficiency of the entire ventilation system. When designing, all characteristics of the ventilation shaft are taken into account.
Attention
You need to select a product after calculations. It’s okay if the exit is purchased after completing the main ventilation work. Then there will be no mistakes with choosing the size.
How to install correctly?
Step-by-step instructions for installing a ventilation outlet with your own hands on a roof structure:
- Determine the installation location of the roofing unit on the roof.
- In the upper wave of the metal tile, the contours of the future hole are made (for this, a template included with the installation elements is used).
- Using a chisel or metal scissors, make several holes in the lower part of the roof.
- Using the template, you need to select the places where the screws will be screwed on and then drilled out.
- Clean the roof surface from settled dust and moisture. The structure is attached to a clean, dry surface.
- At the selected location, lay out the gasket and secure the passage element in it.
- Screws are used to attach parts to the surface.
- From the attic side, the ventilation outlet to the roof is sealed.
You can use a ready-made shaped product to install the vent passage. pipes. This pipe is a combined one. Consists of an inner galvanized steel pipe and an outer polypropylene layer. The lower part of the product is led into the air duct, where the seal is located, and the upper part of the structure is equipped with a cap with a deflector.
To increase the efficiency of the ventilation system, additional elements are used:
- Droppers. Nozzles made of metal or plastic that prevent precipitation from entering the pipe.
- Aerators. Improve air circulation between the roof insulation layer and the outer covering.
- Deflectors. The nozzles dilute the air in the outer part of the pipe due to the blowing wind and the creation of a draft.
When designing ventilation, careful consideration must be given to the pipe exit through the roof to ensure proper air flow. The design should not interfere with the circulation of natural air exchange and serve as protection from the influence of bad weather conditions (how to make natural ventilation with your own hands?). Before installing ventilation, you need to think about its location, the most successful placement on the roof surface (read more about how to install ventilation yourself, here).
There are many different ventilation systems that allow you to solve the issue of ventilation in a bathhouse, bathroom, garage, kitchen, room, cellar, basement and boiler room in an effective, quick way. You will find instructions for installing ventilation yourself on our Internet portal.
