What is grout used for?
This building material is used at the last stage of working with tiles. When all the parts are laid out and the glue has dried, you can begin to aesthetically design the seams between the tiles.
The grout serves as a kind of barrier against moisture and dust. By sealing the seams with this material, you guarantee the safety of the tiled surface.
If during the work the seams turn out to be sloppy or have different widths, you can easily correct this defect using a rubbing compound. It is enough to choose a tone as close as possible to the color of the tile and imperfections will not be noticeable.
And if you are planning to make an unusual design, grout will also help with this. You need to choose a tone that will be significantly different from the color of the tile. This way you can achieve an unusual interior design.
Tile adhesive and mortar for stoves
The quality of adhesion between the tile and the stove surface depends on the solution on which the tiles are placed on the stove. In view of its intended purpose, the adhesive solution must be heat-resistant, fire-resistant, and heat-resistant.
There are three types of mortars for laying stove tiles:
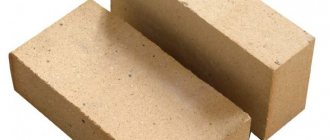
Clay mortar for oven
How to prepare: clay, sand and water are mixed in certain proportions, which depend on the type of clay:
- for oily clay the ratio will be 1 part clay, 4 parts sand, 1 part water. The fat content of clay can be determined in the laboratory or in a traditional way - you don’t feel sand in it, and a ball rolled out of it cracks badly when it dries;
- for normal – 1:3:1
- for skinny people – 1:2.5:1
Cement mortar for furnace
How to prepare: cement and sand are mixed in a ratio of 1:3 and brought to the desired consistency with water. In this case, the cement must be grade M 400 or higher. To improve the properties of the solution, it is recommended to add PVA and asbestos to it. Stove makers advise adding 1 kg of salt. onto a bucket of mixture;
Dry mixture mortar or special adhesives (cement, dispersion, epoxy)
They are ready-to-use mixtures intended for a specific type of tile. They are good because the proportions in them are carefully adjusted, and in addition, various plasticizers are added that improve the properties of the adhesive solution. Such adhesives have proven themselves well: SCANMIX Skanfixsuper (Finland), Plitonit-SuperKamin (Russia-Germany). Budget options: SILTEK T-84 (Ukraine), “Pechnik” (Belarus) and “Plitonit W” (Russia).
Ready-made adhesive solution - adhesive mastic
When choosing this type of glue, you need to pay attention to the markings. It should be intended for lining stoves and fireplaces. Good user reviews for NEOMID SUPERCONTACT (Russia), Terracotta (Russia), “Parad-77” (Belarus). But, in general, the quality of adhesion of the mastic to the surface leaves much to be desired.
In any case, the solution must meet the requirements for heat resistance and coefficient of thermal expansion. Ideally, laying tiles on the stove should be done using the same mortar that was used to level its surface.
All professionals and users agree that it is not worth saving on materials.
Kinds
Based on the nature of the components, building mixtures are divided into:
- cement. The main component of such mixtures is Portland cement. There are ready-made diluted grouts, or you can choose a dry composition, which should be diluted with water or latex before work.
- epoxy. These grouts contain epoxy resin and a special component, which then becomes hard and ensures the strength of the seams made. They look much more aesthetically pleasing, but they also cost more than cement ones. Such compositions require special application techniques and are not easy to work with.
Jointing tile joints (grouting)
Grouting the joints between the tiles is done with a special mixture or clay-sand mortar with the addition of coloring pigments. The work is done with a rubber spatula. It is suitable for tiles because... allows you to fill small seams. Or with a construction gun, if the stove was lined with porcelain stoneware, terracotta or clinker tiles.
Types of grout for tiles and their comparative analysis are presented in the table (analysis of grout for clinker tiles)
Tile grout - comparison table
After applying the grout, wipe the surface with a damp sponge. This technique will remove any remaining mixture. Be careful not to press too hard on the sponge, otherwise you may damage the seam.
Advice. Users suggest using your hand to form a concave seam. It can be done with your fingers (if the seam is wide enough) or with improvised means, for example, a flexible tube or the handle of a toothbrush.
Final cleaning of the grout on tiles or majolica is carried out after the grout has dried (after 1-2 hours). Visually, this can be seen by the fact that the tiles will become lighter. Cleaning is done with a flannel rag soaked (soaked) in a solution of a cement-grout film remover.
The process of tiling the stove is complete. Now all that remains is to wait 3-4 weeks before trying the stove in operation.
Choosing grout for the oven
You can buy ready-made grout mixture at any hardware store. Before purchasing it, familiarize yourself with the basic requirements for such products.
Criterias of choice
- Heat resistance. This is the main condition when choosing grout for the stove. After all, the composition, along with the entire surface, will be exposed to high temperatures.
- Resistance to moisture. If the stove is located in a bathhouse, this criterion is required. But even in an ordinary room, moisture resistance is necessary, because the stove coating will be cleaned of dust or stains with a damp sponge.
- Resistant to fading and color change.
- The nature of the composition. You can choose a coarse grout, thanks to which you can get a rough effect. Or you can take a fine-grained one, which when mixed with water will give a smooth glossy finish.
- Color palette. Match the grout color closer to the darkest or lightest shade on your stove. Or make it bright: white grout looks very nice on a black background or vice versa.
The best brands and their characteristics
- "Terracotta". White heat-resistant grout for ovens. It is the most suitable and widespread remedy. Packaging 20 kg. Moisture resistant, does not crack. Withstands temperatures up to 400 degrees. You can change the color using tints. Price - 900 rub.
- Isomat Multifill Smalto. Weight – 2 kg. Heat-resistant, frost-resistant, water-repellent. It has plasticity, making it easy to use. The recommended seam width is up to eight millimeters. You can choose the appropriate shade. Cost – 350 rub.
- PLITONIT Super Fireplace ThermoRepair. Weight – 5 kg. The mixture can be used when working with seams on stoves and fireplaces. Heat-resistant, moisture-resistant, easy to use. Does not crack after drying and during use. Price – 350 rub.
- Mixonit Fuga KL. For various types of tiles: clinker, mosaic, etc. Heat-resistant, has a water-repellent surface. A construction gun is used for the job. Price (depending on color) 600 – 700 rub.
How to properly finish the exterior of a stove
Plants
We are building
Flowers
In the garden
Calendar
Vegetables
Animals
Mushrooms
Pests
Bees
Landscape design
home
» Construction at the dacha and on the farm » Stoves
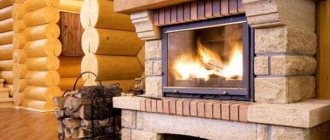
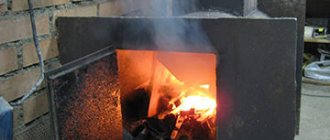
After completing the masonry of the stove, they begin to finish it. An unfinished stove looks unsightly; in addition, dust collects in the seams, which, when burned, emits an unpleasant odor. There are several ways to finish stoves: tiling, plastering, ceramic, figured and majolica tiles, painting stoves, lining the stove with metal or simply decorative jointing. Let's look at some ways to decorate the outside of a stove.
Plastering the stove. The most affordable and reliable way to cladding a stove (if the solution is prepared correctly) is to simply plaster it after laying it. First you need to make sure that the oven is dry and there is no sediment left.
Then the masonry seams are thoroughly cleaned, removing clay to a depth of 5-10 mm, to bind the plaster to the surface of the stove. To strengthen the bond between the mortar and the walls of the furnace, wire is used, which is placed in the seams during the laying process. The ends of this wire should look like a fork. They are produced on the front side at 50-100 mm. You can stretch a mesh with a cell cross-section of no more than 20×20 mm onto the walls of the oven and secure it with fork ends, placing them on the surface of the oven in a checkerboard pattern at intervals of 70-120 mm. The surface of the oven is thoroughly cleaned of dust and clay.
The next stage in preparation for plastering is firing the stove. It needs to be heated well so that excess moisture disappears. Then the hot oven is moistened with water and a layer of solution 5-6 mm thick (the consistency of sour cream) is applied. After fixing it, apply a second layer (thicker), also 5-6 mm thick, and rub it over the surface of the oven.
Solutions for plastering the stove. Clay and lime-clay mortars are used for plastering stoves. But such solutions cannot ensure the strength of the plaster. There are stronger and more reliable solutions reinforced with group 6 or 7 (seventh grade) asbestos.
There are three known compositions of asbestos-reinforced mortar (in parts) for plastering the stove:
1) clay - 1 part, lime paste - 1 part, sand - 2 parts, asbestos - 0.1 parts;
2) clay - 1 part, sand - 2 parts, asbestos - 0.1 part, cement - 1 part;
3) lime dough - 2 parts, sand - 1 part, asbestos - 0.2 parts, gypsum - 1 part.
The preparation of these solutions begins by sifting all components through a sieve with cells no larger than 3 mm. After this, a dry mixture is made from sand, asbestos, cement (if they are included in this composition). Then this dry mixture is mixed with thick, pre-prepared clay or lime “milk”. The solution is ready.
To prepare a mortar with gypsum, first make a lime mortar by mixing sand and asbestos with lime paste. In another container, gypsum is diluted until a creamy mass is obtained and the prepared lime mortar is added. It should be two or three times more than the gypsum mass. Then everything is thoroughly mixed - and the solution is ready. This solution must be used quickly - within 4-5 minutes from the moment of preparation.
The optimal thickness of plaster is 10 mm. 15-20 mm is allowed, which is much worse. As soon as the plaster has dried, the cracks are corrected and the stove is painted with “milk” of lime and salt (100 g of table salt per bucket of lime “milk”).
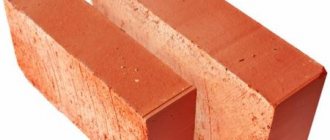
Furnace finishing with ceramic tiles. For this finishing, ceramic tiles are used with rounding of one, two, three and four sides of the following sizes: 200×200, 150×150, 100×100, 200×150, 200×100, 150×75, 150×25 mm and a thickness of 6 mm. For cladding, cornice and plinth straight tiles measuring 150×50 mm are used, as well as tiles with a length of 150 mm (for decorating corners). All tiles must be heat-resistant, with a white or colored glaze.
The most durable ceramic tiles are large-sized corrugated ones made from kaolin clay. For finishing stoves, square tiles with dimensions of 300×300, 200×200, 170×170 mm and rectangular tiles with dimensions of 300×150, 200×100 mm are used. You can use “hog” façade tiles measuring 250×140 mm to decorate the stove.
When facing a stove with ceramic tiles, strips of aluminum with holes for bolts are inserted into the vertical seams. After laying the stove, an aluminum T-profile and corners are screwed to the strip. Ceramic tiles are laid between metal structures from bottom to top. The space between the masonry and the cladding is filled with clay mortar and crushed stone.
Furnace finishing with decorative profiled tiles. A new type of stove finishing is based on the use of decorative profiled tiles that have a pleasant matte surface. The lined surface of the oven is durable, beautiful and hygienic. If the furnace is adjacent to combustible partitions, then the end elements serve as vertical cutting. Tiles are available in various shapes.
Painting the stove. For painting stoves and fireplaces, emulsion, oil-based, silicone, and silicate paints with matte and semi-gloss films are used. For the firebox door and ash pan, black silicone-based paints are better suited. Latches and doors for cleaning the fireplace are usually coated with any brand of black paint or whitened with lime. The smoke collector of the fireplace is painted and systematically tinted (in the complete absence of open fire) with silver or other silicone-based paints. Lime or any other compositions prepared on the basis of organosilicon varnish KO-835 mixed with PF-213 GF, PF or alkyd enamel are used to paint the furnace masonry.
The pre-furnace sheet (brass or light alloy) is not painted, but the steel sheet, after thorough cleaning, is coated with one or two layers of silver silicone-based paint.
Paints of various colors (KO-84, KO-818, KO-822, KO-828, KO-5125, KO-174, KO-286, KO-198) are used to paint the metal casing of the furnace. Paints on other film-forming bases change color, darken and quickly lose their quality.
Before painting the stove, a primer is first applied to it. To prepare it you need the following materials: 2.5 kg of lime dough; 0.1 kg table salt; 0.25 kg of wood glue or carboxymethylcellulose; 0.05 kg drying oil.
Salt and glue are dissolved in 1 liter of water. With continuous stirring, pour 10 liters of water into the lime dough. Drying oil, a solution of salt and glue are added to the resulting mass. Then everything is thoroughly mixed until a homogeneous composition is obtained, which is carefully filtered through a fine sieve and pigment is added to it. The composition includes the following materials: 3 kg of lime dough; 0.1 kg table salt; 0.25 kg of dry pigments (iron lead, iron oxide red or yellow ocher, blancfix, ultramarine); 0.1 kg of glue; 0.05 kg drying oil.
When painting the stove white, a primer coat is applied. Using a brush or an airbrush (a device for finely spraying paint with compressed air when applying it to the surface to be treated), a design is applied to this coating. A beautiful pattern that harmonizes with the interior of the room can be created by painting each brick separately. Colored patterns are obtained using a direct or reverse stencil. Lime paints allow you to frequently change the design, updating the appearance of the stove.
Decorative stitching. Decorative finishing of the seams is carried out in the case when the stove is not intended to be covered or plastered. To make the stove look aesthetically pleasing, even, clean and smooth bricks are chosen for laying the outer walls. The seams are embroidered with concave jointing and filled with ordinary mortar. When color jointing bricks, they are selected according to the uniformity of shades. The seam is left unfilled to a depth of 10-12 mm.
You can edge bricks by cutting off the edges. At the same time, the stove looks textured and decorative. After completing the masonry, smooth out the remaining mortar, protrusions, chips, and potholes from the surface of the furnace. To do this, wipe the finished masonry with a dry cloth and sand it with brick. And then a mixture of white and orange cement is rubbed into the seams. You can also use black clay for jointing, mixing the solution with waste molding sand.
Decorative jointing is done using a rule or a special ruler. These tools will help ensure the uniformity and straightness of the width of the seams and the special expressiveness of the decorative masonry.
You can line the furnaces with metal sheet steel or rolled aluminum.
IN AND. Dark.
Read other articles on this topic here.
| visit our construction forum and heating and water supply forum |
How to make oven grout with your own hands?
You can make a suitable mixture at home. To do this, you will need plaster, waterproofing liquid (available at a hardware store) and dye. All components are mixed until creamy.
You can make grout from clay and cement. To do this, take five parts clay, one part cement and dilute them with water.
Very often the grouting mixture is made from Portland cement and sand, but the durability of such a composition when heated can be significantly reduced.
Types and characteristics
Many sources write about the existence of two types of fire-resistant grout:
- cement;
- epoxy.
The heat resistance and safety of the cement-based mineral composition is beyond doubt. As for epoxy grout, it can be recommended for use in residential premises with great caution.
Based on polymer resins
Epoxy resins are synthetic polymers of organic nature that burn very well, like any organic material. To improve performance, modifiers are added to monomers.
The flammability of epoxides can be reduced by introducing halogen and phosphorus-containing compounds into the structure, which is carried out in technological processes. Consequently, heat-resistant grouts may contain toxic substances.
Manufacturers recommend using them in industrial environments. If they offer epoxy compounds for grouting home stoves and fireplaces, you need to look at the certificates to make sure the products are safe.
It is best not to take risks in the absence of accurate information about the composition of the epoxy product, and purchase a heat-resistant cement-based grout.
If the composition is known and safe, then you can use epoxy grout, especially since it often has the form of pastes, which is very convenient when applied to the space between the seams.
Cement based
Cement-based joint sealers have undoubted heat-resistant qualities because they are made on the basis of Portland cement.
Portland cement contains up to 80% calcium silicates, which is obtained by sintering crushed clinker and gypsum.
Calcium silicate enters Portland cement from clinker powder, which in turn is obtained from clay and limestone. Thus, the composition of heat-resistant grout for joints is almost completely free of flammable substances.
There is a dry compound for sealing joints on sale, which must be diluted with water before use according to the recommendations on the package.
The product retains its properties when heated to 400 ℃, which, taking into account its application to the outer surface, is a very good indicator.
Varieties for internal grouting of ovens have even greater heat-resistant properties, withstanding temperatures up to 1700 ℃. Typically, heat-resistant products are gray or white in color, because the addition of any pigment will worsen the heat-resistant properties and reduce the density of the composition.
For external grouts, the addition of pigments is allowed, so you can choose the option of a colored product that is in harmony with the appearance of the entire cladding.
Methods of applying grout
The following methods can be distinguished for applying grout material to the seams between tiles:
Semi-dry method
When applying grout using this method, the mixture is diluted with a small amount of water. The result is a consistency that resembles wet sand. Using a special jointer, the mixture must be placed in the seam.
The advantages of this application method:
- low cost of the product;
- There are no substances among the components that provide plasticity.
Disadvantages of this grout:
- a seam that is less than 5 mm cannot be sealed;
- the color palette is limited only to gray and beige;
- the installer must have experience in sealing seams using this method, otherwise the design will be of poor quality or unaesthetic.
Using a construction gun
The grout is diluted with water and poured into a special construction tool - a gun. All seams are coated with a thin tip, and excess product is removed. To fill the joint more tightly, you can process the line by pressing the grout in with your finger or some other tool.
Advantages of the method:
- simplicity and ease of application of the composition;
- You can choose the desired grout color.
Flaws:
- high price of the composition;
- you need a special tool;
- Among the components are plasticizers.
Applying the composition over the entire cladding area
The creamy mixture is applied over the entire surface of the tile, then cleaned off with a rubber spatula, leaving the mixture in the joints. The grout for the oven joints is removed from the tiles using a damp sponge.
Pros:
- long-term operation;
- You can use any type of tile.
Minuses:
- high price;
- small palette of colors.
Terracotta tiling
Preparation
- We clean the stove from old plaster and lime down to the brick.
- Spray the surface with water to reduce absorption.
- Using a wire brush, remove any crumbling mortar from the seams.
- We generously coat the base with acrylic primer to improve adhesion and remove dust.
- We plaster the walls with a high-strength heat-resistant mixture for stoves and fireplaces, Terracotta. It is suitable for surfaces up to +400 degrees. The dry mixture is added to the water and stirred with a mixer until smooth. After this, you will need to wait 5-10 minutes and mix it again before use.
- It is most convenient to apply the plaster using the smooth side of the comb.
- Immediately after applying the plaster, a painting fiberglass mesh is placed on it and pressed into the solution with a spatula.
Spray the brick with water
Clean the seams with a brush
Stove plaster
Glue the painting mesh
It is not necessary to plaster the walls if your masonry is smooth. But in a particular case, the cladding will not cover the entire area; the central part of the walls will be finished with paint, so it is necessary to level the base.
Laying
- Heat-resistant Terracotta tile adhesive is used for gluing; it can withstand up to 200 degrees. In those places where the heating of the cladding will exceed 200 degrees, the tiles are glued to heat-resistant Terracotta mastic; it can withstand up to 1100 degrees, since it is not made on a cement base.
- Stir the mixture according to the instructions and proceed.
- It is better to start laying tiles on the stove from the corners, since special corner elements will be used on them. We glue the corners at intervals and use alternately single elements and halves to achieve the effect of brickwork.
- The glue is first applied to the plaster with a regular spatula, and then evenly distributed with a comb. It is important to prevent air bubbles so that the tiles adhere well and the heat transfer does not decrease. Also, some find it more convenient to apply glue separately to each tile; there is not much difference here.
- To get uniform seams between the tiles, we insert 9.5 mm cut pieces of plasterboard into them. There are also 10 mm plastic crosses, but they are difficult to find on sale.
- You can easily cut the tiles yourself using a grinder with a diamond wheel.
- We fill the areas that will be painted with Vetonit. When the putty has hardened, scrape off any uneven surfaces with a spatula. Then we paint the free surface with radiator enamel.
- To protect the tiles from moisture, dirt and create the effect of wet stone, we coat them with “Estate” stone varnish.
Covering the corners of the furnace
We putty the remaining areas of the stove that will not have lining
Grouting joints
Jointing and filling seams
- A day after tiling the stove, you can start grouting the joints. To fill them, we will use a construction gun and heat-resistant Terracotta grout (suitable for surfaces up to 200 degrees). Stir the dry mixture with water until it reaches the consistency of thick sour cream and fill it into the gun tube. The nose of the gun nozzle is cut at an angle of 60 degrees to create a hole of 6-8 mm.
- We insert the nozzle into the seam and fill them evenly to the level of the tiles. This work must be carried out extremely carefully so as not to stain the front surface. If this happens, then under no circumstances should you try to wipe it off, as you will simply smear the mixture over the surface and make it even worse. Wait 2 hours and use a knife to peel off the frozen grout.
- 1.5-2 hours after applying the grout, you can begin to grout the joints. To do this, remove excess and unevenness from the frozen mixture using a flat screwdriver 7-8 mm wide. You can also use a rigid wire ring for this.
Cladding the stove with terracotta tiles - video
Conclusion
Thus, a little diligence and good instructions for laying tiles on a stove with your own hands will help you achieve the desired result.
The best posts
- Photo wallpaper with daisies
- Creative use of clothing in the interior
- How to properly remove sweat stains under armpits on colored clothes
- How to use ceiling tiles for anything other than the ceiling [creative ideas]
- To what temperature can you keep flowers on the balcony?
- Roman curtains photo in the interior 75 ideas
- How to connect a jacuzzi to the mains
- Interesting wallpaper in a children's room for a boy: 5 variations