Pros and cons of insulating outside
External insulation has one significant advantage - it does not affect the dew point and does not collect condensation. Among the advantages of this method, it is worth noting the preservation of internal space; the rooms will not lose precious square meters.
The main disadvantage is that it works only during good weather. External installation is only possible in summer, when there is no rain. Precipitation and cold will prevent the installation of a new façade.
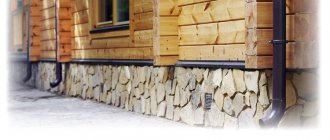
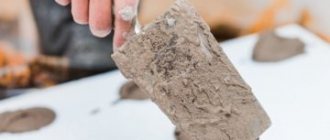
An excellent solution for making an insulated veranda in a wooden house is to install a ventilated facade. Houses made of brick, foam blocks or cinder blocks are best insulated using wet facade technology. Thermal insulation then does not require lathing.
Scheme of laying different materials
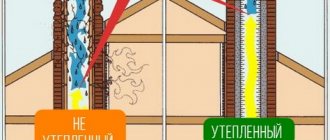
When figuring out how to insulate the ceiling on the veranda from the inside, you need to pay attention to the location of the different layers of this structure relative to each other. If you look at it like a layer cake, then from top to bottom the layers will go like this:
- External part of the structure. This can be either roofing material or the floor of the floor or attic above.
- Waterproofing - in cases where a roof is installed over the veranda. If there is an attic or living space above it, then you can do without it, but in this case, it is better to lay a layer of vapor barrier film.
- Insulation.
- Vapor barrier layer.
- Internal ceiling lining.
Everything should be installed in exactly this order, without excluding any of the components. Only in this case will the heat be retained in the room and not escape outside, and the insulating layer will last a long time.
How to prepare a veranda for insulation
Preparation is about freeing up space and making future work easier. If the method of insulation from the inside is chosen, then the veranda is completely emptied of things and the shelves are removed. To work outside, it is necessary to dismantle the cladding and eliminate cracks and crevices. In houses made of timber it is enough to caulk, but on concrete and brick you will need putty.
To avoid any problems in the future, you need to immediately think about the location of switches, lamps, and wiring. For insulation, a sheathing must be installed, which is necessary for subsequent laying of the material.
An example of insulating a veranda with your own hands
To insulate the veranda from the inside with your own hands, you must first make a sheathing.
- First, the lower and upper wooden boards are fastened horizontally, and intermediate bars are placed between them.
- The wood is treated with an antiseptic before work, this will prevent unpleasant consequences in the form of rot and mold growth on the walls.
- Wooden verandas are the easiest to work with: a screwdriver and a self-tapping screw are enough; for other wall materials you will need a hammer drill.
- After installing the sheathing, take control measurements and check the evenness of the installation with a level.
- The sheathing cells must match in size to the slabs of the selected insulation.
- The insulation is completely inserted. Excess parts are removed only after completion of work.
- To protect the insulation from moisture, the joints are sealed with special metallized tape.
- Sew up the insulation with clapboard or OSB, MDF panels.
Note!
DIY metal bench: instructions with step-by-step guide (100 photo ideas)
Blinds for gazebos: wooden, metal, bamboo. Instructions for installing blinds yourself
Adding a terrace to your house with your own hands: step-by-step instructions on how to easily and quickly add a veranda or terrace (100 design photos)
The example shows the most popular way to insulate a veranda for winter living.
Projects of houses with a veranda
Number of projects 320
- 1 room
Country house project “Meeting Place”
- To favorites
- 31² Total area
- 8 x 4m Construction area
from 247,000 rub.
Construction time individually
- 4 rooms
- 1 bathroom
Country house project Dacha M6
- To favorites
- 72² Total area
- 6 x 6m Construction area
from 694,000 rub.
Construction period 14 days
Available at the exhibition
- 6 rooms
- 2 bathrooms
Toronto House Project
- To favorites
- 115² Total area
- 8 x 8m Construction area
from 970,000 rub.
Construction time 21 days
- 5 rooms
- 1 bathroom
Project AS-2132-2
- To favorites
- 180.7² Total area
from RUR 2,439,450
Construction time individually
- 5 rooms
- 2 bathrooms
Project AS-2211
- To favorites
- 244.9² Total area
from 3,306,150 rub.
Construction time individually
- 4 rooms
- 2 bathrooms
Vereya House Project
- To favorites
- 197² Total area
- 13 x 9m Construction area
from 5,910,000 rub.
Construction time individually
- 4 rooms
- 2 bathrooms
Project AS-188
- To favorites
- 164.9² Total area
from RUR 2,226,150
Construction time individually
- 2 rooms
Project Summer House “Golden Mean”
- To favorites
- 36² Total area
- 6 x 6m Construction area
from 371,300 rub.
Construction time individually
- 6 rooms
- 6 bathrooms
House Project DOK-307 / Arkansas
- To favorites
- 307.5² Total area
- 13 x 15m Construction area
from 5,535,000 rub.
Construction time individually
- 3 rooms
- 1 bathroom
Skip House Project
- To favorites
- 87.5² Total area
- 6 x 10m Construction area
from RUR 1,181,250
Construction period 49 days
- 6 rooms
- 2 bathrooms
House Project Ugolok-M8
- To favorites
- 204² Total area
- 17 x 10m Construction area
from 2,754,000 rub.
Construction period 102 days
- 6 rooms
- 4 bathrooms
Project AS-1356
- To favorites
- 430.5² Total area
from RUR 5,811,750
Construction time individually
- 4 rooms
- 1 bathroom
Project AS-2326
- To favorites
- 133² Total area
from 1,795,500 rub.
Construction time individually
- 5 rooms
- 4 bathrooms
Project AS-579
- To favorites
- 283.5² Total area
from 3,827,250 rub.
Construction time individually
- 4 rooms
- 2 bathrooms
Project AS-657
- To favorites
- 197.3² Total area
from RUR 2,663,550
Construction time individually
- 5 rooms
- 3 bathrooms
Birit House Project
- To favorites
- 225.7² Total area
- 19 x 11m Construction area
from 6,771,000 rub.
Construction time individually
- 5 rooms
- 2 bathrooms
Project AS-2153-2
- To favorites
- 188.6² Total area
from 2,546,100 rub.
Construction time individually
- 6 rooms
- 6 bathrooms
Guest house project "Sextet"
- To favorites
- 160² Total area
- 7 x 12m Construction area
from RUB 1,475,650
Construction time individually
- 6 rooms
- 2 bathrooms
Project of the Demidov House
- To favorites
- 195.82² Total area
- 15 x 11m Construction area
from 2,013,000 rub.
Construction time individually
- 5 rooms
- 2 bathrooms
Project AS-565F
- To favorites
- 351.9² Total area
from RUR 4,750,650
Construction time individually
View all projects
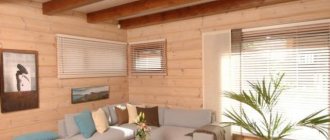
The composition of the family and the needs of its members change over time, and this cannot always be taken into account when building a house. At some point it may turn out to be too small: there is a need for an additional bedroom, office or bathroom. You can solve this problem with little expense if you know how to insulate the veranda, turning it into the same warm and cozy room as the rest of the rooms in the house. To do this, you need to select the right materials and create a warm cocoon inside or outside the extension, depending on its design.
The winter veranda will require not only insulation, but also heating Source nasha-besedka.ru
How to insulate a veranda floor
The choice of method for insulating the floor on the veranda depends on the foundation. With a strip base, the easiest way is not to tear off the existing floor, but to use it as a base. The building will lose a little height, but the work will be completed quickly.
With this method, the work flow is as follows:
- First, the cracks are sealed with epoxy resin.
- Then roll insulation is laid, which is attached to the boards using staples in increments of approximately 15 cm, in the corners with nails with a wide head.
- Tape the seams with metallic tape.
- The finishing coating is OSB, chipboard, and linoleum or laminate on top.
The result is a silent, monolithic and durable floor.
Note!
Do-it-yourself garden path using a mold: a review of original and inexpensive ideas + step-by-step instructions with photos
Do-it-yourself gazebos for a summer residence - 300 photos of exclusive ideas. Instructions for building a beautiful gazebo (diagrams, drawings, foundation, roof)
Do-it-yourself wooden veranda: step-by-step instructions with photos and descriptions. Open and closed options + new designs
The boards on the stilts are torn off from the veranda, a subfloor is made under the joists, which is covered with expanded clay or vermiculite. Installation of vapor and waterproofing will be required. Then the torn boards are returned to the beams.
A good example of insulation
Heated floor installation diagram:
- Backfilling with expanded clay.
- A little sand followed by compaction.
- Reinforcement mesh is laid.
- Layer of concrete.
- After complete drying, a waterproofing layer is installed, for example, from roofing felt.
- Wooden logs treated with antiseptic agents against mold and rot.
- Place heat-insulating material between the beams.
- Finish coating made of OSB or chipboard.
This is a popular solution that provides reliable protection of the floor from the cold.
Video description
You can see how thermal insulation is installed on the frame in this video:
Floors
If the height of the room allows or there is no other way, then the existing flooring is used as a subfloor. Most often these are boards laid on joists. A beam is attached to them in a similar way to a frame for walls. But it must have a sufficient cross-section to withstand the loads. Insulation is laid between the new joists, covered with waterproofing and a finishing floor is installed.
Floor insulation with mineral wool Source balkoncity.ru
If the base is concrete, one of the insulation options could be a screed with expanded clay or a heated floor poured into a regular concrete screed. This method is especially relevant when you need to decide how to insulate the veranda and make a bathroom or kitchen there by tiling the floors.
When the floor is accessible from below, the insulation can be secured under the existing flooring, creating the same thermal insulation pie, protected from moisture.
Advice! The floors will be much warmer if you also insulate the foundation of the extension.
If the distance from the floor to the ground is very small, you can remove the flooring, fill the cavity with expanded clay and put it back in place.
To prevent the insulation from absorbing water from the ground, install a waterproofing barrier made of roofing felt or thick film Source ekouteplenie.ru
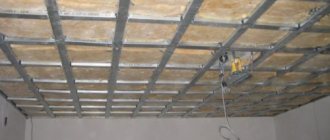
How to insulate a veranda ceiling
The ceiling is insulated using a similar technology. The easiest way to insulate an already built veranda is from the inside; to do this, you will need to remove the cladding, if any. The work scheme is based on the same principle as the walls: lathing, laying insulation, vapor barrier and finishing.
Roof waterproofing should already be installed. If not, then this is a serious construction mistake that needs to be corrected urgently. For this, a special perforated film and metal-coated adhesive are used.
We insulate the walls of the veranda
A lot of heat escapes through the walls
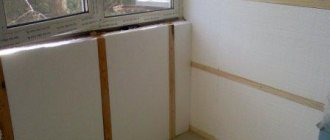
This is why insulating the veranda walls is so important. You can insulate walls from the inside with polystyrene foam, polyurethane foam or mineral wool
You decide. However, the insulation technology is almost identical. Your task is to create a sheathing so that this or that material can be laid in it. In fact, the work is reminiscent of floor insulation, only in a vertical plane.
When the veranda is made of wood, insulation occurs as follows:
- The first step is to get rid of all the cracks.
- Next, you must make a sheathing or frame from wooden blocks. The fastening pitch is selected according to the width of the insulation, and the height depends on the thickness of the insulation.
- When the vertical sheathing is ready, insulation begins to be laid in the free space.
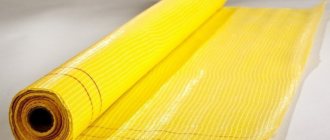
- Using a construction stapler, the insulation is sewn with a vapor barrier film. The film is fixed with an overlap of 10–15 cm.
- Finally, you need to do the finishing. This can be covered with clapboard, plastic panels, plasterboard with wallpaper, painting or putty. It all depends on your desire.
Note! External insulation is performed in the same way. Only the finishing material should not be afraid of moisture and external influences
This could be facade paint or plaster, bark beetle, siding.
If the veranda has concrete walls, then you can insulate it with polystyrene foam. Everything is a little simpler here. You need to glue the foam boards to the wall using special glue, and then strengthen the fixation with dowels with an umbrella. Next, the surface of the slabs is coated with an adhesive solution into which the reinforcing mesh is embedded. After drying, you can do decorative plaster (bark beetle, fur coat, etc.).
Window insulation
A large glazing area means significant heat loss. To insulate a veranda in a wooden house, you will need to install double or even triple glazing. High-quality windows increase sound insulation and retain heat well.
You can carry out the installation yourself; it is only important to remember that all joints have been treated with sealant. “Cold bridges” remain under the window sill, so the gap must be filled with foam.
Determining the scope of work
To decide how to insulate an extension to a house with your own hands, you need to evaluate its design, wall material, dimensions, ceiling height and other features:
- If the area of the room is small and you want to preserve it, you will have to insulate the walls from the outside. The same applies to the floor and ceiling, when when insulating from the inside, the distance between them decreases to unacceptable.
- It is not always possible to insulate floors from the outside without dismantling the existing coating. This happens when the flooring is located low above the ground and it is impossible to get to it from below.
- The same applies to the ceiling: if the veranda and the house have a common roof, there are no problems with insulation from the attic. If the extension is closed by one slope with a slight slope, you will have to either dismantle the roofing material or install insulation from the inside.
- Most of the heat escapes through doors and windows, the insulation of which is not given due attention in a room originally intended for seasonal use. Most often these are single-pane windows and lightweight doors. You need to decide whether to replace them or insulate them.
Even such high-quality and new windows will not retain heat in winter Source ankorokna.ru
- The entrance directly from the street is an open gate for frosty air, which manages to cool the room in a matter of seconds. Therefore, it is necessary to think about installing a vestibule, which can be done by fencing off part of the veranda with a warm partition or by attaching an entrance group to it.
- You should also think about the heating method before starting thermal insulation work. If heating is chosen using a “warm floor” system, the floor insulation technology must take into account the installation features of such a system.
Advice! If you do not live in the house permanently, then you should not install a water heating system - it may freeze and fail in your absence. It is better to prefer electric heated floors.
- The material of the walls is also of great importance. It is undesirable to insulate vapor-permeable materials, such as wood or foam concrete, with non-breathable insulation materials, otherwise moisture will accumulate between them, gradually destroying the load-bearing structures and leading to serious disturbances of the indoor microclimate, including the occurrence of mold and mildew.
The result of improper insulation Source e-brus.ru
As for how to insulate a terrace in a wooden house with your own hands, here we are talking more about a complete reconstruction or completion. Especially if it is an open extension without a canopy and a floor raised above ground level. Sometimes this task is even easier to solve, since there is no need to dismantle existing ceilings, old windows, etc.
In general, to transform the veranda into a living space, comprehensive insulation of all structures except the wall common with the house will be required.
What should you pay attention to when insulating the veranda from the inside?
Insulating an extension in the form of a veranda in a house built of wood is possible if the following conditions are met:
- Installation is only possible if there is good ventilation.
- When it's cool, heating must be turned on in the veranda.
- Additional wall insulation should not be more than 5.5 cm thick.
Now we propose to consider what materials can be used to insulate a building from the inside.
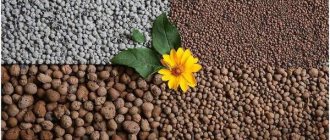
Review of materials that can be used for internal insulation
At the moment, there are a huge number of different materials on the construction market that will help to perform thermal insulation of a room. They differ in cost and performance characteristics. So, let's look at what material to use to insulate the veranda from the inside?
- Polystyrene foam is the most popular insulation material option in most construction applications. It is beautiful because it weighs little, has good rigidity, stable performance characteristics even during long-term use, ease of installation work and the fact that it can be installed with or without a frame. Disadvantages include a high fire hazard and a strange attractiveness to rodents. This is a huge disadvantage if you insulate the veranda of a private home. But what’s also great is that when using polystyrene foam, you don’t need to create another layer of waterproofing.
It is interesting that according to the standard insulation scheme, polyurethane foam, polystyrene foam, lining, a post-frame stand, OSB boards, cladding bars and a block house are laid.
- Penofol is recommended by most experts, since this material is high-quality, modern and can be perfectly combined with other types of insulation (if desired). Penofol is perfect for insulating any building in a country house. It has a low degree of vapor permeability, and the material itself is environmentally friendly. You can install it yourself without any problems.
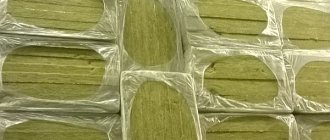
- An equally popular thermal insulation material is mineral wool. It can also be used to insulate any building in the private sector. You can also use it for rooms that are intended for use in winter. To install such a layer of thermal insulation from mineral wool, you will first need to make a frame. Such material will lose its density only 4-5 years after installation, and this can lead to a loss of thermal insulator properties.
- Basalt wool, in fact, is an analogue of mineral wool and it is also ideal for insulating a veranda in a wooden house from the inside. Its difference from mineral wool is only that it is safer from an environmental point of view.
- Expanded polystyrene was able to combine all the advantages of foam insulation at once. It has good strength properties and is easy to work with. Even a beginner can install a layer of thermal insulation with polystyrene foam, but such material has high sound permeability. By the way, it is classified as a type of non-combustible material.
- In terms of elasticity and strength, glass wool was able to surpass all the materials described above. It can be bought in any construction market in the form of a roll, and working with it is quite simple, but you should definitely use means to protect the face, hands and eyes, as well as a respiratory respirator; for this reason, you will have to buy protective equipment along with glass wool. It is not so strong, so over time it may begin to sag. This material is completely fireproof.
When we have decided on the material, let's talk about how to make insulation.