With the advent of new types of insulation, the consumer has the opportunity to select thermal insulation materials according to an expanded range of criteria. But to do this, you need to have complete information on each insulation product on sale. Filling the knowledge gap for novice builders, the editors of the StroyGuru portal continue to introduce their visitors to the technologies for insulating different building structures with various types of insulation materials. Today we’ll talk about insulating walls with polyurethane foam.
Characteristics, pros and cons
Polyurethane foam is the result of a high molecular weight compound (polymers) of a polyol (component A) and a substance from the isocyanate group (component B). The polyol forms the skeleton of the material (the shell of the air chambers), and the isocyanates foam the material with the release of carbon dioxide. At the same time, a slight increase, just 1%, in polyol dramatically changes the density, hardness and other characteristics of the material. For comparison: foam rubber contains 2% component A, and hard polyurethane foam contains 3%.
Various additives can be added to the composition to change the properties of the insulation. For example, fire retardants reduce the flammability of polyurethane foam.
Advantages and disadvantages
Let's start with the advantages:
- Today, polyurethane foam insulation is the most effective. This is due to the cellular structure of this insulation and the carbon dioxide contained in the cells. Ideally, this system gives a thermal conductivity coefficient of 0.02, which is even lower than that of air (0.022).
- Continuous, seamless spraying, which eliminates the presence of cold bridges, further increasing the efficiency of insulation.
- Possibility of spraying on surfaces of any, even the most complex shapes.
- Low hygroscopicity. Simultaneously with insulation, you improve the waterproofing characteristics of the surface. This property is used for insulating foundations, wells and other similar structures.
When insulating the foundation of a house with polyurethane foam, the problem of its waterproofing is also solved.
- Excellent adhesion to any surfaces and materials except polyethylene. Excellent adhesion (adhesion) in some cases can be considered as a disadvantage - it cannot be washed off with anything, since there is no solvent for polyurethane foam. It can only be cleaned mechanically, often with fragments of the surface on which it was applied.
- Long service life - up to 25 years with the declared characteristics, later carbon dioxide is replaced by air, thermal conductivity increases, but not catastrophically, sprayed thermal insulation continues to work.
- If during the first year the insulation with polyurethane did not cause any complaints, there will not be any for the next couple of decades.
- When using high-pressure installations, polyurethane spraying takes a short period of time, without compromising quality.
- The vapor permeability of polyurethane foam is quite high - 0.05-0.06, which allows excess moisture to be removed through the walls, as before insulation (if the walls are vapor permeable).
- Does not support combustion (self-extinguishing).
As you can see, there is a decent list of advantages that contribute to the fact that thermal insulation with polyurethane foam is gradually becoming more and more popular. But there are also disadvantages:
- High price - 1.5-2 times higher than when insulating with mineral wool. But if you calculate it per year of service, it won’t be more expensive.
- The final result depends greatly on the equipment used and the experience of the duster. Good results are achieved only with full compliance with the technology.
Thermal insulation of polyurethane foam ceilings in the attic
- Due to the use of high-tech equipment, polyurethane foam insulation is very, very difficult to do with your own hands. There is a way out - to buy equipment together for several owners - there is a reason for this, considering the prices. But the question of experience remains - achieving normal performance on your own is very difficult.
- The material does not burn, but when burned it emits a lot of caustic and harmful smoke.
- Fear of ultraviolet radiation. When exposed to sunlight, the foam melts and the white surface turns dark brown. But a film of a certain thickness protects the underlying layers from further destruction, so if the polyurethane foam is thick enough, it can even be left open. But the appearance of the surface insulated with polyurethane foam is far from the best, so finishing is still required.
The main limiting factor in the spread of polyurethane foam insulation is the high price. Although, when compared with the cost of insulation with extruded polystyrene foam, the prices do not seem so high, and this despite the fact that sprayed thermal insulation is installed many times faster and gives a better result. Overall, if you are planning to insulate your home, this technology is worth exploring.
Types of polyurethane foam
You can find several types of polyurethane foam on sale. They differ from each other in their state of aggregation (liquid and solid), elasticity (soft and hard), and cell structure (open and closed). Based on these classifying characteristics, several types of polyurethane foam can be distinguished:
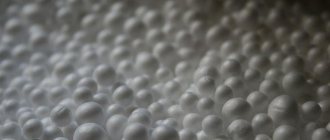
- elastic - foam rubber, familiar to everyone from childhood, with a density of up to 20 kg/m3, open cells and good vapor permeability. Soft material always restores its shape, no matter how it is compressed or twisted. It is practically not used for insulation of building structures. It is more likely to be found when insulating metal entrance doors than on a wall or ceiling.
Foam rubber.
- hard - obtained by mixing two components: polyol and polyisocyanate. The cell structure is closed, density ranges from 30-60 kg/m3, consists of 97% air and 3% solid matter. Due to the closed structure it is vapor-tight. Used to insulate all building elements except the foundation. Can be used both outside and inside a house or apartment;
Hard polyurethane foam.
- one-component (sometimes called semi-rigid) - insulation with a density of 20-30 kg/m3, with an open cell structure. Known to many as polyurethane foam, although manufacturers have recently begun to put the inscription “Insulation” on the can. It is used only for thermal insulation of roofs and ceilings - the density is too low for walls and floors.
Semi-rigid polyurethane foam with a non-uniform structure.
- liquid _ Manufacturers, by introducing stabilizers, obtained a solution of polyol and polyisocyanate, which begins a chemical reaction only after contact with air. At the same time, the process of foam formation is slowed down, which allows you to adjust the thickness of the insulating layer. Density - 60-80 kg/m3. Vaporproof. Used to insulate flat roofs. Sometimes they try to insulate pitched roofs, but they are quickly disappointed and have difficulty finishing the work. The walls are poured into a “well” - a method of insulation using two walls: load-bearing and facing;
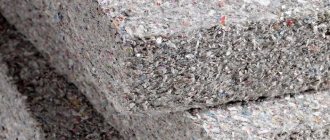
- sheet or solid - gas-filled plastic obtained by the molding method: liquid polyurethane foam is poured into a mold, after which it is subjected to special processing. Density about 60 kg/m3. It is used for insulation of walls, floors, including “warm” ones, and flat roofs.
PPU slabs.
Insulation characteristics
Each type of polyurethane insulation has its own physical and technical characteristics. For greater clarity, they are summarized in a table.
Table 1. Main indicators of polyurethane-based insulation.
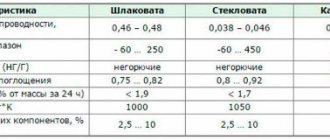
| Types of polyurethane foam / Indicators | Rigid insulation | PPU slabs | Semi-rigid insulation |
| Thermal conductivity, W/(m×°K) | 0,022-0,035 | 0,028-0,031 | 0,025-0,045 |
| Number of closed cells, % | More than 90.0 | Not less than 95.0 | Less than 50.0 |
| Increase in volume since the start of polymerization, % | 1 in 40 | — | 1 to 70-90 |
| Vapor permeability, mg/(m x h x Pa) | 0,02-0,05 | 0,04-0,06 | 0,07-0,17 |
| Density, kg/m3 | 20,0-80,0 | 60,0-100,0 | 8,0-18,0 |
| Moisture absorption,% | 1,0-3,0 | No more than 1.5 | 10,0-60,0 |
| Compressive strength, kgf/cm2 | 1,53-10,19 | About 2.0 | About 1.02 |
| Bending strength, kgf/cm2 | 3,3-19,37 | About 3.0 | About 17.0 |
In addition to excellent thermal insulation properties, polyurethane foam has other strengths.
Advantages and disadvantages
Among the advantages it should be noted:
- the highest level of thermal insulation properties. According to this indicator, polyurethane foam is the undoubted leader among insulation materials;
- durability - service life reaches 50 years or more;
- good adhesion to walls made of any materials;
- seamless spraying, which eliminates the appearance of cold bridges;
- environmental cleanliness of the foam mass (individually the components are very toxic);
Polyurethane foam is an environmentally friendly product.
- low fire hazard - belongs to the class of self-extinguishing materials (G1);
- light weight;
- the possibility of application to surfaces of any geometry (there are no places in the building where foam cannot be blown);
- low level of water absorption;
- versatility - can be used inside and outside, on all structural elements of the building;
- ability to maintain consumer properties at temperatures from -160oC to +150oC.
There are also disadvantages . However, the disadvantages are significant:
- high price of raw materials and work on applying thermal insulation;
- intensive aging under the sun's rays;
- vapor tightness;
- complex spraying technique (knowledge of how to regulate equipment: compressor and spray gun is required);
- impossibility of application without sophisticated equipment, which also operates on a 3-phase AC system (not available in every apartment). All this complicates the insulation of polyurethane foam walls with your own hands;
- the need to strictly follow the instructions, because the slightest deviations in dosage or temperature conditions change the declared characteristics of the thermal insulation layer;
- increase in thermal conductivity during deformation during compression.
In addition, it should be noted such disadvantages as the inability to make accurate calculations on the number of sprayed components and the uneven surface of the insulating layer, which in many cases reaches a difference of up to 8 cm.
For reference: additional information about polyurethane foam can be obtained in the article “PPU Insulation”.
Limitations when insulating polyurethane foam
The use of polyurethane foam for wall insulation requires compliance with certain rules and restrictions:
- Due to the vapor permeability of polyurethane foam, the facades of wooden houses are not insulated with it - the wood rots.
- You cannot spray foam on greasy stains and polyethylene - there is no adhesion at all (it slides down).
- Semi-rigid polyurethane foam should be applied to a damp surface, hard polyurethane foam should be applied to a well-dried surface.
- You cannot start insulating walls if their temperature is below +5oC.
- When using semi-professional equipment, the cylinders must be heated to 18-20oC.
The use of polyurethane foam is not only aimed at one area
Polyurethane foam is designed for insulation of all types of roofs.
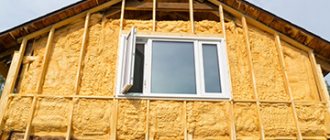
Each of us wants our home to be as comfortable as possible at any time of the year. In our time, a similar effect can be achieved in any number of different ways, from the use of high-quality building materials in the initial stages of construction, to the installation of air conditioning systems and additional heating. Thus, in order to create the most comfortable living conditions in wooden houses, it is necessary to use high-quality insulation of walls, as well as other structures through which air can penetrate.
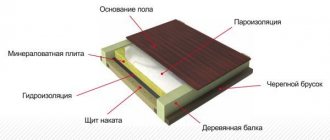
Insulation from the inside with mineral wool. Currently, mineral wool is the main material for insulating houses, which are often used not only in private, but also in multi-story construction. However, such a fairly wide range of uses has many nuances. Thus, mineral wool has a significant disadvantage in the form of minimal wear resistance of the material. Thus, outdated material will allow not only unwanted air into the living space, but also harmful microparticles, as well as unwanted moisture in the gaps.
Insulation with sprayed thermal insulation. Polyurethane foam is recognized as the most effective material for insulating wooden structures. In our country, this method of using polyurethane foam on surfaces is not as relevant as in neighboring countries. For example, in the West, this use has been used for more than 50 years and remains the most successful. Thanks to polyurethane foam, the owner of such a house can save about 50% of the cost of heating and cooling the room.
Required materials and tools
To insulate walls, you need to purchase a set of equipment along with components and materials for lathing, as well as vapor and waterproofing. A complete list of everything necessary to perform thermal insulation work is as follows:
- professional equipment for applying insulation (containers with components A and B, compressor station, heating unit with dispenser, supply hoses, spray gun, set of nozzles);
Technological line for spraying polyurethane foam.
Modern spraying stations.
- disposable semi-professional equipment if it is not possible to rent a professional station (pressure cylinders with components, hoses, spray gun, nozzles, a tank of pressurized water for flushing the gun from foam);
Disposable equipment.
For reference: one set is enough for 20 m2 with a layer thickness of 50 mm.
- vapor barrier film (type B);
- windproof membrane (type A or AM);
- timber for sheathing 40x60 mm;
- rail for counter-lattice 30x50 mm or 40x50 mm;
- self-tapping dowel;
- wood screws;
- hammer drill or electric drill;
- wood hacksaw;
- screwdriver;
- roulette;
- construction stapler;
- knife with replaceable blades.
In addition, in all cases, personal protective equipment will be required: a protective suit, a respirator, goggles, and hand protection.
useful links
How to choose an installation?
Component consumption calculator
Video of polyurethane foam spraying
Photo gallery
Where to start your own polyurethane foam spraying business
1. Buy equipment.
For spraying, you can purchase any installation from the “Master” or “Pro” series. If you want to use polyurethane foam in addition to spraying, then in this case you will need to install 9-Universal. But filling work occurs quite rarely.
You will also need a compressor with the specified parameters to operate.
If possible, it is better to purchase a compressor “with a reserve”, since, in fact, there is never too much air.
It is advisable to purchase special clothing and protective equipment, but you can get by with one protective mask or gas mask.
Installation costs and compressor - from 80,000 to 120,000 rubles.
2. Buy components.
We offer to purchase a trial minimum batch of components in the amount of 100 kg, 50 kg each of A and B. This is a system of rigid closed-cell polyurethane foam with a density of 35-45 kg/cube. m.
Cost 28,000 rub. Then you can purchase components in the required quantity. It is very comfortable.
3. Spray foam.
Find a place to spray.
The best option is some of your own real estate. Cottage, house, bathhouse, garage, attic, wall, ceiling - it doesn’t matter. The main thing is that you will have the ability to spray polyurethane foam, and now you can safely take orders.
Be sure to take a photo of the sprayed object. Prepare PU foam samples in the form of cut cubes. Customers need demonstration and visibility.
4. Make yourself known.
Place advertisements on the Internet on special websites, bulletin boards, various online publications and contact specialists to create your own business card website.
You can make a commercial like our customers (see below). The installation was not included in the frame, but this is an 8-Profi-ESh, the IR-10 pistol is clearly visible.
- Date: 02/19/2015 Comments: Rating: 28
When carrying out construction and insulation work with polyurethane foam or any other material, the issue of economy often becomes an obstacle to quality.
Almost all construction work can be done independently, having solid experience and qualifications. The question of whether to hire experienced specialists or do everything yourself has recently become very relevant. After the appearance on the market of disposable kits for spraying polyurethane foam, many decided to refuse the services of construction companies and take everything into their own hands.
Scheme of a sandwich panel made of polyurethane foam.
Today, polyurethane foam is one of the advanced materials for thermal insulation. This material is used in almost all industries, from mechanical engineering to filling children's toys.
Despite its chemical origin, polyurethane foam is one of the most environmentally friendly and safe insulation materials used in construction. When creating its constituent elements, no formaldehyde, asbestos or freon are harmful to the lungs. In the process of spraying onto a certain surface, polyurethane foam becomes a stable and inert substance, which after many years does not release anything into the air, that is, it does not harm the environment and the general ecology of the planet.
Thickness of applied layer
To insulate the wall, it is enough to apply a thermal insulation layer 50 mm thick. However, it will not be possible to spray over the entire surface with such precision. Therefore, professionals advise working within the range of 50-60 mm, where the minimum thickness of the thermal layer is 50 mm, the maximum is 60 mm. Foam that protrudes strongly beyond the sheathing is cut off with a knife. The data is given for a brick wall of one and a half bricks.
In all other cases you need to count. To do this, you can use an online calculator (see here) or do the calculations yourself.
Insulation density
The density can be adjusted simultaneously in several ways: by changing the proportions of the components, within hundredths of a percent, by the speed and force of foam supply. Therefore, it will not be difficult for an experienced specialist to adjust the equipment to the required density. And for walls it is about 40 kg/m3.
Options for thermal insulation of buildings with polyurethane foam
There are 2 different ways to insulate the walls of a building with this material, differing in thermal conductivity and vapor permeability properties:
- Insulation with rigid polyurethane foam can significantly increase the heat, steam, sound and waterproofing of a house. Spraying thickness varies from 50 to 80 mm. It adheres perfectly to the surface, and all subsequent facing work can begin the very next day. The use of a vapor-permeable moisture-proof membrane in this case is not required;
- The second way to insulate a house is by spraying light polyurethane foam. The main difference from the first option is that the material must be covered with a vapor-permeable moisture-proof membrane, since it is a “breathable” insulation. In addition, a higher thermal conductivity coefficient than that of rigid polyurethane foam indicates that it is applied in a large layer, equal to 100-120 mm.
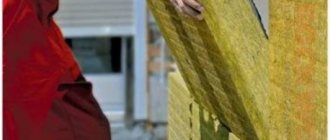
Dense hard polyurethane foam
Breathable, porous, lightweight PU foam
Preparatory work
Insulation of walls by spraying polyurethane foam is carried out after preparing the walls. The work algorithm is as follows, regardless of whether the facade or walls from the inside of the room are insulated:
Important: wall insulation with polyurethane foam slabs is carried out using the technology described here. Therefore, this article is not discussed.
- everything unnecessary is removed: trim, lighting, fasteners, etc.;
- old finishing is removed. On the facade there are facing panels or decorative plaster, inside the room there is wallpaper, paint, whitewash. If necessary, leveling plaster is beaten off (where it “bumps”);
- cracks and masonry joints are sealed with repair mortar. If this is not done, the force of the foam during expansion will be enough to widen the seam or the resulting gap. We already have such experience, when in a rural school a small crack (about 2 m long and about 8 mm wide) in the brickwork was filled with foam - the wall collapsed;
For reference: the technology for preparing walls for finishing and insulation is described in detail in the work “How to prepare walls for wallpapering.”
- the wall surface is cleaned of dirt and dust. Particular attention should be paid to greasy areas (if the finish is not sealed, volatile fats will settle), which can be found anywhere. They are fat-free. If this is not done, then in such places there will be no adhesion of the insulation layer to the wall surface;
- everything where there should be no foam (floor, ceiling, door and window openings) is covered with plastic film. Then it will not be possible to clean without using various scrapers;
- the sheathing is installed. Polyurethane foam is the only type of insulation for which a sheathing frame is mandatory on the walls (for other types of insulation, the presence of a frame is determined by the insulation method). There are several reasons.
- There is no “wet” method of insulating polyurethane foam walls. But this does not mean that after insulating the facade with this insulation, decorative plaster cannot be applied. It is possible, but using a different technology.
- Serves as a guide for the thickness of the insulation layer. If mistakes are made during application, specialists remove the excess before the foam has completely hardened, as a rule. In this case, the sheathing beam serves as a beacon.
- The sheathing frame serves as the basis for cladding with subsequent finishing.
You can see how to properly install the sheathing in the work “Wall insulation with foam plastic.”
Insulation of walls using polyurethane foam
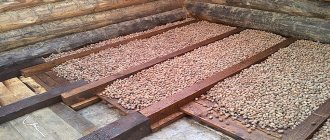
Pouring polyurethane foam into interwall voids is used to insulate and strengthen the walls of a house under construction or an already in use building. When building houses, brickwork of 1.5 or 2 bricks is used. According to SNiP II-3-79, in order to provide adequate protection from the cold, the wall thickness must be at least 1.2 meters.
It is impractical to use such a number of bricks due to the load on the foundation and the complexity of installation, so the walls are made of two layers. They erect an internal and external one, leaving a space of 50 centimeters between them for free air circulation. This helps retain heat and prevent condensation. But this is not enough for complete insulation. It is difficult to thermally insulate the space between walls using rolled or soft materials. The method of filling voids with polyurethane foam allows you to evenly fill all the gaps inside and between walls.
Insulation technology
Insulating the outside walls of a house with polyurethane foam can be done using two technologies:
- spraying on the facade;
- by pouring liquid polyurethane foam into the “well” between two walls: load-bearing and decorative.
You can only insulate walls from the inside using a spray gun. Insulation by spraying is carried out in the following sequence:
- connect the hoses from the components to be mixed to the spray gun;
- wear personal protective equipment;
- carry out primary regulation of equipment;
- carry out test spraying to check the density of the foam. If necessary, the gun and dispenser block are additionally adjusted;
- Spraying begins from hard-to-reach places, from the bottom up. The sprayer is kept at a distance of 50-60 cm from the wall. Apply in several thin layers. Each subsequent layer is sprayed only on the dried previous one. Otherwise, the thickness of the thermal insulation will be greater than planned. You'll have to cut it;
- after completing the work, all taps are turned off, the nozzle is removed, the hoses and gun are washed with a foam cleaner;
- after polymerization of the foam, the insulating layer is leveled: all protrusions are cut off;
It shouldn’t be like this: one, but a thick layer.
Important: when using open-cell polyurethane foam, the inner thermal insulation layer is covered with a vapor barrier film (type B), and the outer layer is covered with a windproof membrane (type A or AM). For two-component polyurethane foam, this procedure is not performed.
- The foam is sheathed with OSB sheets on the façade or with plasterboard from the inside of the room for further finishing. You can’t delay working outside—under the rays of the sun, polyurethane foam ages intensively.
Attention: if the foam is open-cell, then a counter-lattice is placed on top of the membrane on the façade.
Insulation of polyurethane foam using the “well” method
The method of constructing multilayer walls is widely used for insulation with foam plastic and basalt wool. It is less in demand when using expanded clay and is practically not used when insulating with polyurethane foam.
In the opinion of the editors of the StroyGuru.Com website, this situation arose due to the lack of necessary information among “home craftsmen” when building private houses on their own. After all, the method has more advantages compared to its competitors:
- It is performed by pouring rather than spraying, so there is no need to look for complex equipment;
- insulation can be carried out independently;
- the insulation will get into the most inaccessible places;
- the distance between the walls is not 15-30 cm, as for foam plastic, but 5-15 cm;
- heat is retained better.
But you should remember: you cannot insulate already finished walls by pouring insulation from the ceiling - it can squeeze out the wall, despite the reinforcement. The work is being carried out so that polyurethane foam can be poured in layers. If it is brickwork, then every 5 rows of bricks.
Insulation of polyurethane foam using the “well” method.
In conclusion, according to reviews on construction forums, it is better to entrust the work on insulating polyurethane foam to professionals. Otherwise, high prices are noted, but good thermal insulation properties.
Insulating a house with polyurethane foam: instructions and what critical mistakes should be avoided
Polyurethane foam can rightfully be called a new generation of insulation. In recent years, this technology for thermal insulation of buildings has become increasingly popular among owners of private houses. Do-it-yourself insulation with polyurethane foam is quite possible, but only if you have the necessary equipment and the master has studied the technology of applying this material well enough.
Do-it-yourself insulation with polyurethane foam
Polyurethane foam is suitable for insulating buildings both from the outside of the walls and from the inside. The material has a large number of positive qualities, which is why it has been used more and more recently. However, you need to be aware of the negative aspects that may arise when using this type of thermal insulation.
How is polyurethane foam used for insulation?
Insulation with polyurethane foam is most often done by spraying a heat-insulating layer onto almost any surface. By adhering well to it and gaining volume, the foam composition increases in size several times. Polyurethane foam, expanding, penetrates into all, even the smallest cracks, creating a dense and almost airtight coating, thanks to which the walls and roof are not afraid of cold and wind.
The most common method of using polyurethane foam is to spray it on the walls.
The most common method of installing it is spraying, but it should be noted that the pouring method is sometimes used. Most often, this technology is used at the stage of production of thermal insulation structures. Polyurethane foam is poured into special molds, and the resulting parts are used only after complete hardening.
Insulation can be carried out by filling cavities in structures with foam
Another filling option is to fill individual horizontal areas or voids with foam composition where spraying is not possible. For example, this method is used when it is necessary to fill a cavity between already installed or erected walls, or the space between installed layers of finishing material.
The foam composition is formed by mixing two components
Polyurethane foam is a product of mixing two of its constituent polymers, which are usually in liquid form - a polyol and a polyisocyanate. These components are mixed together without air access during the spraying process, foaming when exposed to carbon dioxide and heated to high temperatures.
The finished mixture is fed through hoses into a spray gun and applied to the structure thanks to the high pressure created. The foam composition adheres perfectly to the prepared surface and begins to actively expand, forming an insulating layer of the required thickness.
Video - Modern method of thermal insulation - spraying polyurethane foam
Properties of polyurethane foam
This material is used for insulation of both industrial and residential premises. Spraying of polyurethane foam is carried out on the floors of houses, the inner surface of the roof, various partitions, floors and walls. It is especially popular for insulating walls of frame structures.
Polyurethane foam is universal - it can be used to insulate walls, floors, ceilings, roofs, etc.
During the period of its active use, polyurethane foam has shown its unconditional effectiveness not only as insulation, but also as a waterproofing and soundproofing material. It perfectly protects the premises of the house from freezing, moisture penetration and external noise.
The main advantages of polyurethane foam
So, the remarkable properties of polyurethane foam include:
- Excellent adhesion, that is, reliable adhesion to almost any surface, be it concrete, wood, metal or roofing coverings made of other materials.
- The low thermal conductivity of polyurethane foam allows you to retain accumulated heat in rooms if insulation is done from the inside, and creates a reliable barrier against the penetration of cold air if the material is sprayed from the outside of the walls.
- Polyurethane foam tightly fills all holes and cracks, which helps isolate the room from extraneous sounds from the street. When sprayed onto the inner surface of the roof, the insulation is able to muffle the sounds of raindrops, which is especially important for rooms located in the attics of houses.
In addition to high insulating qualities, polyurethane foam has excellent noise absorption
- This insulation resists the appearance of corrosion on metal structural elements and protects the surface from the negative effects of an aggressive external environment.
- When sprayed with polyurethane foam, it not only covers large surfaces, but also neutralizes cold bridges that arise at the locations of the sheathing guides. They cannot be closed as reliably by any other type of material, therefore, even if insulation is used in mats or slabs (for example, mineral wool or polystyrene foam), the cold bridges are still treated with polyurethane foam.
- Spraying can be carried out on the most complex structures in their configuration, on which it is simply impossible to install conventional insulation.
- Polyurethane foam is a low-flammability material, since one of its components includes polyol substance A. One of the fire retardants is added to it, which gives the insulation the ability to self-extinguish and stop burning even if the material enters the fire zone. Fire of polyurethane foam is possible only at temperatures not lower than 450-500 degrees.
- The low weight of polyurethane foam allows it to be sprayed onto any roofing material from the attic side or onto the attic floor without fear of making these building structures heavier. Moreover, the applied layer of insulation after complete hardening will also give them additional rigidity.
Video - Using polyurethane foam for roof insulation
- When sprayed, the material forms a seamless surface, which cannot be done with other insulation materials without using additional means for their connection (mechanical or adhesive).
- Polyurethane foam is applied very quickly, expanding and hardening in a short time. Therefore, the entire insulation process will take little time - only one or two days, depending on the area and complexity of the structures being insulated.
- Due to the moisture resistance of polyurethane foam and the ability to seal surfaces, its use eliminates the need to use a vapor barrier and windproof film.
- Polyurethane foam is not susceptible to rotting, mold, or damage by rodents and insects.
- Leading manufacturers establish a guarantee for the service life of polyurethane foam of 50 years. However, judging by its components and application technology, the insulation will last much longer without losing its qualities if the foam spraying and its external finishing are done correctly.
- Not a single existing insulation material has such high performance, since none of them has such adhesive properties.
Disadvantages of the material
It is impossible not to mention the disadvantages of polyurethane foam - when insulating it independently and during further use:
- The big disadvantage of this insulation technology is its price, since purchasing or even renting equipment for applying polyurethane foam is not cheap.
- To work on spraying, you need to purchase personal protective equipment - a special suit and a respirator to protect against damage to the respiratory tract. All areas of the skin, mucous membranes, and eyes must be covered.
Working with polyurethane foam will require special safety precautions and the use of special protective equipment
- If there is no experience in installing such insulation, the work may take a long time, and its quality will not be guaranteed.
- Polyurethane foam is not flammable, but when it comes into contact with fire it smokes heavily. Moreover, the smoke contains a large amount of substances harmful to humans.
Polyurethane foam should never be left exposed to sunlight for a long time - ultraviolet light quickly “kills” the material
- If the insulation is applied to the outside of the building and is not covered with finishing materials, then it quickly begins to deteriorate under the influence of ultraviolet radiation, decomposing into monomers that are dangerous to human health.
How to insulate with polyurethane foam
Many would like to carry out the process of insulating their own home with polyurethane foam on their own, however, you need to know that this is quite possible only theoretically, and in practice it will require specific equipment, materials and certain work skills. It should also be noted that the technological equipment requires certain settings before spraying begins, and it is necessary to be able to do this correctly.
One of the main difficulties is the need for special equipment for spraying polyurethane foam
If you have an idea of how the whole system works, but there is no equipment, you can rent it, for which, however, as mentioned above, you will also have to pay a lot.
So what can we conclude? It will probably be easier to invite a specialist with his own equipment - he will quickly, without delay, complete all the technological stages of insulation, freeing the homeowner from a lot of problems.
If you still decide to test your own strength, then you need to take into account some features of this process:
Insulation with this material can be carried out during the construction of a building or in an already built house. In addition, spraying is carried out on individual areas or on the entire surface. Or, if necessary, fill the cavities with polyurethane foam.
Expert opinion: Afanasyev E.V.
Chief editor of the Stroyday.ru project. Engineer.
We have insulated the house from the outside, and now find out how to insulate the wall inside a country house, and also consider options on how to choose the right insulation from our new article.
When carrying out work, it is necessary to take into account the region where the building is located, since the thickness of the sprayed insulation layer will depend on climatic conditions.
Measures for insulation with polyurethane foam include the following actions:
- Insulated surfaces require certain preparation. For example, walls need to be cleared of existing old coating if it is clearly unstable (for example, old crumbling plaster or peeling paint).
- Next, on the wall you need to arrange a sheathing of wooden bars or metal profiles. The thickness of the guides is selected depending on what layer of insulation should be applied to the surface.
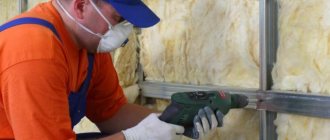
Wall surface lathing
- In addition, the lathing can play a leveling role for the wall. It is mounted on the wall surface level and plumb, and the openings between its elements are then filled with polyurethane foam, which will fill the unevenness and bring the coating to the proper level.
- Foaming insulation is sprayed onto the prepared surface using a special gun.
- The intensity of spraying also needs to be adjusted, since if you need a layer that is not too thick, then you need to adjust the device so that the composition is sprayed in very small jets. The sheathing, in this case, must be made from beams or profiles having a small thickness, since they will determine the thickness of the insulation layer.
- Spraying polyurethane foam always starts from the bottom of the wall, and applies it to the surface between the sheathing elements.
Spray gun for applying polyurethane foam
- Polyurethane foam is applied in a thin layer, which immediately gains volume. If the thickness of the first layer is not enough, then another layer of insulation is applied on top.
The insulation is applied in layers, from bottom to top.
- After the polyurethane foam has hardened and the hardened coating has been leveled along the sheathing guides by cutting off the protruding insulation reliefs, it is fashionable to install siding and lining. Nothing prevents you from doing the outside and brickwork or plastering the walls of the house.
- If it is planned to plaster the wall after insulation, then it must be tightened with a chain-link mesh, securing it to the sheathing guides. Then apply the cement mortar to the wall using the throwing technique. After it has set and initially hardened, it will be possible to apply any leveling composition of the plaster, as it will fit well on this base.
Video: the process of applying polyurethane foam to the wall yourself
In conclusion, I would like to note that in any insulation work two factors are very important - the quality of the material used and the experience of the craftsman. Therefore, it is best to entrust the work to a trusted specialist who will relieve you of unnecessary worries and carry out the spraying quickly and efficiently.
Prices for popular models of air compressors
Air compressors
Step-by-step instructions for polyurethane foam insulation using the disposable PENOGLAS™ KIT
The appearance in stores of disposable kits for applying polyurethane foam has significantly expanded the horizons of using this effective insulation. It is possible to do without inviting a team of specialists with their equipment. The kit includes everything you need, including personal protective equipment, without which it is not recommended to work with polyurethane foam.
One of the striking examples of such equipment is the domestically produced kit “PENOGLAS™ KIT”.
With this “PENOGLAS™ KIT-400” kit you can perform high-quality thermal insulation on an area of 20 m² with a thickness of 50 mm
The entire set is placed in three boxes, with a total weight of about 30 kilograms. Everything is very compact, so a regular car trunk is sufficient to transport the entire set.
The entire set fits easily into the trunk of any sedan
The manufacturer declares the following physical and operational characteristics of the thermal insulation being created:
- The system is two-component, producing foam with a closed cell structure, which minimizes possible water absorption.
- The density of polyurethane foam after complete hardening is from 35 to 40 kg/m³.
- Thermal conductivity coefficient is 0.024 W/m׺С.
- The number of closed cells is at least 85%.
- The full volumetric expansion of the “PENOGLAS™ KIT-400” kit is 1 m³, which will correspond to an area of 20 m² covered with a layer of thermal insulation 50 mm thick.
- The period of complete hardening of polyurethane foam is 1 hour.
The kit includes:
- Two cardboard boxes, each containing a cylinder with one of the components. Both the boxes and the cylinders themselves have clear color and letter markings: component “A” is indicated in red, component “B” is indicated in blue. The components are contained in cylinders under a pressure of 8 atmospheres.
When working with the kit, the cylinders are not removed from the boxes - the design of the packaging itself allows all operations to be carried out without completely removing it.
At all stages of working with the kit, cylinders are not removed from the boxes.
- The third box contains all the equipment, tools and spare parts necessary for the work. It contains:
The contents of the small box are everything that may be required to assemble the system and work with it
- a spray gun, in which the components are mixed. Two flexible transparent hoses are connected to the gun, ending with fittings with union nuts - for connection to cylinders. Typically, the hoses are also color-coded so that when reusing the kit, there is no confusion with the “polarity” of connection to the cylinders. The length of each hose is 3 meters.
— To spray the mixed composition, special replaceable heads with a spray nozzle are put on the gun. The kit includes ten of these heads.
To facilitate the connection of the heads to the gun and ensure a reliable seal of this connection, silicone grease is used - a small package of it is included in the kit.
Connecting the hoses to the cylinders requires tightening the union nuts using a wrench - it is also provided in the accessory kit.
The kit includes a set of eye, skin and respiratory protection - goggles, gloves and a respirator
— The manufacturer also thought about compliance with safety measures - the basic kit always includes a set of personal protective equipment - gloves, goggles and a respirator.
Working with the PENOGLAS™ KIT-400 system is quite simple and does not require any special user qualifications. All assembly and preparation of equipment for use takes just a few minutes. There is no need to use any power sources - the kit is completely self-contained. More details about this can be found in the instruction table below:
| Illustration | Brief description of the operation performed |
| The kit is delivered to the work site. When a small box is opened, you need to take it out and immediately put on protective equipment. | |
| Gloves can be rubber or polyethylene. You can, of course, use your own, but the use of protective equipment is a prerequisite, since the components of polyurethane foam are very toxic, and the resulting foam is very difficult to wash off from the skin. Not included in the kit, but it is strongly recommended to use a disposable work suit - foam that gets on ordinary fabrics cannot be washed off. | |
| Boxes with cylinders are being prepared for work. You can open the top lids of the boxes completely by cutting a strip of adhesive tape with a knife... | |
| ..and then - loosening the locking connection of the lid. | |
| Or you can even simply push the windows on the lid, perforated around the perimeter, inside. By the way, these windows are also convenient for carrying boxes - immediately below them there are metal handles for the cylinders. | |
| On the side wall of the box there is another window - round in shape. It is also easy to push it inward - there is cardboard perforation around the perimeter. Directly behind this window there is a cylinder fitting with a PPU component. | |
| The illustration clearly shows the threaded fitting of the cylinder and the tap for opening the supply of the PPU component. | |
| A spray gun with hoses attached to it is taken out of the box. | |
| The hoses assembled into a coil must be unwound along their entire length. | |
| The ends of the hoses with connecting fittings (with union nuts) are located near the windows of both boxes. Please note that the hoses may be color coded and it is recommended that you adhere to them. Of course, by and large, there is no particular difference which hose is connected to which cylinder now. But it happens that work needs to be suspended, postponed (the contents of the cylinders are allowed to be used for one month) or moved to another site. In this case, the system can be temporarily disassembled. It is also common practice that for large-scale work, several pairs of cylinders and one set of accessories are purchased. This is where it will be extremely important to maintain the same “polarity” that was in the original assembly. And color marking will help with this. By the way, there are kits that do not have color markings on the hoses - you should pay attention to this. | |
| The ends of the hoses are inserted into cardboard boxes through round windows. | |
| Then the union nuts of the hoses are screwed onto the fittings of the cylinders with PPU components. First, as far as possible, twisting is done by hand... | |
| ... and then the connection is tightened with the included wrench. The operation is repeated in exactly the same way on the second cylinder. | |
| Next, you need to make sure that the trigger lever of the pistol is locked. The spray nozzle should not be on it yet. After this, open both valves on the cylinders completely. You need to take an empty plastic bag (or any other unnecessary container) and test release the components into it for two to three seconds. This ensures that the pressure of the components is uniform in both hoses, and that nothing prevents their free passage through the gun. | |
| Next, you need to put the spray nozzle on the gun. To facilitate this operation, use the special silicone lubricant included in the kit. They coat the end part of the pistol with it... | |
| ...and the cylindrical part of the removable nozzle and the nozzle at the edges. | |
| Then the spray nozzle is inserted into the gun and pressed tightly so that the connection is securely fixed by the stopper located at the top of the gun (well shown in the illustration - yellow). | |
| The cylinders are placed in a place convenient for work, taking into account that the length of the hoses is three meters. It is allowed to move cylinders only by the metal handles located on their bodies. Carrying by the crane is strictly prohibited! | |
| You can proceed to applying polyurethane foam. The gun is aimed at the area to be insulated. The optimal distance from the spray nozzle to the surface of the building structure is considered to be 600 mm. Spraying is carried out sequentially, in a thin layer, gradually moving the stream of polyurethane to untreated areas. | |
| Often they start from places that are traditionally difficult to access or vulnerable from the point of view of the formation of “cold bridges”. This illustration shows that the craftsman first processed the corners between the floor beams and the rough covering, and then moved on to filling the free space between them. | |
| And this illustration demonstrates the filling with foam of the often ignored area of connection between the mauerlat, floor beams and rafter legs. The use of polyurethane foam allows you to cope with this task. | |
| This technology is also excellent for filling other voids formed at the joints of building structures. For example, the figure shows the insulation of the junction of an old partition with a newly erected ceiling - filling this gap with polyurethane foam will provide both insulation and the necessary sound insulation. | |
| Polyurethane foam also fits perfectly on metal structures, which, due to their very high thermal conductivity, are always the most pronounced “cold bridges”. | |
| You should not try to immediately apply a thick layer of thermal insulation. Foam increases in volume very quickly, and without experience working with such material, it is very easy to make the mistake of unnecessary waste of material. The optimal solution is to apply a thin layer, and after about 20 minutes evaluate the degree of expansion of the foam. If necessary, then briefly bring the insulation layer to the thickness required by calculations. (Calculations of insulation thickness will be discussed below). | |
| During the work process, it is necessary to monitor the quality of the applied foam. So, if it does not rise well or has changed in color (it has become darker or a pronounced brown tint has appeared), it means that the mixing proportions are incorrect. If the cylinders are not empty and everything is in order with the hoses, there is a high probability that one of the channels in the mixing and spray head is clogged. The kit contains spare heads, which means replacement is necessary. To do this, the release lever is locked. The replacement head stopper then lifts up. | |
| The head is gently moved forward with the help of your fingers. | |
| Its cylindrical guide protrusions come out of the gun channels, and then it is completely removed and put away when not needed. | |
| To install a new head, the above-mentioned lubrication of the mating areas with silicone grease is carried out. Then the head is inserted into place... | |
| ... and pushes it all the way through with your fingers, so that the upper stopper, fixing the sprayer in the gun, is activated. | |
| After this, you can again proceed to spraying polyurethane foam - normal mixing of the components and good spraying of the jet will be restored. |
When working, it is necessary to ensure constant compliance with safety precautions. If components or finished foam get on unprotected areas of the body or, even worse, on mucous membranes, it is necessary to immediately rinse with plenty of clean water. When washing off the skin, you can use regular soap. Foam that has frozen on your hands will not succumb to soap - you can wipe it off with a rag soaked in a nitro-based organic solvent (acetone or 646).
What should be the thickness of insulation with sprayed polyurethane foam?
In order to determine this parameter, you can independently carry out a thermal calculation. Its meaning is that any building structure (wall, ceiling or roofing) after insulation must have a total heat transfer resistance not lower than the standardized value established for a given area, taking into account its climatic characteristics.
The initial data will be:
- Parameters of the insulated structure. This refers to its thickness and the thermal conductivity coefficient of the manufacturing material. In addition, the structure may have a multilayer structure. For example, a wall (ceiling, the inner side of a roof slope) has a continuous finish (cladding) made of material, which also makes its “mite” to the overall thermal insulation. Those layers that are separated from the outside of the building from the main structure by a ventilated gap (ventilated facade or roof) are not taken into account.
- Normalized value of heat transfer resistance. It can be determined by the schematic map offered to your attention - for your region.
Diagram map for determining the normalized value of thermal resistance for building structures
Please note that three values are indicated for each location - separately for walls (purple numbers), floors (blue) and coatings (red). They vary significantly, and it is important not to confuse the values when calculating the insulation thickness of a particular structure.
Find out how to insulate a wall inside an apartment from our new article.
Knowing the listed values, you can carry out the calculation using a special formula. However, the formula will not be given, because below is a convenient calculator for quick and accurate calculations. All necessary dependencies and table values are already included in it.
Calculator for calculating the thickness of insulation with sprayed polyurethane foam
Go to calculations
The obtained value will become a guideline for planning the purchase of the required amount of material and for independently applying polyurethane foam to the insulated structure.