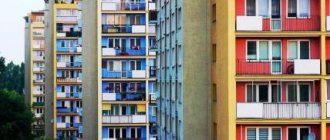
How to insulate a balcony or loggia with panoramic glazing
It will be difficult to insulate a panoramic balcony if the glass part is mounted without a balcony parapet. It is better to carry out installation work on insulating the balcony slab before glazing. Otherwise, the repairman will have to look for insulation whose width corresponds to the width of the metal window profile.
When preparing for insulation work, the homeowner should consider:
- Double-chamber window profiles are too heavy for standard balcony slabs. Many owners decide to install single-chamber double-glazed windows; first they need to insulate the floor on the balcony and the ceiling.
- Insulation of a loggia with panoramic glazing can be done using crossbars and racks. The result will be a structure of vertical valves separated by horizontal jumpers. Glass without profiles is attached here. A specialized polymer substance is used as a sealant.
- When glazing a balcony facade using a mullion-transom design, double-glazed windows or individual glasses are combined into a continuous panel with light transmission properties. A specialized material or ordinary sealant is used as a sealant. All elements are attached to a metal internal or external base.
Post-transom panoramic glazing system
- The result of continuous glazing is a transparent wall without profiles or connecting bridges. There are two ways to glaze a balcony with glass without profiles - monolithic and strip. In the first case, one glass or a single double-glazed window is used. It is almost impossible to protect such a balcony or loggia from frost. In the second case, glazing is carried out according to the principle of coupe systems. This method implies the ability to open the balcony window sashes.
Insulation materials
The choice of materials should be made not only according to their thermal insulation characteristics. It is important to consider the thickness of the sheets and the number of layers. This is critically important if you plan to insulate a balcony that already has windows installed. If the thickness of the resulting layer is greater than the width of the metal profile, the window sashes simply will not open.
Among other modern building materials, a wide range of insulation materials is offered. The main ones include:
- Foam plastic – foamed plastics. Available in the form of slabs, they are easy to process and easy to install. It has gained particular popularity for carrying out work on insulating balconies due to its long service life, low weight and affordable price. The material is not resistant to organic solvents, so gasoline, acetone and similar substances should not be used when working with it.
- Penoplex. A more modern material with better thermal insulation and performance characteristics, but also more expensive. Available in the form of slabs of various colors.
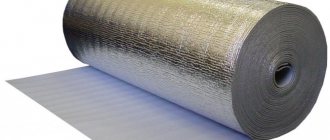
- Foiled polyethylene foam (penofol). It is foamed polyethylene covered with aluminum foil, produced in rolls. Due to the reflective properties of the foil, the material has high thermal insulation properties - it does not retain heat, but reflects it. Easy to install and trim. The small thickness of the sheet gives wide possibilities for its installation - both in the overlay and end-to-end. Used in combination with other materials.
- Mineral wool. It is made from molten minerals of volcanic or sedimentary origin. Not the best choice for insulating a balcony, since condensation may form in such spaces, which negatively affects the technical properties of the material and can also lead to the formation of mold and fungi. In addition, the process of processing mineral wool is quite complex and time-consuming.
How to insulate a panoramic balcony that is already glazed?
In a particular case, the insulating structure for the floor may consist of the following elements:
- waterproofing material laid directly on a concrete slab;
- a 5-centimeter layer of polystyrene foam (it is laid on a waterproofing material);
- vapor barrier material that protects the insulation from moisture, which, interacting with the cold balcony slab, turns into liquid;
- 10 mm layer of moisture-resistant plywood (serves as support for the outer covering);
- laminated flooring.
Insulation of the floor on the balcony with penoplex (expanded polystyrene)
Fences, railings on a panoramic balcony
A balcony with panoramic windows is often uncomfortable for people who are afraid of heights. In this case, it is recommended to install railings. They can be welded or forged. The design of the structure depends on the design of the loggia and the interior.
Thus, forged metal railings look great together with classic interiors. For apartments decorated in a modern style, welded fencing made of chrome-plated stainless steel is suitable.
Is it possible to replace “cold” glazing with “hot” glazing?
Replacement of glazing can be carried out by taking several steps:
- The maximum weight that the balcony slab can withstand is calculated. Read more in the article “load on a balcony slab”
- The “cold” glass is being dismantled. The mounting foam is cut off, the glass is pulled out, and the fasteners (if any) are dismantled.
- A new structure is being installed. Installation of plastic windows on loggias with double glazing.
If installing new windows is not possible for safety reasons, you can replace them with energy-saving glass installed on “cold” double-glazed windows.
Of course, a person who has no experience in installation work should not take on such work.
First stage
Since a balcony, in most cases, is an external structure protruding beyond the facade, with the exception of loggias, although they do not protrude structurally beyond the perimeter of the facade, but, nevertheless, are also an external structural element not intended for heating, glazing of panoramic balconies is carried out taking into account these conditions and is carried out, in most cases, using an aluminum window profile and with single glass of increased strength.
With such a glazing design, it is impossible to talk about insulating the balcony and the possibility of using it in the cold season. To do this, it will be necessary to either make significant changes to the glazing system, replace the aluminum profile with an energy-saving one that has plastic gaskets in the frame structure that prevent the metal from freezing, and at the same time replace all glazing with multi-chamber double-glazed windows, which will to some extent reduce heat loss through large by window area. This is an extremely expensive job.
This is the case in houses that already have panoramic glazing, and if you decide to install a French window in a house of an old design, the balcony fencing in which is made of metal or a reinforced concrete slab, then obtaining such permission will become doubly difficult, since you will have to dismantle the balcony fencing It's unlikely that anyone will allow it.
However, even if you have permission for redevelopment in your hands, you will encounter a lot of problems, the solution of which is difficult not only from a technical point of view, but will require the involvement of specialists of various profiles. It is simply not realistic to do the entire complex of work with your own hands. Firstly, this concerns the installation of the glazing itself. Manufacturers of panoramic windows will only begin work on the basis of a technical report from a licensed design organization, since the weight of the structure and the selected type of glazing may exceed the permissible load on the balcony slab. With your own hands you can perform a range of works on floor insulation, installation of heated floors and insulation of walls on the loggia.
If, due to technical features, it is impossible to install a multi-chamber double-glazed window due to its large mass, then modern energy-saving technologies will have to be used. Although, with a large area of glass, which is a good heat conductor, neither IR film nor special brands of glass can significantly reduce heat loss.
You must also initially be aware that heating a panoramic balcony with French glazing in the cold season will consume a very significant amount of electricity and the cost of utilities for you may increase significantly.
If you are installing a second glazing contour on the balcony, you must strive to ensure that the PVC or aluminum profile and glass are as thin as possible, so as not to overload the balcony slab with excess weight. But in the case of installing panoramic glazing for the first time, as part of the redevelopment of an apartment, you should, on the contrary, use a metal-plastic profile with a thickness of at least 70 mm, with at least double glazing.
The loggia has panoramic glazing. How to insulate it from the inside?
Insulating a loggia with installed panoramic glazing is possible by performing a series of more or less complex manipulations.
These include:
- closing and insulating seams between double-glazed windows;
- clogging of cracks formed in walls and corner parts of the structure;
- work on insulation of ceiling and floor coverings.
How to insulate seams
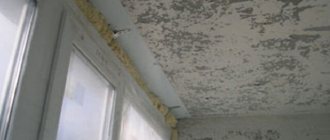
First, the seams are cleaned. If panoramic windows on the balcony were installed a long time ago, the window profiles are freed from the remnants of polyurethane foam, plaster and paint applied as part of seasonal cosmetic repairs. This work can be done quickly if you arm yourself with a spatula, the width of which is at least 100 mm.
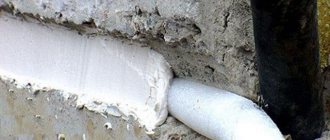
At the next stage, all voids and gaps are eliminated. To prevent cold air and dampness from penetrating through the balcony into the living space, all detected gaps are filled with polyurethane foam or cemented. The best time for such work is dry, sunny weather.
When the mounting foam dries (this may take about a day), the surface is leveled, and the voids filled with foam are covered with a special construction tape that does not allow moisture to pass through. Sometimes the seams are puttied and sealed with special plastic strips.
How to insulate walls
If the so-called cold glazing of the balcony has already been completed, some of the warm air will escape through the frames. By insulating the walls, the homeowner will achieve partial sealing of the structure.
Work with walls is done as follows:
- Having created a wooden sheathing (for more details, see the article “how to make a sheathing on a balcony”), the master fills each cell with insulation;
- installs the top cladding. Experienced craftsmen prefer to sheathe walls with plasterboard sheets (read more in the article “how to sheathe a balcony with plasterboard”).
Tips for creating a heated floor
A significant portion of cold enters through the uninsulated floor. Therefore, the phrase “warm floor on the balcony” should not be taken with skepticism.
First of all, the balcony slab is leveled. Curvature of balcony slabs is a fairly common occurrence. Floor screed will help correct the situation. The procedure consists of the following steps:
- Construction of a frame from wooden beams. Long pieces of wood are placed lengthwise, short pieces are placed across. The recommended distance between the cross beams is 50–60 cm. Self-tapping screws are used to make wooden sheathing;
- Filling the sheathing cells with insulation. In most cases, foam or mineral wool is used;
- Waterproofing film. This step is not necessary.
- The final stage of creating a warm floor includes covering the floor with plywood (chipboard) followed by lamination. If you wish, you can get by with ordinary linoleum (for more details, see the article “how to lay linoleum on a concrete floor on a balcony”).
Ceiling insulation
Since warm air flows rise from bottom to top, an uninsulated ceiling will cause heat leakage. The insulation process will not cause any particular complications for the inhabitants of the lower floors. The work will consist of insulating the outer part of the balcony slab located above their heads.
Neighbors living on the top floor will have to arrange an insulated canopy. As a rule, it is attached to a main wall or installed on specially erected columns.
Floor insulation
In order for the French balcony to be warm enough, it is necessary to take care of the floor insulation. It can be passive or active. In the first case, thermal insulation materials are laid, which reduce heat loss.
Active insulation means heating a room. Most often, a heated floor system is used for this. The fact is that moving a heating radiator or organizing a new circuit in an apartment is prohibited.
Passive floor insulation
How to insulate a balcony, or rather its floor? The work is carried out as follows:
- The old finish, if any, is cleaned from the floor surface, and all construction debris is removed.
- All existing seams and cracks are filled with sealant or polyurethane foam. To continue working, you must wait until the composition has completely dried.
- After this, a waterproofing membrane is laid. It is attached to the walls using construction tape.
- The sheathing is assembled from wooden beams. The distance between the logs should be about 500 mm. The subfloor must be level. The section of the beam is selected depending on how much the floor should rise, as well as depending on the thickness of the insulation.
- Thermal insulation material is placed between the lathing joists. It is fixed with mounting glue.
- To increase the efficiency of thermal insulation, penofol is placed on top. Its metallized layer should “look” upward.
- If you plan to install a heated floor system, it is installed at this stage.
- Fiberboard sheets are laid on top of the “warm floor”, onto which a cement screed is poured.
- A decorative covering is mounted on top. To increase thermal insulation, it is recommended to use laminate, cork or linoleum with a backing.
Active insulation
Insulating a loggia with panoramic glazing will help make the heated floor truly comfortable. An electrical or infrared system is used for this.
Both cable and film heated floors operate from the electrical network.
However, each of these technologies has its own characteristics that affect efficiency, power and service life. The main difference lies in the principle of operation of the system.
Classic electric heated floor - cable. It can be single or double core. The live wire heats up and the temperature is transferred to the sheath. The latter, in turn, heats the screed. Cable heated floors have a number of advantages:
- Price - cable flooring will cost much less.
- Simple installation procedure - special couplings are used for connection.
- For fastening, glue or screed is used.
Infrared heated floor is a special thin film. Electricity is converted into infrared radiation. It heats up the surfaces of objects.
This technology has a number of advantages:
- Heating speed - literally after turning on the system, the room becomes warmer.
- During installation, no screed is required, which means the floor does not rise as much.
- Warmth is felt when touching objects.
If we compare cable and film heated floors, the use of the latter is more economical. When the infrared system is turned off, the room cools down quickly. In the case of cable floor heating, the cement screed accumulates heat. When the power supply is turned off, it will gradually release it.
In terms of strength and durability, infrared film is preferable.
IR systems are resistant to damage and stress. While cable floors are afraid of loads. If even one section is damaged, the entire system will become unusable. If one section of the IR system is damaged, the entire remaining surface of the film will continue to work.
Electric cable heated floors are cheaper to operate.
In this case, electricity is consumed somewhat more economically. With proper installation and care, the system can last about 20 years. Infrared film flooring is an excellent option for additional heating. This solution is advantageous to use if the balcony is combined with an adjacent room.
What kind of floor insulation are you planning for yourself?
Active ("Warm floor" system)
66.67%
Passive (penoplex, polystyrene foam, mineral wool)
33.33%
Voted: 6
The balcony (loggia) is glazed with stained glass. How to insulate it?
Many owners, having listened to the opinions of experts, install a temperature compensator. This device protects the structure from deformation and temperature fluctuations during off-season periods. The temperature compensator is installed not on the balcony, but in the adjacent room, in which room temperature is constantly maintained.
Before installing new frames, the craftsman clears the window openings of construction debris and makes sure that the lower edge of the glass unit coincides with the rubber insert, and the upper part of the unit is connected to the H-shaped guide. The correct installation of rubber seals is also checked - it depends on them whether the thermal insulation will be airtight.
Balcony walls are first covered with foil polystyrene foam. Polyurethane glue or special dowels are used as fasteners. All joints are taped with metal tape.
Dense polystyrene foam can be used as the last insulating layer of the load-bearing and side walls. External walls are covered with foil polystyrene foam.
Read more in the article “Do-it-yourself insulation of a balcony with penoplex”
Insulation of walls and ceilings
A loggia with panoramic glazing can be translucent on only one side, the façade, or on three sides. In the first case, you will need to insulate not only the floor, ceiling, but also the side walls. This will minimize heat loss. With three-sided glazing, the insulation of a panoramic loggia will not be as effective.
To insulate the walls and ceiling of a balcony with floor-to-ceiling windows, thermal insulation material no more than 50 mm thick is used. Most often, several thin insulators are combined. The work is carried out according to the following algorithm:
- Insulation of a loggia with panoramic glazing begins with cleaning the surfaces; if there is an old finish, it is dismantled, all dust and debris are carefully removed.
- The walls and ceiling are treated with antiseptic compounds to prevent the future appearance of fungus and mold.
- The waterproofing material is laid and fixed. A sheathing is mounted on top of it. For its manufacture, experts do not recommend using a metal profile, otherwise “cold bridges” will form. It is best to use a wooden beam; dowels are used to secure it.
- Thermal insulation sheets are mounted using mounting adhesive. If the material is thin, the sheathing may not be installed, and special fasteners are used for additional fastening. The insulating sheets are laid without gaps.
- Next, wiring is laid to connect lighting points and sockets.
- After this, you can finish the loggia. For this, lining or drywall is most often used. These materials will also improve thermal insulation.
The question often arises whether it is possible to insulate a balcony with panoramic cold-type glazing. To do this, it is necessary to carefully seal and insulate all joints and seams between the French window frame, walls, and floor. Particular attention must be paid to the corners.
Is it possible to insulate a balcony with double-glazed windows?
To ensure a comfortable temperature regime, modern double-glazed windows are installed.
It is important to take into account climatic conditions, depending on which different frame designs are used:
- two-chamber. Allows you to maintain a favorable temperature with a slight decrease in temperature in winter;
- three-chamber. Provide an increased level of thermal insulation in cold climate zones.
When deciding to combine the living space of an apartment with a balcony, it is not advisable to install old wooden frames. They cannot provide a comfortable temperature level.
The next most important factor influencing the quality of insulation is the choice of insulation
Let's sum it up
Owners of panoramic glazing may encounter such a problem as the openness of your private life to prying eyes. A way out of the situation can be either covering the windows with tinted or “mirror” film, or installing blinds that cover either only the lower part of the glazing, or the entire glazing from ceiling to floor. The second option is preferable, as it helps to at least partially escape the heat in the summer. After all, a fully glazed balcony is a type of greenhouse attached to the facade of a house.
Related article: Transferring the battery to the loggia resolution
Balcony with take out
Warm structures take up a lot of usable space, and if there is already little space on the balcony, then there will be very little free space left after insulation. Extended glazing will help partially solve the problem. In this case, the balcony is installed at some distance from the perimeter of the fence.
To do this, first install metal brackets and assemble the balcony frame onto the resulting structure.
On the outside, the brackets are covered with plastic lining, siding or corrugated sheeting, and on the inside, everything is hidden by a window sill.
According to domestic legislation, without any permission, a balcony can be moved to a distance of up to 30 cm.
Warm panoramic glazing technology
Before insulating the balcony, you need to deal with the existing “cold” glazing. It is dismantled, the window opening is cleaned of old finishing materials and, if necessary, leveled. Next, they install new “warm” frames and proceed to installing double-glazed windows.
The lower part of the glass unit should rest on the rubber profile, and the upper part should be inserted into the H-shaped guide. Next, the glass is attached to the vertical bars using profile pieces about 20 cm long, and then finally mounted by laying rubber seals.
These rubber profiles are responsible not only for fastening the glass, but also for effective insulation and reliable sealing of facade glazing.
Walls
Foiled polystyrene foam performs well as a heat insulator. It is attached to the walls using polyurethane glue and dowels. The joints of expanded polystyrene boards, as well as areas where the material adjoins the floor and elements of the window system, are glued with aluminum adhesive tape.
The next layer of the “thermal insulation cake” is thicker polystyrene foam.
The joints are also taped with metal tape. When insulating the side and inner walls of a stained glass balcony, you can limit yourself to these two layers (foiled polystyrene foam and thick polystyrene foam). If we are talking about an external wall, then a third layer is also needed - again foil-coated polystyrene foam.
The ideal option is to fill the gaps with foam and finish with metal tape. Before applying the tape, make sure that the foam is completely dry, otherwise it may shrink under the layer of adhesive tape.
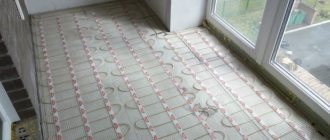
"Warm floor"
A conversation about how to insulate and landscape a large glass balcony would be incomplete without an emphasis on installing a “warm floor”. We recommend using Hemstedt BR-IM heating cable for these purposes. Hemstedt DH, ALU-Z or DH-Z heating mats are not suitable as they are too thin. If you use a cable of a different brand, then be guided by the fact that its power should vary in the range from 180 to 200 W/sq.m, but not higher! To ensure efficient heating, the cable must be laid over at least 70% of the floor area.
Before laying the cable, it is necessary to insulate the floor that serves as the basis for the stained glass glazing. We recommend laying penoplex, and then pouring an intermediate screed 4-5 cm thick.
Another option is laying foil foam. It will slightly raise the floor - this is its advantage, but the thermal insulation characteristics of penofol are worse than those of penoplex.
Next, a mounting tape is laid out on the floor, on which the heating cable is placed along a predetermined path. In addition to it, they also install a temperature sensor in a special corrugated tube, and “cold” wires, which are then brought to the installation site of the thermostat. When laying out the cable, do not forget to leave a space of about 5 cm from the walls.
When all communications are laid, proceed to pouring the screed. Its thickness is 3-5 cm around the entire perimeter of the loggia. A damper tape 1 cm thick and 10 cm wide is mounted at the base of the wall.
When the screed is dry, check that all parameters of the “warm” floor comply with safety requirements using an ohmmeter (to determine the resistance of the heating cable). If everything is in order, you can complete the insulation work on the loggia and lay the final floor covering.
How to install a French balcony
Technical parameters of the design
Technical parameters include the dimensions of the depth and width of the balcony, mosquito nets adjacent to the product, a drainage system and other additional parts of the device.
When you need to choose high-quality material, pay attention to the number of floors of the apartment in the house, as well as the general condition of the building. For example, in Khrushchev-era apartment buildings it is recommended to lighten the French balcony using an aluminum profile
But this option is far from ideal - aluminum is more expensive and does not have such high heat and sound insulation rates as metal-plastic.
French balcony made of metal-plastic
As for the doors, the mechanism of their functioning can be hinged - the doors open outward, solid or partially open. Here everything depends on the taste and desires of the customer, as well as the design of the double-glazed window model. In this case, always take into account what material the facade to which the panoramic balcony is attached to is made of, and the height of the device as a whole.
Installation process
Installation of the device occurs in several stages. First, you should take the necessary measurements; a construction tape will help you with this. Inspect finishing parts for defects. If everything is in order, reinforce the metal-plastic installation using a profile and strengthen it with reinforcing parts.
If you are wondering how to turn an old balcony of a conventional design into a French one, first of all get rid of the concrete barrier and cut down the metal railings, if any. Now strengthen the slab, on top of which in the future double-glazed windows made of metal-plastic or aluminum will be fixed. The latter provides only a sliding door opening mechanism.
Experts advise using double-glazed windows and energy-saving glass. Such a balcony almost entirely consists of glass surfaces, which means that it is advisable to insulate it, otherwise it will not be possible to avoid the low temperature in the room in cold weather.
Some get out of this situation by partially glazing the structure. How it's done? Visually divide the balcony into two parts: there should be a double-glazed window on the top, and sandwich panels should be installed on the bottom.
Conveniently, the proposed model does not require manipulations with insulation and covering of the device. Glazing a balcony from floor to ceiling using technology requires the use of high-strength double-glazed windows, simultaneously combined with sandwich plates. This device is safe even for small children.
How to decorate a French balcony
Elegant balcony products with railings presented in the form of forged gratings will sparkle with new colors if you engage in additional design.
Small decorative lanterns and candlesticks with a closed capsule and lit candles look very cozy and romantic. A bright country umbrella, framed in a designer lampshade that hides you from the rain and sun, will help add some piquancy.
Flowers and lush greenery can be easily placed in flowerpots equipped with holes for fixing to the railings. It is appropriate to use hanging pots.
In stores you can choose a suitable small chair and decorate it with bright fabric. Among the new products, balcony swings are becoming popular.
Connecting with a room
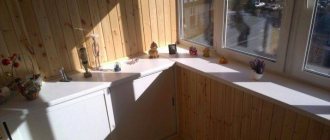
This type of interior solution has long been very popular. Apartment owners often order a combination of loggia and kitchen (room). Especially if the platform with panoramic glazing does not carry a large functional load. This option allows you to significantly expand the space. So if your family is cramped in the kitchen, such a balcony can become an additional dining area, a place for cooking, placing a couch, armchairs, etc. A new level of comfort will perfectly complement the luxurious view from the French windows. Floor-to-ceiling glass on the balcony combined with the kitchen looks very stylish.
To prevent violations of the law when drawing up a design project and quickly get the go-ahead to combine a kitchen and loggia with panoramic glazing, contact our company. Here you can buy all the necessary construction and finishing materials at an attractive price. You can also order work from us and find out its turnkey cost.
If you decide to independently combine the kitchen and loggia with panoramic glazing, you will have to demolish one of the walls. Improper demolition threatens to compromise the safety of not only your apartment, but the entire house. If the wall turns out to be load-bearing, you will not be allowed to completely remove the barrier. But an experienced designer will tell you how to harmoniously fit it into the interior (by removing the double-glazed window, you can make a bar counter or work surface from the window sill).
The right to combine is given by the following documents:
- redevelopment project;
- permits from various government agencies (BTI, architectural bureau);
- written consent from neighbors and the house assembly;
- final act.
When remodeling and combining the structure with a kitchen, it is strictly prohibited:
- take the battery to the site;
- install a kitchen stove there.
But all these problems can be solved: by properly insulating the room, and installing the slab in the window sill between the two rooms. This solution is absolutely legal and does not pose a threat from a fire safety point of view.
Attaching a loggia with panoramic glazing has the following advantages:
- Additional useful space, including by improving the geometry of the room;
- A departure from the standard layout, giving free rein to the designer's imagination;
- Redevelopment is often done in order to sell the home more profitably later;
- Ergonomic room design. You can finally give the room more function. For example, place a dressing table, a shelving unit, arrange a cozy reading corner;
- More light, and this improves the microclimate and even allows you to save on lighting in winter;
- Extra storage space. At the same time, by using the balcony area, you can more easily get rid of the trash that has accumulated there.
Don't forget about some disadvantages. First of all, there is red tape with the approval of redevelopment.
Secondly, expect additional financial costs, including payment for designer services and labor.
Thirdly, after the renovation you will no longer have a balcony in the usual sense. You will have to dry clothes or store things in another place.
Sometimes, after combining rooms, you have to leave the threshold.
In the absence of architectural and technical contraindications, experts advise adding a balcony. This solution increases space and allows you to make maximum use of it. You can make a mini-office, a recreation area, a children's room and even a personal sports corner.
Is insulation possible?
Insulation
First you need to study the design of the loggia. Typically, a balcony or loggia is equipped with the following device:
- The front parapet is up to 70 centimeters high.
- At the upper end of the parapet there are window structures up to the ceiling, as well as blind side parts.
- The front part, which performs two functions: safety and thermal barrier.
If you want to eliminate the parapet and create a viewing window that will be equal to the area of the front part, you need to think about energy saving in advance. When it comes to thermal insulation of a panoramic balcony, a problem arises, since the main source of heat loss is the surface made of glass.
In this situation, it is necessary to focus on the following indicators:
- The first indicator is the formula of the translucent structure (glass unit). What does the formula include? This is the number of glasses and the distance between them, the probable filling with noble gas (inert). The heat transfer resistance coefficient must be in accordance with current standards. This indicator should be 0.8 m²×C/W or more. At the same time, the same coefficient for external walls is 3.3 m²×C/W, so you need to understand that the window structure will not be able to provide energy saving without an external heat source.
- The next indicator is the profile. Although the profile does not occupy a large area in the window, nevertheless, heat loss often passes through the profile. The frame thickness of plastic parts should be 80 millimeters or more. If aluminum windows are being installed, the profile must have a polymer insert along the entire frame perimeter. This ensures excellent thermal transfer resistance.
- Installation. Mounting of panorama structures should be done using dowels. Thanks to this installation method, you can obtain excellent strength and tight pressure of the frame to the balcony walls.
A special feature of the thermal insulation of a panoramic loggia is that the glazing is made using systems with a profile that is 70 millimeters thick. The most popular brands are TROCAL, VEKA, SALAMANDER.
SALAMANDER profile
How does the glazing replacement work proceed?
Any work is carried out in several stages. This procedure is performed like this:
- Calculation of the mass that the parapet can withstand. You should not use glazing that is too heavy, as this may lead to the collapse of the structure.
- Cold windows are quite easy to remove: to do this, you need to cut off the mounting foam, pull out the glass, and disconnect other fasteners, if any. After this, the frame can be pulled out.
- New windows are being installed. It is recommended to use plastic ones with double glazing. They usually don’t weigh very much, but they retain heat well.
- If you had panoramic cold glazing, then you can install plastic windows from the floor or build a parapet from lightweight materials, such as gas block.
- You can choose any windows according to the opening method, it depends only on how much free space is on your balcony.
- If it is impossible to install windows with a thick double-glazed unit, you can install energy-saving glass on a thin one; they will help retain heat without increasing the weight of the structure.
Replacing cold glazing without changing the façade of the building is technically simpler and does not require special permits, so it is recommended to replace the glazing with the same shape as it was, with the only difference being that a warm structure will be used. After the installation is done, you need to install glazing beads on the glass and adjust the fittings.
Insulating cold glazing and then replacing it with warm glazing is a waste of effort and money, since when dismantling old structures and installing new ones, the tightness will be compromised. The finish may also be damaged and new cracks will appear in the seams. If you are planning to make a warm balcony, it is recommended to start work by replacing the glazing, and then carry out work on insulating the structures. They are done in exactly the same way as when insulating cold glazing.
Cold glazing is used mainly to protect the balcony from precipitation and drafts, but even with proper insulation it is not able to protect against frost. If you plan to make your balcony really warm and significantly raise the temperature inside it, it is recommended to immediately replace cold frames with warm ones.
Types of panoramic glazing of a balcony
There are two ways to glaze a balcony with floor-to-ceiling windows. They differ in appearance, design and are suitable for different cases of using a balcony room.
Frameless glazing
As you can guess from the name, this type of glazing does not require frames. This design looks like a completely glass box - it gives the impression of a weightless balcony.
Special tempered glass is mounted on roller guides at the top and bottom, then secured to each other and to the sides. The doors open towards the inside of the balcony or are moved like an accordion.
Advantages of frameless glazing:
- interesting design;
- ease of maintenance and operation;
- maximum room illumination;
- maximum visibility.
It also has its downsides. For example:
- poor insulation of such a balcony - it will not be possible to insulate and seal it;
- inability to install mosquito nets;
- danger of structural deformation due to strong gusts of wind, hail, falling branches, etc.
Features of stained glass glazing of balconies and loggias
Basically, this type of glazing is chosen for the spectacular appearance of the balcony. With it you can organize a recreation area, a small observation deck or an apartment garden.
Frame glazing
Glazing with a frame is a more reliable option. It is suitable for cases where the balcony is on a high floor and the house is in an open area. Insulation in this case is better, and there are technologies in which a panoramic balcony with such glazing can be used as a winter garden or even a living room.
There are several frame options:
- Plastic ones are perfect for warm glazing of a balcony. It is possible to install mosquito nets and choose different mechanisms for opening the doors. Due to the large weight of the structure, before glazing it is necessary to strengthen the supporting slab of the balcony.
- Aluminum. This frame can be used for both warm and cold glazing. Thanks to the excellent quality and lightness of the material, aluminum frames last a long time, and their installation and operation are safer. The only negative is that they cost more.
- Made from glass composite. This newest material for creating window frames combines excellent thermal insulation properties and resistance to mechanical damage. Naturally, the cost of fiberglass frames is quite high.
Which one to choose depends on what purposes the balcony will be used and what visual effect the owner wants to achieve.
Frame glazing has many advantages:
- operational safety;
- more robust design;
- the possibility of warm glazing and soundproofing of the balcony;
- the ability to install insect nets, hang any blinds and curtains.
In terms of safety, this type of glazing has a great advantage. You can safely lean on the window and not be afraid of strong gusts of wind.
There are also disadvantages:
- the design does not look as elegant as a frameless one;
- it is necessary to strengthen the floor slab.
In addition, there are several problematic nuances that apply to both glazing options. For example, when placing furniture on the balcony, you will have to choose materials that will not fade in the sun or provide curtains.
External insulation of the balcony.
In order to properly insulate a loggia from the outside, certain skills are required. Sometimes working independently without such skills can lead to trouble. External insulation means 30% savings on heating. Since difficulties may arise if the balcony is higher than the second floor, the help of industrial climbers is needed.
Before starting work, permission from officials will be required. If the house is located in a tourist area, this may lead to a violation of the overall style and such permission is required.
External insulation has a number of advantages:
- air calmly passes through the reinforced concrete slab, but it still remains warm;
- the insulation layer can be of any thickness, and the internal space remains the same.
You can use the same materials as for internal insulation, but it is often recommended to use spray-on insulation. This thermal insulation is simpler and more effective. Mineral wool in this case may be ineffective, since it is susceptible to moisture, so its use requires a more careful approach.
Making external insulation yourself is not easy. The procedure must be performed at a high level, otherwise the insulation will be ineffective. Also, in order to attach a balcony to the interior space of the room, it is necessary to seek the help of professionals, since this process is quite labor-intensive and costly.