To create the composition with which we will cover the floor, we will need the following materials and tools
We deliberately do not use the so-called liquid floor, because the garage is large and the floor is uneven, so it will take a lot of such material to fix the problems, and the upgrade work itself will be expensive.
We will need: acetone, xylene, two different colors to give a marbling effect, polystyrene foam. And as tools, prepare a container for mixing materials, which must be resistant to aggressive chemical environments, a stirring stick and a paint brush.
You can buy polystyrene foam, or you can use the kind that comes in boxes with electronics. Look for polystyrene foam on sale in the insulation materials department.
Operating procedure
Before you start working on the floor, it should be put in order. The space must be cleared of everything and cleansed. When you sweep, do not use water to settle the dust. It is better to take a brush with soft bristles and slowly walk over the entire surface of the floor.
Now take acetone and pour it into a working container. We only have two liters of this liquid. We lower pieces of foam into it until the liquid becomes cloudy. Next, add xylene. For the amount of acetone that we have, we only need one liter.
The next step is adding color. Just pour and stir. The composition is ready for use on the floor.
Apply the liquid from the container to the floor using a brush. Do not slow down your work, the composition dries quite quickly. Just two hours after we applied it to the floor, it was already dry. We covered the floor with another layer. We had enough prepared material for this.
A practical guide to making glue
The technology for preparing glue from foam plastic and gasoline comes down to the following procedures:
- We prepare the container for the glue; it needs to be washed and thoroughly dried in the sun;
- A small amount of solvent or gasoline is poured into the bottom of the jar, approximately 1/10 of the planned proportion;
- The first portion is filled with foam crushed into granules, approximately three times more than the amount of solvent poured;
- The mixture of glue, polystyrene foam and solvent is stirred vigorously to remove the released gases;
- Next, you can add polystyrene foam in pieces, embedding it in the adhesive mass. If necessary, add a mixture of gasoline and acetone in small portions.
The result should be a viscous and stretchy mass, with a consistency similar to shoe glue or very thick jelly. As soon as the glue has stopped releasing gas bubbles, you can begin gluing the surfaces.
Second recipe for foam glue
This method is practically no different from the previous one, with the only difference being that nitro varnish diluted with a small amount of acetone is used as a base.
As in the previous case, the foam is loaded into the varnish-acetone mixture in small portions and thoroughly mixed to get rid of bubbles and ensure complete dissolution of the polystyrene foam.
If the first recipe was used as a regular glue that can be used to glue wood and paper, then the second mixture is used mainly as waterproofing. It is very convenient to use glue diluted to the state of liquid sour cream to treat the floor, steps, handrails of a country porch, you can seal holes in the roofing material with glue and even glue the roofing onto the sheathing boards.
Sometimes, instead of pure varnish, nitro paint is used to dissolve the foam. The result is a fairly viscous glue that does not adhere very well to ordinary materials. Due to the lumpy nature and large amount of ballast filler, the strength of the adhesive mass is at the level of putty, and it also dries out and cracks after the material has finally set. A mixture of nitro paint and foam glue can be successfully used as a protective coating for painting metal and wood fences.
Two ways to use homemade glue
Foam-based adhesive material cannot be called superglue. Despite the ease of preparation and fairly cheap and accessible components, foam glue has several significant disadvantages:
- Limited shelf life of freshly prepared glue;
- Reduced strength of the adhesive seam. Foam glue turns out to be weaker than polyurethane or even rubber branded materials, so the amount of adhesive mass when gluing materials is increased by 2-3 times;
- The glue takes a long time to dry. Due to the thick glue seam, the place where the parts are glued takes at least a day to dry.
The most inconvenient thing to work with is that foam glue must be prepared only before direct use. It is known from practice that if you dissolve polystyrene foam in gasoline and leave the finished mass for 10-20 minutes, the quality of glue adhesion to the surface drops sharply.
The finished mixture absorbs water vapor very quickly, and even the naked eye can see how a film forms. Therefore, when gluing metal and plastic to a smooth surface, wipe the area where the glue is applied with acetone and connect the parts as quickly as possible.
Porous materials, wood, paper, brick, slate can be joined without any haste, the glue penetrates deeply into the pores, and the quality of the seam is at an acceptable level.
The second gluing method involves using fine foam powder. Ground polystyrene foam is poured onto the gluing area and covered with synthetic fabric. Using a brush or swab, a solvent - gasoline or acetone - is applied to the fabric and carefully rolled with a rubber roller.
Under the action of a solvent, powder foam dissolves in a few seconds, and the roller provides maximum pressure on the surfaces to be bonded. The fabric used as a backing remains in place where it is glued.
General Tips
It is important to work in a room that is constantly ventilated, even if it is cool outside.
You don’t have to add paint to the composition, then the floor won’t have marble tints like ours.
You can apply several layers, we have two, but you can do three. Experts may begin to dissuade you from using such a floor improvement technique, suggesting that you take, for example, liquid glass. However, the latter does not at all meet the requirements for wear resistance of floor coverings in the garage.
At the same time, our idea will create a layer strong enough not to be scratched, even with great effort. The updated floor acquires a glossy effect, which visually makes the garage space larger and makes your stay in it more comfortable.
Don’t forget about the ability to choose any colors as a color scheme. Also remember that this is a completely budget-friendly way to treat a concrete floor so that it does not generate dust. Moreover, the end result looks as if we used some kind of special composition bought in a store. Nothing in the coating reveals that we made the composition ourselves.
Now, don't forget to sweep and mop your garage floor regularly to keep it clean.
Preparing the base
The concrete floor in the garage is made on the ground. But more often than not, the soil itself is not a reliable and dense enough foundation, so a foundation is required - a cushion of crushed stone and sand. Preliminary and mandatory work - removal of the fertile layer, down to clean soil. The fertile layer removes organic matter and most of the microorganisms, while clean soil contains a minimal amount of them.
The first stage of installing a concrete floor in a garage is removing the fertile layer
Zero level mark
As a result, you get a pit of some depth. Crushed stone and sand will be poured into it, but to understand whether its depth is sufficient or excessive, you need to determine the zero level of the floor. It is convenient if the floor is level with the gate threshold. Often they do it just below the threshold, but then they will have to somehow drain the water, and it will definitely be there, if not in spring-autumn, in winter, from melted snow, for sure.
Mark the zero floor level along the perimeter of the walls. The most convenient way to do this is with the help of a plane builder (electronic level or level). Turn on the device to display the horizontal plane, set it at the desired level and draw along the beam.
It's easier to work with a laser level
If you don't have a laser level, use a water level. It’s not so convenient: you have to move the mark many times across all four walls. These marks are connected by a straight line; instead of a ruler, you can use a bubble level, at the same time you can check whether all the marks have been placed correctly.
The water level will have to transfer marks to all walls
Calculation of the thickness of ASG layers
As a result of this work, we have a foundation pit and a zero floor level. Now you can calculate how thick the layers are needed to reach the desired height. You need to start from the following dimensions:
- the optimal thickness of the concrete floor in the garage (if there is a passenger car or lighter vehicle) is 10 cm;
- the thickness of the crushed stone layer is at least 10 cm;
- sand - at least 5 cm;
In total, it turns out that the pit should be no shallower than 25 cm deep. And this does not take into account the floor covering. If you simply treat the concrete floor with impregnation or paint, then no additional centimeters are required; for any other coating, add the required thickness.
Structure of a concrete floor in a garage
Having received a specific figure, you can plan the amount of sand and crushed stone. If the layers turn out to be very large, you can add soil to the bottom and compact it (but not the fertile layer). If the depth of the pit is not enough, we remove some more rock.
You can put marks on the walls of the garage, which will help you control the thickness of the layers. If the width of the garage is small - 2 meters or so - these marks are enough. If the garage is wider, you need to put a few more stakes in the middle and mark them too. It is clear that all marks must lie in the same plane. This is again convenient to do using a level. Another way is to take a flat plank or board and apply it to the marked marks. Place a level on top of the bar/board. If everything is set correctly, the bubble will be in the middle.
If you are planning to make a hole in the garage, now is the time to dig a pit for it. If the pit has brick walls, you can immediately pour a concrete floor in it. While you are pouring concrete under the garage, it will gain the required strength and you can lay out the walls. They can be driven out after filling the floor with a cushion of crushed stone and sand.
Materials for backfill
For a normal concrete floor in a garage, it is better to use crushed stone rather than gravel. Gravel, with its rounded edges, you will never compact to the required degree. And if the foundation under the concrete is unstable, even a thick reinforced slab will burst. That’s why we import crushed stone, medium and fine fraction. Average 60-70%, the rest - small.
The cushion consists of compacted crushed stone and sand
There are no special requirements for the quality of sand for pillows. It is important that it is free of clay inclusions, but it can (and should) be sifted before laying.
Making a pillow for a concrete floor
The first step is to level the bottom of the pit. We remove uneven surfaces, fill in depressions, and raise the level to the horizon. Do not think that the concrete floor in the garage can be damaged. It can be done, but then the slab will crack and you will have to redo it.
Now we take a vibrating platform (you can rent it) or a manual tamper and compact the soil. Along the way, once again leveling the plane. When the soil is compacted, crushed stone can be poured. They don’t fill the entire volume at once - it’s normal not to compact 10 cm. The maximum layer is 5 cm, but 3-4 is better. We fill in the required part, distribute it, level it (with a rake) until it reaches approximately the same thickness. We take a tamper or vibrating plate and tamp it.
It is better to compact with a vibrating plate
This compaction of crushed stone when installing a concrete floor in a garage is very important - a certain amount of crushed stone is driven into the ground. As a result, it becomes even more dense, the load-bearing capacity increases, and the possibility of subsidence is eliminated. Tamping is considered sufficient if you step on the surface and leave no traces. In the same way, all portions of crushed stone are compacted, bringing them to the required thickness.
Sand is poured onto the compacted crushed stone. It is also divided into parts of 2-3 cm. The peculiarity of compacting sand: it must be moistened, they also say - spilled. The wet sand is compacted, again focusing on the layers.
Now you can start forcing out the walls of the pit, if there is one. They are brought to the level with the finished floor or even slightly higher - so that you can wash the car right in the garage without fear of water getting into it.
Damper gap
A concrete floor on the ground is often called floating. This is because it is made incoherent with the walls of the building. In this case, the walls and floor can sink or rise independently of each other, maintaining integrity.
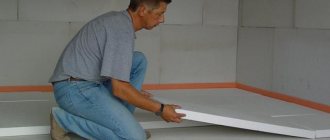
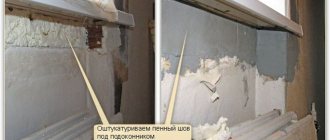
To prevent the floor in a concrete garage from being connected to the walls, a damper tape (sold in hardware stores) is laid around the perimeter or thin sheets of foam plastic (10 mm thick) are cut into strips. The width of the strips is 12-15 cm - they should protrude slightly above the finish of the floor. The excess height of the damper is then cut off flush with the floor.
Covering the concrete floor
Dissolving polystyrene foam in xylene
Note: I was also advised to use solvent 647, but I didn’t have it on hand.
Due to numerous requests in the comments to my videos, today I will try to make a composition of polystyrene foam and solvents for application to concrete.
I would like to see how it will behave, because car owners are interested in cheap varnish to cover the garage against dampness. I’ll start by dissolving polystyrene foam in gasoline. I should also check it in acetone and solvent, but I think that acetone dries too quickly.
- I pour 92 gasoline into a clean, empty metal can. You will need a little more than half the can of gasoline.
- I cut a piece of polystyrene foam approximately 1500 mm long and 40 mm thick into strips and lower them one by one into a jar of gasoline.
- The width of the strip should be chosen according to the size of the can. My goal is to see how the resulting composition will behave on concrete (I don’t need a lot of varnish).
- The foam easily fits into the jar, melts and compresses into a fairly dense lump at the bottom.
- The resulting composition has the appearance of a gel and is similar to napalm (when ignited, it immediately flares up, burns for a long time, and the flame is high).
- It is not possible to regulate the viscosity of the composition by adding gasoline - it reaches a certain thickness and the process stops there.
- I leave the jar for a while so that the air bubbles come out and all the pieces of foam dissolve.
- I take out the gel-like mass from the bottom of the jar and transfer it to another container.
- I clean the area of the concrete slab with a wire brush and blow off dust with a spray gun.
- I prepared a brush and a spatula for work, which I lightly greased with oil. This way the varnish will not stick. It turned out to be more convenient to work with a spatula.
- I pour the varnish onto the concrete and use a spatula to apply it to the surface using movements in different directions.
- After finishing the job, there is practically nothing left on the spatula.
When applying the varnish you immediately smell the smell of gasoline. I leave this area for about an hour to dry.
I will conduct the second experiment with xylene (one liter costs 110 rubles). If you cover the entire garage with this composition, then its cost will be 2.5 times more expensive than polystyrene foam varnish dissolved in gasoline.
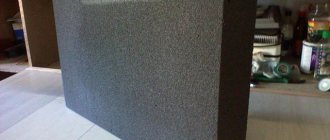
- To dissolve in xylene, I chose denser and more expensive fine-grained foam, from which the protection of the computer system unit is made.
- When xylene is added to the jar, the foam dissolves almost completely, the viscosity of the composition becomes less, and the thick lump disappears.
- A composition of this viscosity can be applied in a much thinner layer. It looks like xylene is better for making foam varnish.
- I'll try using xylene as a wood varnish. I take a walnut branch peeled from the bark and apply a thin layer of the composition with a brush. It turns out very well, but you have to wait for the varnish to dry.
- I also apply a layer of composition onto the concrete with a brush. The layer turns out to be very thin and there are no air bubbles in it.
- I leave it to dry.
My first section did not dry completely within an hour - a film with a very large number of bubbles formed on the surface. Huge bubbles formed on the sides. To the touch it looks like the well-known packaging film with bubbles. However, as an option, this composition can be used after complete drying.
The area covered with xylene varnish turned out better. The composition is well absorbed into the surface of the concrete and looks like real varnish. The only negative is the high cost of xylene compared to gasoline. To reduce the cost, you can first dissolve the foam in gasoline, and only then add xylene and achieve the desired viscosity. It will be inexpensive to prepare a composition based on bottled xylene, which is sold in cans and costs less.
Note: the composition dried on wood in 10 minutes and is indistinguishable from real varnish. In the future, for an experiment, I can take a board polished on a machine from a nearby furniture workshop and apply 3-4 layers of xylene varnish to it.
Well, now it's time to finish the article. All the material I wanted to share has been reviewed. I hope it will be useful to you, and you will use it if you need to remove dust from a concrete floor with liquid glass with your own hands. Improve your own practical skills and gain new knowledge, as they say: “It’s never too late to learn!” That's all, thank you for your attention, successful and easy repair!
Modern adhesive compositions, of which there are many in construction stores, with all the variety of names and brands, are not much different from each other. All of them are united by a high price and average gluing quality. Most often, universal construction adhesive is a polyurethane or polystyrene viscous mass in an organic solvent. Foamed polystyrene, also known as foam and solvent, can be found in almost every home. Following the same logic, you can quite simply make foam glue with your own hands based on a simple recipe.
Waterproofing a concrete floor in a garage
Concrete itself is not afraid of moisture; high humidity is harmful to the car body, as well as to things and equipment, of which there is a lot of accumulation in the garage. The choice of materials for waterproofing depends on how close the groundwater is and how high it can rise during the season.
If the groundwater is high, no special measures for waterproofing can be taken, but a dense polyethylene film (with a density of 250 microns, maybe reinforced, maybe not) is laid on the sand. in this case, the film is more needed to prevent moisture from the concrete from escaping into the sand, which cannot be allowed. If there is a lack of moisture, concrete will not gain the required strength and will crumble.
The waterproofing film is spread
If the groundwater level is high, it is better to take a denser and more reliable waterproofing - hydroisol or its analogues. In any case, the film panels are spread overlapping - they overlap each other by 10-15 cm. To minimize the possibility of water penetration, the joints are taped with double-sided tape, maybe twice (at the beginning of the joint and at the end).
Waterproofing is applied to the walls, above the damper tape. She is temporarily detained there. Once the concrete has been poured and it has set, it can be trimmed.
Reinforcement
Since the loads are expected to be serious, the concrete floor in the garage is reinforced. For passenger cars, you can use a ready-made mesh made of wire 7-8 mm in diameter, the cage size is 15 cm. To obtain a single reinforcing system, pieces of the mesh are laid overlapping each other by one cage. The two meshes are connected to each other with plastic clamps or special knitting wire.
The garage floor is waterproofed with waterproofing and the reinforcing mesh is installed on the bricks.
One more point - the mesh should be located in the thickness of the concrete, approximately in the middle. Simply laying it on a film would be wrong - the metal does not corrode inside the concrete only if it is located at a depth of at least 3 cm. To ensure that the concrete floor in the garage lasts a long time and does not crack, the mesh is raised above the waterproofing by 3-6 cm. There are special stands for this, but more often half bricks are used. They are just 6 cm thick. Place them under the reinforcing mesh so that it does not sag too much.
Installation of beacons
In order for the garage floor to be level, it must be leveled. It is more convenient to do this with the help of a special long bar, which is called the rule (emphasis on the letter I - from the word edit). This plank is supported on even planks set at the required level. They are called lighthouses.
Any flat and long objects can be used as beacons. These can be pipes, bars, special beacons, which are sold in construction stores. They must be placed at the same level as the concrete slab level mark on the walls.
Beacons are placed from the far wall, towards the one in which the doors are located (most often it turns out that along a long wall). The installation step is 25-30 cm narrower than the length of the rule. If the rule is 150 cm long, the distance between the beacons should be 120-125 cm. They retreat about 30 cm from the wall, place the first beacon, then others with a given distance.
This is how a concrete floor in a garage is poured along the beacons
They are usually installed on islands of a thickly mixed solution. They lay out the slide a little higher than necessary, and press the beacon into it so that it is at the desired level.
When installing beacons, you can make a slight slope of the concrete floor towards the doors (0.5-1 cm per meter). In this case, the water will flow by gravity from the floor to the street. Just note that in this case more concrete is required - you have to lift up the edge of the floor farthest from the entrance, but this is compensated by ease of use.
The next day after pouring, the beacons are removed, the voids are filled with mortar and leveled to the same level as the previously filled floor.
Pouring a concrete floor in a garage
The grade of concrete for the garage floor is M250. Its characteristics are more than sufficient in terms of strength and frost resistance. Due to the large thickness of the slab, even a small garage requires a large volume of mortar. Let's estimate: for a small garage measuring 4 * 6 m with a concrete floor thickness, you will need 4 m * 6 m * 0.1 m = 2.4 cubic meters. Taking into account the fact that a slope is needed, this will be all 3 cubes. If you do it yourself in one day, you need to use two concrete mixers - one will not cope. It will take a decent team to do the job.
It takes a large team to mix concrete in a concrete mixer.
There should be one person on each concrete mixer. This is provided that all the components are right there and they will also load them into the pear. If components need to be transported, it’s two more people. Plus, two must transport concrete to the place where it is laid and one must level it. It turns out to be quite a brigade. You will have to work with this composition all day. Even if the helpers are free, they need to be fed and watered. It is unlikely that this arrangement will help save a significant amount of money compared to ordering ready-mixed concrete from a factory. Unless you work with one hand, filling the floor in parts. This is also possible, but it can lead to cracks at the joints of floor sections poured on the same day. You can reduce the chance of such cracks if you remove the cement laitance that forms on the surface with a metal brush.
If you decide to order concrete in a mixer, it is worth installing a receiving tray that will direct the flow of concrete to the center of the garage. From the center it is already easy to distribute it to all corners, and then stretch it using the rule. To facilitate leveling of concrete and increase its grade, immediately after preliminary spreading, the concrete is treated with a submersible concrete vibrator. In this case, air bubbles immediately come out, the concrete becomes more fluid and fills all the cavities. Beacons will be needed only for orientation, and perhaps partial alignment.
Making glue from foam plastic
What kind of foam can glue be made from?
Three types are suitable for this purpose:
- Extrusion . It has a homogeneous structure due to the peculiarities of the material production process at high temperatures. The material turns out to be solid.
- Press . It is characterized by a high level of strength and does not crumble. This can be explained by production technology, namely pressing.
- Pressless . This foam looks like a sheet with many interlocking balls. If you apply physical force to the material, the balls become separated and the sheet easily crumbles. This type of foam is best suited for creating an adhesive. The dissolution process occurs very quickly.
Granular material can also be used to make super glue from polystyrene foam, but first it is worth testing how the granules behave in a solvent, since different types react differently to it.
The process of making foam glue requires compliance with safety precautions so as not to harm your health. Work should be carried out outdoors or in rooms with open windows. Remember that gasoline and other solvent vapors are toxic.
Solvent for foam glue
The best solvent is the one that uses gasoline, nitro paints, acetone, P646. It is better to take pure gasoline without additives added to fuel. Leaded grade or biogasoline, which has a high content of fuel alcohol, would not be the best choice. Water and kerosene in its composition are not its most dangerous components; in addition to them, various additives are added that are hazardous to health.
Experts advise paying attention to Vietnamese gasoline. It is considered one of the safest and most successful solvents for preparing glue from polystyrene foam and gasoline and using it for its intended purpose. The composition is straight-run gasoline mixed with acetone.
Dichloroethane and acetone are also used to create glue. The first substance is poisonous, but the resulting glue will glue any plastic products. Do-it-yourself acetone and polystyrene glue is more fluid and flexible, which makes it easier to work with.
How to choose foam for making glue?
Select clean material, without traces of paint, dirt, or soil. Do not use polystyrene foam, which is used to insulate underground pipes, for this purpose, since fire retardants are added to it. Foamed polymers may contain freon, and some other brands of foam may contain compounds of heavy metal salts.
Note. Styrene and freon can remain in the bubbles of the material and come to the surface during the dissolution process. This will not change the quality of the glue, but inhaling such gases is not recommended.
The container for preparing glue must be washed and dried. The amount of solvent is poured in a ratio of 1 to 10. First of all, it is necessary to pour in crushed foam three times more than the solvent. The resulting mixture is stirred vigorously to remove volatile substances. Then the material can be added in pieces, embedded in the mass.
If necessary, you can add solvent. The resulting mass should resemble shoe glue or thick jelly. When the emission of bubbles stops, the mixture can be used for its intended purpose.
Recipe 1
There is another recipe for making homemade foam glue, which involves using nitro varnish diluted with acetone. The kneading technology is the same as in the first method. The crushed foam is poured in parts and mixed. The main thing is to achieve complete dissolution of the granules.
Recipe 2
The first recipe is good to use as an adhesive for wood and paper. The second composition is used for waterproofing. If you dilute the glue to the consistency of liquid sour cream, it can be used to treat steps, floors, and porch handrails. In addition, it can be used to process holes in roofing felt, make roof coverings, and attach the roof to the sheathing.
If you use nitro paint as a foam solvent, the result will be an adhesive with a viscous consistency, which is not considered suitable for gluing conventional materials. Due to its lumpy structure, its structure has less strength and resembles putty. After hardening, the mass may crack. Why then do you need such glue, you ask? It is well suited for the protective treatment of metal and wooden fences.
Disadvantages of glue
In addition to significant advantages, such glue also has its disadvantages:
- Short shelf life of the prepared composition. The prepared mass should be used within 10 -20 minutes.
- Low strength of the connecting seam compared to rubber and polyurethane compounds.
- Long drying period (one day or more).
- The adhesive mass absorbs steam, causing a film to form on the surface. Therefore, in the process of gluing metal and plastic, which have a smooth surface, they must first be wiped with acetone and the elements must be connected extremely quickly.
Materials such as paper, brick, wood, slate are glued without haste, since the glue penetrates deeply into the supports, ensuring the strength of the connection.
DIY glue made from acetone and polystyrene foam is used to work with wooden slats. This composition is quite capable of replacing carpentry or casein glue. They can be used to glue cardboard packaging, process fiberboard joints, repair plywood and even flooring.
Curing
After pouring the concrete, if it is not very hot outside, you can simply close the garage doors. If there is a window, it must be covered so that the sun's rays do not fall on the concrete. If it is too dry and hot outside, the concrete is covered with plastic film or damp burlap.
During the week, the stove must be watered daily. It’s more convenient to do this over burlap - without much pain, you can water the burlap in relatively small streams, and it will transfer moisture to the concrete. If the concrete floor in the garage is covered with film, it is removed before watering and then stretched again. When watering in this case, you need to make sure that the drops are small - you need a nozzle with a large number of holes. In any case, the degree of watering is to a uniformly moist state (determined by the dark gray color of the surface), but without large puddles.
Insulated concrete floor in garage
There are two options - insulate an already poured slab by pouring a screed on top (the structure in the figure below) or do the insulation immediately by laying it under the main slab.
Insulated garage floor
When choosing the second option, the insulation is laid on top of the waterproofing layer, and a reinforcing mesh is placed on it. The rest of the process of pouring a concrete floor in a garage is similar, only it is necessary to take into account the thickness of the insulation when calculating the depth of the pit.
For this case, it is recommended to use extruded polystyrene foam (EPS) with a density of at least 35 kg/m 3 as insulation. It has very good characteristics, can withstand heavy loads, does not absorb or allow water or steam to pass through. So this is also an additional vapor and waterproofing.
To be sure that the insulation will not be pressed under the wheels, it makes sense to lay a layer of geotextile on top of it. This is a non-woven membrane that is used in the construction of roads. Its function is load distribution, which is exactly what we need.
The minimum thickness of EPS is at least 5 cm, preferably 8 cm. It is better to lay in two layers, shifting the seams when laying - in order to isolate the floor from the ground as best as possible.
Advantages and disadvantages of floor insulation with polystyrene foam
- The insulation does not absorb groundwater. Under the influence of moisture, it does not change its size and is not deformed.
- The high density allows the panels to withstand significant loads.
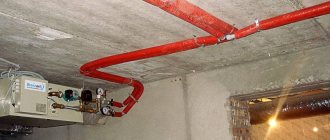
- It goes well with the cables and pipes of the “warm floor” system.
- Samples are easy to process. They can be easily cut into small segments of any geometric shape.
- The insulator has properties that allow the floors to be used for a long time. Microorganisms, bacteria and fungi do not grow in the slabs. The product is resistant to biological and chemical influences and does not rot.
- Expanded polystyrene soundproofs interfloor ceilings.
- The material is environmentally friendly. It does not irritate the skin during installation work, does not create dust and does not emit an unpleasant odor.
Is it possible to lay tiles on drywall?
Floor insulation with foam plastic: stages and methods
As you know, a garage today is not only a shelter for a car, but also a place where comfort and coziness are needed. The garage not only stores the car, it is also repaired there.
In addition, in such a building you can often just relax, sit with friends, etc. Thus, the car owner spends a significant amount of time in this room, and it is necessary that it be warm all year round.
Among other things, nowadays it is much more expedient to park the car in your own garage, and not, for example, in a paid parking lot or under the windows of a house. In addition, building a garage with your own hands today is within the power of any family where there is a real man.
The stages of garage construction can be divided into points:
- Preparatory work, which includes organizing the construction process;
- Territory planning (foundation construction, etc.);
- Construction of the garage foundation;
- Final installation of the building structure;
- Installation of windows and doors, garage doors, etc.;
- Roofing installation;
- Interior finishing, including floor insulation.
The last point is one of the most important and indispensable before putting the garage into operation. There will be people walking on the garage floor, not just a car driving. Therefore, it is worth dwelling on this part of the garage arrangement in more detail. The technology of floor insulation with foam plastic, for example, is possible today for almost anyone, even a novice builder.
Due to the constant increase in tariffs for energy resources and in particular for electricity, thermal insulation of premises is becoming more and more popular. Installing floor insulation in a garage today is as integral a part of the finishing of a building as light and sewerage in an ordinary living space.
Floor insulation measures, in addition to significant savings in money spent on heating, will also create additional comfort in the garage. The modern market for construction equipment and materials offers a lot of insulation materials. Based on the degree of water resistance, insulation materials are divided into two types. The first includes diffuse materials. These insulation materials consist of fibers that allow steam to pass through, so to speak, breathe.
The second type of insulation is sealed materials, usually polystyrene foam and all its derivatives. This type is characterized by an extreme degree of water resistance; it does not allow moisture to pass in both directions and, like a cellophane film, retains the smallest particles of water vapor. When using this type of insulation, it is important to have a high-quality ventilation system so that the condensation formed does not settle on the walls and ceiling. Today, any construction portal can tell you how to properly insulate a floor with polystyrene foam.
General principles
Let's start with some useful general tips.
- When choosing insulation and heating methods, it is worth remembering SNiP 21-02-99 “Car Parking”, according to which the recommended temperature for a garage is +5C. The warmer it is inside the garage, the more moisture will condense on the surface of the body of a car that has driven into it from the cold, and the faster the body will rot.
However: if the garage serves not only as a parking place for the car, but also as a workshop, this temperature will seem uncomfortable. For central heating - a simple solution for quick adjustment - a thermal head on the connection to the heating device. After finishing work, return the temperature to the minimum that can be set using it.
- When making an insulated plank floor, boards with a thickness of 50 millimeters or more are used with a pitch between lags of no more than 50 cm. The car still has a significant mass.
However, there is a simple and cheap solution - to cover a concrete floor without joists with boards of any thickness. The floor will become noticeably warmer; Cleaning under the flooring or replacing a rotten board will also not be a problem.
A simple boardwalk over concrete is a very simple and fairly effective insulation.
- Of the popular and affordable wood species, the ideal choice for flooring is larch. It does not rot even in damp conditions .
- A reasonable minimum thickness of the screed on top of the insulation is 100 millimeters. The screed is poured with a minimal slope towards the garage door: in this case, we will ensure normal water flow when washing the car.
- Reinforcement is carried out with a mesh with a thickness of 5 millimeters or reinforcement with a diameter of 8 millimeters. The price of mesh is slightly higher compared to reinforcement; however, in this case we get rid of the time spent on knitting reinforcement. Cell size is 15-20 centimeters.
- Under the screed, as in any other case, insulation that is not prone to deformation is laid. In the case of a garage, the instructions are especially important: as already said, the weight of the car is very significant compared to the load in residential premises.
- For obvious reasons, hygroscopic insulation materials are reliably waterproofed at the top and bottom. However, it is better to refrain from using them altogether: it is almost impossible to completely prevent water from getting into the thickness of the mineral wool on the floor.
Mineral wool is suitable for insulating walls, but on the floor it is almost impossible to protect it from moisture.
Garage floor
Typically, the garage floor is poured with concrete immediately after the foundation is built. The technology is quite simple: the area between the foundation walls is covered with sand and compacted; in this case, a slight slope of 20 degrees is necessary so that the water can drain outside the garage building. Then roofing material is laid on top, onto which concrete with a thickness of at least 12 cm is poured. If desired, the floor is reinforced with a metal road mesh.
It is necessary to pour cement in two steps: the first time the thickness should be approximately 5 cm, after four days another 5-6 cm. As a result, the garage floor should be 20-50 cm above the ground level, otherwise melted and melted water may penetrate into the garage. groundwater. At the entrance to the building, special drainage channels with gratings are installed, where the water flows.
To prevent water from freezing in winter, you can install a heating cable in the channels. You can also equip a repair pit in the garage, the walls of which should be lined with bricks.
Thermal insulation of garage floors
It is known that thermal insulation materials for floors serve to significantly reduce heat loss, increase sound insulation properties, and also maintain a stable temperature in the building. Floor insulation is carried out by various types of insulators, depending on the materials from which the floor surface and the building as a whole are made.
Each thermal insulation material is unique in its own way: one is resistant to heavy loads, while being able to retain its structure and shape; the other has good soundproofing properties; the third is fire resistant. It is important that each of them must have a low degree of thermal conductivity. The main types of thermal insulation materials can be structured as follows:
- Mineral type of insulation. This type includes expanded clay, mineral wool, and various cement-based mortars with various additives.
- Silicate type of insulation. This is glass wool, traditional for many buildings and structures.
- Wood-shaving type of insulation. These include plywood, sawdust and materials based on them, chipboard.
- Polymer or plastic insulation. These include polystyrene foam and all its derivatives.
Each type of insulation requires its own installation technology. It's better to hire a professional to do the work. However, specifically for a garage, almost anyone can do floor insulation. It is worth noting that currently insulation using sawdust and DPS is practically not done. The reason is simple - modern fire safety conditions do not allow such events. In addition, such materials are susceptible to rotting and quickly become wet. The same can be said about different types of cotton wool.
What is liquid foam
It is immediately worth noting that the term or concept “foam plastic” includes a large number of varieties of foam material based on polymer resins. Their characteristics vary greatly and depend on factors:
- Purpose. Technical foam plastic can significantly exceed toxicity standards for residential premises (this is acceptable). Therefore, cheap raw materials (polymer synthetic resins) of low purity are used for it.
- Production technology. Products made from frozen PP are considered conditionally safe - they may produce toxic fumes when heated (burning). Liquid PP, which is produced immediately before application to the structure, can release harmful substances during operation.
Of all the possible raw material options, urea resin seems to be optimal. The full name of the product based on it is urea-formaldehyde foam.
Method of insulating a garage floor with foam plastic
Firstly, it is worth calculating the floor area that is planned to be insulated. This is necessary in order to determine the amount of material needed and then purchase it. It is worth considering that foam sheets often have different thicknesses, densities and sizes. It is advisable to use as dense and thick a material as possible. The best option is when the foam sheet has a thickness of at least 10 cm with a density of 30 kg/m2 with a sheet size of one meter per meter (for example, grade PSB-S-35).
In addition to the foam itself, the following materials will be needed for insulation:
- Glue (it is recommended to use cement-based adhesive designed for fixing ceramic tiles);
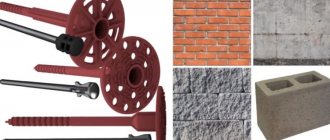
- Dowels with which the foam will be attached (ordinary plastic dowels with a cap will do);
- Deep permeability primer;
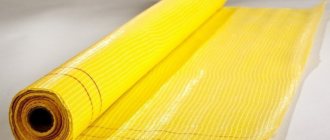
- Reinforced putty mesh with cells measuring 2.5 x 2.5 mm;
- Decorative plaster.
The floor surface must be cleaned of dirt and dust. Next, you should level the surface, getting rid of protrusions and filling cracks and depressions with putty.
Then a layer of primer is applied, and in some places the primer must be applied several times if the material is absorbed abundantly. The final layer should be at least 30-40 cm. Then about 10 cm of sand is added, and this entire structure is carefully pressed.
Then you need to build a floor from reinforced concrete - this will be a rough version of the coating. The concrete will dry in about a week or two. After drying, a layer of waterproofing should be laid - polyethylene film. This is a very important part in finishing the garage flooring, because the car, as a rule, carries with it a lot of moisture, especially in inclement weather. And only after these processes should you start insulating with foam plastic.
As mentioned above, insulation work does not require special skills; any beginner can cope with it if he follows the methodology and technology. So, after the preparatory work, sheets of foam plastic are laid on the floor. Glue is pre-applied - both to the foam sheets and to the floor. A notched trowel is used for this. Having placed a sheet of foam plastic, you need to hold it for a while to fix it. If desired, the sheets can be mounted on dowels, for which it is necessary to drill holes in the corners or in the middle of the foam plate in advance.
After this, the finishing screed is done. Also, if desired, extracted polystyrene foam granules are mixed into the solution used for the screed. This will make the floor more durable. If desired, after all the work you can put a layer of decorative plaster, but there is a high probability that under constant garage loads, it will not last long. After you succeed in insulating the floor with polystyrene foam, you should check, using special tools, whether the floor is even.
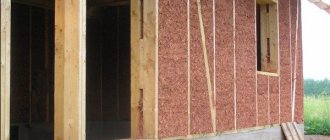
It is worth noting that if the original floor of the garage is not concrete, but wooden, then sheets of foam plastic must be placed between the joists. To prevent the sheets from falling apart and forming bridges during cold weather (and in the garage, as a rule, there is no heating), the space between the wooden elements is blown out with polyurethane foam.
How to insulate a floor with your own hands
This work is carried out in two ways:
- A pit up to 50 cm deep is dug inside the garage, then waterproofing, rough screed (if required), insulation and flooring are laid;
- Insulation is placed on the old screed, and a finishing screed or wooden flooring on the joists is placed on top.
The wooden floor serves as additional thermal insulation. In addition, it is preferable if communications are laid underneath it. In the event of their repair or forced replacement, dismantling the floor covering and performing the work will be much easier, faster, and cheaper.
Wood flooring in a garage is one of the most common options.
It is important! When choosing the second method of insulation, it should be taken into account that in this case the floor rises to the height of the log with the thickness of the boards. If the room is low, this thermal insulation option will cause inconvenience in the future use of the garage.
Expanded clay for concrete floor
The work is performed in the following sequence:
- A pit is dug to a depth of at least 0.5 m. The earth is compacted.
- A 10 cm layer of crushed stone and 5 cm of sand are poured on top. The surface is leveled, the sand is moistened and compacted.
- Lay roofing felt waterproofing with a 5–10 cm overlap. The joints are filled with bitumen or heated with a blowtorch and pressed down.
- At least 30 cm of expanded clay is poured on top of the waterproofing. It is advisable to mix different fractions to fill voids. To maintain the horizontal, beacons are placed or landmarks are drawn on the walls of the garage using a laser level. Having leveled the insulation, the beacons are removed.
- To set the expanded clay granules together, the top layer of insulation is generously watered with liquid cement mortar - “milk”.
- A reinforcing metal mesh is laid on top (usually used with 10x10 cells). It is recommended to raise it above the insulation by 2–3 cm, placing large expanded clay granules.
- Beacons are installed above the net with a slight slope towards the goal.
- A damper tape is placed around the entire perimeter with a height 4–5 cm greater than the thickness of the screed.
- Concrete is prepared in the proportion of 4 parts of fine crushed stone, 4–5 parts of sand and 1 part of cement M 400–500. In this case, it is preferable to a conventional DSP, as it can withstand heavy loads.
- The screed is poured from the far wall towards the exit, aligned with the rule according to the beacons.
- After a day, the beacons are removed and the grooves are filled with cement mortar.
- In the first days, the screed is wetted every 5–10 hours, depending on the air temperature, to prevent cracks from forming. In hot weather, cover with polyethylene. The cracks that appear are filled with cement laitance.
When insulating a concrete floor with expanded clay, it is important to follow the technology
Attention! The hardening time of the concrete floor is 28 days.
Expanded clay under a wooden floor
Sequence of work:
- They dig a pit. The depth is determined by summing the thickness of the rough screed, boards and the height of the logs.
- The soil is compacted, 5 cm of sand is added, moistened, and compacted again.
- The rough screed with reinforcing mesh is filled with a solution no less than 6 cm thick.
- Strips of roofing felt are placed on the screed. The overlapping joints are glued together, and bends are made along the perimeter onto the wall as high as the floor level.
- Logs are laid on the waterproofing in increments of 30 cm.
- The gaps between the logs are filled to their entire height with expanded clay.
- The floor covering is installed from boards pre-treated with a fire-retardant agent.
Expanded clay is one of the most affordable and easy-to-use materials
Expanded polystyrene under the screed
Both polystyrene foam and polystyrene foam of the PSB-S-35, PSB-S-50 brands, which have sufficient compressive strength, are suitable for this method of thermal insulation.
You can also dig a pit or lay insulation on an existing screed, if the height of the garage allows (the floor will rise by about 20 cm).
In the first option, the sequence of work is as follows:
- The pit is dug to a depth of 20 cm, followed by compaction of soil and a 5 cm layer of wet sand.
- The rough screed is poured strictly horizontally so that there is no distortion of the insulation boards.
- Waterproofing - roofing felt - is laid on the rough screed. If the insulation is laid on an old floor, then it is enough to lay a plastic film. The joints are glued with an overlap.
- Further work is the same. Insulation is placed tightly next to each other on the waterproofing. Even if there are locks, the joints are taped.
- A layer of waterproofing is again placed on top of the slabs.
- Lay the reinforcing mesh.
- Fill the screed with concrete or DSP, not forgetting the slope towards the gate. Follow drying rules.
Expanded polystyrene is one of the most popular insulation materials; it is suitable for any covering.
To check whether the screed is dry or not, you need to place any container turned upside down on it overnight. If moisture has accumulated under it in the morning, the floor is not yet dry.
Video: Insulating foam under screed
Polystyrene foam for wooden floors
In this option, the insulation is placed on the old screed. This method is popular among car owners because you can use even the cheapest PSB-S-15 foam plastic with a thickness of 50 mm, since there is no load on it, and the wooden flooring acts as additional insulation. In addition, the floor rises by a maximum of 10 cm.
Sequence of work:
- The floor is swept and covered with polyethylene.
- Logs and insulation are alternately laid on the waterproofing. The height of the bars is equal to the thickness of the foam. The joists should lie near both walls.
- The remaining cracks are filled with polyurethane foam to prevent the formation of cold bridges.
- The insulation is covered with a layer of vapor barrier.
- Lay the flooring from boards 45–50 mm thick.
Even cheap polystyrene foam is suitable for insulating the floor in a garage.
It is better not to use tongue and groove boards. Under these operating conditions, they quickly deform.
Pros of insulating garage floors with foam plastic
Polystyrene foam is a fairly inexpensive and, most importantly, reliable way to insulate garage floors. It is very easy to work with this material because it is quite easily susceptible to external influences, so insulating the floor with polystyrene foam will not be difficult even for the weakest person.
The structure of polystyrene foam characterizes its properties - it consists of small hollow particles that are filled with air. As you know, air is an excellent heat insulator of natural origin. The production of polystyrene foam largely determines its properties. This material is made from polymers. It is worth noting that polystyrene foam is used as insulation in many types of construction.
In addition to garages, this technology is used in the finishing of industrial buildings, high-rise apartment buildings, country houses, and cottages. Moreover, not only the floor is insulated, but also the walls, roofs, and the entire basement area. The low weight of polystyrene foam allows it to be used on load-bearing surfaces. Insulating the floor with foam plastic will 100% protect the garage building from moisture, dampness, and cold.
So, if you need to insulate the garage floor, then you simply cannot find a better material for this than polystyrene foam. If all the thermal insulation work is done correctly and according to technology, then the garage will not be threatened by moisture and its unpleasant consequences.
Floor insulation technology
Foam plastic 2-5 cm thick is laid end-to-end on the waterproofing layer and attached with special butterflies using a hammer drill to the base of the floor (fastening is not necessary, it can be replaced with a weight, as in the video), it is important to eliminate the slightest gaps in the material, as they can become a “bridge” "for the cold. It is advisable to place a reinforcing metal mesh with a cell size of 30-40 mm on top of the foam, which will give rigidity to the concrete with a small layer of it.
Also at this stage it is necessary to lay a strip of insulation along the perimeter of the floor for better thermal insulation characteristics of the base.
https://youtube.com/watch?v=6eSa8gPCLsM
To install a floor screed in a house, a classic concrete mortar is used on top of the insulation (using a self-leveling machine is too expensive, since the screed layer must be at least 2 cm thick with insulation) after installing the guide beacons
The guide elements are installed using a level and any quick-setting mortar, and here it is important to properly control the accuracy of the work
Concrete mortar is poured between the beacons and pulled along the guide elements with a plaster rule or a flat lath, after which it is smoothed with a wide metal spatula or polisher. Avoid exposing the solution to direct sunlight, otherwise cracks in the screed will certainly appear due to uneven drying.
Further laying of the floor covering is carried out no earlier than 2 weeks after the completion of insulation of the concrete floor with polystyrene foam, since it is necessary that all moisture is removed from the screed, otherwise the covering may be deformed.
Questions and answers
Is it possible to immediately fill polystyrene foam with a thin layer of self-leveling material when insulating?
No you can not. The level is used for final leveling of the prepared surface; foam plastic is not such. The level, firstly, due to its greater fluidity, will flow into the joints of the insulation, and secondly, cracks may appear on the surface due to the weak stability of the base. You need at least a minimal screed.
Is it necessary to additionally fix the foam with fastening butterflies?
No, not necessarily. If you lay foam plastic on glue, then the need for additional fixation is completely eliminated.
Is waterproofing required when insulating a floor?
As stated above, if the floor on the ground floor is insulated, then waterproofing is required, in other cases it is not.
The sun's rays fall on the screed, how bad is that?
It’s bad, the screed may crack due to uneven drying. There are two options here - close the windows with thick material or, after the screed has dried on top, cover it with roofing felt or other opaque material.