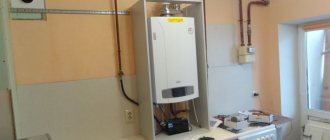
Almost everyone is faced with the issue of installing a faucet in the bathroom, however, many do not know that if you follow the instructions you can do it yourself. The process of replacing an old faucet and installing a new one is a simple job if you follow all the instructions and are careful. In this article, we will look at ways to install a faucet in the bathroom on the wall and on the side of the bathtub, tools that will be useful during such work, as well as the components of the faucet.
Bath faucet device
In our case, the main parts that will have to be dealt with during the work and which must be included in the kit of a new bathroom faucet are:
- main block;
- shower head;
- eccentrics;
- shower hose;
- gander;
- gaskets;
- decorative lampshades.
The first stage of work, after the tools have been selected and the scope of work has become clear, is the dismantling of the old mixer.
Preparatory work
- Before starting work, you need to clear the workplace of foreign objects and turn off the water supply valves.
- You can cover all surfaces and the bathtub with bubble wrap so that if the tool accidentally falls, they will not be damaged.
- Dismantle the old mixer as carefully as possible.
- Gather the necessary tools: adjustable wrench, screwdriver, hammer.
Removing the old mixer
This stage of replacing a bathroom faucet should be approached with due care so as not to damage the pipes and flood the neighbors. To do this, you first need to turn off/shut off the supply of hot and cold water, after which you need to drain the remaining water in the tap, for which you just need to open the valves.
When all the above steps have been completed, you can begin to unscrew the fasteners connecting the mixer to the pipes and remove the old device. If the eccentrics require replacement, then they are also unscrewed.
How can I install a faucet in the bathroom?
Installing a faucet in the bathroom yourself begins with the purchase of new plumbing fixtures. Bathroom faucets can vary in the length of the jib, the presence or absence of a shower head, the opening mechanism (lever faucets or classic) and many other characteristics. It is better to first clarify the question of which faucet to choose with a specialist or seek advice from the seller - he will recommend the best manufacturer and help you choose a model that fits your budget.
- open installation;
- hidden installation.
The first type of mixers is recommended for novice plumbers to purchase. It is much easier to install such a faucet on the wall due to the fact that connection to the water supply does not require additional operations for wall grooves or complex calculations when installing supply pipes.
Installing a concealed faucet in a bathroom yourself is a more difficult task, but it is also possible. The main problem when working with such cranes is that it is more difficult for the master to gain access to communications.
Ultimately, how to connect the mixer - hiding the pipes or not - is decided by home owners based on their own preferences. The main thing is to adequately assess your plumbing skills and not take on impossible tasks.
Mixer installation
First, the eccentrics are installed, the distance between them should be 15 centimeters. After this, the faucet body is installed on them, the connection point is hidden using decorative cups. You should pay attention to all the seals included in the kit and do not forget to install them. Then tighten the nuts connecting the base to the eccentrics; tighten them carefully and alternately.
After installing the base, a gander is attached to it from below and tightened with a nut. Next, attach the watering can hose and the shower holder, if provided by the mixer design.
Horizontal mounting
The device is transferred to a horizontal surface when the model is not standard, or is intended for installation on the side of the bathtub. Before installing the faucet on the side, you need to check with the seller about the possibility of such installation. Or you can study the information on the bathtub manufacturer’s website. The side must be able to withstand the load.
The algorithm for mounting on a horizontal plane differs from installing a crane on a wall:
- We study the instructions from the manufacturer for installing on the side of the hot tub.
- The part of the rim on the surface of which holes for the tap are later drilled is reinforced with a plate.
- A scheme for connecting the tap to the water supply pipes is developed in advance using the connecting hoses from the kit. At the same time, the freedom of movement of the bath after installation should not be limited so that there is access to the equipment.
- A faucet with an automatic thermostat is adjusted to the required temperature after installation.
- To ensure that the horizontal plane is not damaged during work, it is sealed with construction tape. Once the holes are drilled on the side, the tape is removed. Before installing the device, the edges of the holes on the side are processed with a suitable tool.
- According to the instructions, the crane structure itself is assembled into a single whole. If everything is installed correctly, the connection hoses easily fall into place. The device is fixed to the base.
- The connections are checked for leaks. The bathtub is put in place. If the connecting hoses for the faucet are not long enough to move the font, then lengthen the supply lines. Then the installation process will be completed.
Installing a faucet on the side of a bathtub
Installing a water tap on the side of the bathtub is a fairly common occurrence in modern apartments. This is a stylish, convenient and practical solution for installing plumbing fixtures.
Before starting work, you should determine the distance at which the mixer will be located and determine the length of the pipes. For such purposes, a flexible hose is best suited. Avoid stretching the hose, but also keep in mind that you don’t need a hose that is too long.
The sequence of work for installing the mixer on the side of the bathtub:
- Seals are installed, and supply hoses are attached to the tap using nuts.
- The seal is placed in the mixer body.
- The hoses are passed into the hole in the bowl, and a special gasket is placed between the tap and the bowl. After this, the bathtub mixer is installed in place.
- Tighten the bolt and nut to secure the device. It is very important not to overtighten the nuts during installation.
- Next, connect the mixer to the water supply system.
Installing a faucet in the bathroom is not at all a difficult job, which any owner can do. Before choosing a new faucet, be sure to read all the documentation to choose the model that is right for you.
Bathroom faucet installation steps
The installation of the mixer will be carried out in several successive stages, and each one must be given a lot of attention. The totality of these actions determines the final result.
Removing the old mixer
Initially, it is important to take care of dismantling the old plumbing fixture, if any. This work is considered quite simple. To do this, follow these steps:
- Initially, the water is shut off, both cold and hot;
- The water from the tap is completely drained;
- it unscrews from the wall, and this action must be performed carefully, since careless actions can lead to deformation of the threads on the fitting;
- if you damage the thread located on the wall, you will have to carry out major repair work, since you will have to replace the fitting, so there will be a need to knock down the tiles;
- After dismantling the old device, the fitting in the wall is thoroughly cleaned, since it is important to remove any remnants of winding or paint from it.
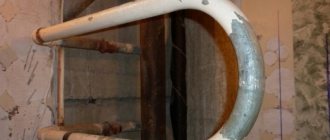
Removing the old mixer
Thus, dismantling an old plumbing fixture is quite simple, so this process does not require the investment of significant effort or time.
Shut off the water
Let's get her down
Removing the tap
We clean the coatings after dismantling
Assembly of the structure
Most faucets sold on the market are dismountable, so the product must be assembled before installation. Standard models consist of components:
- a shower head;
- gander and eccentrics;
- rubber gaskets and decorative lampshades;
- shower hose, main unit and gander.
Typically, manufacturers place each part in a separate bag made of cellophane or fabric.
Assembly of a single lever mixer
Stages of assembling a two-valve mixer
Before assembly, it is important to make sure that all components are included and are of high quality. Particular attention is paid to eccentrics, since their threads must be intact and reliable.
Assembly of the structure is quite easy. To do this, a gander is attached to the block, after which a hose with a watering can is attached. The process is simple as all components are simply screwed together. It is not advisable to use keys for this work, and you should not put in significant effort.
Wall installation
How to install a faucet in the bathroom if it is attached to the wall of the room? To do this, follow simple steps:
- all plumbing fixtures in the room are covered with film to protect them from dirt or damage;
- if the old mixer has not been installed previously, then the fittings are initially installed on the desired section of the wall, and the calculation of the location of the structure must be carried out in advance;
- the mixer is assembled in accordance with pre-written instructions;
- the eccentrics must be wrapped with FUM tape, after which they are inserted into the wall fittings left after dismantling the old plumbing fixture;
- if tape is not available, then it is possible to use tow, pre-treated with a special paste;
- the eccentrics are screwed in, and between the two inputs on the mixer, an optimal distance of approximately 15 cm is certainly left, and it is recommended to measure this distance using a building level;
- The main block of the device is screwed onto the eccentrics, and if they are screwed in correctly, then no problems arise during this work;
- the block is removed, after which decorative lampshades are screwed onto the eccentrics, and they must fit firmly and tightly to the wall;
- the block is screwed on again, and at this time it is necessary to use winding;
- for tighter shrinkage, it is recommended to use spacers;
- the nuts are tightened using a wrench, and significant efforts must not be made so as not to break the product;
- The bathroom faucet is connected to the hot and cold water supply system.
Thus, in the bathroom, installing a faucet is a simple job that can be completed in a short period of time. Most often this device is fixed to the walls of the room, since in this case it is comfortable and convenient to use.
After installation, it is important to figure out how to connect the mixer to cold and hot water supply systems, and this is easily done using corrugations. It is important to carry out the work in such a way that it is convenient to use the structure, and all connection points must be reliable and durable.
Installation of fittings
Preparing the eccentric for installation
Mixer installation
Mixer installation steps
Bath installation
If you plan to use the mixer only for a shower in the bath, then installation can be carried out directly on the plumbing fixture. To do this, you first need to assemble the model, after which you can place it on the bathtub in the correct sequence of actions:
- since it is planned to install the product in a bathtub, markings are applied to it to determine the location of the holes for the mixer;
- Using an electric drill, holes are drilled according to the markings, after which the irregularities are sanded;
- on adapters intended for hoses, FUM tape is wound along the thread, and it is advisable to create several layers at once;
- adapters are screwed into fittings;
- nuts are mounted on the holes in the side;
- a gasket is installed at the base of the drain, after which this element is screwed to the side and crimped;
- two flexible tubes designed to supply water are connected to the mixer, after which they are well crimped;
- A crimp nut is screwed onto the device from below, and then it is installed in the hole and secured on top with another nut;
- is fixed in the shower hole, after which the bathroom faucet is connected to the hose;
- two tubes of the product are screwed to adapters located in the wall of the room;
- The water is turned on to check that the installation is correct.
Installation diagram of the mixer on the side of the bathtub
Bathtub with tap hole
Mounting block for bathtub with mixer
Installing a faucet on the side of a bathtub
Mixer installation
Thus, installing a faucet in the bathroom is an essential process that can be done on your own. The device can be mounted on the wall or directly on the bathtub, and this results in a reliable and high-quality design.
Sequence of work for installing the mixer
Before installing a new faucet, you must first remove the old one. For this and subsequent work, you will need the following tools:
- hexagons:
- large pliers;
- Phillips and flat screwdriver;
- gas and open-end wrenches;
- adjustable wrenches;
- FUM tape.
How to remove an old faucet with your own hands
Ridding your bathtub of an old faucet yourself won't be a difficult task, but before you do it, be sure to turn off the water supply .
It is necessary not only to shut off the main line, but also hot water, which in some apartments and houses is supplied through a gas water heater or boiler. The replacement is made in the bathroom itself, where the walls are lined with tiles.
First, drain the water from the tap, and then unscrew it , but very carefully so as not to damage the threads on the fitting, which are located on the wall itself. If it gets damaged, you will have to make major repairs to the room in order to change the fitting.
After you remove the old faucet, carefully clean the fitting in the wall to remove any remaining paint and old tape.
How to assemble a collapsible structure with your own hands
Most faucets are sold disassembled, so they should be assembled before installation. When purchasing a design, make sure that all its parts are present in the box:
- Shower Heads;
- gander;
- shower hose;
- main block;
- decorative lampshades;
- rubber gaskets;
- eccentrics.
Each part must be packaged separately in small bags - fabric or cellophane. Also be sure to check the quality of the fastening eccentrics, in particular, for the integrity of their threads.
To assemble the structure, attach a gander to the main block, as well as a hose with a watering can; such work should not cause any difficulties. However, when assembling, do not use wrenches or tighten the nuts.
Faucet installation
Next, all that remains is to assemble the bathtub faucet with the tap using the nuts included in the kit. Check the presence of the winding.
After this, you can turn on the water and start testing the faucet. Do not immediately apply a strong pressure of water so that it does not rip off. Check for leaks. Finally, you can attach decorative trims to the junction of the mixer with the pipes. After this, you can begin to seal the damage to the wall with mortar.
Strictly speaking, the process of assembling and installing faucets is not a particularly complicated procedure. However, if you are buying an expensive designer model or a model with an innovative system, it is better to use the services of professionals so as not to damage any fragile elements.
You are on the website of the manufacturer Profsan. You can view our bathroom faucet models here.